Some hints for the future:
1) Use oil paint (on top of a gloss varnish layer) instead of the brown wash. Oil paint stays wet much longer so you don't have to worry about doing it an inch at a time, and it's a lot easier to thin and blend so you don't get those harsh lines at the edge of a pool of wash.
2) You may have done this, but it should be mentioned: when doing the decals always do a layer (or even 2-3) of gloss, add the decal and let it dry, add another layer of gloss on top of it, and finally spray the whole thing with a matte layer. This keeps you from having air trapped under the decal and leaving shiny spots under the clear film.
3) I'd suggest using the sponge chipping method. Do one layer with your base camo color to wear away the edges of the stripes, then do a dark gray layer focusing on the edges to represent paint wearing down to the primer layer. You can do this heavily or just a very subtle effect, but it adds a lot to the model.
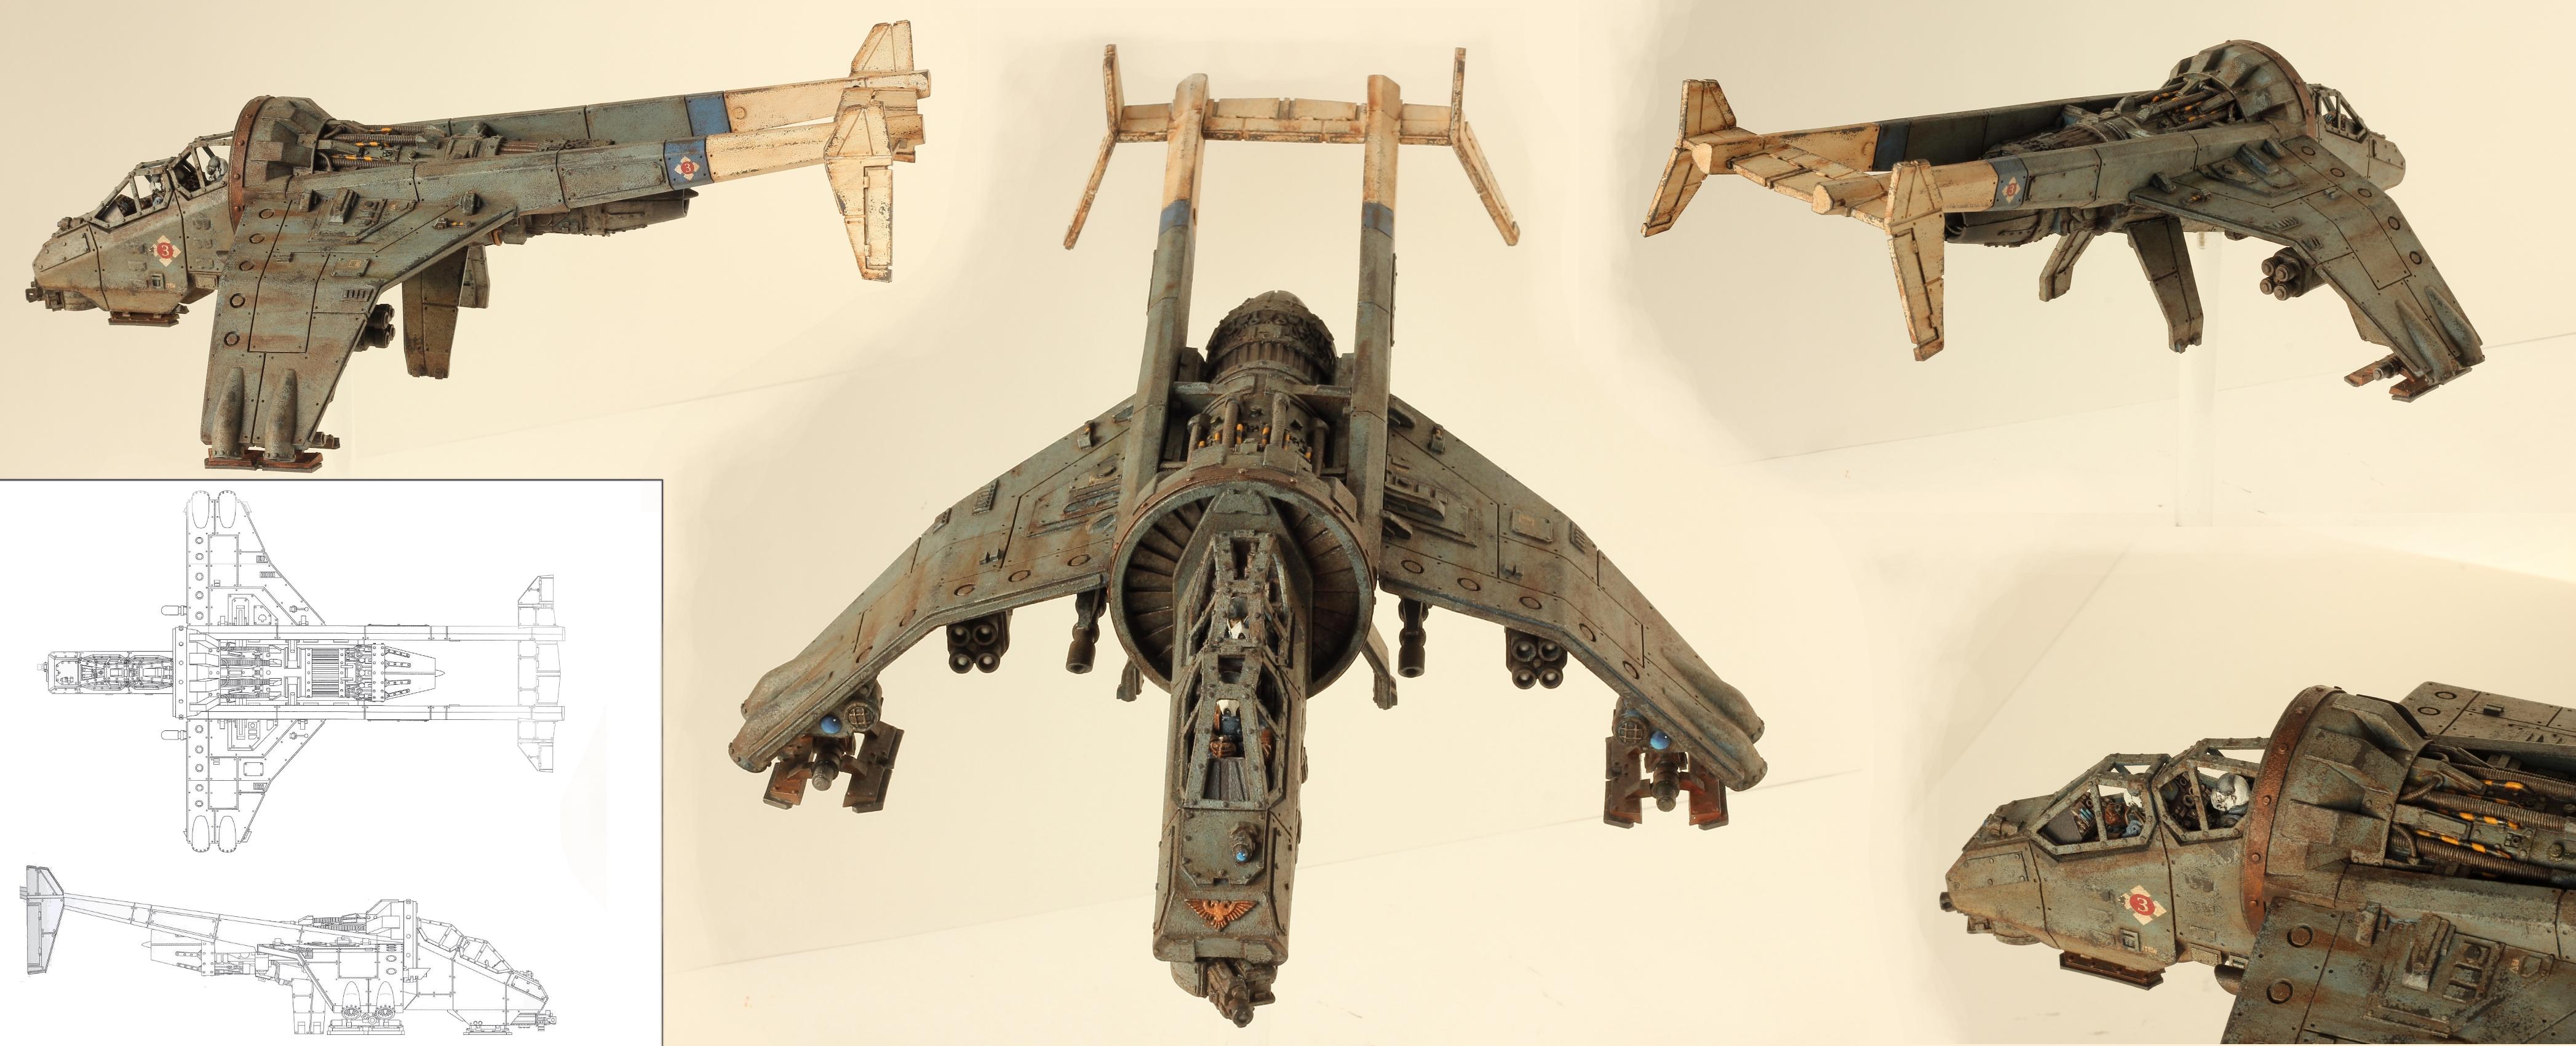
Here's an example of how it looks on my Vulture. The white tail section should pretty closely match how it would look on your model.