So been meaning to do this for a while so recently started up this little project complete with photos! It's still all work in progress, but do feel free to jump in and give tips/advice and so-forth
 PS
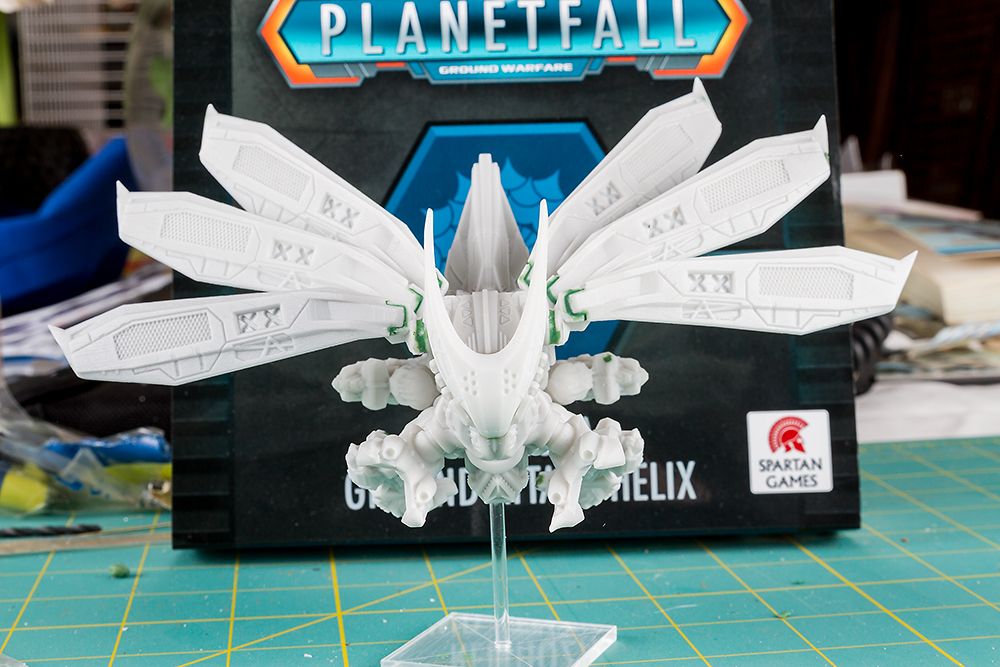
PS I have to say that this is one of the best models I've had to work with; barring a few bubbles here and there its been a very clean build in general.
PPS - you can find a 360 rotational view of the completed model here
http://www.dakkadakka.com/dakkaforum/posts/list/677535.page
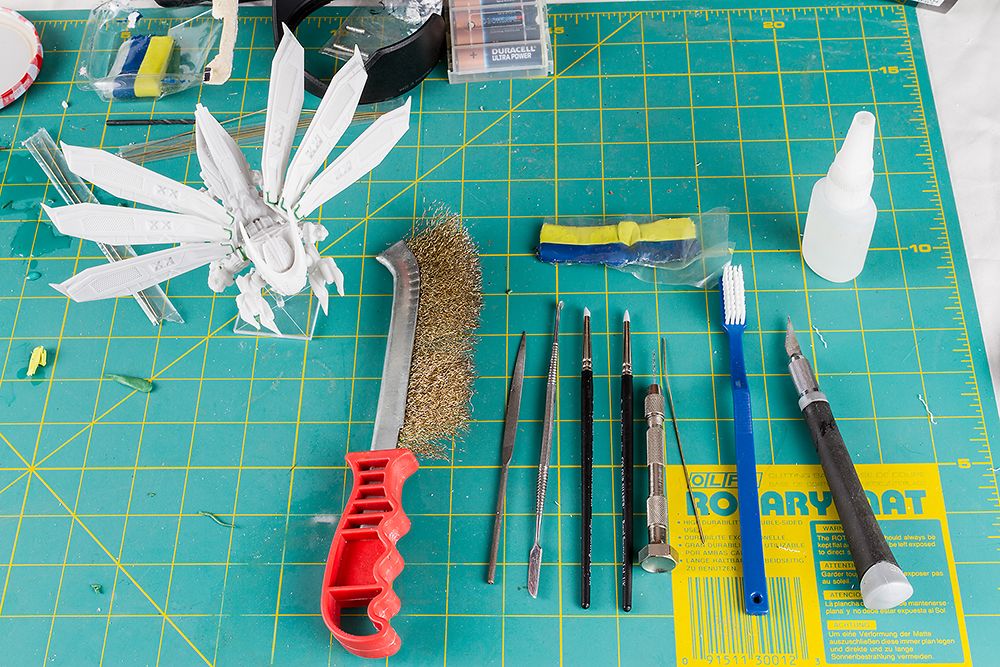
Tools!
Left to right:
Brass bristled brush - invaluable for cleaning metal files after using them on resin/metal/greenstuff. Especially greenstuff will choke up files fast so a brass brush like this one will be very important if you want your metal files to keep working!
Metal file - used mostly to remove the waste on the bone-pinned joints.
Standard Greenstuff Tool - dull blade on one end and flat section on the other; a standard default basic greenstuff tool that can do a lot.
2 Colourshapers - I've more but these are the two I mostly used for this model, and honestly a vast amount was the cone headed tool.
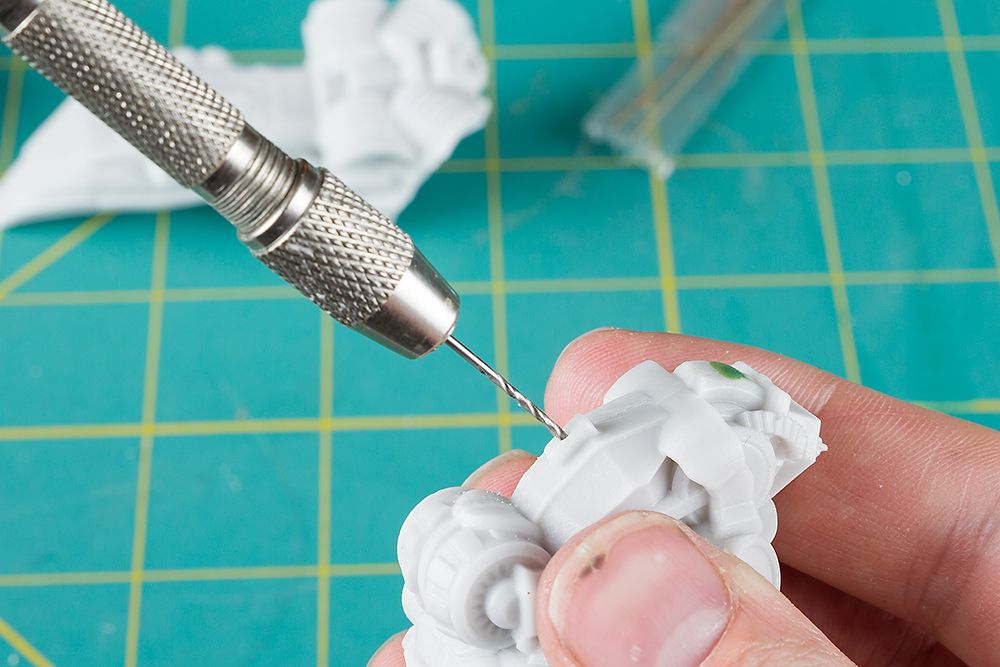
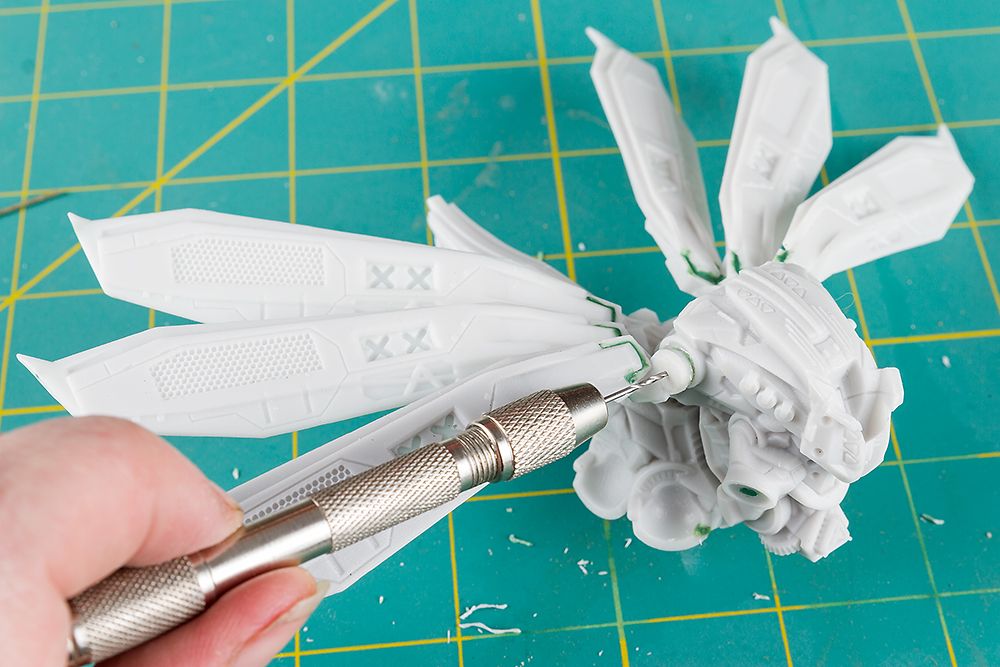
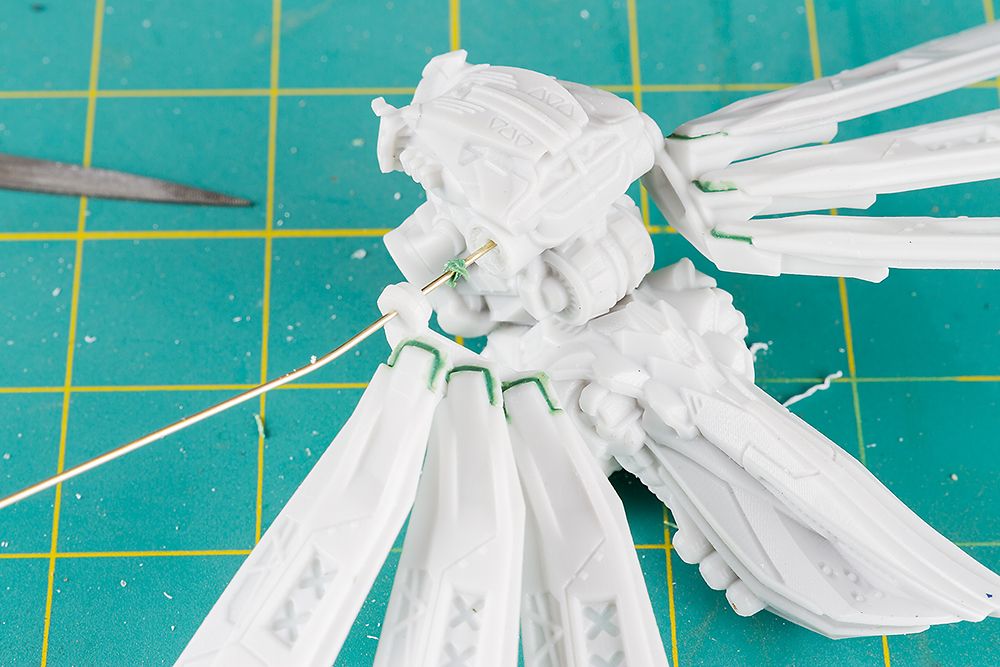
Pinvice with drill attached and brass rod - for pinning work.
Toothbrush - for cleaning the model before assembly.
Scalpel. This is a Games Workshop one and I do like it over many scientific/standard ones as it does have a more chunky handle that makes it a little easier to hold at times. Blades are also a LOT easier and safer (in my view) to change in this than the "snap" fit ones typically found on most regular scalpels.
Finally along the top we've got a stick of greenstuff (yellow and blue stuff) and a standard tube of superglue.
Note shown - a pair of modelling clippers (on account I've missplaced mine!)
That's what I'd honestly consider the basic tool-kit. You've got everything you need to work with to a good standard. Each tool has its place and function and tools are one thing you want to spend decent money on; good tools looked after will serve you well for years.
Phase 1:
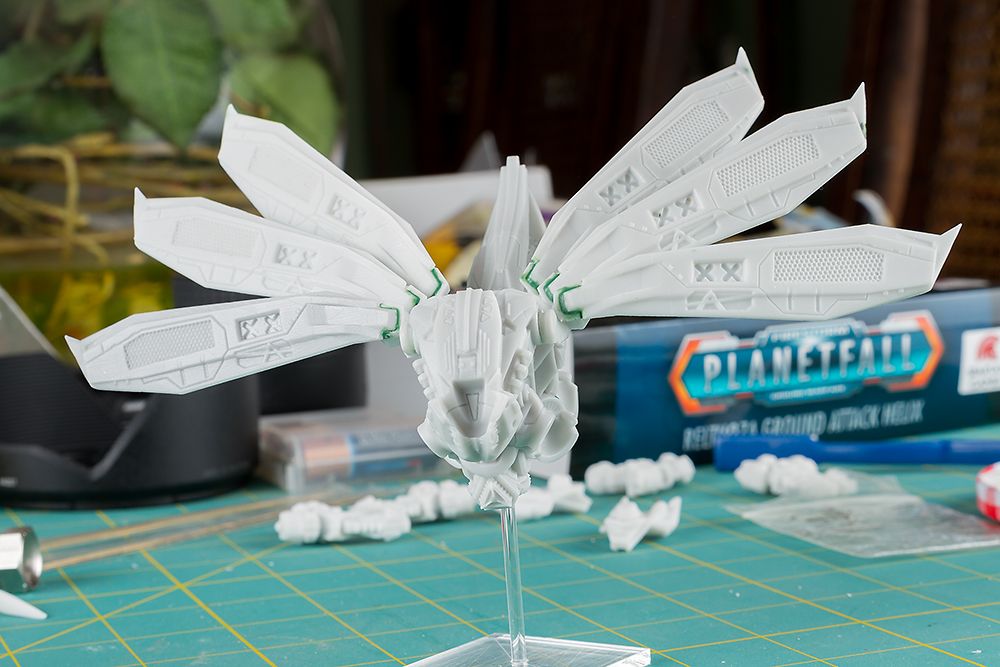
Get the box - open the box - take out all the parts and stare in wonder at your new model!
Ok staring over time to go through; this first stage you're looking for a few things

a) That you've got all the parts; it helps if the model has an assembly sheet, although most Spartan ones don't they are generally fairly easy to work out how they go together. At this stage you're just looking to see that you've got every bit present and correct.

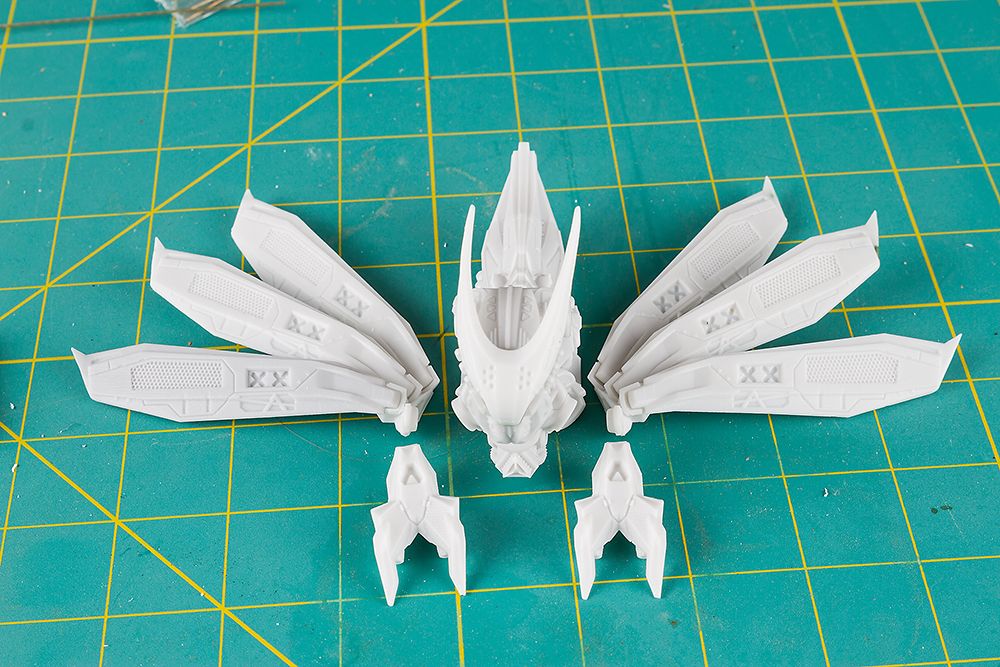
The Gunship has the following parts:
1 Abdomen (long chunky bit)
1 Thorax (short chunky bit)
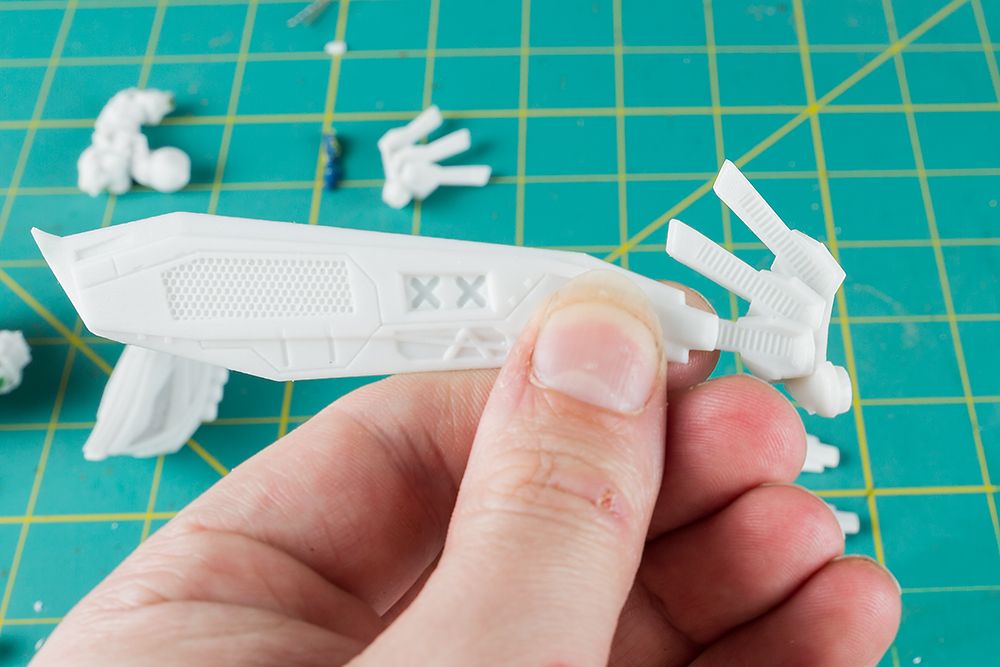
6 Wings
2 Wing arms
2 Twin gun arms
1 Head
1 Mounting slot (small bit of resin with a hole in it)
2 Droppods
4 Legs
1 Small Dice
1 Small Dice holder
1 Flight stand and peg (clear plastic)
B) Checking for excessive flash, mould lines or bubbles/damage to details. Check each bit over carefully under good light for bubbles, lost details, flash and other aberrations. At this stage you're looking to see if you're unlucky enough to have any parts damaged beyond use and thus in need of replacement. You do this now because also inside the box is the packer slip which you can use when filling for replaced parts.
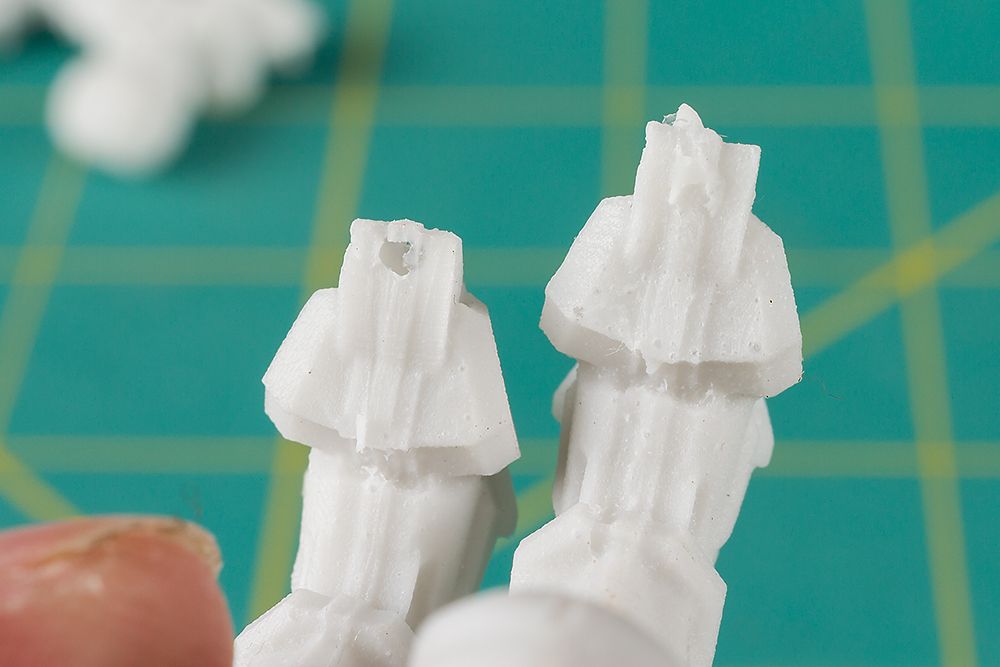
An example of some flash on one of the leg tips
Normal
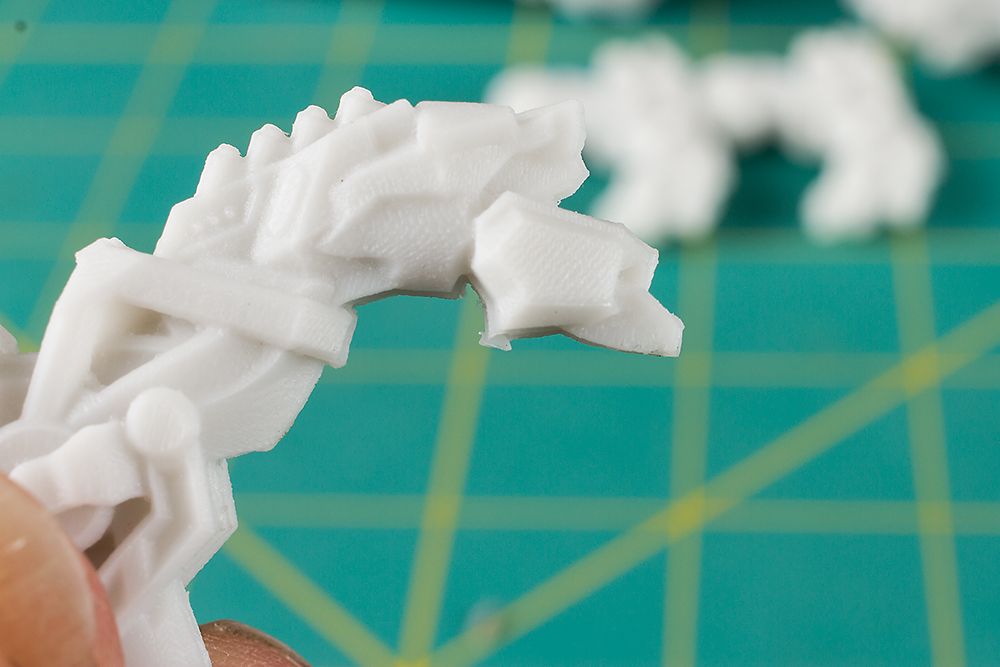
Flash
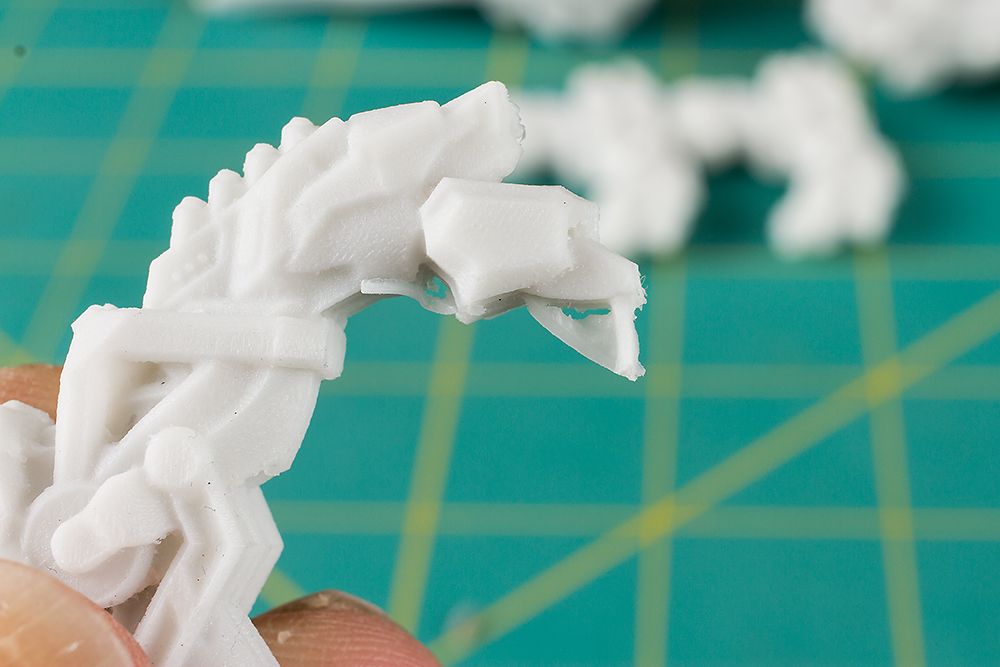
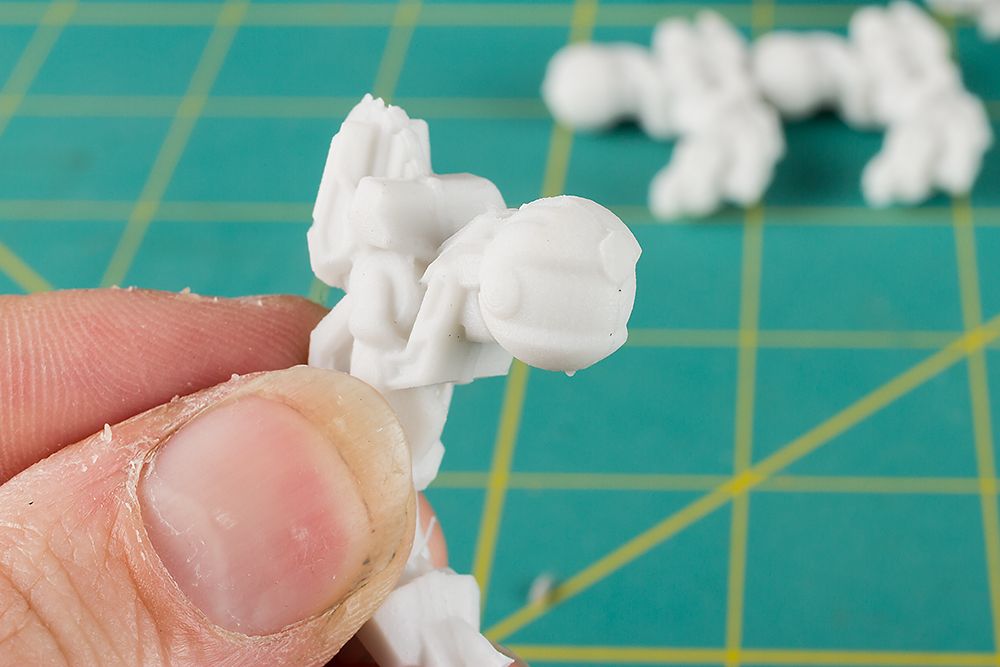
An example of a mould injection point on the ball of a leg; this is the point on the model where the injection mould has the resin pumped into it. Sometimes its clearl evident, other times its subtle and not an issue.
An example of a bubble, in a minor location.
As you can see the bubble is in the toe of the left foot, its an area with minimal detail and the overall shape of the foot is still the same as one without. Thus repairing this is perfectly simple and wouldn't require replacing the part (note some flash on the other toe).
c) Bent parts; metals will have the most risk of a bend, followed by resin and then plastic. For a model like the gunship which is all resin a bend could be possible, especially in the wing segments. Bends are not automatically a replacement need, depending on the nature of the bend itself.
If you do have a bend heat the afflicted part in very hot water for a while; this will soften the resin and lets you make small adjustments to its shape by applying pressure. Take it slow and carefully to avoid snapping. Thinner parts work easier, whilst thick chunky segments might be impossible to fix. Again if such is the case contact Spartan for replacement parts.
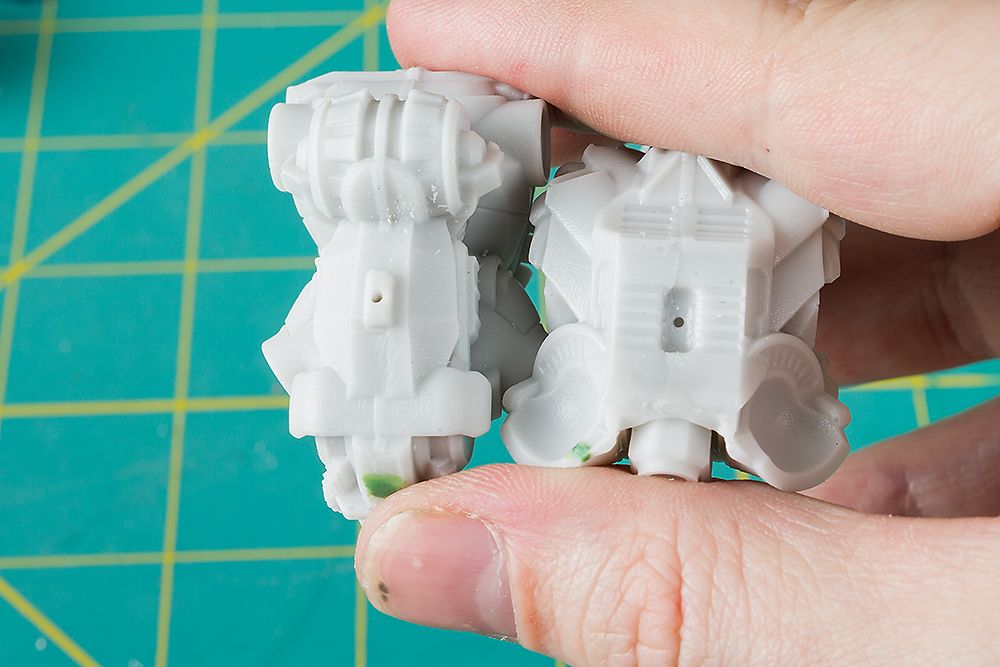
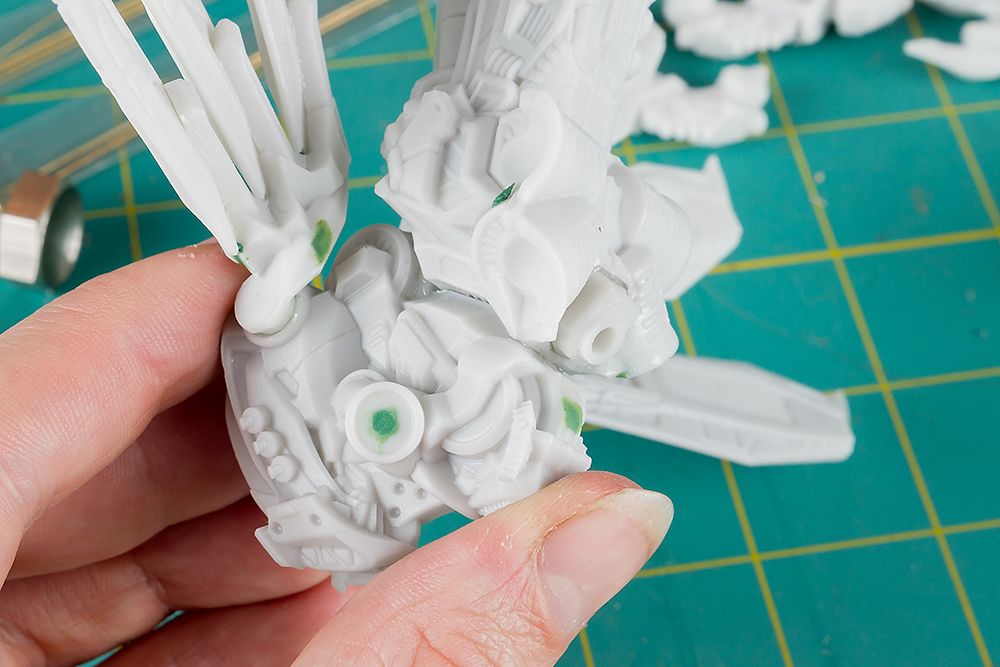
d) You might see some parts have a slightly different colour (shown below). This is perfectly normal for resin, sometimes it represents slightly different formulas for different parts; most of the time it simply reflects slight differences in the composition between mixes and shouldn't have any effect on your model.

Phase 2;
Ok so you've checked your model over and its all looking good now onto the next step. Most hobby models are formed in injection moulding and thus feature a mould line where the two halves of the mould are pressed together. What also happens is that there is often a resin/oil coating on the outside of the model which helped it slip out of the mould initially.
You don't want this on your model (and many times might not even see nor feel it) because it will affect the ability of glue and paint to bond to the model.
To remove it is simple.
a) Get a small bowl and fill it with hot water and a little bit of soap (eg Fairy Liquid) - you don't need lashings of soap, just a little drop.
B) I use a second bowl of warm (but not hot) water into which I put all the parts to sit (this keeps them out of the way and lets me work through the model start to finish easily - you can, of course, just leave the parts loose if you wish).
c) Dip each part into the soapy water and then, using a soft tooth brush, scrub the part down. Be careful when working with thinner segments and its only a light scrubbing, you're not using vast amounts of force here.
d) Once scrubbed with soapy water I then take the part over and continue scrubbing under a flow of water from the tap. This helps you wash all the residue that you've loosened up off the part. It's better than a rinsing bowl as it means that the water is always fresh and thus won't contaminate the part.
e) Leave the parts to dry (tip if you rinse in warm water it will evaporate off quicker than cold). Some kitchen paper/roll helps otherwise just leave them on a cloth to dry.
NOTE 1 At no point in this are we using boiling water; hot from the tap not scalding from the kettle.
NOTE 2 Be mindful that models often have very small parts and thus I would advise keeping the plug in the sink or washing over a large bowl. Dropping a part down the plug hole is not grounds for free replacement parts so if you lose a bit its going to cost you to replace it.
NOTE 3 Generally speaking you should always wash resin and metal models. Plastic is generally safe without washing, but there are a lot of plastic-resin hybrids on the market now (often still sold as "plastics"). Washing won't hurt so its generally safer to wash all the parts rather than find out you've got problems later on.
Phase 3:
Once dry, lay out all the parts again, double check you've got them all!
Phase 4
Ok lets start fixing some of the problems with the model and clean it up ready to start assembling.
a) First you want to go over and remove any mould lines and flash from the model. Resin is soft and thus easy to work with a simple scalpel blade and you will do most work with this for cleaning off bits. Take it SLOW and scrape with small motions. You're aiming to shave off a little each time rather than hack at the model. Belive me scraping will remove stuff very quickly and by taking steady motions you remain in control of the blade, thus saving your model and your fingers.
b) Thick segments of flash. Sometimes you will get thicker chunks of flash which are not going to scrape away, but which are positioned so you can cut them. Now if you use clippers they will work but you have to be careful because its very easy to cut and put pressure on a detailed area and warp it.
Thus you can cut with a blade intead.
First identify the area to be removed
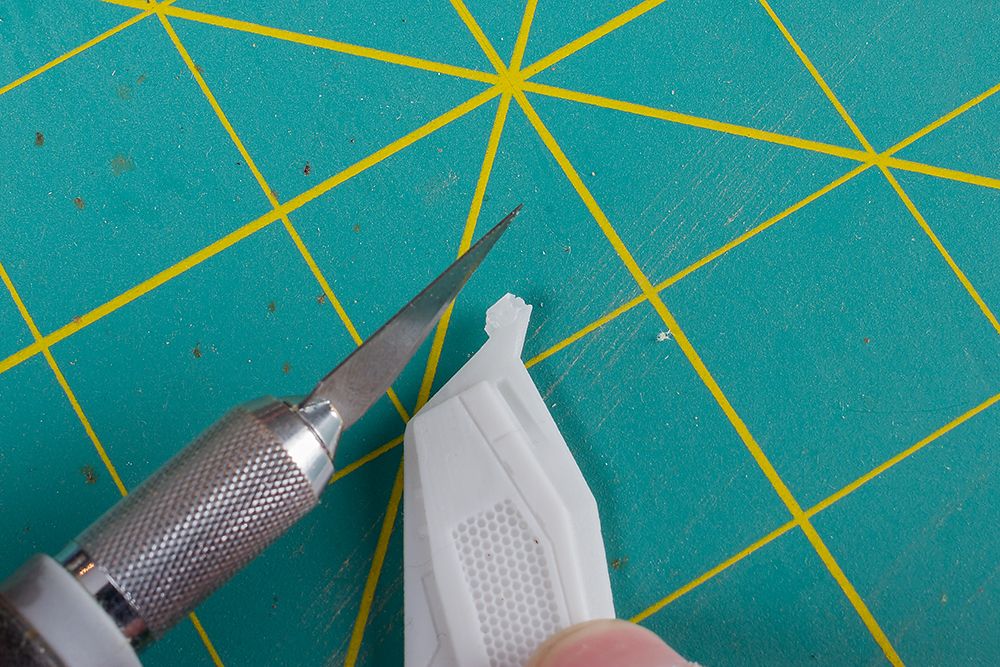
Then line the blade up and saw with it slowly and steadily with a little pressure.

Don't try to go through it all in one go as you can find your blade will jump at a point of weakness; or that you'll suddenly put too much pressure and snap a part off. Instead work one side then the other, flip the part over. For some you can even work around in a circle around the segment to be removed. Removing a little from around steadily is the best approach and soon enough the part will come off.
c) During this process of preparation you might well find more bubbles and sometimes scraping away an area can expose an underlaying bubble. This is no problem. First use the tip of the blade to gently clean around the edge of the bubble, all you're doing is exposing it more fully to fill (rather like a dentist giving a filling). Of course temper this against the area you're working in on the model, sometimes you will want to keep the edges raised to protect another area.
Once cleaned you'll have a bubble, like this on the left.
Now you can use greenstuff or even liquid greenstuff to fill this (liquid is basically a thick green coloured superglue good for filling tiny gaps easily). For this I chose greenstuff itself (note you can use any kind of fine detail modelling putty, greenstuff is just a standard popular choice).
Greenstuff comes in a stick of yellow and blue that when mixed goes green (hence the name). Once green you've around an hour to work with it before it goes tacky and then it will start to cure and harden (takes around 12-24 hours for a fully hard finish). As we are filling holes we only need a very tiny bit.
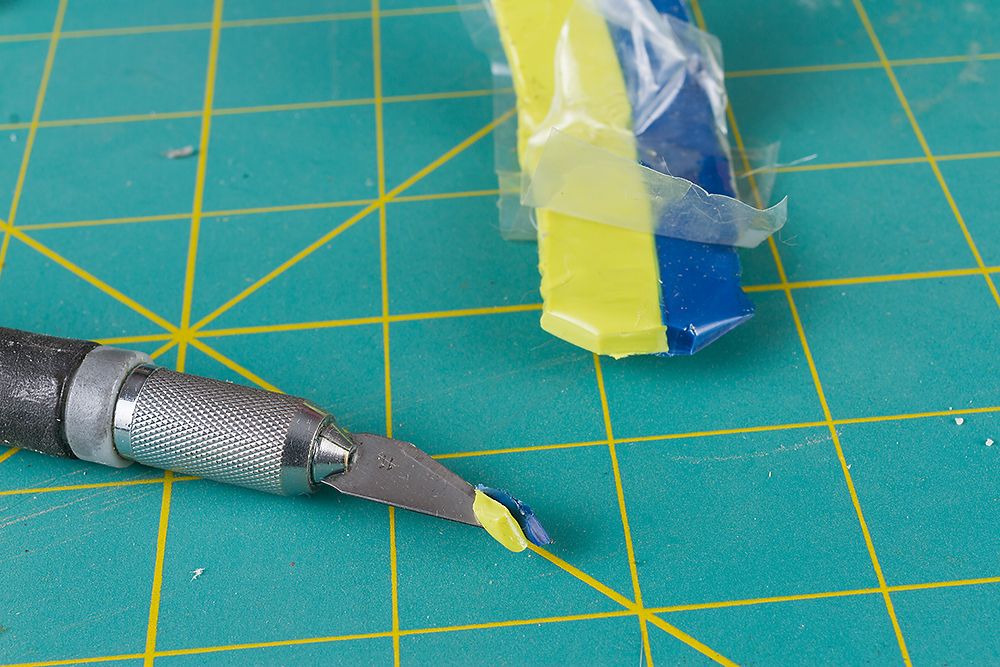
Note, you see the join between the two, that area is often hard and cured as the two parts react. So when cutting off a strip I tend to cut out a slither of the middle so that I get a smooth amount of greenstuff without a hard lump in it.
Then just knead the yellow and blue between your fingers till it goes soft and green in colour (it will also be slightly sticky too).
Once green roll it into a sausage shape, make it thin and then slice off a VERY tiny bit from the end. Rather like scraping away detail was done in small steps so too is adding greenstuff. It's much easier to add a little more than take any away from an area you're working on.

Remember when working with greenstuff it is a little sticky so it will stick to your tools. That is unless you wet them. Just the tip that's working with the greenstuff; I use an old jam-jar lid filled with water. You can use vegitable oil as well which keeps on the tool longer (you have to re-wet every so often with either and more so with water); however you MUST wait for the greenstuff to fully cure and then warm soapy water wash the model again if you're using vegitable oil otherwise it will mess with your paint and glue.
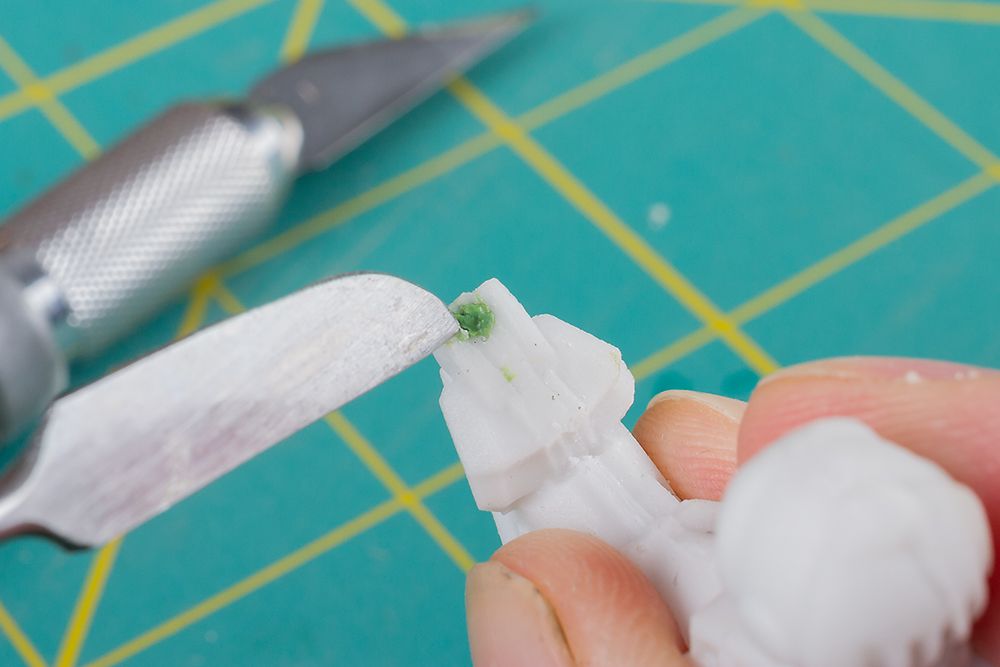
When adding the greenstuff I used a standard modelling tool which has a dull blade on one end and a flat surface at the other. Using the blade end I gently push the greenstuff into the bubble, adding more as needed in little stages till its built up.
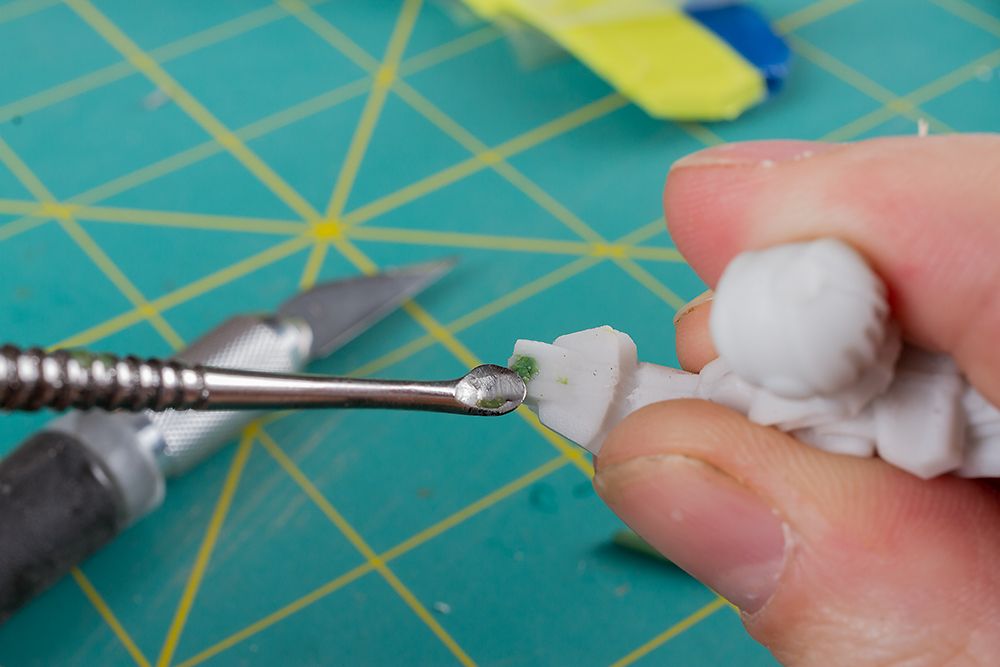
I then used the other end to smooth over the greenstuff and shape it a little to the gap.
Finally I turn to a colourshaper (also known as clay shaper). These are silicon tipped tools that let you smooth greenstuff over much more cleanly and evenly than metal tools can. They are great to work with and come with a range of shapes; for this one as I had a flat surface I chose one with a flat head.
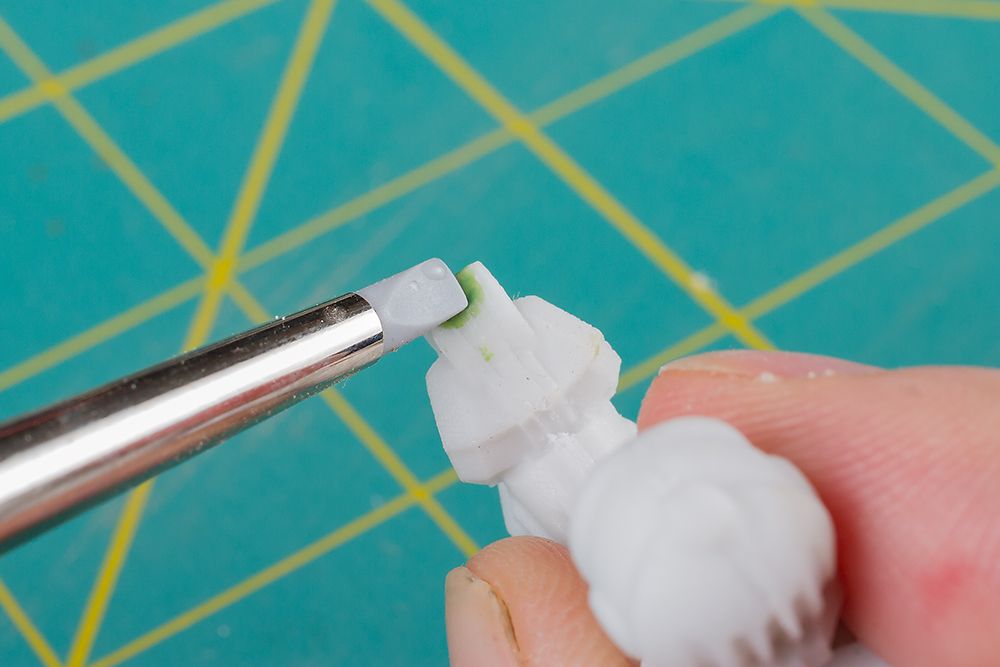
Just rub back and forth gently over and over to smooth over the greenstuff. At this stage if you've any excess you can gently tease it away with your tools. So long as you keep them wet they will work. A scalpel blade can be bood to cut away any excess that won't roll away with other tools.
Note that if you have a little raised area its not the worst, you can wait until its fully cured and then scrape with the scalpel (you can file it too but it will clog up your file fast so keep a brass wire brush nearby to clean your file; or use a disposable emery board instead of a file).
And there you have it, you've filled a bubble!