GW sells gameboards for $500 AUD in Australia, which a fair bit of dosh. I thought I could build myself something similar for less.
For me investing time rather than cash was worth it but I understand some people can’t spare the time.
Here is something of a ‘how to’ to show my process.
Overall the project cost me $255.53 AUD including painting. Plus a lot of time, didn’t document that as well as the money unfortunately.
Here’s a cost break-down:
Jigsaw
~$40 (from memory)
2x F-clamps
$15.80
6mm
MDF sheet (inc. cutting charge)
$29
2x 3mm
MDF sheets (inc. cutting charge)*
$29.90
2x 500mL quickset PVA glue
$25.98
Plaster of Paris 1Kg**
$6.95
500mL White paint for priming/sealing
$23.90
Paint roller kit
$5.98
Sand
Looted from beach
Woodchips
Looted from park playground
3x 400g Matt black acrylic spray paint
$37.13
Large paint brush
$4.49
500mL ‘Red Oxide’ Acrylic Impasto paint
$14.99
250mL ‘Yellow Oxide’ Acrylic Impasto paint
$9.99
250mL Black Acrylic Impasto paint
$9.99
*I had a spare sheet or two of 600x450x3mm
MDF, so 2 of the 2400x1200x3mm sheets might not be enough depending on your hill size
**was barely enough, you’d best buy 2 bags
Process:
Figure out how big you want your hills to be in terms of its footprint on the board and how tall it will be. I based my proportions loosely on
GW’s injection moulded kit.

The hill is divided into quarters and the board in to modular squares like
GW’s. The side length of my tiles is 600mm (23.6 Inches) but.
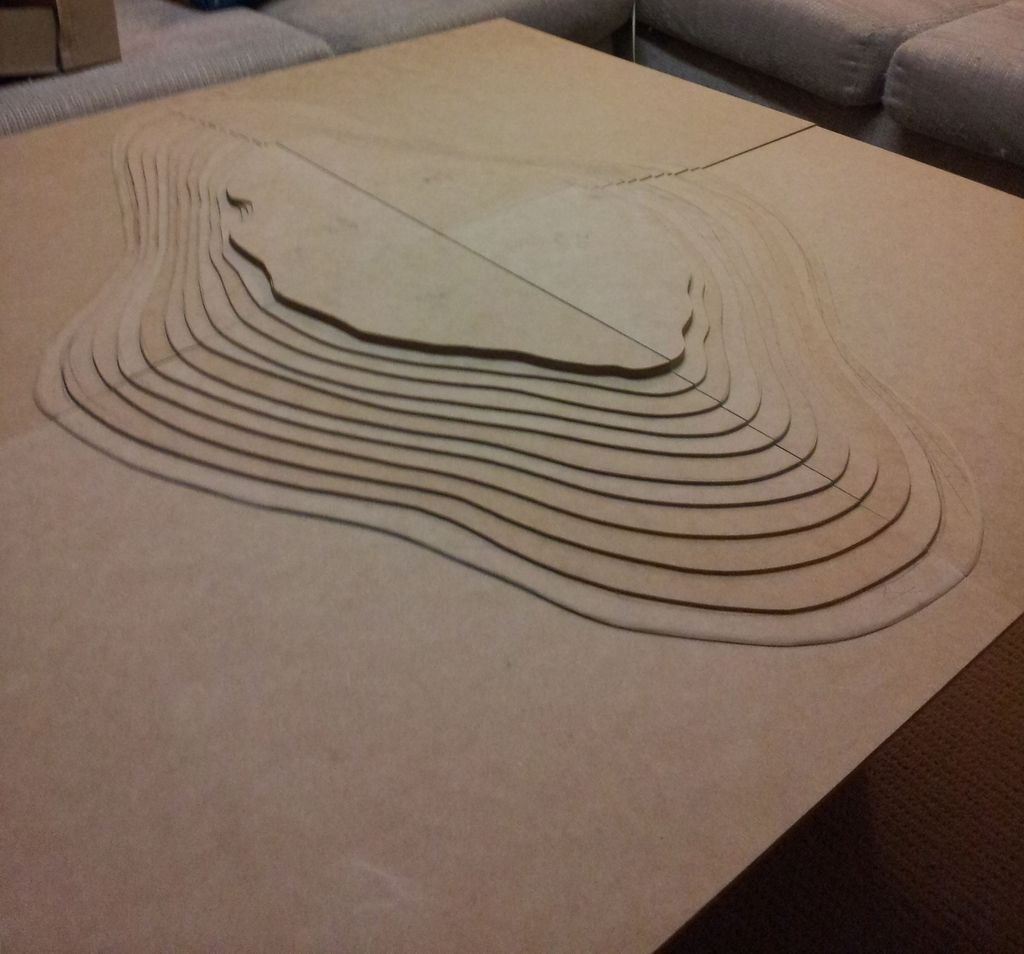
Mark out the grade of your slope so that it looks like a contour map. Take a picture perpendicular to the surface to print a paper template. I did some tracing of the lines in Illustrator to make it clearer (and so I could lasercut it


) but in hindsight you could just print the picture.
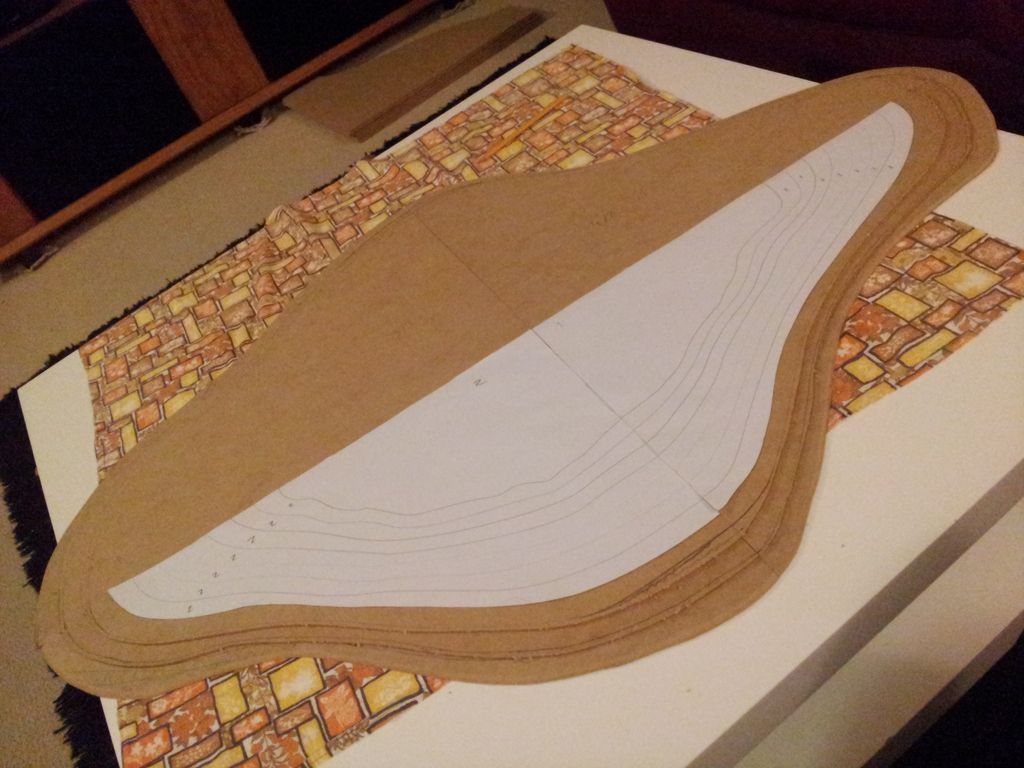
Mark out your sections on the 3mm
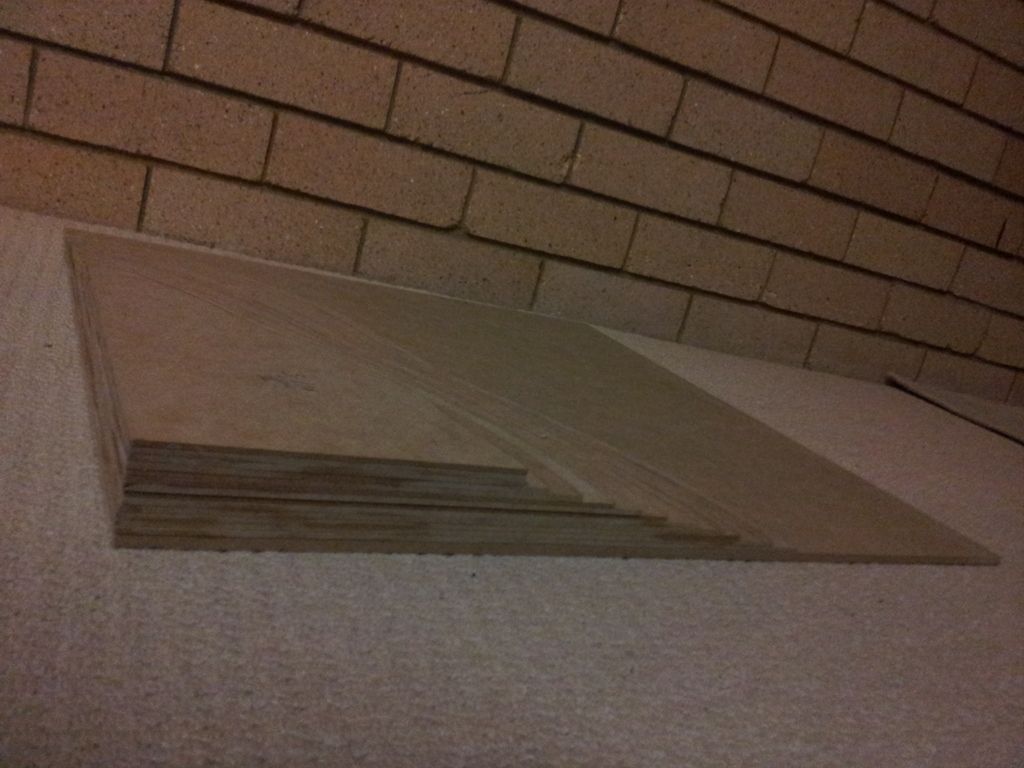
MDF. I had sections cut at the shop to be 600x450mm so they’d fit in a lasercutter I had access to.
(I ended up cutting them all with a bandsaw anyway as a proof of concept that most hobbyists could do it given enough time. I know a bandsaw is easier (and probably safer) than a jigsaw but I didn’t want to be there forever with clamps.)
I’d recommend in hindsight that you cut the middle out of each tier, to cut down weight, making the finished hill hollow. Otherwise they are quite heavy.
You should end up with a stack like so
Glue each tier carefully so the corners and edges match up. This can be challenging and I ended up having to do some filling and sanding. I recommend only gluing one layer at a time as they’ll be more susceptible to wandering otherwise.
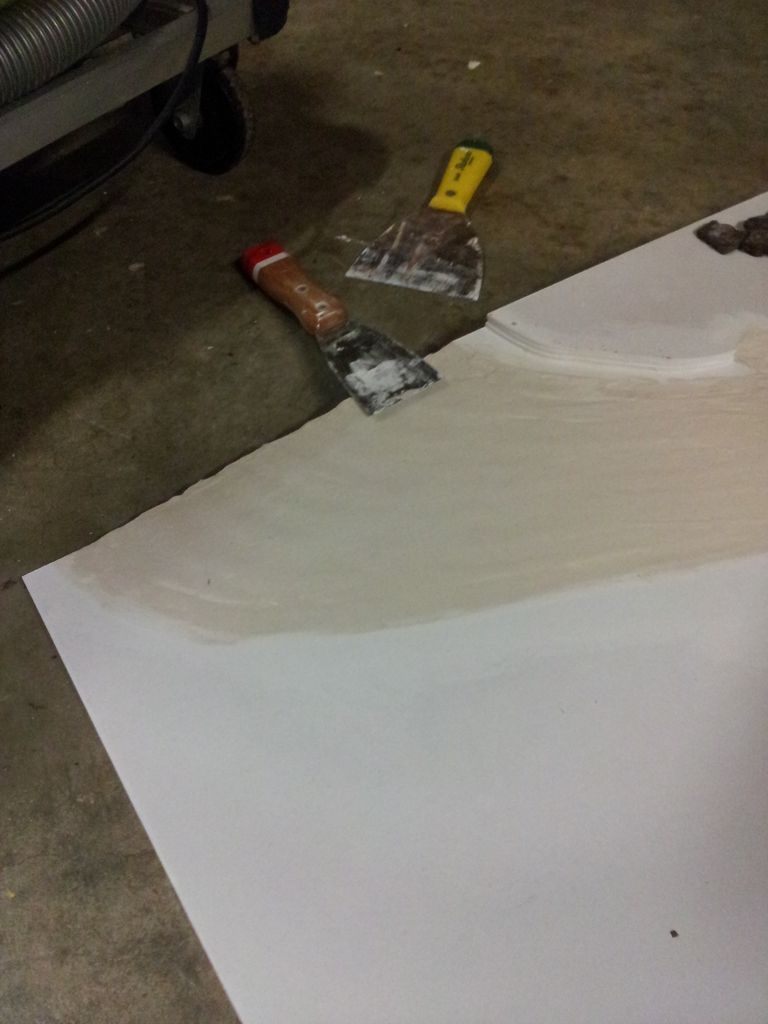
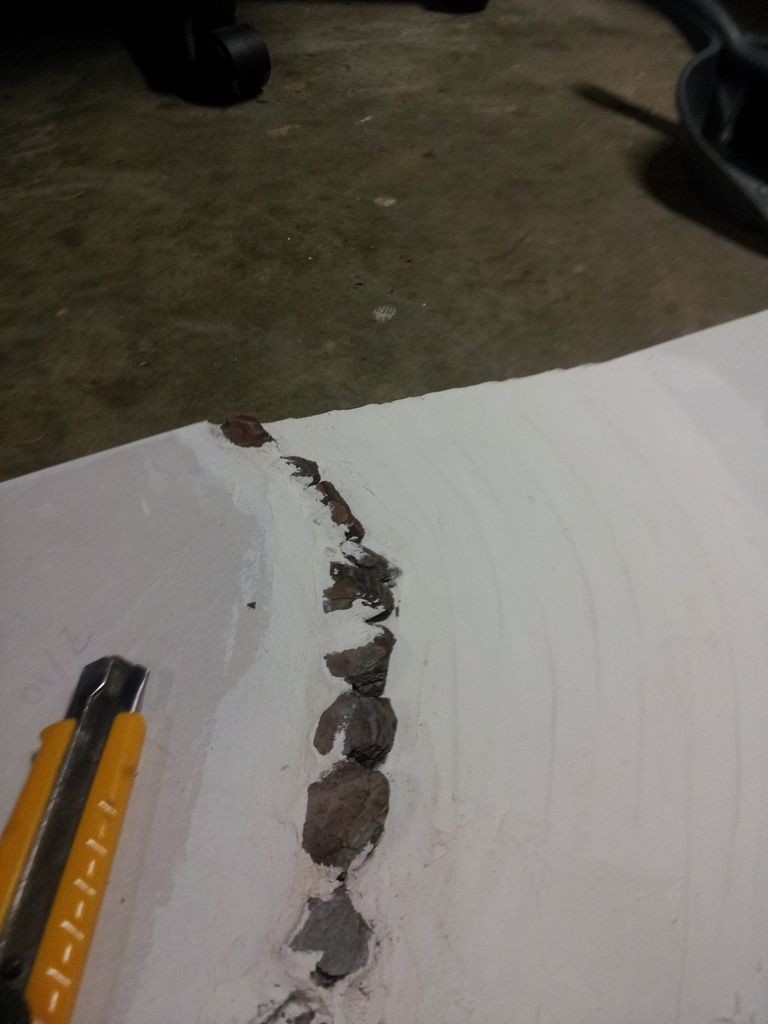
To prevent any warping I then gave the whole thing a coat of white sealant with a roller both top and bottom. Once dry you are ready to plaster. Mix some up and spread it on, filling the gaps between the top corners of the tiers. On the side, to get a crisp edge with the plaster, it helps to hold a flat bit of cardboard or scrap
MDF to the side and spread the plaster, then once it’s starting to dry slide it away toward the hill edge.
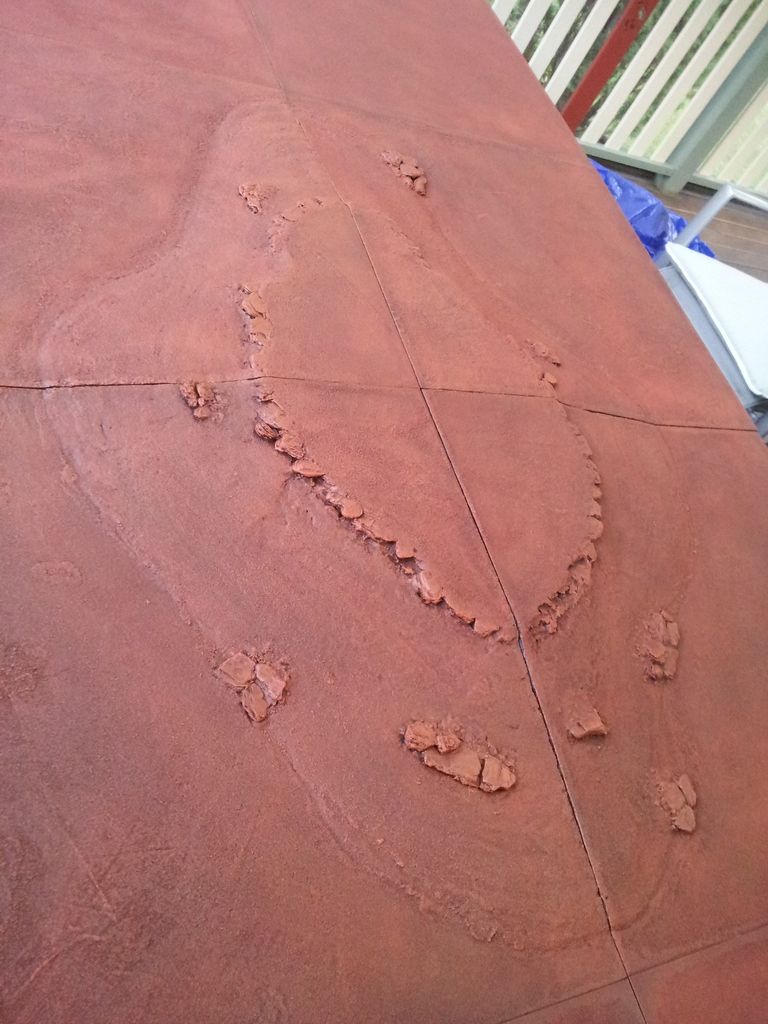
At the top of the hill where it plateaus and at various random spots, I placed woodchips to represent layered rock jutting out of the soil. If the woodchips on the plateau jut out higher than the top surface you’ll want to trim them so the boards can be stacked more easily.
After some sanding you’re ready to glue the sand down. I put down a plastic tarp to catch the extra sand so I didn’t waste any. Coat the board in PVA. It may be easier to do in stages with the tiles that have hills on them as the PVA can dry before you can get sand onto it. Try not to get glue on to the woodchips as it will ruin the effect of them being rocks if they are covered in sand.
(I found the best way to apply to glue was to squeeze it out in lines and then use a brush to spread it evenly. I tried a paint/plaster scraper but that tends to pool the glue or leave lines in the glue that show up when the sand has dried on.)
Pour the sand over your glued surface, wait for a sec, then tip off the excess.
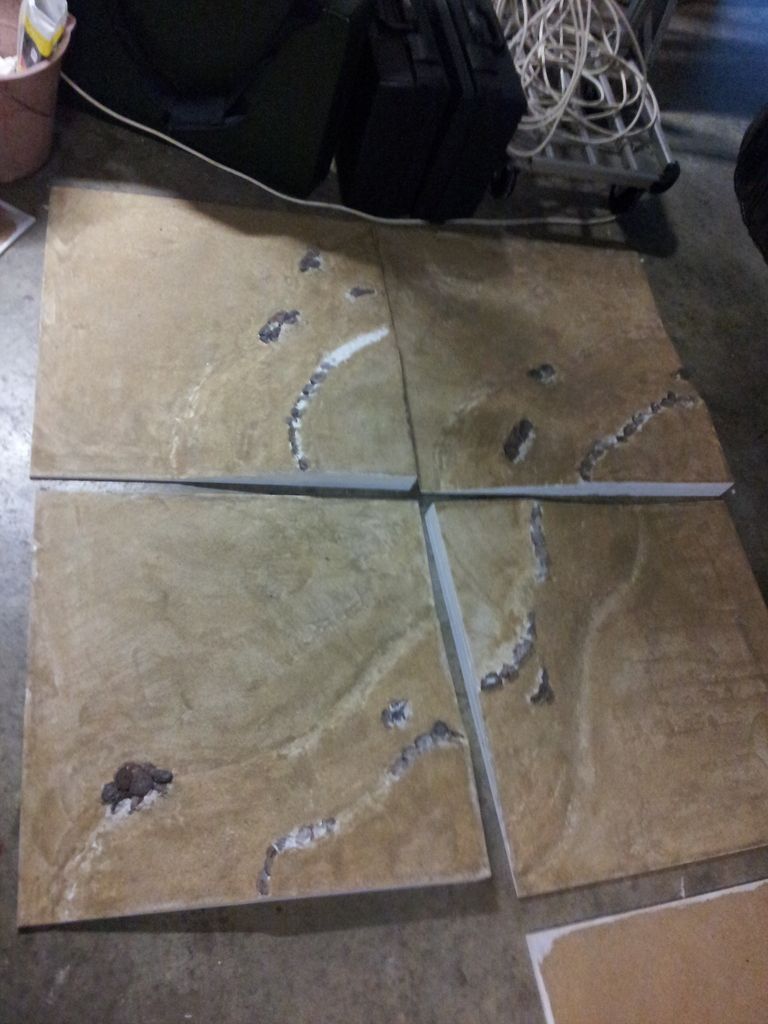
I then sealed the edges of the tiles with PVA, to prevent chipping, by pouring a thin line on each edge and dabbing it with my finger. I don’t think it was necessary and in the end it looks different to the rest of the sand even when painted over with multiple coats so I would suggest not doing this stage.
Now you seal the sand with black acrylic spray paint. It took a lot more paint than I’d anticipated. Now you have a good undercoat to work up from.
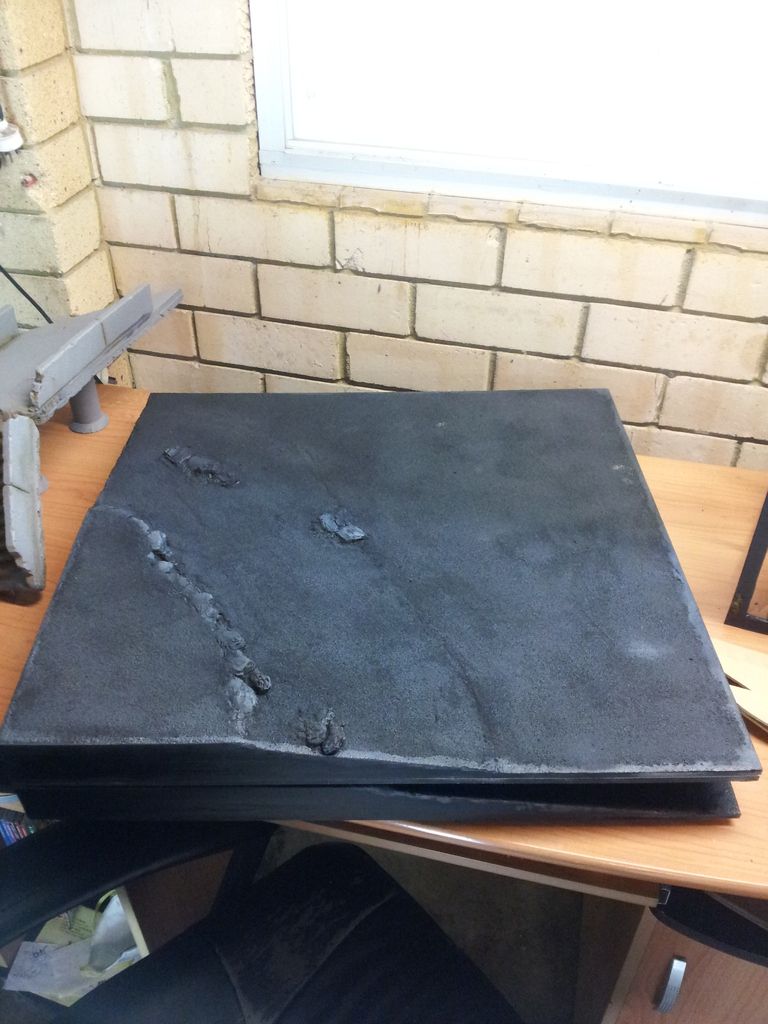
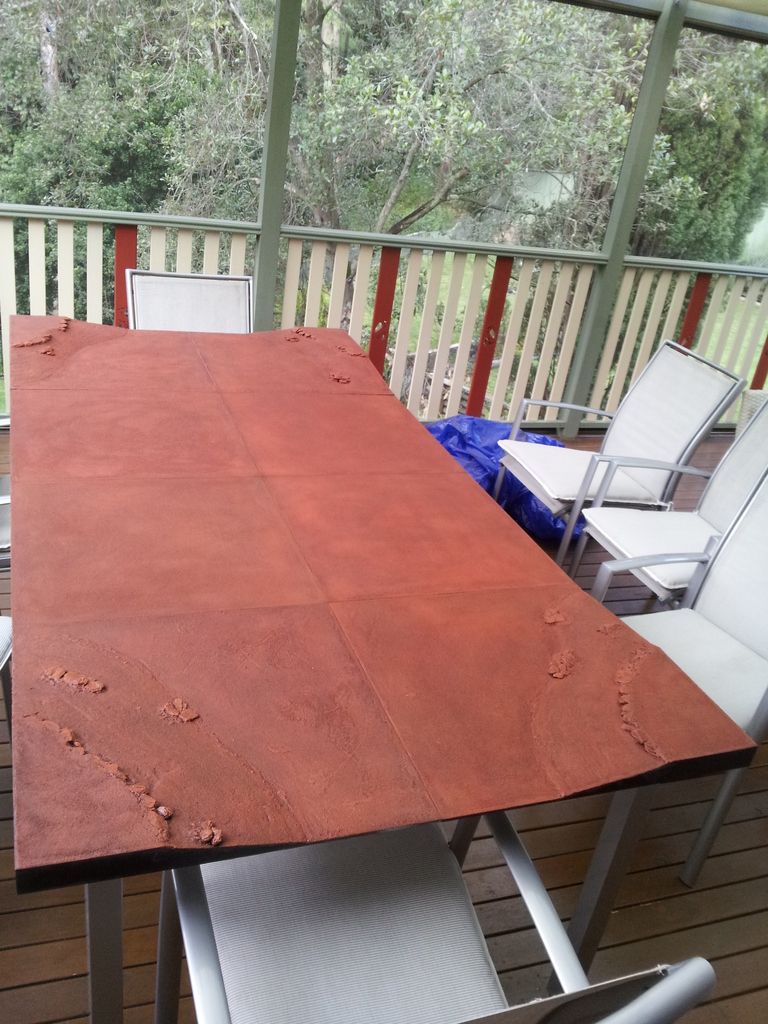
From here it’s up to you to figure out how you want to paint it. I decided I wanted a Martian/Australian desert look but at this stage you could easily just dry-brush grey over the black and call it a day.
I mixed black and red for a basecoat, then dry brushed just red and then a lighter pass with a mix of yellow and red.
I’ve got plans to make a frame to hold 6 tiles so that I can put them on a tabletop that isn’t as big as not have to worry about leaning on the edge an tipping it off the table. I might even add some folding legs so there’s no need for the table.
Hope I’ve inspired you to make your own. Happy building!


 "Trust in the Emperor at the hour of battle.
 - "Uphold the honour of the Emperor",