Forum adverts like this one are shown to any user who is not logged in. Join us by filling out a tiny 3 field form and you will get your own, free, dakka user account which gives a good range of benefits to you:
No adverts like this in the forums anymore.
Times and dates in your local timezone.
Full tracking of what you have read so you can skip to your first unread post, easily see what has changed since you last logged in, and easily see what is new at a glance.
Email notifications for threads you want to watch closely.
Being a part of the oldest wargaming community on the net.
If you are already a member then feel free to login now.
2016/02/22 05:30:45
Subject: 1650 ITC endless swarm vs Daemons w/knight
All right, first semi-competitive game post TSHFT. I'm going to be playing my team mate Bogalubov. I haven't pulled off a victory in over a year against him...maybe two? Last time we tangled he brought IG with a lot of friends and my regenerating units failed to the tune of 4/15. Battle report here; http://www.dakkadakka.com/dakkaforum/posts/list/671396.page
This time however he is trying out a daemon list. Really he just wants to pull out his shiny new chaos knight. We have decided to try out the 1650 point limit that is being discussed at as the new black for ITC. Dropping the flyrants and the trygon I have tons of points to play with. I'm going to try out a couple of more little things, feeling it out. Without further ado:
Opponents list: This is what I can recollect, I'm sure he will send me an accurate copy at some point.
Spoiler:
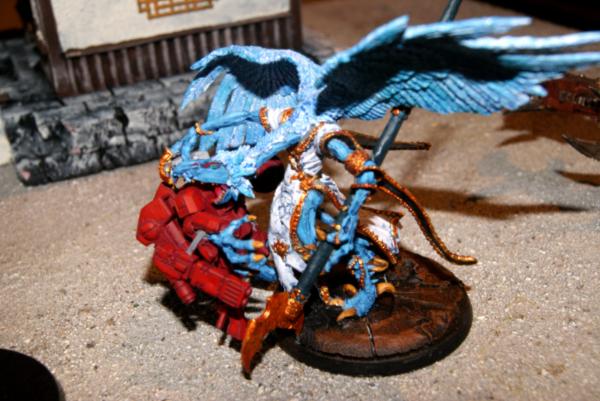
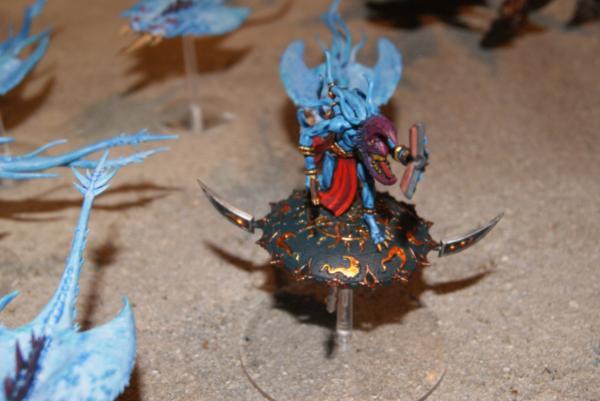
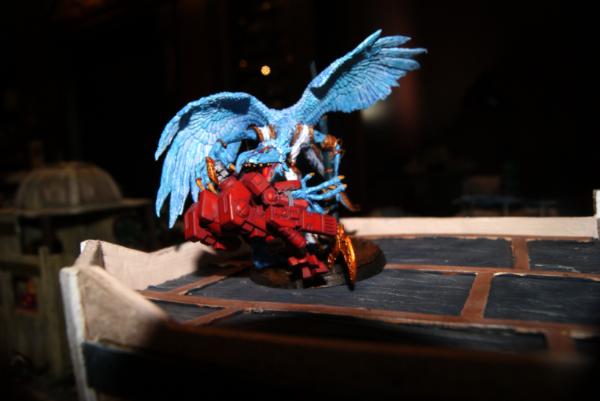
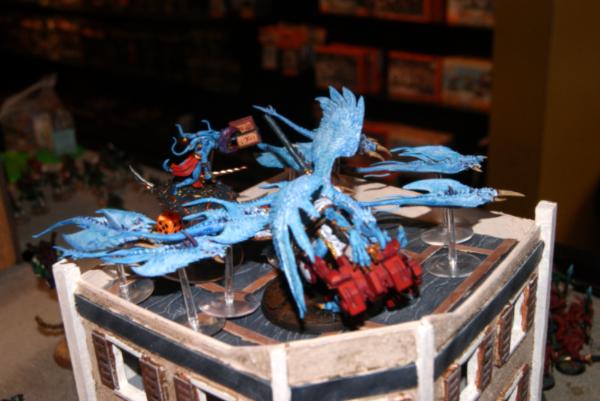
HQ Lord of change: 3+ armor of please don't eat me
Herald of Tzeentch: book of +1 invul, Relic of flipping psychic dice
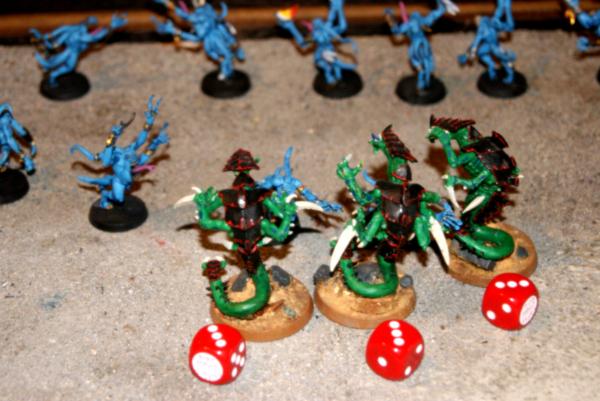
Tzeentch blue horrors (10)
Tzeentch blue horrors (10)
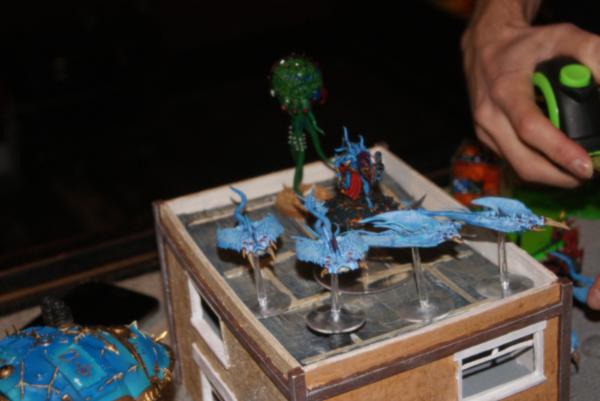
Screamers (9)
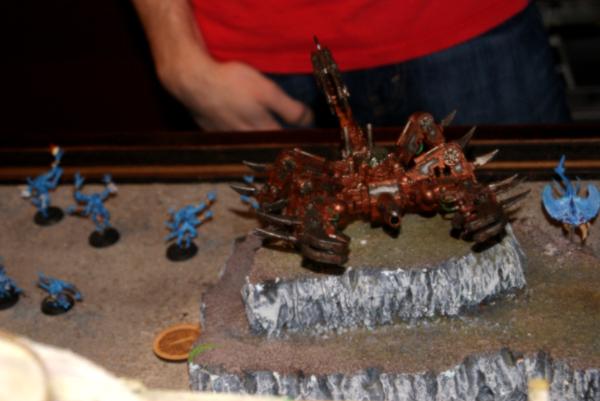
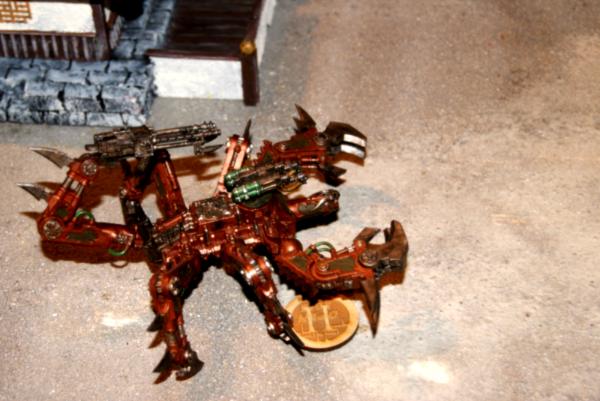
Soul grinder w/cannon
Soul grinder w/flamer
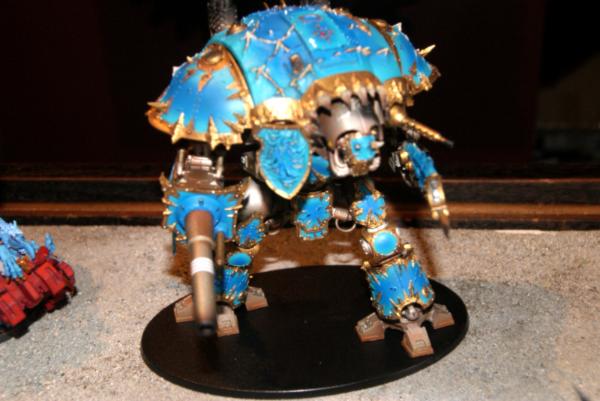
Knight w/battle cannon Tzeentch daemon
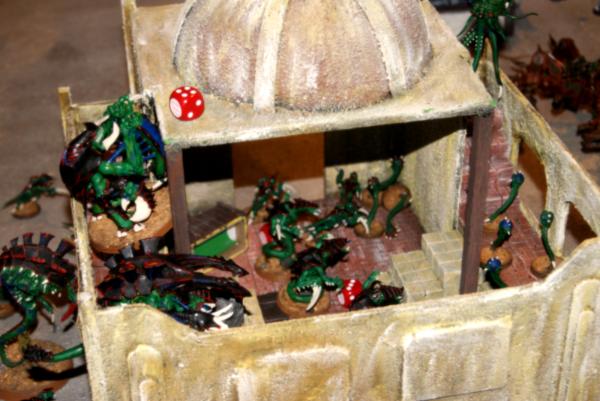
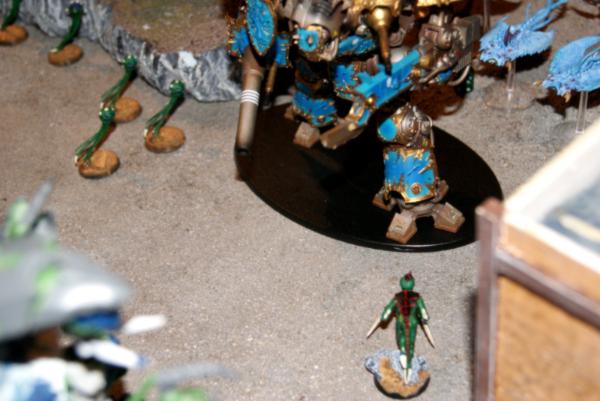
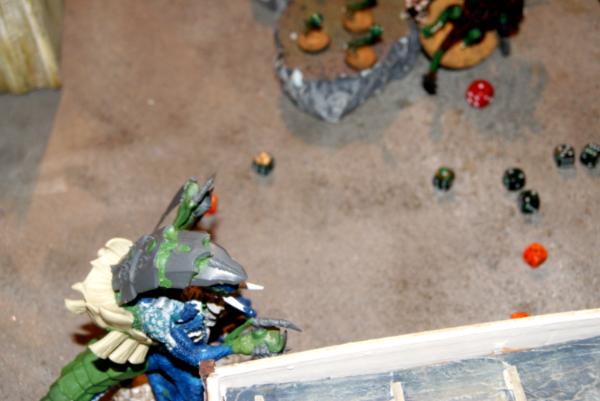
What a nicely posed lord of change. (Oh right, I did that.)
Pregame thoughts:
Spoiler:
That knight is so intimidating. So, I have played against daemons quite a bit lately, and have a little familiarity with them. Taking out the book herald will make everything so much easier, and one of the best ways to do that is close combat. If I can get one of my three big ugglies in there he can lay waste with instant death attacks everywhere. Conversely I can also get great big squad of gaunts into combat and overwhelm them with volume of attacks. Screamers can be super durable, but their actual attacks can be underwhelming.
I no longer have a real great anti-air weapon, but I can hope that volume of fire from my termagants and warriors will manage to knock it out of the air. The bonus to this is the super armor the lord of change is wearing involves a leadership test to work (or he is removed) Deathleaper works his magic and reduces the birds leadership by 3. If he flies into shadows of the warp he's testing on a leadership of 3 when he takes a wound. I can't rely on him hitting a mucolid unless he makes a mental mistake, they are just so slow and awkward.
The knight is the big thing. Can I take out the knight before it does way more damage then my fragile army can stand. I will need to work hard to get two or three of my big guys into close combat with him to have a chance of knocking him out of the game. Alternatively, if I can drown him in gaunts the most he will be able to do is stomp out into nearby units.
Mission: ITC mission 1
Dawn of war deployment.
Modified Emperors will.
Deployment:
Spoiler:
No psychic powers to roll or warlord traits, nice to save a touch of time here. My opponent started the long process of rolling up Tzeentch powers. He came up with the question for horrors. How do people take additional powers if they are mastery level 1? When you expand their unit size above 10 they count as more warp charges, but do not increase their mastery level. We felt there was a GWfaq or something that allowed them another power, because that's what we have both faced in tourney play. Daemons won the roll off and decided to allow me to go first. That way he has the last say on objectives every turn.
Tyranid deployment:
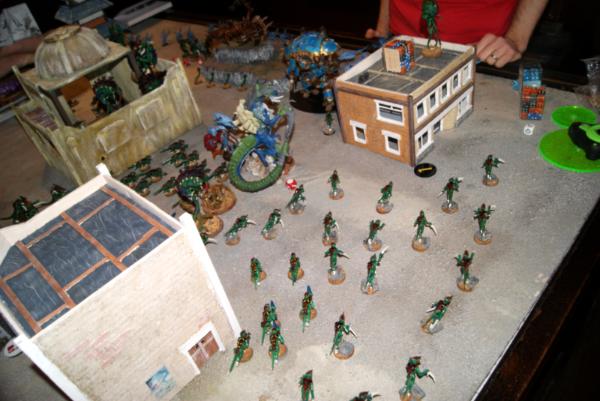
I noticed as we were playing a team tournament lately that many people felt they had to cover the entire board with their models. Deployment had to be stretched across the entire field. In the placement of the objectives, it seemed to me that I could concentrate my forces to one side of the table, and he would be forced to either counter deploy on the side of safety, which would let me run rampant over the area he would need to secure. Or he would deploy heavy right in the face of my swarm.
I positioned my bunker with it's familiar one entrance at 6" so I can sling shot returning gribblies, the escape hatch was placed in the open, but with an easy nine inches to two different objectives. Dimachaeron perched on the battlements in case he seized the initiative and targeted a quick moving threat. Gribblies spaced out as normal, with all of them tailing into a malanthrope somewhere. Both stone wrecker carnifex's were placed in the center behind large line of sight blocking ruins. Warriors and a malanthrope shored up the synapse on my left flank. (Left flank terminated about at the board center.
Daemon deployment:
Speaking of that stretched out line...
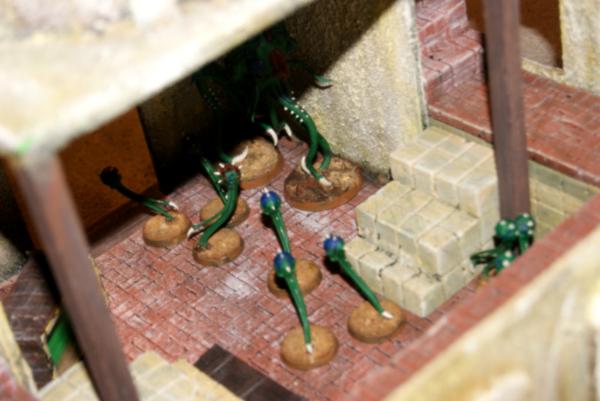
Infiltrators:
Deathleaper removed 3 ld from the lord of change. With his armor of please don't eat me, if he fails and is within the shadow of the warp (quick to happen when he moves forward) One wound will cause a leadership test on 3. If he fails, he vanishes.
Turn one:
Spoiler:
Missions:
Tyranids: 5/6 (Kill an enemy/3 units in my deployment zone, and none of his.)
Daemons: 4/6 (Kill someone/ 3 units in his deployment zone, and none of mine.)
Tyranid turn one:
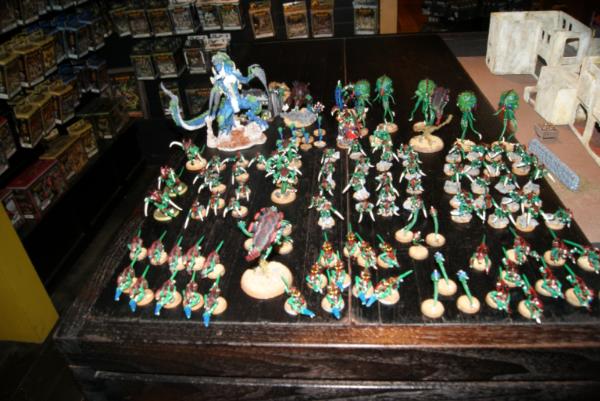
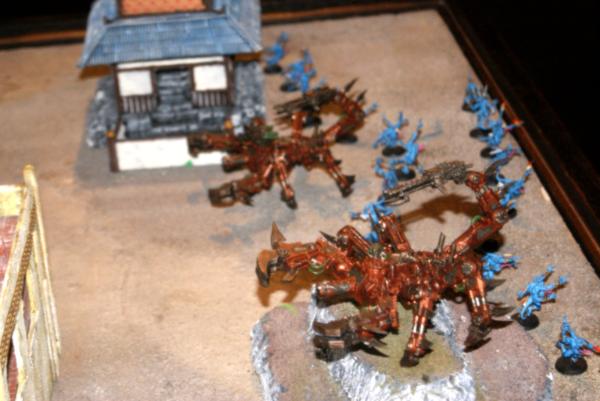
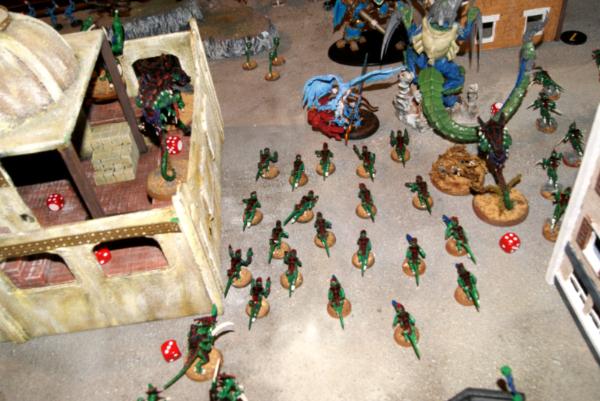
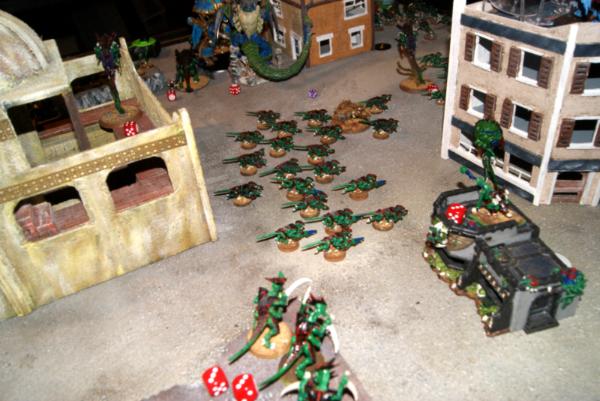
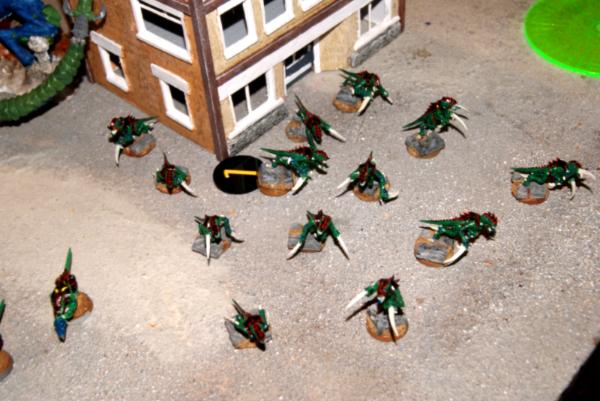
Standard first turn for the swarm. The 20 gaunts in the box popped out and ran as fast as they could, using fleet and they managed to block the knight into the corner he was in completely. They also wrapped around the building and towards the lord of change. He would be forced to fly towards the middle of the board with the mass of models I had in the area. From normal manner, the Dimachaeron, malanthrope, three squads of termagants moved forward in the middle.
On the right flank the other 20 hormagaunt squad zipped forward and filled in all the spaces, while a trail of gaunts reached all the way to the malanthrope.
Mucolids and spore mines moved forward from their infiltrated position, if his flyer comes to far I can go bomb him, or if any of his troops move out of the backfield I can threaten them. In the true center, the two stone wrecker carnifex's moved into the central ruins. Malanthrope hugged the back corner of the building, and the super speedy Ravenors raced up beyond the center of the board.
Shooting was super fast as just the biovore fired off a large blast that landed squarely on the heralds head. Two ensuing wounds were passed on to the screamers, killing one guy on the first turn.
Daemon turn one:
Not much movement for the Daemons, only the lord of change zipping towards the middle of the board. I just couldn't quite cover all the space he had to work with.
Psychic phase was comical. I managed to cancel cursed earth and then watched the psychic might of the daemons as they failed to cast summoning twice in a row.
Shooting was much better though. The central soul grinder and the chaos knight killed all but 10 of the hormagaunts in the first squad, as well as some incidental termagants farther back
On the left flank the soul grinder with the torrent flamer barbecued a mucolid, but it came back for me the next turn.
Wrap up:
Tyranids 1
Daemons: 1
Neither of us managed to kill a model, but we also both scored the hold your own territory. I was close with the super fast hormagaunts, but they were shot out of his deployment zone, and struck by the screamer squad. So far the game is going well, I've put a lot of pressure on the daemons right from the beginning. I was able to spread out my models quickly and avoid the potentially terrible damage that could have ensued from three large blast templates. My plan now is to push the carnifexes up and hopefully manage a charge against the knight. However if they roll poorly, then I will try and use something else to just keep it occupied for a turn. I expect the ravenors will be a huge surprise and will reach his first squad of pink horrors next turn. I think I want to get them out of combat so they can be an additional threat in the back field.
Second turn:
Spoiler:
Missions:
Tyranids: 3/5 (Unit in the enemy deployment zone/kill something.)
Tyranid turn two: 3/5 (Unit in the enemy deployment zone/kill something.)
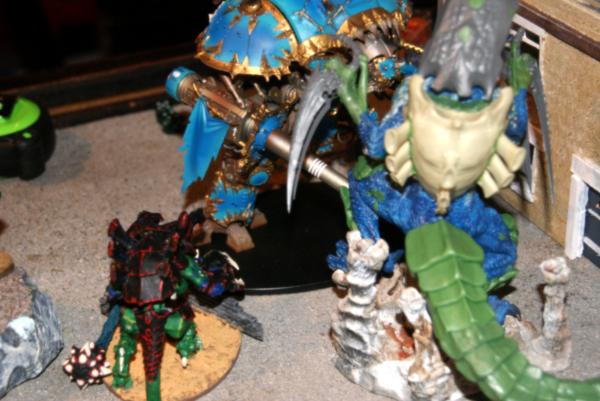
Both carnifex's decided they did not want to reach combat this turn, they did decent in their rolls, but not the 5-6 I needed to get them out of the terrain and really into threatening range. So the turn became one based on delay. Deathleaper and a reborn mucolid arrived. The mucolid deep struck on the building near the knight and screamers. Deathleaper popped up all the way left flank, behind a building with the intention of charging some horrors next turn. His primary goal is to stay alive, but currently he's getting me a maelstrom.
Shooting phase was once again super fast. All the termagants and warriors shot at the lord of change....and did no wounds. Biovore caused one more wound dropping a blast on the herald once more.
Assault, now this is where it's at. Largely a turn for delaying things. I charged with my 10 hormagaunts who came out of the escape hatch initially. I had them stretched out in as long a line as I could manage, with a couple of them spread out around 9 inches away. They got in combat on a nice low 4 for the assault distance. Knight pulped three of them, and his two stomps killed a few more. However, not enough to free him. One remained.
On the left flank, the super fast moving ravenors had sped out of the building and closed in on the first squad of horrors. I charged the first two in the long line, planning on them breaking free at the end of the combat. I killed seven of them, but they somehow made their leadership check. Doh.
The horrors couldn't make it into base contact with the ravenors though even after double follow up, so we consolidated. I placed my ravenors directly behind the central soul grinder.
The soul grinder with a flamer I charged first with a mucolid to eat over watch. (In retrospect it should have been the other way around.) Then I charged with 10 hormagaunts. They took a couple punches to the face, but hung out in combat, keeping the beast tied up with less then 25 points of models.
Daemon turn two:
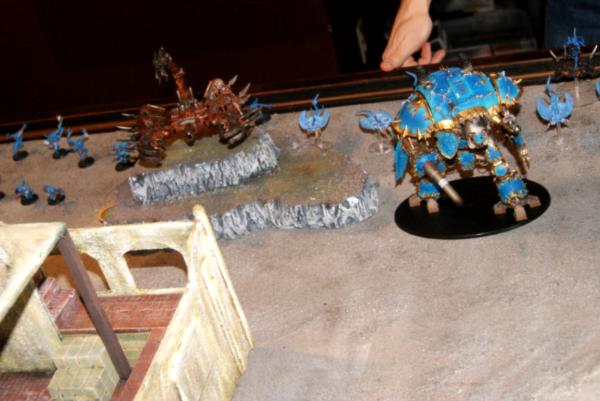
So there weren't a lot of models that could do things this turn really. The knight is trapped in combat, as is a soul grinder on the other side. The second grinder is the only thing that can crush those ravenors before they eat the second squad of blue horrors. Screamer star and lord of change have a lot of work to do.
During the movement phase the screamers zipped up on top of the building where the mucolid had stationed himself. (My thoughts was..okay, I'll blow up a mucolid on your weak link there.) I continue to forget about their turbo boost swipe attack.
The lord of change vector strikes the malanthrope on his way up to the top of the building in my deployment zone. (Achieving a maelstrom for him. )
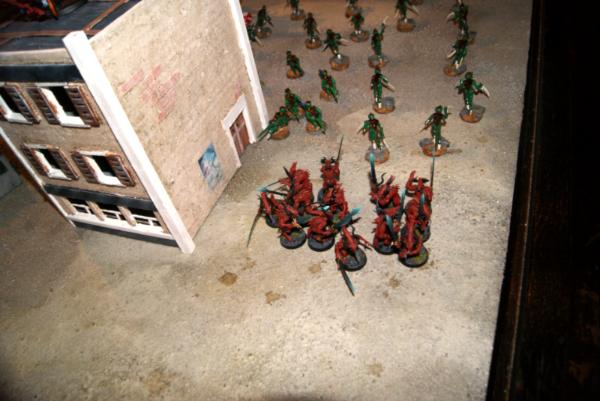
Psychic phase begins and this time the primary focus is summoning. Dice are rolled and....Blood letters! Both the herald and the lord of change summon squads of blood letters. One in my deployment zone, and one near objective 1.
The screamer star then jets to join the lord of change on the building in my deployment zone, swipe slapping a couple termagants on the way.
In assault the knight titan kills the lone hormagaunt and consolidates a might two inches backwards. On the left flank the torrent flamer soul grinder kills off a couple of hormagaunts and...They run, only to be eaten. (Forgot they were out of synapse after they consolidated.) The soul grinder then consolidates directly on top of objective marker 2.
In the center of everything the battle cannon soul grinder charges into and smashes the ravenor squad to pieces, taking a glance in the process. (Go rending claws! Go) He consolidates right back on top of his little mountain.
Turn wrap up:
Tyranids: 2
Daemons: 3
Daemons have pulled ahead on maelstrom objectives, but if things go right I can make a strong comeback there. Heck, if I table him it doesn't matter right? While he squished three units entirely. Although the hormagaunts are walking on the board edge next turn from the soul grinder battle. I feel like I'm gaining the upper hand. All three of my big uglies should be able to charge next turn, will they all make it? That's the question.
Third turn:
Spoiler:
Missions:
Tyranids: 1/6 (Hold objective 1/three units in my deployment zone, none of his)
Daemons: 2/6 (Hold objective 2/three units in his deployment zone, none of mine.)
Tyranid turn three:
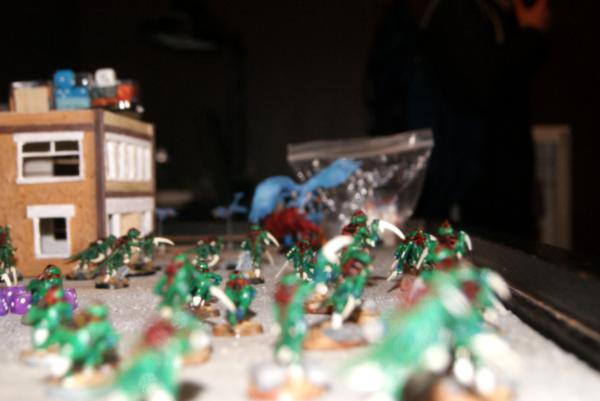
A couple of reborn bombs and the hormagaunts came in from reserve. Bombs deep struck around the building where the lord of change and screamers were. The hormagaunt squad on the right flank prepared to assault the newly born blood letters positioned near the objective marker 1. Both carnifex's managed good move through cover rolls, rumbling 6 inches each from their respective cover. Bio flail fex and the dimachaeron lined up to take on the knight, while the wrecker claw fex prepared to knock on the soul grinders door. All the shooting units I possessed lined up to make an attack on the building, more specifically the lord of change. All I need is one failed armor save!
Deathleaper moved towards the back line horrors, hoping to charge and remove them entirely. I couldn't do anything about the soul grinder crouched over objective 2. I created a termagant screen for the right flank malanthrope from the to be uncharged blood letters. Shooting killed some of those blood letters, and the biovore knocked out another screamer. (I got like 8 hits on the one blast up on that roof.)
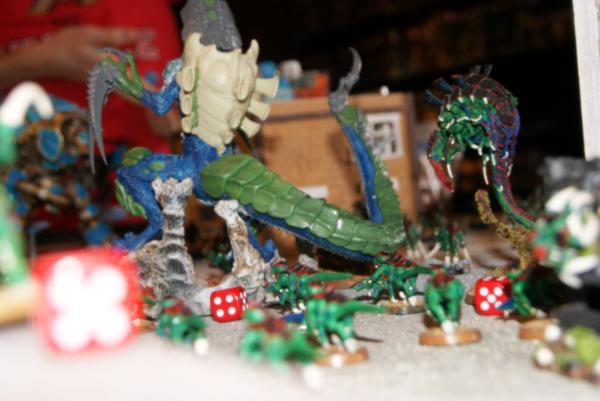
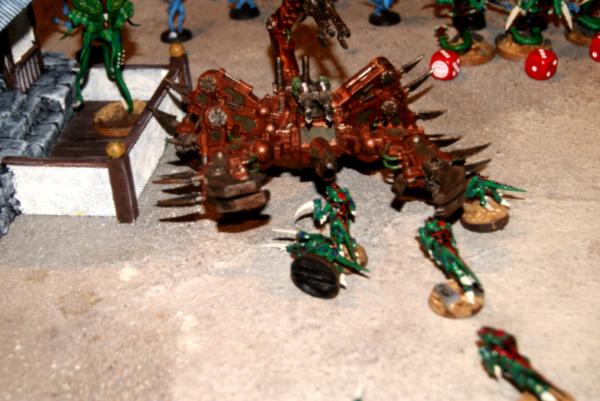
Assault phase! Everybody made it where they were supposed to, except deathleaper, he rolled a 4 and used fleet to make it a 3. Hammer of wrath from the carnifex took 3 hull points off the knight before anything else could happen. Dimachaeron used his strength 8 on the charge attacks and managed 4 glance/pens.
Sadly for the knight of tzeentch he rolled 2, 3, 4, 2. Not even a chance to re roll. The ensuing explosion took a wound off the dimachaeron, and three from the fex.
This really took the wind out of my opponents sails. Fex moved towards the central area and remaining horrors. Dimachaeron started back towards the board middle. In the other two now minor combats, the hormagaunts over ran the blood letters, killing all but three. Those three only killed two hormagaunts before vanishing under the warp instability. My gaunts consolidated into my version of objective secured.
The carnifex that chared that soul grinder in the center? Crushed by hammer of wrath.
Daemon turn three:
After a few minutes looking over the field of battle, consider the potential of mounting a comeback, vs making the wives happy that we were done on time. even a little early...My opponent conceded.
Wrap up:
Tyranids: 3
Daemons 3(4)
Killing the knight and the soul grinder pretty much ended the game. One summoned unit of blood letters is trapped with bad options either direction for charging. The flyer and the screamers really haven't pulled their weight so far, and eventually they will get caught.
Turn four:
Spoiler:
Nothing to see here, move along.
Tyranid turn four:
Daemon turn four:
Turn five:
Spoiler:
Game over man.
Tyranid turn five:
Daemon turn five:
Final thoughts:
Spoiler:
On paper a daemon army with a chaos knight seemed really frightening, but without that normal 200 points of support units, and being limited to taking the two soul grinders due to models finished vs not finished. Summoning had the potential to tip the balance, but neither going off in the first psychic phase put him behind the eight ball. Army design wise, the added dimachaeron and second stone wrecker did so much more vehicle damage then a pair of flyrants using their ESG attacks. Even assuming pens, I would have managed two-four hull points off the knight, and two hull points off a defiler by the end. Versus both destroyed completely. The biovore once again paid for itself a couple times over, being light on synapse allowed the one squad to be eaten, but didn't seem to fail me yet.
Deployment:
Focusing on one side of the board tipped the field in my favor. My army is predicated on overwhelming my opponent with too many models and separate units to combat. This helps protect my synapse units because my opponent can't waste shots on them, only to be swamped by the swarm. While I focused on one side, the bombs and big creatures in the central ruin helped control the board as he couldn't move out of his deployment zone for fear of being assaulted.
First turn:
I think in retrospect I could have done just a little better in my redeployment running from the first turn. I think I could have prevented the lord of change from having anywhere to go except along his deployment edge. As I write that, I don't think that would have made too much more of a difference. Having no psychic phase definitely saves me time.
Second turn:
I was underwhelmed with the speed of the carnifex's once more, but that's just a standard issue. The speed of the Ravenors really adds another element that my opponent has to deal with. Ability to regularly charge on turn two from cover is consistently surprising. I made a mistake in how I charged them however. I should have positioned them so they could finish off the troops in his turn, and then be available to assault in third turn. It worked out however, as he was unable to shoot with his available soul grinder. Much like eldar jet bikes it is difficult to trap the screamer star, but deep striking a bomb on top of the building in my deployment zone instead of by death leaper would have really confounded him. (If he went as he did, they would have had a few on the ground level as he couldn't get within 1" of my bomb.
Third turn:
This turn was great. I trapped his remaining units, blew up his two heaviest hitters, and set myself up to wipe him from the board in the next turn or two. I could have consolidated my wrecker fex towards the second soul grinder as he was un-injured. The rest of my forces were in a position that wherever his flier/screamers went I should be able to effect them.
All in all, I was pretty happy at how the endless swarm did when reduced for 1650 points. I think my attack plan still works, while my opponents have less support units then I would otherwise have to deal with. I'll be getting plenty more games in as I tweak the last few points in the list.
This message was edited 9 times. Last update was at 2016/02/26 17:52:00
~seapheonix
2016/02/24 02:30:58
Subject: 1650 ITC endless swarm vs Daemons w/knight
Hey, if I flipped a 6 on that first stomp on the Dimacheron all your brilliant planning would have been for not! Or if I rolled one less 1 for that one gaunt that held the knight in combat.
Once I realized that I could land the screamer star the building in your deployment without fear of being assaulted I should have put the grimoire on the knight instead of the screamer star. With a 3++, re-rolling 1s I think he could have lived and crunched at least the carnifex.
I'm blaming the whole thing on the cold and lack of sleep due to the baby
2016/02/26 21:05:11
Subject: 1650 ITC endless swarm vs Daemons w/knight
Ooh, grimoire on the knight would have been good. He would have had a hull point left I believe.
I think I skimmed over the decision not to use the dice flipper earlier as well in the psychic phase. The decision between taking a perils of the warp, or not casting the summoning. The daemonettes you were planning on bringing out would have prevented me from assaulting the knight. Which would have allowed more fire power to be brought out, and you could move and assault the unit you wanted to.