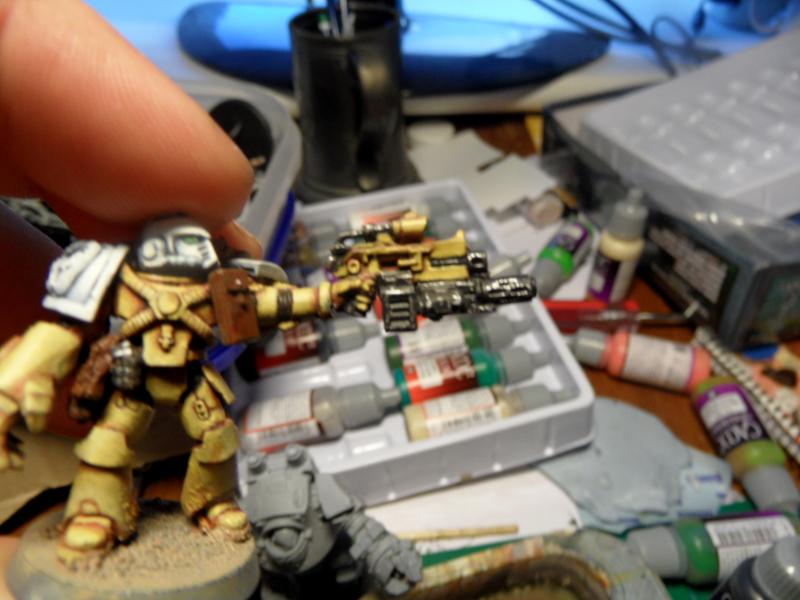
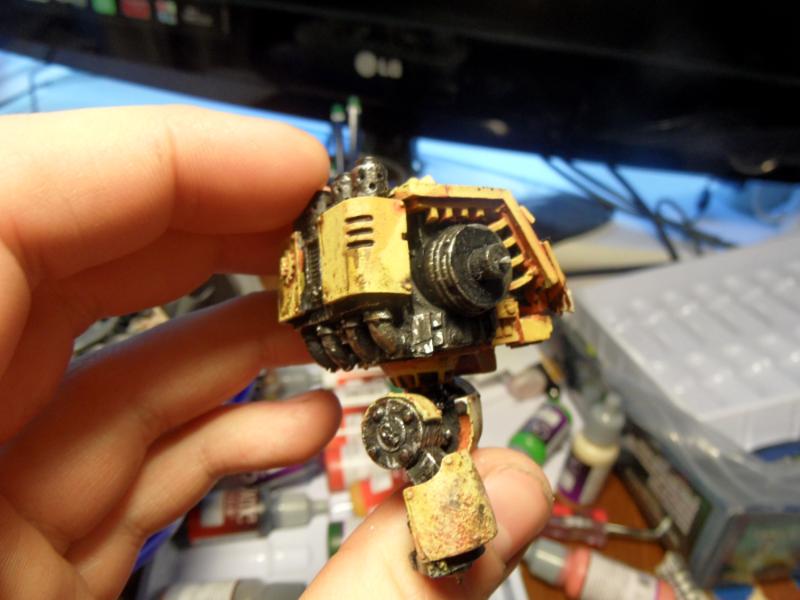
Very simple tutorial to get that pleasing chipped black 'ruggedized' metal finish on your models whilst removing a little of the guesswork/need for precision. I like it best on guns as they are very rarely bare metal in real life.
If you can't get better results than me with my hamfists, consider my tutorial a failure!

I'm a bit out of wack with
GW's current range but you should be able to look up the new versions.
Step 1: A good even coat of gun metal (Boltgun metal), or your brand of choice's equivalent. If you prefer a more nitre blued steel finish mix in a little blue to the gun metal.
Step 2: At least 3 coats of of black wash (badab black wash)/black shade/black ink. All that should be visible of the Gun metal is the edges, more on this later

, a slight metallic hint should be all that remains of the basecoat. You can do less washes but you do want a marked contrast between the chips and the body of the object, so the less metallic the better.
Step 3: With your most shiny pristine metal colour (Mithril Silver), dab paint along the edges that still show the gun metal basecoat through. You can do this simply with the edge of your brush. Do try and be sparing as it can start to look messy. For some areas it is worth freehanding some scuffs and scratches, such as track marks on a sickle mag or the tread of a wheel.
Step3b: Something that always looks great is the 'Twin fang' chip, basically press side of your brush tip to make one 'Large fang' then just overlapping it a 'Small fang' it looks very natural for something so easy. You can see it on the Dreadnought.
I think this looks better than simply painting chips on a black surface as the dull metallic hint left by the gun metal adds alot of depth. Also having the gun metal on the edges gives you a good guideline of what would be chipped.


 Blood Angels,
  Ultramarines,
