Hi guys another commission for cleaning and assembly here.
I've already done an intensive build with a forgeworld Fire raptor I made convertible to a storm eagle.
http://www.dakkadakka.com/dakkaforum/posts/list/678872.page
As well as a simple posed assembly of a Thanatar seige engine.
http://www.dakkadakka.com/dakkaforum/posts/list/686807.page
This is a trio of artillery cannons from Ramshackle games. Notes from the client include some casting issues and a reallllly hard resin, as well as lack of assembly instructions. So hard it tends to snap and shatter worse then even the Chinese recast stuff. Here are some pics from Ramshackle for the completed models:
This is a link to the items page:
http://shop.ramshacklegames.co.uk/index.php?main_page=product_info&cPath=45&products_id=400
Here is a completed pic from their studio.

I can spot some flash and a little bubbling from even their completed work which I interpret as a bad sign. Let's dive in though!
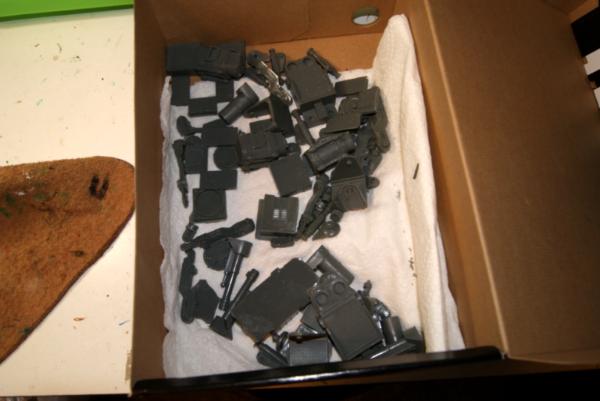
First off here is the box 'o goodies.
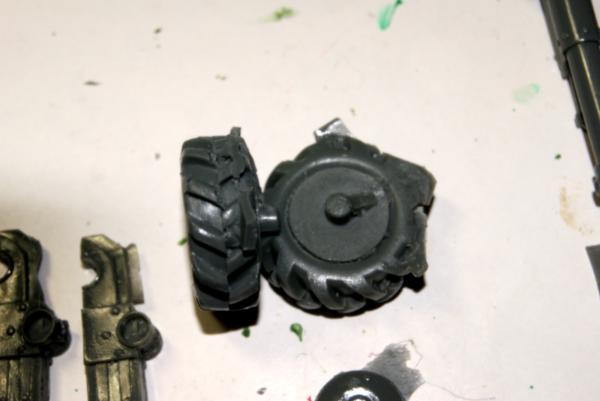
My first take is that for the price, much of the casting is very crisp. The wheels are really messy and have some serious air bubble issue. I zoomed in here, but even that isn't showing all the bubbles and filling that will happen with these.
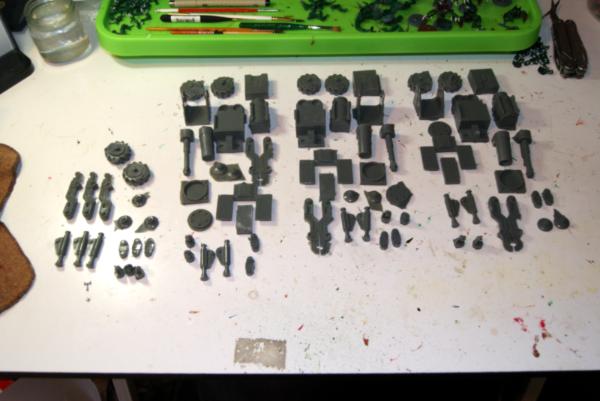
Looking at the website picture, I've divided up the parts for assembly between the three guns that were ordered. They include nearly a full spare kit, one extra of just about everything per kit, which strikes me as a company admission of poor quality control. That does allow me to sort through for the best cast of each though I suppose.
Okay, moving onto some of the positive first impressions: There is some good potential for magnetizing the two different barrels for easy switching between mortar or cannon. There is a good looking opportunity for flexible joints in the cylinders, the tail supports, the towing hitch. It would not take a ton of effort to turn this model into an action figure pretty much. However, that is not the primary goal here, so while the back will be flexible, I likely will set the cylinders and the wheels.
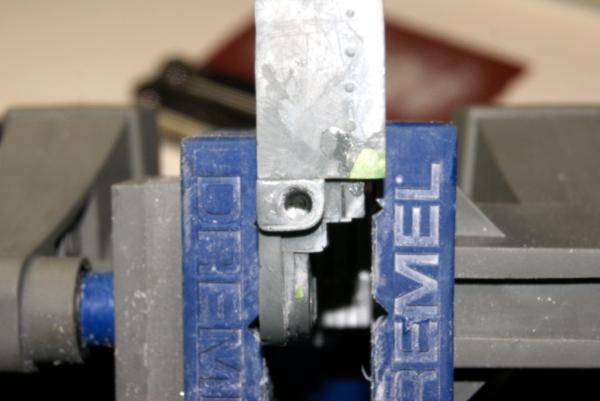
Entering into work on the first of the artillery pieces. I took a careful look at the pictures on the Ramshackle website, and I couldn't find the use of a couple of the pieces. (A square block, a pivot point, and a block with vents on it.) So I set them to the side. I'm guessing free objective parts? Next step was to start with drilling out the cannon barrels. It was at this point drilling into the resin that I noticed the overly sweet smell coming from the work. It was eerily similar to the smell of fiberglass when you are working with it. Lo and behold a few minutes later my arms started to itch. So while I can't definitively say that this material is made out of fiberglass, my body reacts as if it is. So on go the long sleeves, the eye protection, the gloves, and the respirator. (Fiberglass is just not something you want to mess around with.) I then took the first artillery piece out into the days sun, put my portable vice on the trash bin and pulled out the dremel. Some hot sweaty work later I had the pieces cleaned up without shattering. Everything went into a tub filled with about equal parts vinegar and soapy water.
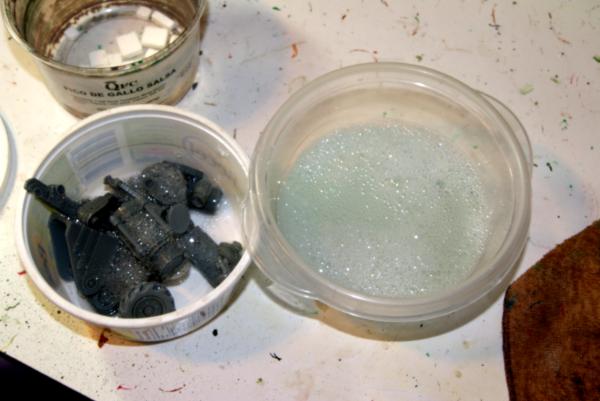
This cleaned off all the glass dust and also the vinegar can break down the surface of the material just a little, making it more willing to accept super glue when you are attaching pieces.
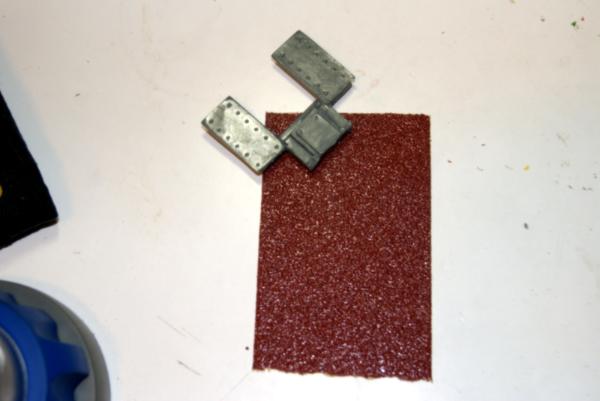
Having found this material to be super brittle, I am avoiding the use of blades wherever possible and instead find myself squaring the parts with rough sand paper. (this is just off the roll sticky back 40 grit.) Then I smooth out the rough work with a file.
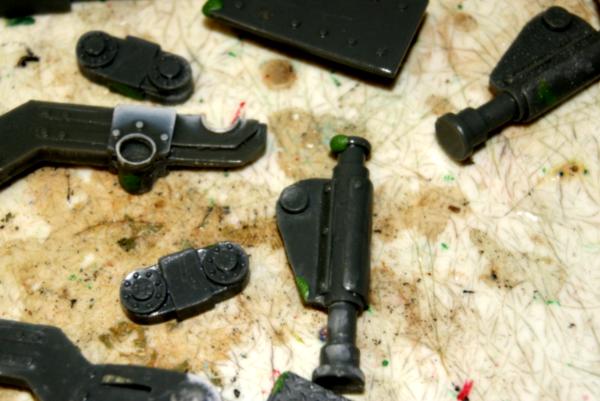
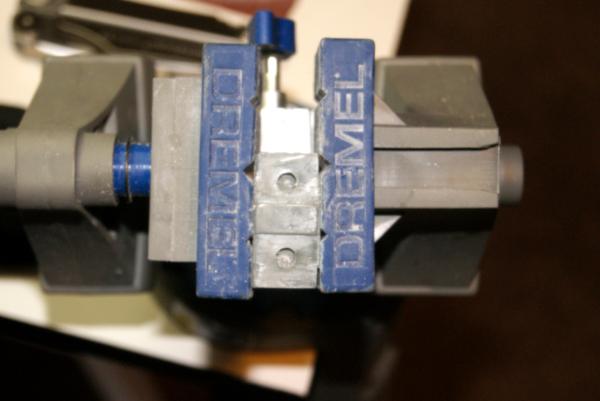
Next on the task list is filling in the various air bubbles, mis-casts, and a couple of pre-broken parts. Green stuff to the rescue.
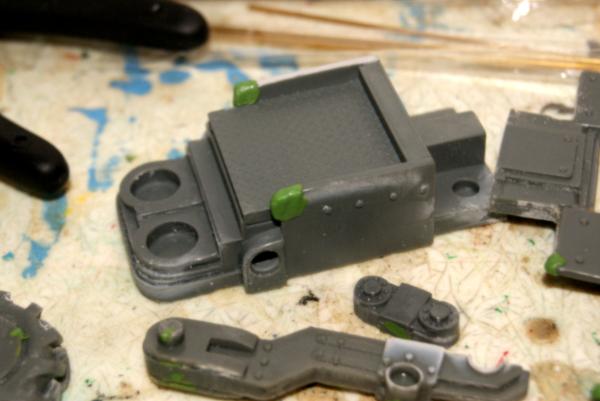
Many of the cylinder parts were missing half of the pad for the ground.
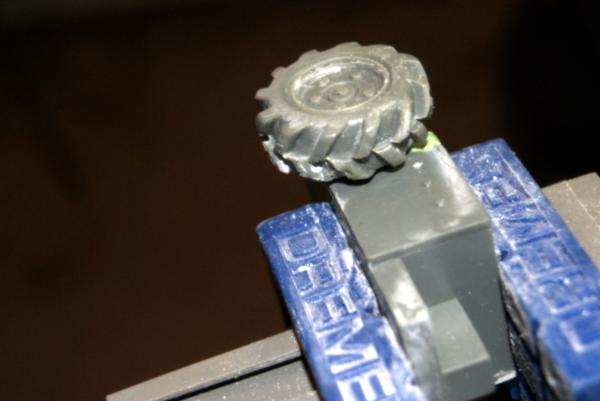
Having cleaned up the wheels, I figured that was a natural first step. (On the next ones it will likely be a final step instead.) I found the holes the wheels are supposed to slide into largely plugged up with flashing, so I bored them out.
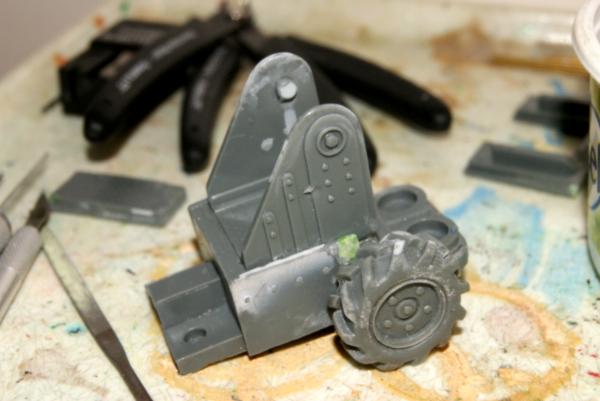
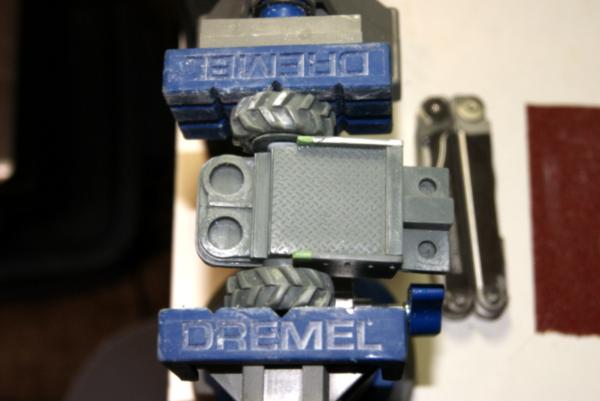
I then glued on the first wheel with the chassis held in the five, in retrospect, holding it in place with the vice may have been a better way.
While that was gluing I cleaned out some more flash. This is the panel that covers the tow hitch pivots.
Second wheel was added, and this time I glued them in opposition to get a straighter pose. You may notice that they do not have a right and a left wheel in the box. They are a single wheel cast, so the tread goes in reverse. A little detail that it seems wouldn't be that hard to correct. (Aren't I the opinionated modeler.) Were I really doing it up on these models, I would probably consider casting a wheel myself.
Next was placing the gun mount on top of the carriage, the piece didn't quite fit, and in the process of gluing it down, I cracked the top rail on the other side. I'll come back with green stuff and glue to repair that. This resin is really brittle.