| Author |
Message |
 |
|
|
|
|
Advert
|
Forum adverts like this one are shown to any user who is not logged in. Join us by filling out a tiny 3 field form and you will get your own, free, dakka user account which gives a good range of benefits to you:
- No adverts like this in the forums anymore.
- Times and dates in your local timezone.
- Full tracking of what you have read so you can skip to your first unread post, easily see what has changed since you last logged in, and easily see what is new at a glance.
- Email notifications for threads you want to watch closely.
- Being a part of the oldest wargaming community on the net.
If you are already a member then feel free to login now. |
|
 |
2016/08/22 18:37:45
Subject: Diary of a Novice
|
|

Longtime Dakkanaut
|
What Nevelon said. Nuln oil for the guns and armor joints. Basically where you have metal. Make sure to shake them very well, then add 1:1 ratio with water (1 drop of paint to 1 drop of water, making sure it's clean) then lightly wash. Remember, it's always easier to add a second layer than to go back over it again and start over.
Then do the same with Earthshade for your seals or parchments.
If you really want your models to stand out, practice some drybrushing (youtube or google how to do drybrushing, it's really easy) and dust your future models lightly with a lighter green before doing the red/silver/white/parchment.
|
|
This message was edited 1 time. Last update was at 2016/08/22 18:39:09
|
|
|
|
2016/08/22 22:36:47
Subject: Diary of a Novice
|
|
Longtime Dakkanaut
|
 Nevelon wrote: Nevelon wrote:Drybrushing is what you do with brushes after you’ve already killed them. It does not do kind things to them. My primary drybrush is a splayed wreck.
(side note, look into brush care. Good brushes are worth investing in, and taking care of. Don’t let paint get into the ferrule, and use some brush soap. Synthetic brushes are going to curl, nature of the beast)
Washes can be used in a number of ways. I use them straight out of the pot. You can either use them to coat a whole surface, or targeted into crevices to add some shading.
Sorry, but that's fundamentally incorrect. There are brushes designed specifically for drybrushing... I have several, have had the same ones for almost a year and they are still in extremely good shape. If you're using rounded tip brushes for dry brushes, well no wonder.
Automatically Appended Next Post:
 suxdavide wrote: suxdavide wrote:Rhinos are one of those things you should think about har far you want to glue it. You basic rhino hull is used fo so many different tanks, it’s nice to be able to swap things around. The last few I’ve done I left the tracks off and painted them separately. Makes it a bit easier IMHO.
Yeah I'll be leaeving the rhino without the top glued at least for a bit. I bought it second handed but he didn't have the razorback turrets... I'm going to search for those later on.
What Nevelon said. Nuln oil for the guns and armor joints. Basically where you have metal. Make sure to shake them very well, then add 1:1 ratio with water (1 drop of paint to 1 drop of water, making sure it's clean) then lightly wash. Remember, it's always easier to add a second layer than to go back over it again and start over.
As of washes no, I only tried covering the models with base colors without leaving the borders... I have nuln oil but it's really liquid how to I apply that? Do I need to place it on the palette (a plastic dish in my case) as the other colors or? I watched some videos on youtube but they didn't explain that too much...
If you really want your models to stand out, practice some drybrushing (youtube or google how to do drybrushing, it's really easy) and dust your future models lightly with a lighter green before doing the red/silver/white/parchment.
I'm watching out for drybrushing right now 
I also destroyed way too many brushes in the first few tries... I had 1,2,4 da vinci's and the 1 has now two tips while the 4 has been completely annihilated, I now have bought another 4 with longer bristles and I feel like they are better
Lol ok, I seem to have missed a few things Nuln oil is a wash. Meaning it has a higher concentration of water so that it is designed to not cover up your base coat. Grab a junk model, clean it off some, grab a brush full of nuln oil and apply it. See what it does, how it flows, and how it dries. This is the basic of a wash. Glazes and Tints are in this family, but they act differently because of the chemicals mixed in. There's more to it as well, like sometimes you'll see that paint and therefore washes, are made of little pigments. Pigmented paint sometimes likes to dry like coffee. I.E it spreads away from the center, and this can sometime make it move away from the cracks as it dries. This is not normally something you have to worry about, but for future information, grab a medium or a fluid that you mix in that retards or slows down the drying process. This causes the pigments to have a longer time to settle into cracks. I use Pledge floor care, that you can buy in any grocery store.
As for brushes, dont destroy good bushes. Buy a drybrush brush, GW sells them, Vallejo sells them, reaper too. I buy my stuff from www.thewarstore.com but you can get them anywhere, and you'll def want a few different sizes. These are stiffer brushes that are designed to be beat up. But the most important thing is to maintain your brushes. Wash them gently in soap after every painting session, wash them out OFTEN. As in every few minutes while your painting. There was an awesome thread here on dakka or bolter and chainsword where everyone got together to give a tip of the day, if you can find it, read it all.
But generally, for your first lessons, follow the basics.
1: learn to primer correctly. Wash the model in thin paint i.e if you prime black, give it a thin paint (not quite a wash) coat of black.
2: Paint your base coats
3: Learn and apply drybrush coats
4: Wash the models, the thinner the paint, the more work but the better it looks
5: Pick out details
6: Finish the model
Here's some links to my painting blogs:
http://www.dakkadakka.com/dakkaforum/posts/list/700248.page
http://imgur.com/a/w59hI
|
|
This message was edited 2 times. Last update was at 2016/08/22 22:46:56
|
|
|
|
2016/08/23 12:10:30
Subject: Diary of a Novice
|
|
Longtime Dakkanaut
|
Lol you did alright Remember, you always want to thin the wash. And make sure you shake it up really well, and mix really well with the clean water. But yes, that's why I told you to use a throwaway model that doesn't mean anything to you. Yes, the wash makes things "deeper" by adding shadow and inversely making details and highlights stick out more than before, bringing detail to the model.
The next thing to try is to "pull" the wash away from areas you don't want that much. Remember, when painting, the most paint ends up where the brush stops. So take a shoulder pad for example. You want the top to be your highlight because that's where light hits. So start your wash there and pull your brush down to the bottom. Then do it again from top to bottom next to it, and keep doing that till you have very little wash on the top and more towards the bottom where the shoulder pad should be darker. If you end up with too much wash, you can take a dry brush and soak some up, wipe it off and do it again.
|
|
|
|
2016/08/24 15:17:21
Subject: Diary of a Novice
|
|
Longtime Dakkanaut
|
Yikes, I guess that was a bit close to home for you. Here's hoping for a speedy recovery.
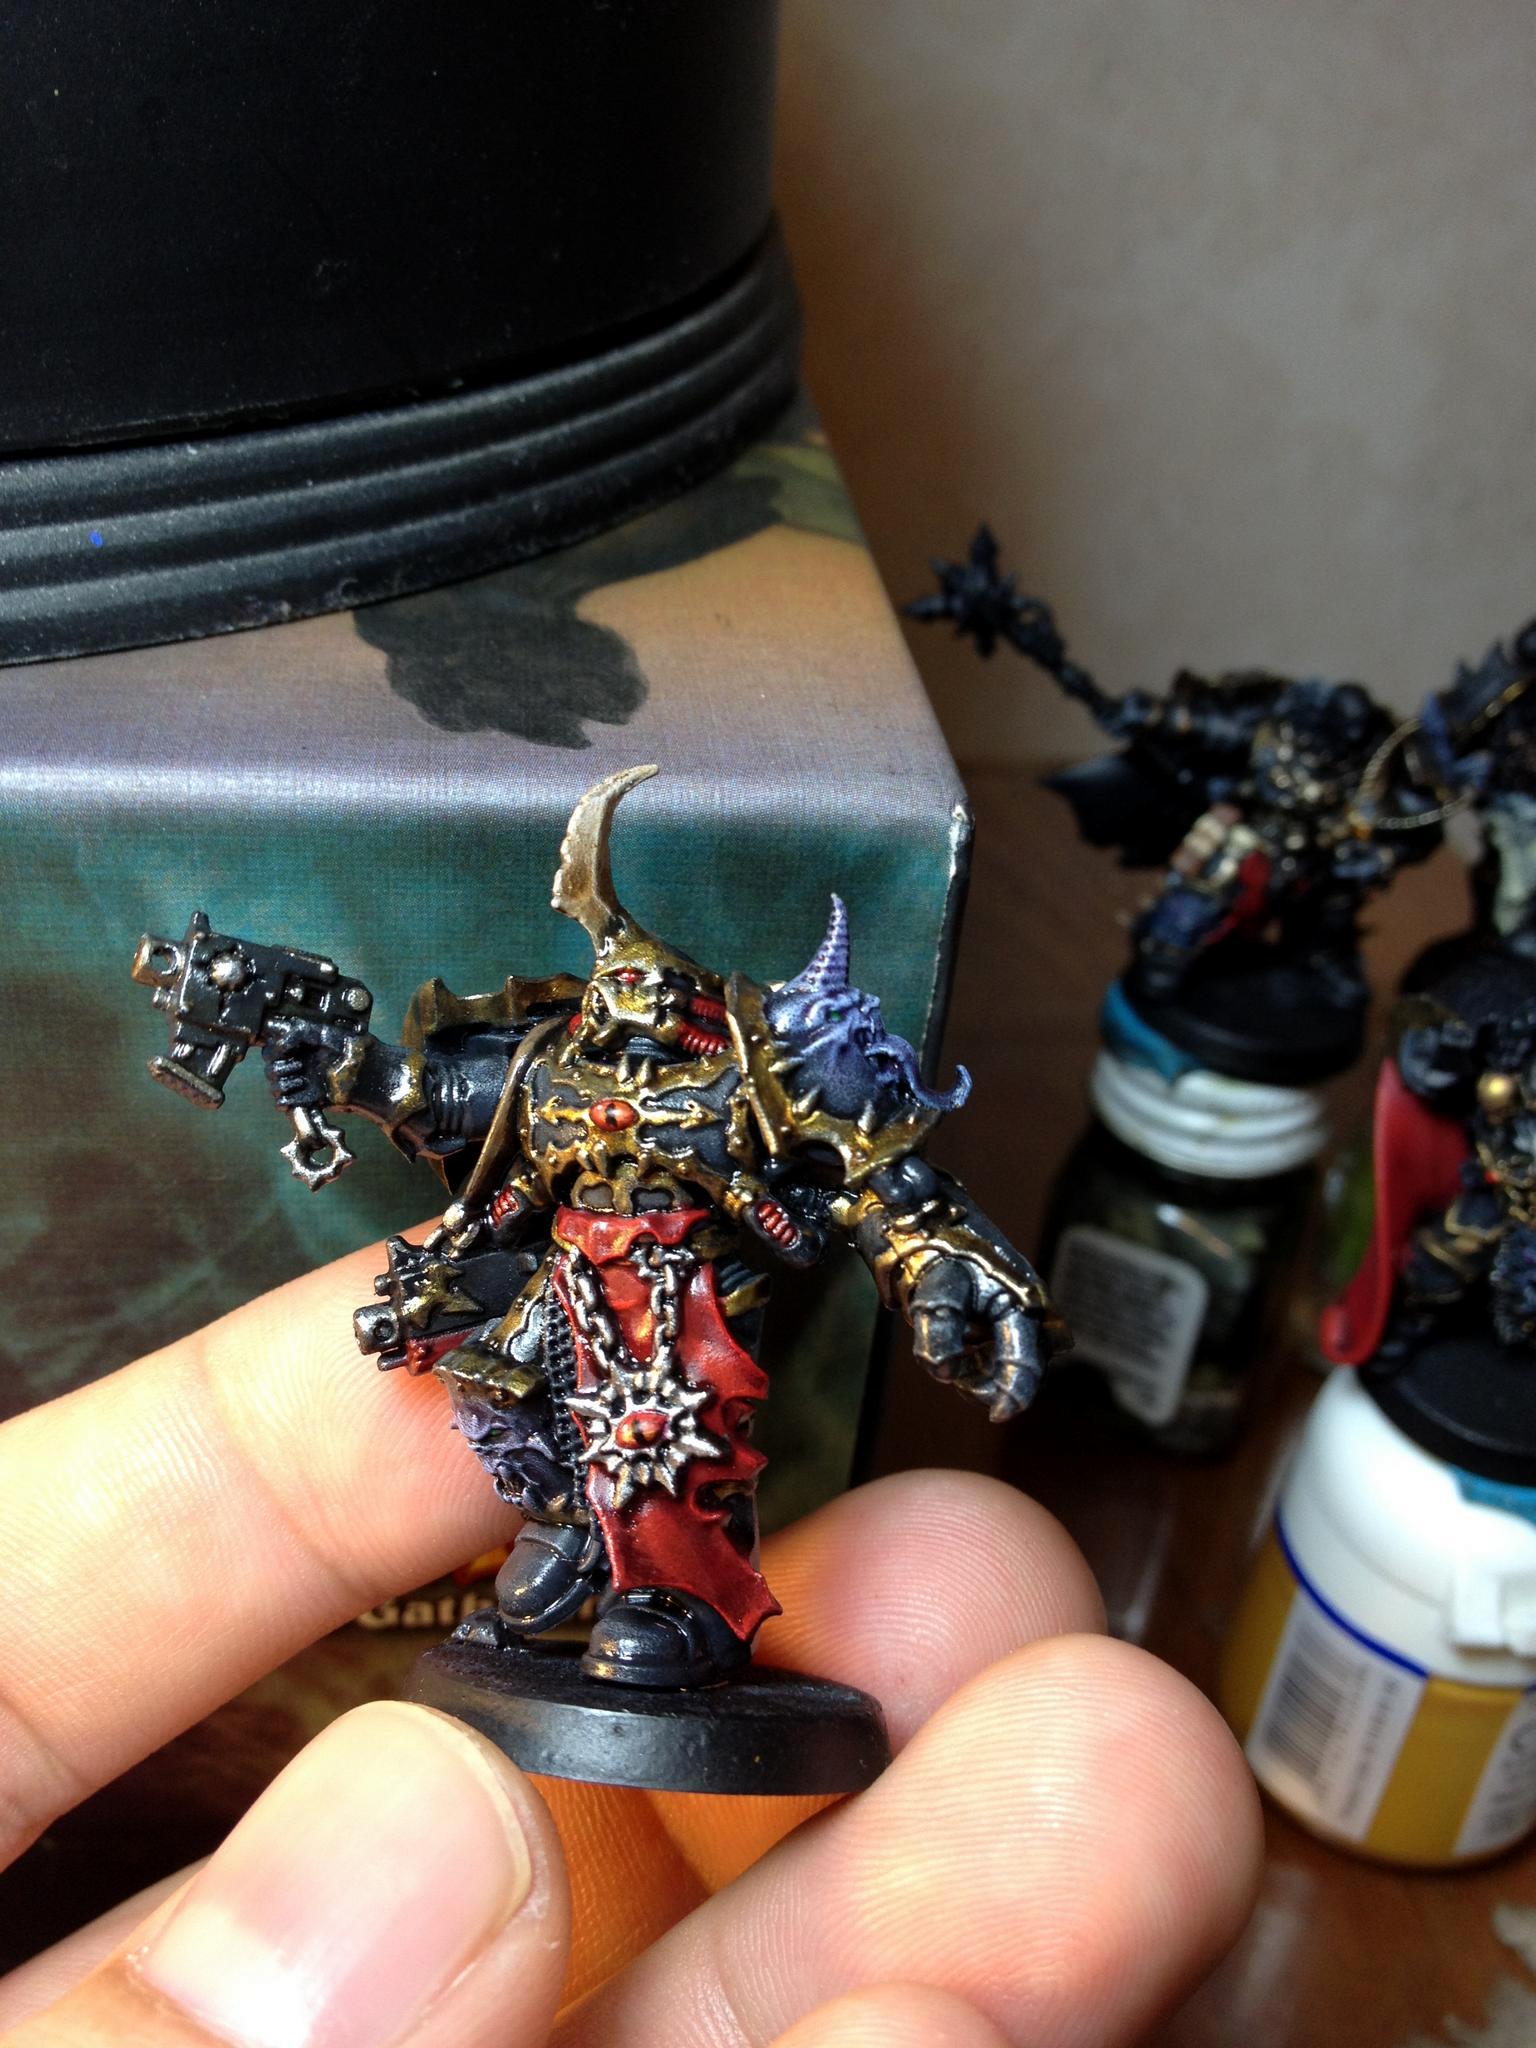
Here, I wanted to show you what a proper wash looks like when finished I wanted to find my skaven that I did using what's called "grayscale" washing as I'm really proud of them, but unfortunately I doubt I'll ever find them after warseer went down.
I started off with a black base coat, drybrushed a few layers of successively lighter grays, then drybrushed the demons, and once those were dry, washed the model a few times with different colors on different parts.
|
|
This message was edited 1 time. Last update was at 2016/08/24 15:18:52
|
|
|
|
2016/08/29 16:41:58
Subject: Diary of a Novice
|
|
Longtime Dakkanaut
|
Looking good! Just need a bit of drybrushing to bring in highlights, or if you have subscribed to GW TV on facebook, watch the salamander painting video they posted today and pay attention to the "edge highlighting" section. Those will really bring out the detail in your models.
|
|
|
|
2016/08/29 17:13:05
Subject: Diary of a Novice
|
|
Longtime Dakkanaut
|
Remember, dry brush before putting all your base coats on. You want to work from inside out, like this:
1. Prime and primary base coat. In your case, Dark Angels Green
2. Drybrush (lightly!) on top of the green
3. Wash primary base coat, in your case Nuln Oil or Drakenhof Nightshade. Remember to thin.
4. Base coat rest of model, like Eagle, shoulder pad details, eye lens, guns.
5. Wash rest of model.
6. Pick out details and highlights, like edge highlighting.
7. Finish with a varnish or matte spray.
|
|
|
|
2016/08/29 17:38:21
Subject: Diary of a Novice
|
|
Longtime Dakkanaut
|
Varnish is a finish that protects your models from dings and scratches. It's see-through but makes your models shiny. Some people don't like that too well, but it doesn't bother me. There are other alternatives too. I use Pledge floor care by Johnson and Johnson. This stuff is magical and you can buy it at nearly any grocery store, or something like it.
I just take a brush full and slop it on the model like you're doing a wash. The more the better, but do at least 2 coats and let them dry for a day between coats. This does a couple things, first it protects your model. Secondly, it makes the color look deeper, sort of like several clear coats on a car make the paint job look better.
Also, this stuff is great with paint. I mix it in with my paints, with water, and it thins it down while also reducing the drying time, and makes it easier to paint.
|
|
|
|
2016/08/30 11:03:50
Subject: Diary of a Novice
|
|
Longtime Dakkanaut
|
No, not really. You can still paint over varnish, certainly the Pledge floor care that I use. It's a bit glossy, so you just have to be careful, but there's plenty of professional painters who put a coat on after reaching certain milestones because they work on their models for so long, they don't want to risk damaging it before it's finished. Ultimately, just test it out on some old model down the road
|
|
|
|
2016/09/01 17:56:35
Subject: Diary of a Novice
|
|
Longtime Dakkanaut
|
Looking better! Just need to focus on the wash a bit more, and they'll be tabletop ready!
|
|
|
|
|
|
|