With the release of the new combined stormtalon/stormhawk kit I thought it would be a neat challenge to build a convertable model with all options from the box. I think both models look pretty cool, I love magnetizing way too much, and this would be my first flyer so this made me pretty excited about this build.
So, Challenge accepted.
I reviewed the sprues before hand on the
gw site and all seemed good. The stormhawk stuff is its own sprue added to the regular 2 sprue stormtalon, and it didn't appear like there were any double use parts aside from the weapon pods. My goal at first was to build both models exactly as the instructions describe with all interchangeable options for both jets, but after getting the kit and going through everything I did decide to make a few small concessions that I'll outline as I go through the assembly. I took all the pictures after completing the modelling of this, but I will try to describe how I did each section as I go through it. Sorry if this gets kinda long too, I took a lot of pictures to show how the build was done in detail.
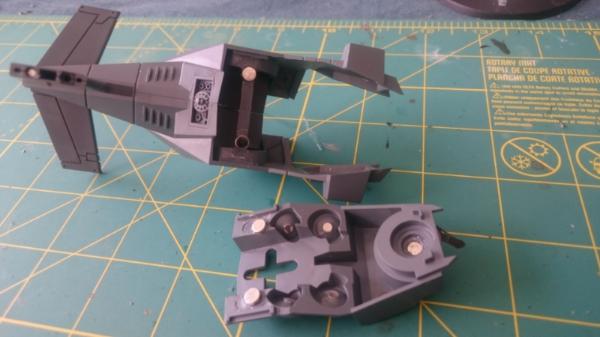
I'll go through the stormhawk assembly first, then follow up with the stormtalon. When I did the build the order was all over the place because I like to install magnets before glueing anything if possible, and some of the swaps required many different pieces to be ready at once. I held the hull together with elastics while doing the rest of the work until the very end when I completed the join between the bottom of the hull and the rest. I should point out too this kit is an absolute dream as far as tidiness goes. You could see the difference in quality between the new 2016 stormhawk sprue and the original 2012 stormtalon ones, but not by much, and I would rate both sprues as excellent for tab placement and mold alignment etc. Where there were lines, they were crisp and easy to scrape, and all the tabs seamed to come off super easy as well.
So the first part to figure out how to magnetize was the bottom plate of the hull to the rest of the hull so the cockpits can be interchanged. I used 5mm magnets and I attached the ones on the inside of the main hull to a piece of sprue. This was actually one of the last tasks that I completed, but for the flow of pictures I'll show it first. I finished this last because the magnets didn't really have anywhere to sit until I added in the sprue. I did get one attached by the smallest of margins without the sprue just for testing. This step also ended up adding some more strength to the main hull assembly when everything is apart from the sprue.
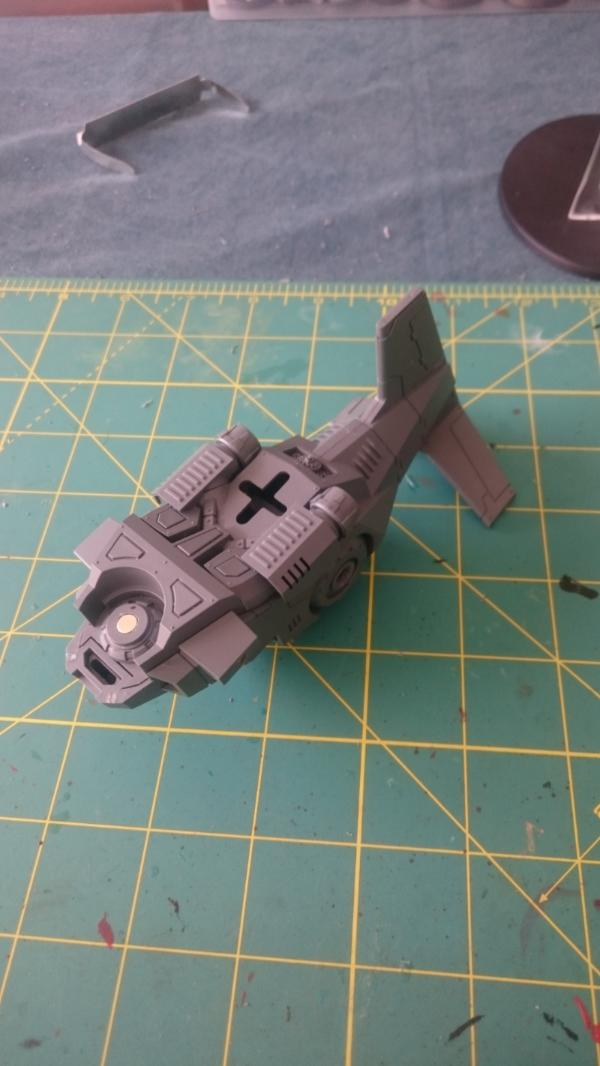
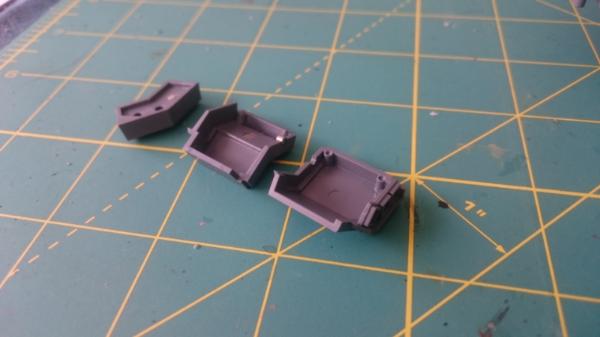
You can also see the first concession that I decided to make with the "butt plate". I decided to glue in the stormtalon plate instead of using the stormhawk one at all. The stormhawk plate uses the landing pads from the stormtalon assault cannon, its shown later in the stormtalon assembly This was the only dual usage part in the whole build, and instead of using at least 9 magnets to get this done I just went with the simpler stormtalon plate. You can't see this anyways....
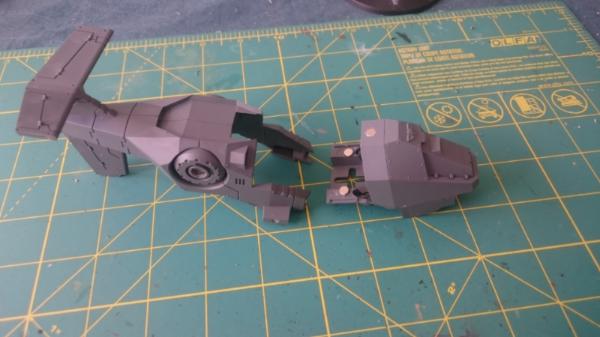
I've also magnetized the bottom piece of the tail to swap the two models using a 2mm magnet, and the thrusters on the bottom of the hull with 3mm magnets. As with the body magnets, the 2mm tail piece was done right at the end of the build because I didn't glue the hull together until the very end.
From the top, the cockpit just sits loose on top of the hull base. It has a 5mm magnet in the top to attach to the top plate. The cockpit and bottom plate fit in and out of the hull by sliding up from the bottom.
For the top plate itself, it has a matching 5mm magnet underneath to match the one in the top of the cockpit. The chaff launcher thing is joined with 2mm magnets so it can be swapped to the stormtalon antennas later. The inside triangle piece only fits in from the bottom of the top plate, this is especially true for the stormtalon so this top top plate had to be removeable. I also added a 2mm magnet in the ridge of the hull where the back end of the top plate meets up to keep it from rattling and put a little preasure on the cockpit to hold it in place

Showing the back of the chaff launcher, due to its thickness the magnet can't be fully recessed so it must fit into a recess in the triangle part.
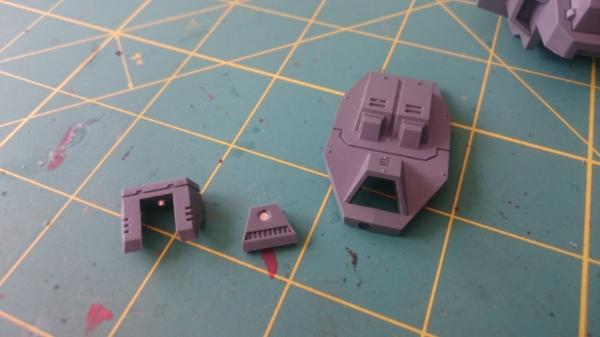
Like a glove. This will need some trimming down before painting so the chaff launcher still fits over the hull correctly because the section of the hull is going to be painted.

Here we have the hull assembled for the stormhawk. There is no rattle or looseness at all, after removing the top plate, it takes a little force to push the rest apart from the main hull. The key I find is to always mount one side of the magnet join, then with the other magnet mated to it, slowly adjust the other piece until it fits perfect as it there were no magnets. This will ensure you get that nice thwack of plastic on plastic with your magnets touching as well.

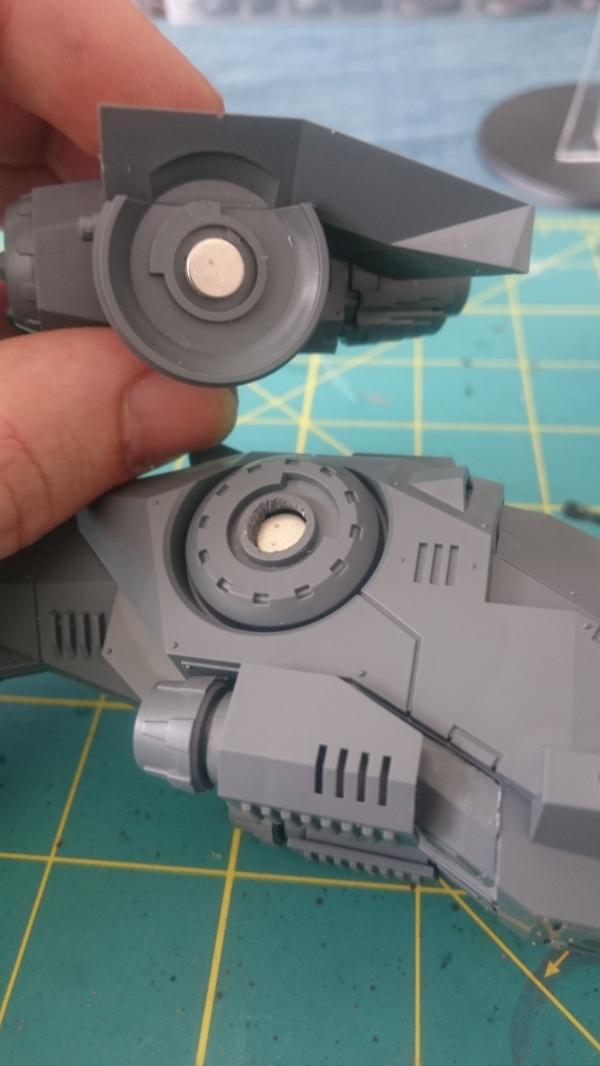
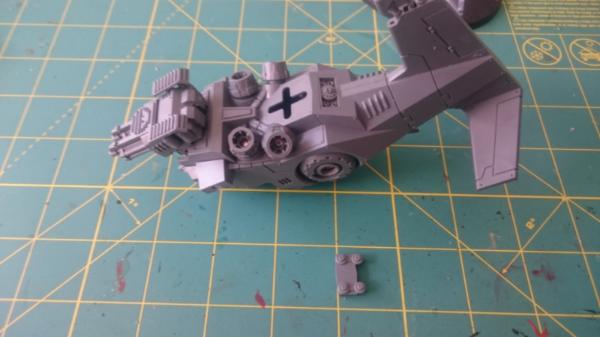
To finish off the hull, we add the thrusters and tail piece to the bottom of the hull. The storm hawk thrusters fit over the mounts on the hull completely. Some putty was needed to get the magnets to join. I installed the magnets (3mm) in the hull to mate with the stormtalon thrusters first, then used greenstuff to get the stormtalon thrusters shown here to match the same magnets. The tail piece is a strait forward single 2mm magnet join.
and attached:
The wings were done with bigger 1/4" magnets to get solid strength. I get these from Lee Valley, they are advertised with 5lbs of lifting force per magnet. They get the job done. These magnets are fairly tall though, without measuring I'd say 4mm so I could not recess the magnet into the wing attachment. This is why the magnet in the body is so recessed. This did make installing the magnets and not glueing the rest of everything together pretty annoying, but in the end it worked out well.
Again, showing one wing on, one wing off
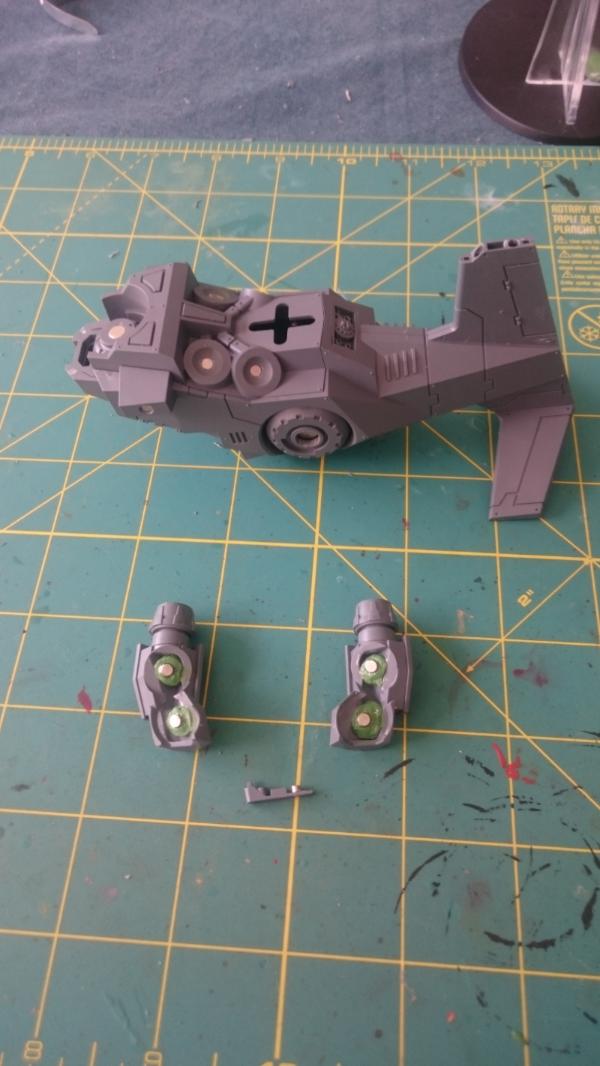
Next, the 2 nose weapon options. Both are completely independant parts. 5mm magnets. Nice.
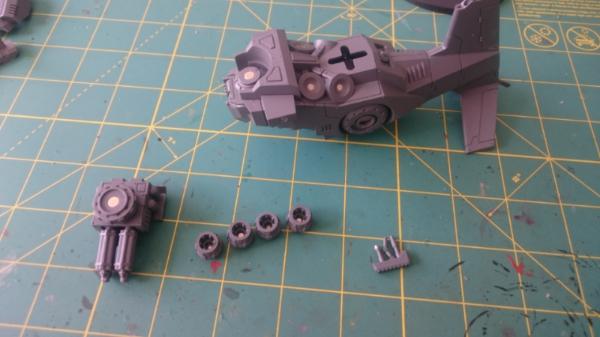
Now we come to the weapon pods. These guys were hungry for magnets, but I tried my best to conserve. There is only one set of pods for both models, which makes sense. On the stormhawk there are small avionics pods that go on front stubs, and the weapon pods mount under the wings. The pods stay on the same side as the stormtalon build, but are inverted when attached. With all joining pieces ready to go, its key to start by drilling all the holes with the parts together before gluing in any magnets. Do one set, then use the pieces as templates for the other parts until everything is drilled and matching. Having the hull and wings unassembled makes this possible. The avionics pods were the thinnest parts that had to mount, so they would dictate the depth of the magnets in the tabs and wings when installing. Just like drilling the holes, I installed magnets in the avionics pods, then the hull tabs, then the wings all matching so everything is interchangeable. This was pretty tedious and annoying with a lot of parts flying around the desk.
Once the pods were attachable to the hull, I did the swappable weapons in the pods themselves. I made all the fronts swappable to represent each weapon choice, but I didn't make all the matching options for the rest of the pods as it would require magnetizing every single piece. For example, on the stormhawk the bolter fronts use the missile pods sides and bolter/lascannon backs from the stormtalon. On the stormtalon, the ammo packs change but the back plate is the same for bolters and lascannons. I decided missile pod sides get attached to missile pod backs, stormtalon bolter/lascannon side gets the lascannon ammo pack glued in. This way only the fronts needed magnets to hold the whole pod together.
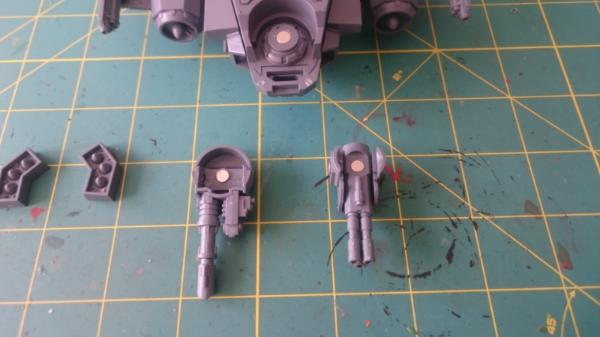
Pod halves. 2mm magnet connects front plate to the rest. the magnet is installed in the middle of the join of the two halves to match up with the whole in the back of the skyhammer missile front.
Pod assembled on the bottom. Bolter and lascannon pieces go through the same tab and hold it in place with their own 2mm magnets to make that option. Not shown is the Typhoon front. On it the magnet goes completley through the front plate in the center of the top 4 missiles. You can see the magnet, but it is just a bigger cylander than the plastic one you have to drill through in the design.
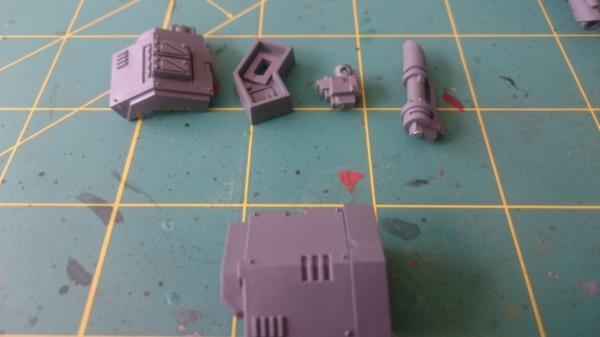
Weapon pod and avionics pod for wing. I drilled out the assault cannon barrels as well.
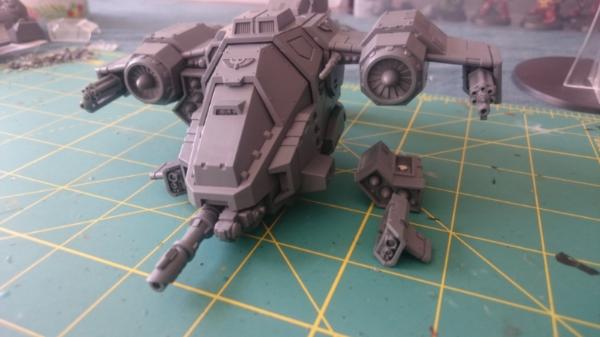
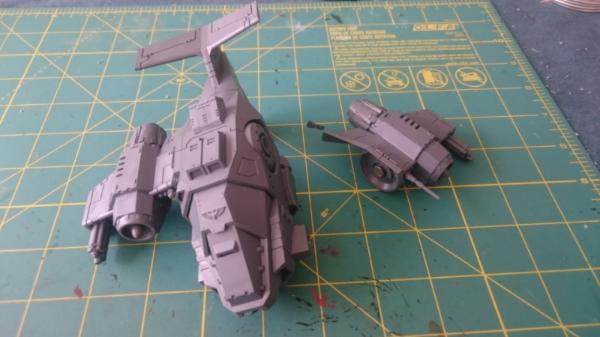
Stormhawk ready to smash face

Now for the Stormtalon assembly. I assembled the cockpit in two halves that just sit loose in each other inside the hull. This is so I can paint everything. There isn't any movement once the rest of the hull is added anyways.

The antenna piece has no magnets, it is held in place by the top plate by inserting it from the inside. I had to adjust the alignment of the antennas to be strait back so the assembly would fit through the top plate. Still looks cool. You can see the 5mm magnet on the top plate that joins to the top of the cockpits as well. I had to cut down the ledge it sits on slightly using a #4 knife blade so that the top plate would sit flat on the hull.
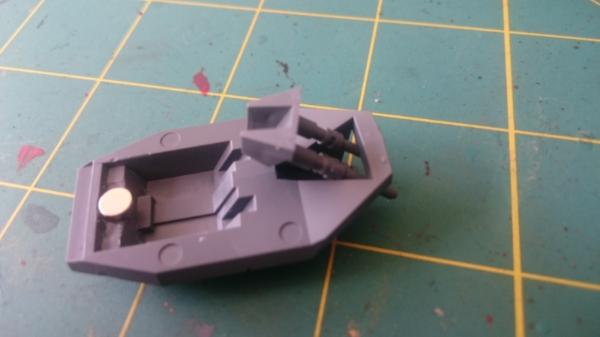
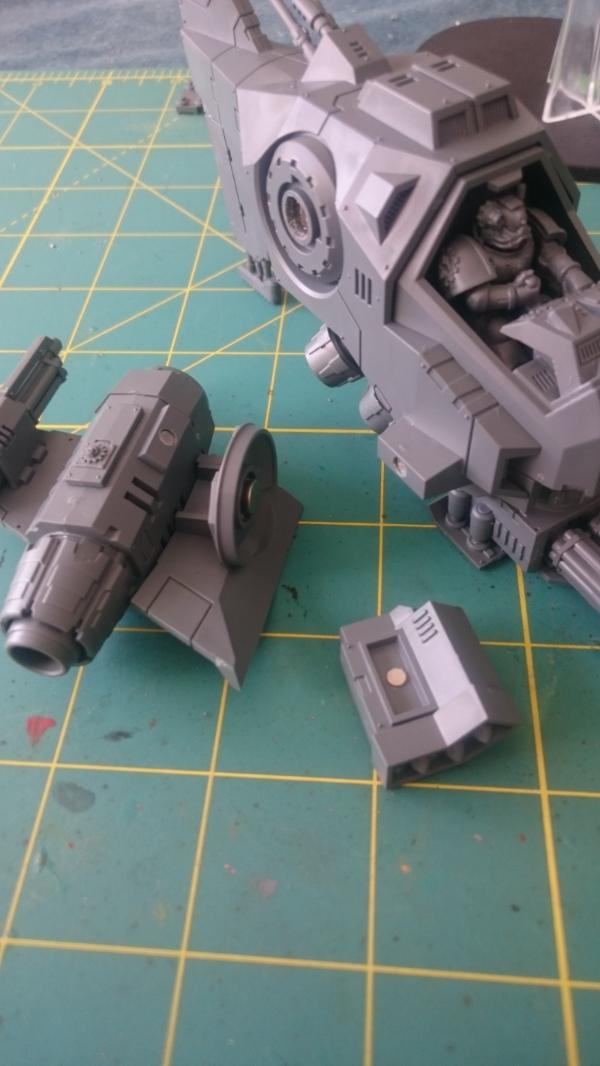
Heres the 4 thrusters, assault cannon and tail piece to complete the stormtalon bottom
This is the butt plate from the stormhawk so you can see how it was supposed to go. It takes the 2 landing pads shown on the assault cannon on its nubs and replaces the inset piece with the gear in the center. Please post any suggestions you have for epic conversions that I can now do with this awesome extra bit.
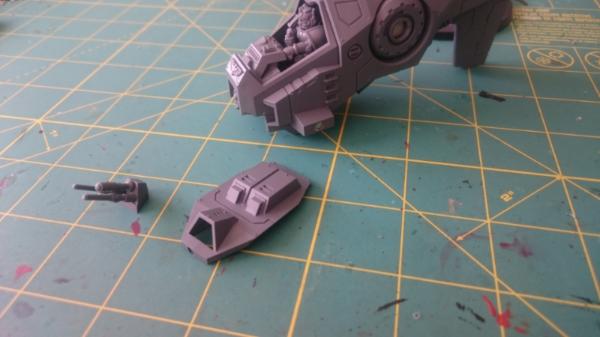
The stormtalon wings were done the same way as the stormhawk ones, has the full range of motion the kit allows for poseability. I put the lascannon pods on to show that option.
Here is a better view of how the pod goes onto the body and the wing
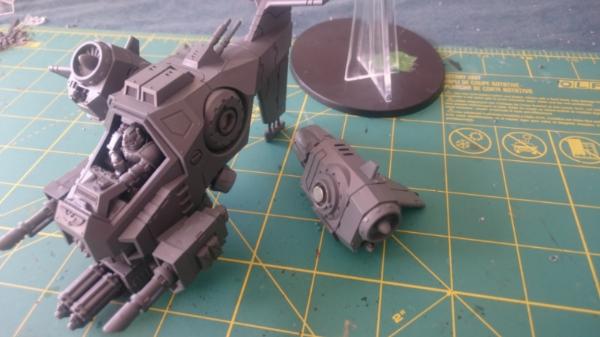
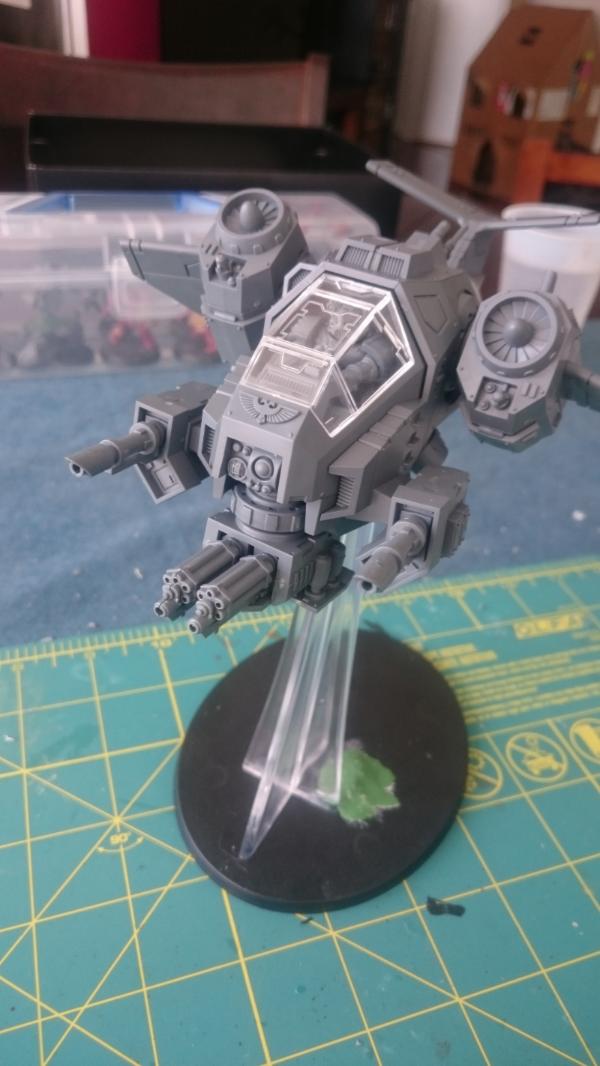
And here is the stormtalon ready to create an epic crash and burn diorama with all those removeable parts. I drilled out the assault cannon barrels again here because I suck at painting, but I'm decent at drilling.
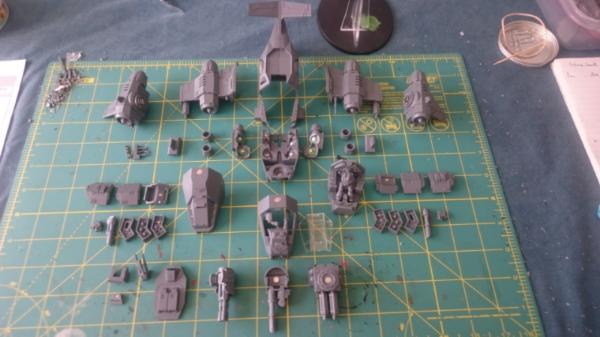
All the parts
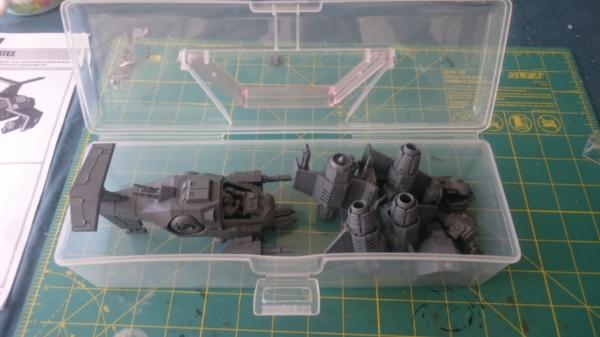
Stored in a dollar store plastic case. I'll add pick and pluck foam pieces and metal trees to hold the parts when I get around to painting it. For now I just put all the small bits in a ziplock and the rest in the case or on the model.
This project turned out awesome and was really fun to do. Now I can be as indecisive as theoretically possible with my flyer! I can't wait to paint this up, might have to skip the queue in the backlog just cause it looks so badass.
I wouldn't say that this is the most economical way to build this kit, but it is fun for sure. I'm at about 17 bucks of magnets in this beast and the kit itself is around 37. No Remembrancer will pen an epic poem to tell the tale of your vast savings on this one. I'd say build either plane and do the weapon pod options and it would only be a few dollars in magnets if you want the best deal. You would have lots of spare parts too.
Thanks for reading, this was my first big post here, I hope you enjoyed!


 Ultramarines, 3rd Co. and friends, 16k+
  4k
4k  4k Points
 Competition Index