| Author |
Message |
 |
|
|
|
|
Advert
|
Forum adverts like this one are shown to any user who is not logged in. Join us by filling out a tiny 3 field form and you will get your own, free, dakka user account which gives a good range of benefits to you:
- No adverts like this in the forums anymore.
- Times and dates in your local timezone.
- Full tracking of what you have read so you can skip to your first unread post, easily see what has changed since you last logged in, and easily see what is new at a glance.
- Email notifications for threads you want to watch closely.
- Being a part of the oldest wargaming community on the net.
If you are already a member then feel free to login now. |
|
 |
2016/09/03 23:37:47
Subject: House Terryn Knight with Forge World upgrade kit
|
|

Most Glorious Grey Seer
|
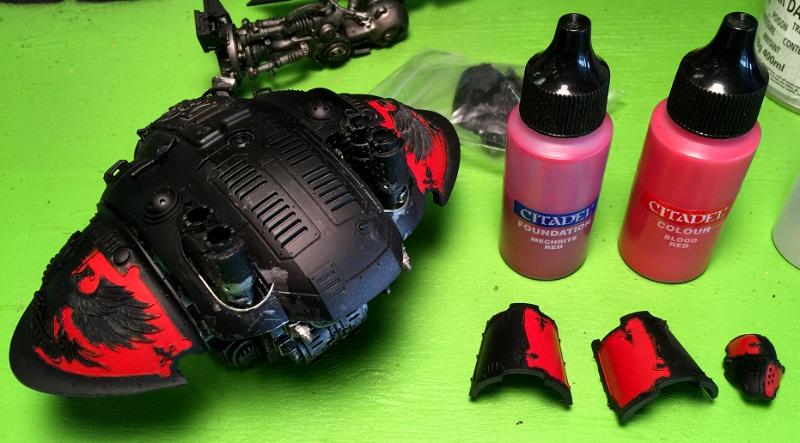
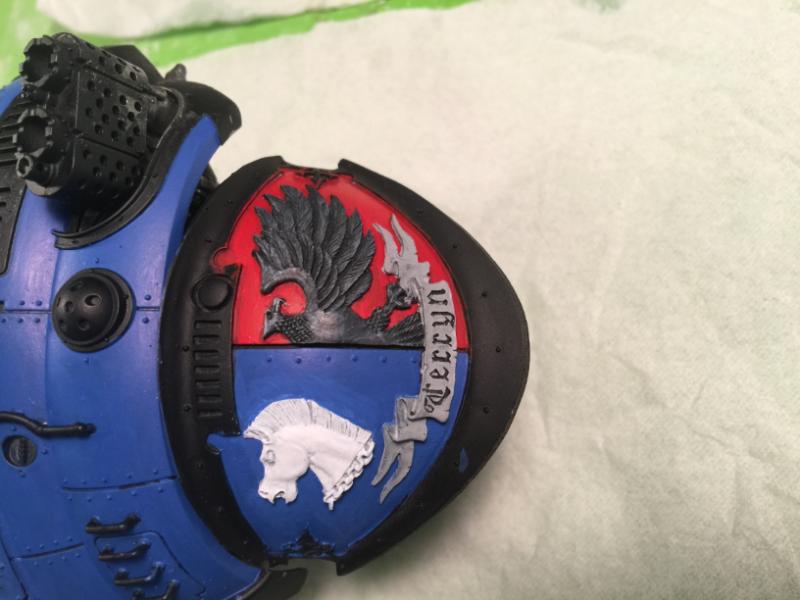
I recently got some time to paint again, so I decided to paint my House Terryn Knight. I bought the Forge World upgrade kit because I am a sucker for sculpted relief in stead of just decals. I wish Forge World had sculpted the leg plates but I guess you can't have everything.
Anyway, after priming the whole thing black, I hit the machine parts with a base of Boltgun Metal (yes, I still have several pots of that stuff). After letting that dry, I went to the red parts and based them with two thinned coats of Mechrite Red (Foundation). After that, I then started putting on thin layers of Blood Red. I'm not a fan of Blood Red as it has blotchy areas of more/less color as you apply it. Still, eventually I wound up with a uniform color. I didn't use any washes at this stage because everything is more or less flat on the model. I'll hit the rivits on the legs with a dark wash later on. I'm also not worried about being neat at this point since I haven't started with the Eagle or brass/silver parts.
|
|
|
|
 |
|
2016/09/04 14:53:34
Subject: House Terryn Knight with Forge World upgrade kit
|
|

Longtime Dakkanaut
|
Ah, that vibrant Blood Red! Can't wait to see it paired with blue. Unless you're going for some different paint scheme?
|
|
|
|
|
|
2016/09/04 18:51:49
Subject: House Terryn Knight with Forge World upgrade kit
|
|
Most Glorious Grey Seer
|
The only difference is that I'm using the older paints that I have instead of the latest "recommended" GW paints.
|
|
|
|
|
|
2016/09/06 00:40:32
Subject: House Terryn Knight with Forge World upgrade kit
|
|
Most Glorious Grey Seer
|
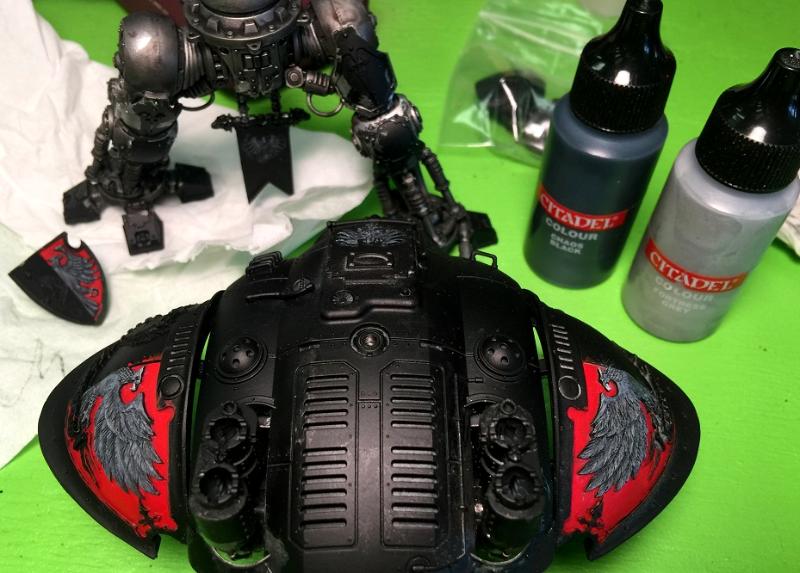
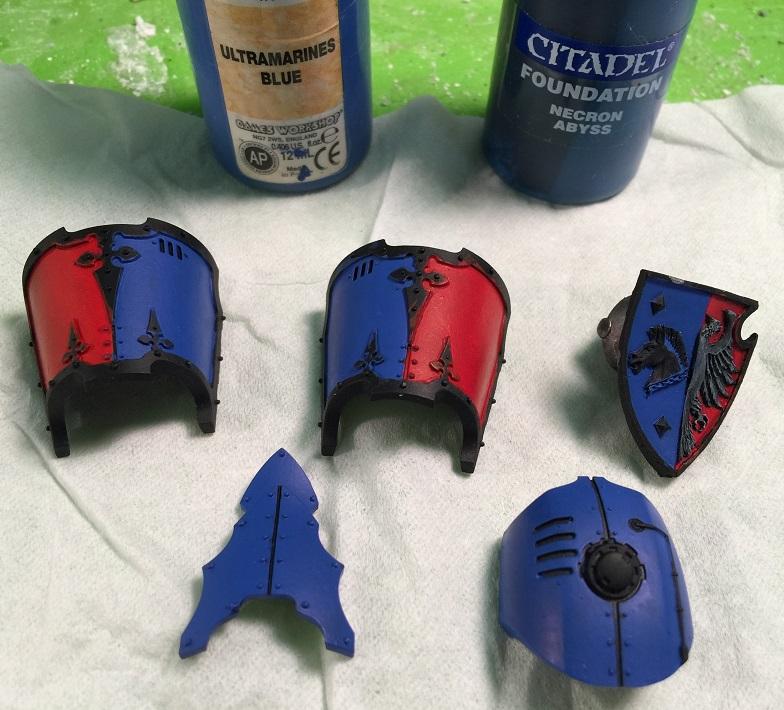
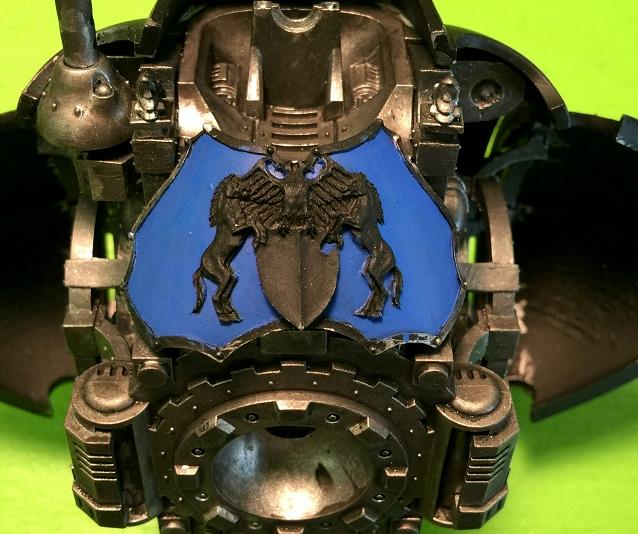
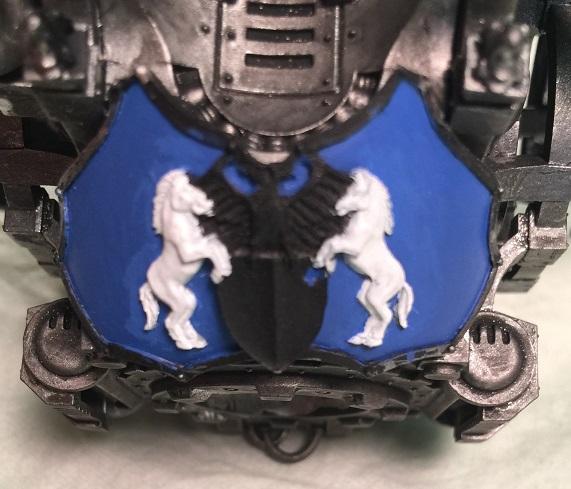
Okay, I got a little bit of work done. I cleaned up the red, blackened in the Eagles with Chaos Black and then hit them with a drybrush of Fortress Grey. They look a lot more grey in the photo than they actually do. Still, I might hit them with a soft drybrush of a dark grey to bring them down just a bit. I'll wait until the blue is on to decide.
|
|
This message was edited 1 time. Last update was at 2016/09/06 00:40:51
|
|
|
|
|
2016/09/08 23:45:08
Subject: House Terryn Knight with Forge World upgrade kit
|
|
Most Glorious Grey Seer
|
|
|
This message was edited 3 times. Last update was at 2016/10/02 01:37:41
|
|
|
|
|
2016/10/02 01:46:48
Subject: Re:House Terryn Knight with Forge World upgrade kit
|
|
Most Glorious Grey Seer
|
|
|
|
|
|
|
2016/10/02 08:50:44
Subject: House Terryn Knight with Forge World upgrade kit
|
|

Grim Dark Angels Interrogator-Chaplain
|
Lookin great so far mate 
|
|
|
|
|
|
2016/10/09 02:07:48
Subject: House Terryn Knight with Forge World upgrade kit
|
|
Most Glorious Grey Seer
|
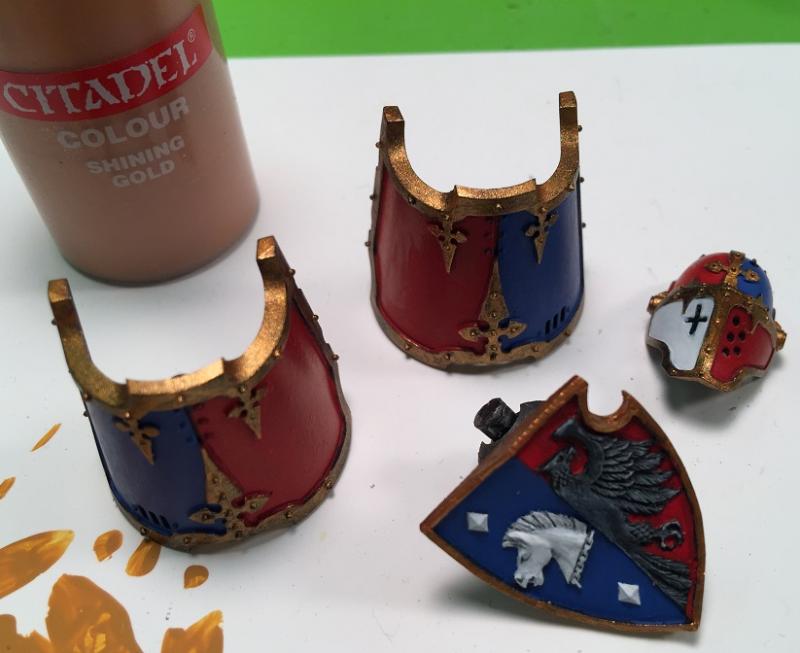
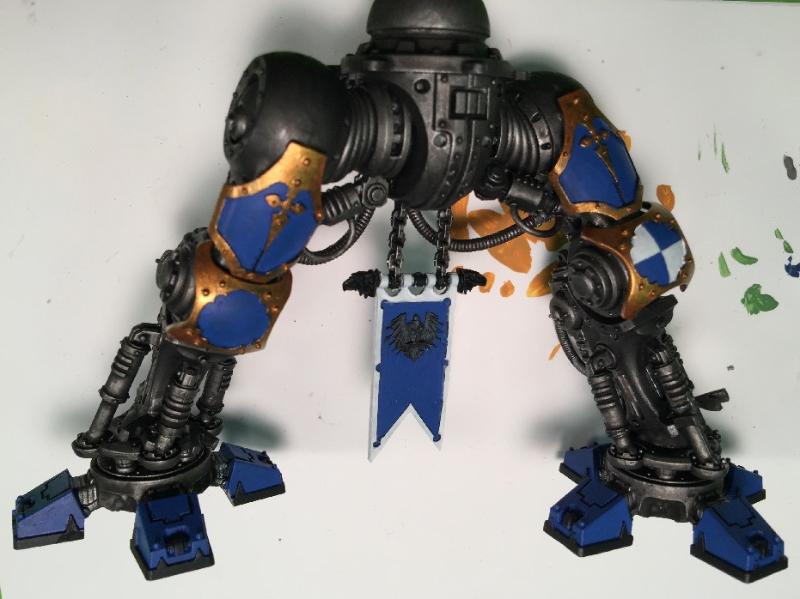
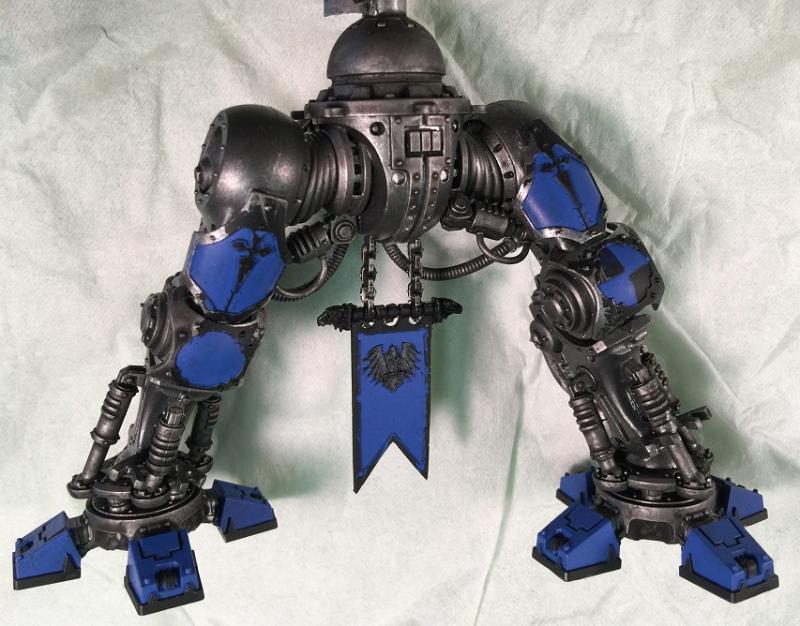
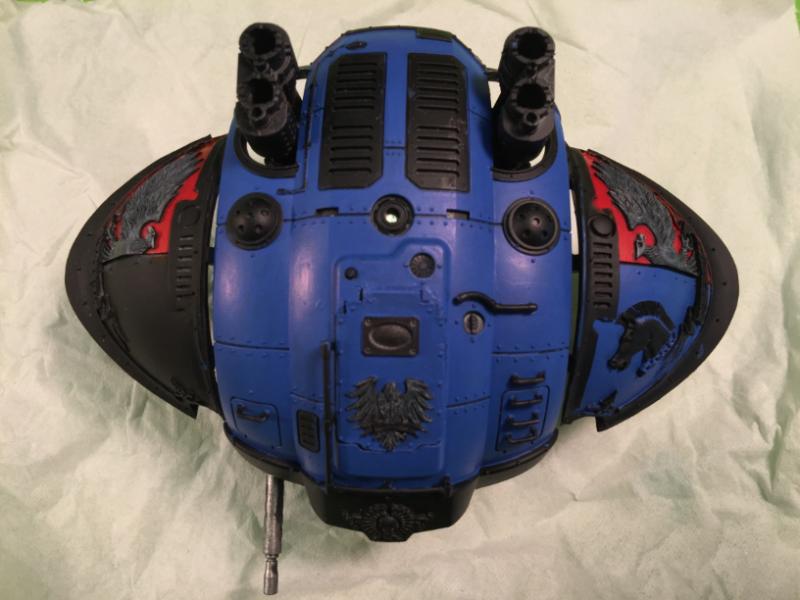
I got some time today and I started working on the gold trim. I used my old pot of shining gold but am disappointed with how it covered. I guess after sitting so long it just wasn't mixing correctly. What I've done today will work as a base coat but I'll probably have to buy a fresh pot of some gold paint to do the actual layering.
I also noticed some blotching in previous pictures so I did some clean-up work on the blues and reds. Finally, I gave the large metal parts on the legs a wash of Nuln Oil to darken them up a bit. The picture probably doesn't differentiate them much from the rest of the metal bits in the legs but when I go back and hit the smaller parts with chainmail silver, the contrast will be more pronounced.
|
|
|
|
|
|
2016/10/09 04:09:49
Subject: Re:House Terryn Knight with Forge World upgrade kit
|
|

Battle-tested Knight Castellan Pilot
|
The gold and the blue on the legs look aces. You did a great job on the red also. I can't wait to see where this goes
|
|
|
|
|
|
|


 Legion: Dark Angels