| Author |
Message |
 |
|
|
|
|
Advert
|
Forum adverts like this one are shown to any user who is not logged in. Join us by filling out a tiny 3 field form and you will get your own, free, dakka user account which gives a good range of benefits to you:
- No adverts like this in the forums anymore.
- Times and dates in your local timezone.
- Full tracking of what you have read so you can skip to your first unread post, easily see what has changed since you last logged in, and easily see what is new at a glance.
- Email notifications for threads you want to watch closely.
- Being a part of the oldest wargaming community on the net.
If you are already a member then feel free to login now. |
|
 |
2016/09/20 13:50:41
Subject: Knights and Genestealers - I love the smell of hairspray in the morning... smells like victory
|
|

Adolescent Youth with Potential
|
|
|
This message was edited 6 times. Last update was at 2016/11/03 21:05:15
|
|
|
 |
|
2016/09/21 10:41:27
Subject: Knights and Genestealers
|
|

Regular Dakkanaut
|
Love the GS Cultists but especially keen to see how your Shapeways project comes along!
I've bought a few parts from there but not in the last couple of years so it'll be interesting to see how the quality has improved (was pretty good before but even the finest prints had micro-ridges).
|
|
|
|
|
|
2016/09/21 15:37:59
Subject: Re:Knights and Genestealers
|
|
Adolescent Youth with Potential
|
They now do an even higher resolution of their frosted plastic but it still has the problems of the FUD in that its incredibly brittle and you always get micro ridges where the waxy support material meets the plastic. I'm hopping the new DLP acrylate will be both stronger and smoother, though it is lower resolution and will need cleanup where the support material is. It should be fine though for the scale of parts I'm aiming to make.
Decided to change the boars head from a "realistic" one to a stylised one to fit the overall them better.
|
|
This message was edited 1 time. Last update was at 2016/09/21 16:44:51
|
|
|
|
|
2016/09/26 07:18:03
Subject: Re:Knights and Genestealers
|
|
Adolescent Youth with Potential
|
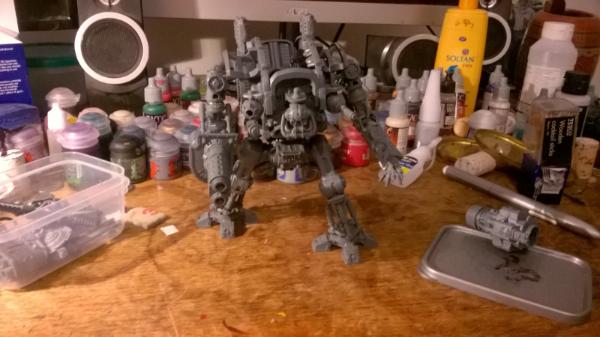
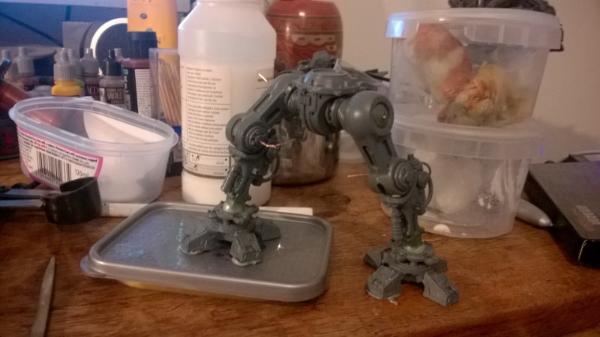
So I got this far on modelling the leg (also did the foot and foot plate) before taking another look at the model and realising I'd have to cut the hips and reposition them as well.
At this point I decided it probably wasn;t worth the effort to model the lower leg and would be easier to just do it the old fashioned way, cut the legs at the knee and reconstruct the pistons with plastic rod. Oh well, only a couple of hours wasted. I also finished assembling and magnetising the first knight that is going to be in standard pose. Lots of gap filling and mould line removing to do and then I'm going to start carving in some battle damage. Still planning on 3d printing crests and the next job is to start designing personal heraldry for each of the knights.
|
|
|
|
|
2016/09/26 21:30:42
Subject: Re:Knights and Genestealers - So... I put the legs on backwards
|
|
Adolescent Youth with Potential
|
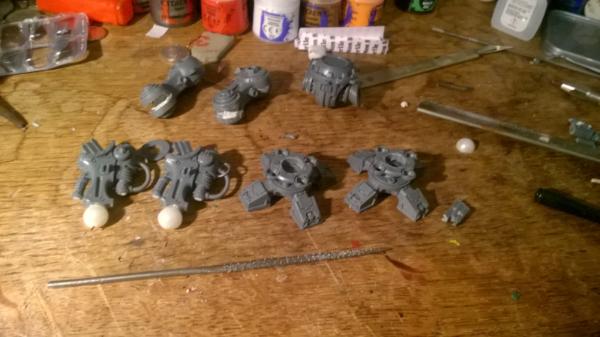
Ever get that feeling when you look at something and you think... hmmm... something's not quite right. Just had that. Yep turns out I put the legs on backwards on my first Knight. Luckily with a bit of brute force and ignorance I managed to take them off and put them back on the right way with only a little bit of damage that will probably be covered by the groin armour anyway, but still. Not my finest moment.
Moving on... While waiting for liquid green stuff to arrive I decided to start cutting up knight number 2's legs so I can repose him. I've stuffed the leg cavities with magic sculp so I can drill into it for pinning and the bits of sprue are Araldited in place. The ball joint at the ankle is a bead liberated from a gift bag that my housemate had and is pinned and Araldited as well. To turn the solid footplates into functional sockets I drilled a hole in each one then used a piercing saw to cut out the rough hole. I then used a jewellers wax file (that gnarly file with the teeth) to even it up until I could just push the ball through. These are really useful if you need to remove a lot of material and don't fancy using a dremel or spending ages with a needle file.
Lastly I cut the hip and reconstructed it at a closer angle with greenstuff so when his right leg is bent his knee is facing forward rather than out to the side. Lots of pinning and neatening up the holes to do but should be able to dry fit the pose tomorrow.
Note to self: Pay more attention in future.
|
|
|
|
|
2016/09/27 07:50:04
Subject: Knights and Genestealers - So... I put the legs on backwards
|
|
Pious Palatine
|
Looks like you made a decent recovery from putting the legs on backwards. Sounds like a horrible realisation to make on such a big/expensive kit.
EDC
|
|
|
|
|
2016/09/30 16:58:13
Subject: Re:Knights and Genestealers - So... I put the legs on backwards
|
|
Adolescent Youth with Potential
|
Yep, saved thank God. Have now pretty much finished gap filling the body of Knight 1 and will get some paint on him this weekend. Yay! I've also added a load of scratches to the feet as I figure these would get pretty beat up kicking through rubble and stomping on the enemies of the Imperium. Added a few little nicks in other places and will really scratch up the blade of the chainsaw so it looks like its been cutting through steel and concrete.
Knight number 2's legs have been reposed roughly and now I'm just waiting for some plastic rod to reconstruct the pistons. Got quite a lot of gap filling to do on these as well as wasn't too neat in hacking up the joints.
|
|
|
|
|
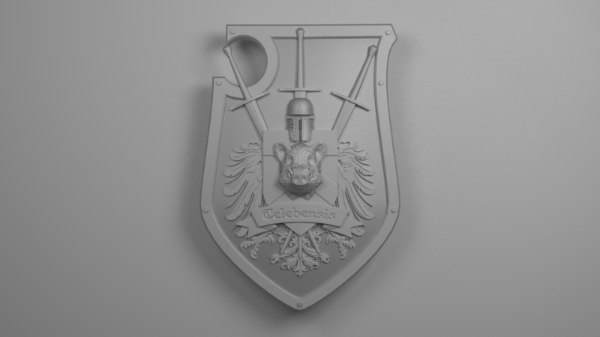
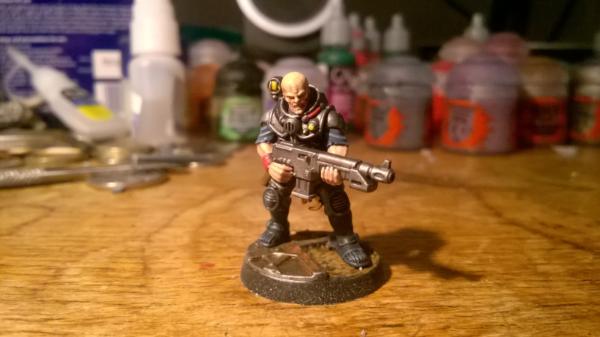
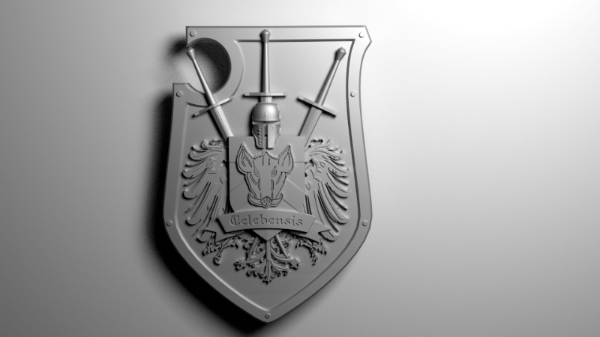
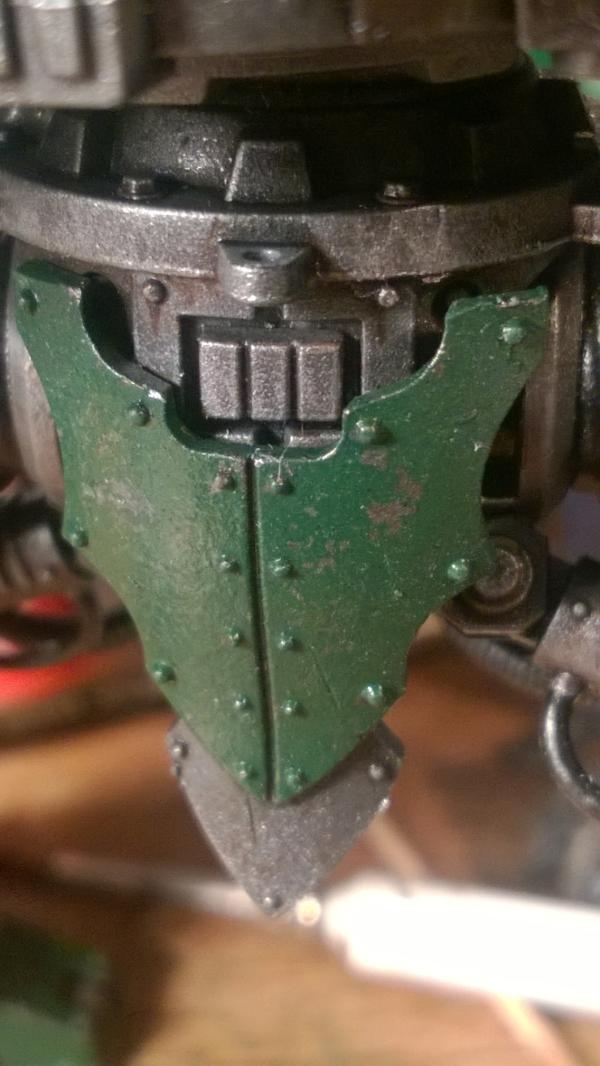
2016/10/08 15:55:13
Subject: Re:Knights and Genestealers - 3D printed shield is here
|
|
Adolescent Youth with Potential
|
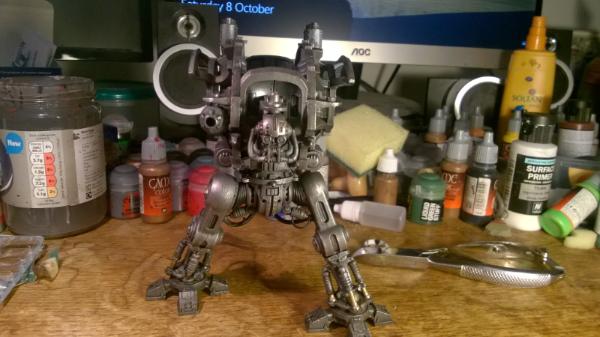
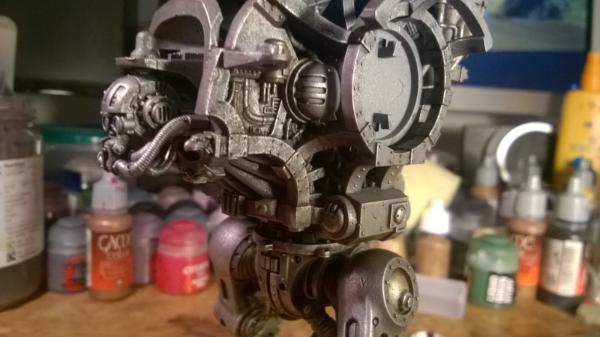
So got some paint on Knight 1's bodywork. This is a basecoat of 75% / 25% Vallejo Gunmetal Grey / cold grey airbrushed over black, followed by a wash of Nuln oil, then drybrushed with gunmetal grey and lastly a little necron compound. I've then gone into the cracks with some typhus corrosion and also sponged some on lightly all over. I think its got a nice aged steel patina.
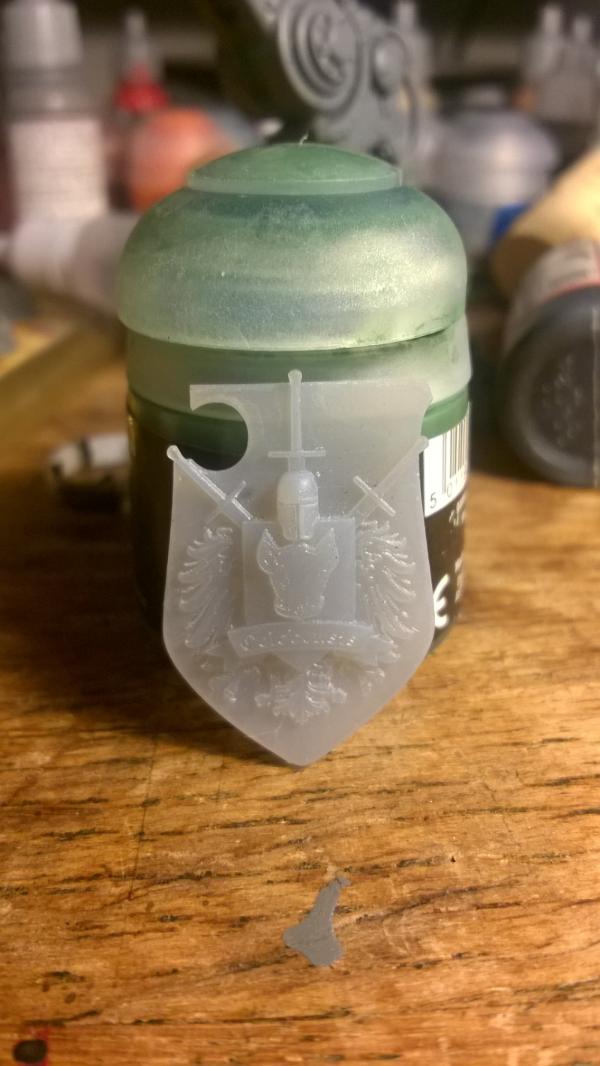
Also a set of 3d printed shields arrived for my knights. Got these done through 3d hubs on a Form 2 at 25 micron resolution. Kind of hard to see with it being semi transparent but the text is perfectly readable and there's almost no stepping visible. Very pleased 
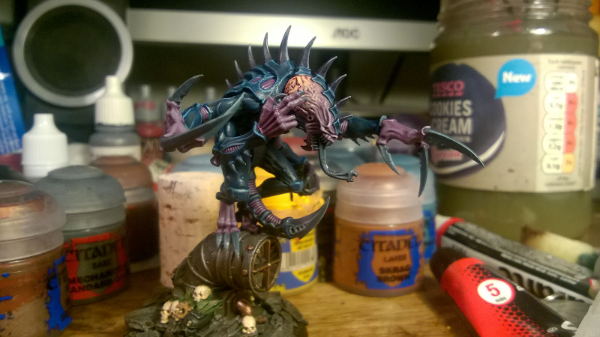
Going to take a break from the Knights and start on my Genestealer Patriarch for this months painting challenge.
|
|
|
|
|
2016/10/08 16:57:23
Subject: Knights and Genestealers - 3D printed shield is here
|
|
Longtime Dakkanaut
|
That's a nice looking crest. Look forward to seeing it painted, as well as the patriarch.
|
|
|
|
|
|
2016/10/08 17:09:11
Subject: Knights and Genestealers - 3D printed shield is here
|
|
Pious Palatine
|
Nice progress on the knight, those custom shields are sick.
EDC
|
|
|
|
|
2016/10/08 17:46:44
Subject: Re:Knights and Genestealers - 3D printed shield is here
|
|
Adolescent Youth with Potential
|
Thanks! Trying to think of what else I can get done for the knights which won't break the bank. Thinking a custom breastplate and helm for my High King might be cool
|
|
|
|
|
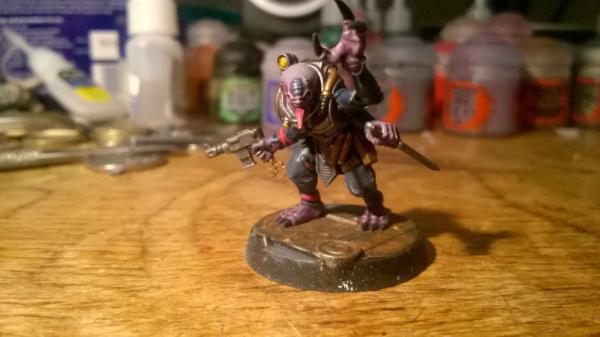
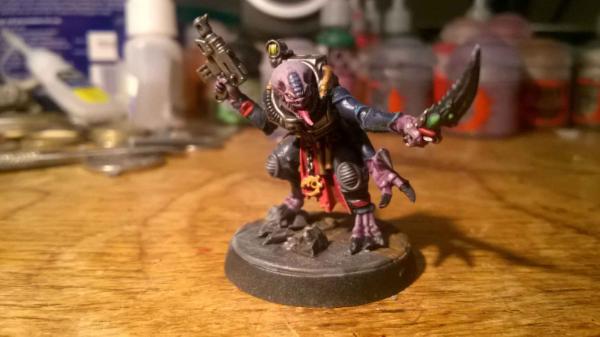
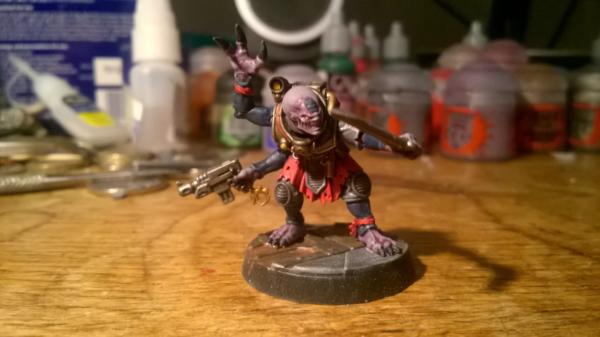
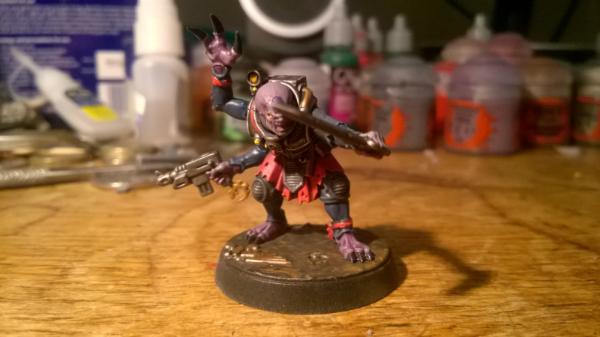
2016/10/20 17:23:22
Subject: Re:Knights and Genestealers - Patriarch almost done
|
|
Adolescent Youth with Potential
|
Got some painting time in and have been working on my Patriarch. He's almost there although I think I'll do some more on the base to make it less grey. Need to take some proper photos of him once I can find my tripod and decent camera.
|
|
|
|
|
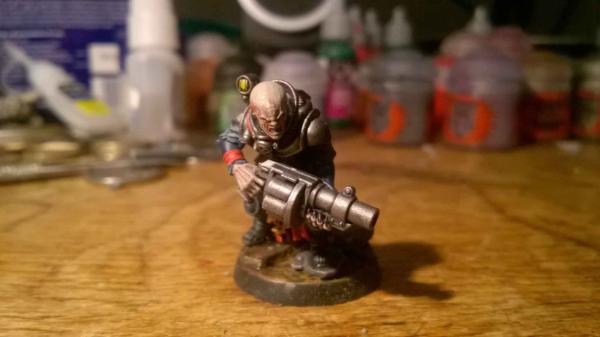
2016/10/30 16:32:06
Subject: Re:Knights and Genestealers - Brass and copper
|
|
Adolescent Youth with Potential
|
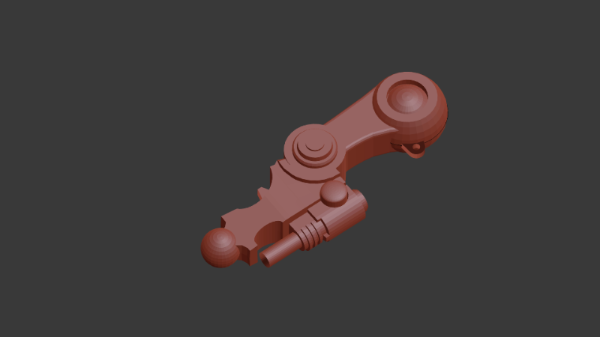
Got to spend some time on my knight over the last couple of days. I've been trying to get a dull brass look by mixing Brass scorpion with flash gitz yellow, a bit of bleached bone and some silver drybrushed over a coppery colour made from brass and a bit of brown. I think its working pretty well. Heat staining is washes of Seraphim Sepia, Agrax Earthshade and a bit of Druchi Violet and tarnishing is Nihilakh oxide. Would have liked the Melta cannon to come out smoother but experimented with several different blends on it and the paint ended up a bit thick. Might strip it right back with isopropyl and start again but haven't decided yet.

|
|
|
|
|
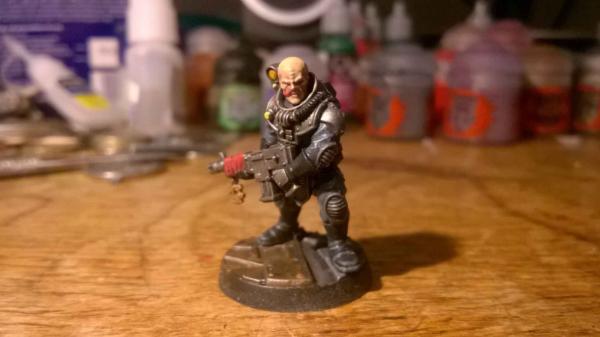
2016/11/03 21:12:28
Subject: Re:Knights and Genestealers - I love the smell of hairspray in the morning... smells like victory
|
|

Adolescent Youth with Potential
|
So Knight number 1 is coming on
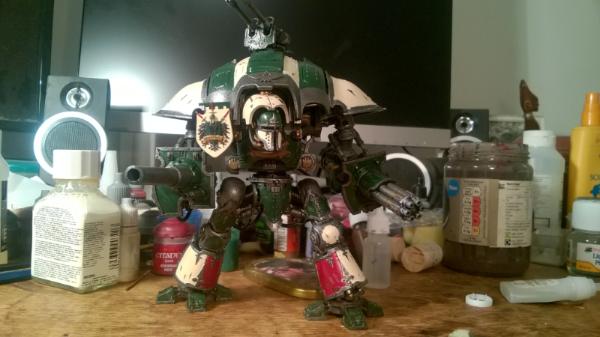
Still got a lot of detailing work, transfers, rivets to shade and last lot of weathering to go but he's definitely getting there. I've used the hairspray technique to distress the paint work. Simply slop a load of hairspray on with a brush, wait for it to dry and then paint over either by hand or with an airbursh. Then once its dried dampen the surface and then rub off bits of paint with a brush. The more hairspray the easier it is to flake the paint off.
Gratuitous crotch shot:
Really pleased with how this has come out and I'm glad I pre-weathered the base coat layer by sponging over typhus compound after dry brushing as I think the little flecks of rust showing through really give it some depth.
Pretty pleased with how the 3d printed shield has come out as well, although damn some of the detail on it like the Knights helm is seriously tiny! Will take proper photos of it when I can be bothered setting up the light box
|
|
|
|
|
|
|