Switch Theme:

General green stuff tips  [RSS] Share on facebook Share on Twitter Submit to Reddit
»
Author Message
Advert


Forum adverts like this one are shown to any user who is not logged in. Join us by filling out a tiny 3 field form and you will get your own, free, dakka user account which gives a good range of benefits to you:
  • No adverts like this in the forums anymore.
  • Times and dates in your local timezone.
  • Full tracking of what you have read so you can skip to your first unread post, easily see what has changed since you last logged in, and easily see what is new at a glance.
  • Email notifications for threads you want to watch closely.
  • Being a part of the oldest wargaming community on the net.
If you are already a member then feel free to login now.


Made in se
Ancient Space Wolves Venerable Dreadnought


So I'm planning on making some bedrolls and ushankas for some guardsmen and I need to clear a few things out:

How do you get so smooth green stuff?
How do I make it into a good cylinder shade?
And what's the best lubricant to use, water?
   
Made in us
Androgynous Daemon Prince of Slaanesh


Norwalk, Connecticut

Water is the best lubricant that I know of.

Reality is a nice place to visit, but I'd hate to live there.

Manchu wrote:I'm a Catholic. We eat our God.


Due to work, I can usually only ship any sales or trades out on Saturday morning. Please trade/purchase with this in mind.  
   
Made in gb
Esteemed Veteran Space Marine


Northumberland

@Matthew -

1. Smooth it with your finger, metal tool (GW sell them, eBay sell them cheaper) or silicone Clay Shapers.

2. For a hollow cylinder, I'dd roll a piece out flat, wrap it around a cylindrical object of the right size (Not tapered like a paintbrush handle), smooth it down, then leave to cure overnight. For a solid cylinder, put a ball of it onto a smooth surface like a tile, then roll it out with something cylindrical like a small rolling pin - a scalpel handle usually works well. Another method could be to use a core of plasticard rod and build up the layers around it.

3. Some people like water. I find Vaseline woks well as it doesn't evaporate or disappear into the GS. However, you should be aware that you'll need to clean the greasy residue off before you prime. Some Isopropyl Alcohol (Get it on Ebay) should work well enough provided you wipe the most of it off. Obviously leave it to cure before you try this.

Hope this helps!

Now with 100% more blog: 'Beyond the Wall'

Numine Et Arcu
 
   
Made in gb
Posts with Authority


Norn Iron

Bedrolls, tarps and such are a common subject for miltary modellers. If you do a search I'm sure you'd get at least a few sculpting tutorials for them.

 Warpig1815 wrote:
1. Smooth it with your finger, metal tool (GW sell them, eBay sell them cheaper) or silicone Clay Shapers.


Get a couple of cheap metal dental-quality wax carvers off ebay, rather than cheap metal sets of a dozen wax carvers. You only get one, for about £3-4, but one good 'un - the right shape; fine, smooth edges etc. - will do you for 90-95% of your work. Ideally you'll want a large, fairly fine 'blade' and a small, convex 'miniature fingertip' . Search for 'lecron', 'zahle', 'hylin', 'vehe', or 'beale' wax carvers.

Lecron is the shape of the old GW sculpting tools, a long blade at one end (blade edge, point, flat surface) that has a convex circle or oval at the other. (Blunt edge, 'fingertip') I still use one myself, though heavily ground down - re: fine, smooth edges. Hylins are like a smaller version of lecrons.
Zahle is the shape of the 'wax #5' tool that used to be the holy grail recommended by some expert sculptors. The problem for me was that searching for 'wax #5' brought up nothing but those same recommendations! It's a short blade shaped a little like a scimitar, or even a poleaxe, with a circle or oval.
Vehe is a short, double-edged, diamond-shaped blade with an oval. I used one for a while, out of a cheap set. Going back to it, I could see the cheap sets weren't the best quality. Better than some of GW's offerings, but still with some rough, squared edges, missing points, and so on.
Beales mix it up a bit, with a spoon-shaped 'blade' and a pointed 'fingertip'. Still works for some, though.

(And yes, clay shapers are great for smoothing green stuff)

I'm sooo, sooo sorry.

Plog - Random sculpts and OW Helves 9/3/23 
   
Made in us
Longtime Dakkanaut


Central California

I am seconding the above information. I lick my shapers (silicon rubber tools, a flat, round, and pointed one). I also use Chapstick lip balm for blade cutting or rolling stuff out etc. As said above, clean when cured.
I wouldn't let the bedrolls cure before putting them on the miniature myself. Here is how I would do this (for what it's worth, I sculpt a lot, but claim no true expertise)
Step 1: Flatten GS out on a smooth surface with fingers until it is less than 1mm thick (I use a cast off Pergo tile, as the GS doesn't stick to it that well) then use a cylinder coated with Vaseline, chapstick etc to flatten it smooth.
Step 2: Use a sharp blade also wiped with vaseline or chapstick to cit it into lengths fitting your bedrolls.
Step 3: Roll into shape you want by using hobby knife to scoop up one end and roll toward other still attached to base.
Step 4: Place roll in spot you want, and gently press it to fit contours as bedrolls do flop.
Step 5: Add a buckle if you want by placing a tiny ball of GS and flattening it into a thick circle, then using a paperclip end, press down to turn it into a "ring"
Step 6: (if you made buckles) Take some very thinly rolled out GS and cut into lengths. Press the end of a length into your circle leading one direction, then flatten with tool (pressing the end into circle to make attachment) Repeat for other side of buckle. Below is a picture of end product hope they help.
Step 6: (if you skipped buckles)Take two very thin strips (or simply roll out between fingers) to use as straps. Place over appropriate spots, press in with tool, flexing bedroll and flattening strap so it looks like it has tightened roll and is also a flat leather strap.
Hope these help, and ask away if you need to.


Keeping the hobby side alive!

I never forget the Dakka unit scale is binary: Units are either OP or Garbage. 
   
Made in us
Fresh-Faced New User


I didn't want to open my own thread for this question so I will ask here. How do you make greenstuff arms? I have an ogryn that is missing his arms and I want to use greenstuff to fix that.
   
Made in us
Longtime Dakkanaut


Central California

You need a wire armature for it. That is step one. I use a drill, and pin my wires in at the basic shape. The sculpt on top. For an OIgrynn go find some pictures of arnold or some other body builder. Let me see if I can find some pics to show the process.
These are the best I could find quickly. For arms if you have a plastic torso, drill a hole and use a thick paperclip (or whatever). The secret is once it is positioned and set, cover it with a thin layer of GS, because GS as a base. It really has to be built up in stages. I first shape a football for the bicep, two smaller ones for the triceps, Let them dry! Then sculpt the over muscles from the shoulder that connect with the points between those muscles. Forearm is two bundles, etc. If you have more questions I'll try to help, I just finished sculpting dinosaur riding Ogrynns...
These first two pictures show the wire covered by GS for my IG captain. Below is a link to my own Ogrynn sculpt which clearly shows the arms, just not in a step by step way.


http://www.dakkadakka.com/gallery/images-102599-52201_Ogress%20Bodyguard.html

Keeping the hobby side alive!

I never forget the Dakka unit scale is binary: Units are either OP or Garbage. 
   
Made in gb
Fireknife Shas'el


Leicester

For limbs and bigger elements, make sure you use some sort of framework to support the green stuff; a wire armature (paper clip will do) is ideal for limbs. Play around with the proportions and pose at this stage until your happy with it.

I'd then block out the limbs fairly crudely with lumps of green stuff (almost like muscle groups) before starting to fill in the gaps and doing finishing layers. Depending on how thick the limb is you may even want to let the base layers cure, so you have a solid foundation for the next layer.

In all of this it's a good idea to have various reference images to use as a guide. Obviously you can use the original GW models, but you can also look for real world examples (WWE wrestlers and power lifters leap to mind for Ogryns).


Automatically Appended Next Post:
*snap!* Ninja'd!

At least we seem to be consistent!

This message was edited 1 time. Last update was at 2017/01/24 19:50:03


DS:80+S+GM+B+I+Pw40k08D+A++WD355R+T(M)DM+
 Zed wrote:
*All statements reflect my opinion at this moment. if some sort of pretty new model gets released (or if I change my mind at random) I reserve the right to jump on any bandwagon at will.
 
   
Made in gb
Posts with Authority


Norn Iron


1. Get some wire. With ogryns it can be relatively thick wire; or you can fold it in two and twist it, which helps with flexibility and posing, and gives the GS something to cling to.

2. Clip off enough for the length of the arm (say, from the middle of the palm or fist to the middle of the shoulder mass, if the arm was held out straight) plus enough to firmly anchor the wire in the model. If you're familiar with pinning that should be no problem. You might want to allow a tiny bit between the shoulder attachment area and the middle of the shoulder mass, but that might be splitting hairs.

3. You've got your armature securely attached to the model - pose it. Bend it at shoulder, elbow, and maybe wrist points, using any other ogryns or arm pieces you have as a guide. If you want it to hold a weapon, attach it to the free end. If you're pinning or wrapping the wire for that, you'll need a bit of extra length for it, too.

4. Cover the wire with putty so that it holds it's shape. Squeeze it on with your fingers and smooth it a bit with a nice zahle or lecron. For something chunky like an ogryn arm, don't make the putty layer too thin (thicker will be more stable, when you come back to it) but leave plenty of room to sculpt shapes and details on top of it. Again, use other ogryns as a guide. Be careful not to push the pose too far out of place, and bend it back when you're finished. Let the putty harden up.

5. Push on balls and sausages of putty to get the general shape and positions of muscles and the bony point of the elbow and wrist. They'll stick a little easier if you score or rough up the surface of the cured putty. Yet again, use existing ogryns as a reference, or get a guide to arm muscles too, to help things along. (Any realistic anatomy guide would have to be adapted for chunky ogryn arms, obviously) There should be plenty of anatomy pics online, from wikipedia and further afield. Smooth these shapes as they harden, with a sculpting tool or clay shaper, and let them cure fully.

6. Do a bit of gap-filling and smoothing between those muscle shapes. Don't be afraid to scrape or cut things back a little, if they need it. Again, reference reference reference.

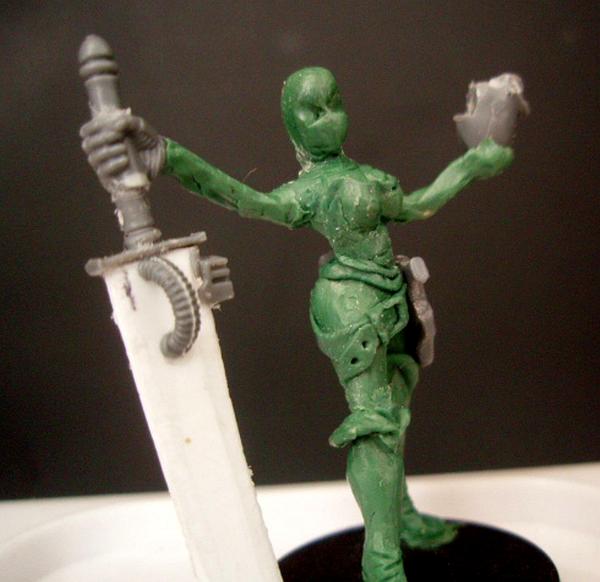
7. Hands and fingers can be a bit tricky. If you're sculpting a fist, start off with a rough box. Mark a line and make a slight gap into one side of the box, where the fingertips should come up against the heel of the palm.
Mark three lines into the putty for four fingers, starting inside this gap, and running around to the front of the 'box'.
Mark in the curl of the first finger and pinky finger on the top and bottom of the box.
Try to round off the fingers and heel of the palm a little, and keep the knuckles relatively square. For the most prominent knuckles at the base of the fingers, you might want to add these afterwards. If so, mark in holes where they should go. Again, helps the extra putty to stick.

8. I usually leave thumbs 'til after. I put a triangle of putty on top of the fist, running from the first knuckle to the heel of the hand. Then I stick on a sausage of putty on top of that, curling round the second segments of the fingers, with a kink in the middle. Make a fist yourself, to see where everything goes.

9. For open hands, each finger is a bit like an arm in miniature, with a little armature and a layer of putty. But I'll bow out and let Ebob show that process:

http://www.ebobminiatures.com/greenroom/wallacegal2/wallacegallery2.htm

Though it is a bit easier if you're sculpting fingers flat against the side of a ripper gun, or something.

For armour pieces, well, ogryn armour isn't too complicated. For shaping the flat surfaces and sharper edges of mechanical objects like these, add more yellow into the greenstuff mix* or use... just about any other modelling putty. They all tend to be easier for flatter surfaces and sharper edges. For aquilas and things, it's like anything else: use a reference, make the basic shape, then mark in and refine the details.

* The makers recommend more yellow for general sculpting anyway. Their info pdf:

http://www.polymericsystems.com/technical-data/pdf/SculptorsInfo.pdf

 Jadenim wrote:

*snap!* Ninja'd!


At least you only got ninja'd once.

This message was edited 1 time. Last update was at 2017/01/24 20:11:18


I'm sooo, sooo sorry.

Plog - Random sculpts and OW Helves 9/3/23 
   
 
Forum Index » Painting & Modeling
Go to: