Forum adverts like this one are shown to any user who is not logged in. Join us by filling out a tiny 3 field form and you will get your own, free, dakka user account which gives a good range of benefits to you:
No adverts like this in the forums anymore.
Times and dates in your local timezone.
Full tracking of what you have read so you can skip to your first unread post, easily see what has changed since you last logged in, and easily see what is new at a glance.
Email notifications for threads you want to watch closely.
Being a part of the oldest wargaming community on the net.
If you are already a member then feel free to login now.
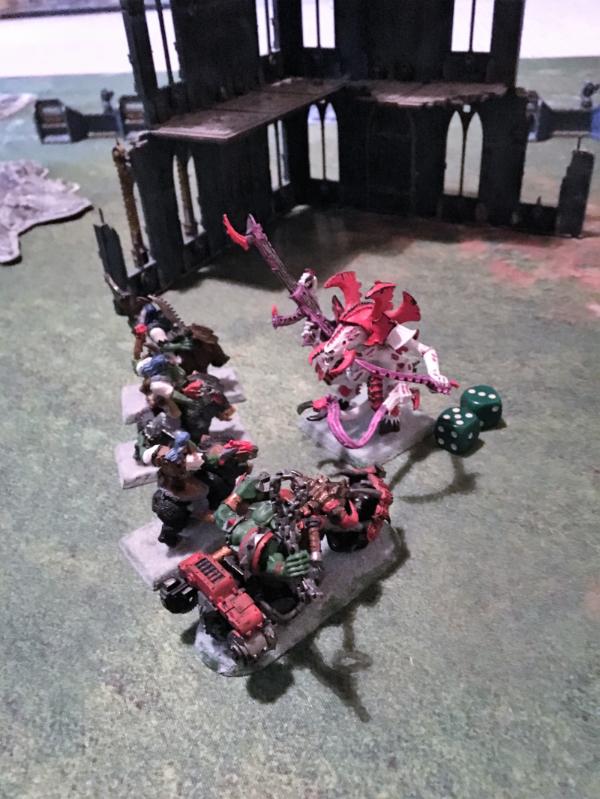
My second batrep for 8th sees the Tyranids (no Hissy you aren’t in this one) take on the Orks.
Go out the airlock Ratiusss, we better have won
I had wanted to try a Nidzilla build in 8th since it seems to have made a bit of a comeback and was interested in putting it up against a relatively fast “in your face” Ork list.
A bit like “big unz versus little unz”.
Being a bit more familiar with the rules and nuances for 8th off we went.
Hive Tyrant: 2x Deathspitter with Slimer Maggots, Lash Whip and Monstrous Bonesword, Prehensile Pincer Tail, Wings
. Rules: Death Throes, Psychic Barrier, Shadow in the Warp, Synapse, The Will of the Hive Mind
Trygon Prime: Bio-electric Pulse with Containment Spines, Biostatic Rattle, 3x Massive Scything Talons
. Rules: Death Throes, Shadow in the Warp, Subterranean Assault, Synapse
++ Battalion Detachment +3CP (Tyranids) ++
+ HQ +
Hive Tyrant: 2x Deathspitter with Slimer Maggots, Lash Whip and Monstrous Bonesword, Prehensile Pincer Tail, Wings
. Rules: Death Throes, Psychic Barrier, Shadow in the Warp, Synapse, The Will of the Hive Mind
Tervigon: Massive Scything Talons, Stinger Salvo
. Rules: Brood Progenitor, Shadow in the Warp, Spawn Termagants, Synapse, Synaptic Backlash
Warboss: Attack Squig, Power Klaw, Shoota
. Rules: 'Ere We Go!, Mob Rule
Warboss: Attack Squig, Power Klaw, Shoota
. Rules: 'Ere We Go!, Mob Rule
+ Troops +
Boyz
. Rules: 'Ere We Go!, Mob Rule
. Boss Nob: Big Choppa, Slugga
. 18x Ork Boy W/ Slugga & Choppa
Boyz
. Rules: 'Ere We Go!, Mob Rule
. Boss Nob: Big Choppa, Slugga
. 18x Ork Boy W/ Slugga & Choppa
Gretchin: 10x Gretchin
+ Heavy Support +
Battlewagon
Battlewagon
Mek Gunz
. Gun: 5x Grot Gunner, Kustom Mega Kannon
. Gun: 5x Grot Gunner, Kustom Mega Kannon
. Gun: 5x Grot Gunner, Kustom Mega Kannon
. Gun: 5x Grot Gunner, Kustom Mega Kannon
. Gun: 5x Grot Gunner, Kustom Mega Kannon
+ Flyer +
Dakkajet: 6x Supa Shoota
. Rules: Airborne, Crash and Burn, Hard to Hit
Dakkajet: 6x Supa Shoota
. Rules: Airborne, Crash and Burn, Hard to Hit
++ Battalion Detachment +3CP (Orks) ++
+ HQ +
Weirdboy: 3. Da Jump
. Rules: 'Ere We Go!, Mob Rule
Weirdboy: 3. Da Jump
. Rules: 'Ere We Go!, Mob Rule
+ Troops +
Boyz
. Rules: 'Ere We Go!, Mob Rule
. Boss Nob: Big Choppa, Kombi-Skorcha
. 19x Ork Boy W/ Shoota
Boyz
. Rules: 'Ere We Go!, Mob Rule
. Boss Nob: Big Choppa, Kombi-Skorcha
. 19x Ork Boy W/ Shoota
Gretchin: 10x Gretchin
+ Elites +
Painboy on Bike: Killsaw
. Rules: 'Ere We Go!, Mob Rule
+ Fast Attack +
Warbikers: 5x Warbiker
. Rules: 'Ere We Go!, Mob Rule
Nid thoughts:
Spoiler:
The basic build of the list is around Nid MCs. It has a good amount of shooting and high T creatures that potentially the Orks will struggle with. The Flyrants and Rippers also give it some manoeuvrability around the board. It has a decent level of psychic offense / defense and of course being Nids is capable enough in hth. However it will be vastly outnumbered around objectives, dosent have huge synapse coverage and could be picked of piecemeal.
Ork thoughts:
Spoiler:
The Ork army has a lot of bodies – 60 boyz plus characters. It should be able to control and hold objectives easily. It is backed up with some decent firepower from the Dakkajets and KMKs and being Orks has a good hth presence also. Utilising da jump, bikes and the battlewagons it should be fast and able to get where it needs to go. However it dosent have any particular “killer” unit and being Orks is quite fragile.
Mission:
Spoiler:
The mission is a modified No Mercy, DoW set up with 3 objectives. Each obj is worth 3 Vps at the end of the game and STW, LB and FB are in play. Basic Kill points are also in play.
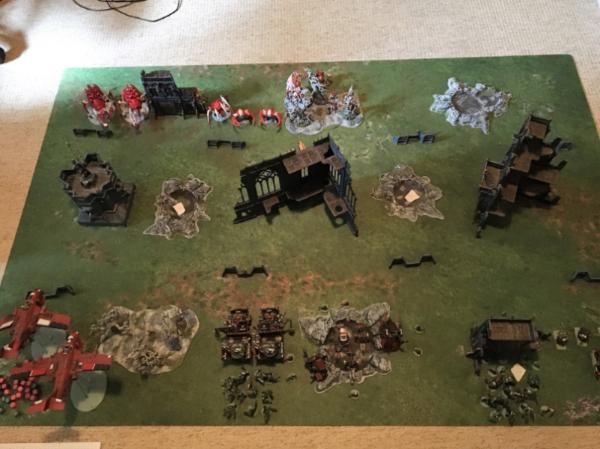
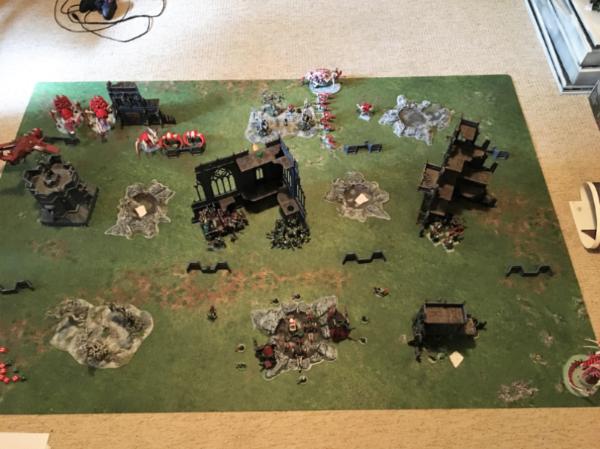
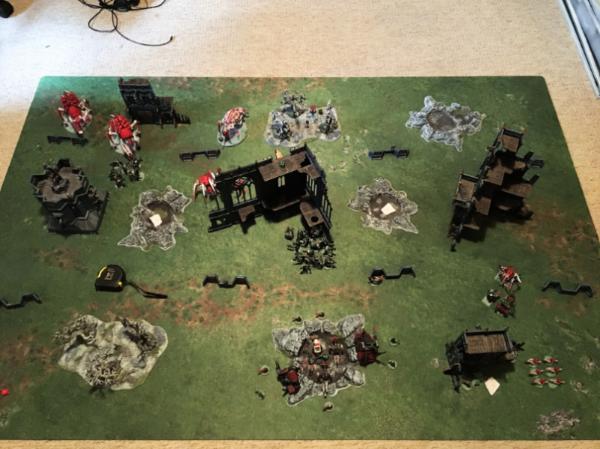
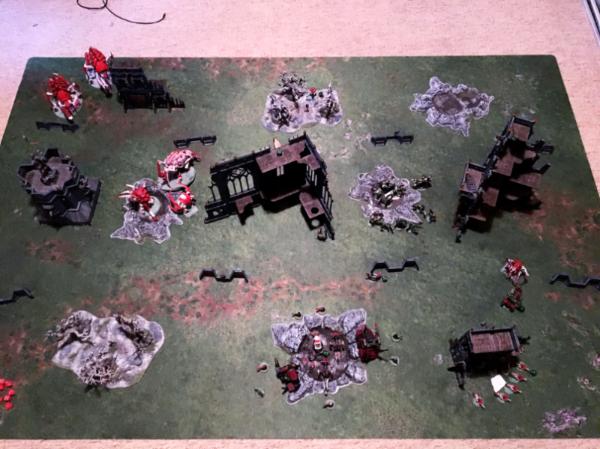
Setup and terrain:
Spoiler:
The bunker and two large ruins across the mid table are played as impassable and fully BLoS.
The rest of the terrain is as is from the BRB rulebook.
The Orks won the rolloff and place objective 1 in the crater mid table on the left flank. The Nids then place obj 2 in the opposite crater. Finally the Orks take a risk and place the final objective in the ruins on the right flank in one of the DZs.
For their psychic powers the Nids choose catalyst and the horror for their Flyrants and Cata for the Tervigon.
Both Warpheads choose Da Jump.
Flyrant Warlord picks FNP for their trait whilst the Warboss chooses +1 LD.
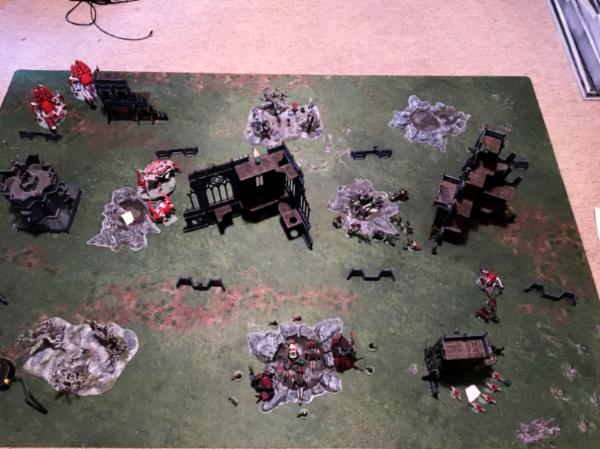
Deployment:
Spoiler:
The Orks luckily win the roll off and choose the table side with obj3 hidden amongst the ruins in the DZ.
The Nids then win the roll off to deploy first and choose to do so.
The also finish first and choose to also go first. The Orks fail to sieze.
Nid tactics:
Spoiler:
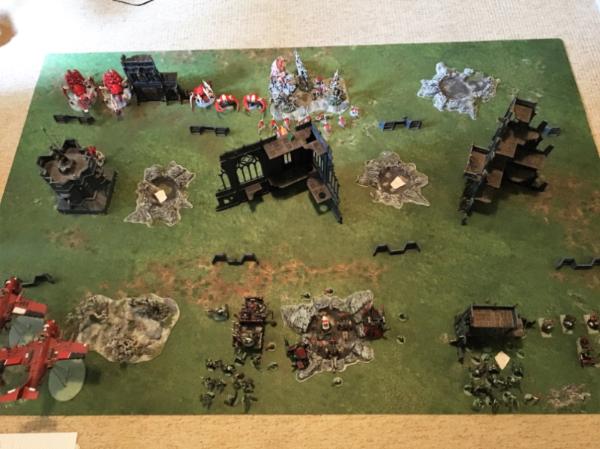
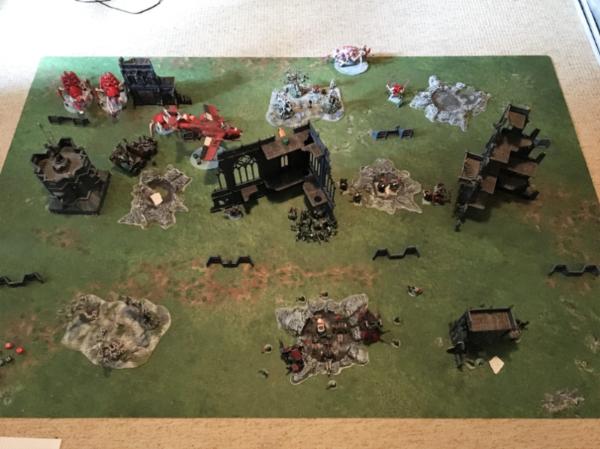
The Nids set up with a refused flank deciding to concentrate their forces around obj 1 and try and ninja cap either obj 2 or 3 late game using the Rippers/Trygon.
They deploy the Exos as a firebase and the Carnifexes and Biovores near the forest as a second base but more importantly out of LoS of the KMKs. Both Tyrants and the Tervi babysit what is needed. The Rippers and Trygon Prime start in reserve. Their goal is to try and cripple the BWs first, pick off the Boyz and try and deal with Da Jumps as they come.
Ork tactics:
Spoiler:
The orks spread their forces more evenly placing the two Dakkajets on their left flank ready to roll up the Nid flank from left tor right. The two BWs start centrally out of LoS of the Carnis. One unit of Boyz with a Warphead starts behind them whilst the second Warphead and Boyz start near obj 3 ready to jump to #2. The KMKs deploy centrally to provide a fire base whilst the Bikers start on the far right flank. Finally the Grots tuck in around obj 3 to claim it early.
Turn1:
Spoiler:
Nidsturn 1: Turn one sees minimal movement from the Nids with only the two Flyrants jumping forward to the bunker/ruins and the Tervi spawning a 10 man termagant unit which stay close.
The first Exo in combination with the Biovores then opens up on the first BW wiping it out. The ensuing explosion kills 5 boyz and with the followup from the second Exo they suffer 7 more casualties, fail their morale check and are wiped out. A very good start and First Blood to the Nids.
Everything else is either out of range or LoS.
Orks turn 1: A nasty loss first turn for the orks but they rally. Both Dakkajets fly forward into the Nids lines. The surviving BW and one unit of foot slogging Boyz Da Jump into the central ruins. On the right flank the Bikers move up under cover ruins to close in obj 2. Finally the other footslogging Boyz unit Da Jump 9” from the exposed Biovores.
Shooting sees the KMKs just manage to pick out the Nid Warlord Flyrant who dosent tuck in to the bunker enough. A solid volley of fire in combination with one Dakkajet sees it killed off. STW to the Orks. The other Dakkajet then open up on the termagant unit wiping them completely.
Finally the jumped Boyz unit fires into the Biovores killing two and wounding the last one.
Score (inc. Objs):
Nids 3 – Orks 6
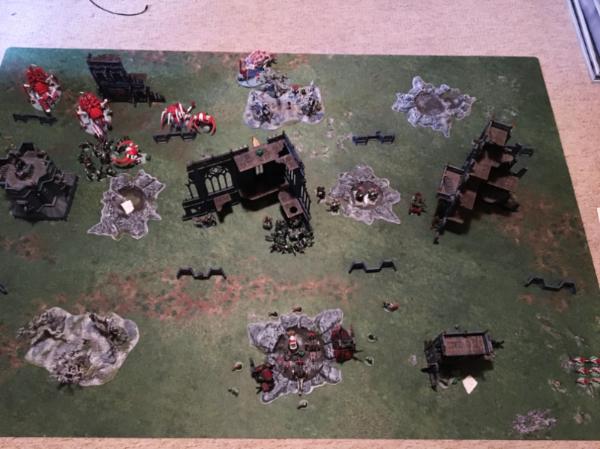
Turn 2
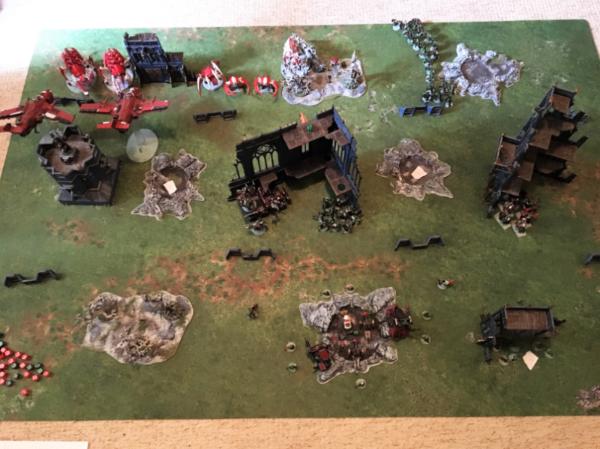
Spoiler:
Nids turn 2: The Nids drop in the trygon Prime 9” from obj 3 to start pressuring the Grots there. Neither the Exos or Carnis move, the Carnis being fearful of a charge from the BW Boyz in the central ruins. The rest of the Nids move toward the Jumped Boyz – Tervigon, second Flyrant and newly spawned Termagants.
Being out of synapse range from the fallen Tyrant the Exos fire into one of the Dakkajets destroying it wholsesale. The Carnifexes also out of synapse fire into the second chipping of a few wounds.
The Termagants, Tervi, Tyrant and last Biovore then obliterate the Jumped Boyz unit.
The Trygon whiffs horribly killing not a single Grot.
Orks turn 2: The remaining Dakkajet swings right along the Nid front lines as the BW Boyz move well within charge range of the Exos/Carnis for next turn.
The other Da Jump Boyz hold their positions for the moment as the Bikers move up to claim and secure obj 2.
Shooting sees the KMKs again just manage to pick out the exposed Trygon and happily blow him away. The Dakkajet fires into the Flyrant stripping a few wounds from it.
The Bikers also follow up but whiff badly.
The Orks definitely have the bodies and board control at the moment with several Nid units lacking synapse. However the Nids definitely have the firepower and high T units left.
Score (inc. Objs):
Nids 5 – Orks 10
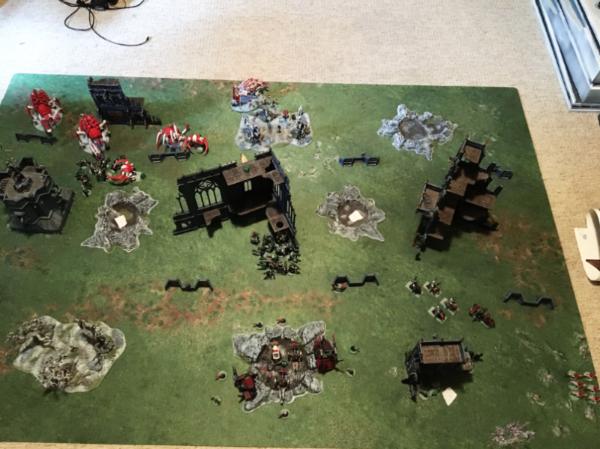
Turn 3
Spoiler:
Nids turn 3: The Nids currently hold no objectives but are holding on with KPs.
Movement for the Nids sees the remaining Flyrant advance and tuck in behind the right hand central ruins. Its plan is to pick off a few Bikers and bait them into charging. The Tervi advances to try and give synapse to the Carnis managing to get one within range.
The Rippers all arrive from deepstrike and setup 9” from the Grots around obj 3.
Being out of synapse range the Exos fire everything they have into the last Dakkajet destroying it outright.
The Carnis and last Biovore then just manage to kill the last BW.
Hand to hand sees a Carnifex and Exo charge the dismounted Boyz who fail to wound with overwatch.
Combat sees the Carni lose 5 wounds as it and the Exo whittle down the Boyz unit who pass morale.
Orks turn 3: At this point the orks are losing obj1 and don’t look like getting it back. As a result the central Jump Boyz hold to grab obj 2 later whils the Bikers ignore the Tyrants bait and go to try and help the Grots at obj 3. They move and shoot into the first of the Ripper swarms wiping one out.
The KMKs are out of range of range and LoS to the unengaged Exo and Carnis.
Combat sees the Boyz and Warboss trade blows with the Carni reducing it to a single wound as it kills off a few more Boyz who hold once again.
Score (inc. Objs):
Nids 7 – Orks 11
Turn 4
Spoiler:
Nids turn 4: Movement sees the Flyrant fly to engage the retreating Bikers and prevent them killing any more Rippers. The Tervi advances again to try and get synapse to as many units as possible. The unengaged Carnis move up to try and pressure obj 1 but are still out of LoS of the last Jump Boyz.
Lastly the Rippers advance towards the Grots at obj 3.
No shooting takes place.
The Flyrant engages the Bikers killing two and taking a few wounds itself from the Painboyz killsaw.
Both units hold however.
The other Boyz unit finally finish off the Carnifex and continue the fight versus the Exo.
Orks turn 4: The Orks currently hold obj 3 but obj 1 seems lost.
As a result the last Boyz unit Da Jumps onto obj 2 to secure it for the final turn. Nothing else moves.
The KMKs cant see the Rippers who have learned their lesson from the Trygon. The other Carnis are out of LoS and the final Exo out of range.
The Grots strip a few wounds from the Rippers however.
Combat sees the Exo and Boyz exchange a few wounds but nothing decisive.
The Tyrant and Bikers also trade blows, the Painboy loses two wounds the Tryant 4.
Score (inc. Objs):
Nids 6 – Orks 12
Turn 5
Spoiler:
Nids final turn 5: In order to definitely secure obj 1 the Nids need to kill off the Boyz unit there and so the engaged Exo withdraws from combat. The Tervi and remaining Carnis move to secure obj 1 in the crater as the Rippers charge into the Grots.
Shooting sees the other Exo and the Carnis fire into the now exposed Boyz/Warboss and wipe them out earning STW too.
The Tyrant kills the last of the Bikers earning another KP as the Rippers fight the Grots to a standstill.
Orks final turn 5: With little choice in movement the Orks hold at obj 2 to secure it.
Shooting sees the KMKs kill one of the Carnis at obj 1.
Hand to hand sees the Tyrant reduced to 2 wounds as the Painboy survives.
Finally the Rippers cause more wounds on the Grots who fail their morale check and are wiped out.
The game ends.
Final result:
Spoiler:
The Nids hold obj 1 and 3 and have secured 11 Kps which include STW, First Blood and Line Breaker.
The Orks hold objective 2 and gained 8 KPs including STW.
The Nids win 18-12 and Hissy is happy!
Post game thoughts:
Spoiler:
Quite an enjoyable game. It had some fun manoeuvring, shooting and hand to hand which is all one can really ask for along with a bit of a seesaw finish.
The Orks were unlucky to have lost their BW that early on – the Exo shooting capability was definitely under estimated and the BWs should have stayed further back our out of LoS completely.
The Orks found it difficult to deal with the Nid MCs which played well either staying out of range or LoS of the lethal KMKs or killing off the threats quickly like the Dakkajets.
Despite having overwhelming numbers lists-wise, the orks didn’t bring them to bare in a coherent fashion and were ultimately bled out over several turns. If they had formed up with all four Boyz units supported by the Bikers and better positioned the KMKs it might have been a different game.
The Nids despite a refused flank eventually managed to secure 2/3 of the objectives which was more poor play on the part of the orks than strategic genius from the Nids. Unless taken in a huge mob circa 25-30, Grots just cant hold objs under any amount of pressure. The surviving Flyrant did well being highly manoeuvrable and preventing the Bikers taking obj 3.
The Exos shooting really is very good if they can sit still and pound away. However if forced to move/fall back or even in hth they are much less effective.
I think the Orks lost this game rather than the Nids really winning it although they did play the objs and secondaries much better, securing LB, STW and FB.
Hope you enjoyed the rep!
This message was edited 1 time. Last update was at 2017/07/20 17:53:18
Dman137 wrote:
goobs is all you guys will ever be
By 1-irt: Still as long as Hissy keeps showing up this is one of the most entertaining threads ever.
Thanks for the write up, the Ork list does seem a little inefficient and it did seem to struggle presenting multiple threats at the same time.
Units of 30 boyz walking is more of a threat with Da Jump and gives some padding so you can lose models and still claim the +1 attack for being over 20 models.
One other thing of interest is the 5 KMK and the 2 x 10 gretchin squads. I guess the squads were to complete the detachment cheaply and maybe for objectives but the 5 man gun crew could also take objectives.
It only takes 1 gunner to fire the Mek Gun so after deployment 1 squad of 5 gretchin could fire all 5 KMK (as long as they are within range) and the other 20 grots could go walk about and try and claim objectives or just get in the way
Did the painboy save many models with his Doc's Tools or was he mainly there for the CC boost with the killsaw?
Also did you feel that the dakka jets were a threat or more of just a nuisance?
Thanks again for taking the time to do the write up!