Switch Theme:

Bailey03's Larger Scale Orcs  [RSS] Share on facebook Share on Twitter Submit to Reddit
»
Author Message
Advert


Forum adverts like this one are shown to any user who is not logged in. Join us by filling out a tiny 3 field form and you will get your own, free, dakka user account which gives a good range of benefits to you:
  • No adverts like this in the forums anymore.
  • Times and dates in your local timezone.
  • Full tracking of what you have read so you can skip to your first unread post, easily see what has changed since you last logged in, and easily see what is new at a glance.
  • Email notifications for threads you want to watch closely.
  • Being a part of the oldest wargaming community on the net.
If you are already a member then feel free to login now.


Made in us
Fresh-Faced New User


San Jose, CA

I know a lot of what's shared here are gaming scale figures, but I thought I'd share of few of my larger projects in case anyone was interested. While I started out painting warhammer fantasy and 40k figures, lately my focus has been just on display and competition painting. Because of that I paint a lot of 54mm and larger scale figures. Recently I've been working on these two orcs (around 75mm tall). Despite the similar subject, they will be part of two different displays.

The first piece is the Orc Brave from Ouroborus miniatures. Here's a look at the almost finished piece


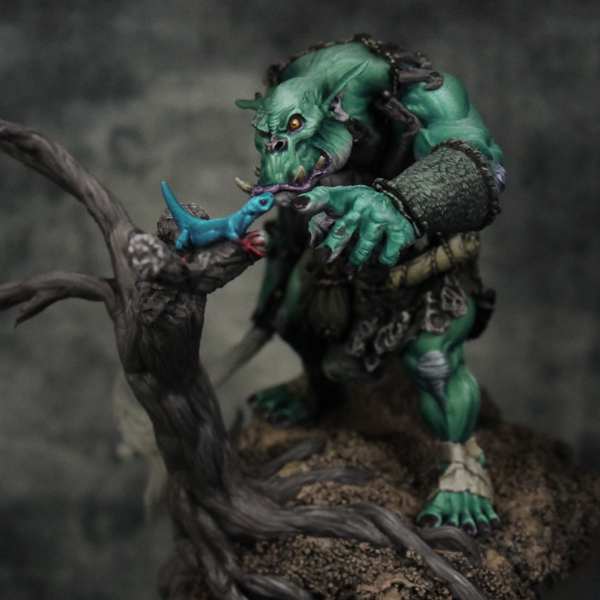
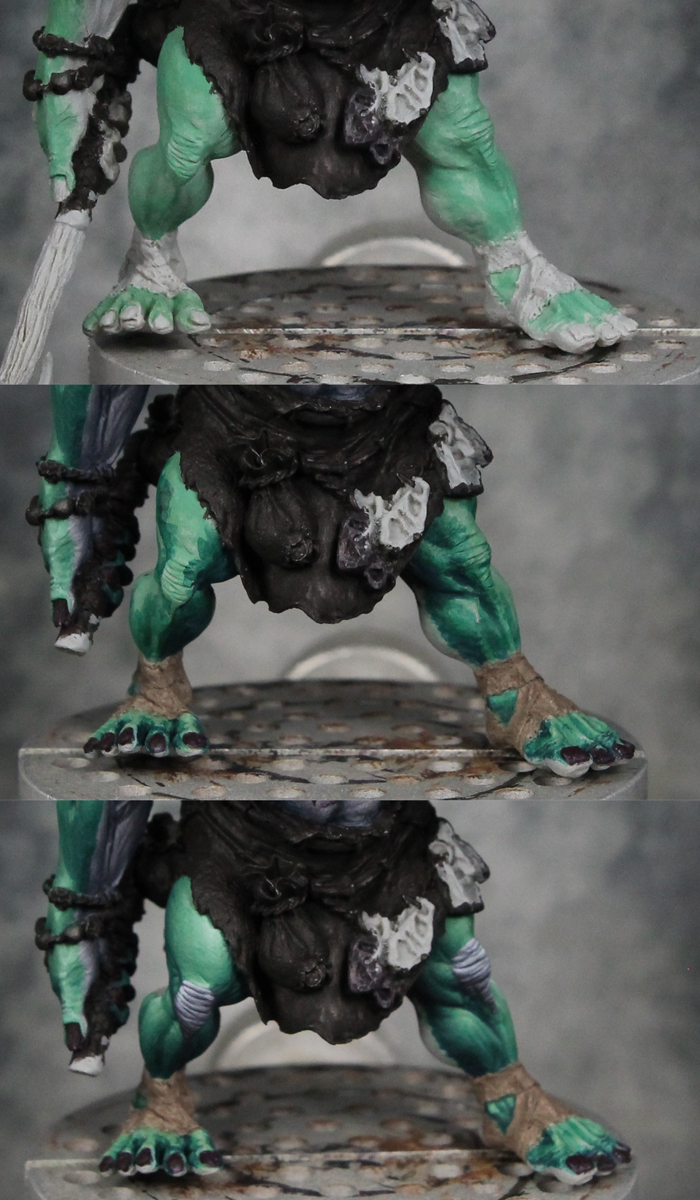
The skin is a mix of green and teal so create a slightly different looking shade from the regular orc green. Here's an earlier picture where you can see the difference between the more finished upper torso and then the legs where shadows are just sketched on.


Here's a look at how some of this evolves from the base coat, to shadow sketch, and then the final version. The blending is done by layering. But I like to first sketch in the shadows so I know where my lights and darks go. Then I layer on top of that, gradually working from the shadow areas to the highlight areas as each layer gets lighter and lighter.


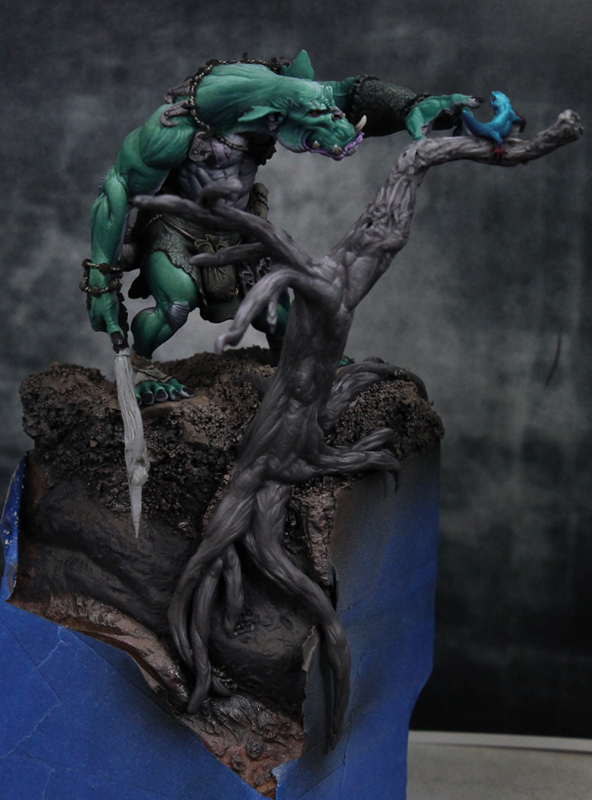
The base was mostly scratch built. The branch with the lizard came with the kit, I think it was supposed to be a tree stump. But I decided to reposition it and turn it into a full tree. For this I used wire to create the body of the tree, then covered it in putty.


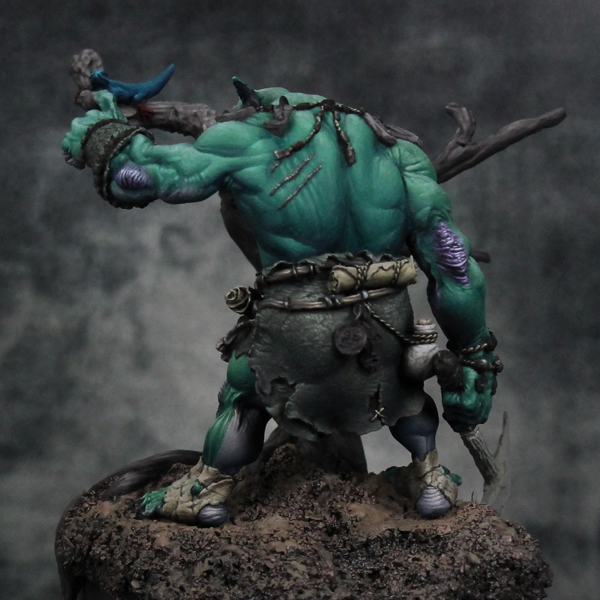
At this point he's just about finished. Only a few small details left to do. Here are the rest of the views for the current version of the piece.


I've got another orc from Big Child Creatives that I'm painting, but I'll save that for another post in this thread. I think this one is long enough! I hope you like the progress on the orc. Thanks for checking it out.
   
Made in de
Krazy Grot Kutta Driva


Holy thats some nice work here!
Love the shading and thanks for the WIP pictures.
How many layers are there in total for the skin?

The details and the choice of colours are awesome, looks very natural and not like the GW colour style.
I love it, please keep us posted.
   
Made in us
Fresh-Faced New User


San Jose, CA

Thanks, Grotrebel. At one point I'd taken a picture of the color mix for the skin on my palette:


It's a little hard to see with the darker colors, but on the left you can see how the shade for each layer gets a little bit lighter. This isn't pre-mixed, by the way, I normally start with the darkest color and then add my midtone little bit by little bit. And then add the highlight bit by bit. But I try to leave some of the earlier mixes so I can jump back to one if I need to correct something.

Anyway, to answer your question, I count 14 layers there. In some spots I went even lighter (closer to the white-blue on the far right), so probably a few more in spots. Of course I tend to apply the darker colors only in the shadow areas and then gradually shift the sections I'm painting on as the colors get lighter. That way the spots with the lightest highlights don't actually have all 14+ layers piled up. The darkest those spots ever get is the midtone/basecoat and then the highlights are layered up from there.
   
 
Forum Index » Dakka P&M Blogs
Go to: