I picked up a Foetid Blight Drone to see how tough it would be to LED it up. Turns out, not hard at all.
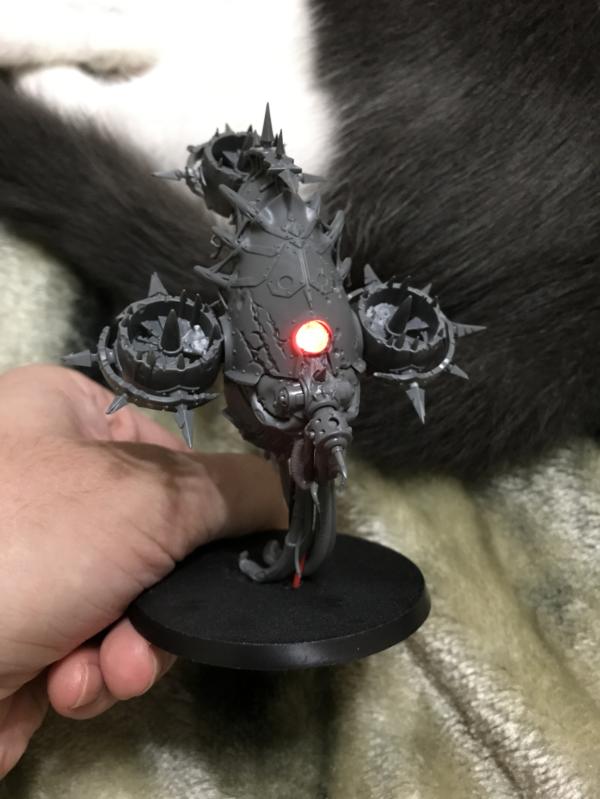
You can pick up pre-wired LEDS on numerous hobby and train websites, which use 3V watch batteries. For this model, I started unassembled and cut a small hole in the bottom where tentacles and wires hung down. This would be where the LED wires comes out. Then the single lens on the front plate of the drone was drilled out and widened with an xacto. The exact size here would depend on your LED bulb size. Make sure it's a snug fit with a little of the bulb protruding.
The next step is to lightly sand the entire LED. The reason for this is that most LEDs only shine directly forward. By applying a rough texture to the bulb, the light diffuses and will glow at every angle, rendering the LED more visible.
Applying a very thin layer of superglue, attach the LED into the eye hole of the drone, being careful not to smear glue across the front of the bulb. Assemble and glue the drone body together, then push the wires through the prepared hole in its bottom.
At this point it's up to you where you want the battery to go. If you want it mounted under the base, you'll need to use plasticard to raise the base up higher for it to fit beneath. Otherwise the battery mount can be attached on top of the base and disguised with scenic elements. The easiest option would be top mounting, as you'll have more room. The same hobby stores will sell on/off switches for your LEDs, which can be attached by twisting the wires together and simply gluing the sections together. Glue the mount on top of the base, insert the battery, and you're good to go with decorating it as you see fit.


 Apostles of Contagion (40K) - 1750 Points
 Iron Warriors (30K/40K) - In progress
 Farsight Enclaves (40K) - Planned
 352. Infanteriedivision (FoW) - 3000 points

