 - by Iain Wilson
A few weeks ago, I showcased a dice tower made from a Knights of Dice MDF blank and some bits from the Maelstrom's Edge terrain sprue. This week, I'm giving a similar treatment to a desert building from the KoD 'Tabula Rasa' range.
The Tabula Rasa terrain range is specifically designed to be fairly basic, both as a cost-effective way of filling your table and to serve as a base for people to add their own detail... which obviously makes these buildings a perfect match for the Maelstrom's Edge terrain sprue!
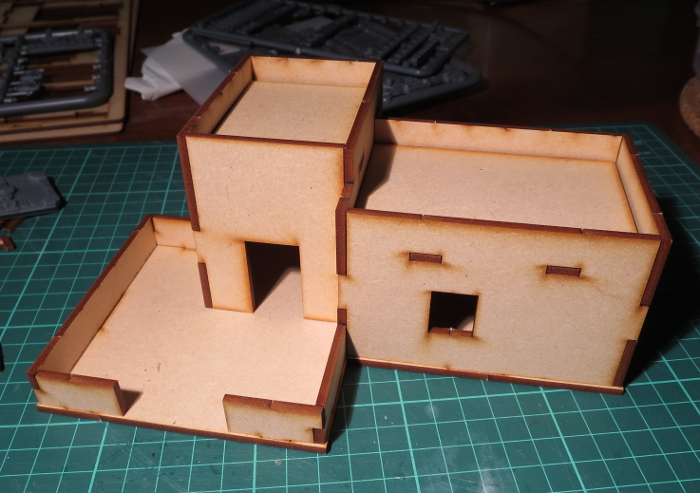
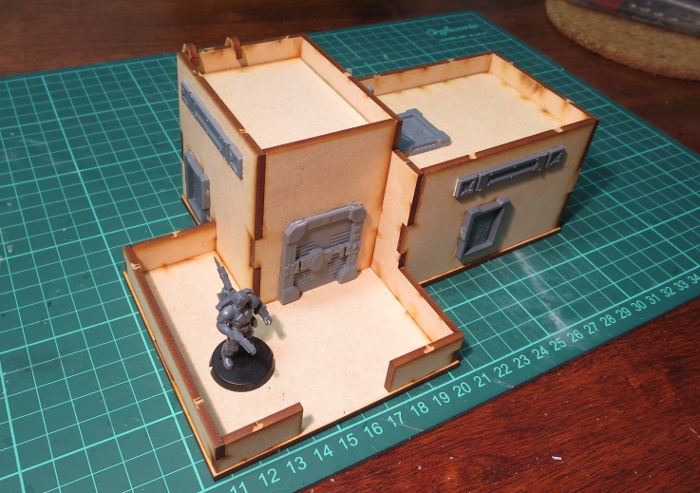
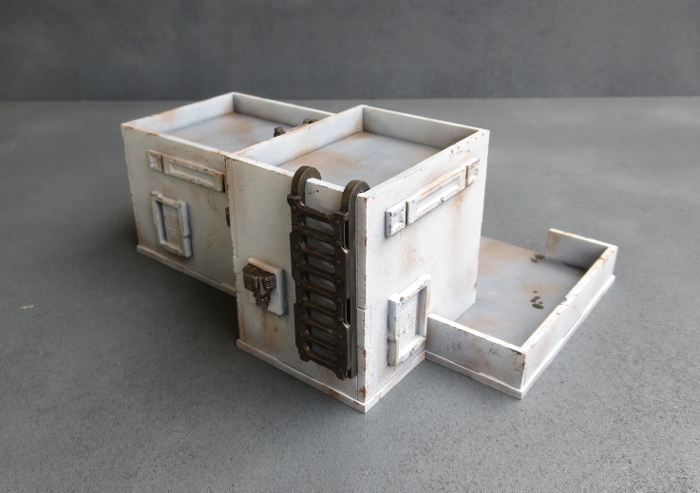
The building I've started with is the 'Desert Residence 1', which when assembled straight out of the pack looks something like this:
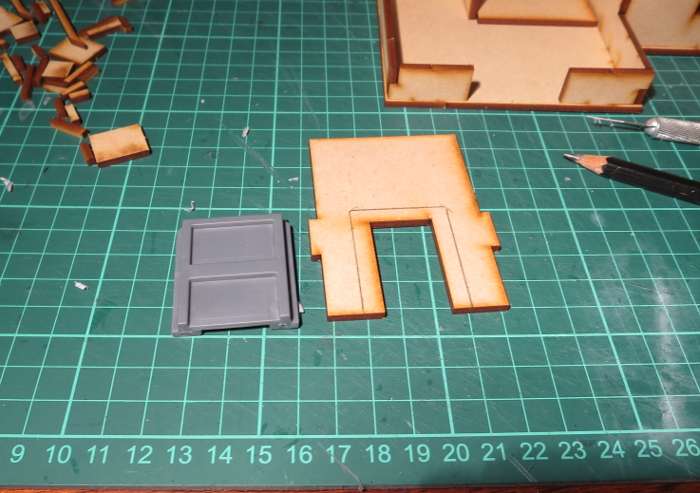
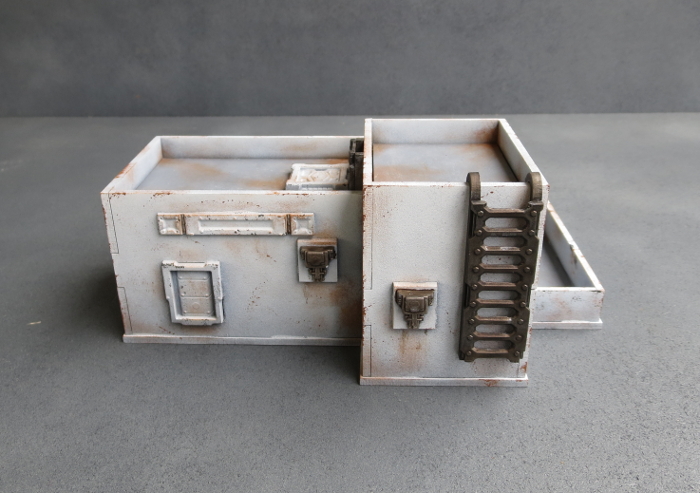
Before gluing the building together, there were a few modifications to make. To begins with, the doorways are a little small for the Maelstrom's Edge doors to fit in. So I sat the door over the doorway, traced around it with a pencil and then carefully cut the resultant enlarged doorway out with a sharp exacto knife. MDF cuts fairly easily, so this isn't too onerous, but if you would rather avoid it you could alternatively build a boxwork around the door, as I did on my watch tower) and just glue it over the existing doorway.
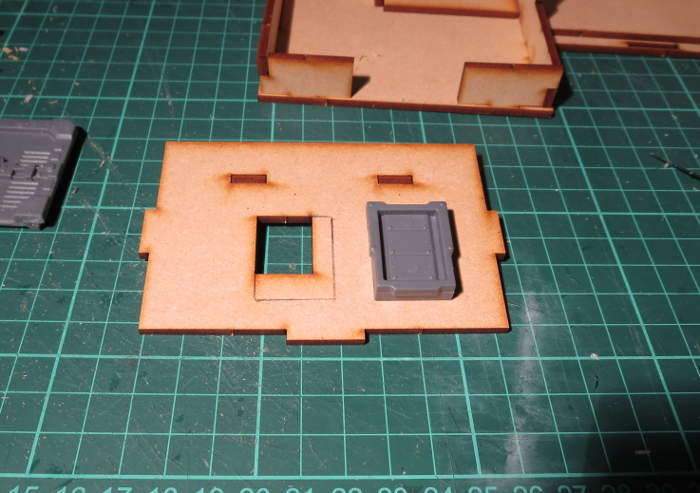
There are two differently-sized windows scattered around the building. The larger of them, like the doorways, is a little small for the shuttered windows from the terrain sprue, so I repeated the door process, using the top corner of the window hole to line up the plastic part, and then tracing and cutting a larger hole. Again, if you would prefer to avoid cutting MDF, the shutter windows work quite well just glued straight to the wall.
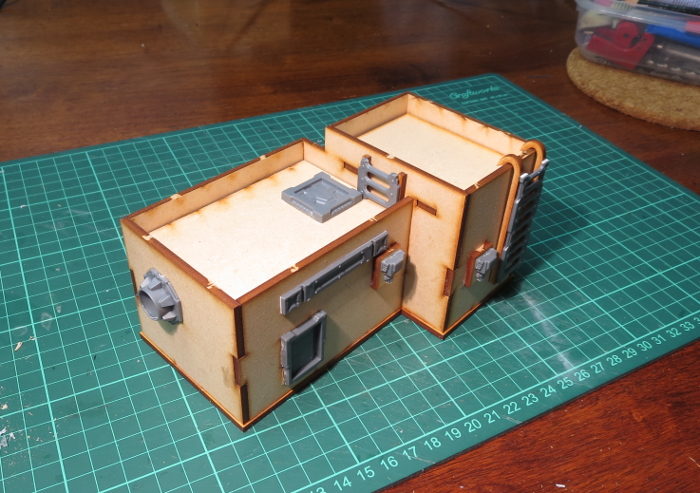
For the smaller window holes, I covered over two of them using the cast-off MDF pieces from the larger windows, and to this I attached part of the energy fence pylon from the terrain sprue to make some sort of mechanical gubbin (I have to admit, it looks a little like a high-tech toilet cystern to me).
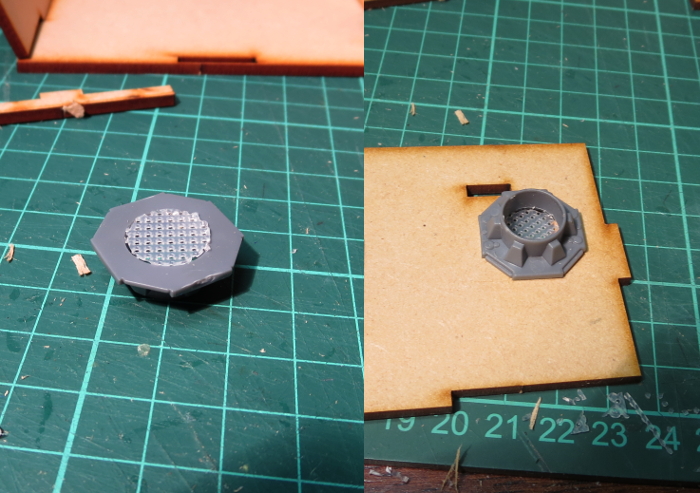
For the third small window, I took the large pipe fitting from the terrain sprue, and glued a small circle of plastic mesh into the back of it. This was then glued over the window hole to make a covered vent.
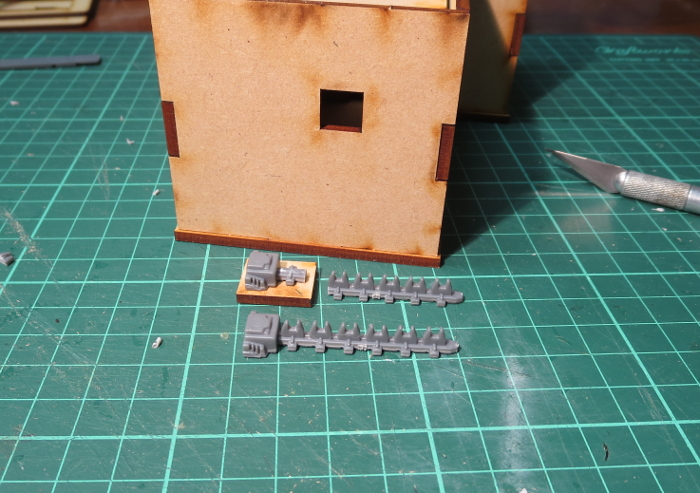
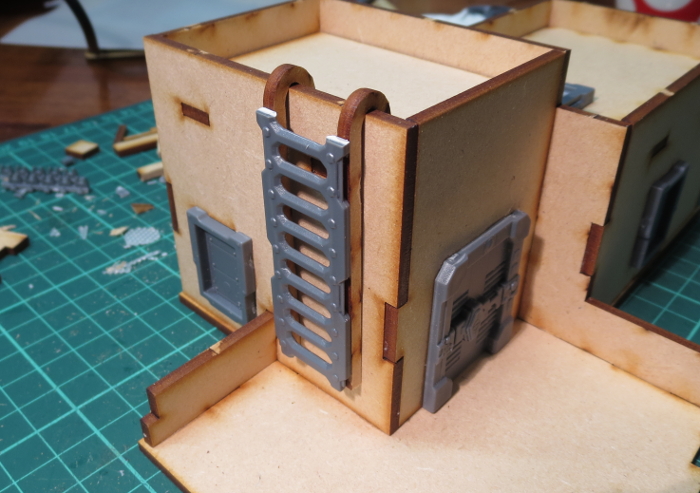
As a nice little touch, all of the Knights of Dice kits come with a little crowbar-sort-of-thing in the top corner of the MDF sheet, which can be used for prying parts out for assembly, or pulling removable roofs off. With a little bit of trimming up, they also serve quite well as upright bars for attaching ladders. I trimmed the ladder from the terrain sprue off so that it was short enough to work on either of the two building sections - the hooks on the top allow it to be hung from any free stretch of roof railing without needing to glue it in place.
With the leftover piece of ladder and a couple of MDF cast-offs, I made a smaller access ladder to hang between the roof sections.
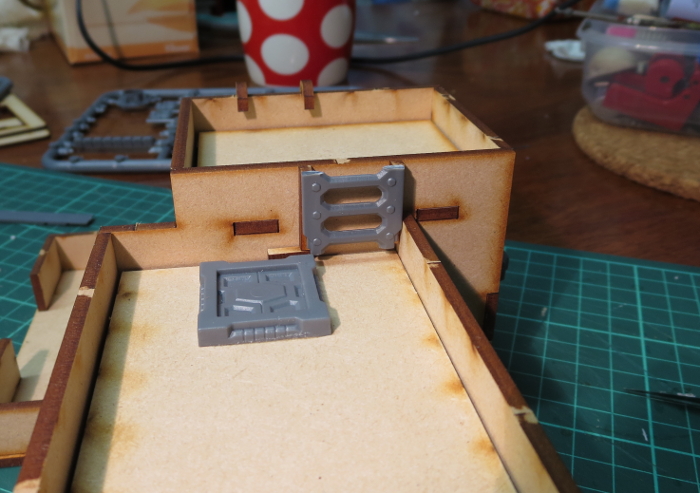
The final touch was to add some support strut sections from the terrain sprue to cover over the joint holes where the roof supports attach to the walls. I could also have removed the other joint gaps by filling with some filling plaster or putty and sanding it down smooth, but I actually like the wall joints for creating a pre-fabricated slab-assembly look.
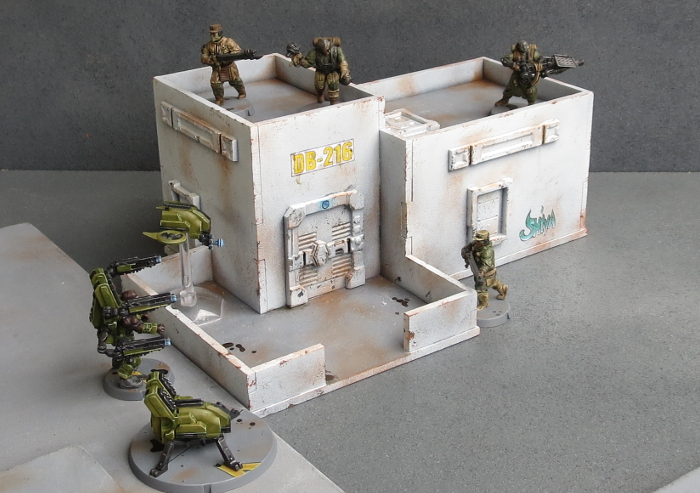
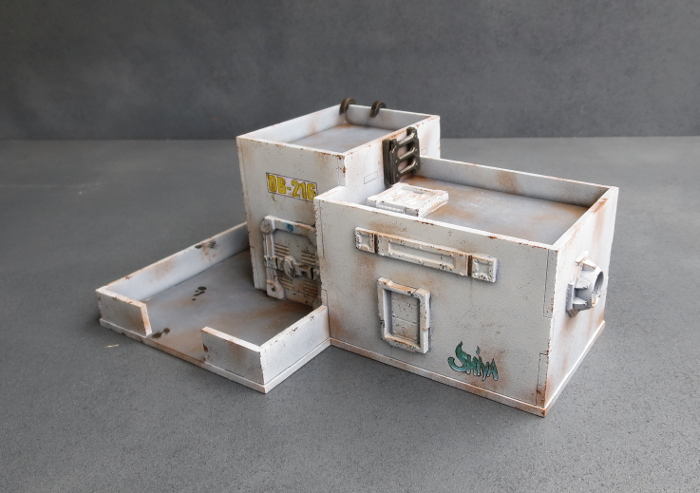
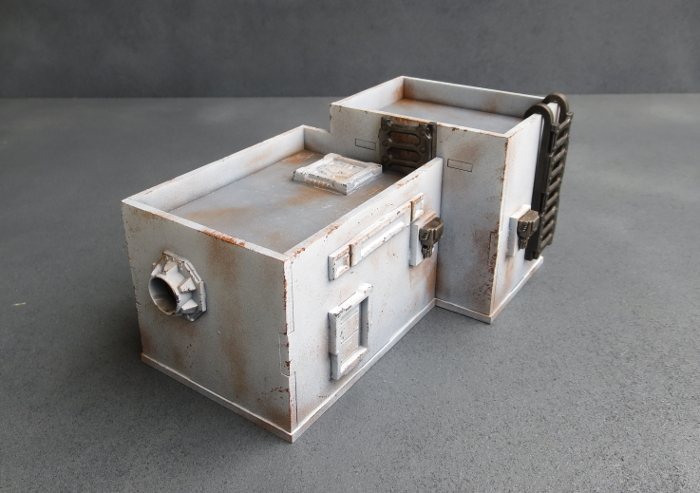
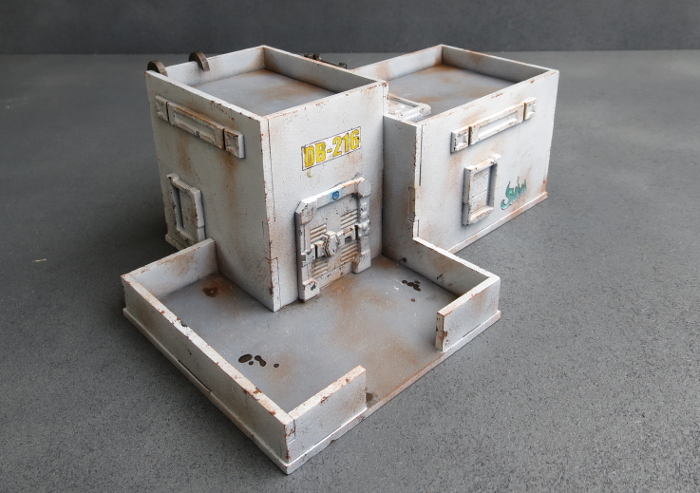
With some paint and weathering, the final building winds up looking like this:
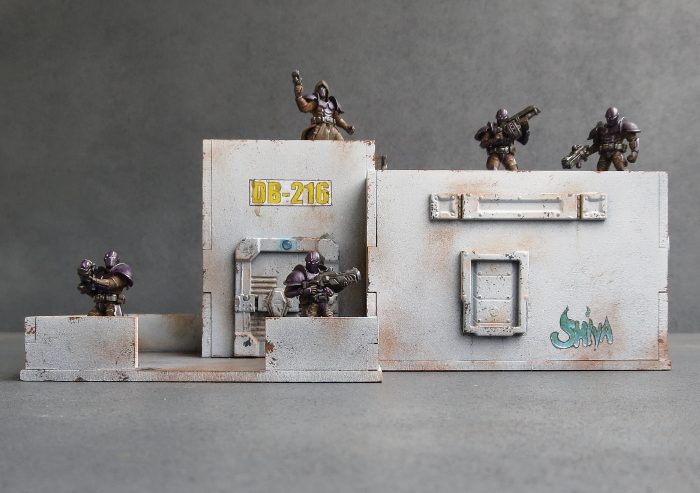
Some Karist troopers, taking up station:
To tech up some buildings of your own, you can pick up the Maelstrom's Edge terrain sprue, or any of the rest of the Maelstrom's Edge model range, from the webstore
here. As always, be sure to share to see your creations, or pop in with any hobby questions to the
Comm Guild Facebook page!
For other Maelstrom's Edge modeling articles, including tutorials and walkthroughs of a wide range of different building and miniature projects, check out the article roundup
here.


