 - by Iain Wilson
One of the most enjoyable aspects of terrain building for me is to find everyday things that, with a little bit of tinkering, suddenly turn into something that looks at home on the battlefield. This has resulted in me spending more time than is healthy wandering through hardware stores and discount shops looking for new fodder for the workbench - it's often a little surprising where that perfect next project piece will show up.
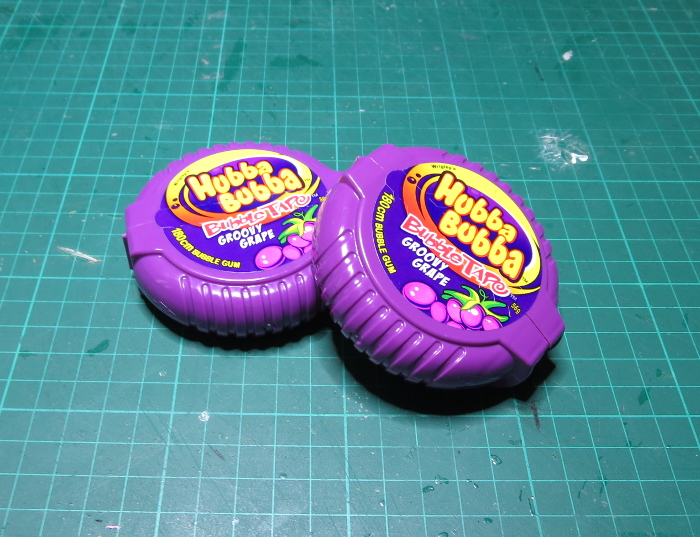
This week's build is based on an idea that I have come across in several different incarnations online, and thought it looked too cool to not try it out. So after a quick trip to the local grocery store, I found myself building a generator out of bubblegum tape dispensers!
I picked up two packs of grape-flavoured Hubba Bubba. Obviously, the flavour doesn't make any difference to the build, but if you're buying bubblegum anyway, is there any logical reason to buy any flavour
other than grape?
The first step was to remove the bubblegum from the packs, and remove the labels. The labels mostly peeled off easily, but needed a little cleanup with some Tea Tree Oil to remove the sticky residue - If you don't have access to Tea Tree Oil, use whatever local equivalent you have for cleaning sticky residue off things.
Then I may have got momentarily distracted...
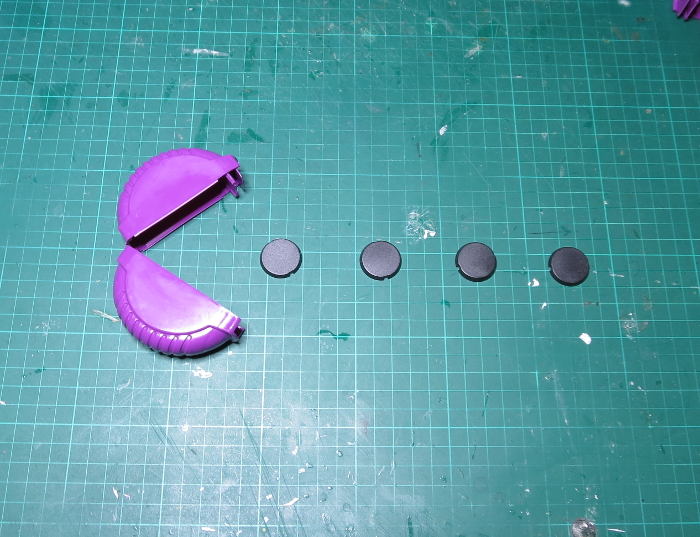
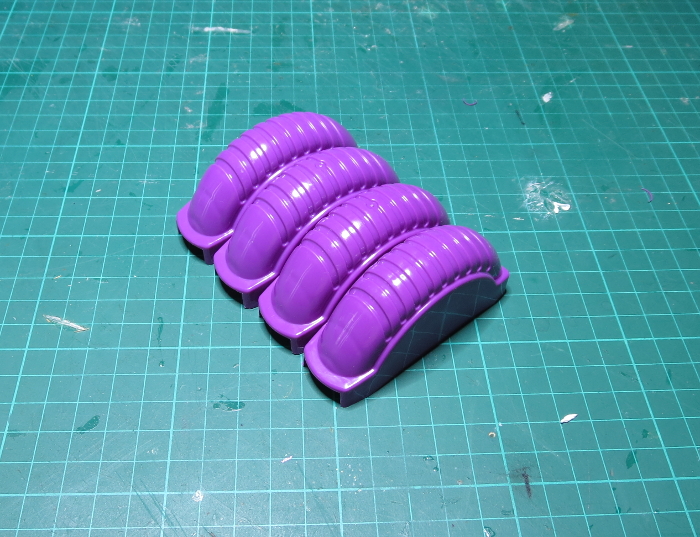
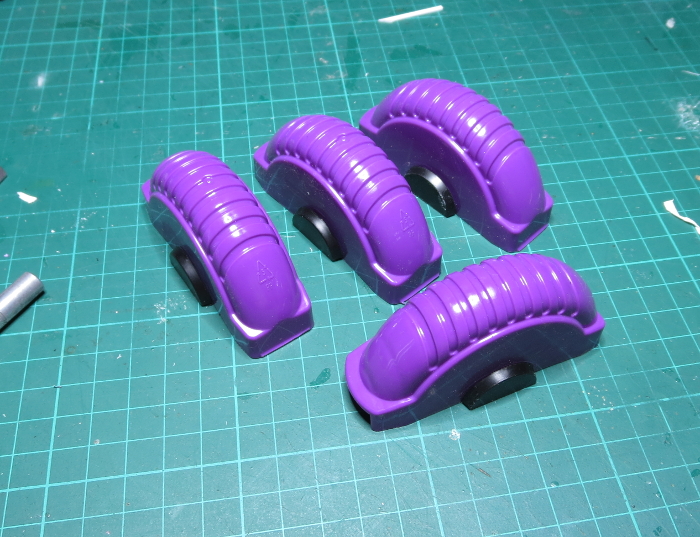
One side of the pack has an internal ridge running down each long side of the opening, and a pair of tongues that close over into the other half. These needed to be removed, which I did with a sharp exacto knife. They're made from a fairly soft plastic, so cut easily.
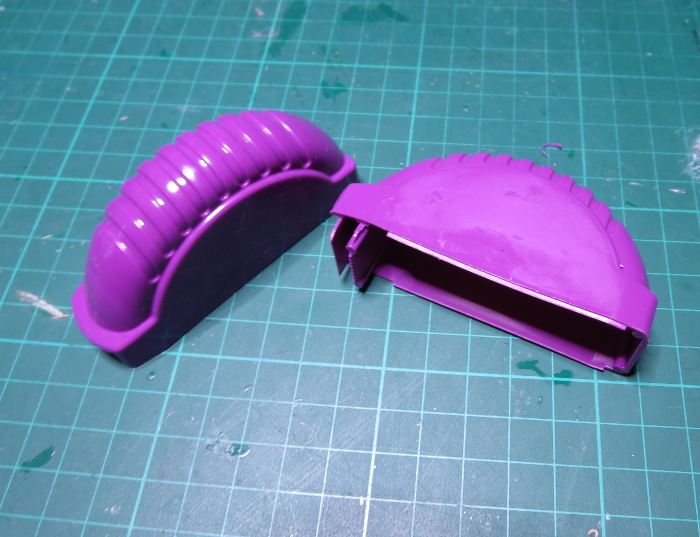
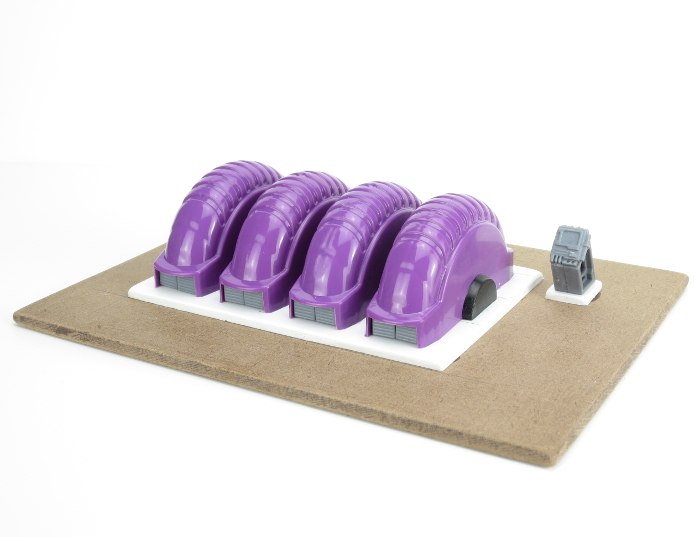
This left four almost-identical, semi-circular pieces.
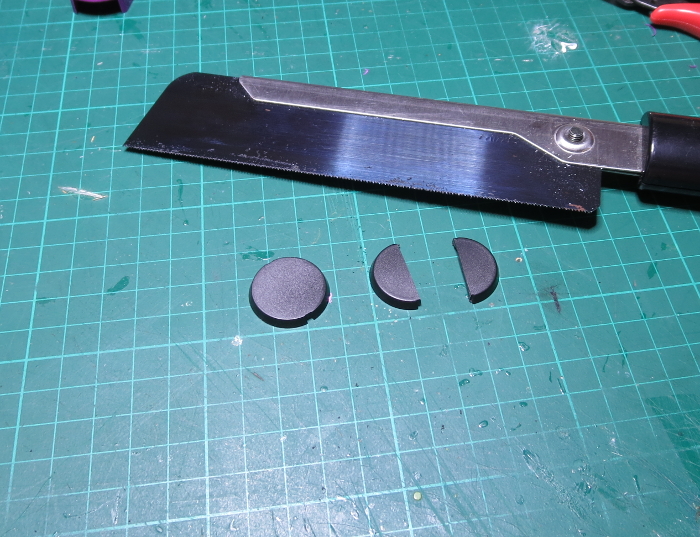
To join the segments together, I took four 25mm bases and cut them in half with a razor saw. The arc markers on the Maelstrom's Edge bases serve as a handy guide for this, but if you are using different bases then some measuring and marking would be involved here.
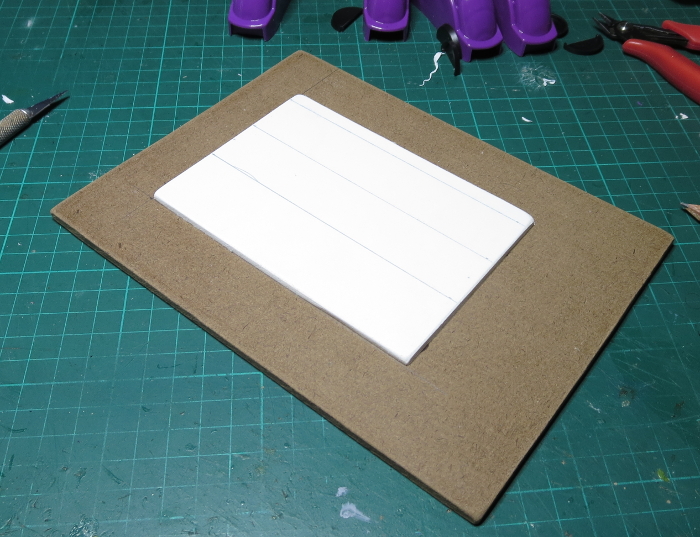
I cut a piece of masonite to an appropriate size for a base, and then a smaller piece of foamed PVC for the generator to sit on. I could have used another piece of masonite here, but figured the plastic gum dispenser would glue better to the PVC. On the PVC, I marked out where the dispenser pieces would sit, and added a 25mm-wide centre strip to serve as a guide for gluing the base pieces on.
Then, I sat each dispenser piece in turn onto the marks and glued the base sections in position on both sides using an all-plastics glue.
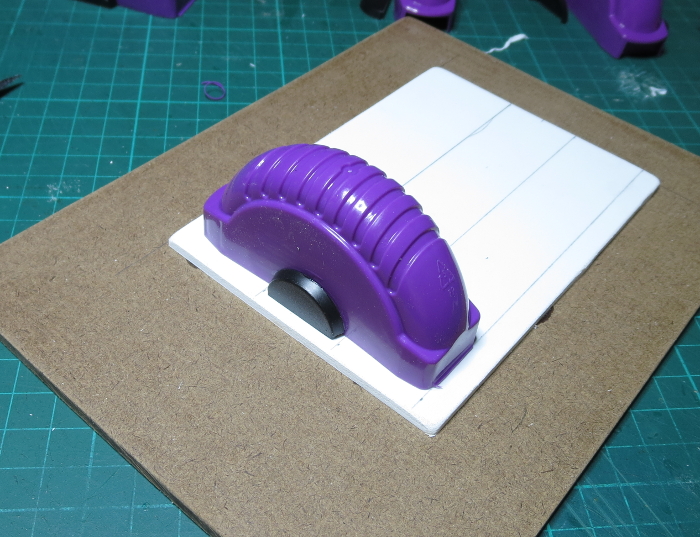
(The 'all-plastics' glue that I use is a 2-part system that has a tube of superglue and a 'primer' pen. You prime the contact points on both parts to be glued before applying the glue, and it creates a super-fast and extremely strong bond with just about any type of plastic).
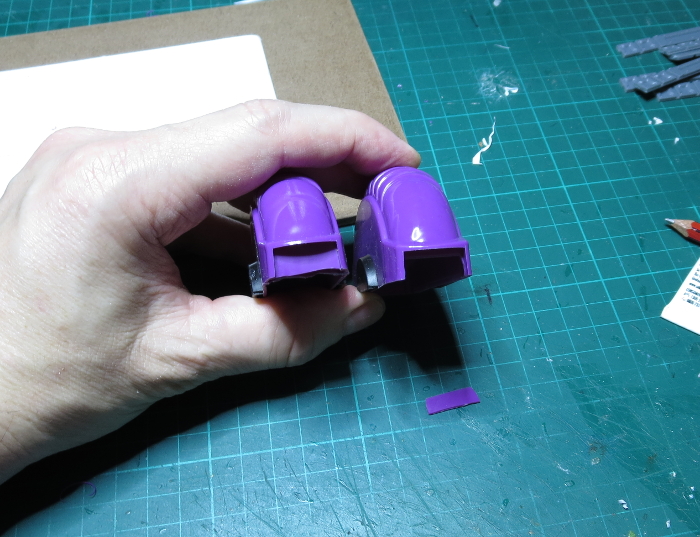
It was around about this time that I noticed that there were small recycling symbols embossed on two of the dispenser pieces, so I carefully shaved these off with the exacto knife and lightly sanded down the surface. Then I moved on to the ends. Due to the dispenser having that tongue that I cut off back at the start, one side was left with a flat plate, while the other had a hole where the tongue originally slotted in. I took the cut piece of tongue and glued it into this gap.
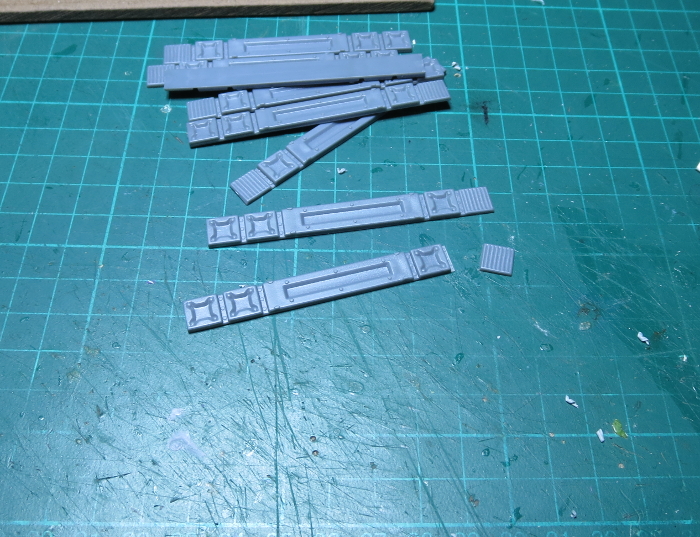
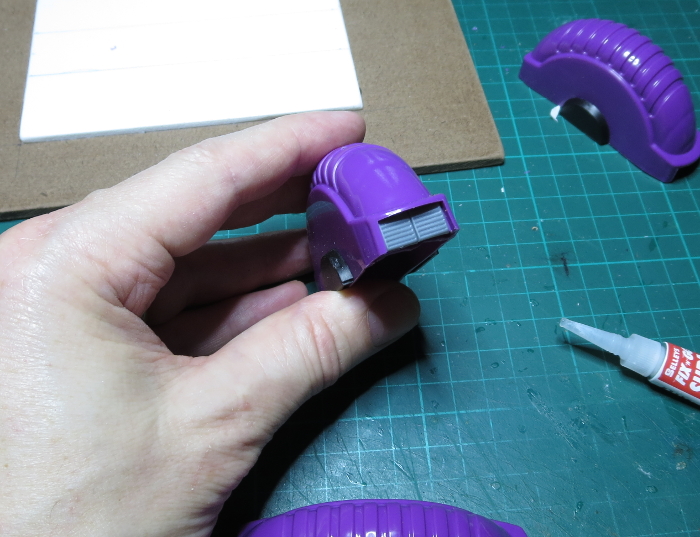
Then I took eight support struts from the Maelstrom's Edge terrain sprue, and cut off the vent sections on their ends. These were glued in pairs into the dispenser opening.
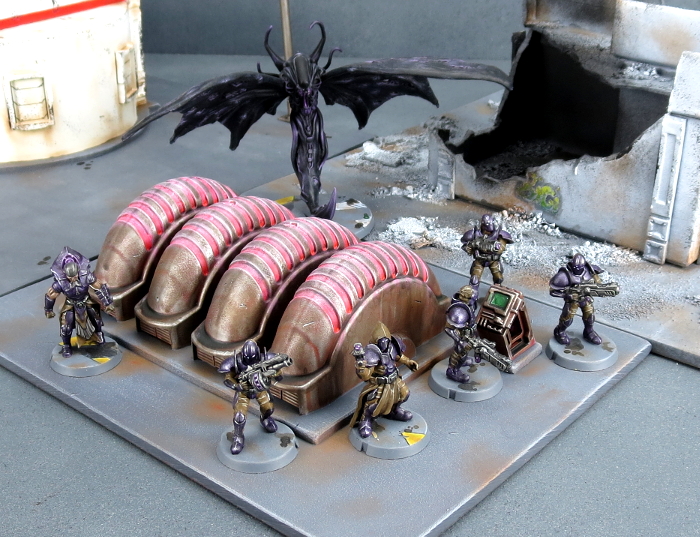
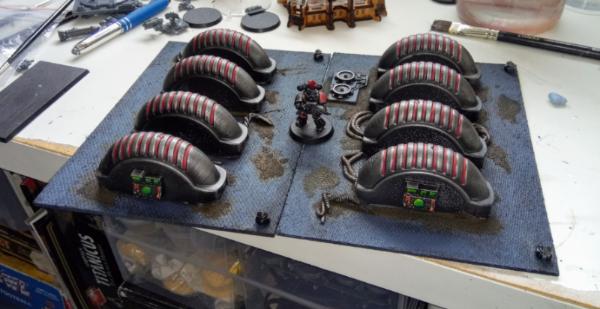
The four sections of dispenser were then glued down onto the base, with the 25mm base sections on each touching the matching section on the next.

I felt that the generator needed a control panel, so quickly threw one together using a console and two trapezoid windows from the terrain sprue, with a square of foamed PVC as a base.
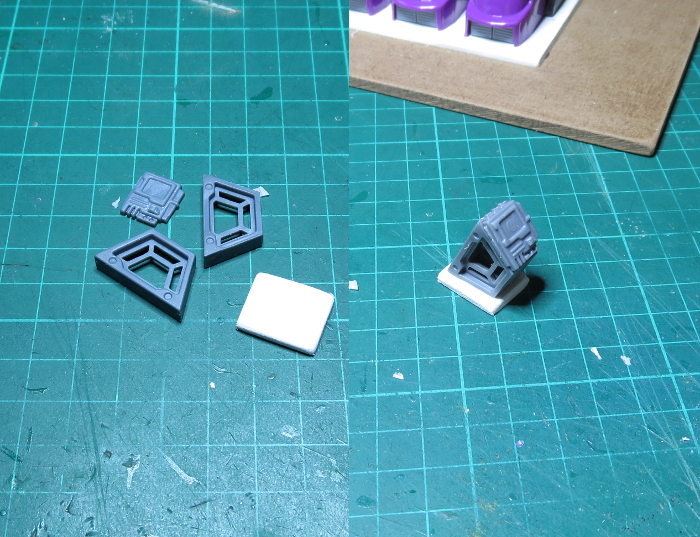
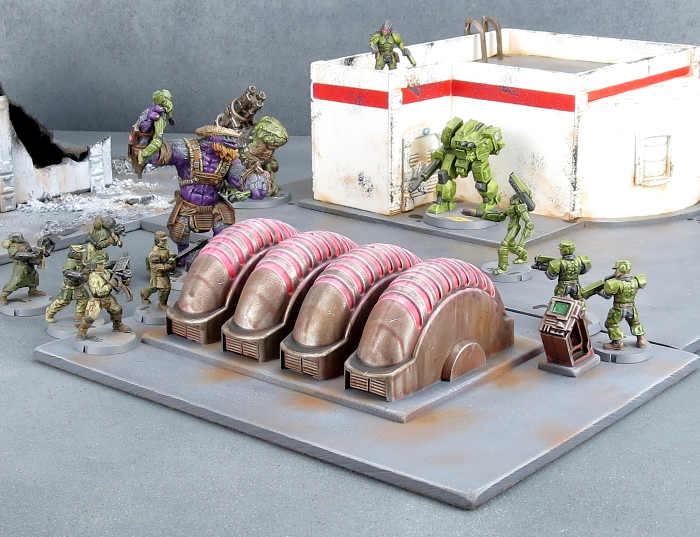
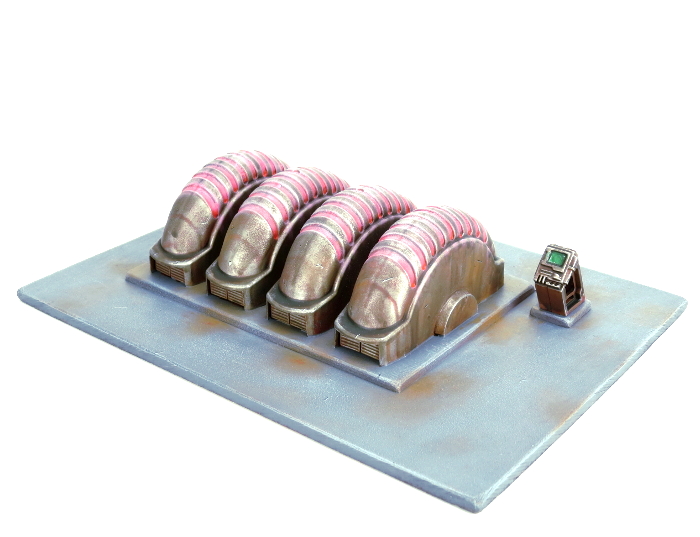
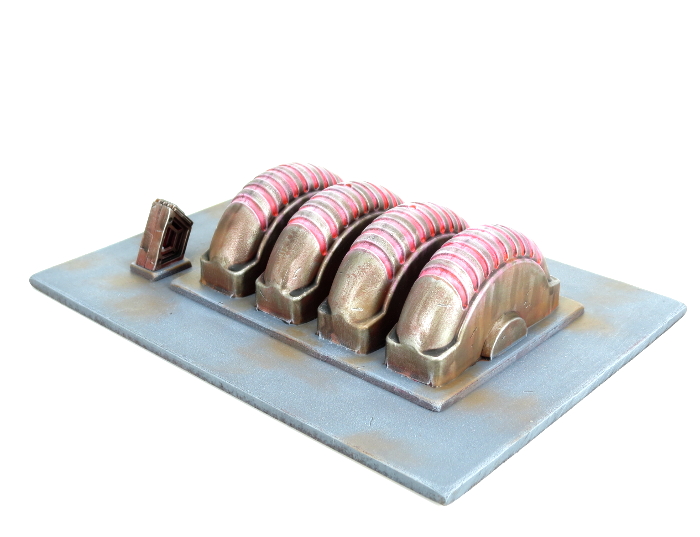
With that glued in place onto the masonite base, the generator was ready for some paint!
I painted it up using my normal weathered metal technique (which you can find in the tutorial
here).
To build your own generator, you should be able to find the bubblegum tape just about anywhere that sells bubblegum, and can pick up the Maelstrom's Edge terrain sprue along with the rest of the Maelstrom's Edge model range from the webstore
here.
As always, feel free to pop along and share your work, or ask any Maelstrom's Edge- or hobby-related questions on the
Comm Guild Facebook page!
For other Maelstrom's Edge modeling articles, including tutorials and walkthroughs of a wide range of different building and miniature projects, check out the article roundup
here.


 224th Astra Legion (main army)
 628th Praetorian Guard Cohort (wife's army)
 827th Auxilia Cohort (ad mech fun)
 825th Foderati Cohort (in the beginning army)
 1212th Foederati Cohort - Jokaero (cause I like apes with guns)