Switch Theme:

A better Ravenwing bike part 2 - actual progress  [RSS] Share on facebook Share on Twitter Submit to Reddit
»
Author Message
Advert


Forum adverts like this one are shown to any user who is not logged in. Join us by filling out a tiny 3 field form and you will get your own, free, dakka user account which gives a good range of benefits to you:
  • No adverts like this in the forums anymore.
  • Times and dates in your local timezone.
  • Full tracking of what you have read so you can skip to your first unread post, easily see what has changed since you last logged in, and easily see what is new at a glance.
  • Email notifications for threads you want to watch closely.
  • Being a part of the oldest wargaming community on the net.
If you are already a member then feel free to login now.


Made in gb
Dakka Veteran


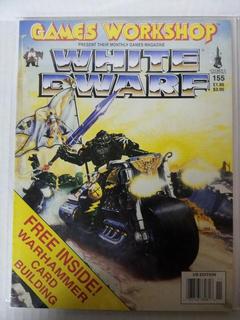
So, I actually made a start on making a Ravenwing bike inspired by the cover of White Dwarf 155.


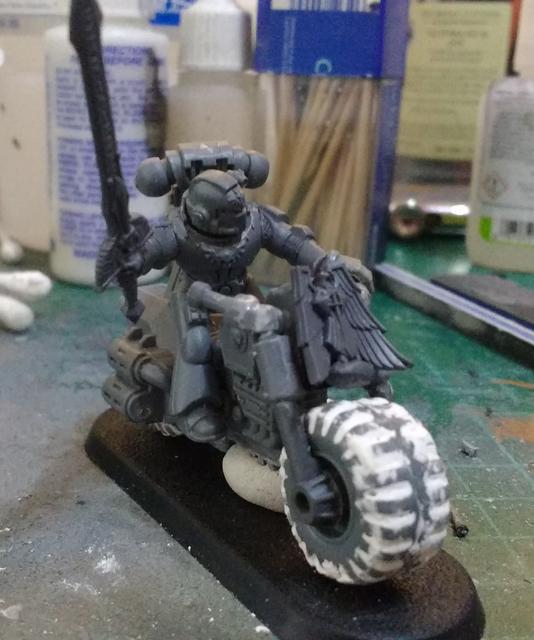
This is what I've got so far, some "nice" photos with the rider held together with some white tack...


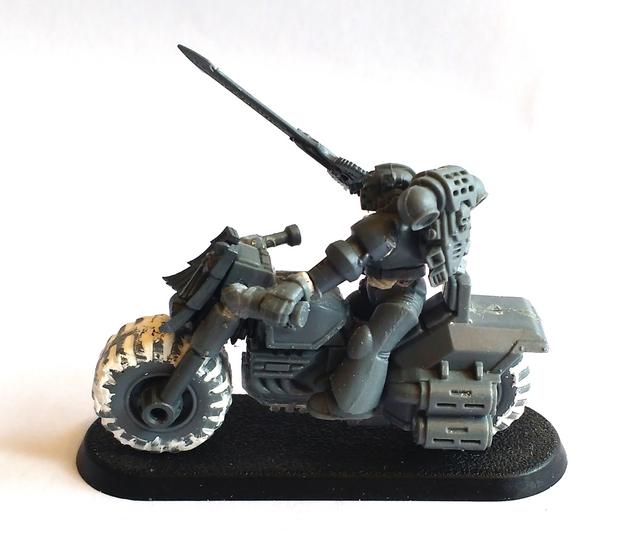
A bit of Tamiya extra thin and some superglue later...


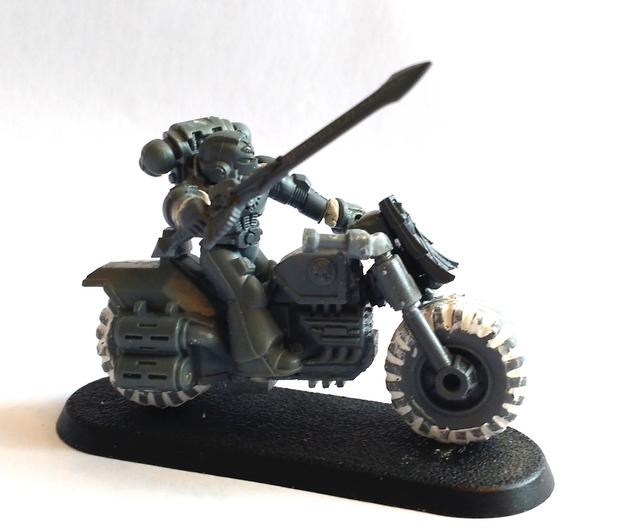
So, besides a few adjustments I may make, including possibly repositioning the head, I need to add the bolters (which I need to buy drum mags for) I need to do some filling on the rider, where the hand is angled to meet the handlebars. I need to do some filling between the bike "chassis" and the front fork assembly (I'm not 100% happy with that area though, it might have turned out better if I had used a razor saw, but I don't have one). And I need to finish off filling and smoothing off the wheels, to get that "slick" tyre look (that white stuff you see on the wheels is Perfect Plastic Putty by the way, couple more layers, maybe even one, a sand and the tyres should look like "slicks").

Then I need to make and fit, in between the front wheels and the riders feet, that lump of an engine and exhaust manifold you see in the cover art, and run the exhaust pipe under the riders feet. That will be an interesting task, at least I can use the existing engine and pipes as an attachment point and just build up onto and around them. I'd like to replace the two exhaust pipe ends with a single big pipe on each side as per the cover art, but I'm not so sure I can do it properly. I may play it safe and just go with what's there already as there's a lot to remove and if it goes wrong it'll ruin the entire model!!!

I really wish I could have found a smaller Ravenwing icon for the front, but the one on there at the moment, despite looking oversized imho, is covering a few sins where I hacked off and chopped up the front fork assembly on the Ravenwing bike in order to attach the front forks from a Chaos bike...

The riders pose also looked more like the cover art when he was held together by blue tack. I might try fiddling with his position...

The bolt guns on the cover art look shorter than normal so I'm wondering if I could get away with using bolt pistols with drum mags...

Will be doing another 2 after this one is finished as I bought a 2nd hand squadron of 3, worked out cheaper for parts that way, but I'll position the riders differently, I'll do the 2nd as per the cover art (bolt pistol being waved in the air), no idea what to do for the 3rd (I'm open to suggestions on that one)...

This message was edited 22 times. Last update was at 2019/03/30 10:12:26


Made in us
Vlad_the_Rotten


Third one pulling his body close to the bike to reduce drag, suggesting high speed? Might not work with a marine's armor.
   
Made in gb
Dakka Veteran


Yeah, probably wouldn't work given the nature of the model. Either that or would require far too much surgery. Good idea though. Given that I'm moving the foot rests back, as per the first bike in the cover art, I may still try to keep the position of the 3rd rider in a normal pose, i.e. both hands on the handlebars.

This message was edited 1 time. Last update was at 2019/03/31 06:25:05


Made in us
Crushing Black Templar Crusader Pilot


London

A "stock pose" with your custom bike could look quite good. And would provide a nice reference point as against the straight GW version


Relapse wrote:
Baron, don't forget to talk about the SEALs and Marines you habitually beat up on 2 and 3 at a time, as you PM'd me about.
nareik wrote:
Perhaps it is a lube issue, seems obvious now.
 
   
Made in gb
Dakka Veteran


Yes, I guess it would.

I'm wondering if I should make the riders on the other 2 bikes sit down more. I know the first one looks as though he's standing up rather than sitting in the seat, but I'm not sure the other two should be in the same pose, especially if I'm making one hold both handlebars - that just won't look right.

In that cover art the 2nd bike rider looks as though he's seated a bit more normally, as his torso appears to be lower in relation to the front of the bike. So, for the other 2 riders I would probably need to bend the legs at the knee, as with the position of the foot rests being moved back, the rider can only currently be standing up rather than sitting on the seat properly.

However I have no idea how to bend the legs at the knees properly, easily, and safely (i.e. without ruining parts of the legs in that area). I don't think cutting a V shape behind the knee and then cutting down behind the knee pad from the top is as easy as it sounds, even with a craft knife!

This message was edited 7 times. Last update was at 2019/04/01 12:52:38


Forum Index » Painting & Modeling
Go to: