Forum adverts like this one are shown to any user who is not logged in. Join us by filling out a tiny 3 field form and you will get your own, free, dakka user account which gives a good range of benefits to you:
No adverts like this in the forums anymore.
Times and dates in your local timezone.
Full tracking of what you have read so you can skip to your first unread post, easily see what has changed since you last logged in, and easily see what is new at a glance.
Email notifications for threads you want to watch closely.
Being a part of the oldest wargaming community on the net.
If you are already a member then feel free to login now.
My unprecedented period of productivity continues unabated.
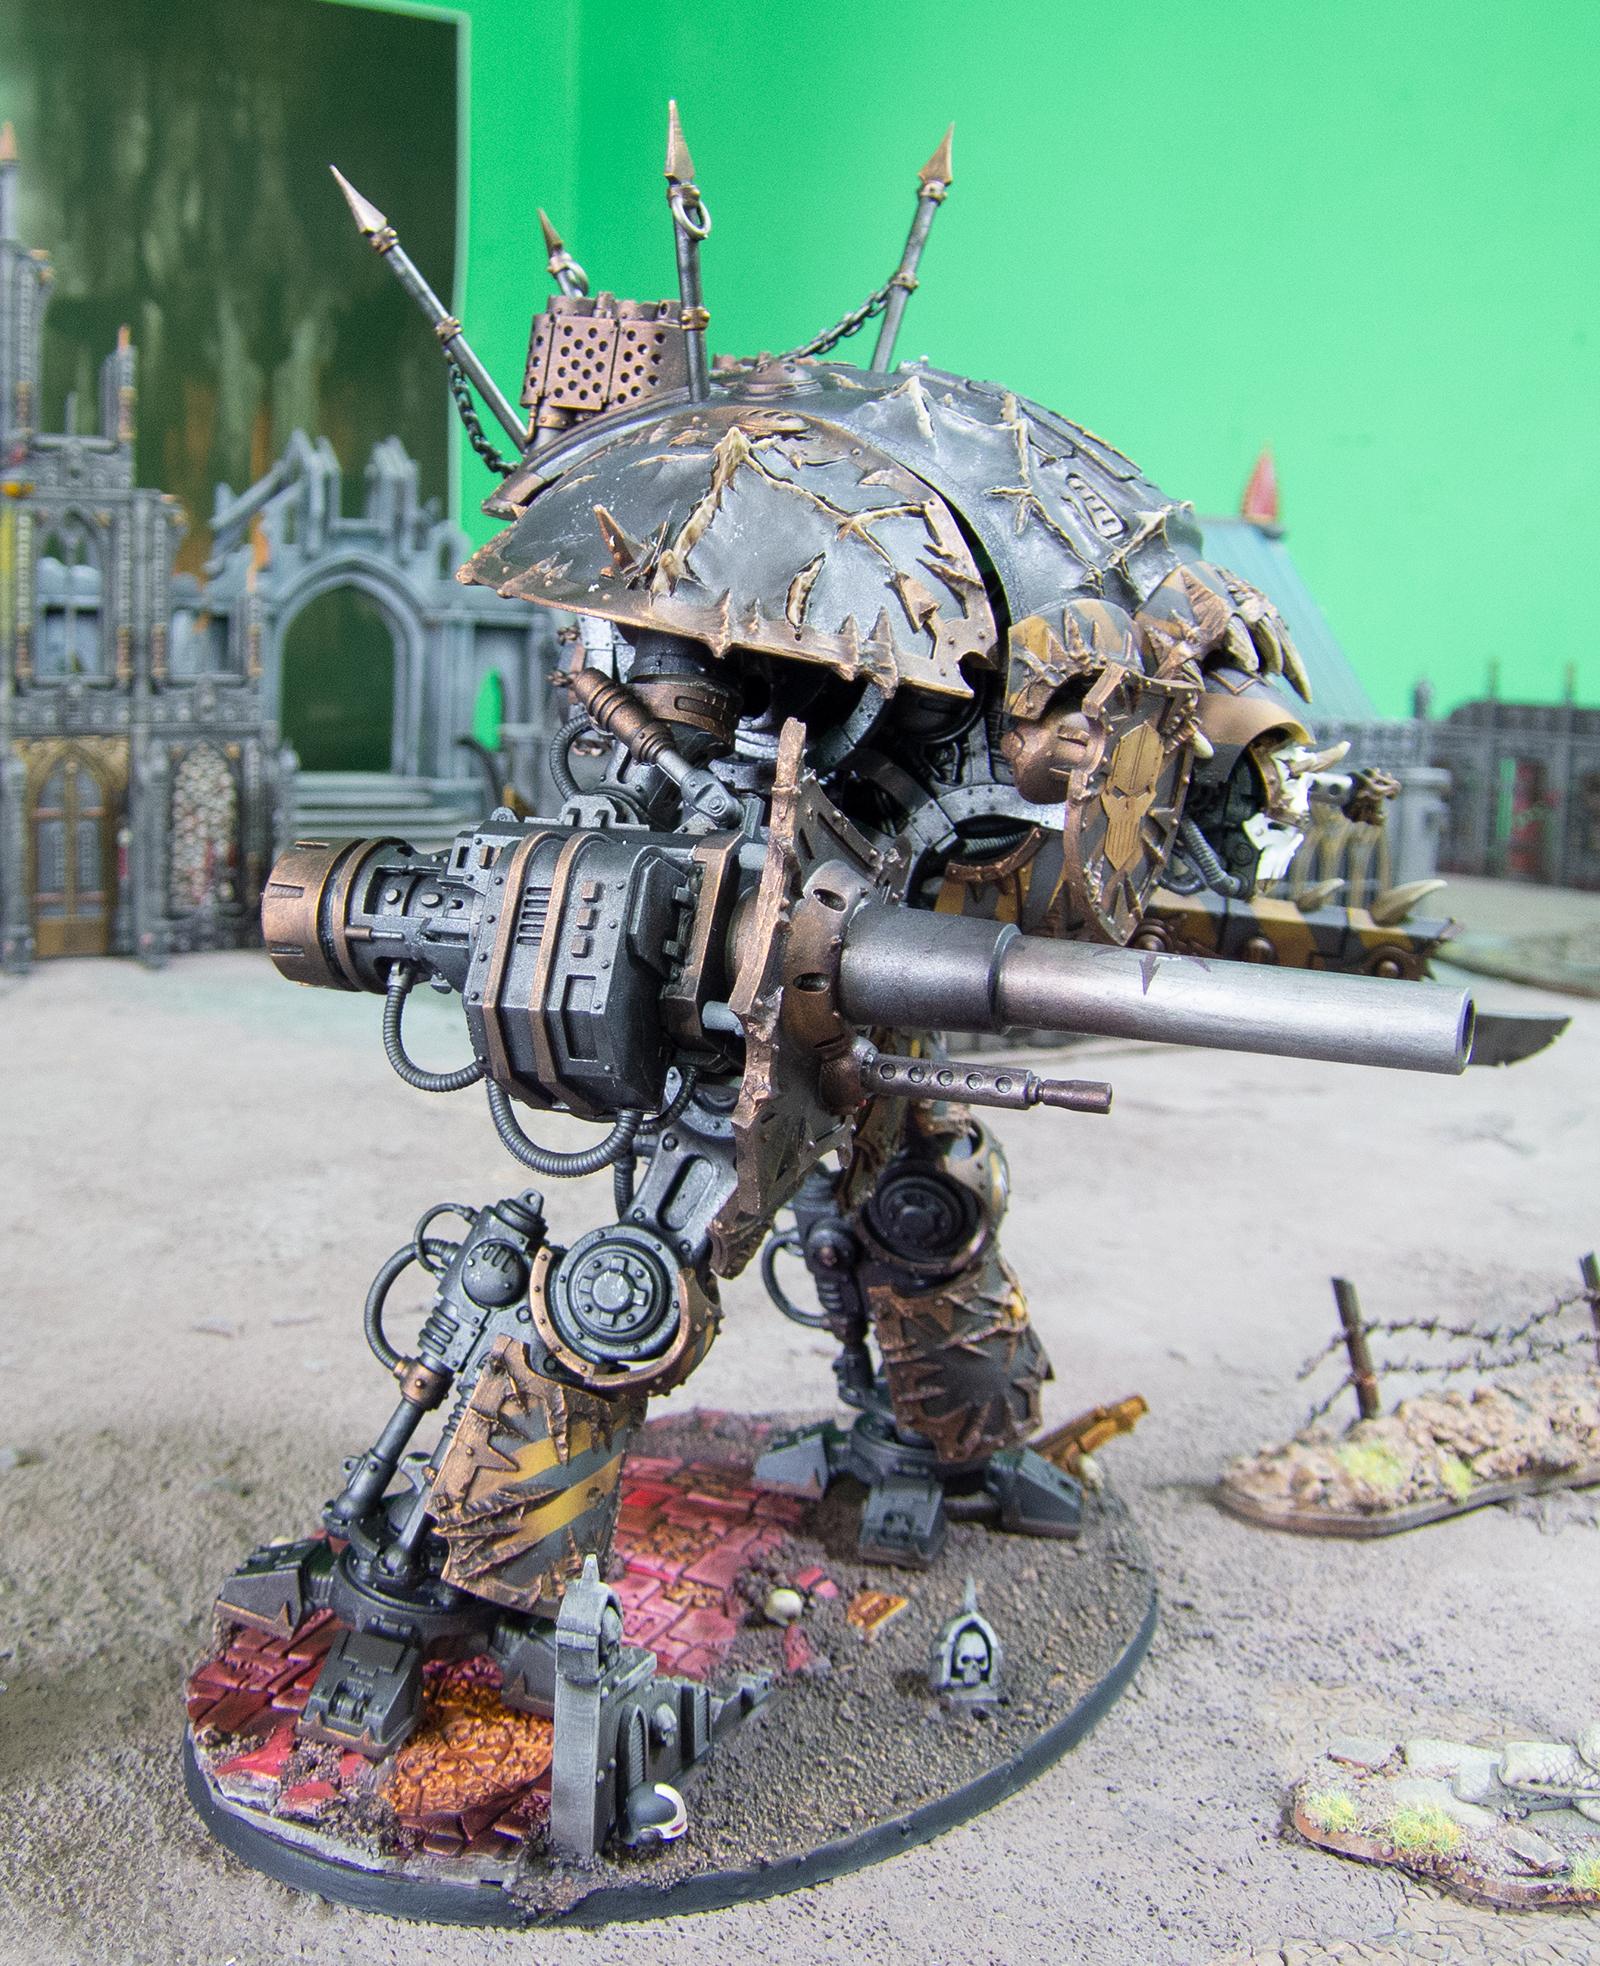
Today, I have my Chaos Knight. There are newer ones in plastic, I think? But this is the older one, the first Chaos one.
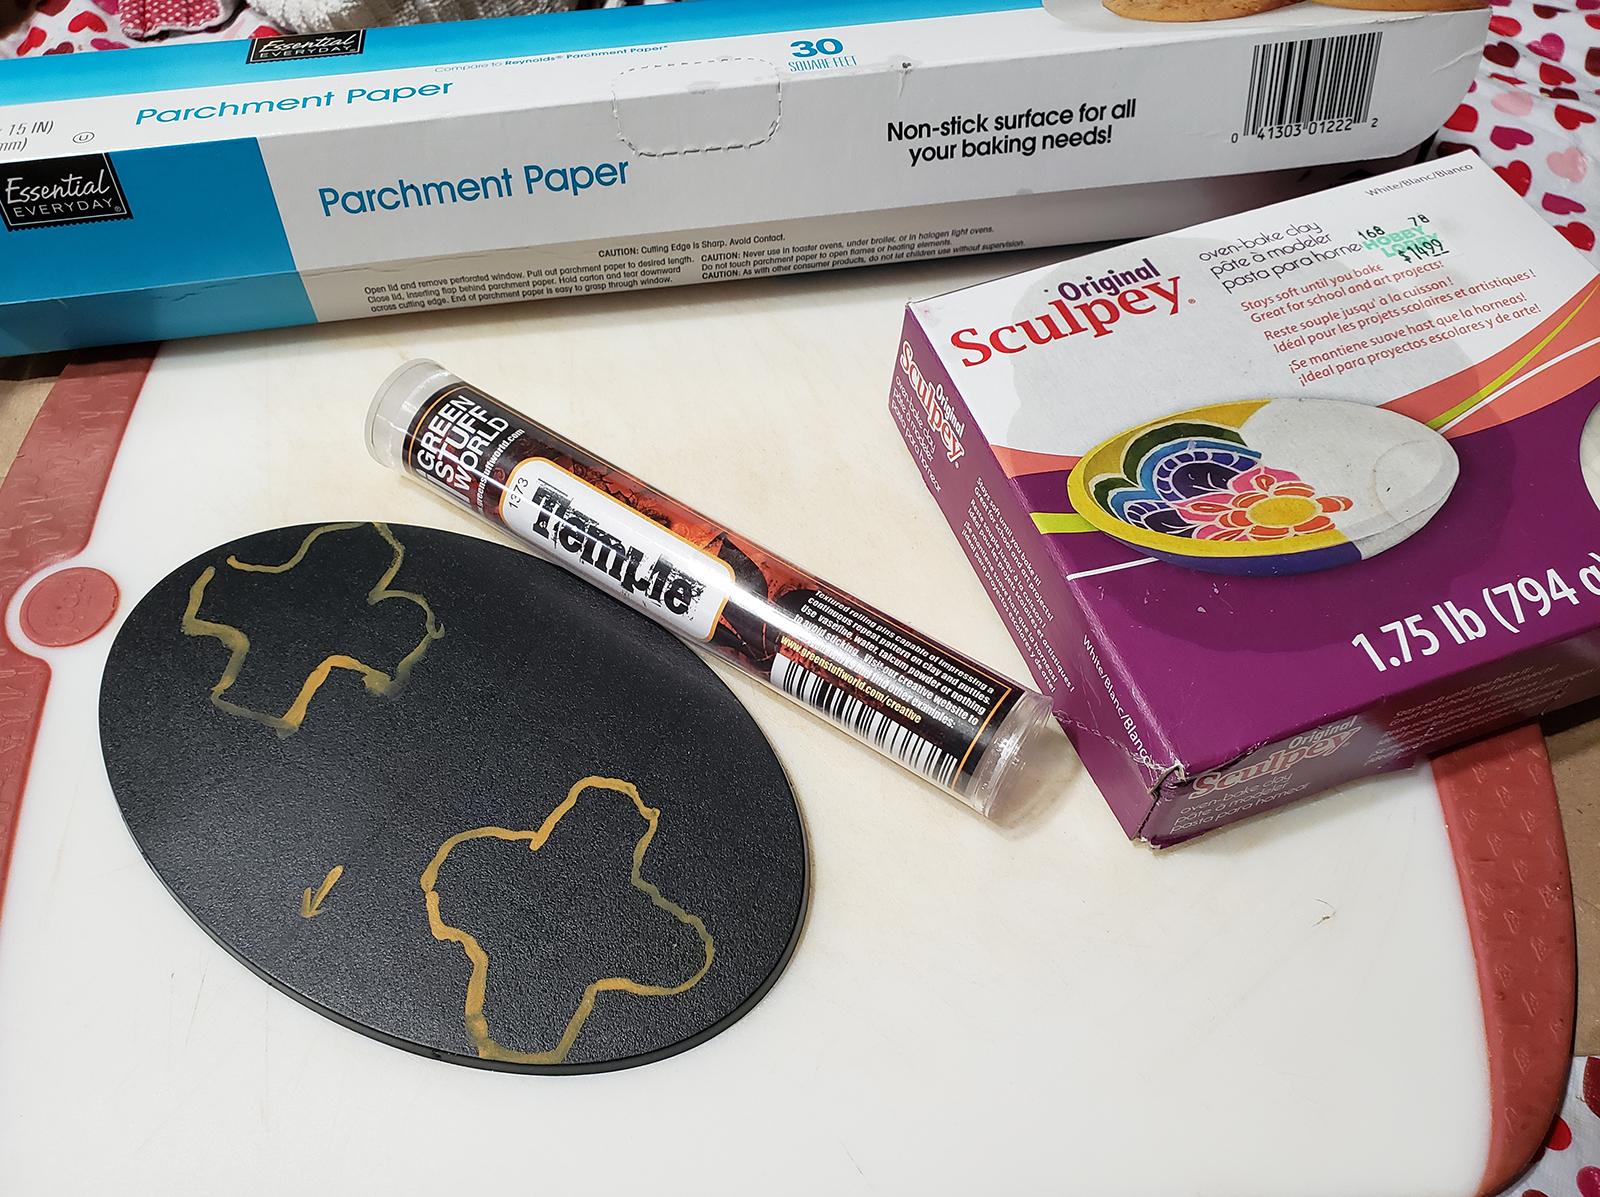
First, here is a block of how I did the base and the spikes - I really like the spikes and chains on the newer kits and wanted to recreate them - which you can skip if you just want to see the Knight.
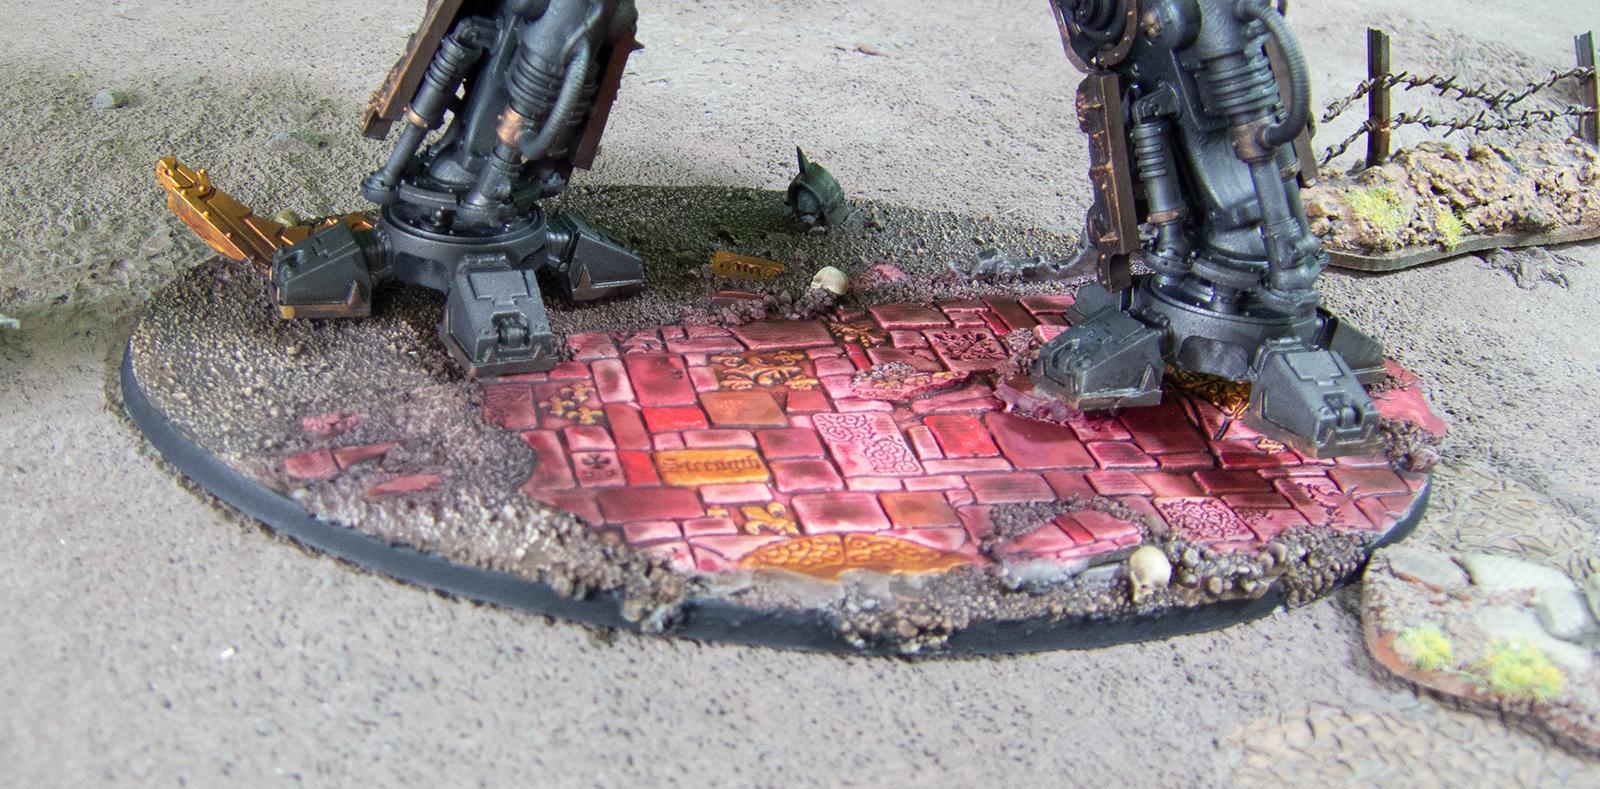
The base:
Spoiler:
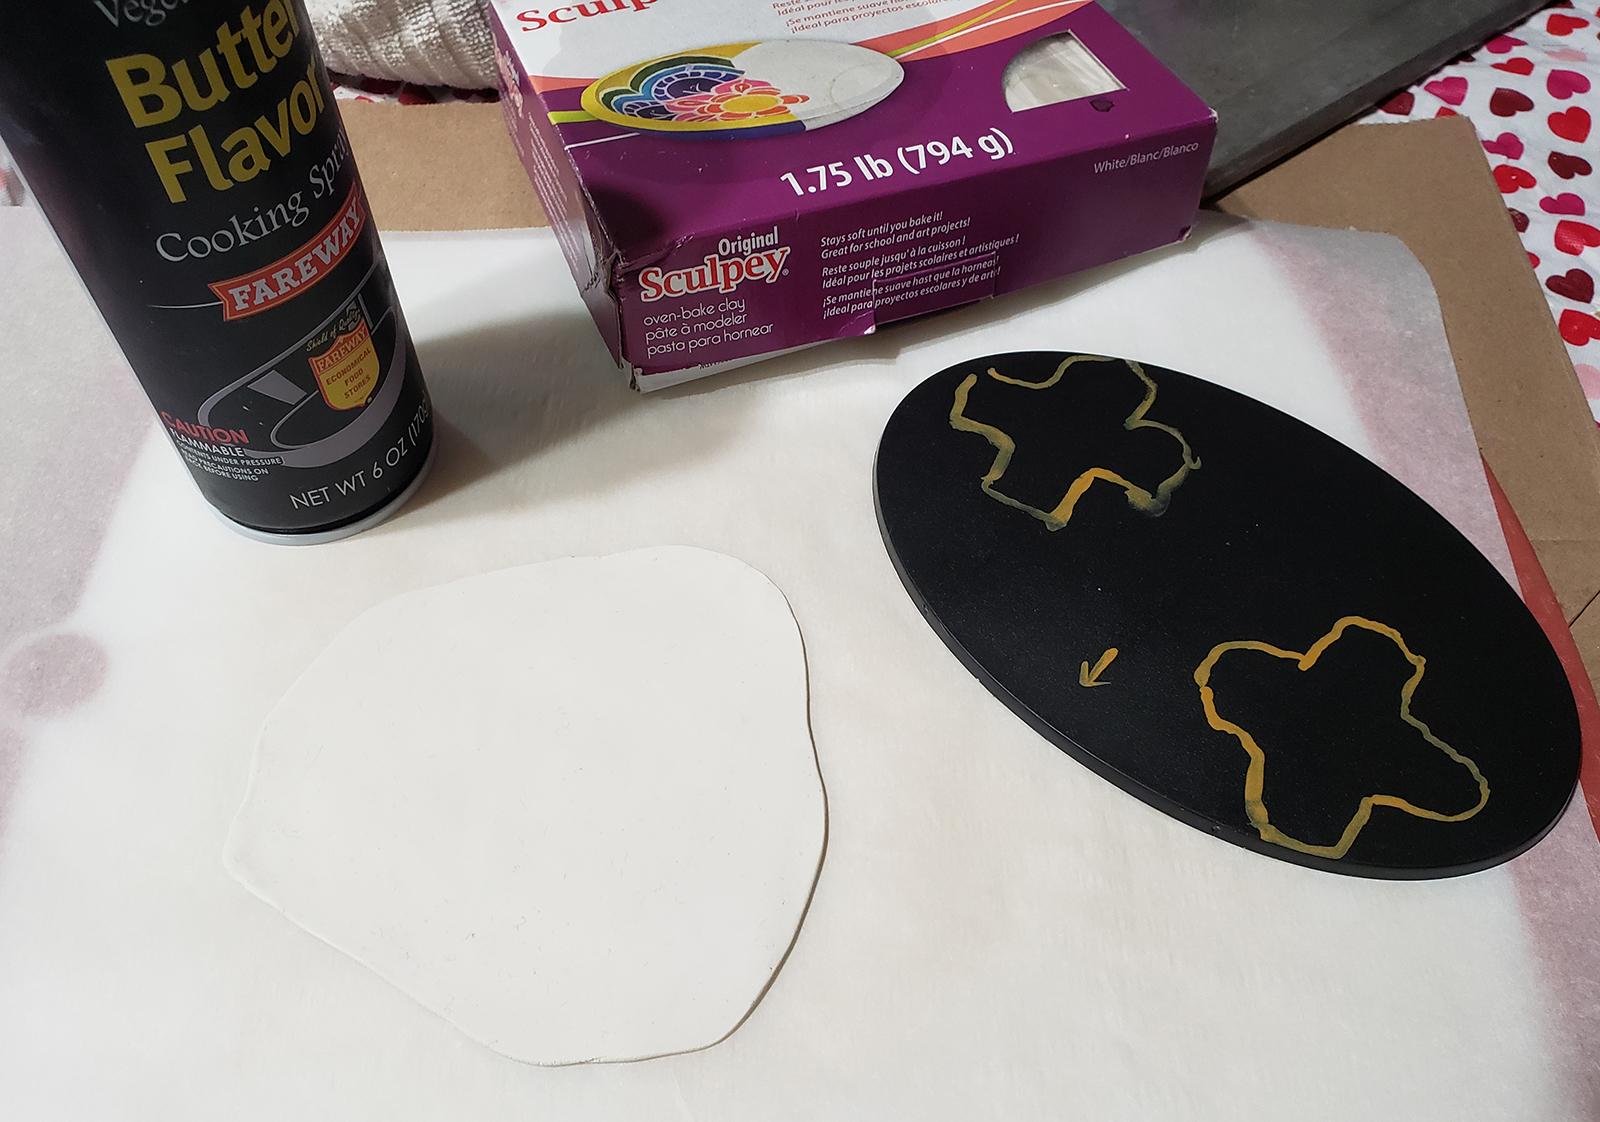
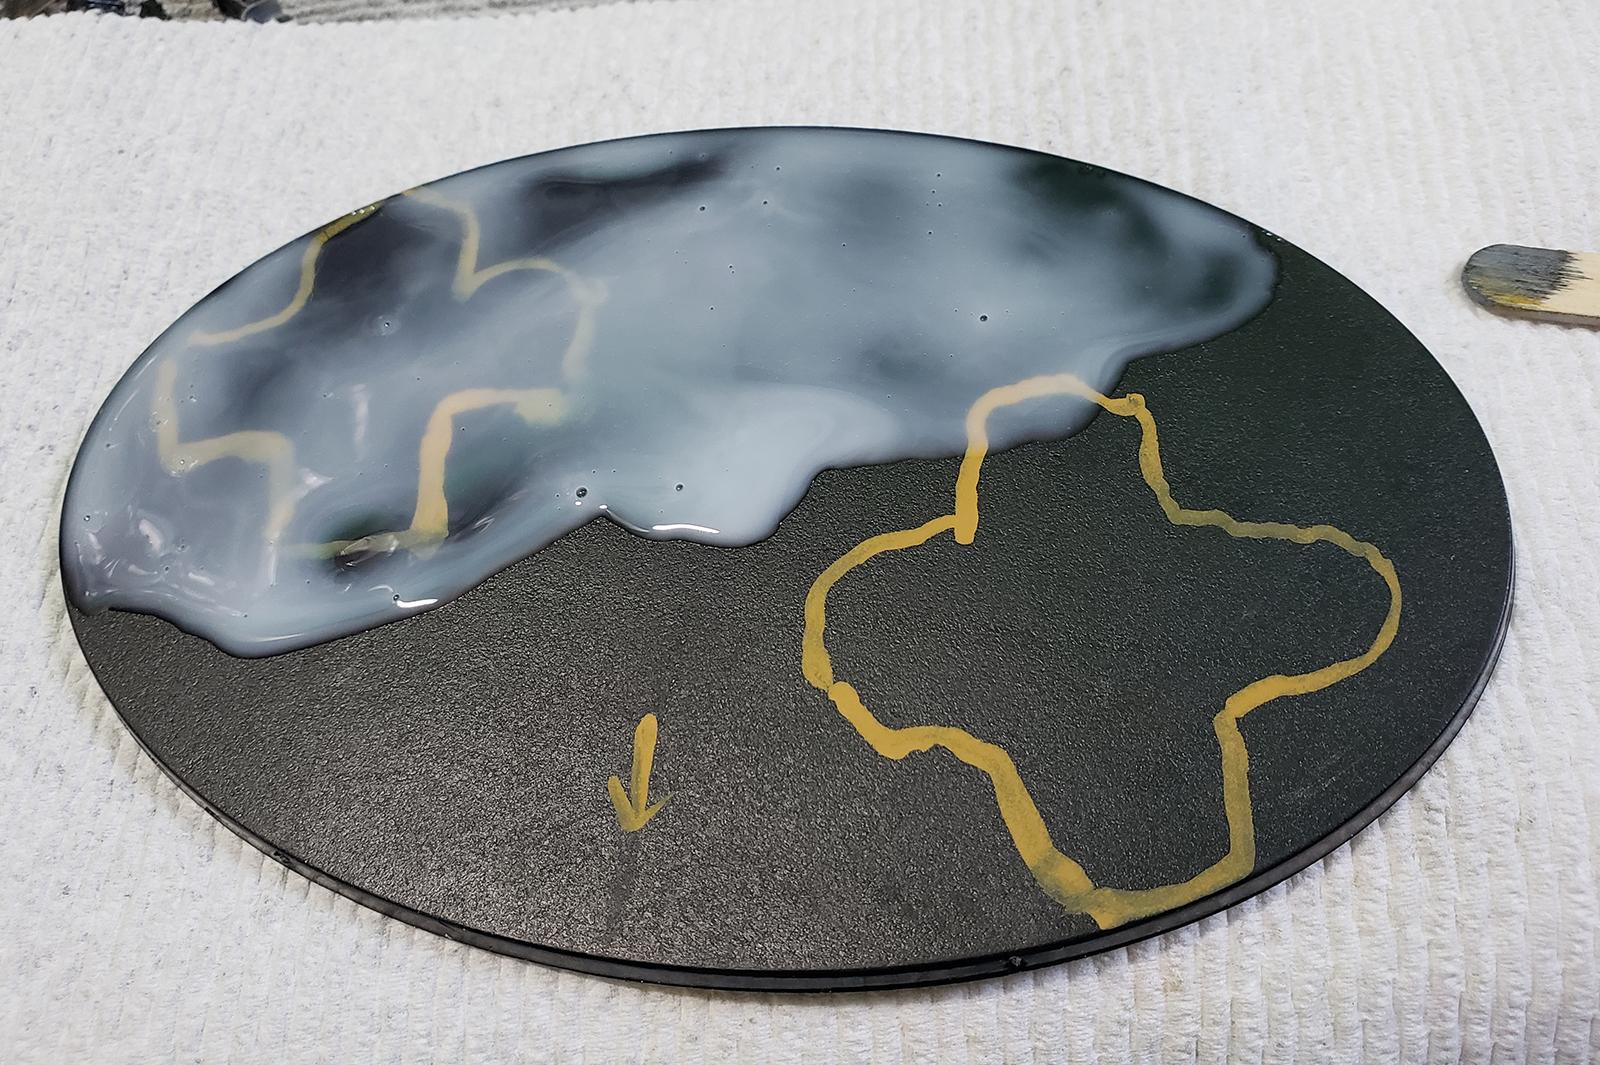
I painted a rough orientation of where the Knight would be standing so I knew where to put terrain stuff.
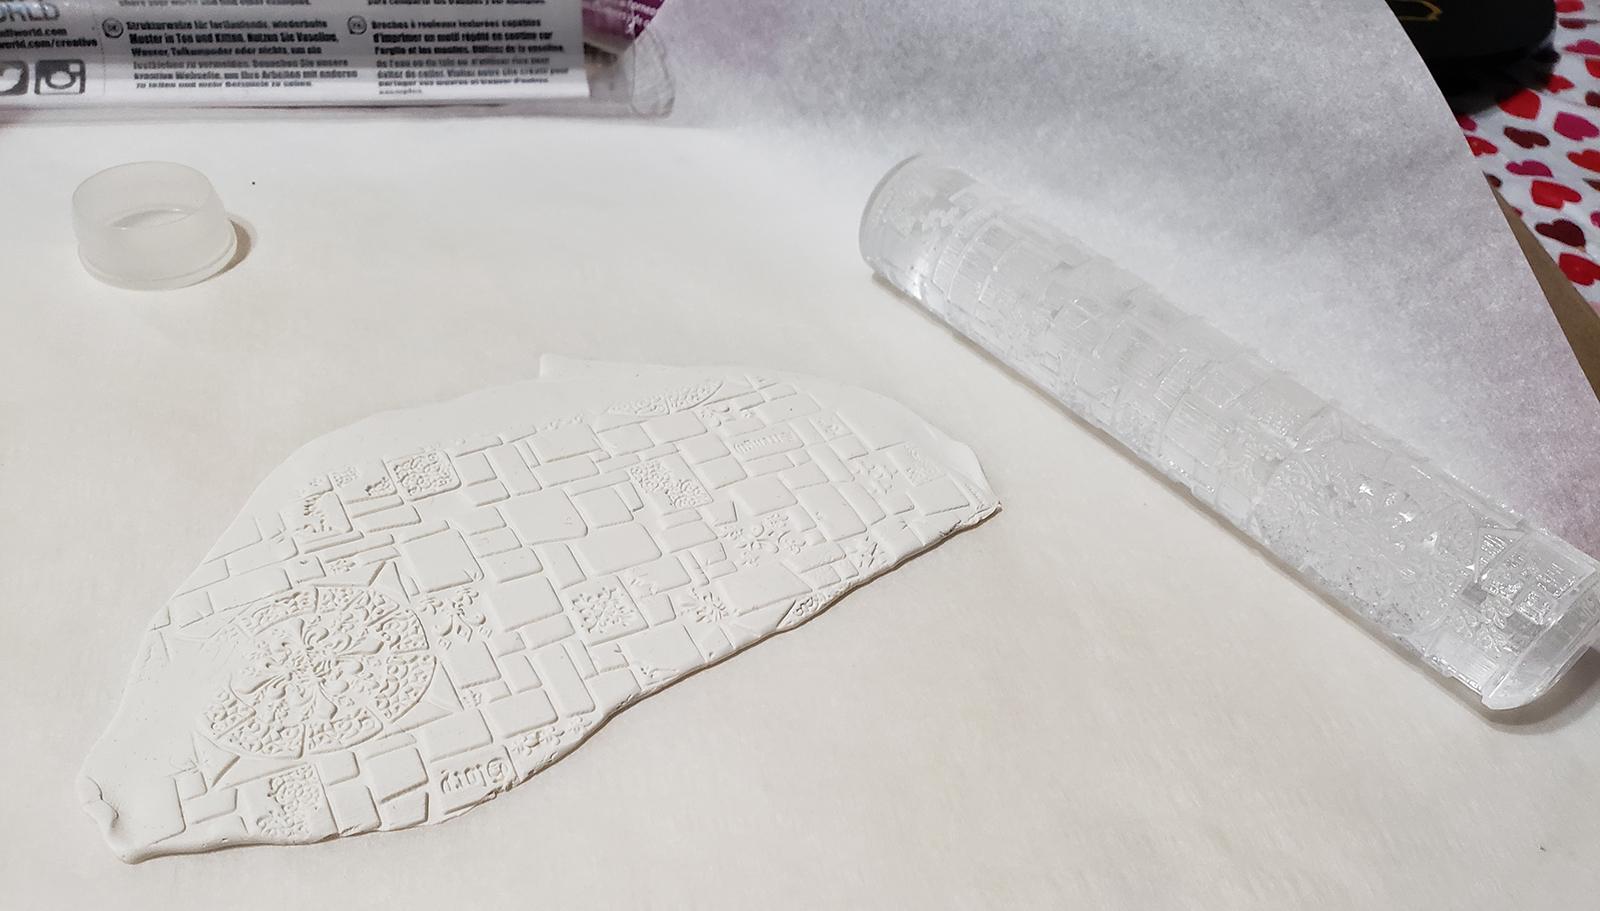
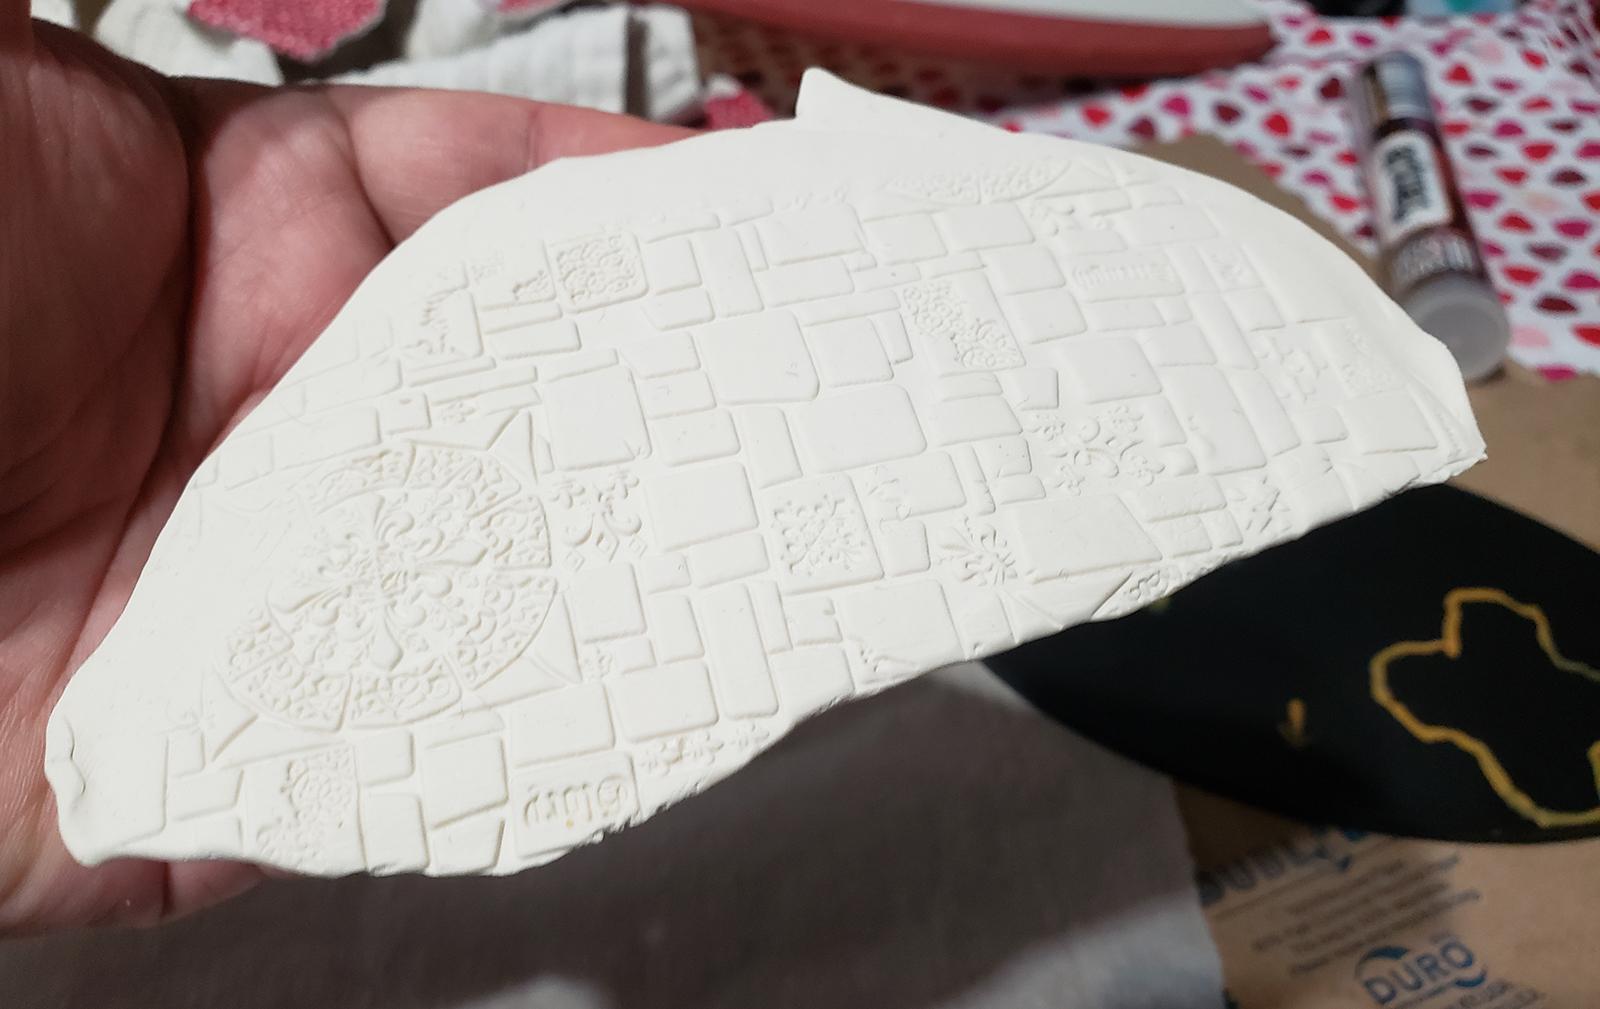
The butter-flavored cooking spay wasn't really used in the base production, per se: I used it as a roller to roll out the clay. I don't want to use my food roller for clay because it's wooden, and I don;t know what is in the Sculpey but I bet you are not supposed to eat it.
Here it is after baking at 275 degrees F for 20 minutes.
White glue, roughly to shape.
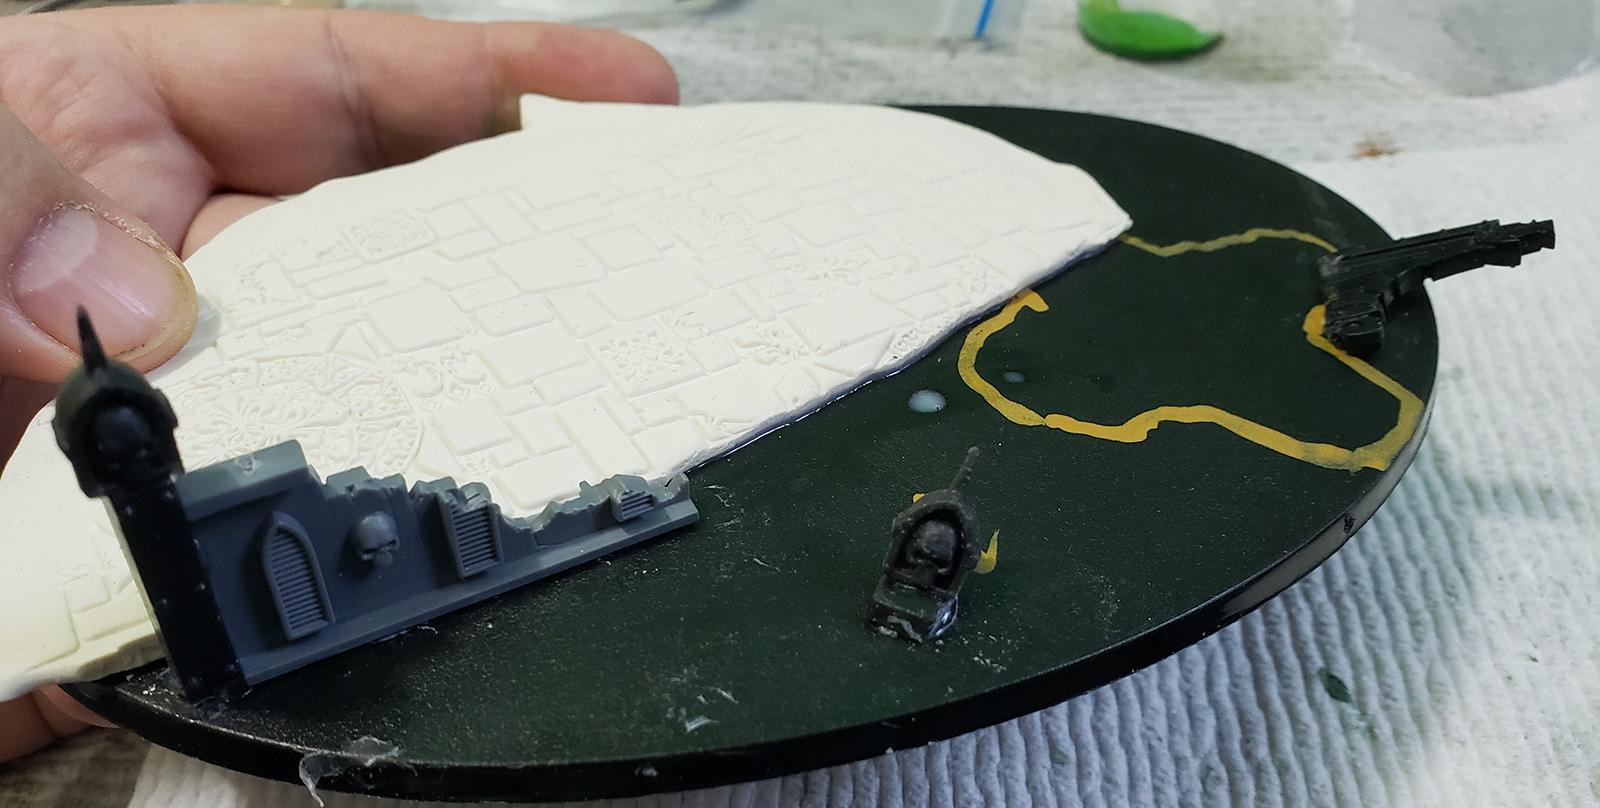
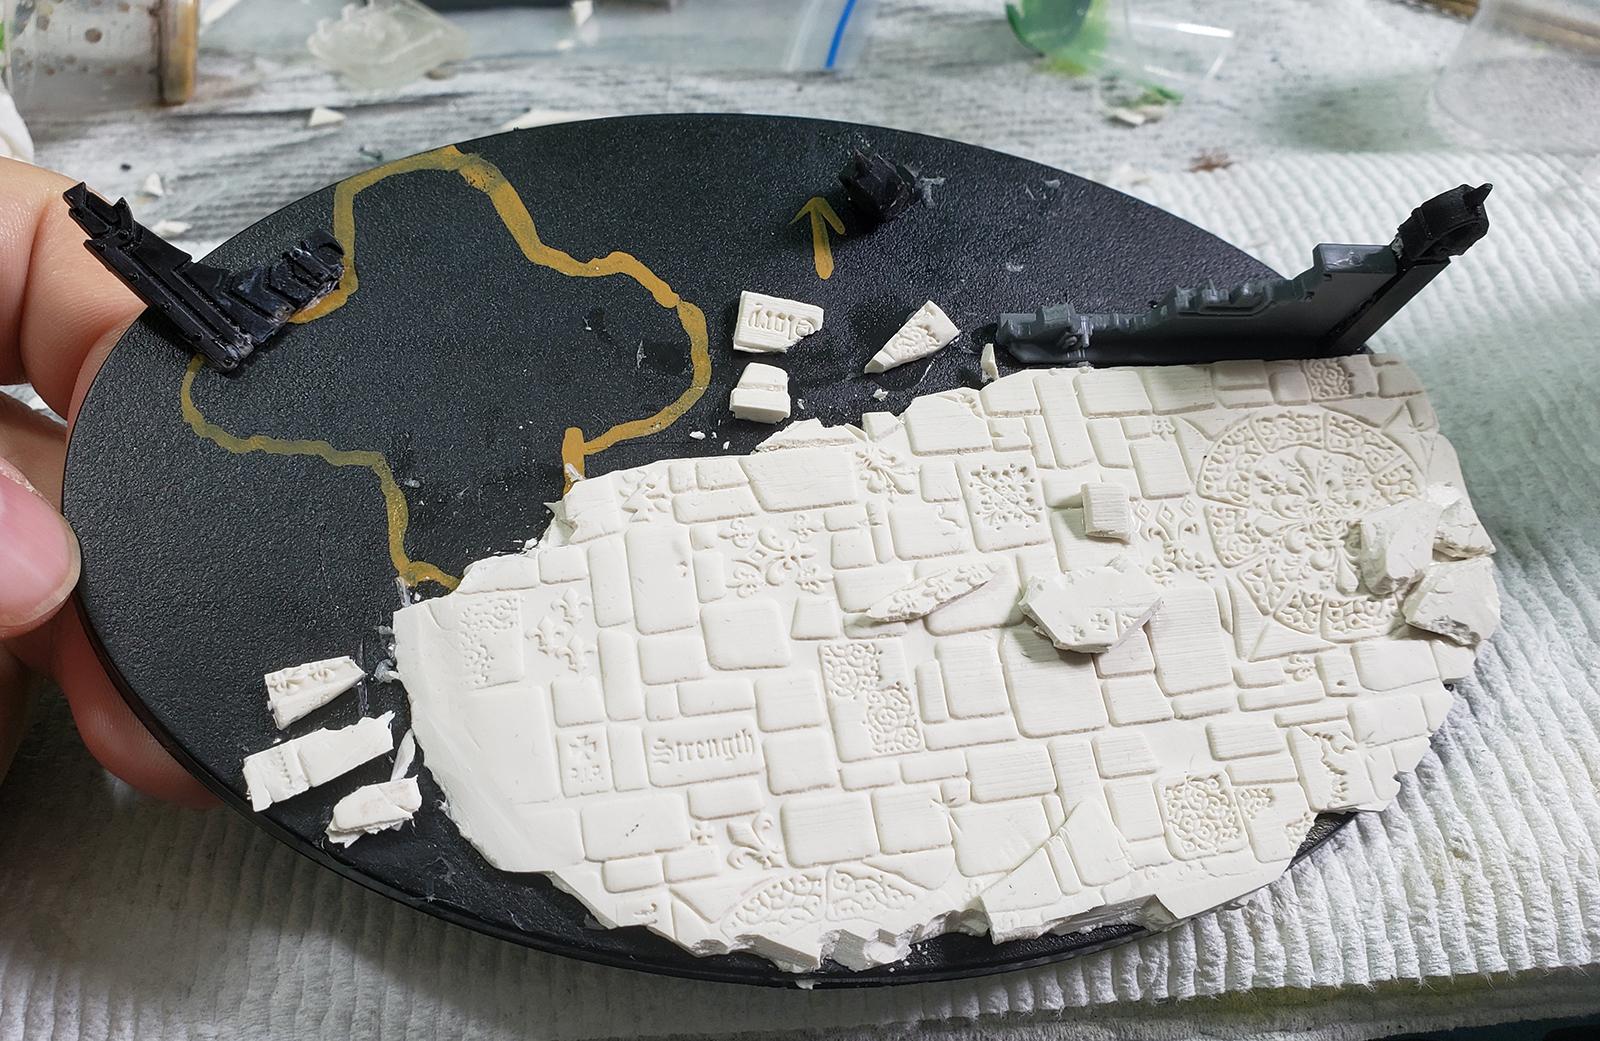
Glued onto the base. I started trimming away the edges of the clay basing, and added in some scenery effects from my bits box.
I have also used the trimmings from fitting it to the base to make some standalone bricks. I wish I had done more of this.
I used some of the scrap to build up a spot for the Knight to stand on.
Filling it out with some play sand.
Unfortunately, I got pretty hot to finish this, and stopped taking pictures at this point.
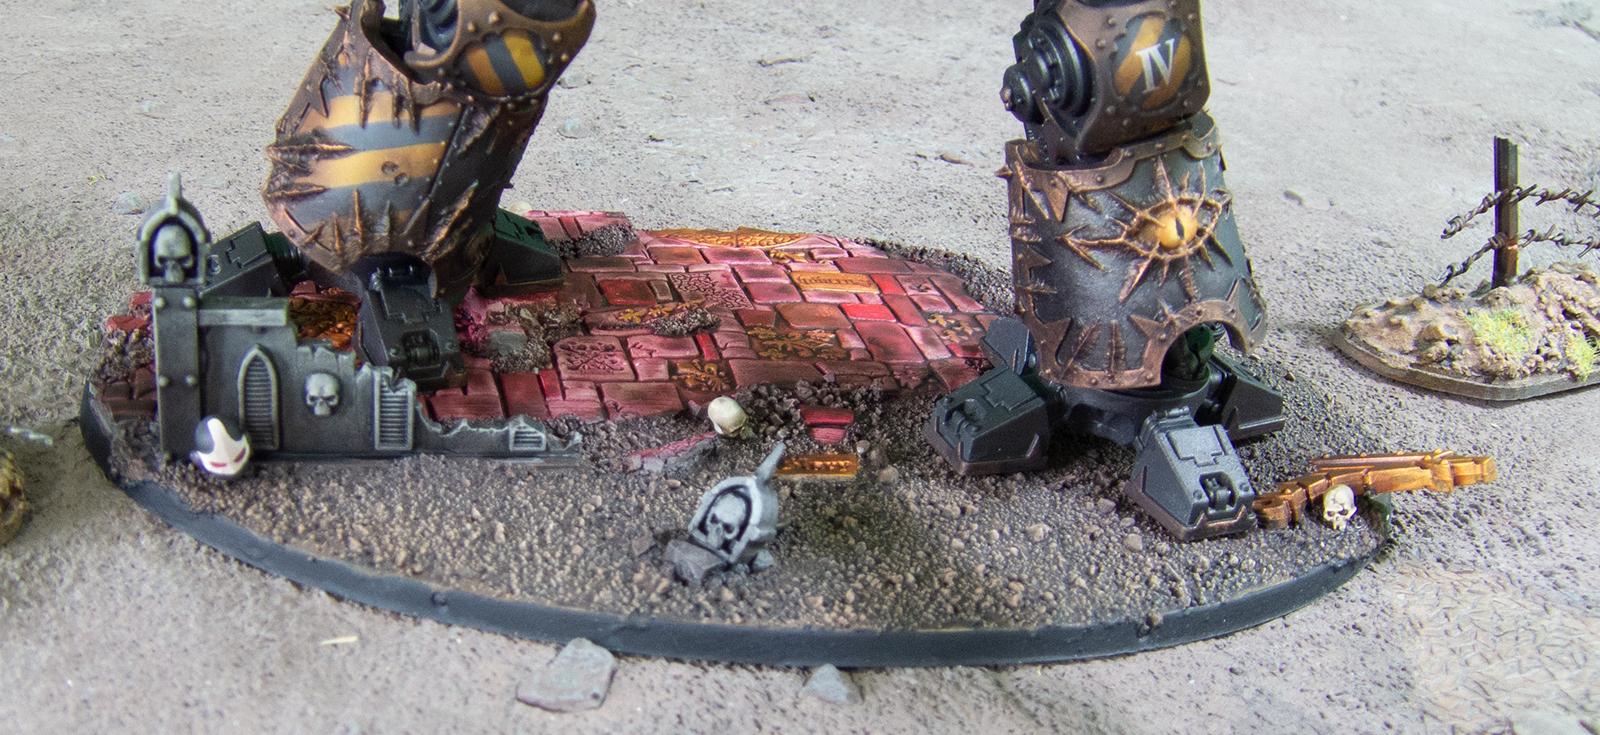
I painted the sand in my usual colors with craft paint, and I did the clay basing part with minitaire ghost tints red. Then I picked out some individual bricks for darker tones, and washed them with AP red, then picked out some accents in gold.
I also added some skulls and some 3D printed Sororitas helmets - I don't have Sisters helmets to use as bits like that, yet.
Finished base:
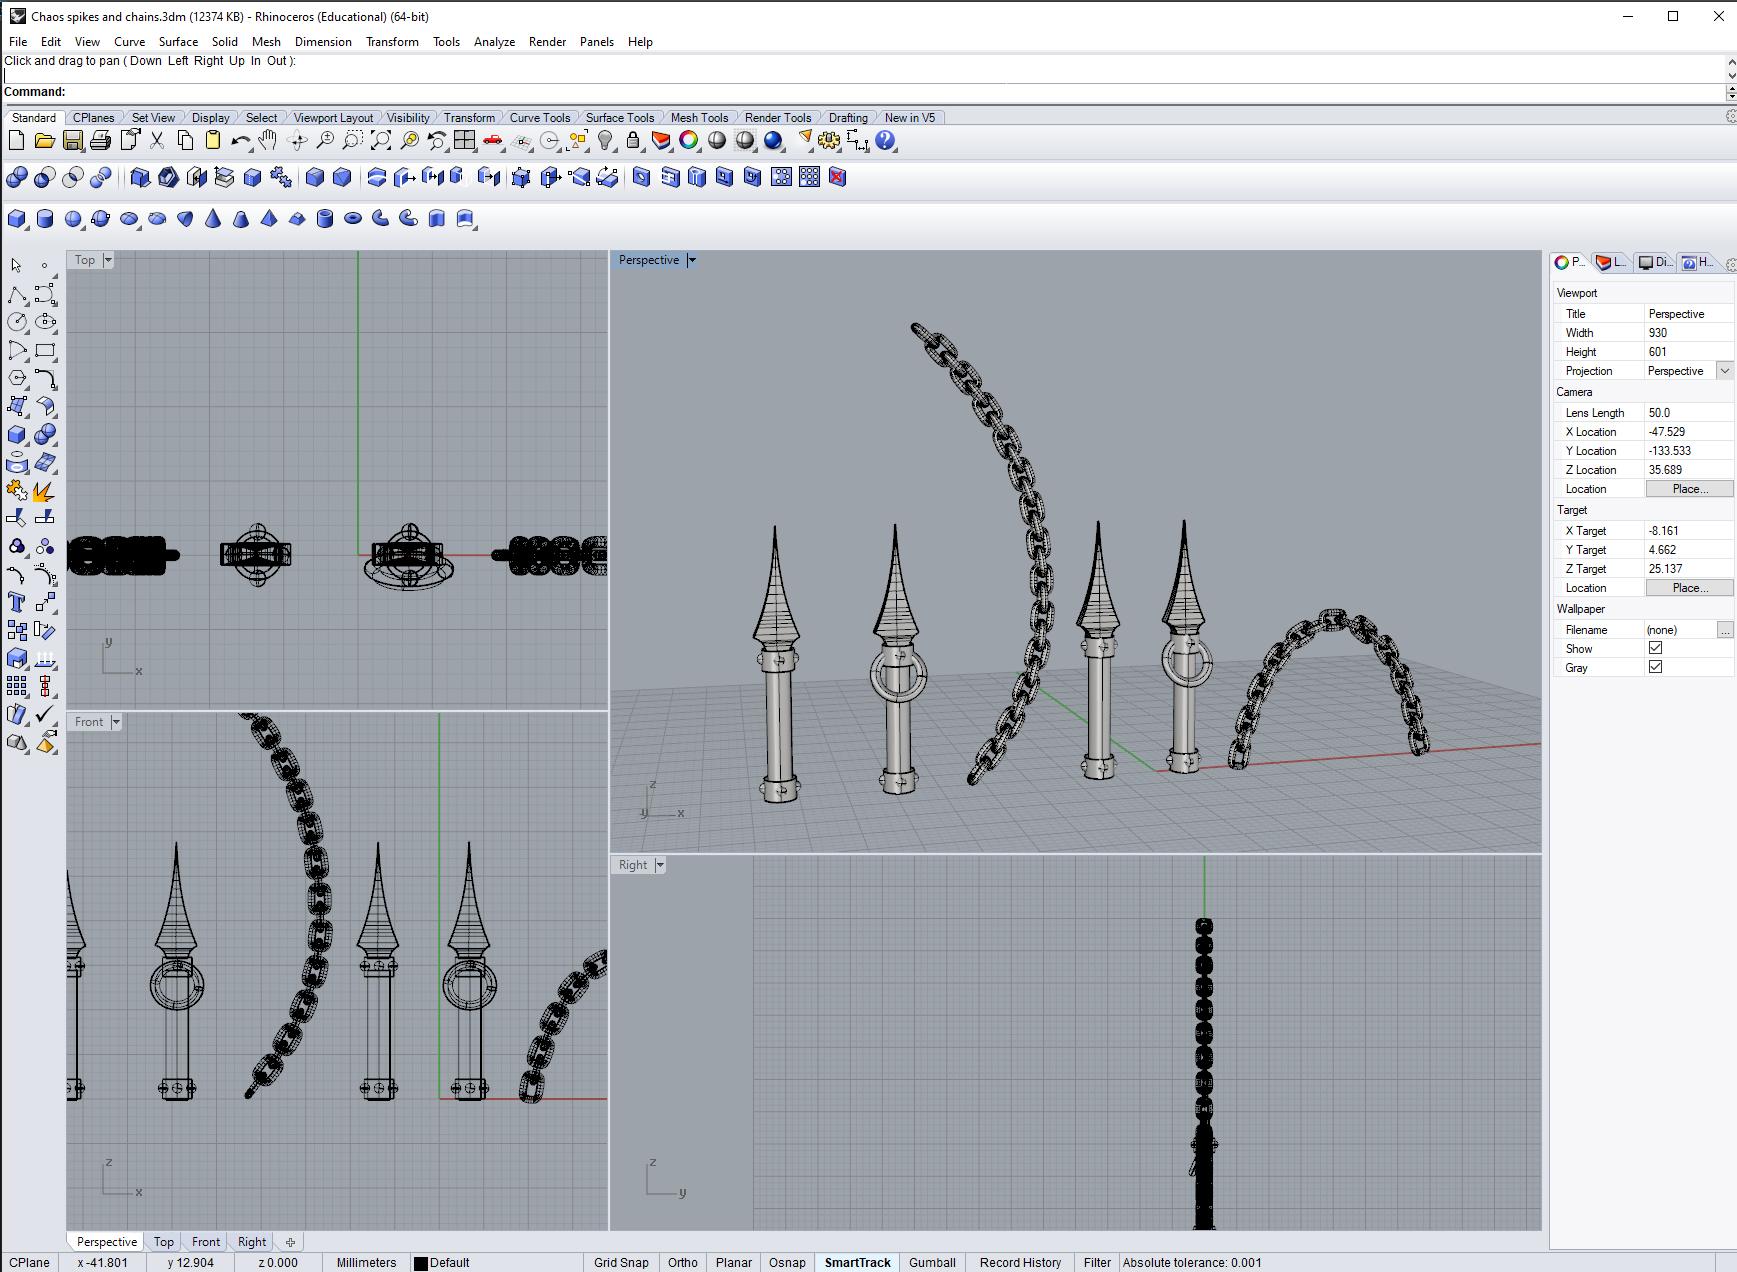
The spikes and chains:
Spoiler:
I designed them in Rhino 3D. I anm quite pleased with how the chains came out; I had never designed them before. I basically just creates the links by making a curve, doing a pipe around the curve, copy-pasting it, flipping it sideways and up to make 2 links - and this is the part I had not done before - doing an array around a curve to spawn the rest of the links around said curve. I had to reposition a few but it was nearly perfect on the first go.
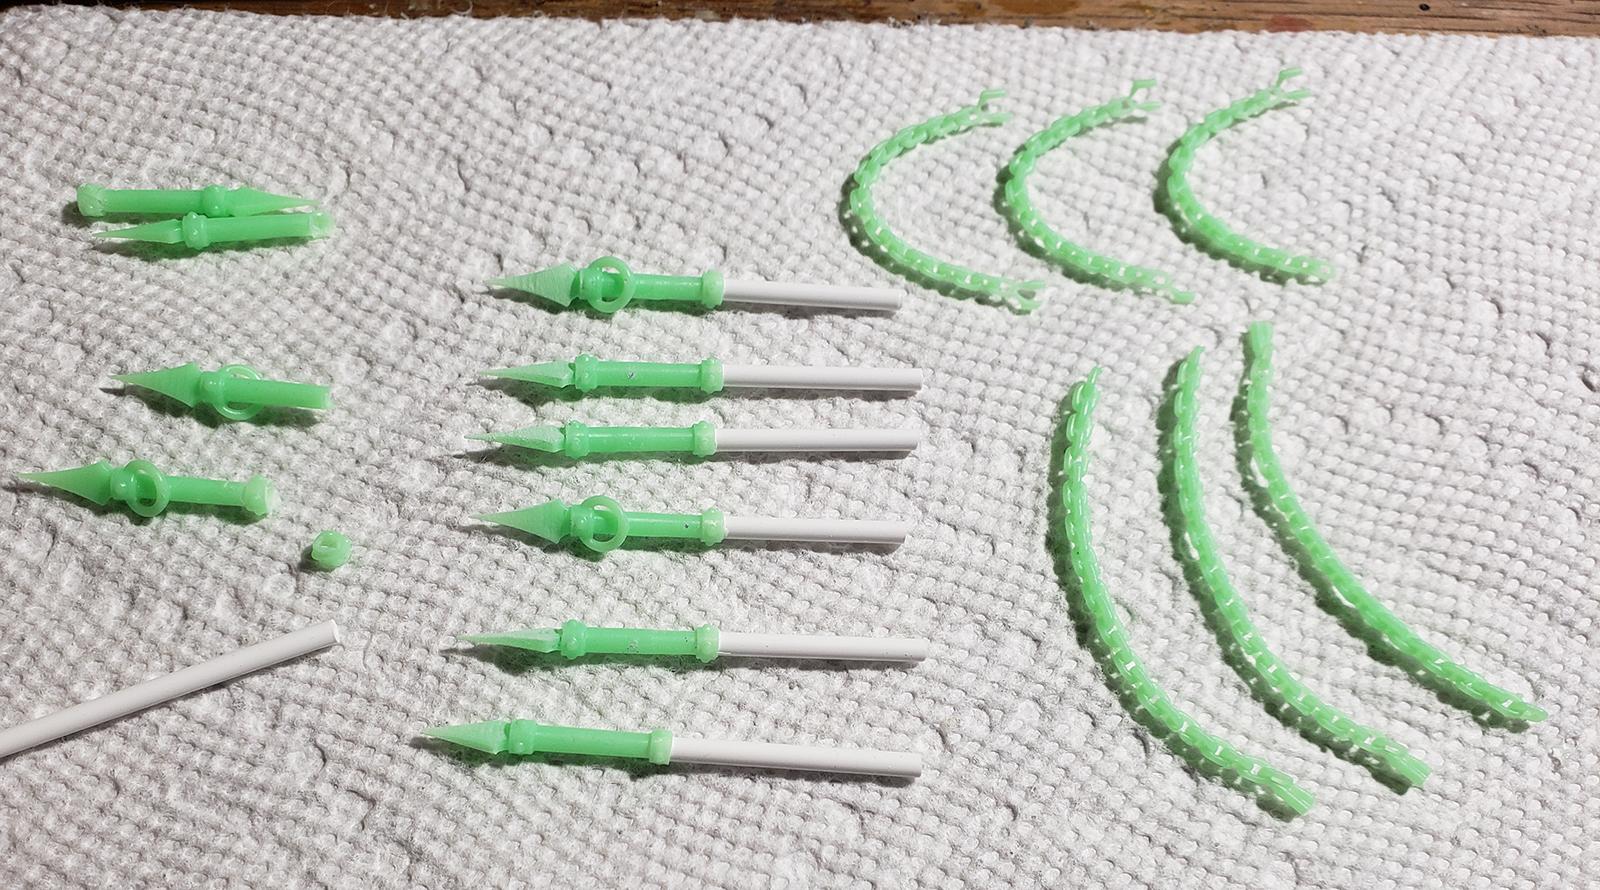
The fresh prints curing in UV. I used this ghastly green resin - Anycubic Eco Green - because as ugly as it is, it prints very well and is also fairly flexible after printing.
The finished spikes. I designed the spikes so that I could drill that little.... garter thing and extend them with 3/32 styrene, just as you see here, as I wanted to be able to tweak the height easily.
I also did sand down those layer lines you see on some of the spikes before painting.
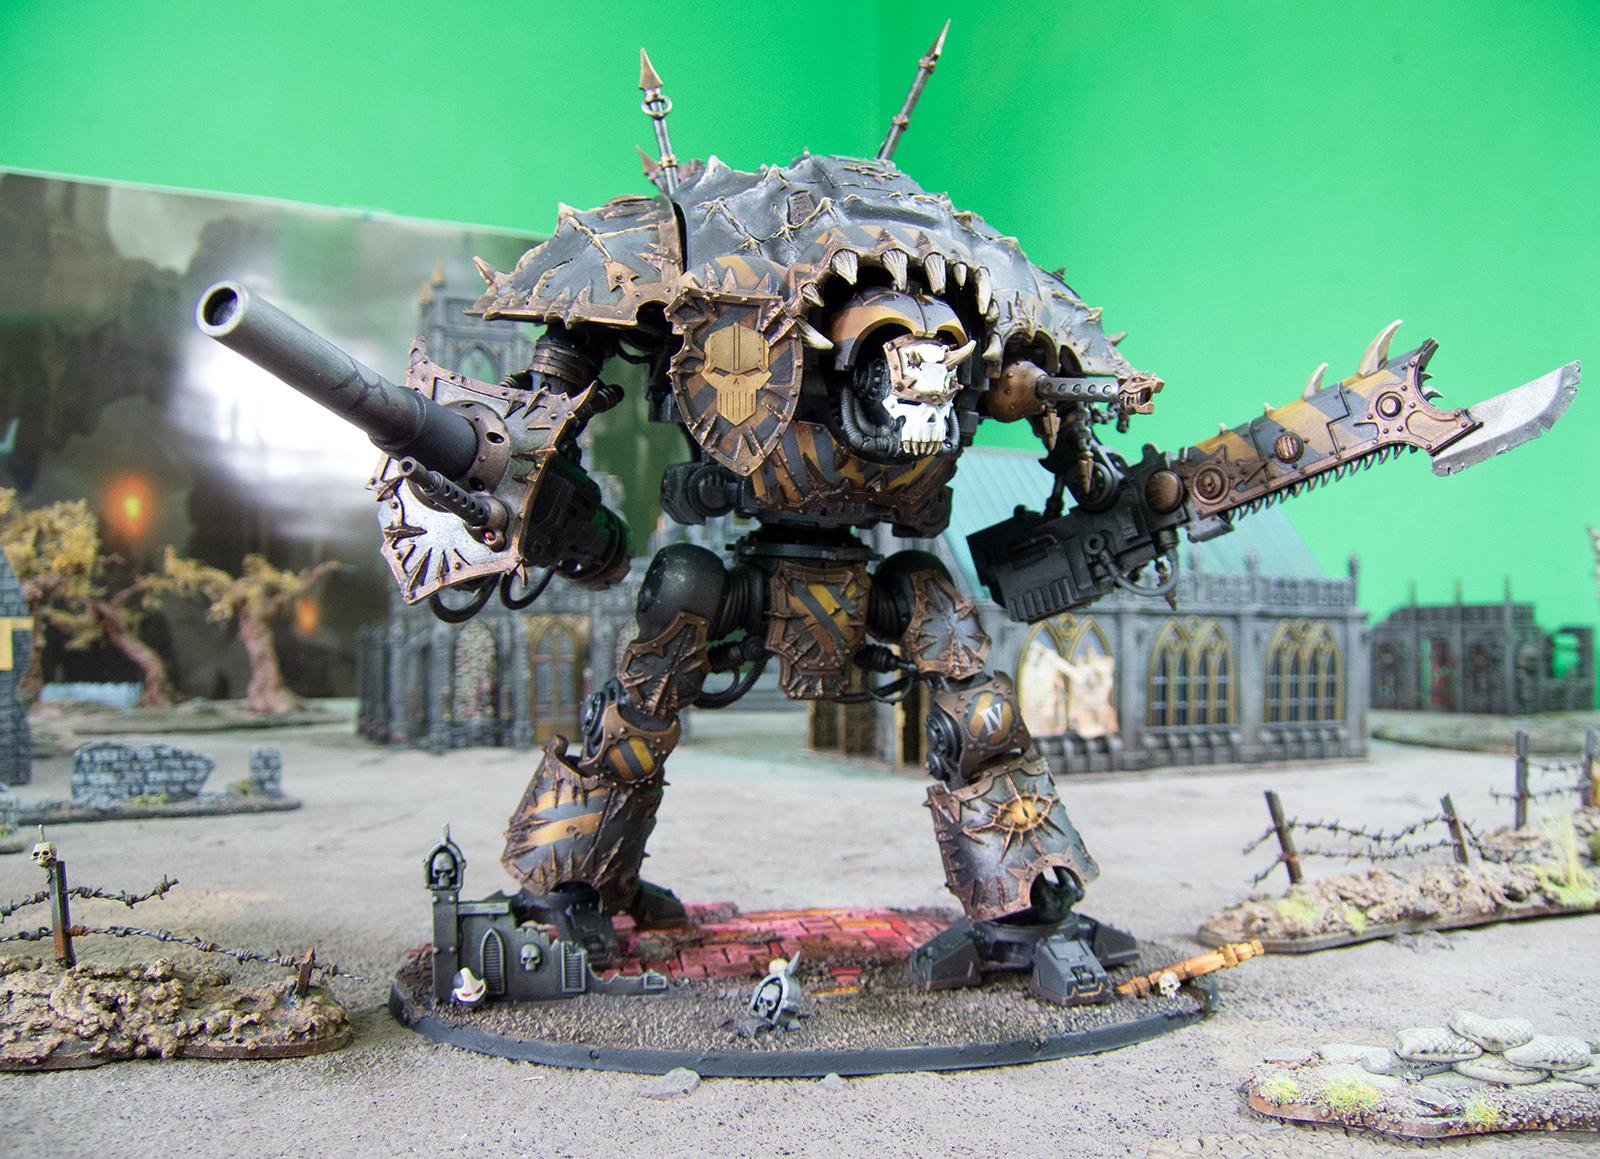
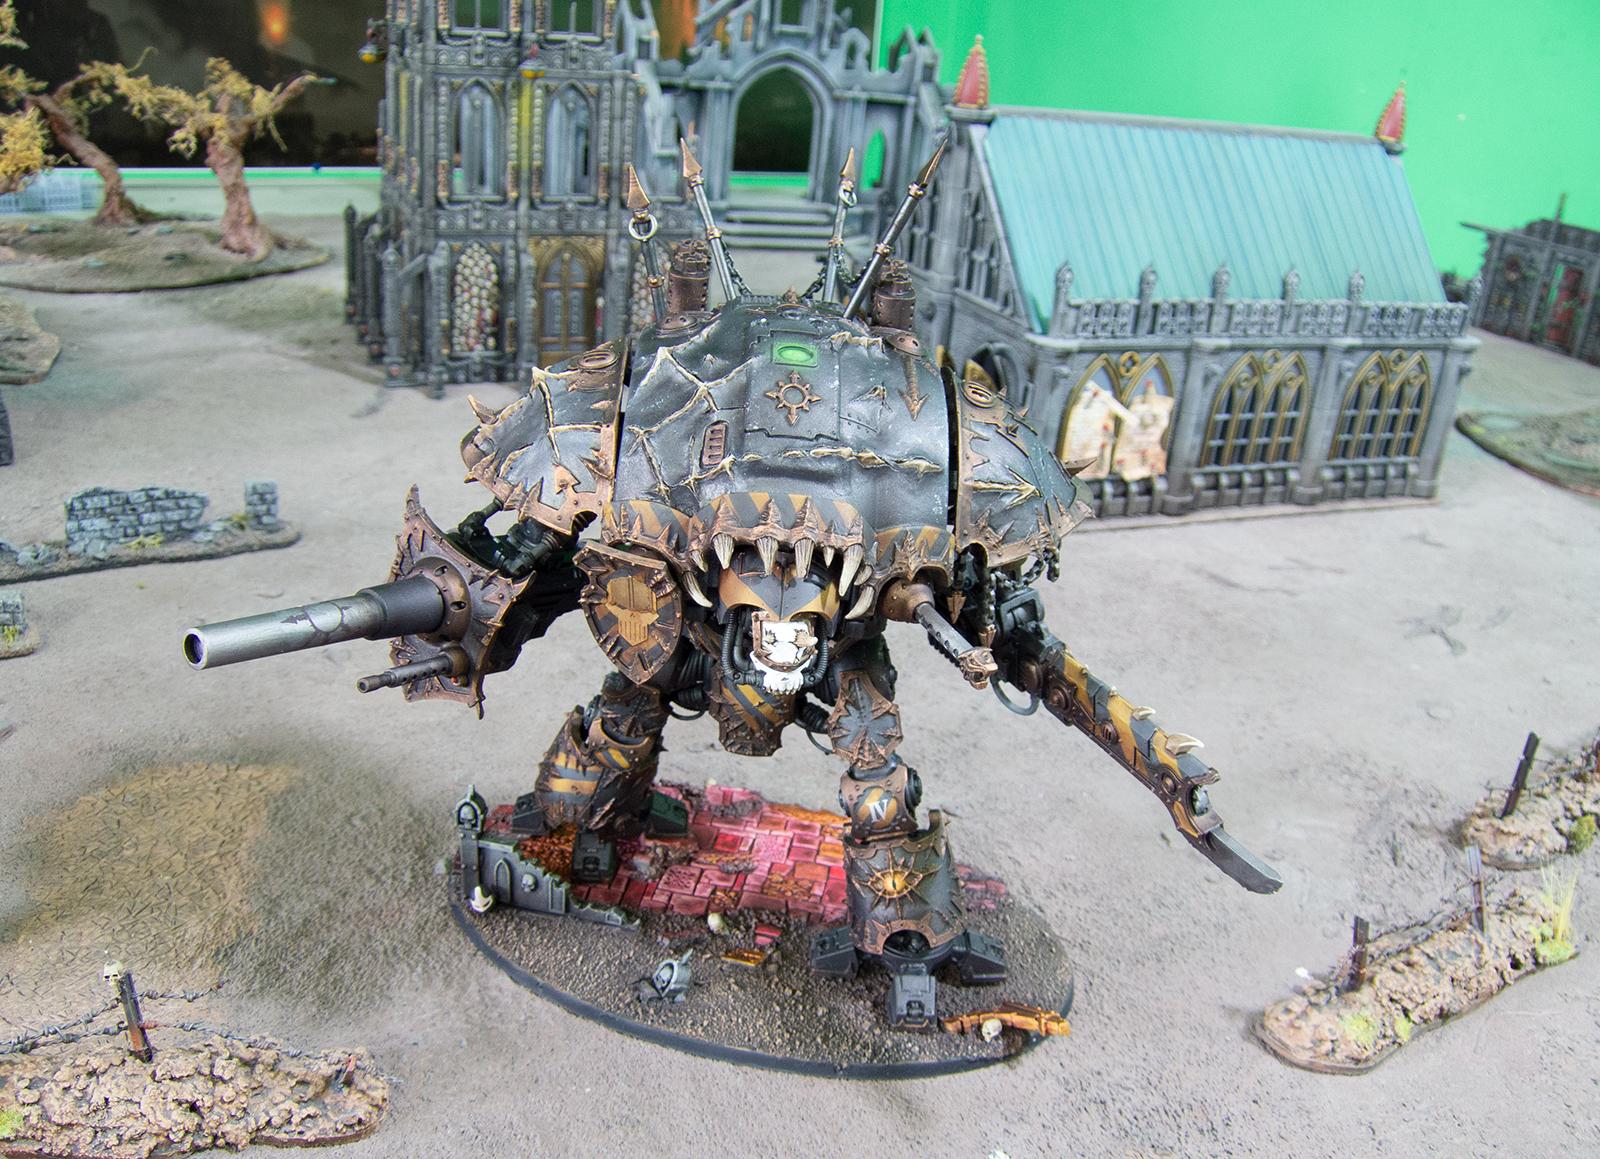
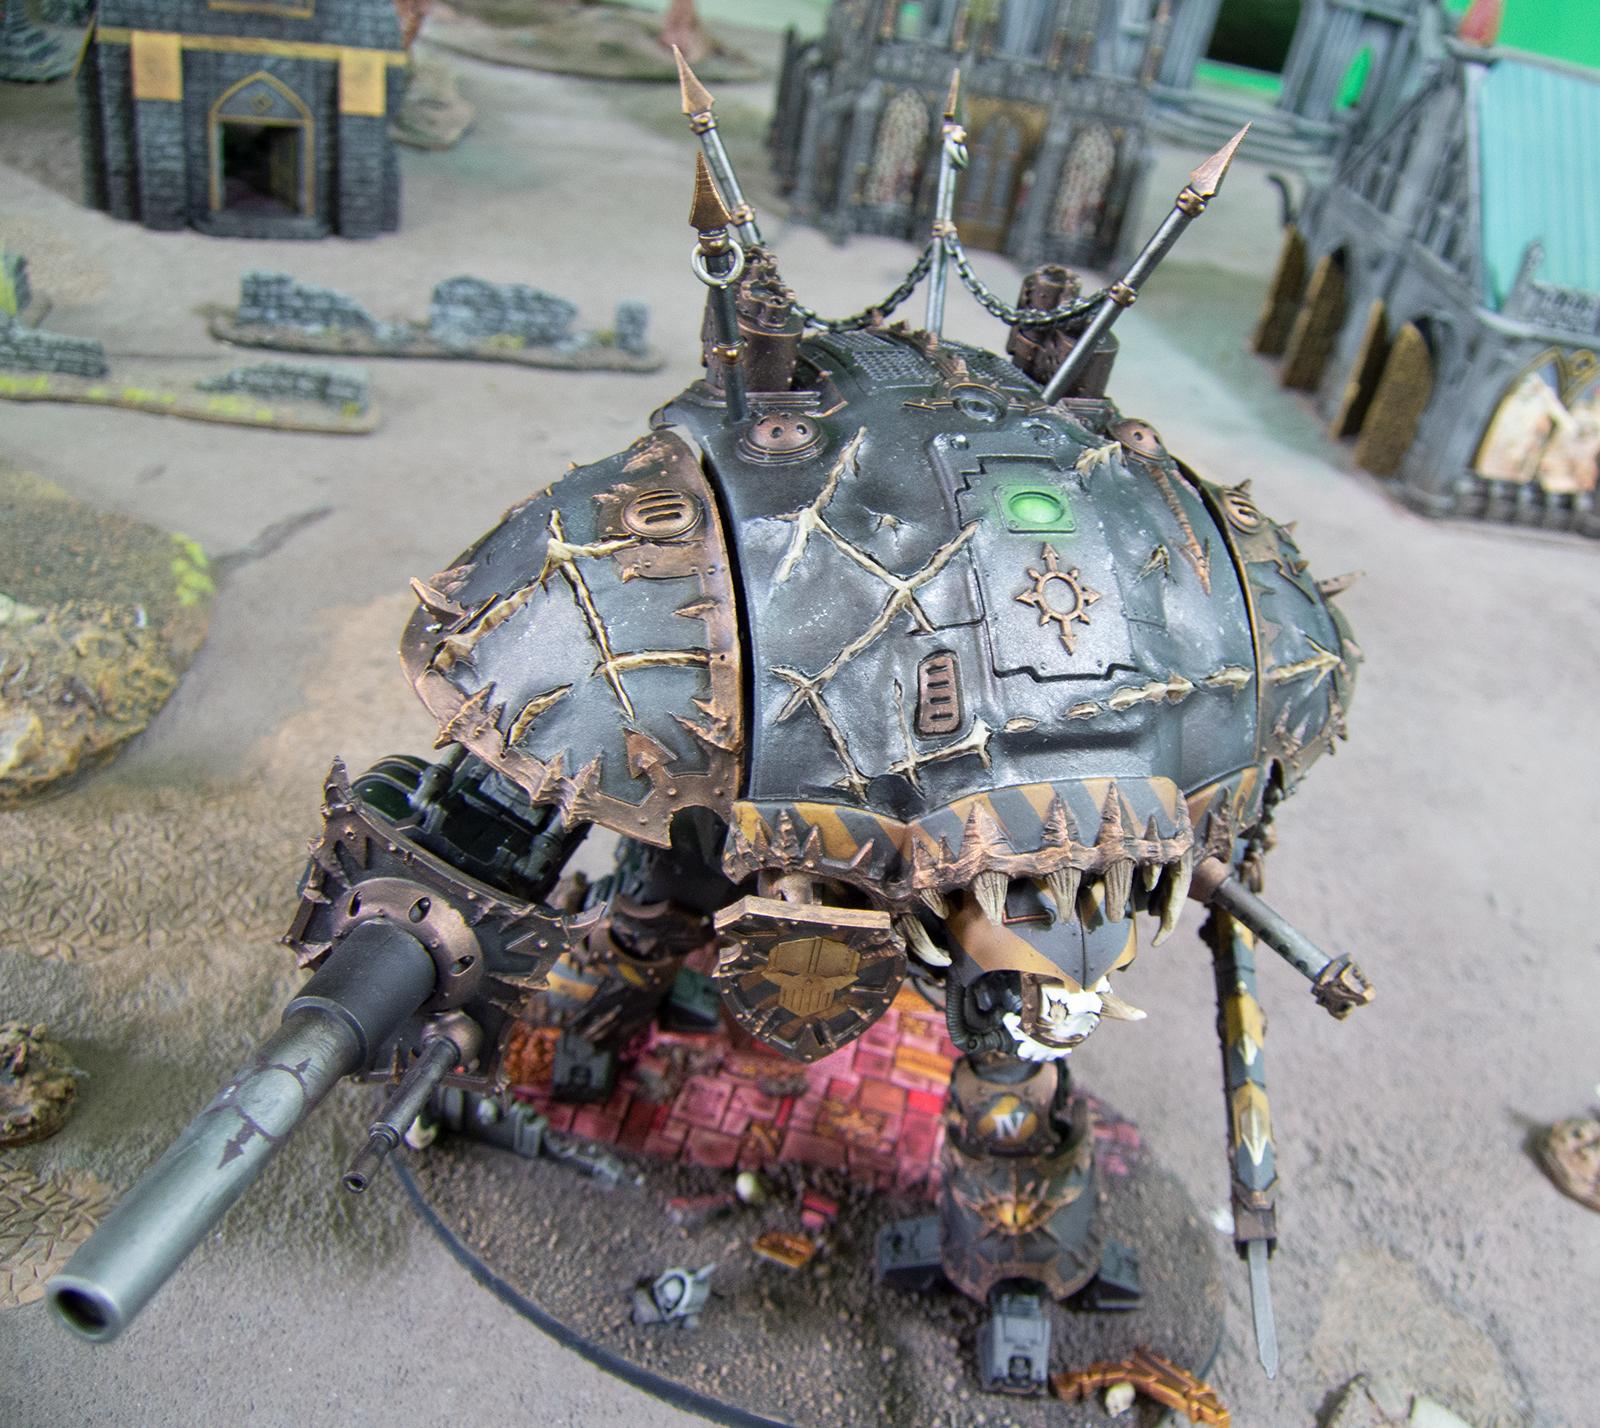
The finished Knight:
Spoiler:
"Come at me, Bro"
I didn't take photos of this (oops) but the battle cannon (?) and the flamer or whatever are magnetized and swappable.
Back than thing up.
Somewhere in moving this thing around over the last few years I lost a little piece off the chainsword. I covered it up with chains.
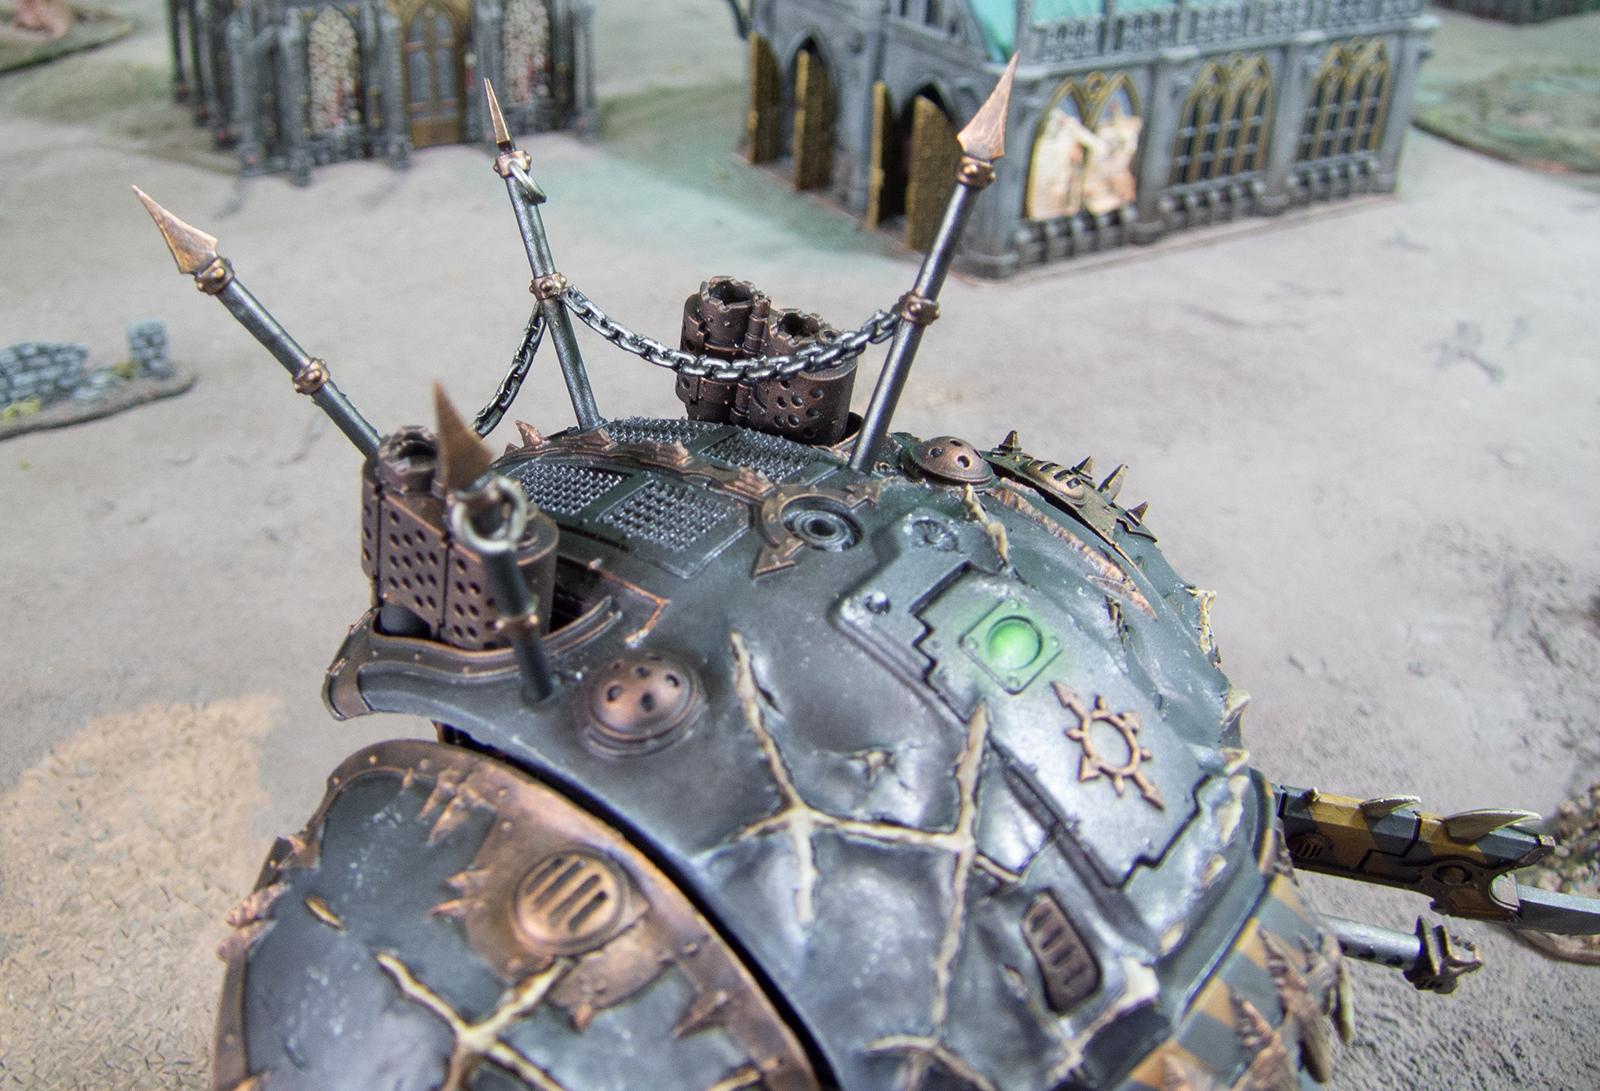
Overhead.
Some detail on the spikes.
I was quite pleased with how the eye on the left left armor came out, but then I overreached with a wash and some blending and it's less impressive now. But still pretty good!
Another overhead view
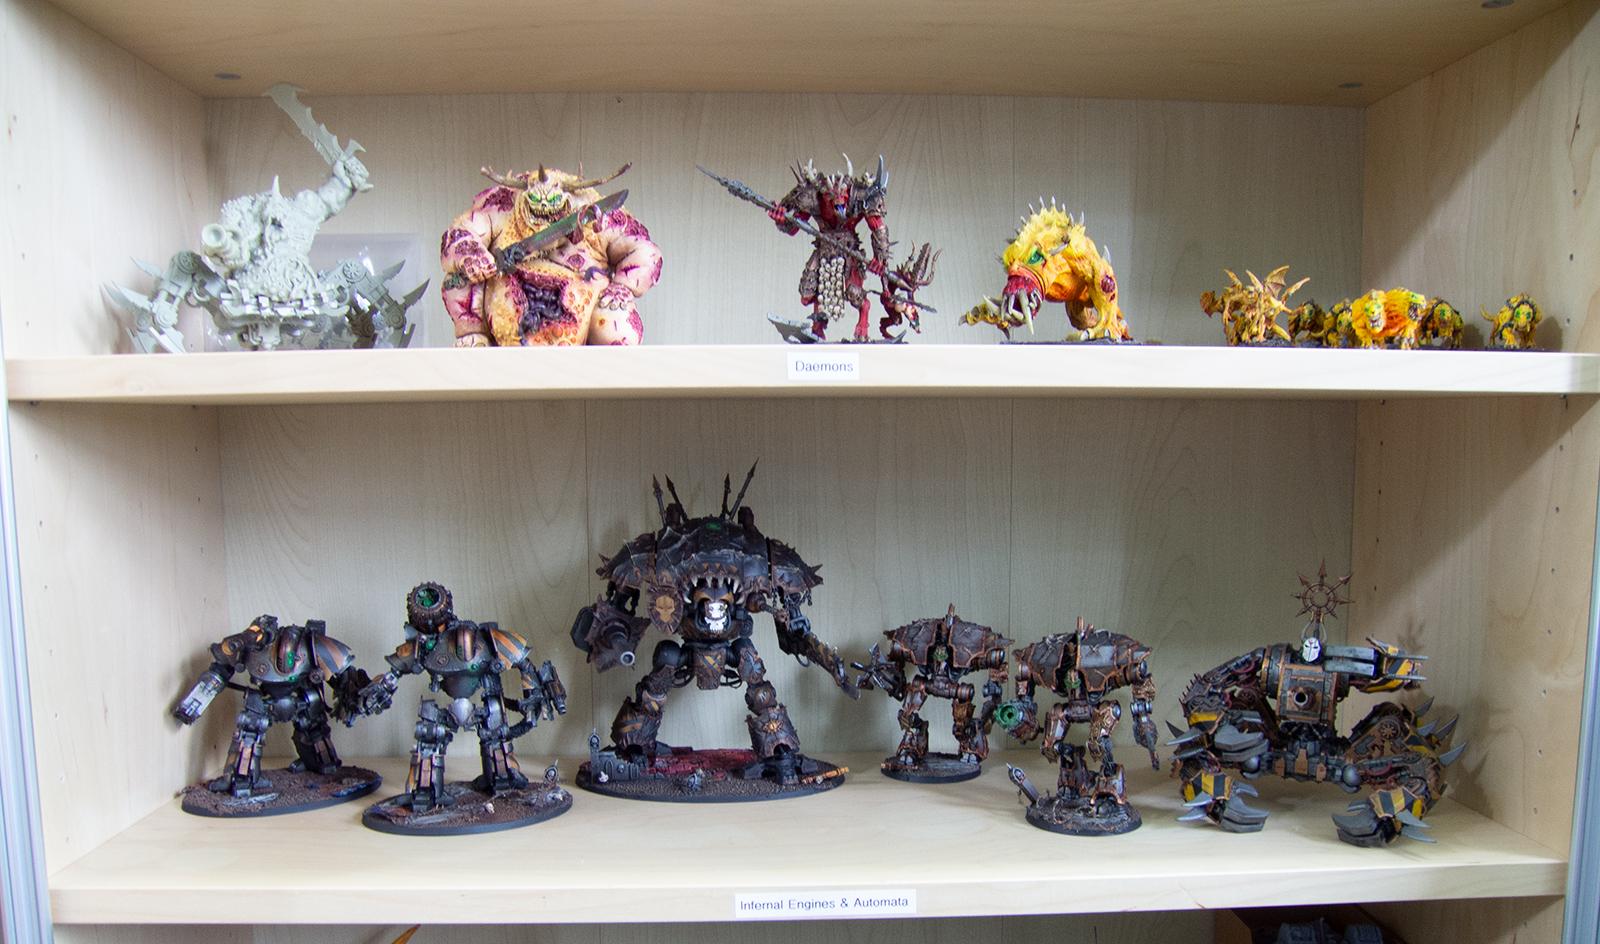
I don't know how long this quarantine is going to go on for, but half the bottom shelf is since the quarantine started. I guess I will start on the plague hulk next? I also have 3 Domitars and 2 IW tanks to do next. I dunno yet.
Spoiler:
This message was edited 2 times. Last update was at 2020/04/16 22:53:48
lord_blackfang wrote: Respect to the guy who subscribed just to post a massive ASCII dong in the chat and immediately get banned.
Flinty wrote: The benefit of slate is that its.actually a.rock with rock like properties. The downside is that it's a rock
very nice work.
thanks for the WIP shots too - very helpful.
Check out my gallery here Also I've started taking photos to use as reference for weathering which can be found here. Please send me your photos so they can be found all in one place!!
Great looking knight, really enjoyed the WIP on the base and custom 3D stuff All your IW stuff is looking sweet, appreciate the dark metal with token pops - like the knight's mask!
EDIT: I guess this is threadnomancy BUT have my praise anyway, plus maybe some peeps missed the tight base tutorial
This message was edited 2 times. Last update was at 2020/06/03 17:37:02


 All your


 6800 points
  75 points
  600 points

 5740 points
  2650 points
 55 points
  640 points
  1840 points
  435 points
 2990 points
  700 points
  2235 points
  1935 points
 3460 points

