
- by Iain Wilson
There are a lot of examples out there in internet land of huge, sprawling, super-detailed dioramas that you can pore over for hours and dream of one day having the time (or the storage space!) to make something like that yourself... This is not one of those. Dioramas can also be just a quick, simple exercise in putting together something different to whatever else you're currently working on. I love putting together armies, but sometimes I just want to do something unrelated, or I'll have a little flash of inspiration for a mini scene, and letting that out and building whatever it leads to is a great way of flexing those creative 'muscles'.
That's sort of what happened here. When I put together my
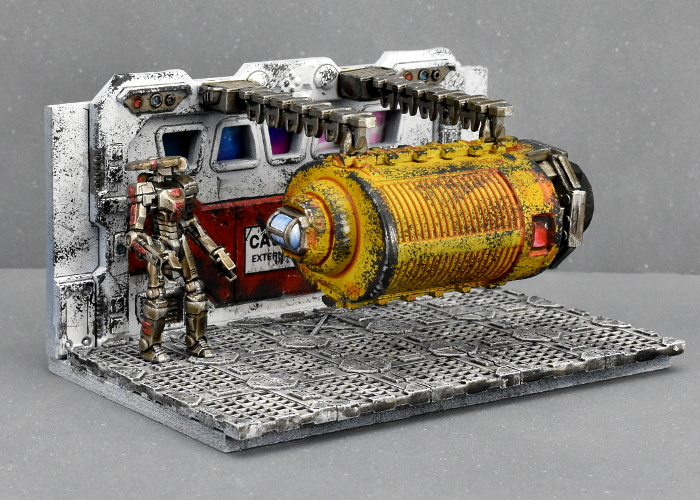
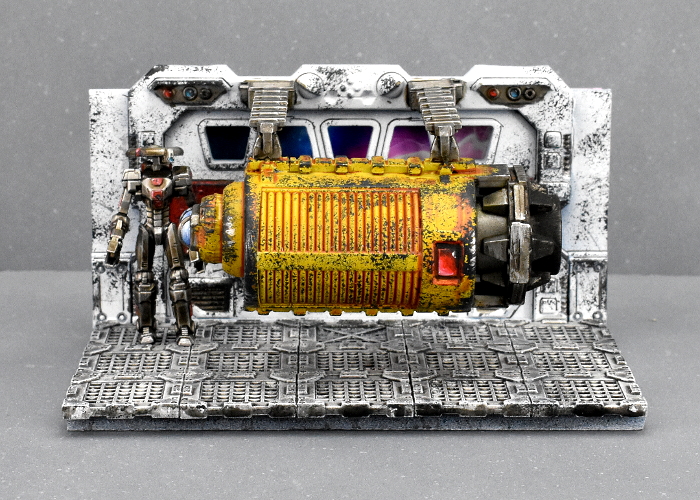
kitbashed escape pod a couple of weeks ago, I had the idea to throw together part of a launching bay for it, just to give it something to hang from for the photos. I hadn't originally even intended to paint this, but looking at it sitting on the table afterwards, I decided that it would make for a cute little mini-diorama. So, I broke out a few extra parts, slapped on some paint, and this was the end result:
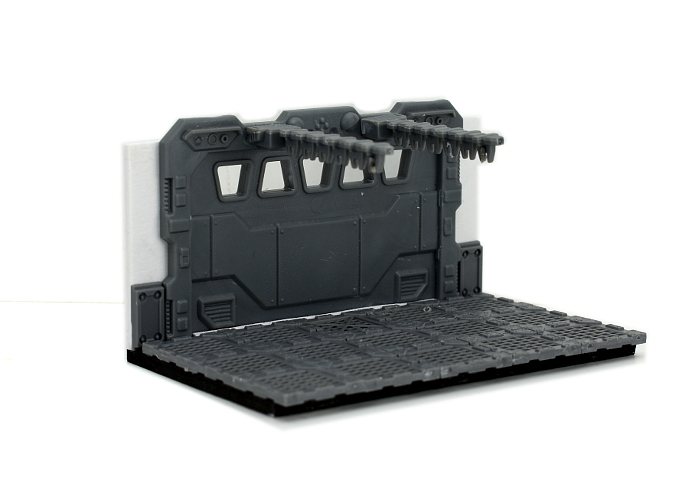
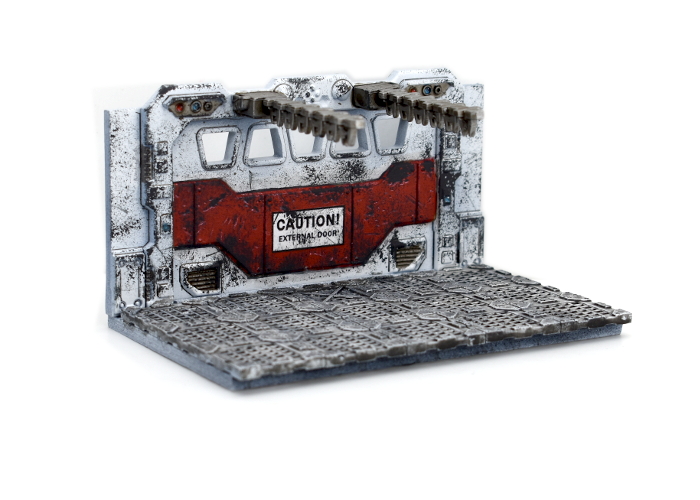
To get started, I had to snap the escape pod off the hanging struts, as it had been glued in place to photograph it for the previous article. Luckily, I had used superglue here, and it snapped away cleanly without breaking anything. I then finished detailing around the door by adding a thin strip of foamed PVC into the gap between the door and the floor grating, and fleshing out the sides of the doorway with some more PVC and a couple of strut pieces from the terrain sprue to widen it out to match the floor.
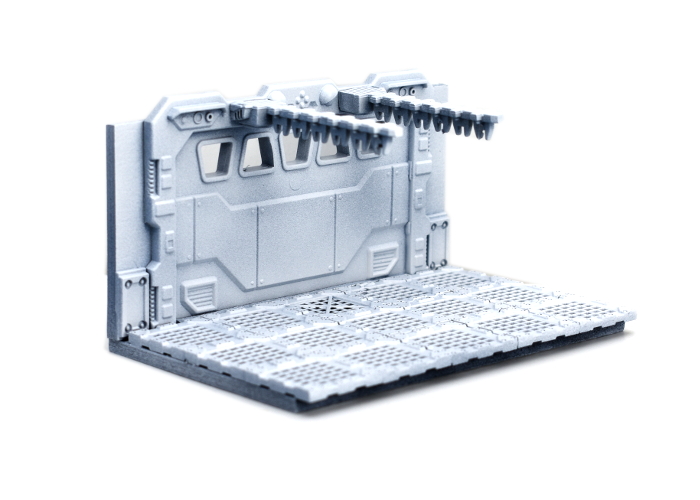
A lot of my terrain tends to be rather worn and dirty-looking. I wanted this piece to be old and worn, but not as dirty, simulating a ship or station interior rather than a planet-based facility. To that end, I began painting with a base coat of Army Painter Wolf Grey spray, following by a downwards spray of white. This is sometimes called 'zenithal painting', and is used to allow the spray to natural add highlights and shading as the second spray catches raised areas while leaving the darker basecoat in the crevasses and undersides of detail pieces.
I used Citadel Boltgun Metal to pick out some exposed metal pieces, which I then washed with a layer of Army Painter Strong Tone. On the middle strip on the door, I applied a a coat of Vallejo Heavy Brown and then a couple of layers of Army Painter Pure Red. This was a little messy around the edges, due to the difficulty of painting around the protruding floor piece, so I had to clean up around the edges of the red with a little more grey and white.
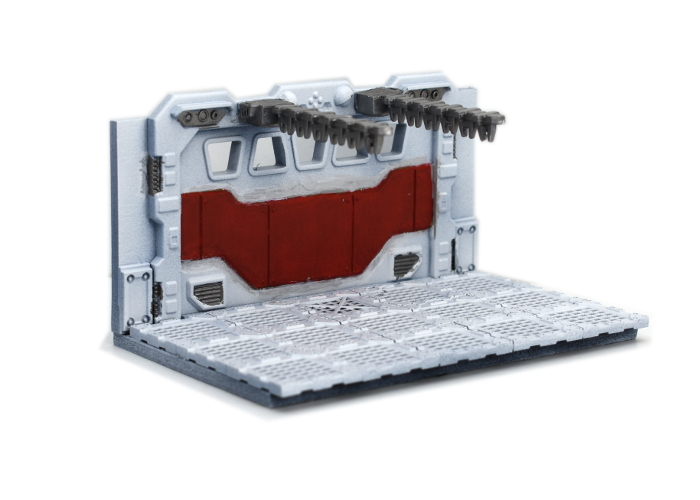
At this point, it was time for detailing. I printed up a small sign for the middle of the door and stuck it in place with some PVA glue. On the upper edges of the red door strip, I added a highlight with some old Citadel Titillating Pink, and then applied some
sponge weathering over the white and red areas with Army Painter Heavy Charcoal. I went back over the red on the door with some more pink to highlight the edges of the weathering, and blacklined around the white parts with a finepoint black pen to help pick out the details.
My initial intention was to have the floor painted the same as the walls, to accentuate that cleaner spaceship look, but in practice it just killed the detail on the floor grating and made the whole think look a bit bland. So I went back over the floor with some Army Painter Dark Tone, and then gave it a light drybrush with white.
While I wasn't intending to cram a whole heap of docking bay detail into this little diorama, I
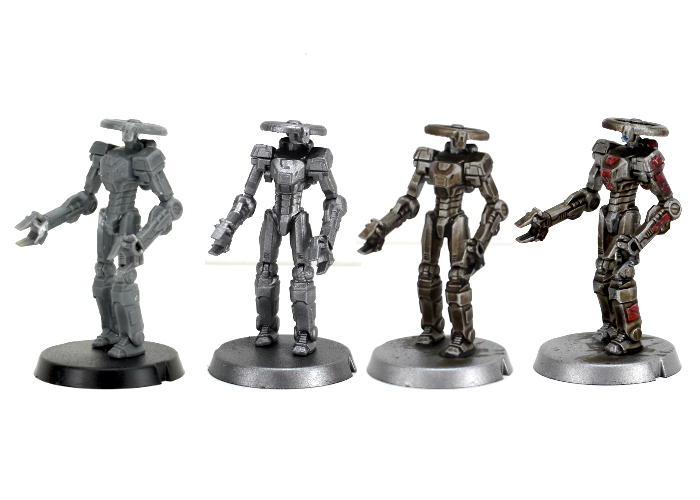
did want something other than the escape pod in there. I decided to throw in a service robot, assembled from most of an
Epirian Scarecrow, with clamp-hands taken from the
Master Handler kit and a head made from a trimmed down
Firefly Drone' turbine, with an eye lens cut from one of the Scarecrow heads.
The robot was painted with a spray of Army Painter Plate Metal, then a wash of Strong Tone. Over that, I gave it a light drybrush with some more Plate Metal, and then picked out some red bits using the same steps as the red on the door. Finally, I painted in the blue eye lens using some Vallejo Electric Blue, black and white. (You can find a handy tutorial on painting lenses here!)
The final detail before assembling everything was to print out a picture of the Maelstrom, to glue in behind the door to provide a nice view out the windows. I played around with various orientations of this for a bit to find what looked best, and then trimmed it to fit behind the door and glued it into place with some superglue. With the robot and pod glued in position, the diorama was done!


To build your own escape pod, you can pick up the terrain sprues, along with the rest of the Maelstrom's Edge model range from the webstore
here.
What are you working on? We would love to see what your models and terrain in the
Comm Guild Facebook group!
For other Maelstrom's Edge modeling articles, including tutorials and walkthroughs of a wide range of different building and miniature projects, check out the Hobby section of the Maelstrom's Edge website
here.


