| Author |
Message |
 |
|
|
|
|
Advert
|
Forum adverts like this one are shown to any user who is not logged in. Join us by filling out a tiny 3 field form and you will get your own, free, dakka user account which gives a good range of benefits to you:
- No adverts like this in the forums anymore.
- Times and dates in your local timezone.
- Full tracking of what you have read so you can skip to your first unread post, easily see what has changed since you last logged in, and easily see what is new at a glance.
- Email notifications for threads you want to watch closely.
- Being a part of the oldest wargaming community on the net.
If you are already a member then feel free to login now. |
|
 |
2020/10/02 12:33:47
Subject: 3D printing a warcry board fully from scratch
|
|

Grovelin' Grot
|
Hey all,
So been getting into warcry (as I just never seem to actually play 40k games). One of the things I wanted to do was build a warcry terrain table using my 3D printer. Going to use this thread to showcase and get ideas!
Automatically Appended Next Post:
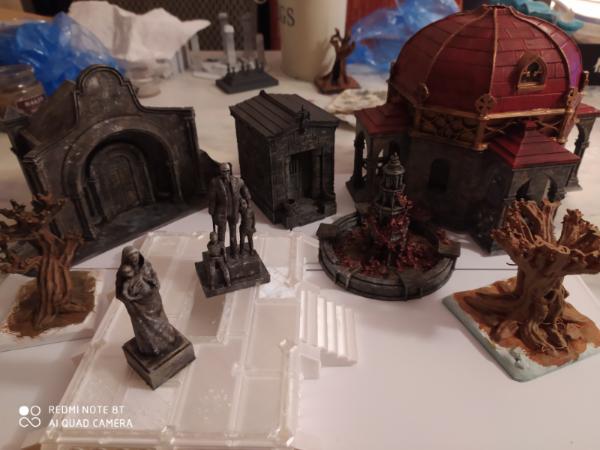
Some of the models I've printed this far:
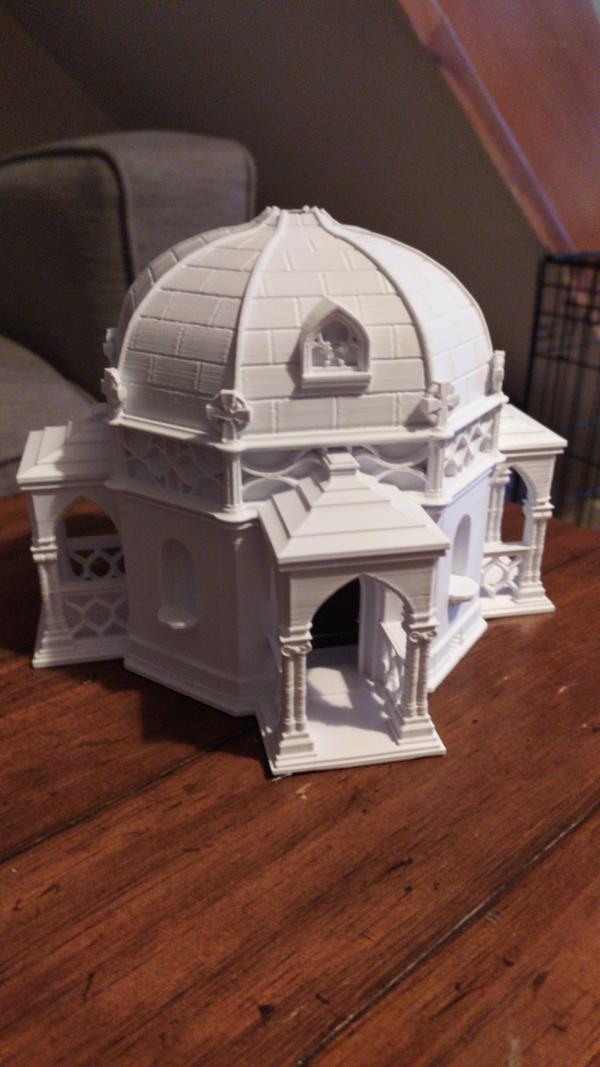
Printed ready for painting
Automatically Appended Next Post:
So a warcry board is usually 22" by 30", the issue obviously that a 3D printer bed is no where near that. But I wanted it to be solid pieces, not scatter terrain on a tabletop. So I took the open source openforge lock system and I divided the warcry board size down to be able to print it. Turns out if you divide it into 8 that fits. It can probably be done in 6. But for now I'm sticking with 8.
|
|
This message was edited 4 times. Last update was at 2020/10/02 16:03:23
|
|
|
 |
|
2020/10/02 13:21:12
Subject: 3D printing a warcry board using a 3D printer
|
|

Courageous Questing Knight
|
Well...that is...SPECTACULAR!!!!!!!
Can't wait to see it all together, even if I do not play Warcry, it makes me want to.
|
|
|
|
|
|
2020/10/02 13:34:29
Subject: 3D printing a warcry board using a 3D printer
|
|
Grovelin' Grot
|
 MDSW wrote: MDSW wrote:Well...that is...SPECTACULAR!!!!!!!
Can't wait to see it all together, even if I do not play Warcry, it makes me want to.
Haha yeh! I still haven't actually played it either..... But I have friends who want to, but never finish their models.... So I thought if I make a kick ass board get 1 of them to play 1 game.... Send loads of images to others and really be like "oh warcry it was the best gak ever, remember that funny?? That was SOOOO funny...".
Then hopefully they will all play 
|
|
|
|
|
|
2020/10/03 10:29:36
Subject: 3D printing a warcry board fully from scratch
|
|
Grovelin' Grot
|
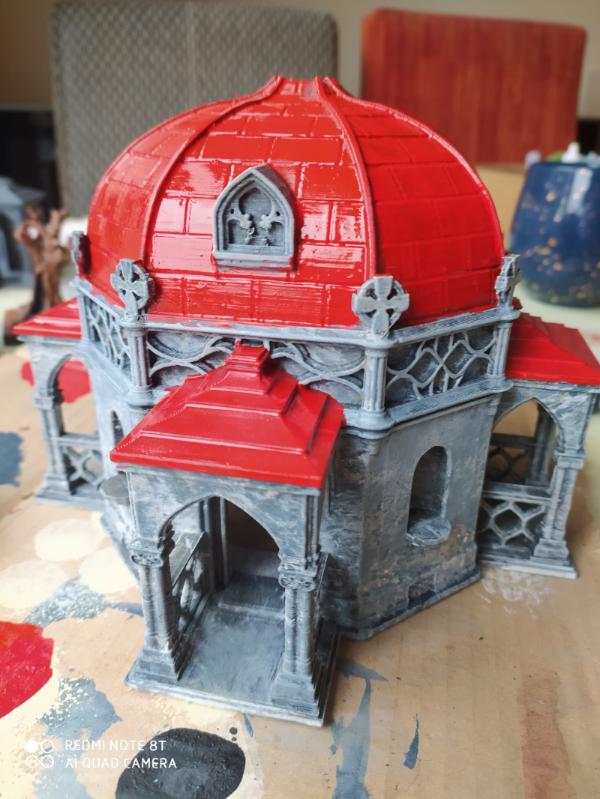
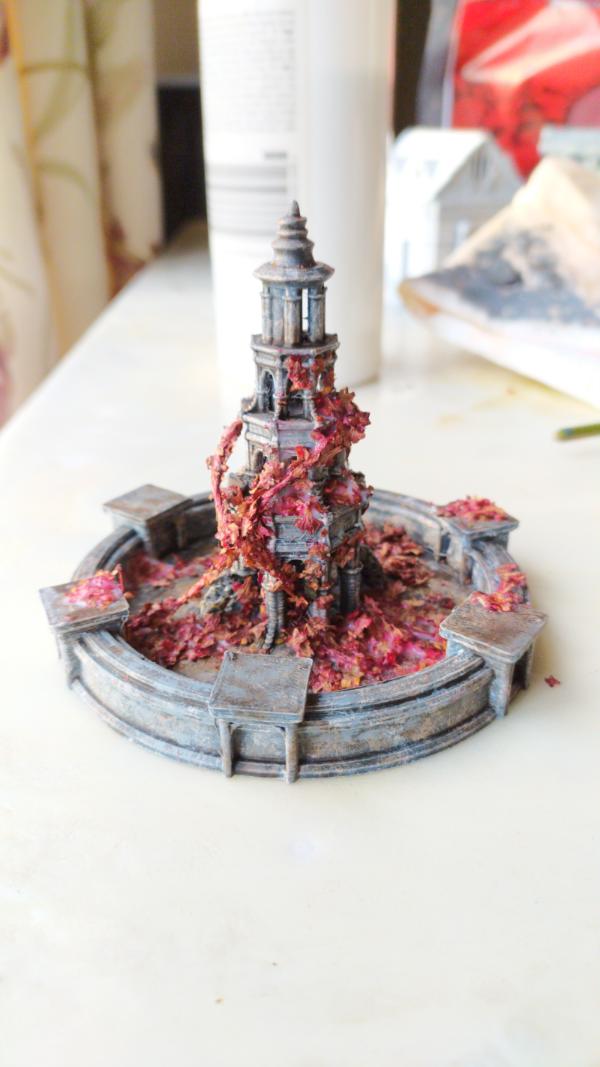
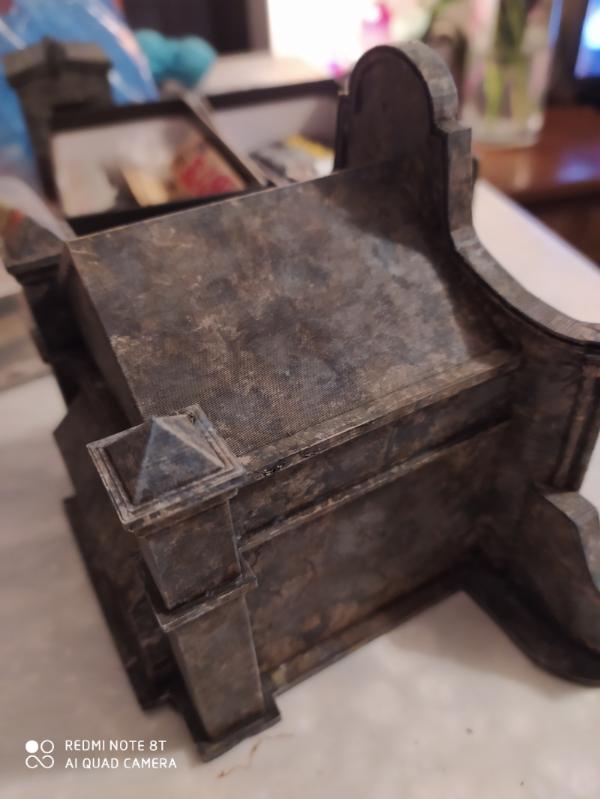
Mausoleum WIP.
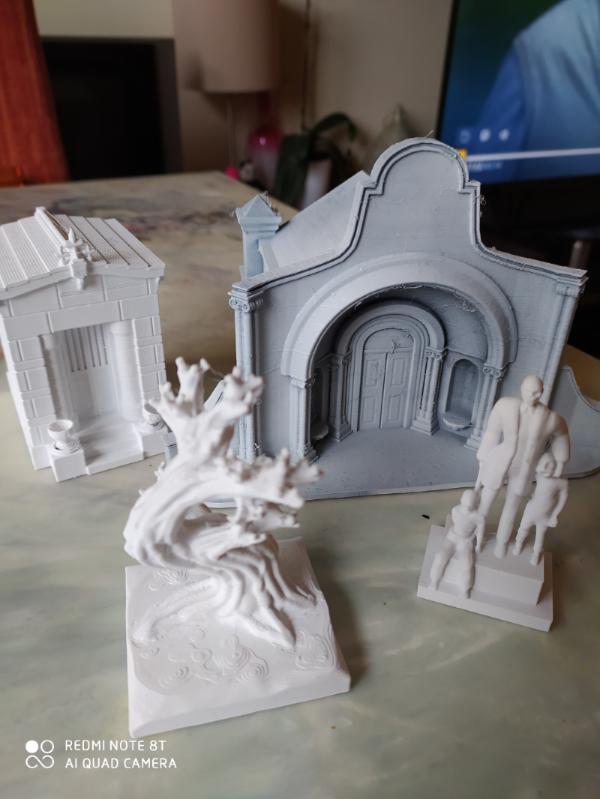
I think the best option is going to be to do everything but the base for this, as I will need to tie it into the board and il probably use sand/stone. Automatically Appended Next Post: Printers been busy over night! Bringing me 4 more assets to go on my warcry table. Primed, ready for painting.
|
|
This message was edited 1 time. Last update was at 2020/10/03 11:15:06
|
|
|
|
|
2020/10/03 11:21:37
Subject: 3D printing a warcry board fully from scratch
|
|

Alluring Mounted Daemonette
|
Hey mate,
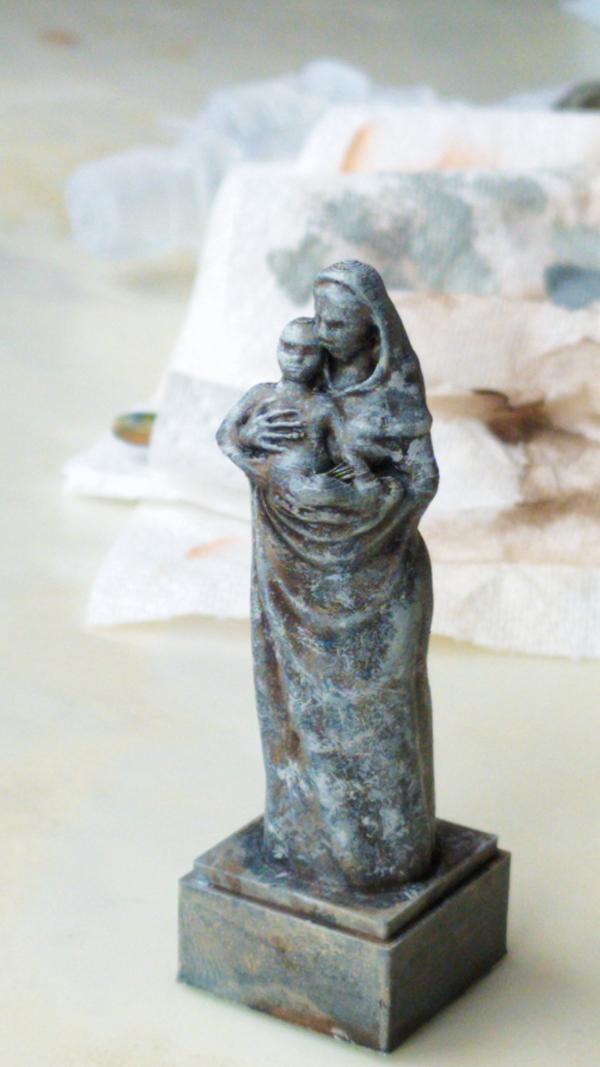
Will be following this with interest. I think the statue of the mother in the OP is some of the best weathered stone I've seen - would you mind sharing the recipe?
A whole board looking like that would definitely be a carrot on a stick for to drag your mates into playing!
|
t z you are k |
|
|
|
|
2020/10/03 12:45:44
Subject: 3D printing a warcry board fully from scratch
|
|
Grovelin' Grot
|
 tzurk wrote: tzurk wrote:Hey mate,
Will be following this with interest. I think the statue of the mother in the OP is some of the best weathered stone I've seen - would you mind sharing the recipe?
A whole board looking like that would definitely be a carrot on a stick for to drag your mates into playing!
Hey thanks Tzurk!
im gona be totally honest with you, i hate technical painting (blending, wet palette work - in fact painting is my least favourite part), so what i tend to stick with is what id call 'method' painting. So where the method is the most important not the skill.
total time painting =< 1Hour (as your using such 'dry' paint you can basically just go layer to layer and not worry about drying, in fact its better its slightly wet still as it gives you even more random bits of blending)
Stage 1:
Base in dark grey all overStipple on a mid/light grey (so like dry brushing, but i use a very fluffy and large brush and rather than side to side, you jab the model creating these splodges of colour - A woman's foundation brush for buildings just cos it saves time, il take a pic of them shortly)Stipple even lighter colour - pale sand or terminius stone
Now at this stage what you've created (in my view) is a very speckled and random stoney looking colour and texture that went Dark -> Light, so overall its quite light in colour. This is like the statue when its brand new so now we need to 'age' the statue.
Stage 2:
brown wash - standard GW one - now your adding the shadows and recesses back in, your also adding another layer of randomness as the wash will be heavier in places and affect the random stippled layers belowonce dry you basically repeat the first process, but this time going Light -> Dark, So pale> mid grey> dark grey. This is to emulate the idea of dirt and dust getting onto the stoneSometimes (and i did on this model), ill add a light brown between the mid grey and the dark in stage 2, this is to further help the idea of dirt getting on the modelFinal wash but this time only in targetted areas (that maybe you accidentally got too much light colour into a crevice and it looks odd)Then give the model a 360 and have a look and if you feel you need to stipple any specific areas where the colour is too uniform or blocky
And thats where that model is now!
I might later add some actual 'dust' using pigments. I buy a cheap £2 pack of pastels from amazon (the chalky ones) and i crush them up in food bags - infinitely cheaper than buying pigments and is the same thing. You just sometimes get some larger lumps that you have to brush off the model if you dont like em.
So like i said, its about the 'method' and trying to mimic what would happen in real life - Dirt and grim in the air, rain etc.. I am just about to start this process on some other models, i will take pictures of each stage.
Thanks for the interest.
Can i ask, what do you think of the models themselves?
|
|
|
|
|
|
2020/10/04 10:49:23
Subject: 3D printing a warcry board fully from scratch
|
|
Alluring Mounted Daemonette
|
Thanks for the detailed response mate! Was really interesting to see your way of thinking about the painting process. Totally different to the way I do it - even though painting is my least favourite part of the hobby as well - I usually visualise what I want the mini to look like and then try to backwards map the best way to get there. Your results certainly speak for themselves!
I wouldn't have picked either of the painted models as being 3D printed - the quality is really high. I think you have a promising little project in the works here!
|
t z you are k |
|
|
|
|
2020/10/05 22:09:31
Subject: Re:3D printing a warcry board fully from scratch
|
|
Grovelin' Grot
|
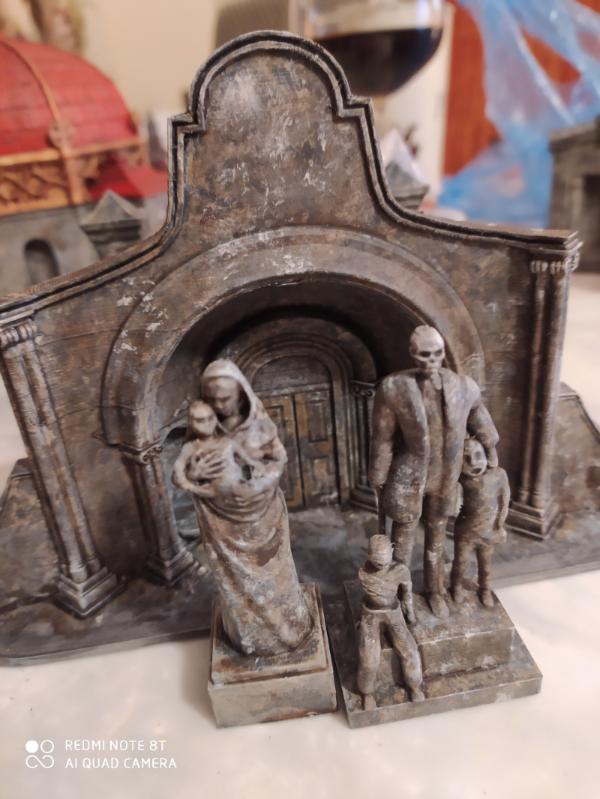
I like your strategy too thats a way I think often. So after I wrote all that out I was like I should defo do it again and I swear I immediately lost it and I hated the models for ages until the wash. It has to be pretty heavy, I had to lie these ones down to create the effect right, basically to let it pool enough. But I also tried it on a building and I didn't think it worked as well on the flat surfaces, but I like the colours.
I think the main important rule is do it enough with various colours and use washes to build up the transitions and dirty it up.
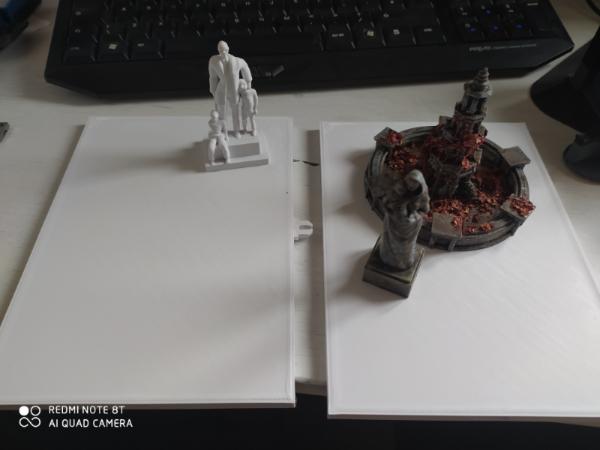
But starting to fill it out, got another piece on print and then I need some more of the connecting bases
|
|
|
|
|
|
2020/10/07 16:19:56
Subject: 3D printing a warcry board fully from scratch
|
|
Courageous Questing Knight
|
Absolutely great effect on the weathered/marbled painting. I will definitely try that on my next suitable building!
Very well done!!
|
|
|
|
|
|
|
|