Monty Python’s Empire World Tour Battle #3 Chaos
Chaos: 3000 Points v Arthur 2000 Points (More or less)
Scenario: Ambush (Defender has 150% points compared to defender)
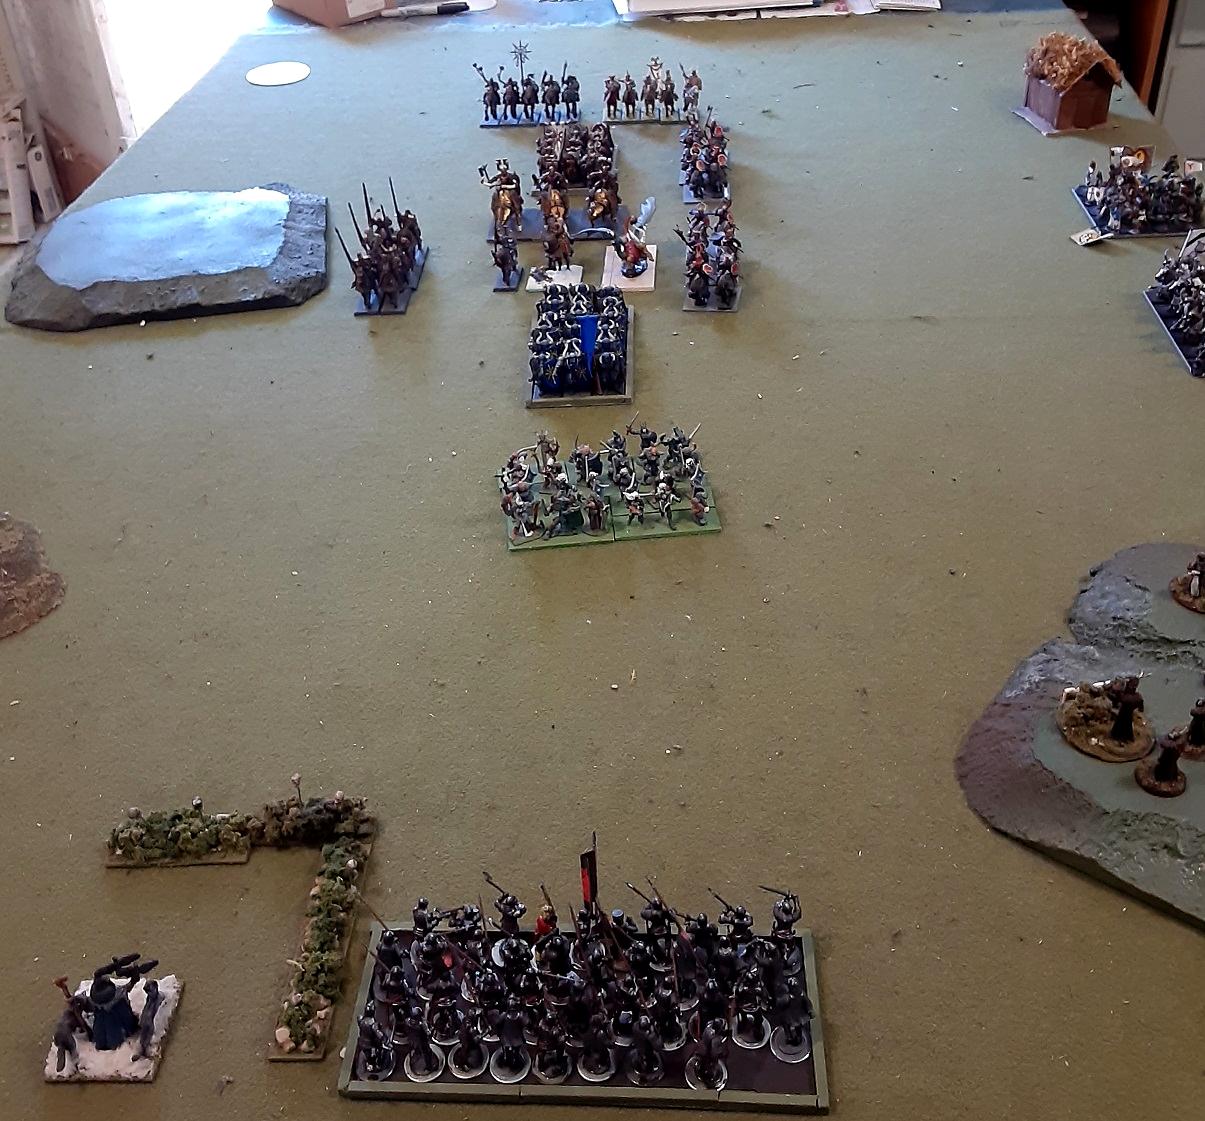
Background: With his route home blocked, Arthur has turned east and is heading towards the planes of Kislev. But before he gets to the open country, he must cross the Frozen Land of Nador, where the icebergs lie. The journey is difficult and rife with peril. The very land seems to conspire against them and Arthur ponders whether the sun ever shines in this accursed country.
Suddenly, a breathless scout reports to Arthur that a large Chaos force is nearby. It appears to be a reconnaissance in force headed for the Empire. Without hesitation, Arthur plans a hasty ambush near Black Blood Pass. Of course, the placement would have worked better had Sir Bedevere remembered to take his assigned place on time.
Notes:
As almost always, army lists are based more upon what figures I had on hand rather than what works best for any particular army list.
Terrain was placed using a random generator I created
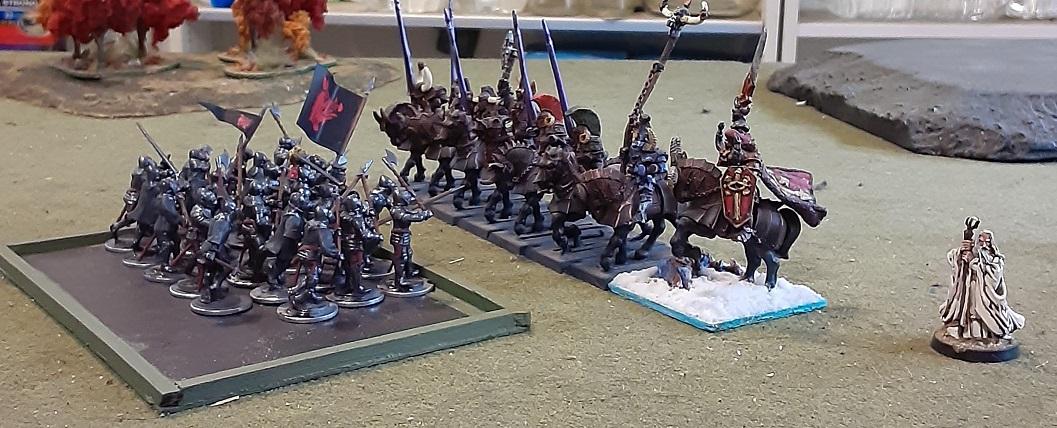
Arthur’s Forces:
Arthur Himself (Grand Master w/ plate, shield, barded warhorse, Excalibur Runefang & an Obsidian Trinket)
Sir Lancelot (ABS w/ plate, shield & Barded Warhorse, Sword of Might & Talisman of Endurance)
Sir Galahad (Arch Lector: Heavy Armor, enchanted shield, barded warhorse, Obsidian Blade & Talisman of Preservation)
Tim the Enchanter: Level 2 wizard: dispel scroll
Lore of Fire: Fireball, Flaming Sword of Rhun
The Dead Collectors: Level 1 wizard on barded warhorse; Van Horstmann’s Speculum
Lore of Death: Doom & Darkness
The wise man from scene 24 (Engineer w/ repeater pistols)
6 Knights of the Round Table (inner circle): Great weapons, plate, barded warhorse,
Steel Standard Magic Banner, musician.
Arthur, Lancelot, Galahad & the dead collectors line up with this unit.
12 (Empire) Knights of Camelot: Great weapons, full command
30 Cult of the Black Knight (Great Swords, plate), Standard of Discipline, music
1 Brother Maynard & Holy Hand Grenade (Volley Gun)
1 Knights who say Ni (Volley Gun) – sometimes called Forest Knights
Chaos
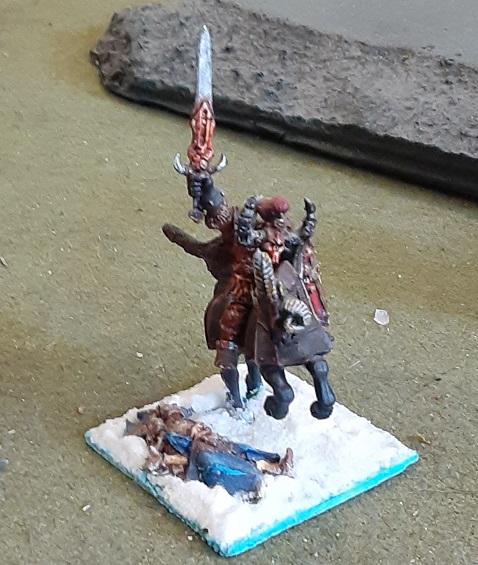
Melmak the Magnificent: Chaos Lord, Mark of Khorne, Daemon sword, BWH
Solvak the Stoic (ABS): Mark of Khorne, Banner of Rage, Chaos steed
Bad Moon Rising: Level 2 sorcerer; dispel scroll, familiar
Lore of Slaanesh: Lash of Slaanesh, Hysterical Frenzy, Phantasmagoria
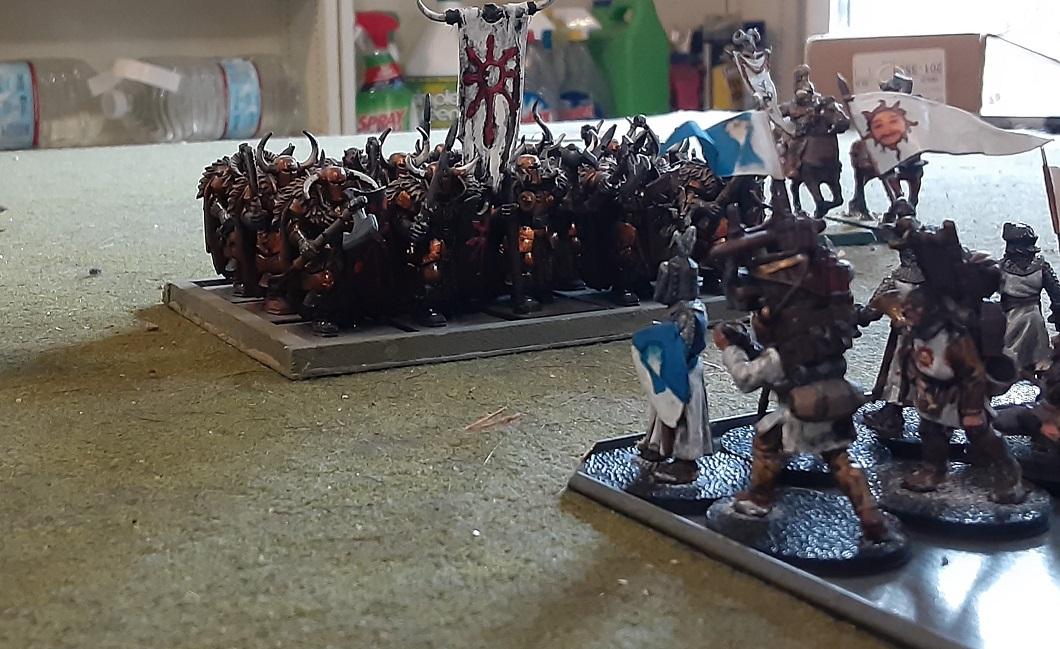
1 x 24 Marauders: Handweapons, light armor & shield; full command
1x18 Chaos Warriors: Handweapons, shield, Mark of Tzeentch; full command
(AKA Blue Warriors)
1x15 Chaos Warriors: Handweapons, shield, Mark of Khorne; full command
(AKA Khorne Warriors)
2x5 Marauder Horse: Handweapons, throwing axe, shield, fast cavalry
(AKA red & black Marauders)
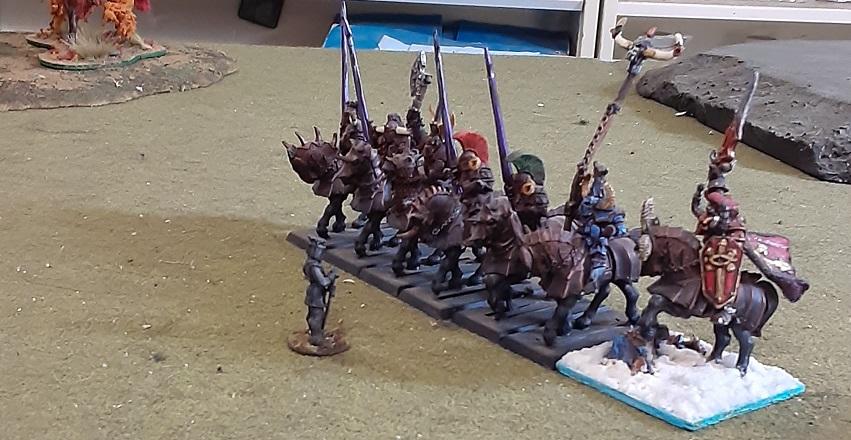
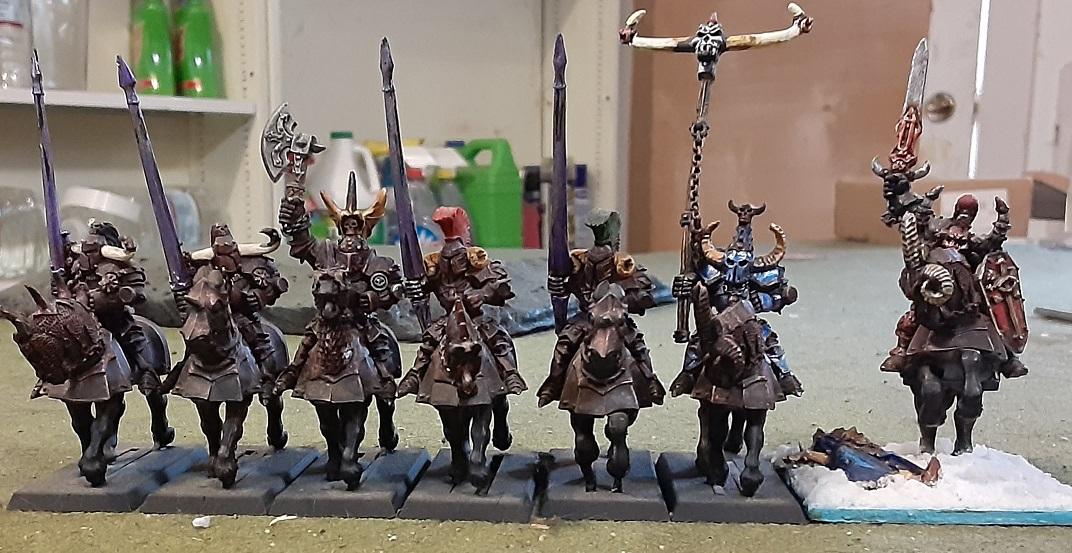
1x6 Chaos Knights: Lance; Full command (AKA Lancers)
2x6 Chaos Knights: Ensorcelled weapons; full command
(AKA 1st Blue & 2nd Blue)
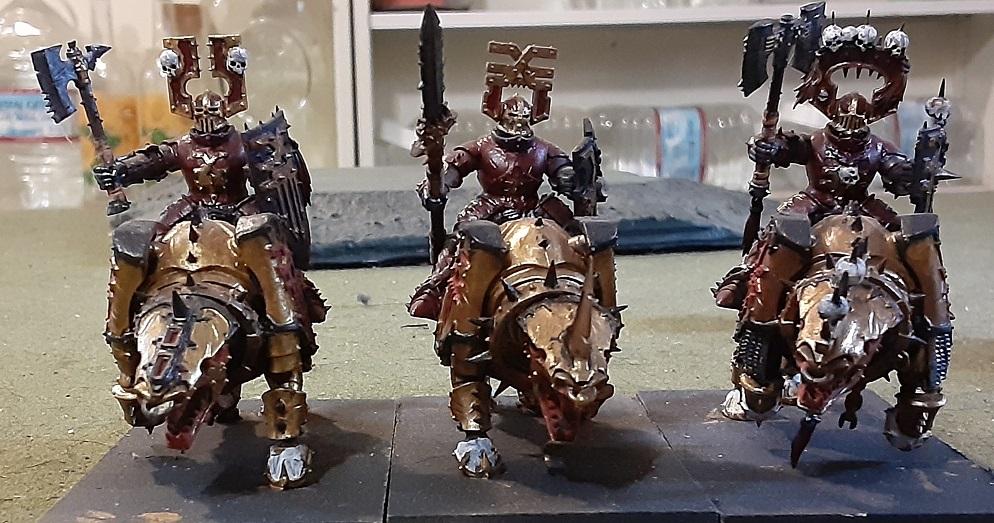
3 x Skullcrushers of Khorne: Full command
1 x Chimera
The Battle Begins:
The Chaos Column of March
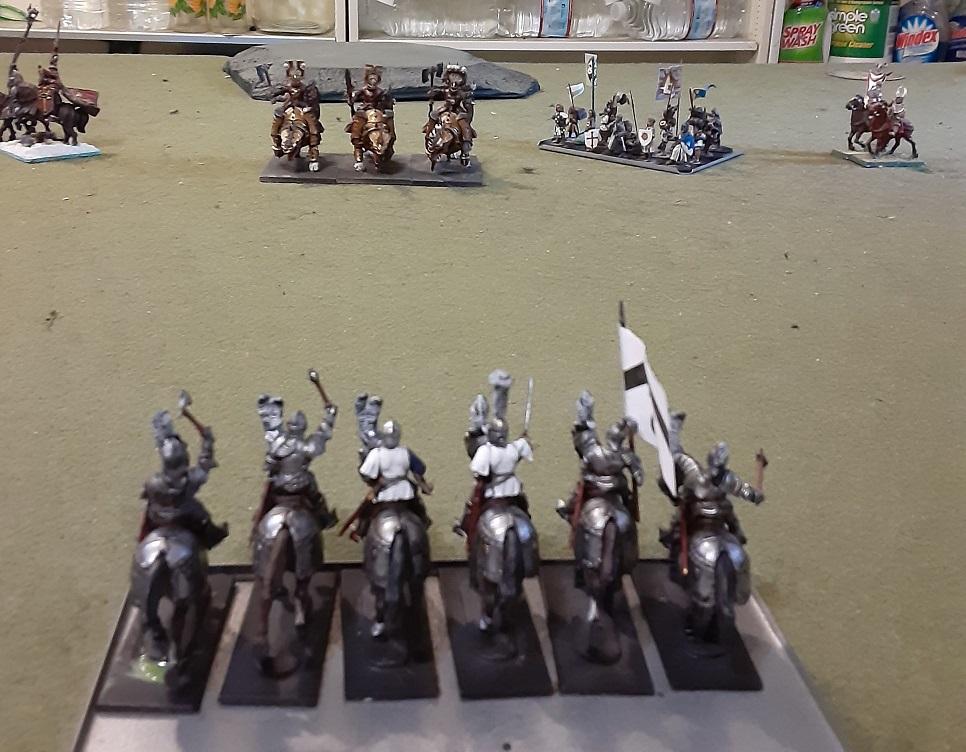
 Turn 1: Arthur springs his trap –
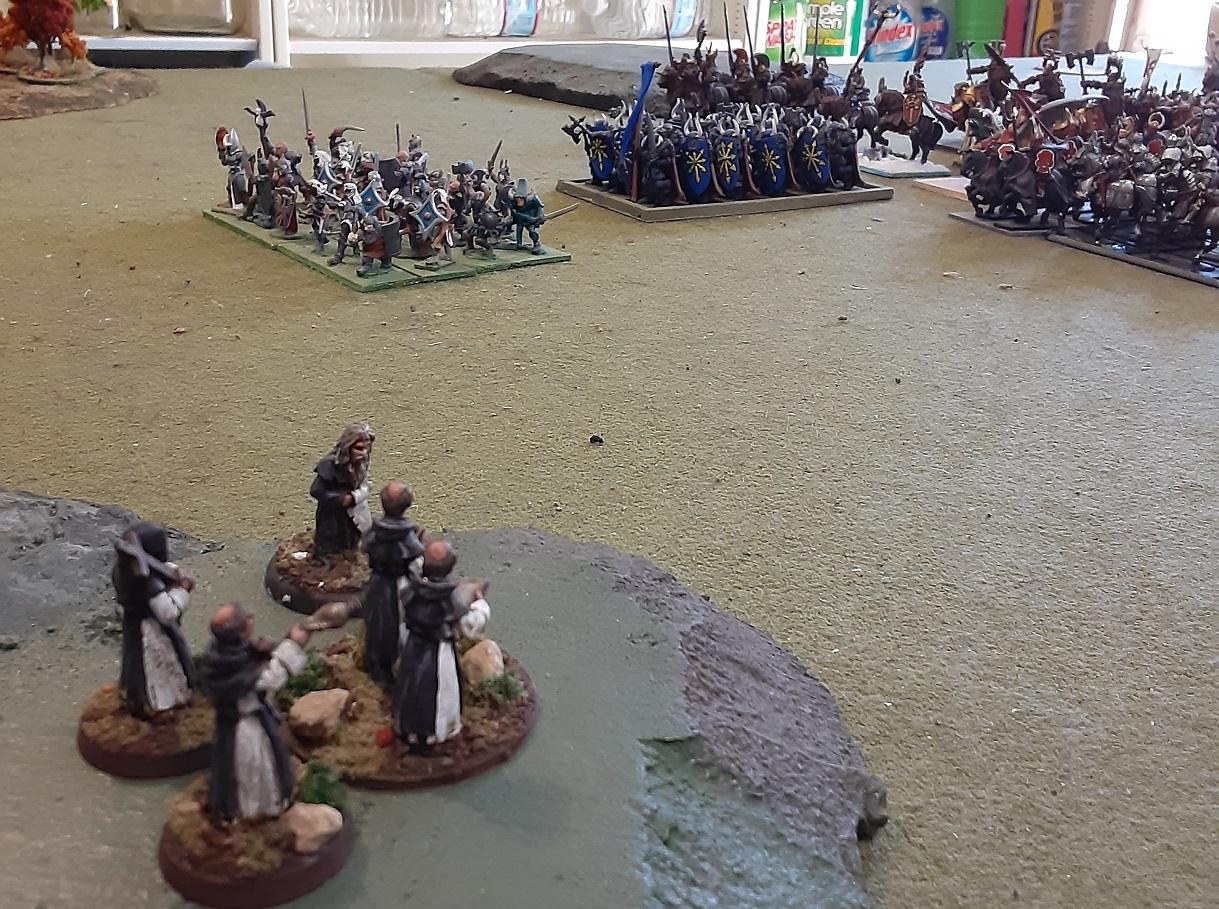
Arthur has decided to split his forces a bit – he and Lancelot will start out on their own and try and take out the rear guard. Hopefully this won’t weaken the Knights of the Round Table too much.
Arthur charges the Red Marauder Horse, while Lancelot charges the Black Marauder Horse. Galahad & the Knights of the Round Table charge 1st Blue Chaos Knights, while the Knights of Camelot charge the 2nd. The Cult of the Black Knight fail their charge against the Marauder foot – as they are too far away.
Magic – (die roll: 2,2) –
The dead collectors fail to cast Doom & Darkness
Galahad’s prayer ‘The Hammer of Sigmar” is blocked.
Shooting:
Knights who say ”NI” – kill 2 Blue Chaos Warriors with their chanting
Brother Maynard & his Holy Hand Grenade, ably assisted by the Wise Man, kill 10 Blue Chaos Warriors.
Combat:
The Knights of Camelot kill three Chaos Knights (including one by a horse). The latter break and run, but escape. The pursuit carries the Knights of Camelot into the middle of the Chaos formation and they crash into the dreaded chimera.
In the center, the Dead Collectors bellow a challenge that is confidently met by the commander of the Chaos Knights. He is quickly cut down by the dead collectors and their speculum. The rest of the attacks of Galahad and the Knights of the Round Table are frustrated by thick Chaos armor. The 1st Chaos knights hold, but are unable to reform.
Arthur kills Red Horse Marauders, they break and run, Arthur breaks off the pursuit and heads off to assist the Knights of the Round Table.
Lancelot kills two Black Horse Marauders, but they stand
Chaos Pulse: The dice turn cold for Arthur.
Lord Melmak recovers from his surprise and starts to organize his forces. The foot marauders charge the Black Knights.
Magic (6/5 – no channels)
Cast Hysterical Frenzy – dispelled
Cast Fantasmagorica – failed
Combat
Although they lose four killed, the Black Knights make short work of the marauders, killing 12. They route and are overrun; the pursuit takes them one inch short of the six surviving Blue Chaos Warriors of Tzeentch.
The chimera kills three Knights of Camelot. Lady Luck frowns on the Knights, who only cause two casualties (one by horse) as the battle rages on.
Lancelot destroys the last three horse marauders. He will try and join the Knights of the Round Table as soon as he can.
The dice gods laugh in the face of the Knights of the Round Table as only Arthur scores any kills (2), whereas the Chaos Knights score three kills. The battle rages on.
Turn 2: An uphill battle
The Black Knights charge what is left of the Blue Warriors. Lancelot is able to rejoin the Knights of the Round Table.
Magic (5/4 – no channels)
Tim casts Fireball on Juggernauts – dispelled
Dead Collectors fail to cast Doom & Darkness
Galahad’s prayer to Sigmund is heard
Shooting
Knights who say “NI!” get all tongue twisted (double misfire – out one turn)
Brother Maynard lobbeth the Holy Hand Grenade at the surviving Chaos Knights, who being naughty, are blown to tiny bits (no survivors)
Combat:
The Black Knights destroy five out of last six Blue Warriors, with the sole survivor fleeing for parts unknown. No longer having the numbers for a viable horde formation, the Black Knights reform and face the approaching Chaos Lancers.
The Knights of Camelot are gaining the upper hand against the Chimera. They manage to block all attacks from the beast and inflict two wounds of their own (The Chimera has one wound left)
The battle rage is finally boiling up in Arthur’s blood. He dispatches the last three Chaos Knights singlehandedly. Arthur and his men reform and await the onslaught of the as yet uncommitted Red Warriors.
Chaos Phase: That was easy
Chaos Lancers attempt to charge Black Knights, but just fail to reach. This does enable Lord Melmak to join their unit
Magic: (6/5 – bad day for channeling continues)
Cast Hysterical Frenzy on Red Warriors
Cast Lash of Slann on Knights who say Ni – dispelled
Combat
Good News: Knights of Camelot complete the destruction of the Chimera. Bad news: In its death throws, the tail takes out three knights. Worse News: They are now in the charge path of the three Skullcrushers.
The Dead Collectors step forward to challenge the Chaos Champion – thanks to the speculum, they fight to a standstill. Arthur continues to wield his runefang Excalibur to deadly effect, killing four warriors; Lancelot and Sir Robin contribute one kill each, but Galahad comes up with a duck. The impetus of the Chaos Warriors’ charge has been broken, but being proud warriors of Chaos, they fight on.
Turn 3: T’is but a scratch! I’ve had worse!
The Knights of Camelot decide to fall back in order to give Brother Maynard and the Forest Knights a chance to damage the Juggernauts.
The Black Knights charge the Chaos Lancers, hoping to deny them their lance benefit.
Magic: (6/1 + Chaos Channel).
The Dead Collectors cast Doom & Darkness on the Khorne Warriors
Galahad’s prayers are unanswered
Tim casts Fireball at Juggernauts, but it is dispelled
Shooting
The knights who say “Ni” spend the turn using Binaca to get their voice back
“One, Two, Five…” the Holy Hand Grenade is a total failure against the Juggs
Combat
The Black Knights are decimated by Melmak and his ABS (8 total kills to 1); but thanks to their standard of discipline, they continue to make their stand.
Meanwhile, Arthur and Excalibur, along with Lancelot & Galahad and some others, Destroy and overrun what’s left of the Khorne warriors.
Chaos Pulse: The Black Knight is invincible!
The Skullcrushers fail to make their charge as the Knights of Camelot advance to the rear.
Magic (5/1 + Chaos Channel)
The Big Kablooie! Bad Moon Rising casts Hysterical Frenzy on Melmak and his knights, but it blows up with irresistible force, killing the sorcerer and causing a wound to Melmak.
Shooting
The last two survivors of the Red Marauders manage to take out a Knight of the Round Table with their throwing axes.
Combat:
Melmak and his knights destroy the last of the Black Knights who die in place.
Turn 4: Hey! Where did everybody go?
Arthur turns his formation to threaten the rear of the Skullcrushers; otherwise everyone remains in place.
Magic: (2/3 – no channels).
Dead Collectors cast Doom & Darkness on Melmak & his lancers, hoping that it will combine with the Forest Knights & The Holy Hand Grenade to send them packing.
Shooting
Forest Knights kill 3 Chaos Lancers
Holy Hand Grenade takes the last two lancers and also wounds Solvak the ABS – but they stay,
Chaos Pulse: Last stand of the Knights of Camelot
Figuring a slim chance is better than no chance, Melmak & his ABS ride away from the Forest Knights and Brother Maynard towards Arthur & Company.
Bursting with rage at not having been in combat yet while their comrades fall all around them, the Skullcrushers pass a 17” charge.
The Skullcrusher dilemma. Do they take a chance at a long charge with Artgur threatening their rear?
Combat:
The Skullcrushers overwhelm and destroy the last six Knights of Camelot who only manage to cause one wound as they fall.
Turn 5: Another such victory shall ruin me
Arthur & company charge Melmak and his ABS
Magic (2,2 – no channels)
The Dead collectors cast Doom & Darkness on the Skullcrushers
Galahad’s prayers to Sigmar are heard
Shooting:
The Forrest Knights misfire
The Holy Hand Grenade bounces off the thick armor of the juggernauts (needing a 5+ save, Chaos rolls 4 x fives on 5 dice)
Combat:
Melmak choses not to live forever:
The Dead Collectors bellow out their challenge to Melmak, They cause one wound to Melmak, who fails to return the favor. Meanwhile, Arthur makes short work of Selvak and personally captures the Chaos standard.
The severely wounded Melmak has had enough and flees the battle. Unfortunately, he flees right into the line of sight of Brother Maynard and the Forest Knights. He will not long survive the ignominy of his flight.
Arthur has won a great battle and has stopped the Chaos incursion dead in it
s tracks. But he will need reinforcements before he continues his Holy Quest.
I am ready for my close-up Mr. Demille
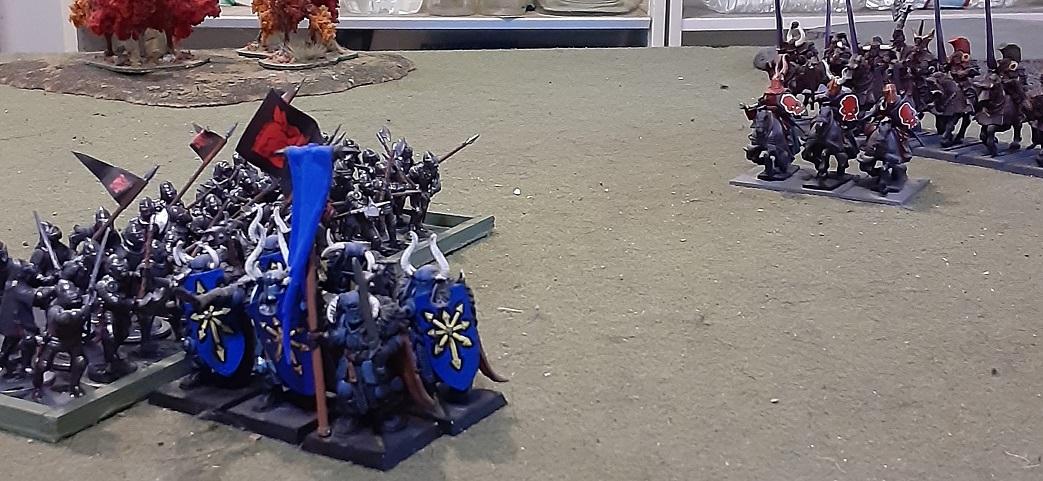
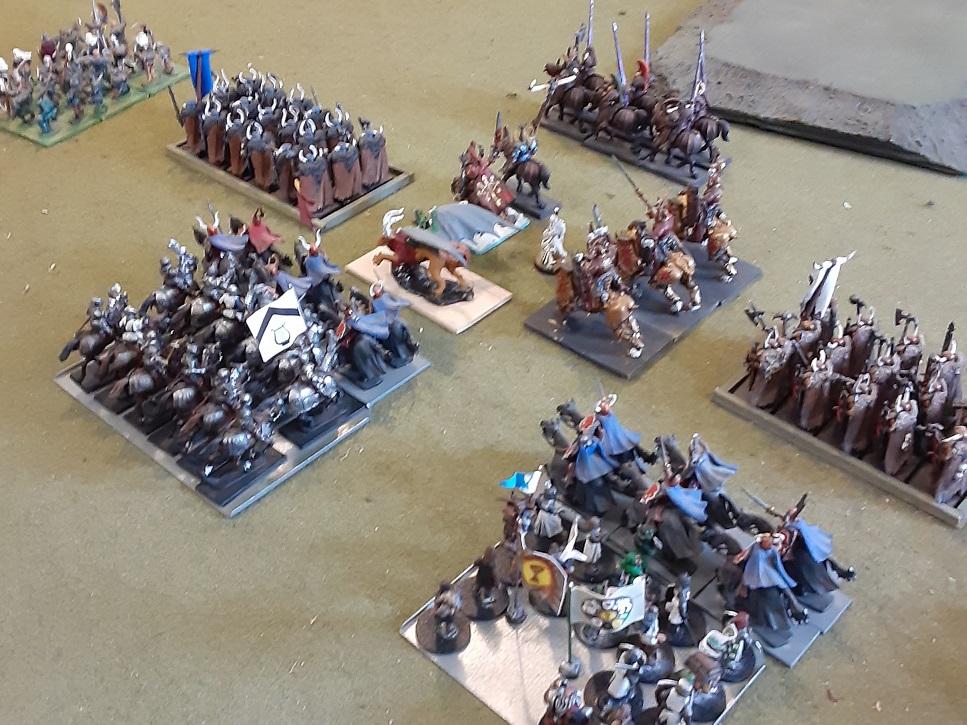
Arthur & Company face up to the Warriors of Khorne
 Automatically Appended Next Post:
 More Photos
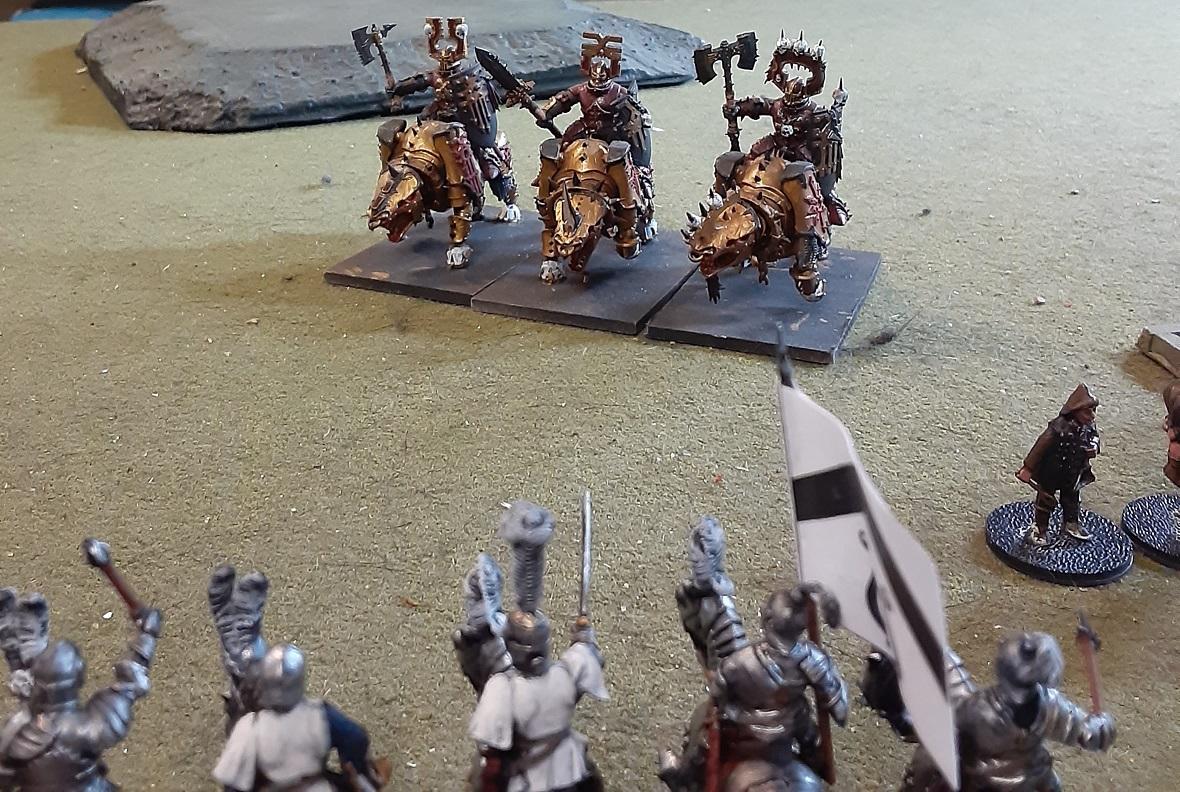
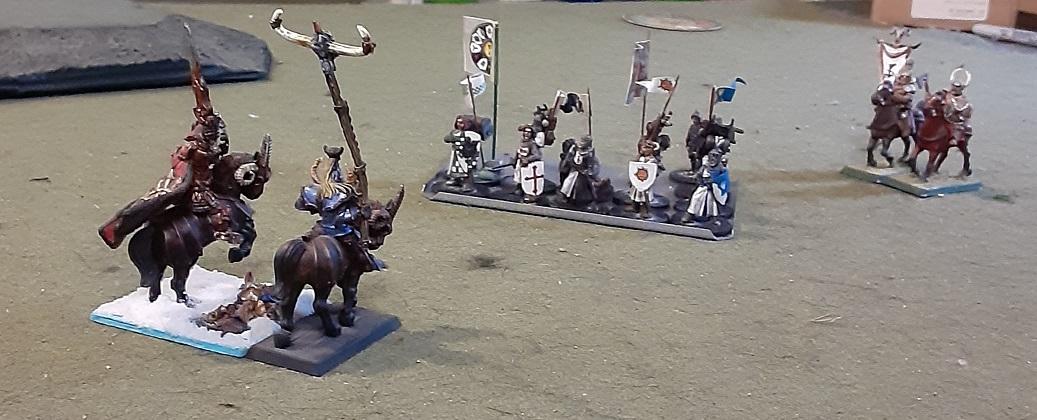
Lord Melmak
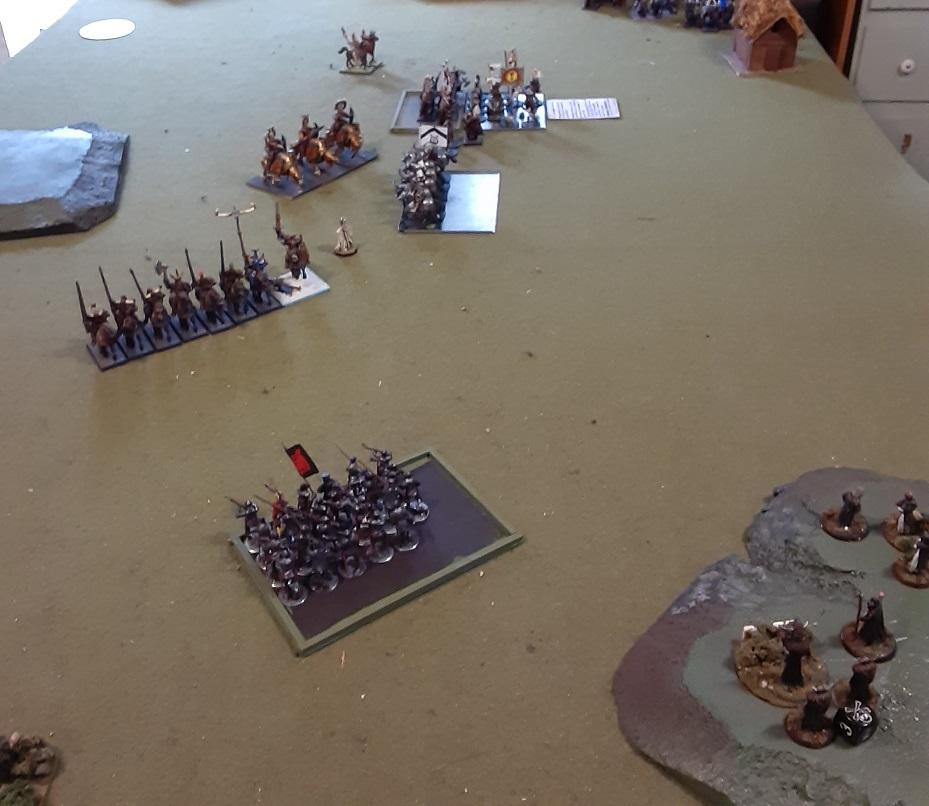
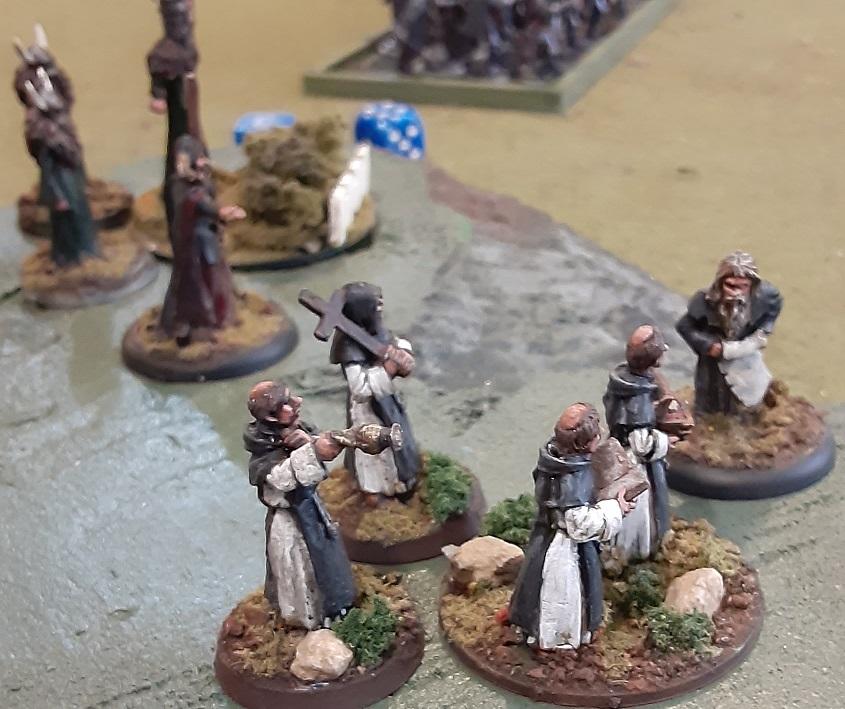
Brother Maynard eyes some juicy targets
Brother Maynard receives instruction from a wise man
The trap is sprung
The next battle may be a bit as I need to paint some

