Forum adverts like this one are shown to any user who is not logged in. Join us by filling out a tiny 3 field form and you will get your own, free, dakka user account which gives a good range of benefits to you:
No adverts like this in the forums anymore.
Times and dates in your local timezone.
Full tracking of what you have read so you can skip to your first unread post, easily see what has changed since you last logged in, and easily see what is new at a glance.
Email notifications for threads you want to watch closely.
Being a part of the oldest wargaming community on the net.
If you are already a member then feel free to login now.
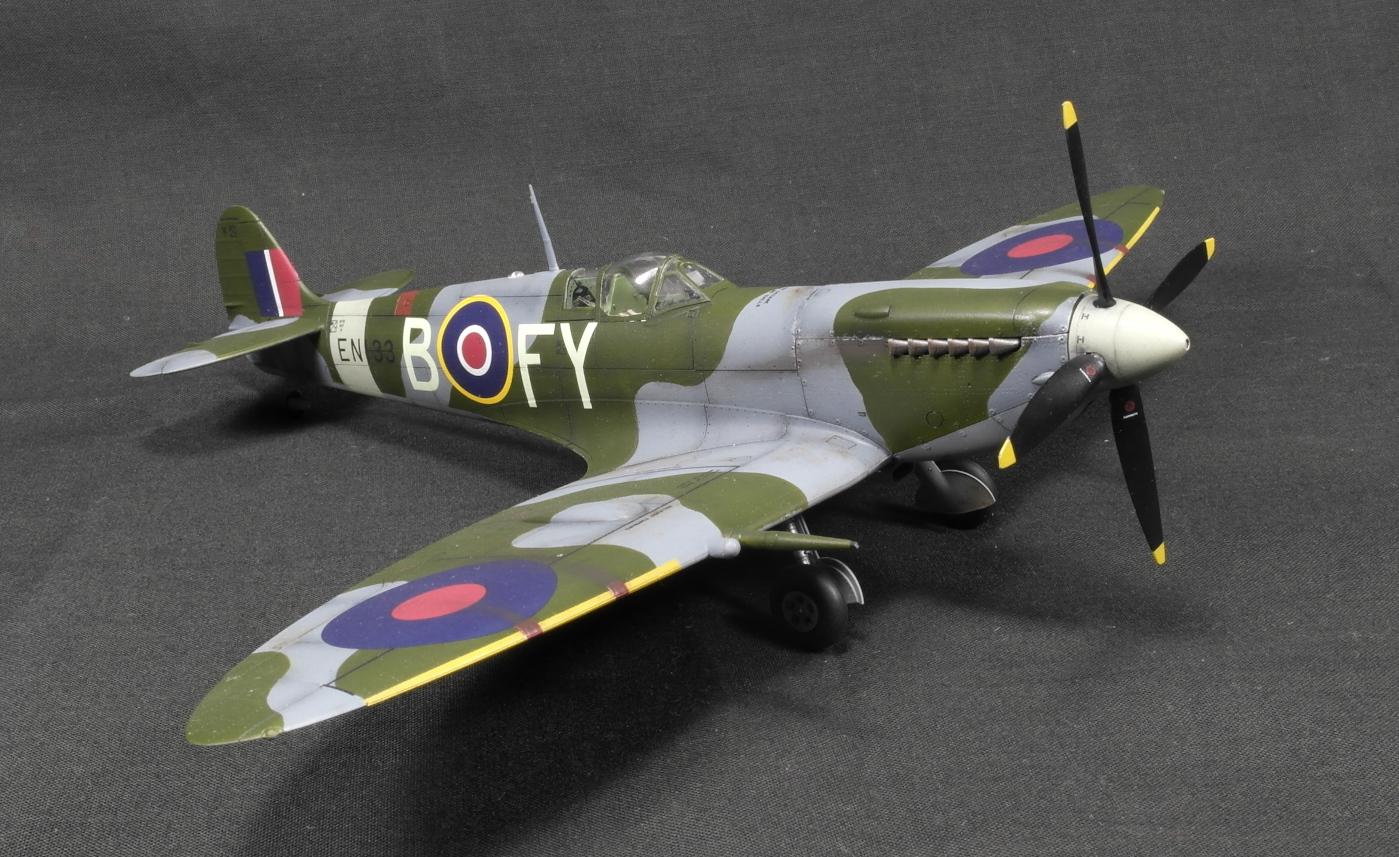
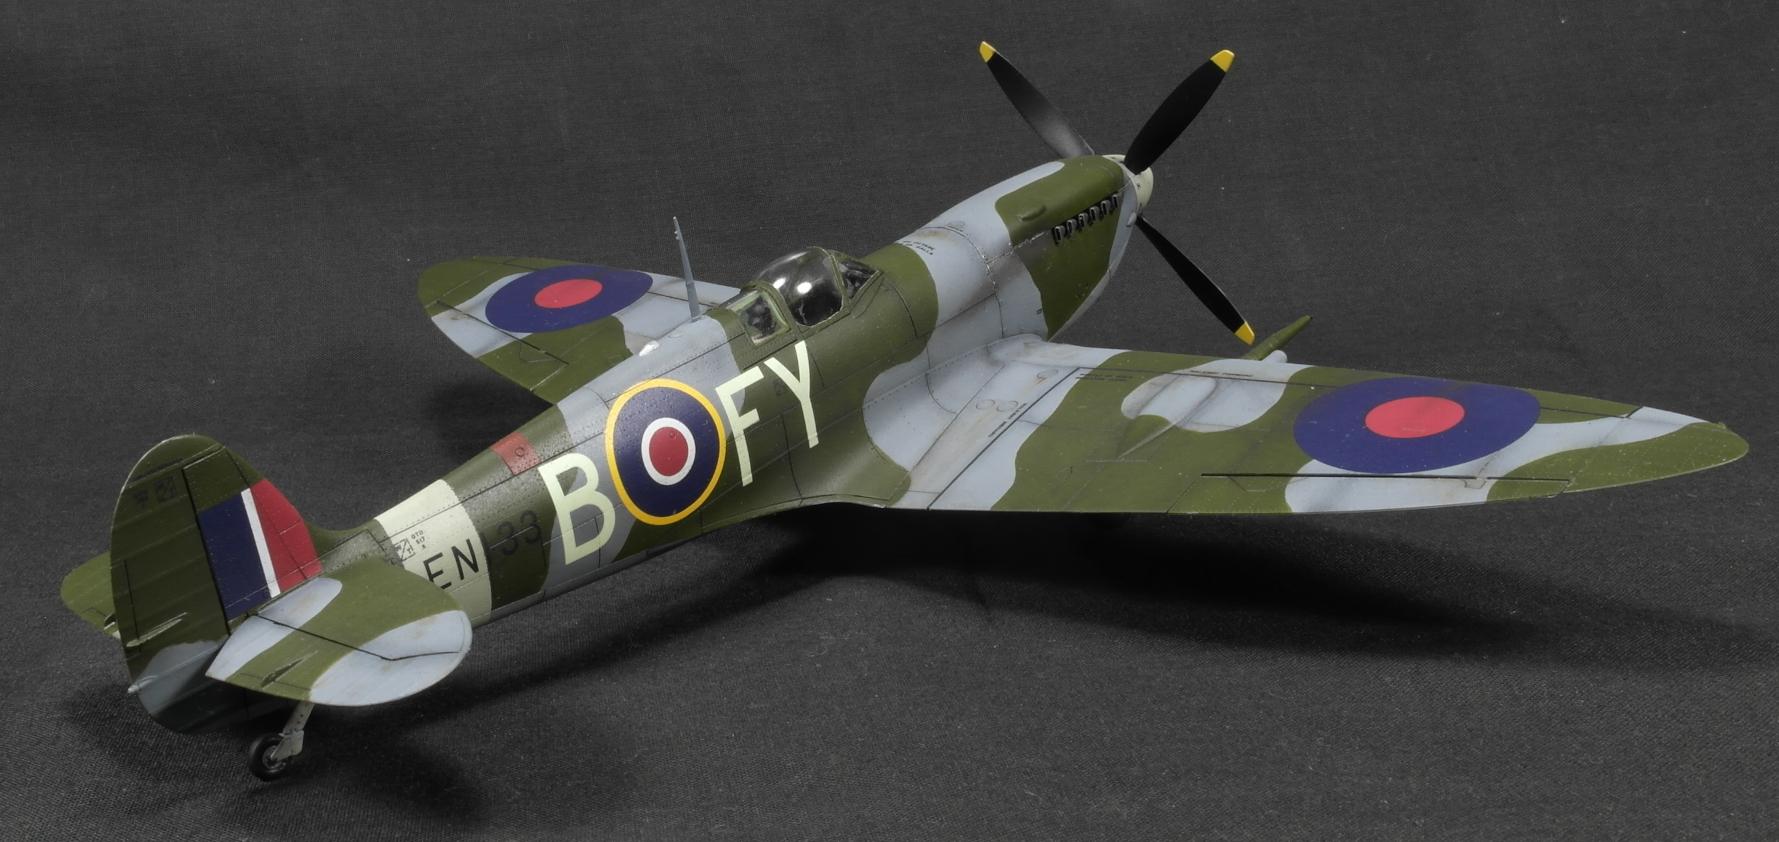
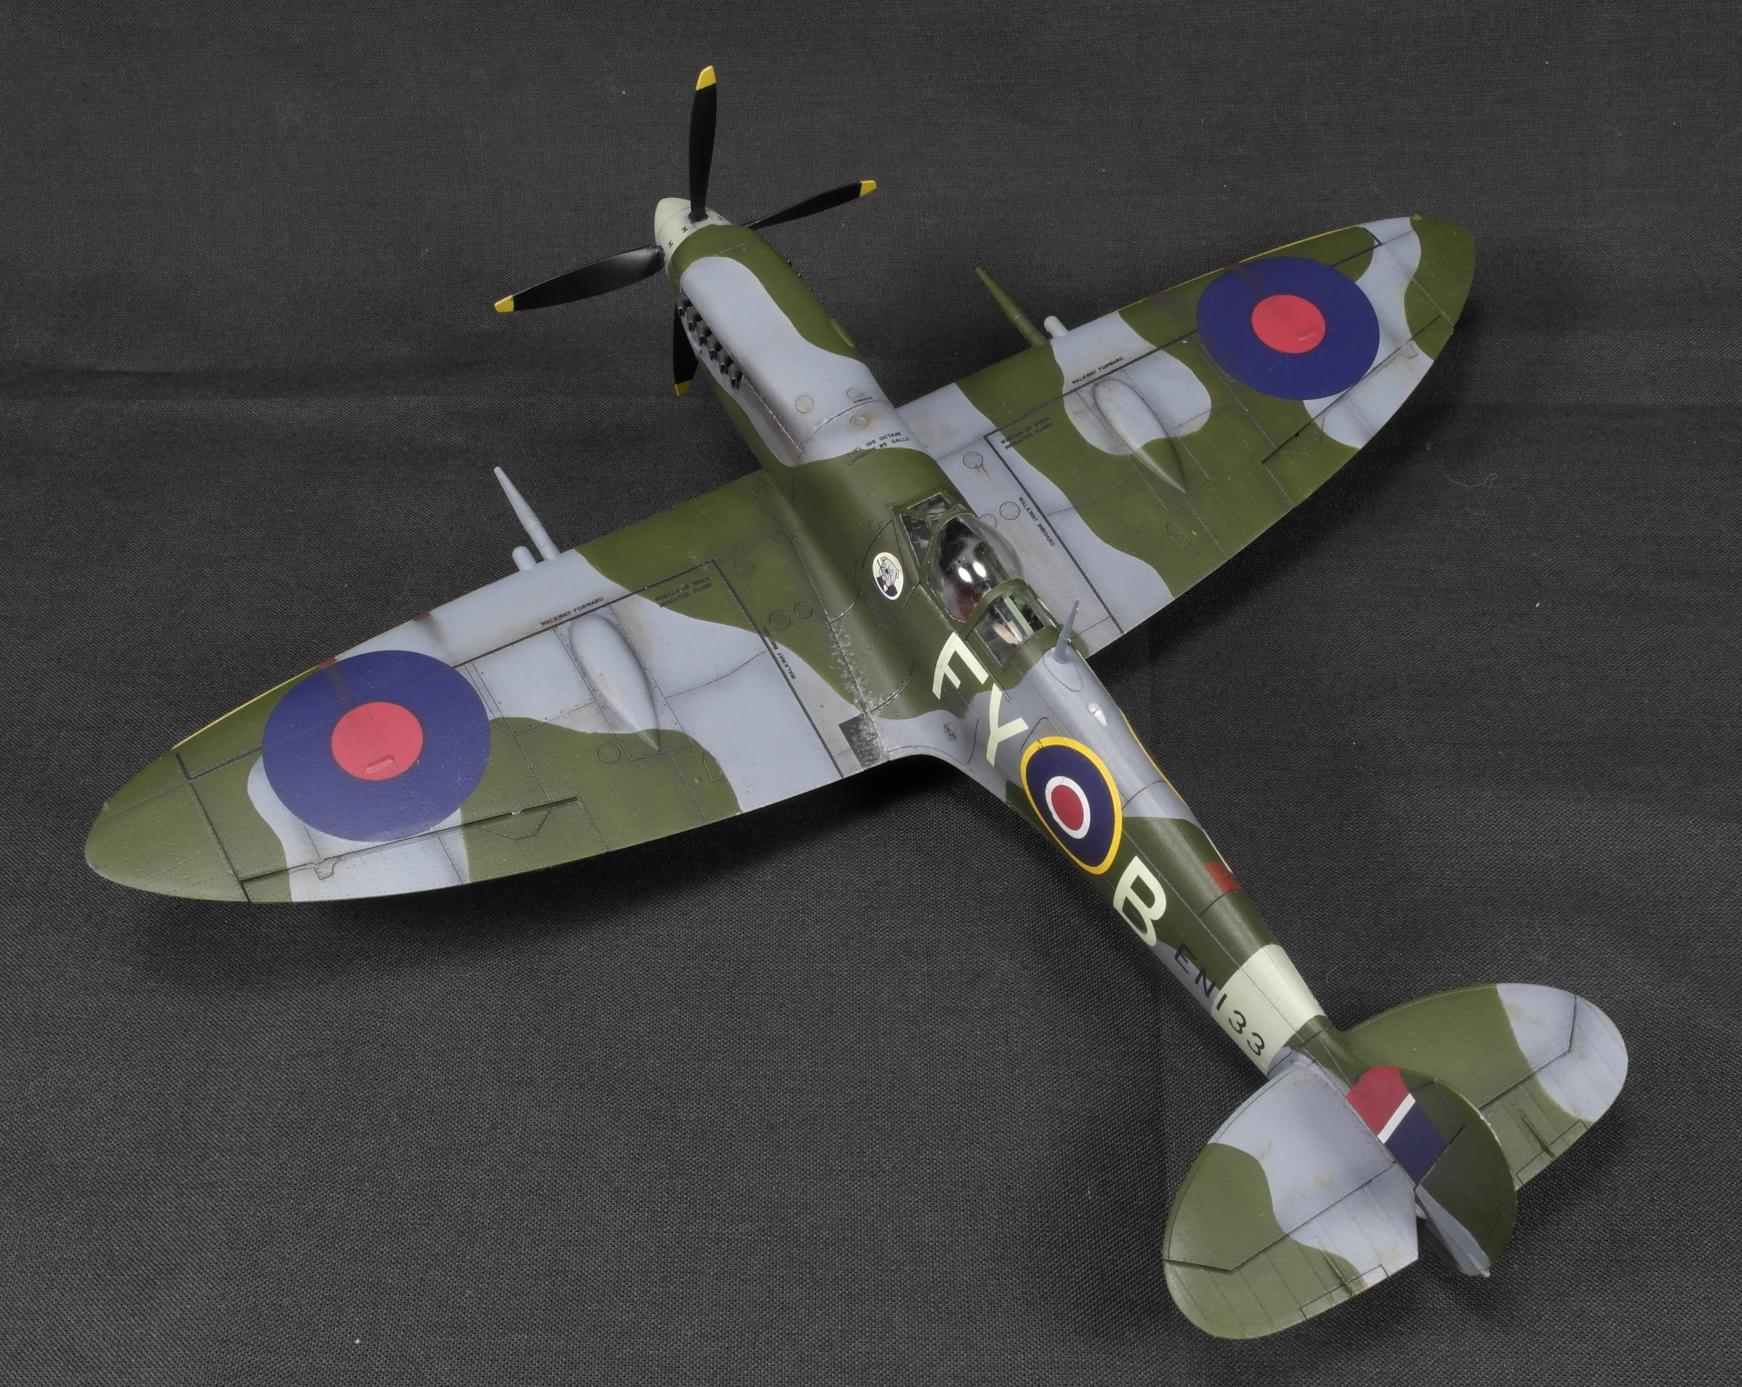
In an effort to bring some civility to you barbarous miniature painters (I'm looking at you, Ork painters ) I have recently delved into the mystical arts of scale modelling. I present to you my endeavours - a 1:48 scale Spitfire Mk IXc, painted in the 1943 'Day Fighter' scheme of No.611 Sqn, Royal Air Force. This project was a fantastic departure from my usual fare of minis, and I've learnt a great deal about oil colour weathering, pre-shading and decal application. It's also 2 months late for when I was going to submit it to the Dakka painting challenge... but better late than never eh .
I'm aware Dakka generally doesn't go in for historical stuff (Although, I can assure you critics that the Spitfire is quite simply weaponised beauty - Dakka worthy of Gork himself (Or was it Mork?)), but I can recommend that any mini painters looking to step out their comfort zone and try new techniques should really have a go at some scale modelling. It's a great genre for learning new approaches.
Anyway; less rambling, more Spitfire - c&c is most welcome!
Sorry for the pics - they're not as good as I'd hoped. A new background is definitely in order!
This message was edited 1 time. Last update was at 2021/03/25 21:31:41
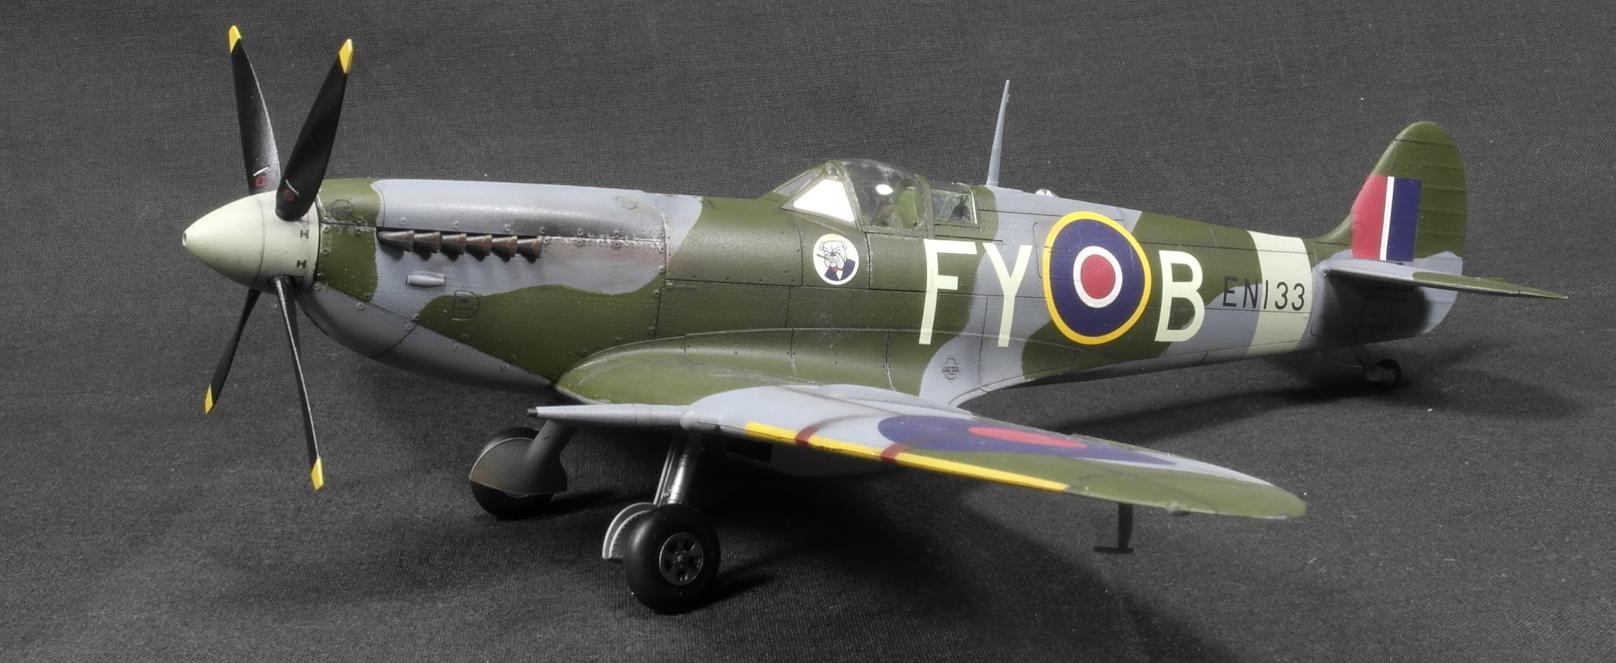
Absolutely love it, particularly the rivet detail. I've recently started getting the Airfix mag every month, and have a huge appreciation for details such as this which really give it that extra bit of realism
The detail is immense on this kit. It's made by Eduard and at £24, including photoetch details and spares for the later Mk IX variant, it's pretty great value. It's my first aircraft kit in possibly 15 years and I was staggered by how much more detailed it was - many manufacturers don't bother with the rivets on the large surfaces. I also fondly recall my childhood Airfix magazines!
Next up is a Tamiya Mosquito, and then possibly an Airfix Tomahawk
Looks fantastic, and reminds me I have an unbuilt Airfix Spitfire kit that's been sitting around for the last couple of years.
40k returnee (originally played 1987-1995). Also loves Space Hulk and Dark Future.
Currently repairing/repainting/restoring 1st Ed. Imperial Guard Regiment + Mentor Legion attachment and original Space Hulk.
Hey Warpig, I was really hoping to see you finish off this model for the painting challenge in January and was wondering if I would ever see your attempt! Fantastic work on such an iconic aircraft and if you don't mind me saying, a little bit of dust/weathering around the wheels would really sell the mini even more for me as the rest of the mini shows a bit of wear and tear.
Always good to see another scale modeller, cracking work!
@ John - Thanks! I can highly recommend cracking out that Spit In all honesty, having a go at this was a nice change of pace and technique and helped me get over some burn-out with doing minis.
@Tyranid - Thanks dude! Yeah I eventually got the paints for it after a month and a half of waiting . The weathering was something I was a bit cautious about. There's reams of forum posts with various enthusiasts debating the extent to which these aircraft got bashed-up, so in the end I decided to go for a moderately weathered look - used, but looked after. It seems reasonable that the groundcrews were rushed off their feet, but would keep the aircraft in general good order. The wheels do have some oils and dust on them, but perhaps I needed more to make it stand out in my photos (which are a bit sub-par really). Thanks for the suggestion - I'll put it to use on my next one
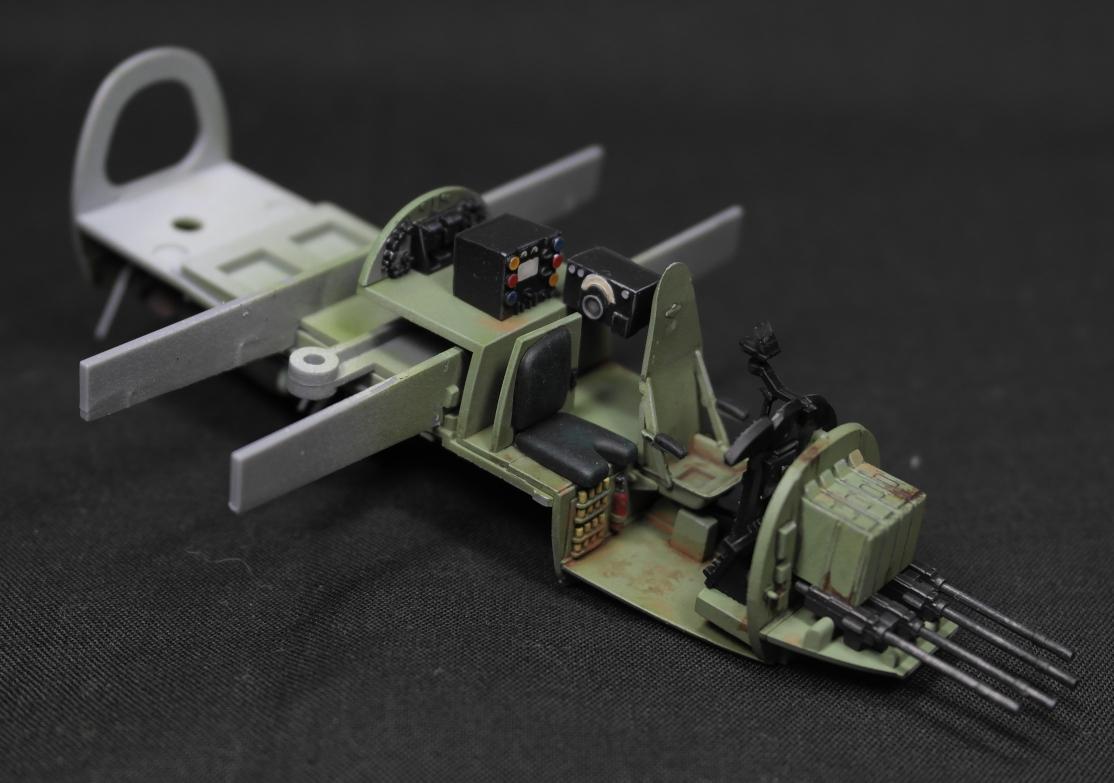
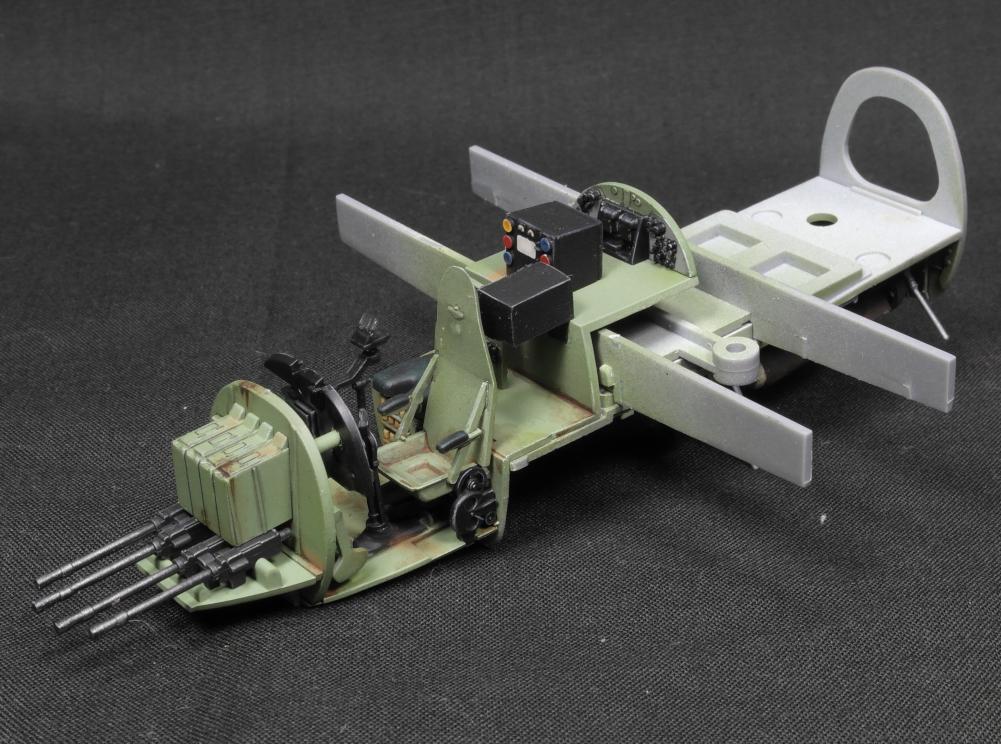
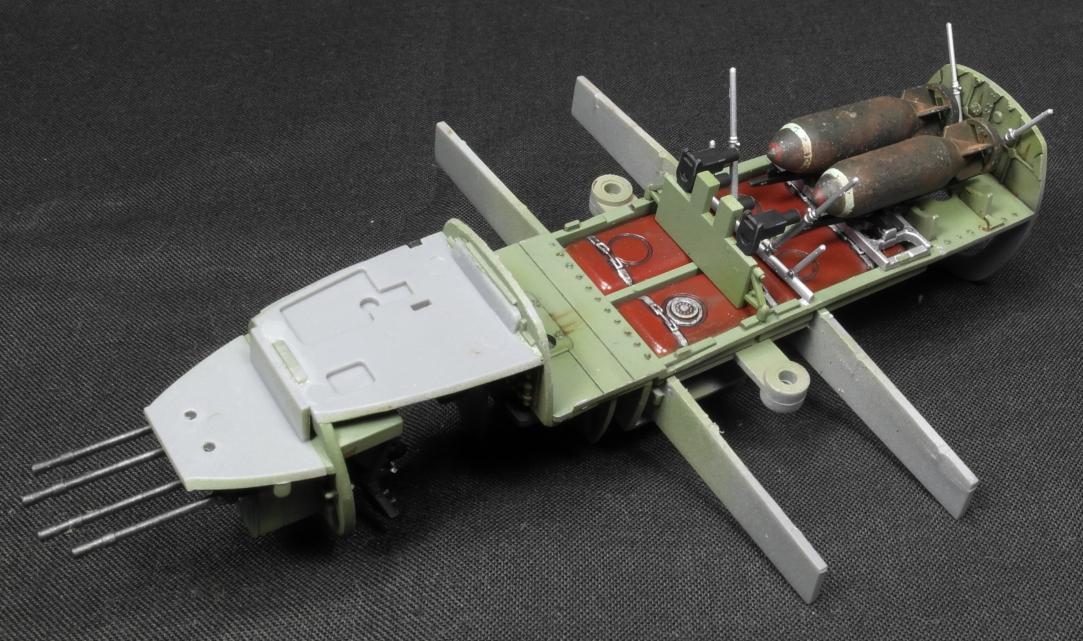
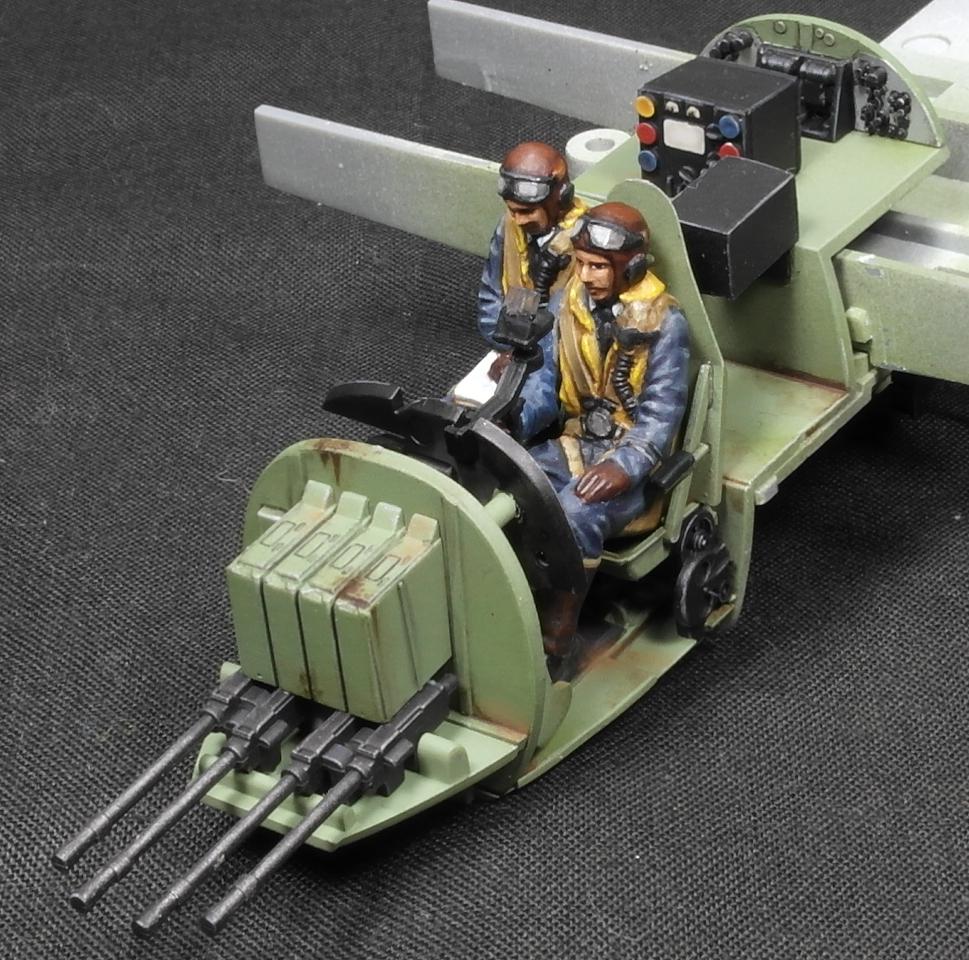
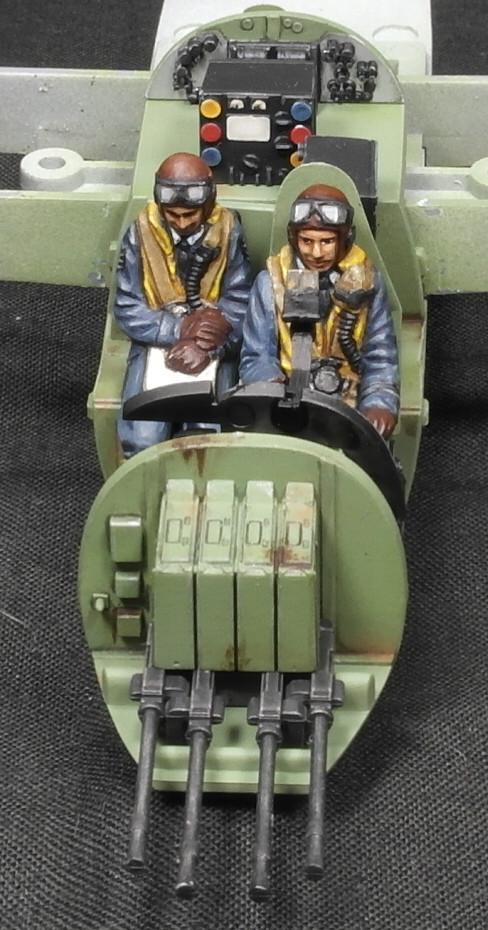
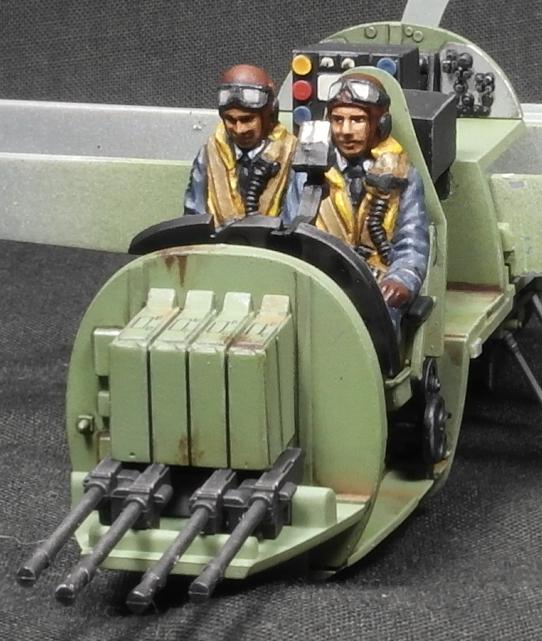
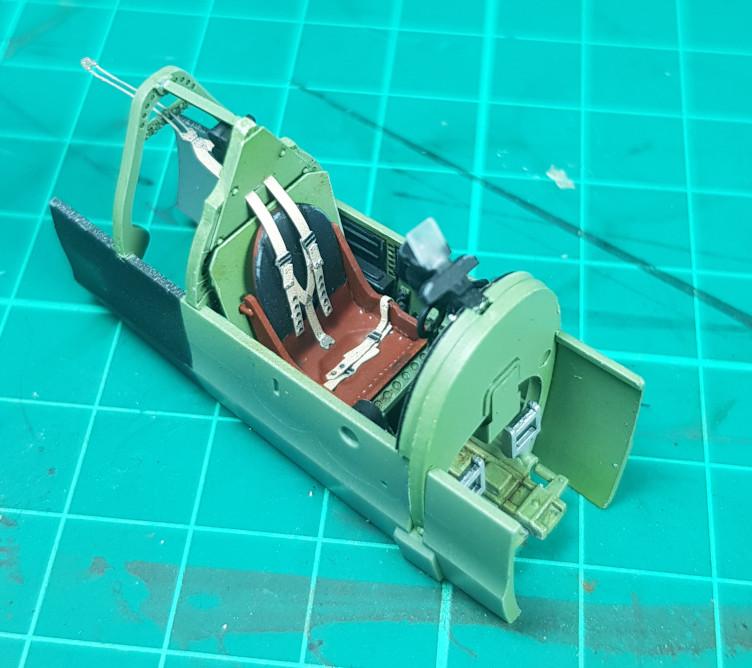
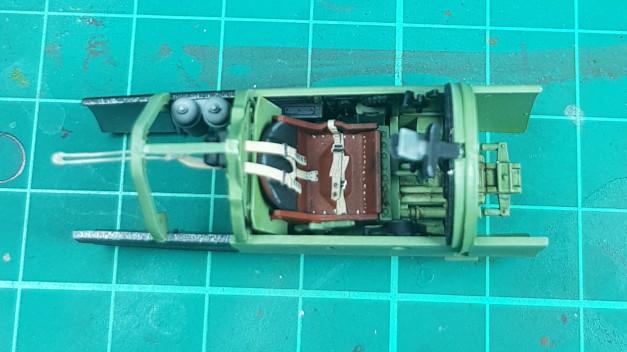
EDIT: I also realised I didn't post any pics of the cockpit, which took me the longest to do
This message was edited 1 time. Last update was at 2021/02/28 13:39:26
Nicely done one the cockpit, how did you find the photoetch? I picked up a profi-pack Hellcat in 1:72 which comes with some and I've never used the material before.
Love the cockpit detail, did you use Eduard parts at all? Have heard great things about them.
I'd love to get back into Airfix. As I mentioned previously I've been getting the mag and I have an old EE Lightning kit half-finished from a while ago, do you have any tips on how to give it that wow-factor you've done so well on here, particularly with the panel/rivet detailing?
@Tyranid - I've mixed feelings about the photo-etch. On the one hand, for the instruments it was a blessing - the Tamiya mosquito I'm working on now has moulded instruments and decal details, so you can imagine the pain I had trying to get the decals to set over the raised detail (I actually binned the decal and painted the instruments). But the Spitfire instruments were great and come in 3 pieces so you get the raised detail of the instrument mountings.
However. I was not a fan of some of their other choices. The droptank lever, canopy handle and rearview mirror are concertina affairs that have to be folded up to gain bulk. As you can imagine they essentially all came apart at the tiny hinge points, so they're either a bit wonky or, in the case of the mirror and handle - entirely missing from my build as I basically destroyed them (Actually the mirror assembly pinged out from my tweezers into the aether. Tzeentch was definitely involved ). to make it more irritating the regular sprues don't include plastic alternatives for these parts, despite the technology being there to make such small components. So I'm 50:50 on that. All I can say is to handle the PE very carefully and make sure you hoover the floor BEFORE you begin (In case you drop them). But if you get them all on, it's very rewarding
@Valkyrie - Thanks again . It's all Eduard - one of their profi-pack offerings (Which as far as I can tell are just their lower cost 'Weekend Editions' bundled with some PE and more decal options). But you heard correct, they are really high quality and went together very easily with almost no gaps.
The EE Lightning is my all-time favourite jet and unfortunately are now as rare as hens teeth in 1:48 (I've been desperately searching for one! ) Get it done - I'd love to see your take on it. Regarding tips, I'm flattered you'd ask . There wasn't anything fancy that I did really, but I guess I can give a run down of my process:
Spoiler:
1.Make sure all sprue gates and mould lines are sanded, a must for any model really.
2.I used Tamiya extra thin cement for assembly so that I wasn't blobbing glue everywhere, and them Mr Hobby Surfacer 500 to fill any gaps. So at this point I have a nice clean and flush model to work with. I should also say that I did all the interior detailing first, but I assume you guessed that .
3. Painting it, I mainly used an airbrush, with my brush for touch-ups only.
4. I started with a grey primer coat (Vallejo), then pre-shading it by running over all the main panel lines, recesses and shaded areas (Like wing roots/wheel wells) with a targeted spray of black. Some modellers hate this preshading as it's unrealistic, others love it. As it was my first venture I rolled with it, but my latest Mosquito is using a different type where I apply a stripey-streaky pre-shading to mimic realistic fading and water runs over the aircraft. It's a matter of taste really.
5. After that, I put down my main colours, applying thin coats to the point where the inside of the panels register the colour, but the preshading was just showing through for a bit of visual interest. I did the underside first, masked it off then sprayed the top. I made the mistake of trying to do each camouflage colour separately, but it may be better to do all one colour, reapply the preshading and then do the other. Masking the camouflage lines was done with Mig masking putty.
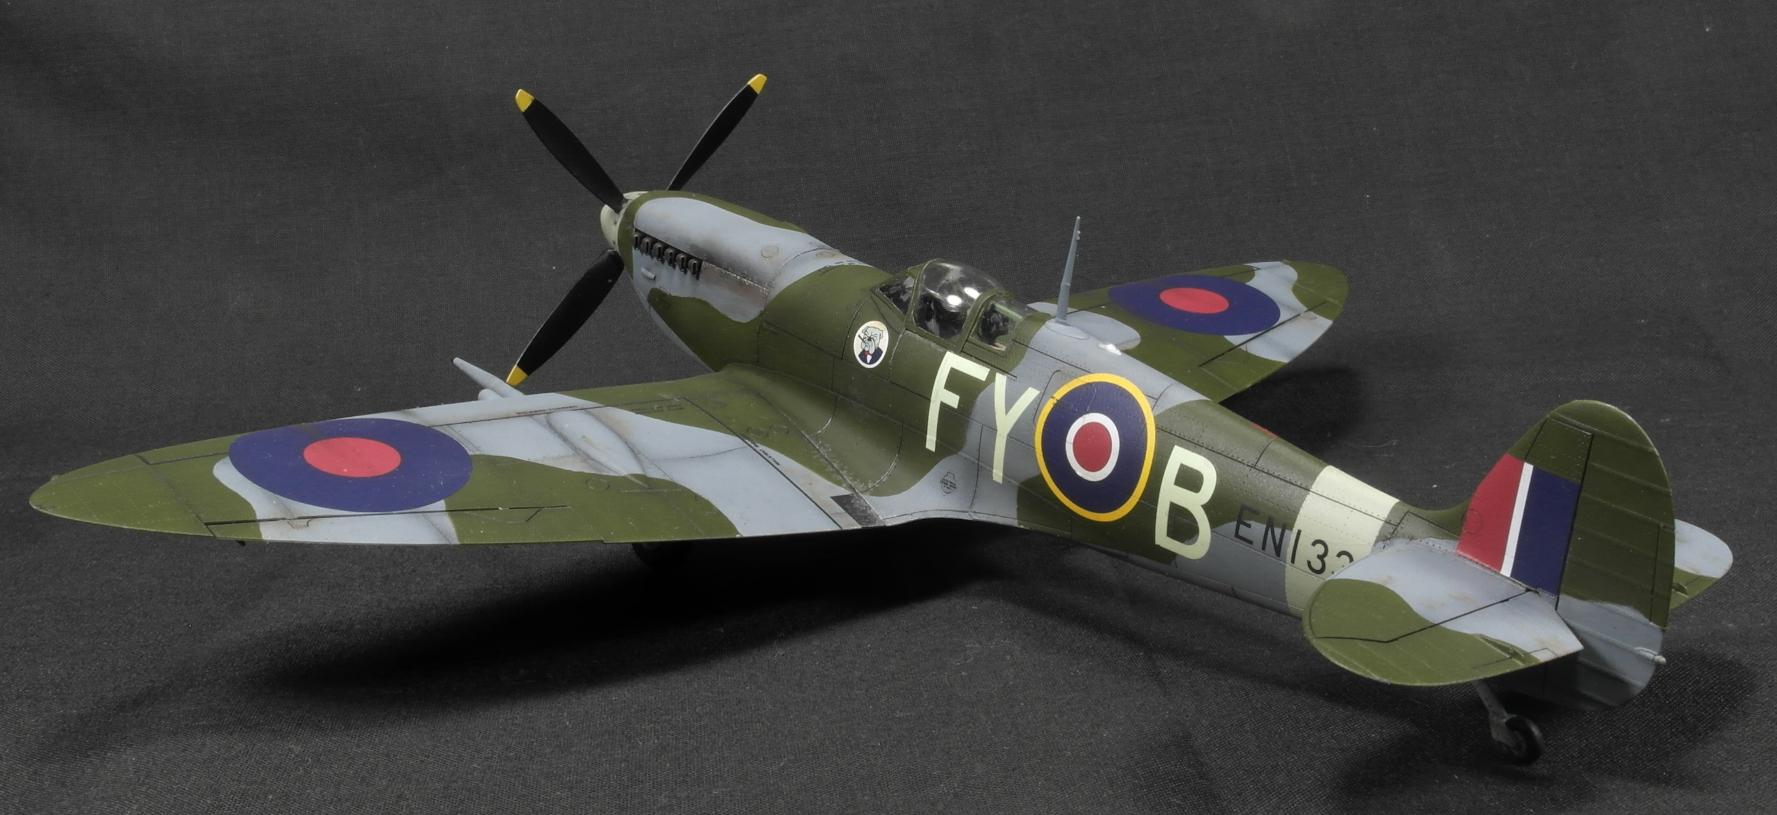
6.Then I sealed it all with a gloss coat and did the panel lining. For that, I watered down some Vallejo Dark Grey wash and cover the lines I wanted, before rubbing off any excess with a cotton-bud. Here's where the rivet detail debate comes in. Generally, you don't want all of your rivets detailed (In my opinion), because aircraft mainly had flush rivets and tight panels to ensure aerodynamics. But you have to have a trade off because scale modelling only applies to detail, not lighting conditions. So sometimes you need to emphasise the panel lines and groups of rivets even if the real aircraft would have those gaps. Basically, use your instincts on what looks good to you. I tried to pick out the main panels and any hatches/flaps - but I didn't pick out all the rivets in the wing or fuselage skins, because I didn't feel it was representative.
7. After panel lining and rubbing off excess, I applied the decals (Using Micro-Sol/Set to get them to settle into the panel lines). Another gloss coat was followed by some oil weathering (The gloss is important at both stages so you can wipe off mistakes and excess), then a final matt coat to bring it down.
8. Then I applied some fresh chipping with a prismacolour silver pencil and it's all done!
Of course, if you're going with the silver Lightning scheme, the camouflage section is less relevant. If I could have got ahold of one, I was going to attempt to use Alclad II lacquers, as they're super realistic metallics. I'd say the trick there is to study some pics of Lightnings and apply some subtly different metallics to certain panels to give it visual interest. You won't be able to do preshading, because the metallics require a gloss black undercoat to really pop. That's your fundamental difference, because all the other steps of the build I've listed above should still apply. And if you're doing the camouflage scheme, then all my steps should help.
Oi, looks pretty gud fer humie work, mite be worth nickin an' lootin. Gonna need a lot more dakka though. Or maybe lotsa burny rokkits! And some teef. Deffo needs some teef, else how dey gonna know you's proppa grim?
Superb job on the Spitfire. Your attention to detail and quality of work makes it look the real thing.
"All right, sweethearts, what are you waiting for? Breakfast in bed? Another glorious day in the Corps! A day in the Marine Corps is like a day on the farm. Every meal's a banquet! Every paycheck a fortune! Every formation a parade! I LOVE the Corps!" ---Sgt. Apone
"I say we take off, and nuke the site from orbit. It's the only way to be sure."-----Ripley
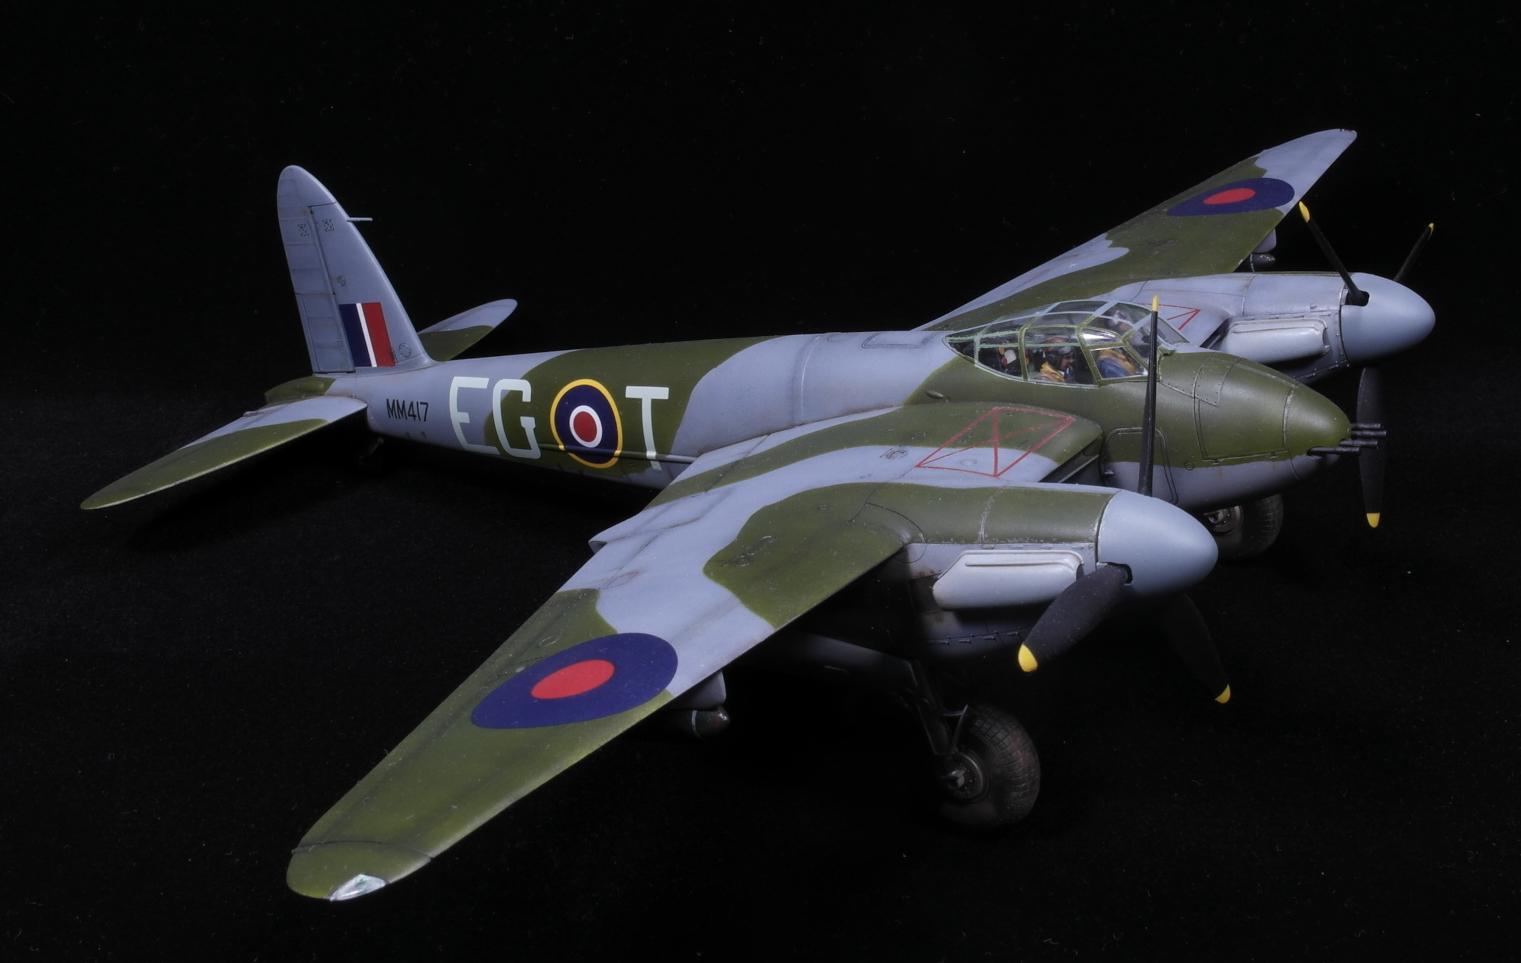
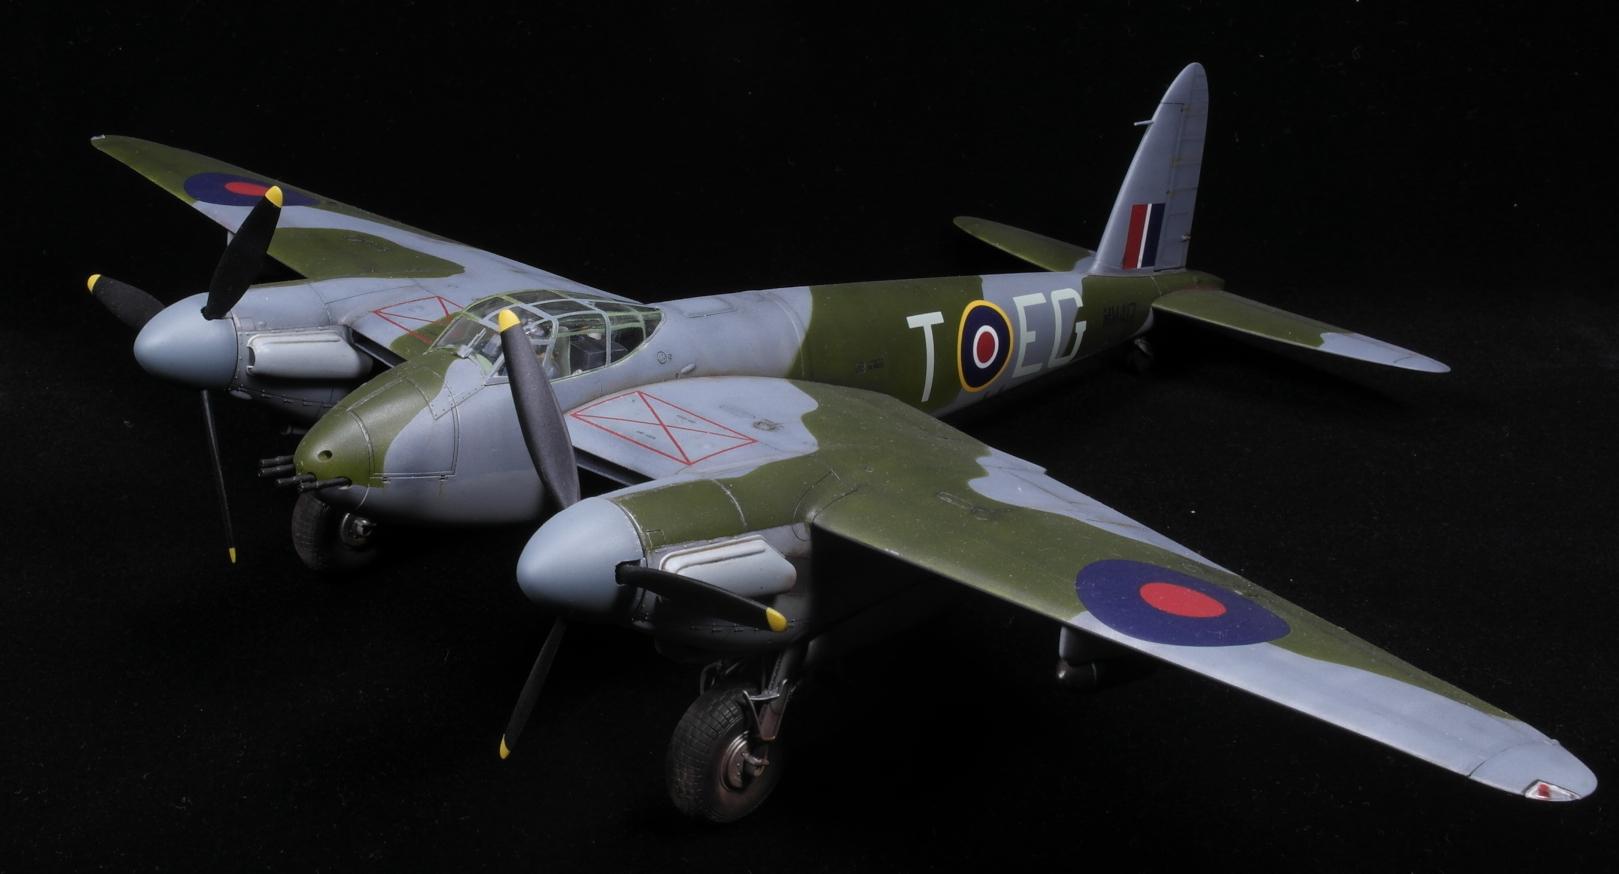
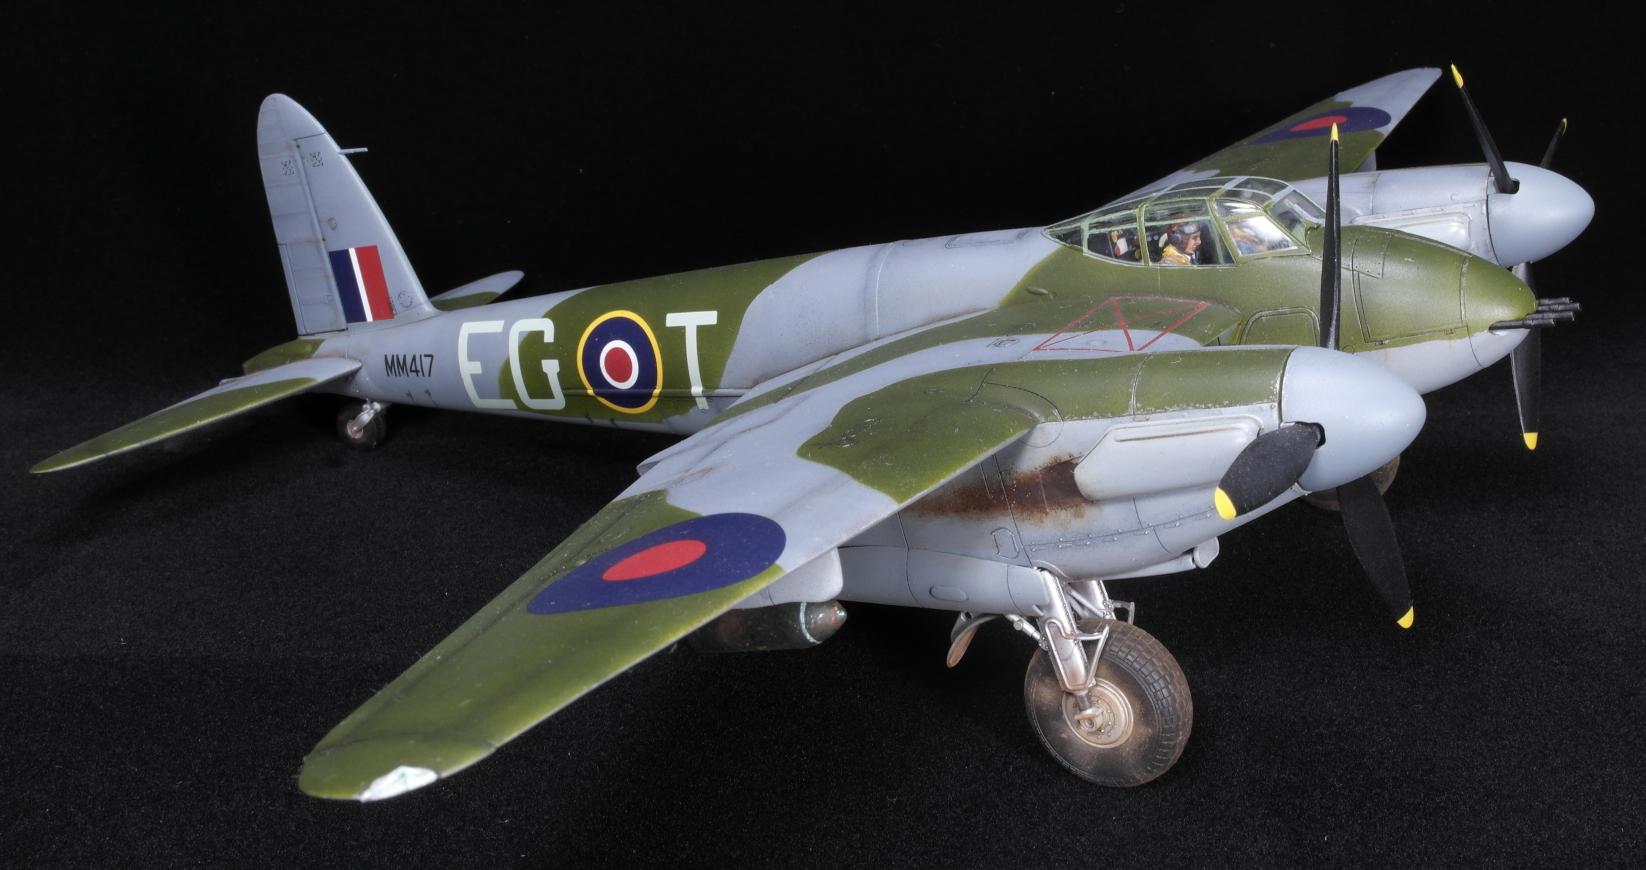
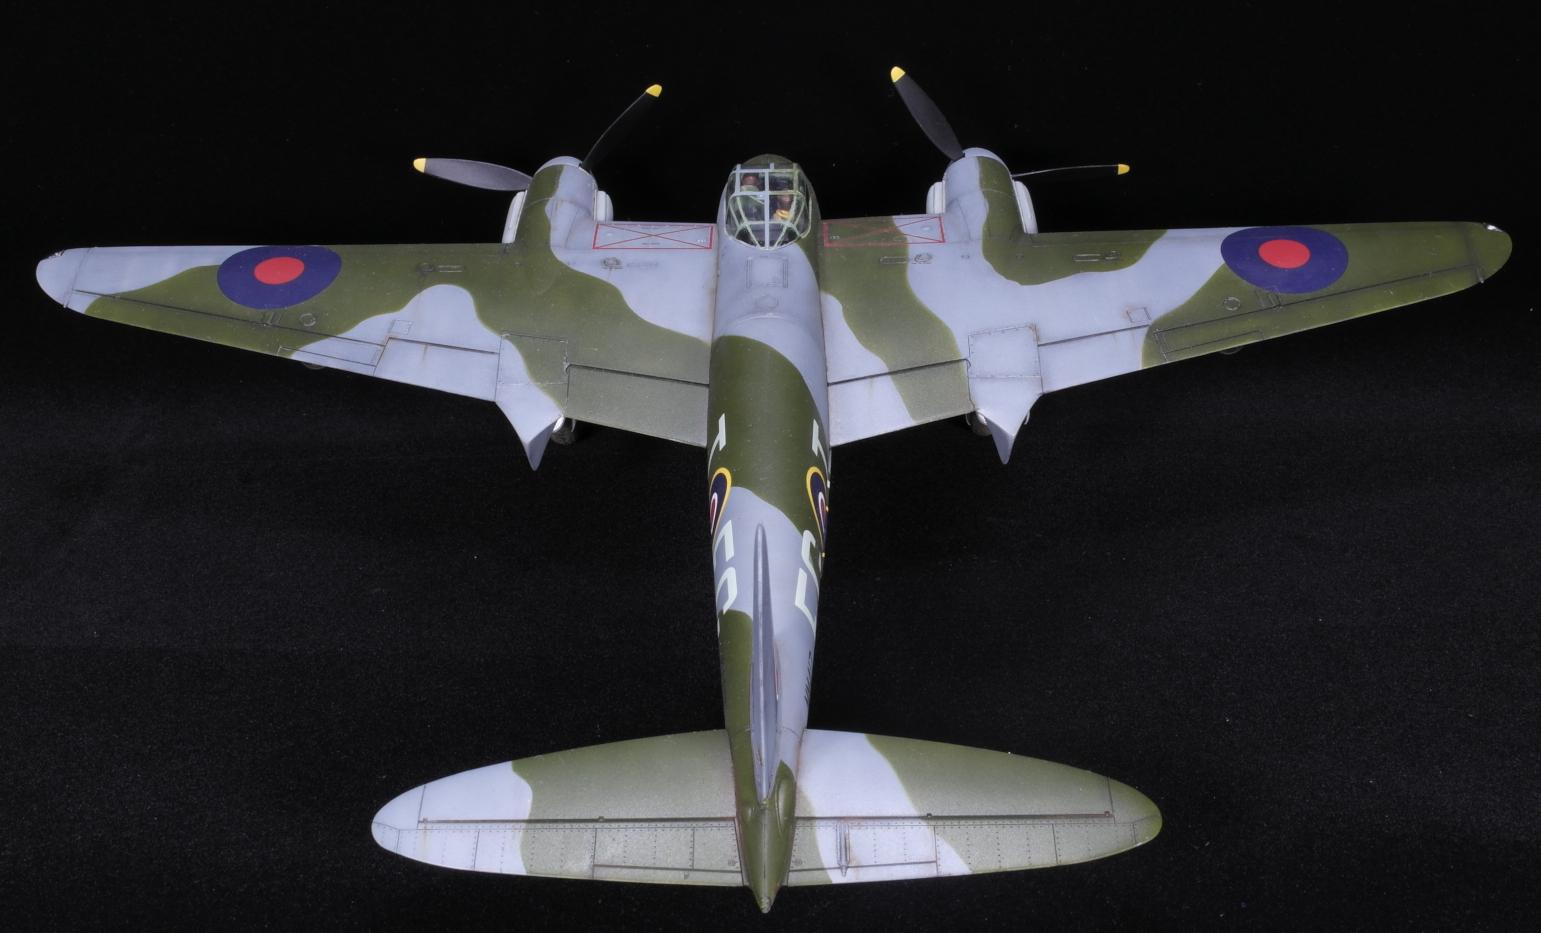
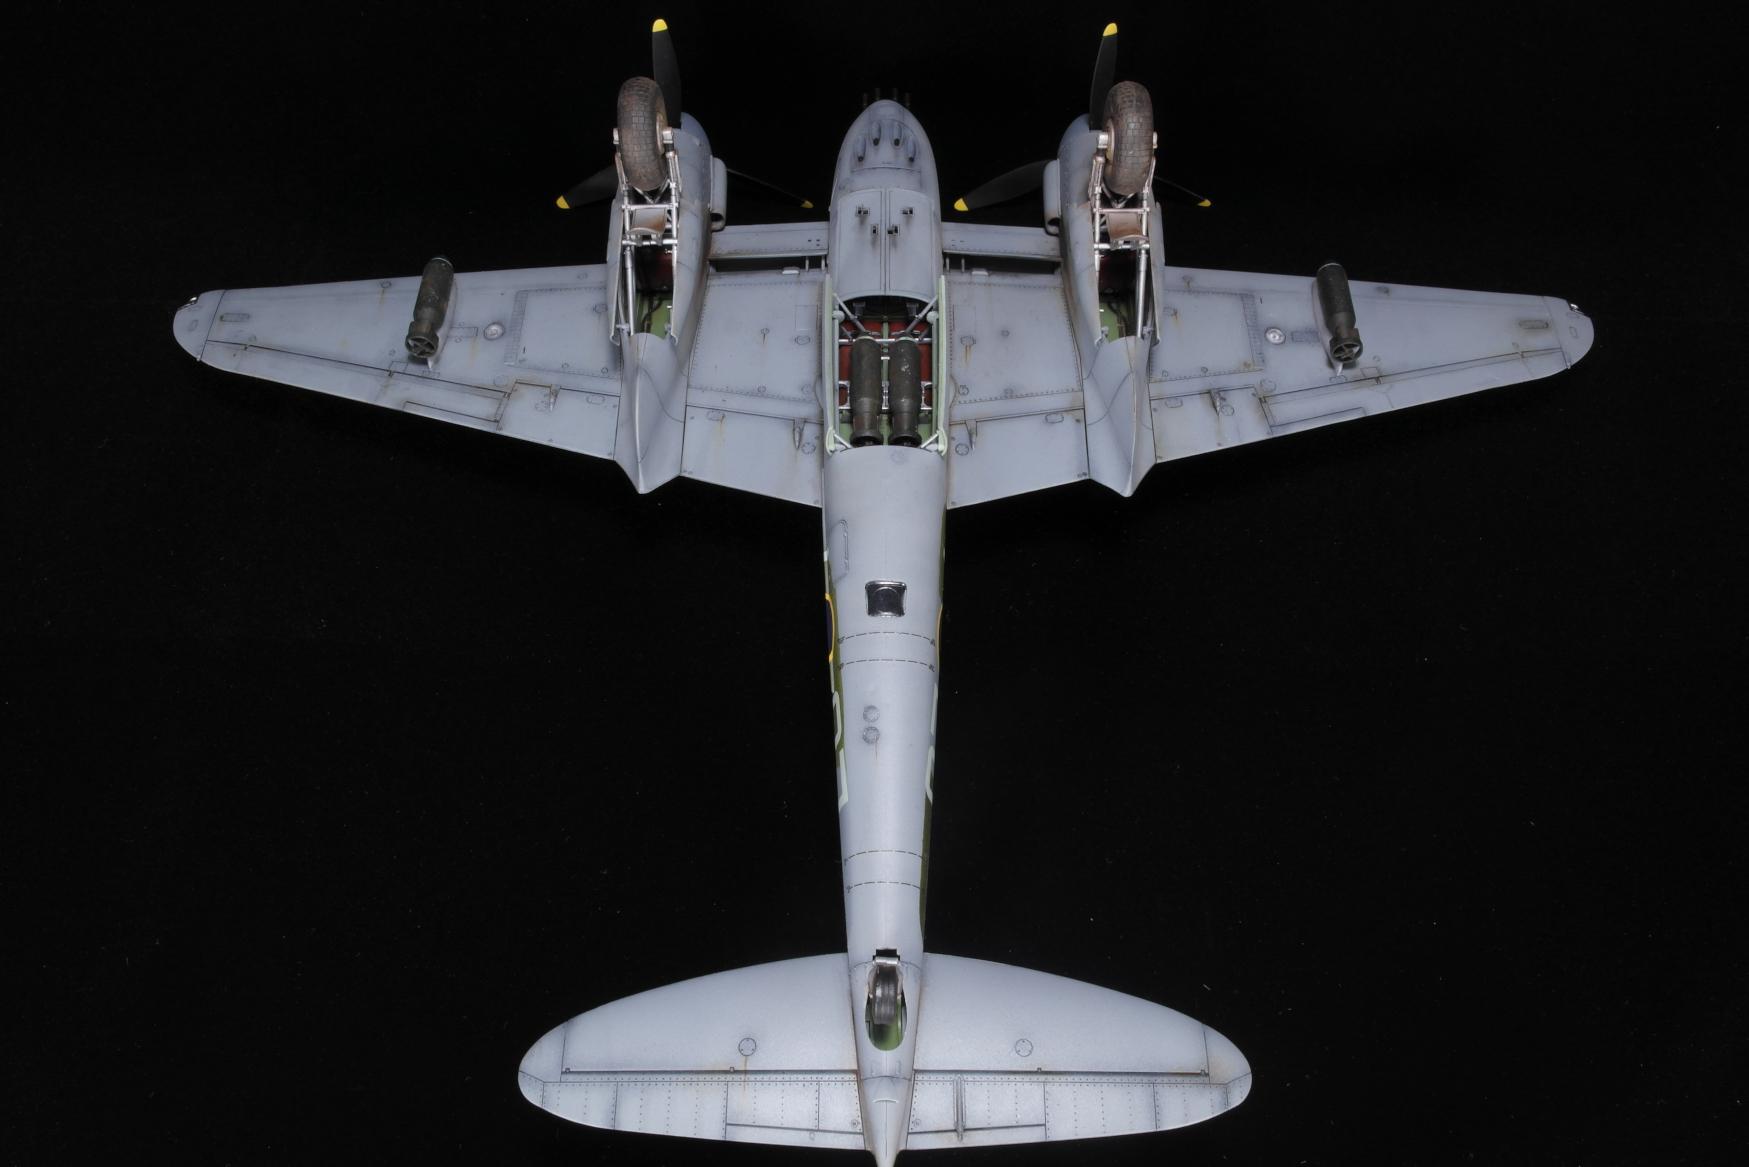
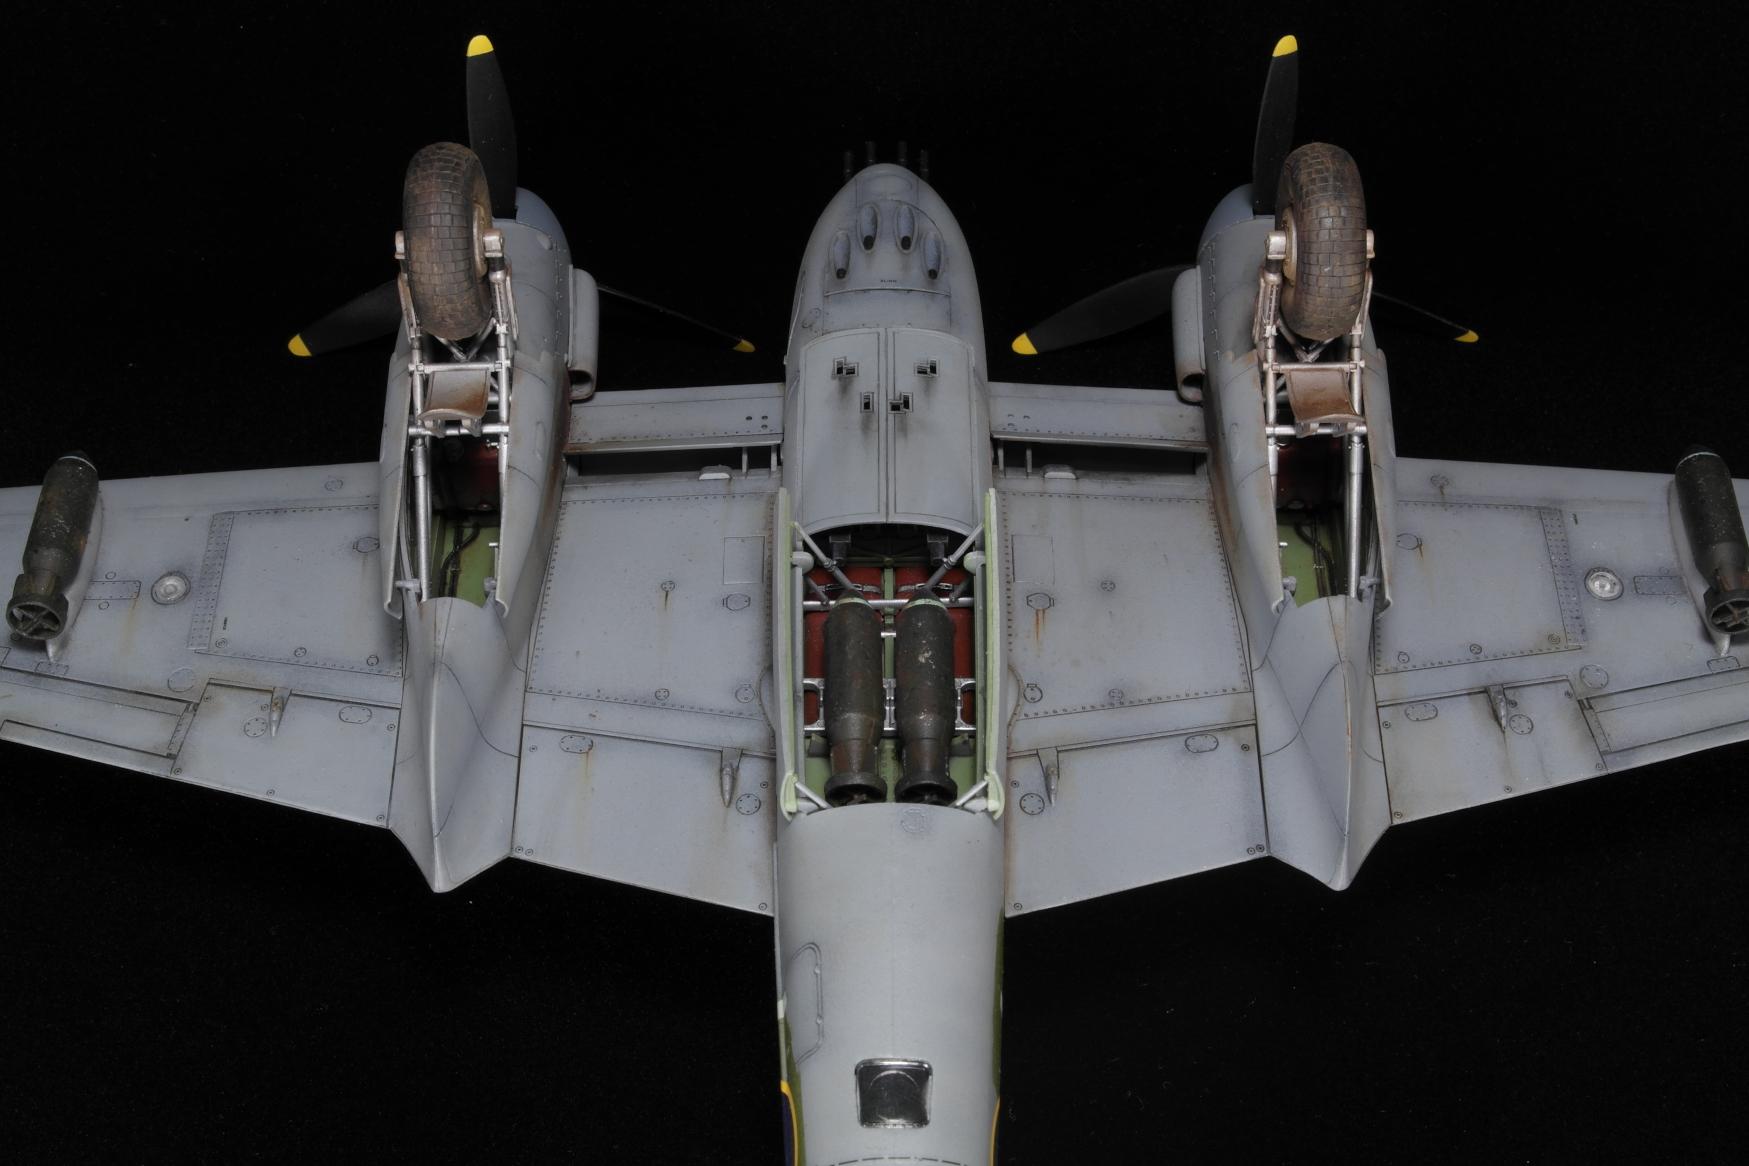
May as well rename this thread, because there's more to come - I seem to have got myself hooked on 1:48 stuff recently Anyway, my latest - a De Havilland DH.98 Mosquito, FB Mk VI. This one is painted up as 'EG-T', 487th (New Zealand) Squadron Royal Air Force. Once again, I had a great time getting stuck into this. It was more challenging than the Spitfire, as there are almost no panel lines - owing to it's plywood construction and skin. A couple of issues here and there (of my making), but I'm happy with how it turned out.
As usual, C&C most welcome and appreciated!
Next up: Tomahawk IIB 'GA-V' of the 112th 'Sharkmouth' Squadron RAF, along with a bonus diorama (If I can manage it!).
Another lovely model Warpig, the mozzie is a really pretty plane to look at and you've nailed the lightly weathered look. The only real feedback is nitpicky, and that is that a few chips in the cockpit would have been great but it's not something you'd ever see when the model is fully assembled.
Neat to see pilot miniatures too, scale modellers don't seem to paint those regularly.
Thanks man - I appreciate it! I also appreciate the nitpicking, helps me improve. I didn't apply much chipping to the cockpit mainly because I wasn't sure if RAF aircrews wore hobnailed boots (Which would scratch the cockpit deck) and I figured the paint inside would be rubbed more than chipped. Also, this aircraft served in a temperate theatre (Europe), so dust abrasion would be minimal. Nevertheless - it's something to think about. Cheers!


 ) I have recently delved into the mystical arts of scale modelling. I present to you my endeavours - a 1:48 scale Spitfire Mk IXc, painted in the 1943 'Day Fighter' scheme of No.611 Sqn, Royal Air Force. This project was a fantastic departure from my usual fare of minis, and I've learnt a great deal about oil colour weathering, pre-shading and decal application. It's also 2 months late for when I was going to submit it to the Dakka painting challenge... but better late than never eh
  .
.
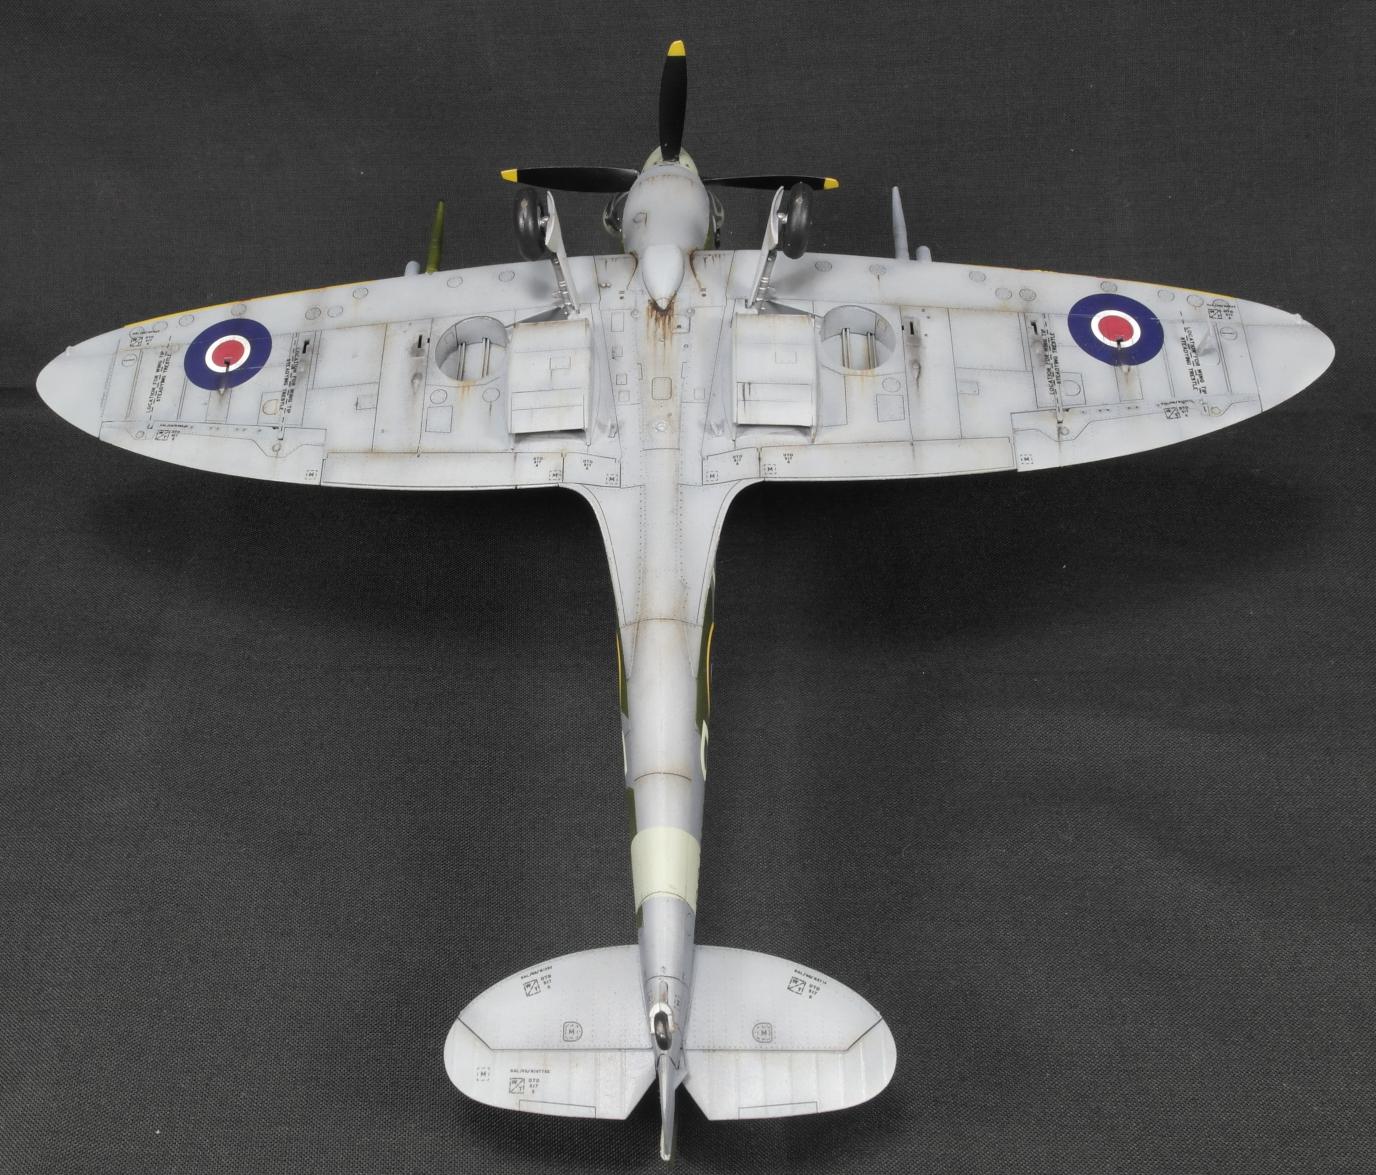


 . The weathering was something I was a bit cautious about. There's reams of forum posts with various enthusiasts debating the extent to which these aircraft got bashed-up, so in the end I decided to go for a moderately weathered look - used, but looked after. It seems reasonable that the groundcrews were rushed off their feet, but would keep the aircraft in general good order. The wheels do have some oils and dust on them, but perhaps I needed more to make it stand out in my photos (which are a bit sub-par really). Thanks for the suggestion - I'll put it to use on my next one
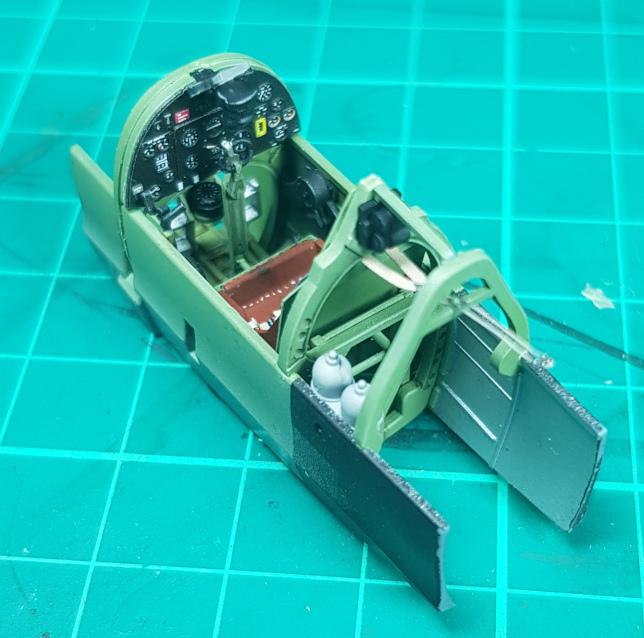
 ). to make it more irritating the regular sprues don't include plastic alternatives for these parts, despite the technology being there to make such small components. So I'm 50:50 on that. All I can say is to handle the
  . It's all Eduard - one of their profi-pack offerings (Which as far as I can tell are just their lower cost 'Weekend Editions' bundled with some
  . There wasn't anything fancy that I did really, but I guess I can give a run down of my process:
 Anyway, my latest - a