Highland Wars
The Battle of Old MacDoughal’s farm
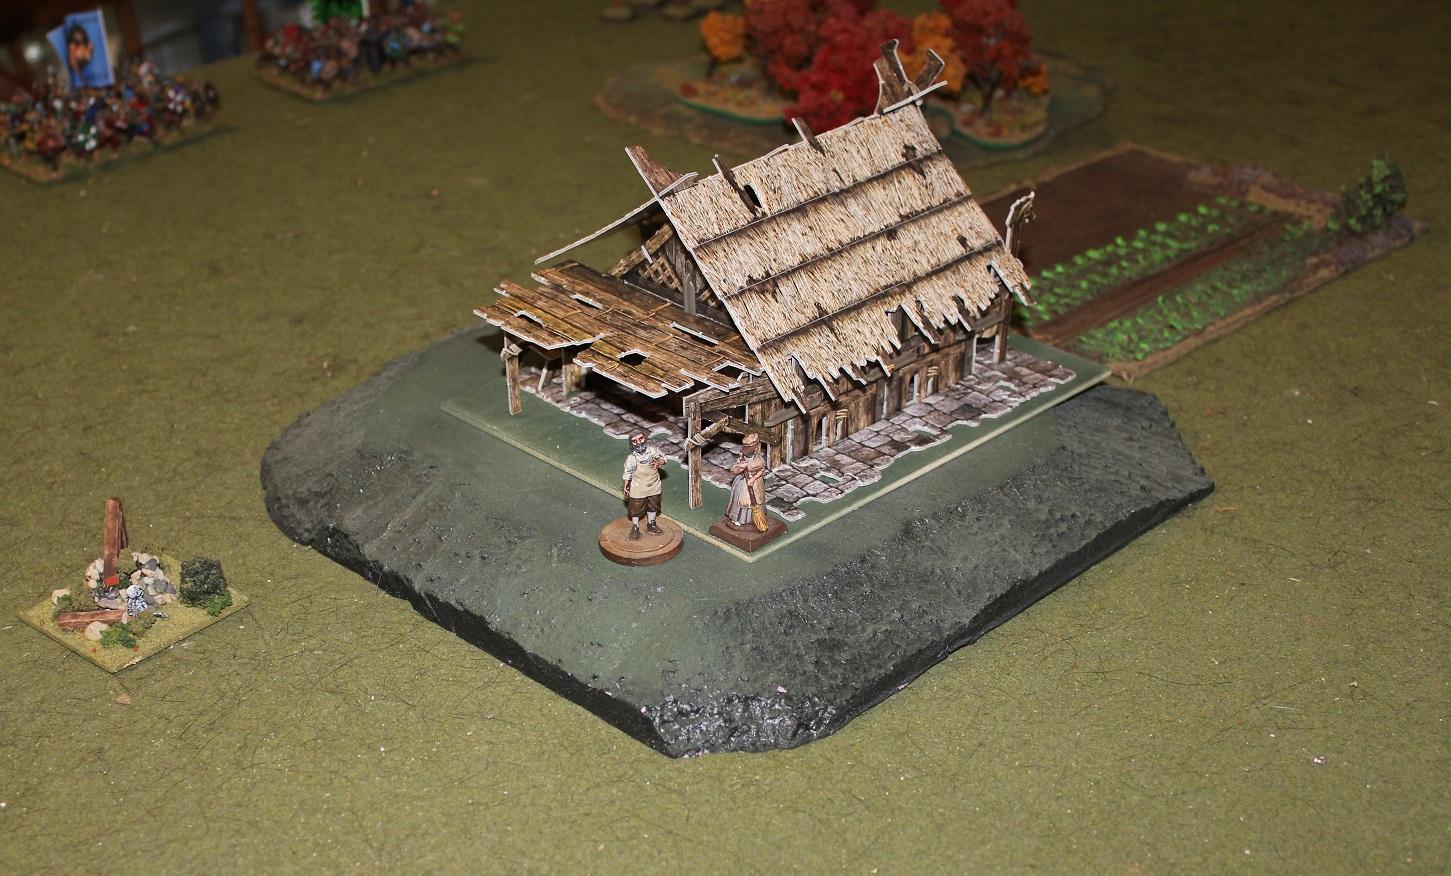
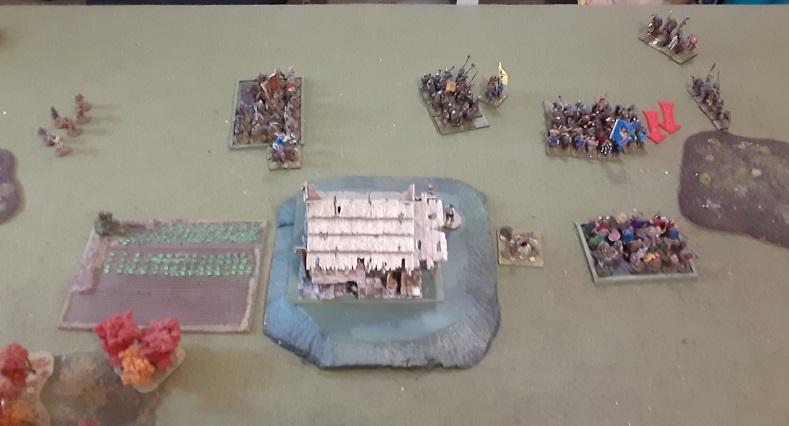
Somewhere in the isles or coasts of Western Scotland – 1150s
Somerled’s Kingdom of the Isles v. Viking coalition
Rules: War & Conquest
Scenario: Basically a meeting engagement with delayed & scattered reinforcements. Half the army’s points value of units must be held in reserve.
Starting on turn 2, roll a dice for reserves (2 dice on turn 3, 3 dice on turn 4, etc) for each 5 or 6 rolled one unit arrives on a random portion of friendly board edge.
The abbreviation in brackets is the unit symbol used on the map
Kingdom of the Isles: (the term “company” is used very loosely)
At start:
2IC: Malcom MacBeth, Earl of Ross
10 Robert Longsword’s company (Light cavalry w/ spear; armor value (
AV 3)
32 Thorfin Finngail’s company (Gallowegians w/ hand weapons; AV1)
24 Gillebride’s company (Lesser Islemen w/ hand weapons; AV1)
24 MacDuff’s company (Men of the Isles w/ bows; AV0 – split into two units)
12 MacAdder’s company (Scouts w/ javelins & AV0)
8 MacBundy’s company (Scouts w/ javelins & AV0)
Reserves:
Commander: Somerled the Mighty
24 Darroch Stoutheart’s company (Irish Huscarls w/ throwing spear; AV2)
28 Dubhgall company (Better Islemen w/ throwing spears; AV2)
24 Ragnall’s company (Better Islemen w/ Throwing spears; AV2)
Vikings (the AKA is in reference to their flag)
At Start
Sub-commanders: Ragnar the Unlucky
36 Nials the Tall’s company (Bondi w/ hand weapons; AV1)
24 Black Anghus’ Orkney company AKA “Bulls” (Bondi w/ hand weapons; AV1)
24 Arthur Dragon-Slayer’s company – AKA “the Dragons” (English Renegades/Mercenaries w/ hand weapons; AV1)
15 Beserkers w/ mixed weapons; AV1
10 Skirmishers w/ javelins; AV1
Reserves
Commander: Godred Olafsson
6 Mounted Raiders w/ javelins; AV2 & Lagertha the Hot
24 Erik Oaksplitter’s company (Huscarls w/ throwing spear; AV2)
24 Sigrun the Victorious’ company (Hird “Shield Maidens” w/ throwing spear; AV2) AKA Shieldmaidens
24 Harald the Well-Traveled’s company (Dublin Vikings w/ hand weapons; AV2) AKA Mermaids
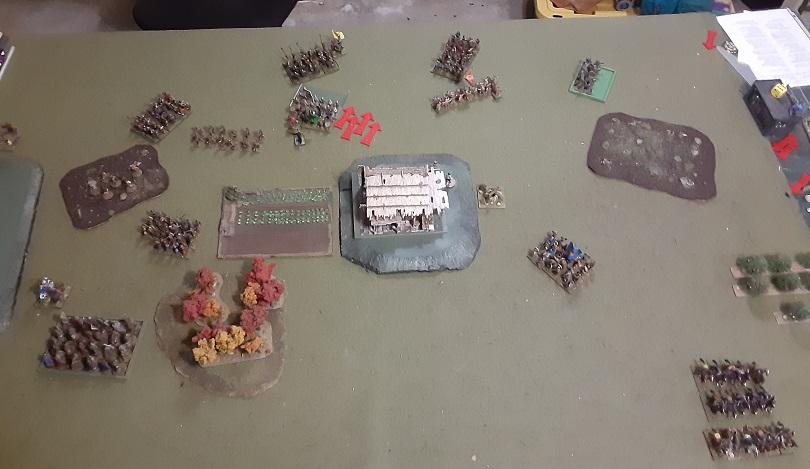
TURN 1: Scots have initiative
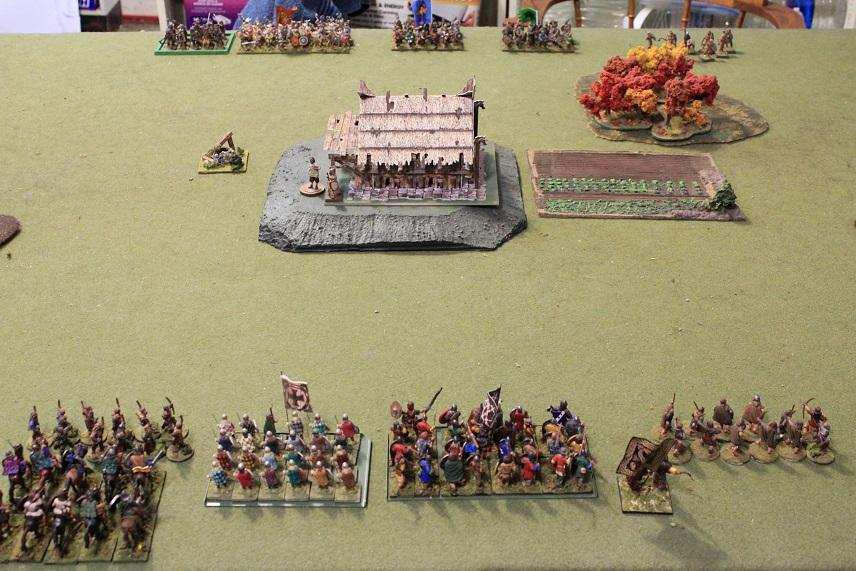
Both sides advance with the farm serving as a breaker. The Islemen send their skirmishers to try and control the rough ground on the flanks. Robert Longsword’s company forms a march column and rides to get around the rough patch, which is unsuitable for cavalry. No shooting or combat for either side.
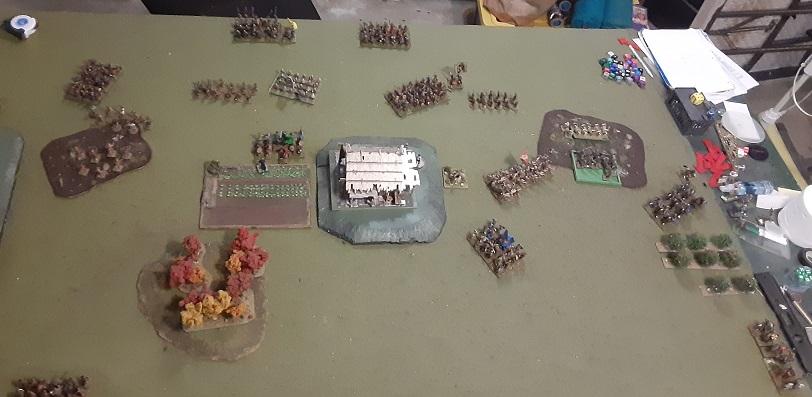
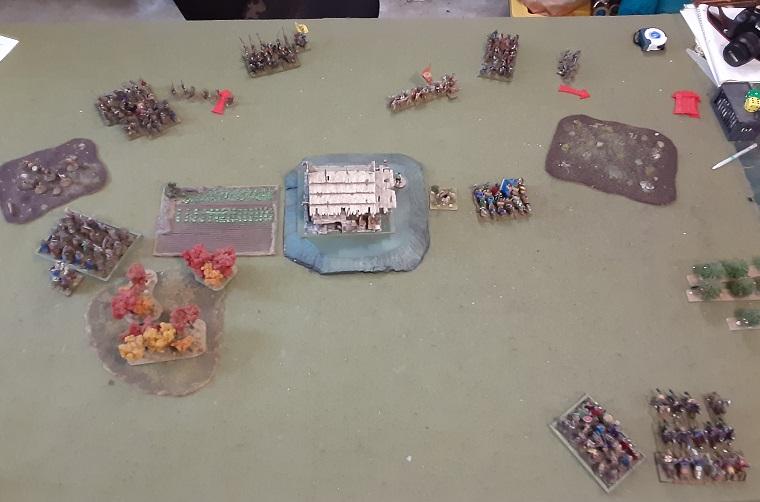
TURN 2: Vikings have initiative

Reserves: Ranald’s company arrives on the Islanders far right flank
Not quite in charge range, the Vikings advance aggressively.
Scots: cavalry continues to maneuver on their left flank; otherwise mainly shoot:
1/MacGuffins kill 4 of Nial’s company
2/MacGuffins kill 2 Black Angus’ company
MacBundy skirmishes with Viking counterparts without success.
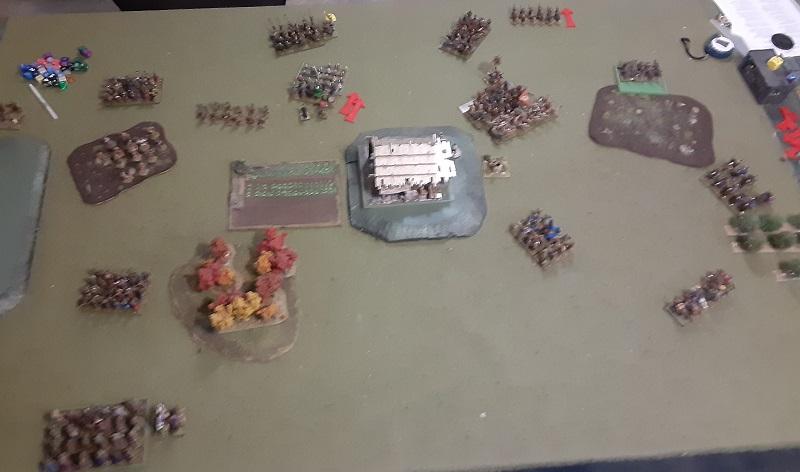
TURN 3: Scots have initiative – pass to Vikings
Reserves: The Dragons arrive on Viking left
Vikings:
Seeing the developing cavalry threat to their open right flank, Harald the Well-Traveled turns his company to face the threat. Vikings continue to march forward.
MacBeth restrains Thorfin’s company, as the time is not quite right.
Scots’ shooting:
MacAdder’s javelins kill three beserkers
1/MacGuffins kill 2 more from Nials’ company
2/MacGuffins kill 5 more of Black Angus’ company
MacBundy’s skirmishers take out one Viking skirmisher
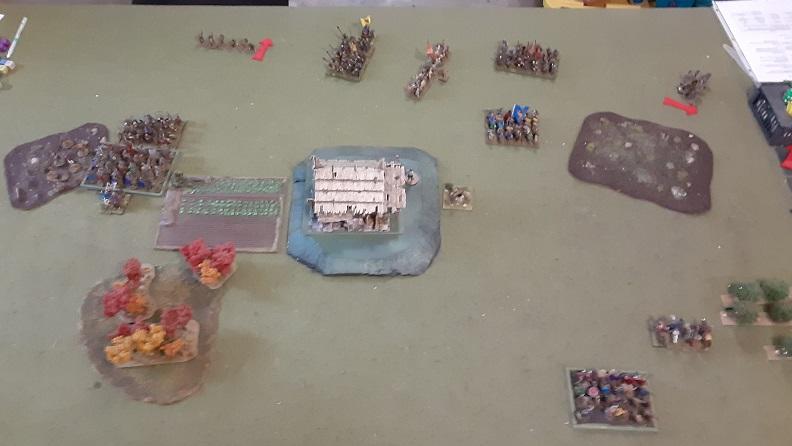
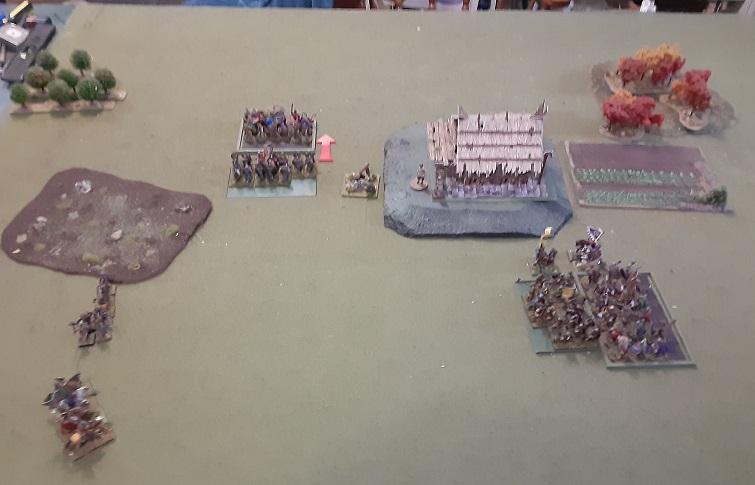
TURN 4: Viking initiative (both sides used one of their strategy points)
Reserves: Somerled arrives with his Irish on the right center; Dubhgall arrives on the left center. Lagertha and her mounted raiders fortuitously arrive on the Viking right.
Vikings:
The Beserkers charge MacAdder’s company, they bravely elect to throw javelins, knowing they won’t flee far enough to escape – killing two Beserkers before dispersing.
Nials’ company charges 1/MacGuffins. They also elect to fire/flee. Likewise killing 2, but escaping.
Black Angus & his Orcadians charge home against Gilliebride’s Islanders. The initial clash is inconclusive, with a slight kill advantage to the Islanders (2:1). Both sides are locked in a melee.
Scots:
1/MacGuffins fail to rally; 2/MacGuffins advance to clear a path for Ranald to have a possible flank attack against the Orcadians. MacBeth joins Thorfin & his Gallowegians and orders them to charge home. The cavalry reform from march column to line.
MacBeth & Thorfin are locked in a melee with Nials.
The Orcadians are pressing Gilliebride’s Islanders, they start to faulter, but barely hang on due to the inspiring nearby presence of Somerled.
MacBundy advances on the enemy skirmishers – but fighting is inconclusive.
TURN 5: Scots win initiative but yield it to Vikings
Reserves: None
Vikings:
The Dublin Vikings maneuver to trap the Scots horse; Berserkers advance on the Scots center.
Combats:
MacBeth & Thorfin continue to be locked in an inconclusive melee with Nials.
Ragnar & the Orcadians continue to press Gilliebride, but the latter rather miraculously hold on. Inspired by the nearby presence of Somerled & his Irish retainers, no doubt.
MacBundy chases off the Viking skirmishers, who are now dispersed.
Scots:
Somerled positions his Irish to intercept the Orcadians when they inevitably route Gilliebride. Ranald MacSomerled positions his company to support 2/MacGuffins. Dubhgal MacSomerled moves his company forward to block the Beserkers, depending on MacBeth & the Gallowegians to hold. Robert Longsword decides to ignore the threat to his flank from the infantry and charges home against Lagertha and her Norse Horse.
1/MacGuffins route off the board.
Shooting:
2/MacGuffins & MacBundys fail to wound the advancing Dragons.
Combat:
MacBeth & the Gallowegians unexpectedly give way, and are routed & overrun.
Gilliebride & his Islanders continue to heroically resist Ragnar. Both sides are being slowly whittled down
Robert Longsword defeats Lagertha & the Norse Horse in a strange combat (neither inflicted a loss, Lagertha fails an easy panic test, routes 12” and is pursued 11”)
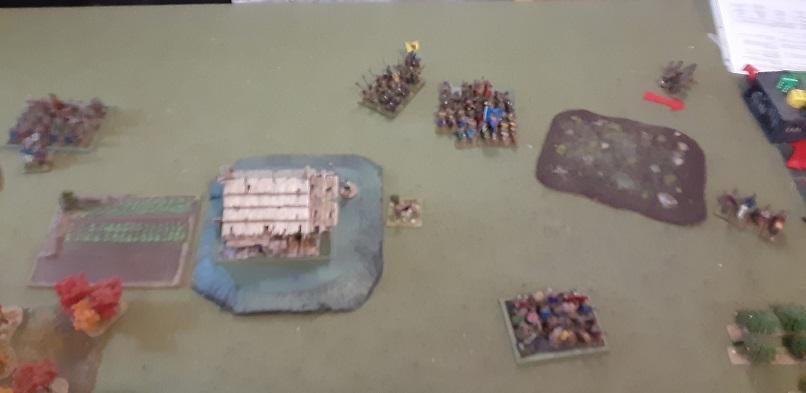
TURN 6: Viking initiative
Reserves: Shieldmaidens finally arrive (last unit to do so). Fortunately for the Vikings, in exactly the right spot to counter the threat from the Scots cavalry.
Arthur & his Dragons charge 2/MacGuffins. They stand & shoot but fail to score a hit.
Beserkers & Nials maneuver to try and trap Dubghall. Lagertha rallies her horse.
Combat:
Somewhat miraculously, Gilliebride & his Islanders continue to heroically resist Ragnar. Both sides are being slowly whittled down. Ragnar now has 5 momentum markers.
2/MacGuffins are just holding against Arthur & his Dragons
Scots:
Robert Longsword charges home, hoping to defeat Lagertha before he gets flanked
Likewise, Dubghall charges the Beserkers hoping to defeat them before he get’s flanked by Nials’ company. Ranald maneuvers to support 2/MacGuffins.
Combats:
Longsword & Lagertha are deadlocked.
Dubhgall defeats the Beserkers, they route but escape. Dubhgall is safe from being flanked for now.
Ragnar finally defeats Gilliebride, they break and are overrun. Unfortunately, his unit has suffered so many casualties, they are dispersed during pursuit as well.
Arthur & his Dragons defeat 2/MacGuffins, but they are able to escape.
TURN 7: Viking Initiative
Somerled used 2 SIPs (Vikings 1) attempting to gain initiative – but failed. This will be the death of Longsword and his horse as he is now flanked by the Shieldmaidens. Beserkers again fail to rally.
Viking Combat:
Predictably, Longsword & his men are defeated, they panic & are overrun.
Ranald defeats the dragons; they panic and are overrun; Ranald’s pursuit carries them into Godred & his Huscarls.
Scots:
Dubhgalll turns to face the approaching Mermaids. Somerled & his Irish maneuver into position behind Ranald’s company. 2/MacDuff fail to rally & flee the board.
The combat between Ranald vs. Godred & his Huscarls ends in a tie.
TURN 8: Viking initiative
The mermaids reorganize dropping a rank (6x4 to 8x3); Nials maneuver his Bondi to block Somerled from threatening the flank of the Mermaids. Beserkers again fail to rally. Lagertha begins a long ride to get around the Scot’s left flank.
Combat:
Godred & his Huscarls defeat Ranald – they panic and are overrun.
Scots:
Needing a victory before the Shieldmaidens and the cav arrive, Dubhgall charges the Mermaids. With Godred a turn or more away, Somerled charges Nial’s Bondi.
Combats:
The combat between Dubhgall & the Mermaids ends in a tie.
Somerled defeat’s Nials’ company – they panic & are overrun.
TURN 9: Scot’s Initiative
Somerled turns his Irish around to face the Huscarls moving on his right flank.
MacBundy’s skirmishers fire off a deadly volley of javelins and take out 3 Huscarls.
Combat:
Dubhgall defeats the Mermaids – but they hold
Vikings:
Godred & his Huscarls advance on Somerled & his Irish. Beserkers rally
Combat:
Dubhgall continues to defeat the Mermaids, but they continue to hold.
TURN 10: Viking initiative
Godred & his Huscarls advance to within charge range of Somerled.
Dubhgall finally defeats the mermaids – they panic & are overrun
(The Mermaids just missed being “Hero of the Day” – meaning passing an impossible panic test by rolling ‘snake eyes’ – they rolled a Dr3)
Scots
Realizing they can’t stand for fear of being surrounded, Dubhgall charges the Shieldmaidens; Somerled charges Godred & his Huscarls.
Combat:
Dubhgall defeats the Shieldmaidens, they panic but escape.
Somerled is getting the better of Godred, but the Vikings hold.
TURN 11 Viking Initiative
Shieldmaidens rally (I made a rules error here – I let them turn to face; I think they are supposed to keep facing the way they were running). The Beserkers & Lagertha’s horse continue to advance on Dubhgall’s left flank.
It also looks like I forgot to do a round of combat between Somerled & Godred. Oh well, fog of war I suppose.
Scots:
Dubhgall charges the Mermaids – he needs to finish them off before the Beserkers and Lagertha can take him in the flank & rear.
Combat:
As before Dubhgall & Somerled win their combats, but the Vikings stubbornly hold.
TURN 12: Scot’s initiative
Dubhgall defeats the Shieldmaidens – they panic & are overrun
Somerled defeats Godred – they panic & are overrun
The Vikings call it a day

