Forum adverts like this one are shown to any user who is not logged in. Join us by filling out a tiny 3 field form and you will get your own, free, dakka user account which gives a good range of benefits to you:
No adverts like this in the forums anymore.
Times and dates in your local timezone.
Full tracking of what you have read so you can skip to your first unread post, easily see what has changed since you last logged in, and easily see what is new at a glance.
Email notifications for threads you want to watch closely.
Being a part of the oldest wargaming community on the net.
If you are already a member then feel free to login now.
Just finished up an article for Chicago Skirmish Wargames on how to use foam rubber to make rocks, crags and caverns. I've tried alot of different methods to make rocks over the past decade or so, but this is by far the fastest method I've discovered and gives some of the most durable results. Hope you all find it usefull!
adamsouza wrote: Any chance of a Copypasta here so that of us at work with restricted access can read it ?
I only wrote it, another member of the club curates the blog, so all I have is the text, but here you go. Trust me when I say that it's worth checking out when you get home for the pics.
Spoiler:
Today we bring you what is quite possibly the fastest and cheapest way ever for making cliffs, rocks and caverns for wargaming using pieces of foam rubber.
Supplies
Foam Rubber - This can be purchased at craft stores, bought in a roll as a mattress pad, or salvaged from old furniture.
Paint - Housepaint, craft paint or pray paint will work. Spray paint is the fastest and most recommended method. For this project I used the following spray paints: cheap flat black, Krylon Multicolor Textured Brown Umber, Krylon Camoflauge Khaki.
Hobby knife - Optional, used for for making the initial cuts in the foam. An electric carving knife will make the initial cuts even faster.
Permanent marker - Optional, if you want to number the bottom of the rocks for storage.
How To Make Your Rock Sections
1. Acquire foam - Foam rubber can be found in many sources. The most expensive option would be to purchase it from a craft store, but the advantage is that it can be bought in exactly the preferred thickness. It is available quite cheaply at stores like Target or Wal-Mart as a mattress or mattress pad. You can even salvage it from old furniture (if it doesn't smell too bad). The foam I'm using was taken from a mattress pad that I found in my grandma's basement, hence the wrinkles in the foam from being tied in a roll for 20 years!
2. Plan your arrangement - Though these will be sturdy enough to be just tossed into a bag, it's far more efficient to fit them to the size of a given box. Below you can see where I have cut out a piece the size of an old 40k box and divided and numbered the sections. I copied the same numbered layout design onto the box itself so that each piece can be placed easily for storage.
3. Separate the sections of foam - You can tear them apart by hand or with a hobby knife but I prefer to use a reciprocating electric carving knife that I found at a resale shop. It greatly speeds up the process and gives very accurate cuts. Below are some sections that have been cut apart with an electric knife.
4. Roughen up the edges - This part is all done by hand. With a bit of practice, you'll get good at tearing out strips, bits and sections to create the look of layered rock. I also tear off the corners around most top edges and tear a lot of inner loops out of the sides to make "C" and "L" shaped rocks. This makes good cover and hiding places, and also creates caves when other rocks are placed on top. This is the most time consuming step, but goes quite quickly when seated in front of the TV!
5. Add cracks and nooks - This is a step that will really bring some realism to the rocks. Tear out cracks across the top of the rocks. Make them a bit deeper than you might think Then make cracks along the side of the rocks where the cracks meet the edge. If you want to make a few small caves in the side of the rock, that's fine too.
6. Apply base color - I started with a black base color, as it makes it easier to create the impression of shadows, but you can start with a different color if you wish. Foam rubber doesn't melt the way foam insulation does, so you can use spray paint. I recommend the cheap $1 flat black spray paint that is available at most hardware and big-box stores. Completely spray the top, bottom, sides and all nooks and cracks. When finished, you can re-number the bottom of the rocks with silver metallic marker. The rock pictured below will need a bit more paint.
7. Apply main color - You can do this right away, but if you let the base color dry, you can use less paint for the main color. I used Krylon Multicolor Textured spray paint in the Burnt Umber color. This gives a nice rocky look, but at $5 a can, the cost can add up. It sprays really fast, too. I apply this to the top and sides from above. Don't worry about completely covering the sides or cracks, as the black undercoat showing through will make a nice shadow effect.
8. Apply highlight color - I used a Krylon Camoflage Khaki spray. Lightly dust the model, spraying sideways along edges. Do not spray directly onto the model! Note the difference in the picture below between the rock in the upper right, which has not received the side highlights, and the two on the left, which have.
9. Allow to dry - And you're done! The rocks below received an additional light dusting overall of Khaki to lighten them a bit more.
Alternate Techniques
Lighter rock tops - For a lighter top surface color that looks more like sand, don't apply the black layer to the top (still apply it to the cracks and nooks on top) of the rock. You can then spray the main color directly to the top. You could also apply a mid-coat of light tan or white. A mid-coat adds a step, but the result will be a base that is not so porous, and you can use less of the main color.
Even cheaper paint - This project took about t cans of textured brown spray paint. You can make the whole project even cheaper by using brush-on house paint or craft paint for the main color, rather than the textured brown spray paint. I still recommend using black spray for the base, as it is very cheap, covers evenly and takes very little time to apply. If you are using this method, let the black base color dry before applying the main color or the foam will suck up the brushed-on paint like a sponge. You can brush on the highlights too, but I only used one highlight can for all the rocks pictured in this tutorial, so there isn't much savings to be had.
Alternate texture - If you want a rougher sandy surface and/or are not using textured spray paint, you can sprinkle fine sand right onto the wet base coat (before applying the main coat) or mix it into the main coat before applying.
Rock spires - If you don't need flat tops for miniatures to stand on, you can make rock spires by leaving only one side flat for the bottom and tearing off all the flat foam sides. In the pic below, only the rock on the left is resting on it's base and the taller spire on the right is resting on it's side. Great for spooky, craggy rock formations and allows you to make rocks that are taller than the thickness of the foam.
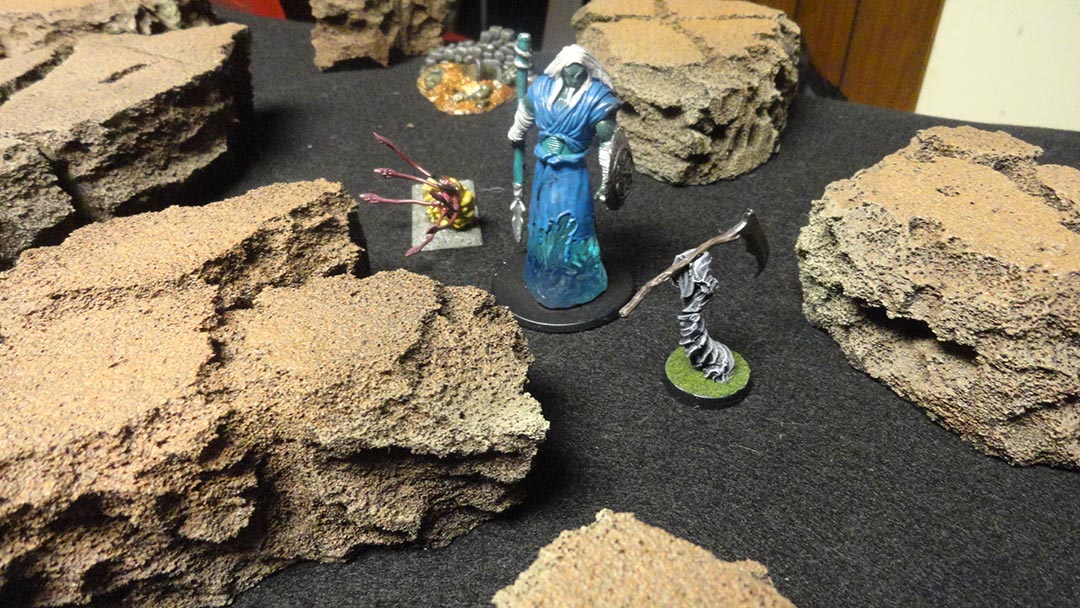
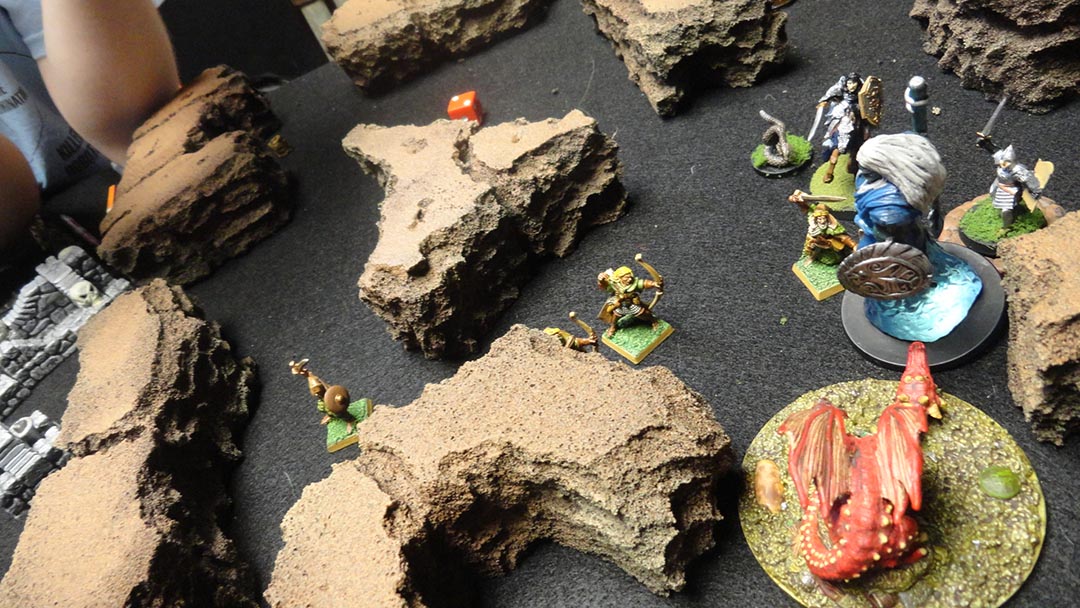
In-Game Pictures
Here's some pictures from a recent game. Check out this battle report for more photos.
-- Karl, Chicago Skirmish Wargames club member
Posted by Chicago Skirmish Wargames at 7:12 AM
CT Gamer,
I've played that gag on at least 4 people so far. I toss it too them awkwardly and see their look of panic as they try to catch it to keep it from breaking.