| Author |
Message |
 |
|
|
|
|
Advert
|
Forum adverts like this one are shown to any user who is not logged in. Join us by filling out a tiny 3 field form and you will get your own, free, dakka user account which gives a good range of benefits to you:
- No adverts like this in the forums anymore.
- Times and dates in your local timezone.
- Full tracking of what you have read so you can skip to your first unread post, easily see what has changed since you last logged in, and easily see what is new at a glance.
- Email notifications for threads you want to watch closely.
- Being a part of the oldest wargaming community on the net.
If you are already a member then feel free to login now. |
|
 |
2013/02/22 15:40:32
Subject: World Eaters Vindicator
|
|

Tough-as-Nails Ork Boy
|
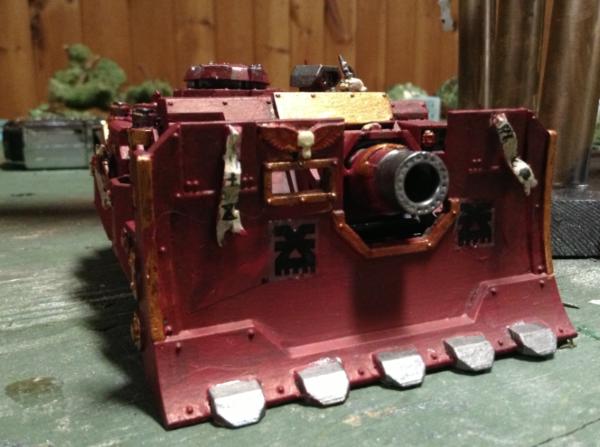
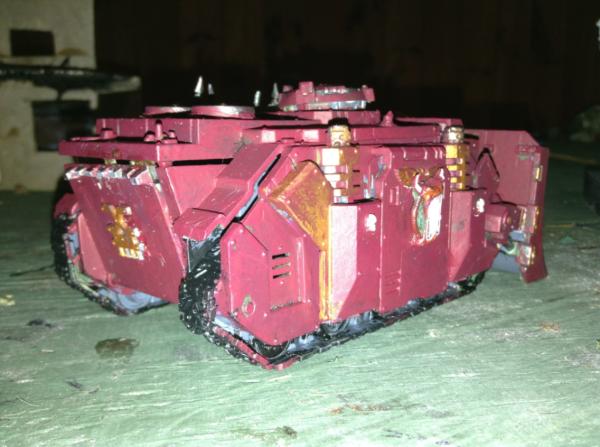
I have recently finished my Vindicator for the World Eaters 3rd Company. NOTE: My iPhone is sort of messing around with the flash, so the green isn't actually there, it's just the camera. Please rate the images and give some constructive criticism if you have some time.
Vindicator 1
http://www.dakkadakka.com/gallery/466406-World%20Eaters%20Vindicator%201.html
Vindicator 2
http://www.dakkadakka.com/core/gallery-viewimage.jsp?i=466408&m=2&w=800
Vindicator 3
http://www.dakkadakka.com/gallery/466407-World%20Eaters%20Vindicator%202.html?m=2
|
 World Eater's 3rd Company-1650 pts World Eater's 3rd Company-1650 pts  |
|
|
 |
|
2013/02/22 16:14:05
Subject: World Eaters Vindicator
|
|
Blood Angel Neophyte Undergoing Surgeries
|
One big tip, which I also had to learn was to fill the tank gaps with green stuff. Buy a molding tool and place a rolled strip along the gap and you can fill it. It will make the model look much better.
|
 7000 7000 |
|
|
|
|
2013/02/22 16:16:39
Subject: World Eaters Vindicator
|
|

Krazed Killa Kan
|
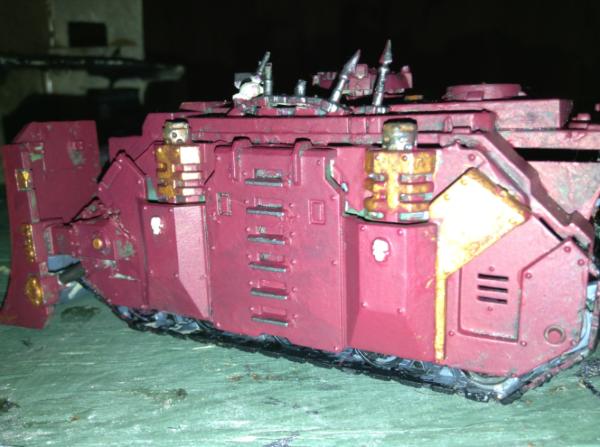
The paint appears to be on there pretty thick. With some highlighting and weathering you can really add a lot of depth to the vehicle. Did you prime the vehicle first? I notice a lot of grey plastic spaces.
Keep at it, great start.
|
 2500 4000 2500 4000  4000 4000  5000 5000  5000 5000
DE 2500 TS: 2500  2500 2500 |
|
|
|
|
2013/02/22 16:18:28
Subject: World Eaters Vindicator
|
|

Trigger-Happy Baal Predator Pilot
|
 Vivalabuffalo wrote: Vivalabuffalo wrote:One big tip, which I also had to learn was to fill the tank gaps with green stuff. Buy a molding tool and place a rolled strip along the gap and you can fill it. It will make the model look much better.
Having assembled several rhino chassis, I can tell you that you really shouldn't even need green stuff
As to the model; there's a lot of unpainted plastic showing; did you prime the model?
The decals on the front are really showing, try that microsol stuff, should really help
|
|
|
|
|
|
2013/02/22 16:49:07
Subject: World Eaters Vindicator
|
|
Tough-as-Nails Ork Boy
|
I need to buy some green stuff, I've heard of that technique before. As to the vehicle, it's just the flash. I don't prime my models however. How exactly does that help?
|
World Eater's 3rd Company-1650 pts |
|
|
|
|
2013/02/22 21:14:13
Subject: World Eaters Vindicator
|
|

Fixture of Dakka
|
You really dont need GS, Vindicators fit together without leaving gaps. You need to take your time and make sure you get the parts lined up correctly when glueing them.
You should be undercoating all your models before painting to be honest.
|
|
|
|
|
|
2013/02/22 21:37:36
Subject: World Eaters Vindicator
|
|
Colonel
This Is Where the Fish Lives
|
The priming topic comes up all the time in the P&M Forum, so to save myself typing, read this. Bottom line, prime everything all the time, no excuses.
I'll echo some previous posters; take your time and assemble your model correctly. The Rhino-chassis vehicles fit together excellently, probably one of the easiest and quickest vehicles to assemble. That being said, you still need to make sure everything fits properly before moving on to the painting process.
Waterslide decals are the bane of many modelers existence. However, with the proper tools, it is easy to make them look painted on. Check this and this out for more information. Those are two awesome modelers/painters with tons of good advice, always worth a read.
I'm not trying to be hard on you... you painted your model and you should be proud of it; far too many bare plastic models make it to the gaming table! Never stop trying to improve and keep up the good work!
|
 d-usa wrote: d-usa wrote:"When the Internet sends its people, they're not sending their best. They're not sending you. They're not sending you. They're sending posters that have lots of problems, and they're bringing those problems with us. They're bringing strawmen. They're bringing spam. They're trolls. And some, I assume, are good people."
|
|
|
|
|
2013/02/22 23:41:38
Subject: World Eaters Vindicator
|
|
Tough-as-Nails Ork Boy
|
 ScootyPuffJunior wrote: ScootyPuffJunior wrote:The priming topic comes up all the time in the P&M Forum, so to save myself typing, read this. Bottom line, prime everything all the time, no excuses.
I'll echo some previous posters; take your time and assemble your model correctly. The Rhino-chassis vehicles fit together excellently, probably one of the easiest and quickest vehicles to assemble. That being said, you still need to make sure everything fits properly before moving on to the painting process.
Waterslide decals are the bane of many modelers existence. However, with the proper tools, it is easy to make them look painted on. Check this and this out for more information. Those are two awesome modelers/painters with tons of good advice, always worth a read.
I'm not trying to be hard on you... you painted your model and you should be proud of it; far too many bare plastic models make it to the gaming table! Never stop trying to improve and keep up the good work!
Thank you for the links and the kind words. I can't, however, get that end down. When I was building the kit, I noticed that and tried to make it work, but I think it's just a flaw in the molding. I will just have to get GS.
|
World Eater's 3rd Company-1650 pts |
|
|
|
|
2013/02/24 00:17:14
Subject: World Eaters Vindicator
|
|

Longtime Dakkanaut
|
You really need to fix up the rear end, it looks nasty.
Take a hobby knife and carefully take off any excess paint and glue at the back then re-position. Use force if you need. At the very least get that top plate touching the tops of the side walls.
Glue in place and hold down with rubberbands, string, clamps, heavy books, whatever you have available.
Is it possible that the inside wall (bulkhead) with the screens on it was not pushed in properly. If it was sticking up too high, that might have caused the roof not to go on properly.
The more I think about, this is your problem. It's the internal wall sitting too high. It might be on a slight angle or some of the sprue material might be on it making it higher than it should be.
If you can get the rear hatch off, you might be able to cut off the top of that wall with a knife which will make it easier to lower the roof.
Automatically Appended Next Post:
One other thing about the priming.
Priming stuff with black primer paint means that the parts that are hard to reach with your brush will be black rather than light grey.
It looks better as those black bits look like they are in shadow, the grey unpainted bits just look unpainted.
|
|
This message was edited 2 times. Last update was at 2013/02/24 00:27:00
|
|
|
|
|
|
|
 3000p
3000p


