Forum adverts like this one are shown to any user who is not logged in. Join us by filling out a tiny 3 field form and you will get your own, free, dakka user account which gives a good range of benefits to you:
No adverts like this in the forums anymore.
Times and dates in your local timezone.
Full tracking of what you have read so you can skip to your first unread post, easily see what has changed since you last logged in, and easily see what is new at a glance.
Email notifications for threads you want to watch closely.
Being a part of the oldest wargaming community on the net.
If you are already a member then feel free to login now.
2013/03/22 20:02:36
Subject: Nal'da Enclave (7/26/17: Metal Tau Rising: Revengeance Force Squad Go)
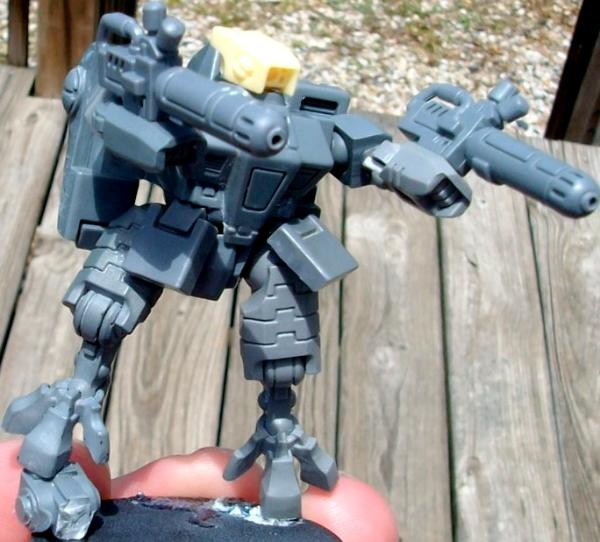
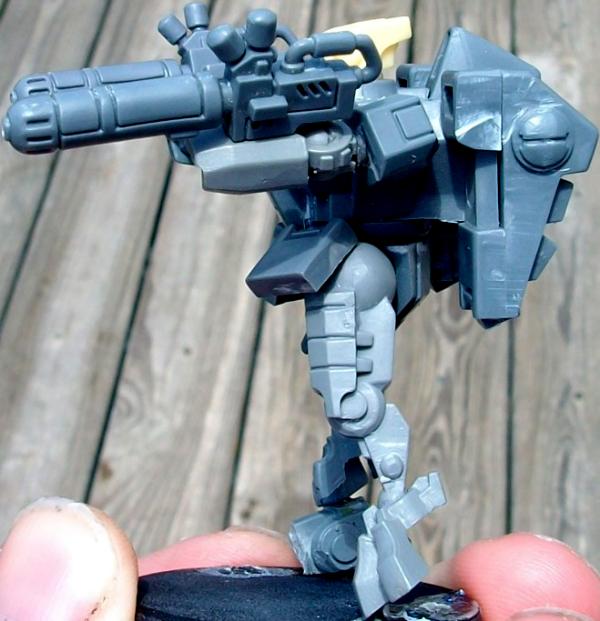
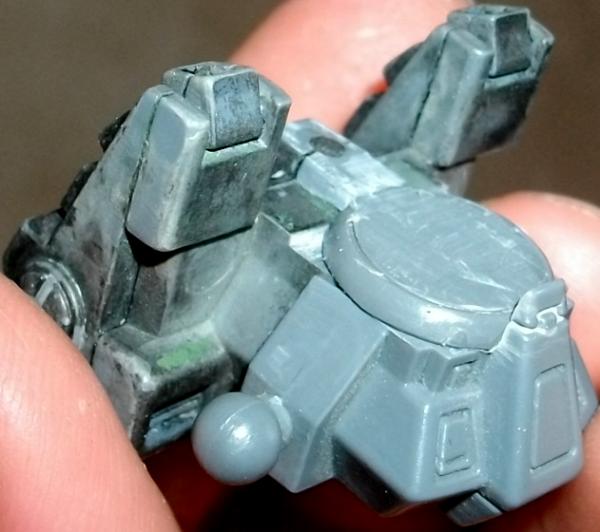
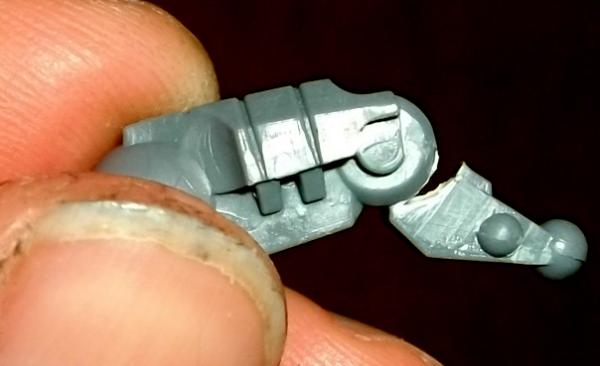
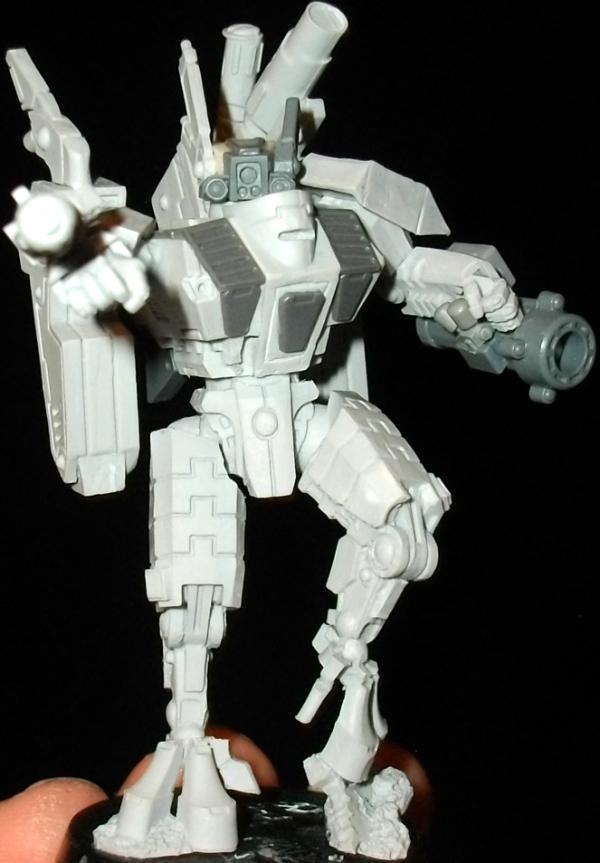
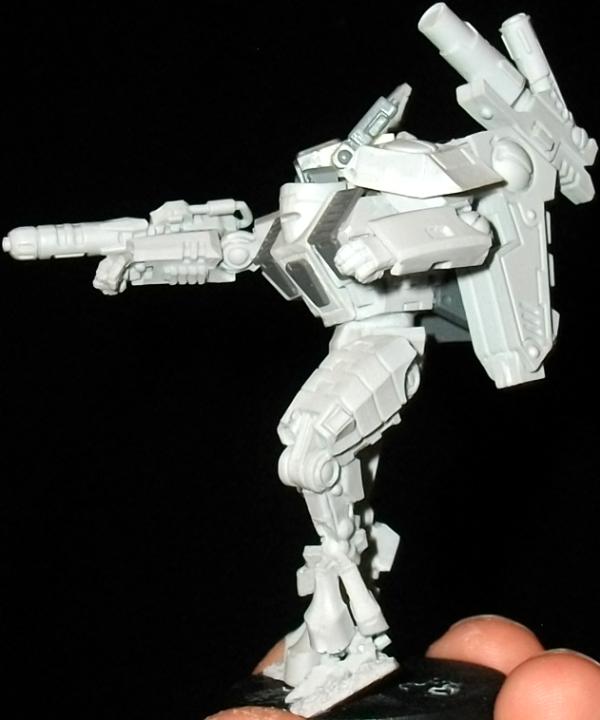
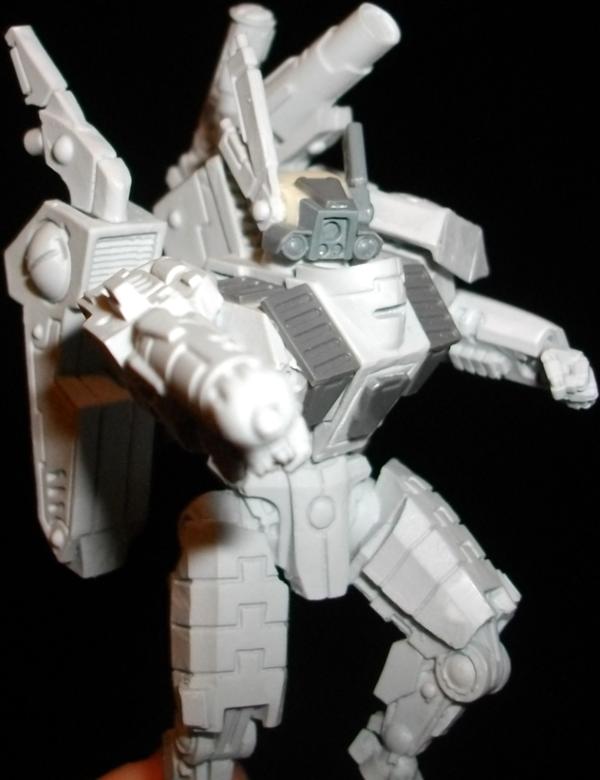
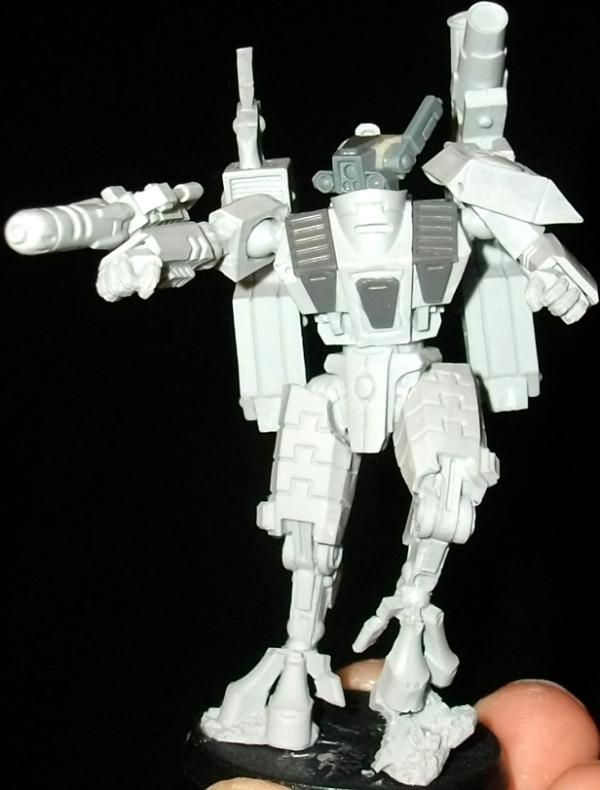
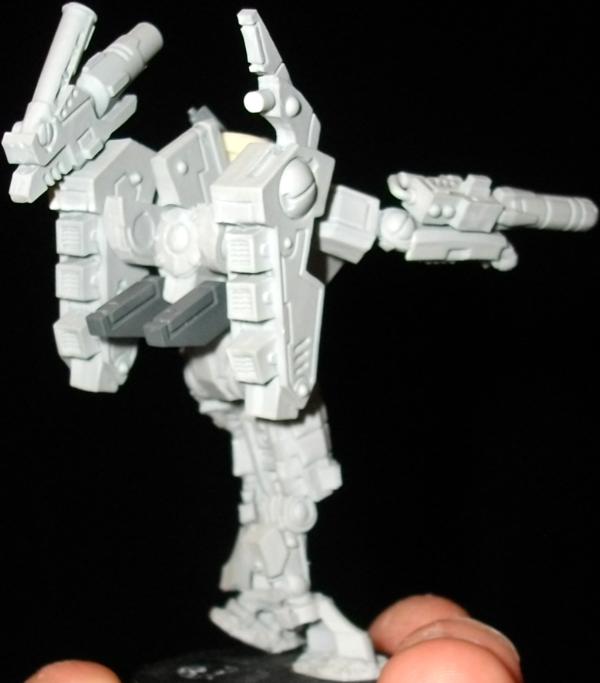
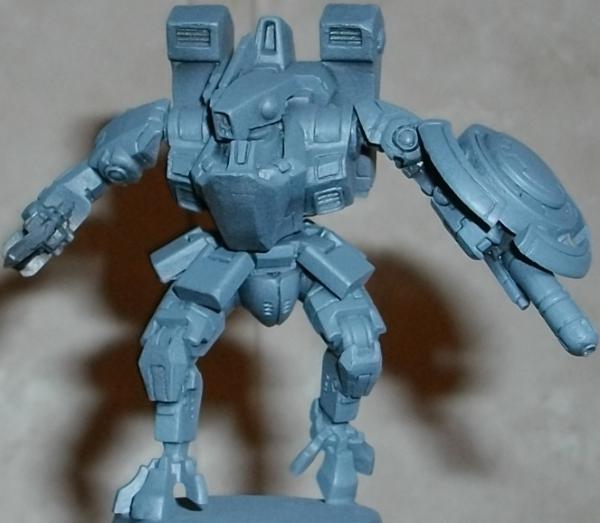
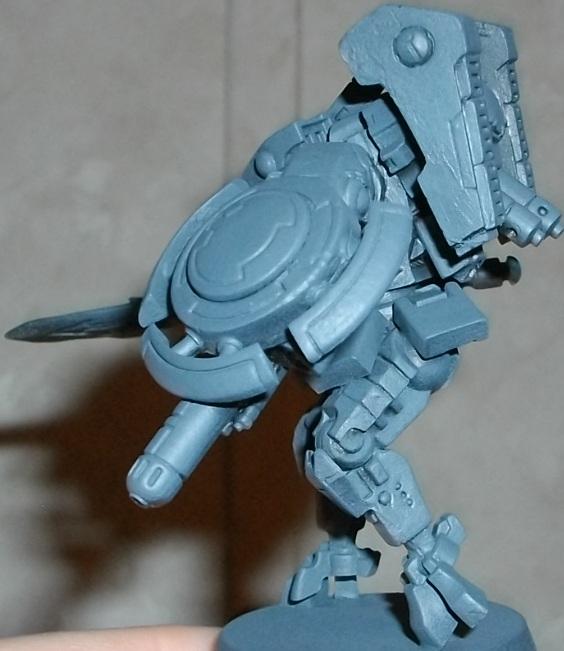
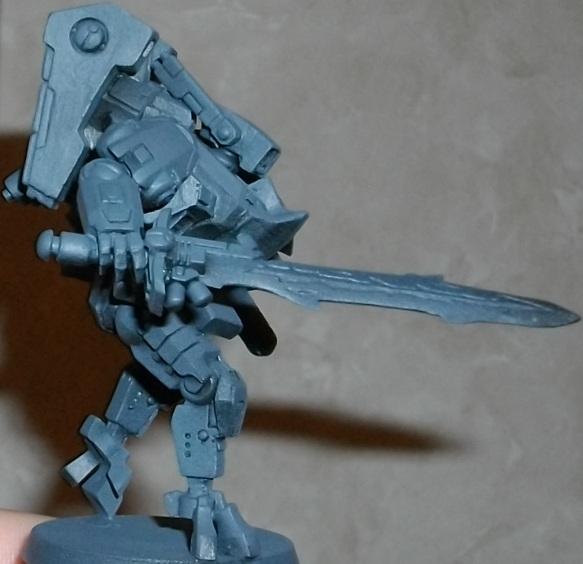
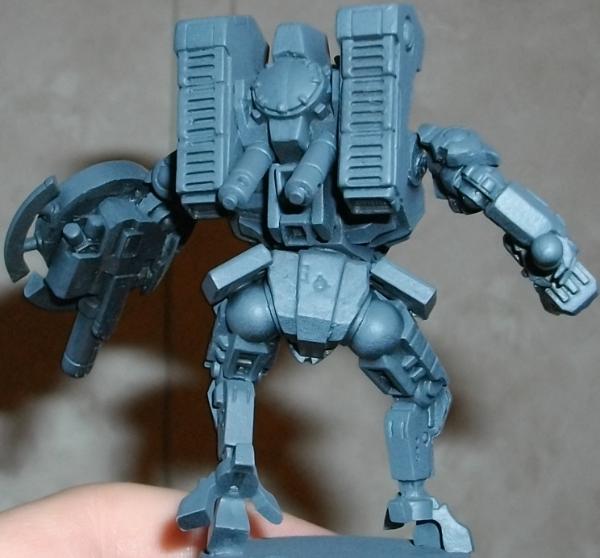
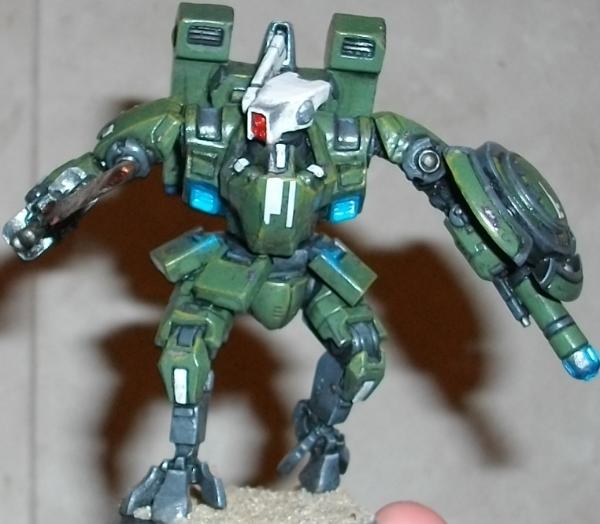
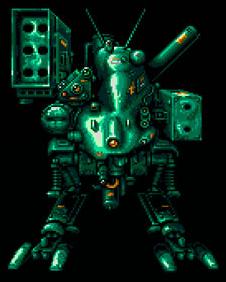
Right, so seeing all the the pics and the confirmation that Tau are indeed next have gotten me fired-up, and I spent the better part of the past few days working on battlesuit conversions. One of them stood out the most, and quickly became my to-be commander:
The question now is hat to do color-wise. So far I'm looking at a few options:
-Leave the main color the airbrushed grey and paint the secondary parts (joints, shins, etc.) black.
-Leave the main color the airbrushed grey and paint the secondary parts (joints, shins, etc.) gunmetal/silver.
-Leave the secondary parts airbrushed grey and paint the main panels Knarloc Green.
-Leave the secondary parts airbrushed grey and paint the main panels White.
-Leave the secondary parts airbrushed grey and paint the main panels Orange.
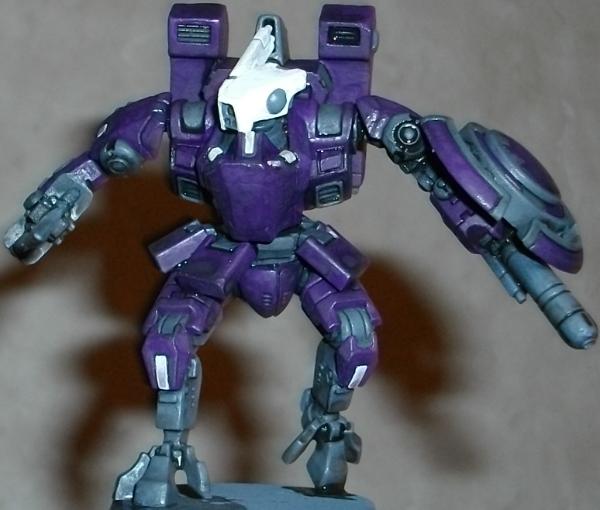
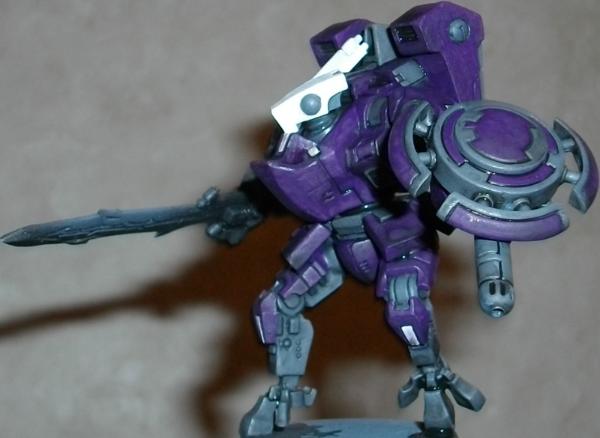
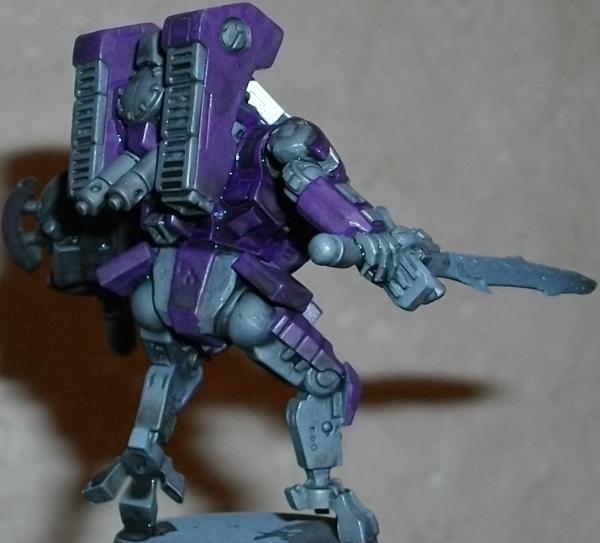
-Leave the secondary parts airbrushed grey and paint the main panels Hormagaunt or Liche Purple.
What do you guys think?
This message was edited 12 times. Last update was at 2017/07/26 05:14:04
2013/03/23 08:37:08
Subject: [Tau] Nal'da Rising (3/22: Time to decide!)
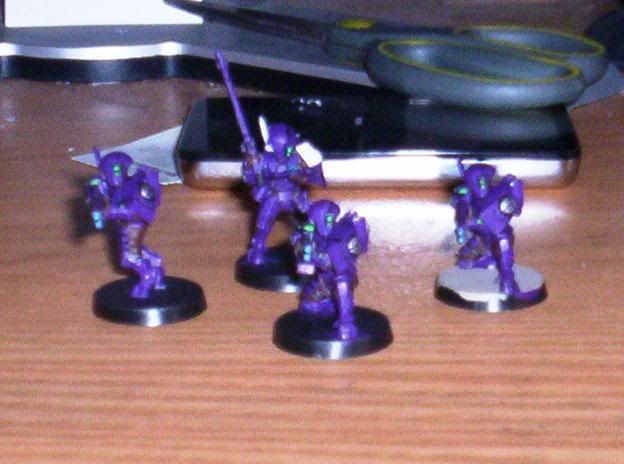
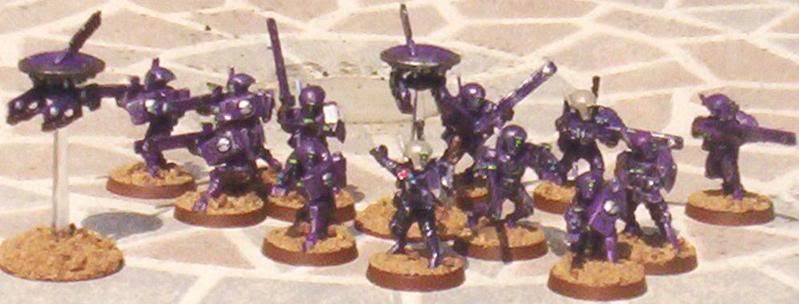
Well, my best friend convinced me to try purple because my original firewarriors were painted purple, back in late 4th edition. Heck, let's have a then-and-now comparison!
THEN:
NOW (maybe!):
Still a WIP, but yeah. Still undecided; should I paint his helmet black to indicate that he's the Shas'o, or should I save helmets for Firewarrior Shas'ui's and Battlesuit Shas'vre's? Or should -they- get the white helmets? Also, here's a couple of my other schemes I tried, in case they're preferred:
ORANGE (The highlights are messy, I know):
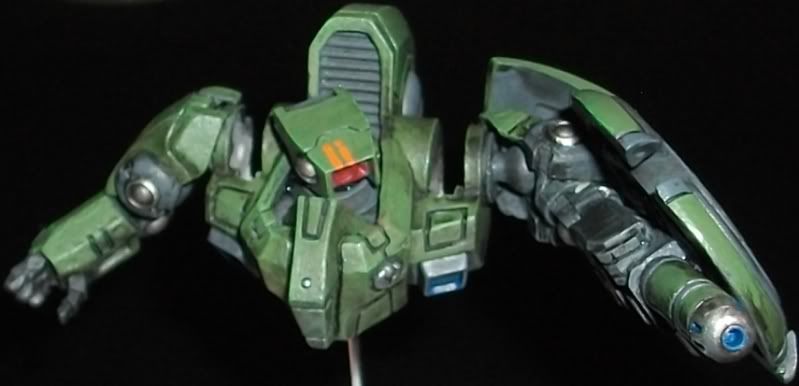
GREEN:
THIS IS THE LAST CALL FOR INPUT ON THE COLOR SCHEME! If you have something to say, PLEASE say it!
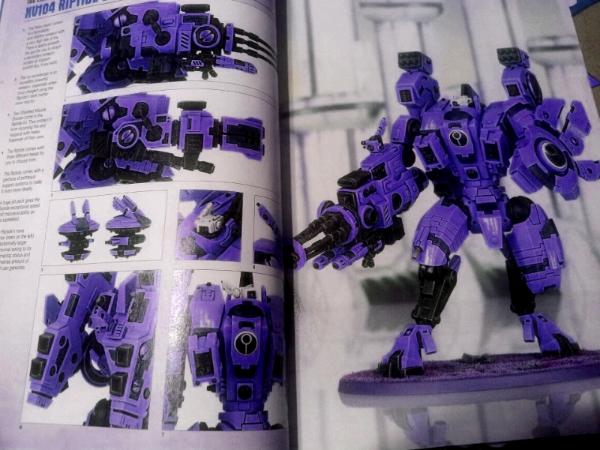
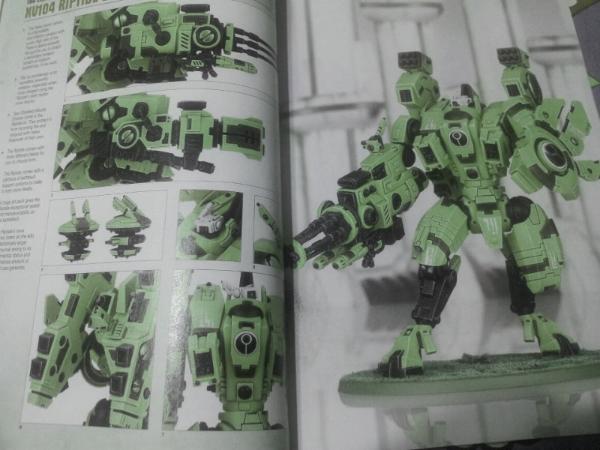
EDIT: As a bonus to help people decide, I tinkere dwitha picture of the riptide to show it on other colors:
Spoiler:
This message was edited 1 time. Last update was at 2013/03/24 02:08:35
2013/03/24 02:02:37
Subject: [Tau] Nal'da Rising (3/23: Last call on colors!)
Hmmm...so Green over all the other choices, eh? Well, for the commander, should the helmet be white or black? The other will be the helmets for Squad leaders and the commander's bodyguard.
2013/03/24 04:57:59
Subject: [Tau] Nal'da Rising (3/23: Last call on colors!)
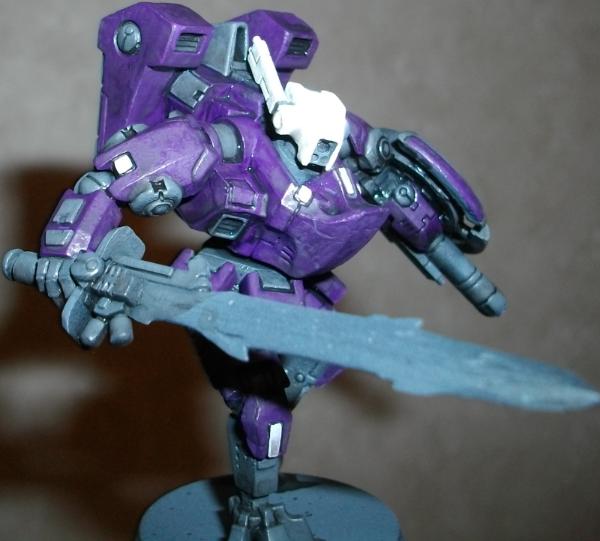
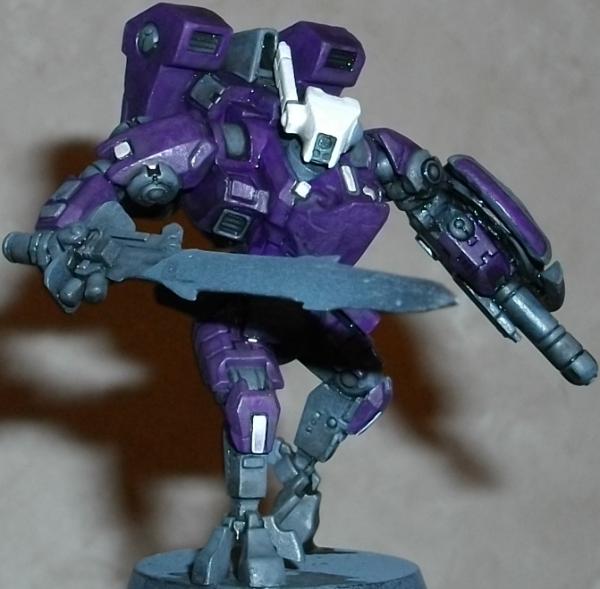
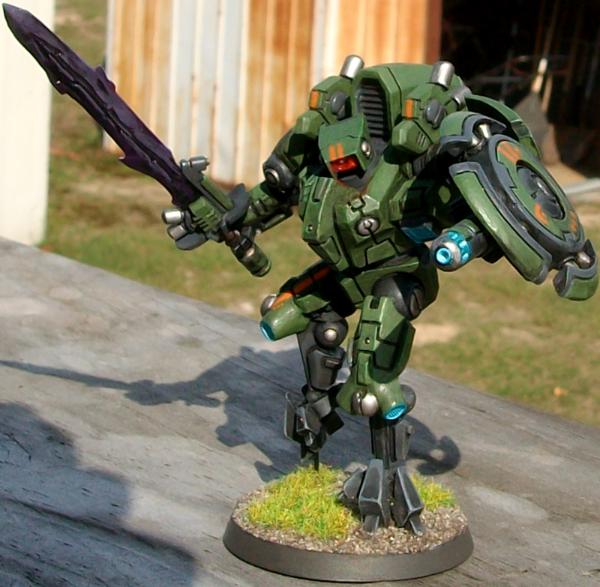
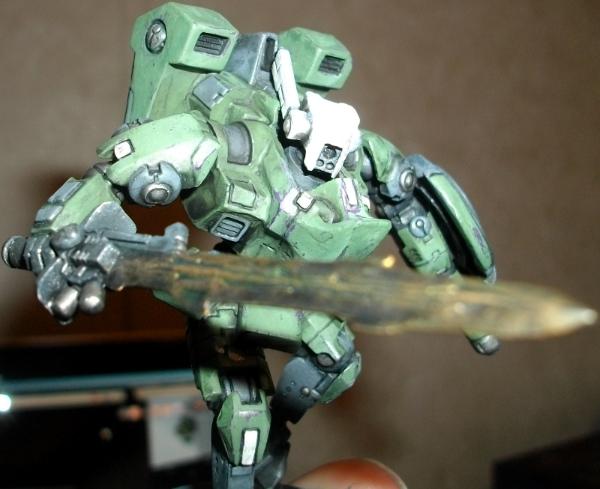
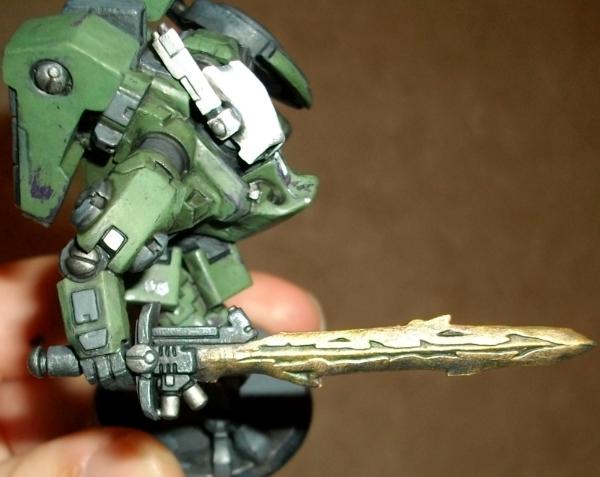
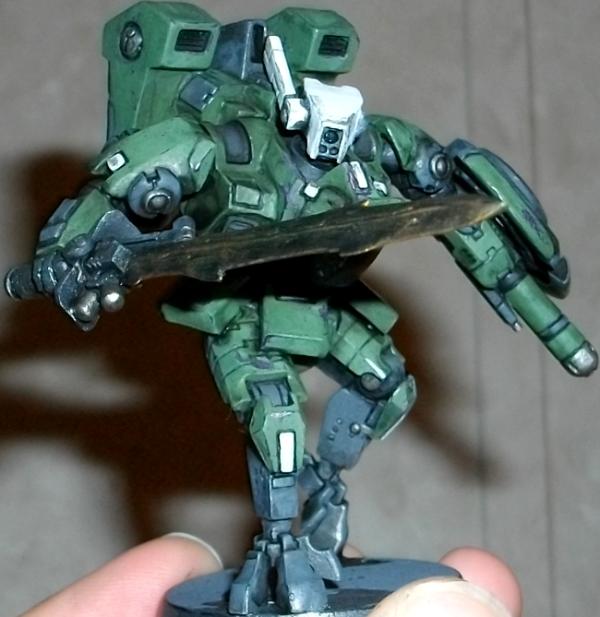
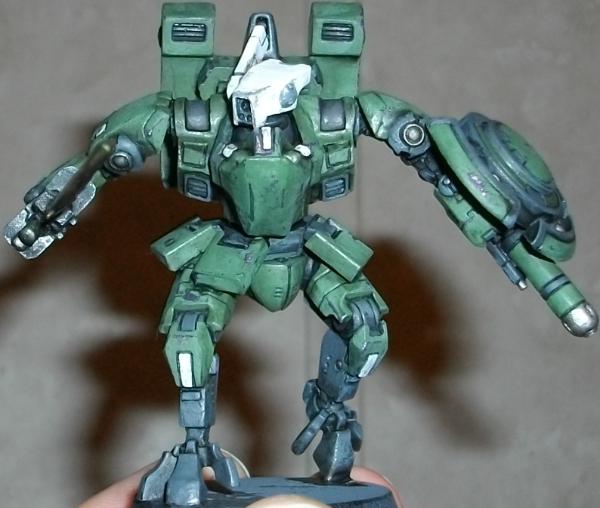
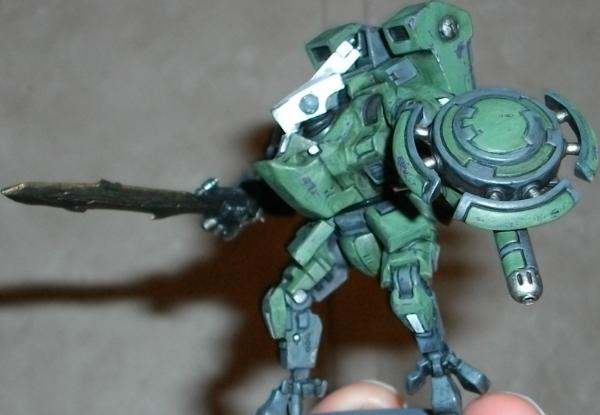
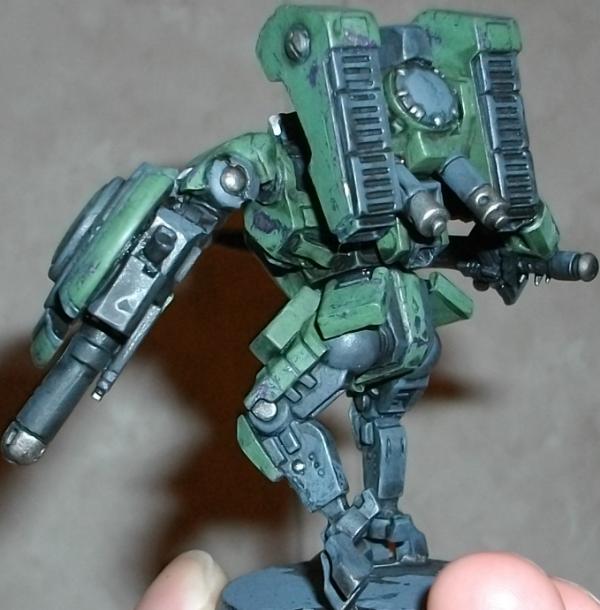
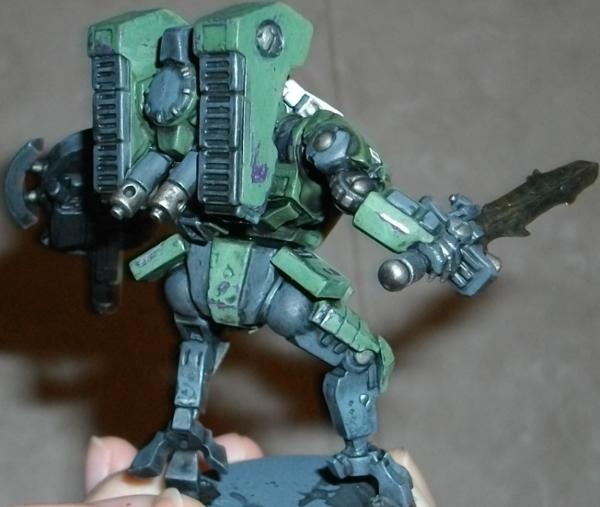
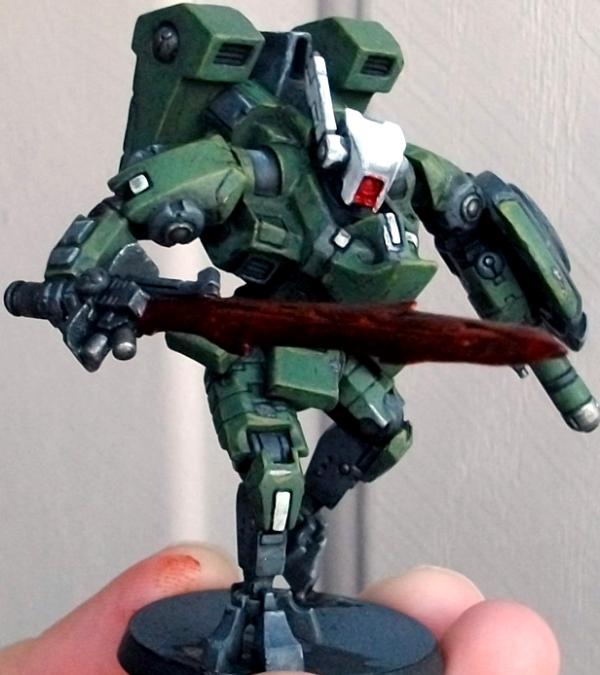
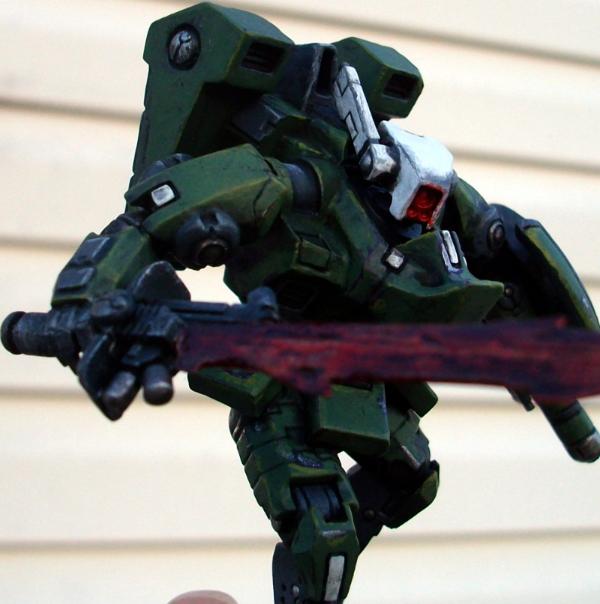
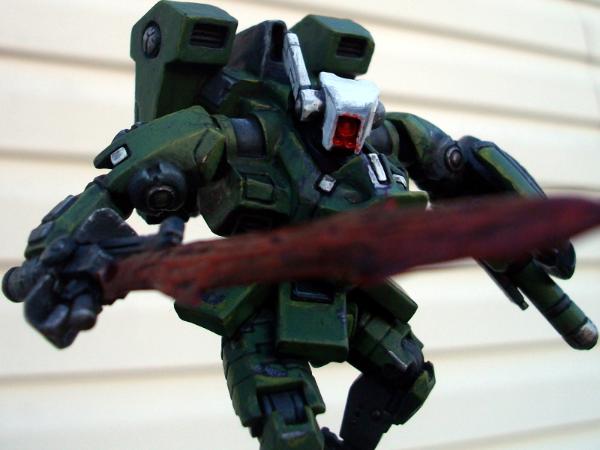
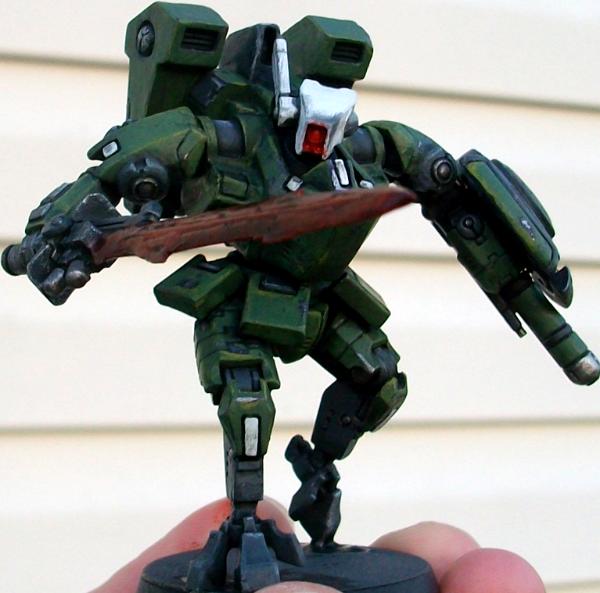
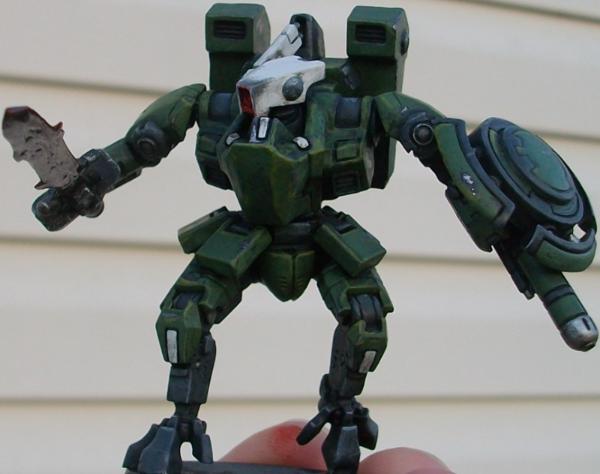
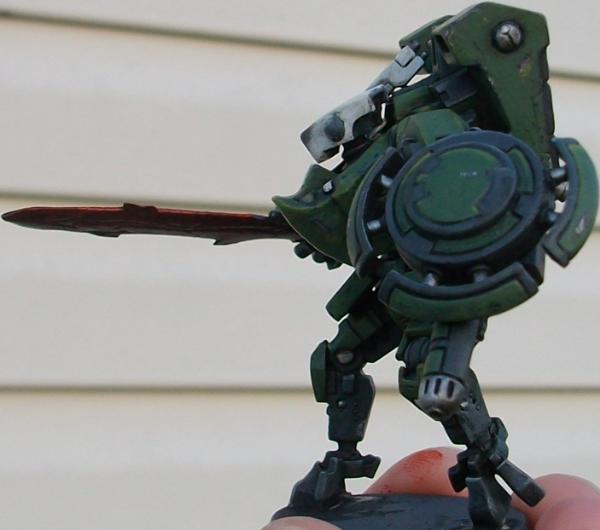
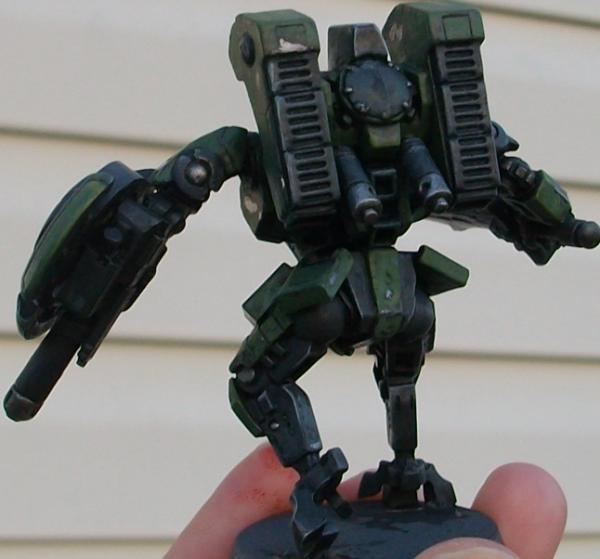
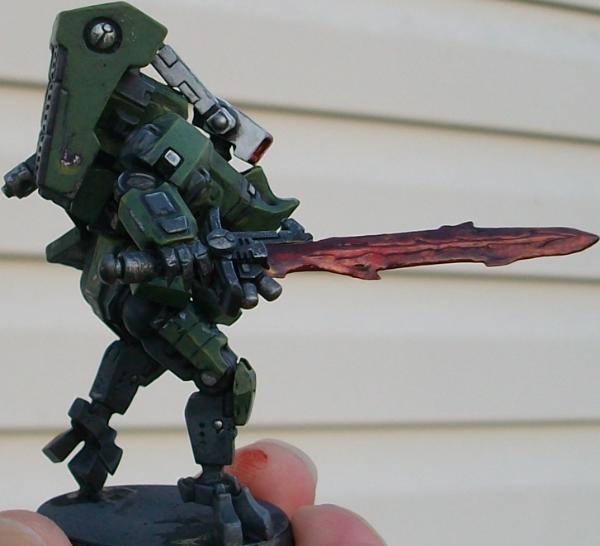
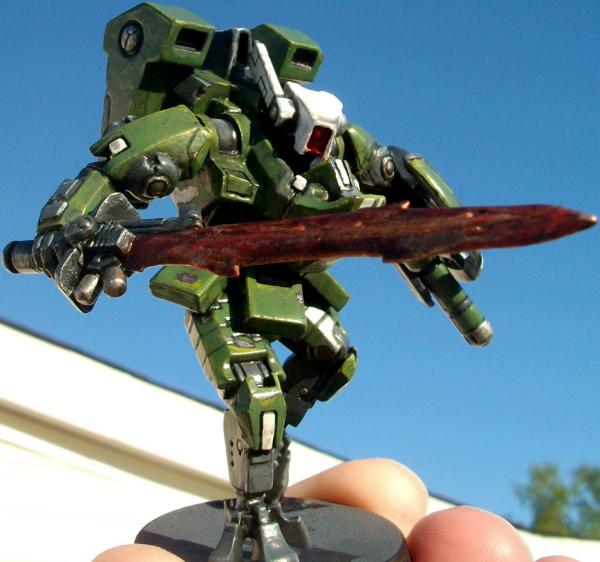
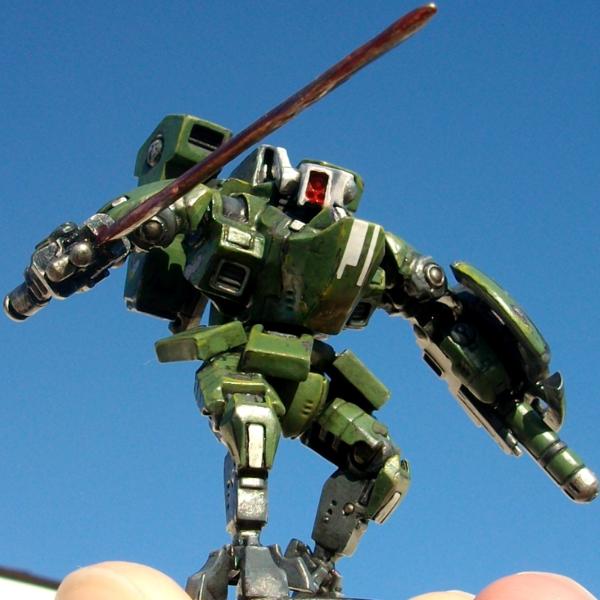
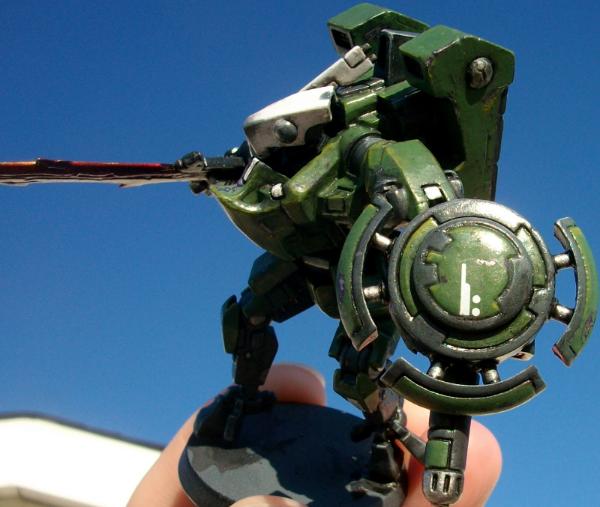
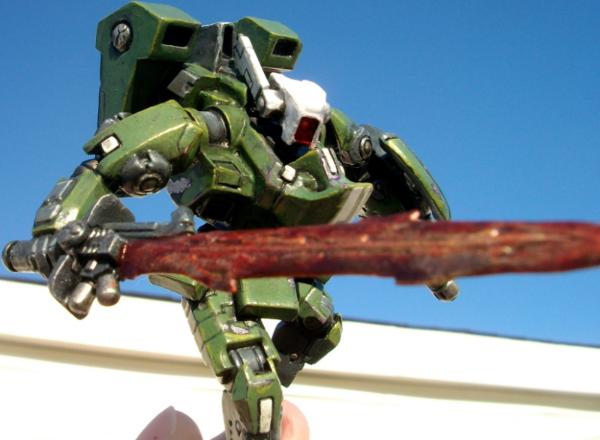
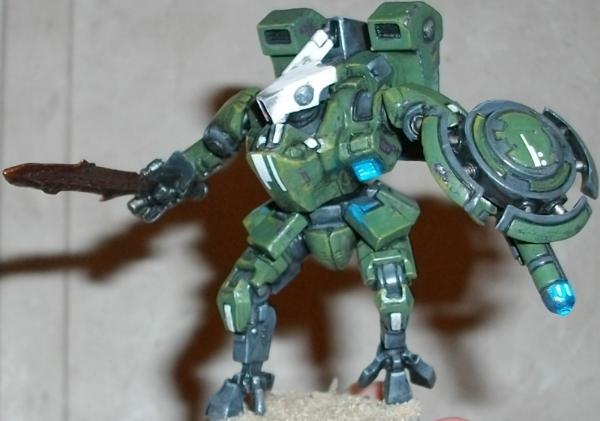
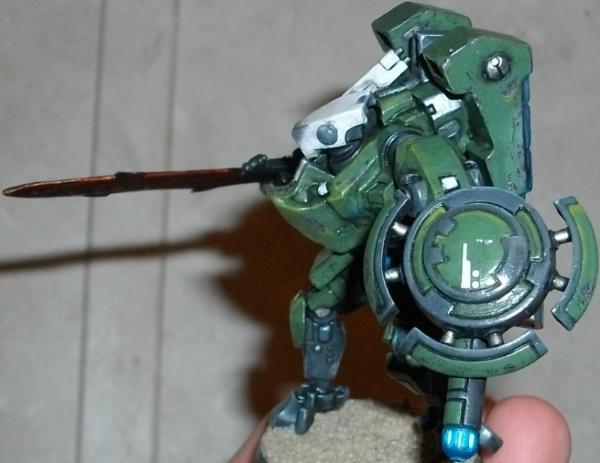
With a resounding majority of votes across the board(s), the color I will paint my Tau shall be GREEN! And with everyone's input in mind, here's where I'm currently at painting-wise:
So far I think it looks pretty neat, but what do -you- all think about the rougher, beaten-up look? Should I roll with it, or should I try to go for a more classic neat and tidy paint scheme? How's the sword looking? Should I go for red glow from the lenses or purple? You've all been a big help so far, so don't leave me hanging!
2013/03/25 08:35:51
Subject: [Tau] Nal'da Rising (3/25: And the winner is...!)
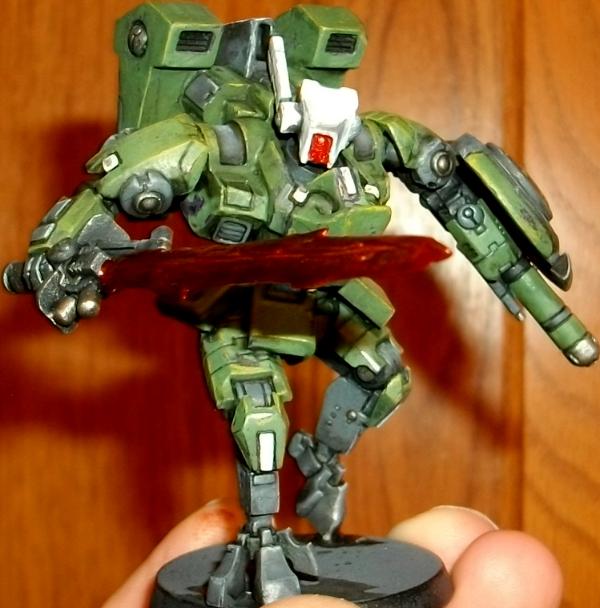
Right, made myself power through the OSL effects while watching a friend's art stream and listening to some kickass music. Once the glue for the sand on the base dries I'll get to properly painting the base; anyone have any suggestions for anything else to do?
Also, my sister noted that, when Zanzibar Breeze-the theme song from Metal Gear 2-started playing, my color scheme is that of Metal Gear D from Metal Gear 2! I had NOT intended that!
Nice you went with the hot rod method for metallic red, didn't see that coming.
Blue glow is good, it'd perhaps show a little on the torso as well though perhaps the tubes on the back as well. Red glow maybe a little yellow or orange to make the source a little brighter than the glow around it. Though might just be the pictures. Still I'm liking this, you're doing a pretty solid job.
Right, the purple and the green were neat, but...bright colors like that tend to work better on Spehss Murheens, not the more realistically-minded Tau. Thus, I dug through my old photos and found my suits that were painted in Charadon Granite (now Stormvermin Fur). It was a really cool brown/grey-ish neutral color, and it suits the Tau very well in my opinion-though you can judge for yourself from the photos!
Now as much as I like that battlesuit, the bronze/gold was a pain in the rear to paint! So, for future suits, it'll likely just be silver; however, if the general consensus is that the bronze/gold parts look better, I can tyr a sepia wash to emulate gold/bronze. Any opinions thus far?
2013/04/18 01:26:16
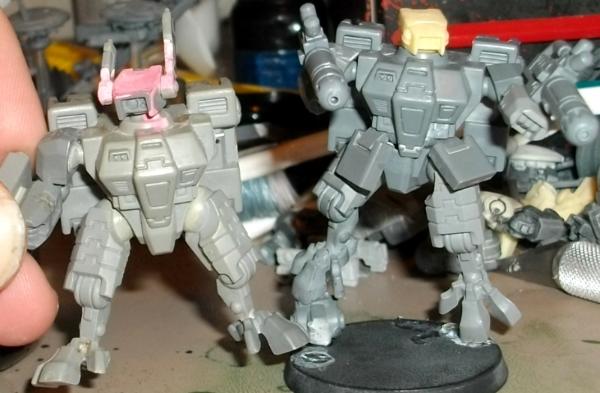
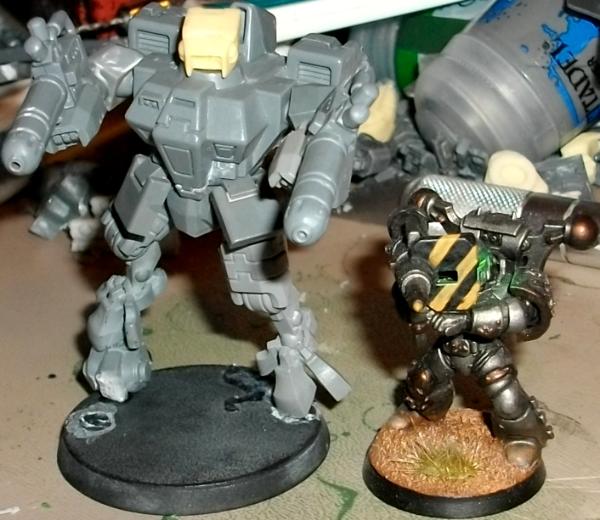
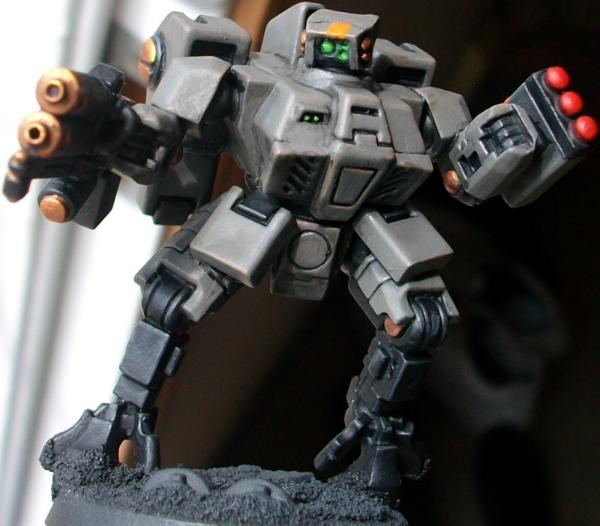
Subject: [Tau] Nal'da Rising (4/17:Test figure & new colors)
Right, using what I learned on the test model, I've developed what I dubbed the XV8-03 "Contender" Battlesuit. The squad I'm going to run is a Burning Eye-D setup-basically a pair of plasma rifles instead of a twin-linked one. The Shas'vre is going to be wearing armor based on an XV9, while the Shas'ui will be wearing XV8-03 suits. The commander who will be attaching to them will be in XV8-05 Enfrocer armor (when I can get the model), but I'm unsure what weapon configuration to run with him: Burning Eye-D, Plasma & Cyclic Ion Blaster, or Plasma & Airbursting Fragmentation Projector. Thoughts?
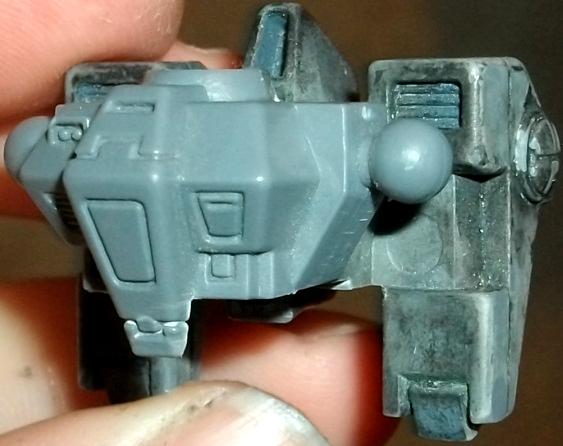
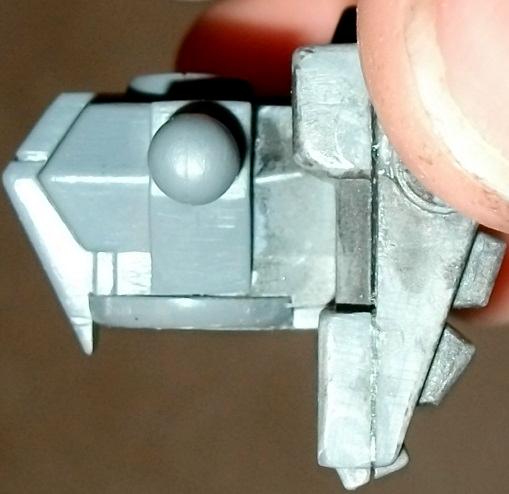
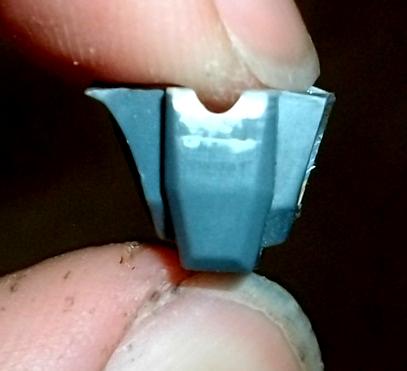
Right, I decided to make a how-to for my XV8-03 "Contender" battlesuit, since someone out there might actually want to use this conversion themselves. I've found that this is a good way to give your battlesuit a waist and remove a lot of the 'squished' look of the torso without making it obscenely tall and harder to hide on the tabletop. Anyways, on to the tutorial!
STEP 1
Assemble the jetpack as normal if you wish, but instead of attaching the front of the torso, get a fresh blade and (CAREFULLY!) cut out the rear half of the hips, cutting right above/at the top of the socket. Do what you can to make sure this is a nice, even cut; you're going to need everything here! Repeat the same on the front of the torso, and glue it all together.
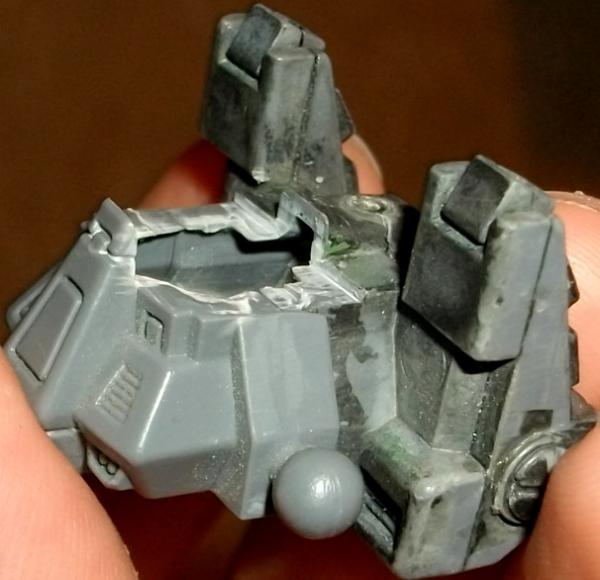
STEP 2
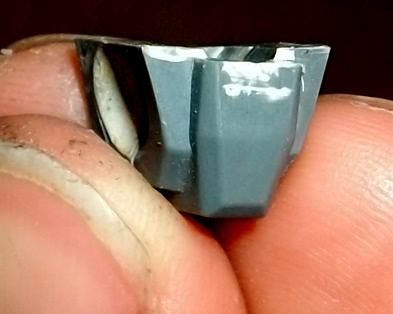
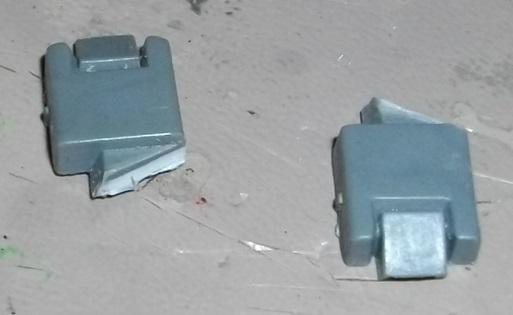
Take a shield generator and locate the 'tabs' on the outer facing. Using them as guide marks, trim away part of the outer 'ring' so that it can fit into the cut portion on the underside of the torso. The protrusion under the power plant may need to be cut further as well to accommodate. HWen you're done, reove everything on the underside of the shield generator (the side that'd normally face the battlesuit when attached). Don't glue it in yet!
STEP 3
Step 3 is separate because I need to emphasize: BE VERY VERY CAREFUL DOING THIS! I sliced the ever-living crap out of my thumb on the first suit; take your time, don't rush, and control your cut! Now that the warning's there, take the former shield generator and, using the lip of the outer ring, begin to cut out the raised portion in the center, leaving it flat. Glue it in, and perform any necessary extra cuts to smooth out everything and any desired gap-filling.
STEP 3.5 [Optional]
If you wish to make the armored 'skirting' like I do, something that may help them fit better is to cut out part of the shield generator's outer ring to give them flat portions to glue onto.
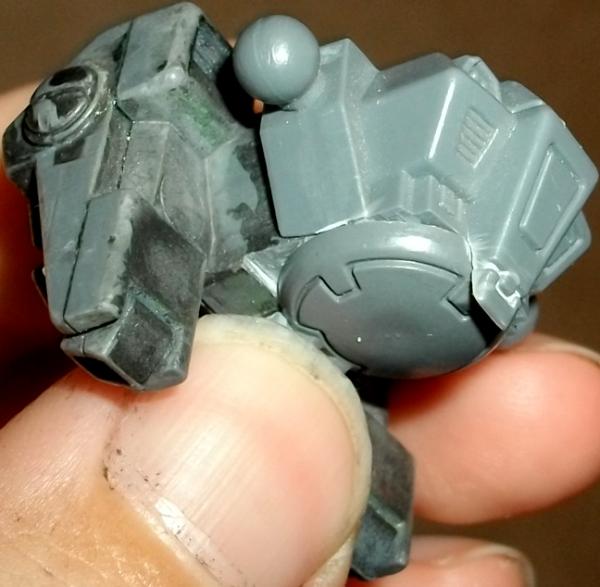
STEP 4
Glue together the hip pieces, being careful to make sure the socket's properly aligned. From there, make a cut from the bottom to the top on the side, using the front half's shape as a guide, removing any curvature. After this, cut the top flat and make any other cuts you wish; I opted to remove the uppermost portion of the groin plate seeing as there was a depression left on the inside from when it was removed from the chest. Glue it on at the rotation desired.
STEP 5
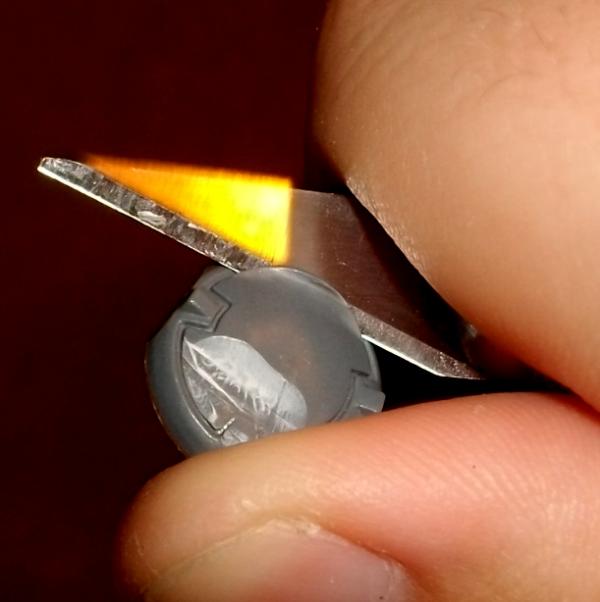
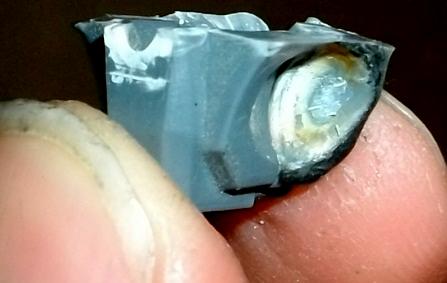
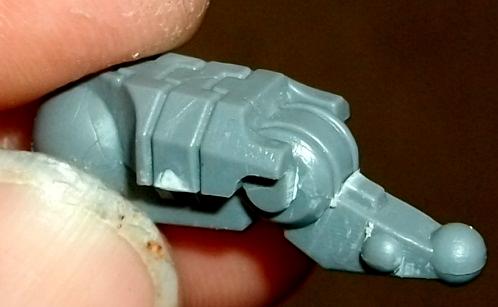
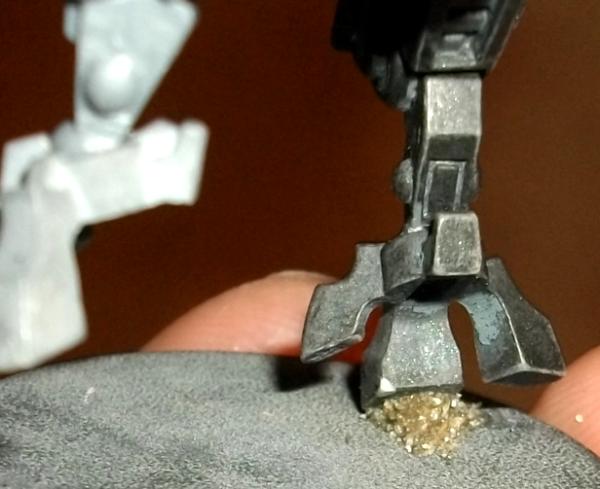
Technically this step is optional, but it's practically given that, if you want a rotating waist, you want bending knees as well! I actually see some people struggle with this, so here's a simple, easily repeatable way to get bent knees! Prepare your battlesuit's leg as normal, then locate the 'tab' on the shin, right under the knee. Make a horizontal cut that just barely goes into the shin; now, put your knife down and slowly pull back on the shin, gradually applying pressure. The plastic will turn white and rip, and-if done right-will follow the curve of the knee! Once it's barely dangling, carefully cut it free, clean the cuts/rips, and engrave the grooves in the knee further back. Pinning is optional; I find that, if done right, the shin will get a very good seal on the knee when glued-one, and be very sturdy. The ripping makes the plastic a little rough on the surface, giving the glue more to 'grip' onto and this making a stronger bond. If you fee it's necessary, though, go ahead and pin it (especially if you will add large weapons/metal parts to the suit).
STEP 5.5 [Optional]
If you want a nice dynamic pose, pinning the model to the base is almost necessary (and pinning battlesuits to the base is highly recommended anyways thanks to how little contact surface there is). If you're like me though, and your pins aren't quite as wide as your drill bit, or your model's wanting to move before the glue sets, there's an easy way to make it dry faster and get a firmer seal! Pour a little excess superglue into the area around the pin on the top and bottom of the base. Then, take some basing sand or baking soda and sprinkle it into the wet glue. it'll act like a sponge and soak up the glue, increasing the surface area and thus causing the glue to dry faster! I recommend that, while it's still wet, apply a little more glue and a second layer of sand/baking soda to make sure it doesn't soak up TOO much glue.
STEP 6 [Optional]
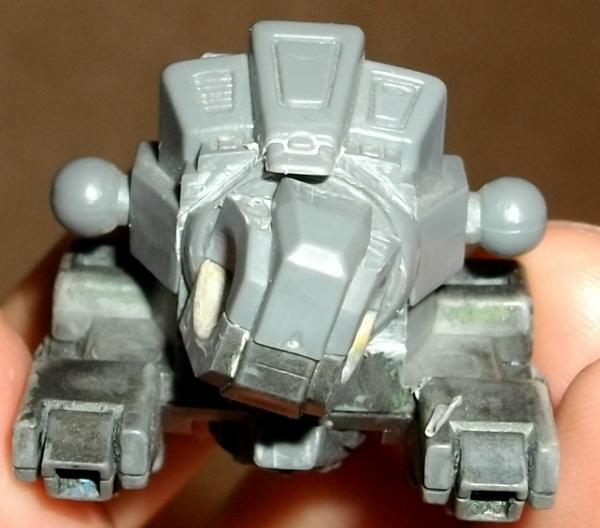
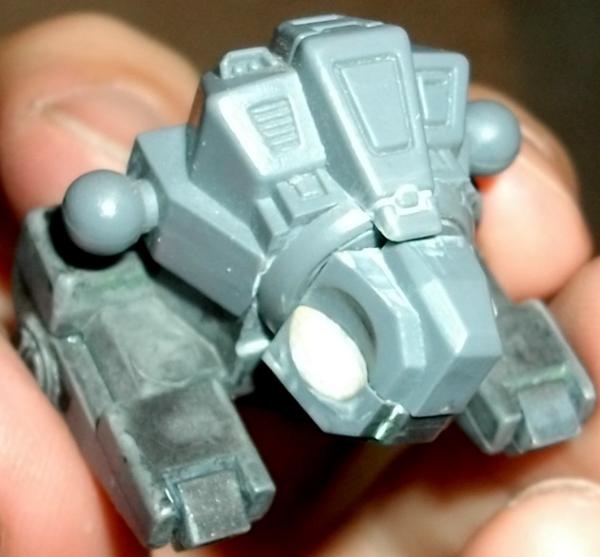
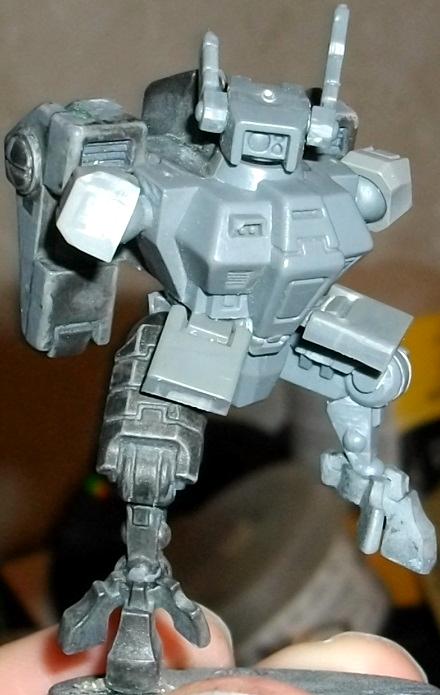
For those who followed step 3.5, here's where that extra step comes into play! Find a spare jetpack (preferably one from a beaten-up suit or failed/cancelled conversion), and only remove the inner/front half of the lower jet, the largest part. Keep the half of the nozzle attached; you'll need that! From here, jsut prepare the part as any other, remove the excess where it was attached tot he jetpack half, and carefully glue it in after cutting the former nozzle to fit flush against the waist cut made earlier. Now your battlesuit can enjoy greater protection for the vulnerable joints! The final image shows it at it's curent state of complete with the exception of the head; I simply wanted to show how much better the stock head looks wen the 'stem' of the neck is removed and the head is allowed to sit almost flush on the collar.
That's it! Feel free to follow it as closely as you wish, or to go off-course to your heart's content! Many thanks to the conversionists from Advanced Tau Tactica, whom have inspired me greatly in this conversion and in many others; now get out there and start preparing your battlesuits-the enemies of the Greater Good will not wait for you!
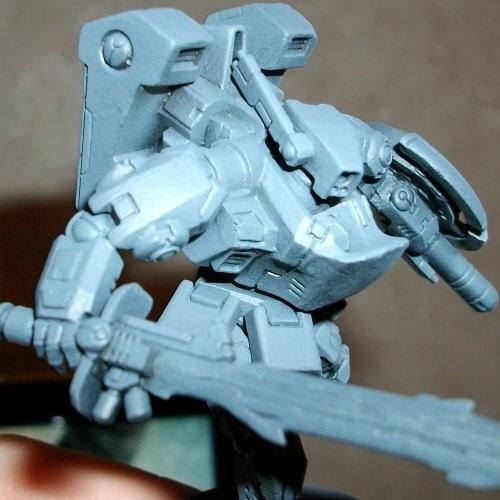
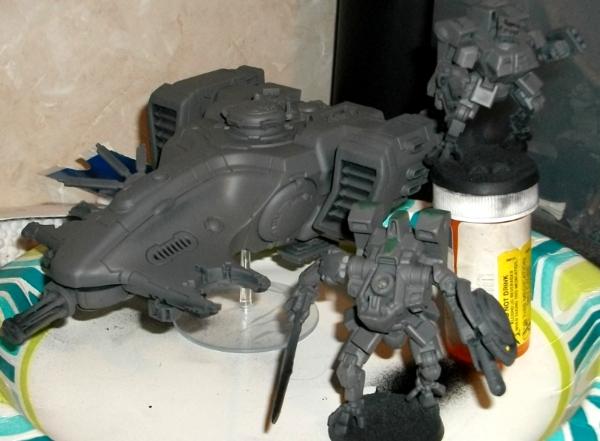
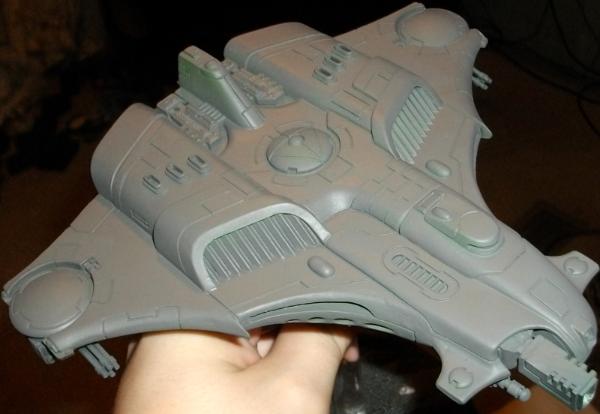
Right, can't post this on ATT until it's done seeing as I hope to enter it in the Riptide conversion contest, but for now I can at least share it with you guys! Mostly a re-posed stock, the modifications I made were as-follows:
-Magnetized both a Twin-Linked Fusion Blaster and a Twin-Linked Plasma Rifle for the shoulder mount
-Magnetized the Heavy Burst Cannon and Ion Accelerator
-Mounted the Early Warning Override (Interceptor Wargear) on top of the Nova Reactor, in the gap between the Riptide's head ad jetpack as opposed to a hardpoint
-Removed the 'fins' from the backs of the shins and replaced them with Burst Cannon drums
-Up-armored the shins and calves
-Built a much larger shield to replace the rather small stock piece
-Grafted an antenna onto the cool single-lensed head
-Added an underside camera/sensor cluster to the socket that a flying stem could be attached to
-Added Kotobukiya detail vents to cover up/replace the old intakes for the jetpacks
-Listened to "Disc Wars" from Tron Legacy religiously while building this model to motivate/inspire me!
Anyways, on to the pics!
(Whoops, can't post them -anywhere- yet, it seems!)
This message was edited 1 time. Last update was at 2013/05/16 12:09:59
"Shas'el Nal'da Tal'den, your most recent reports concern me greatly. The sudden rise and fall of Dark Angels activity and the rapidly boldening Chaos incursions are of no small consequence, and they draw ever closer to our borders. After convening with the Shas'ar'tol, it has been decided; I shall personally join you on the battlefield soon. May whatever gods they pray to have mercy on them should they harm any of our own on my watch."
Theme Music:
------------------------------
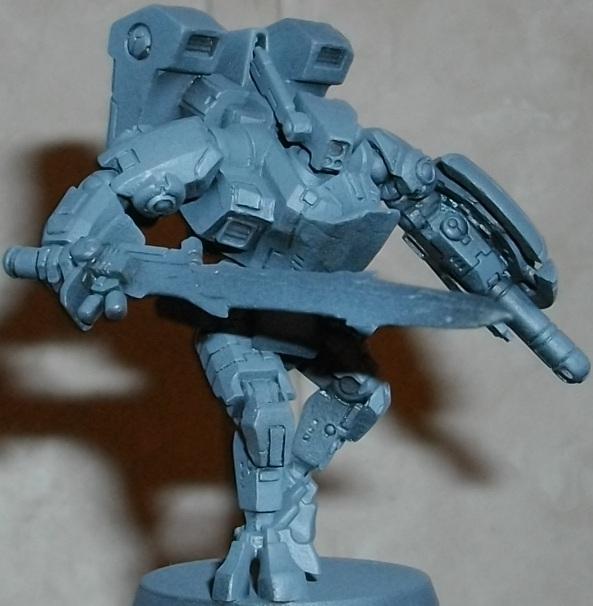
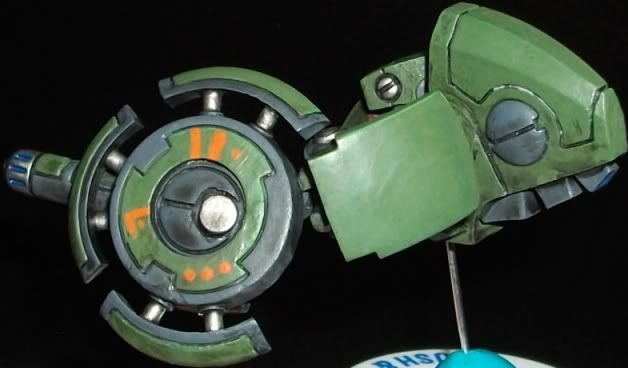
Right, not much to say that the pictures don't show; still needs some liquid greenstuff work, and I'm not entirely sure about this Onager Gauntlet design. If anyone has any suggestions concerning the gauntlet, please let me know! The current one is inspired by Big O's punching attack from the anime "The Big O!". Also, should I go with a closed fist or open hand for the right (plasma rifle) arm?
The following photos were taken prior to the assembly of the gauntlet and the addition of the aerials/antennae to the right side of the head:


 Still undecided; should I paint his helmet black to indicate that he's the Shas'o, or should I save helmets for Firewarrior Shas'ui's and Battlesuit Shas'vre's? Or should -they- get the white helmets? Also, here's a couple of my other schemes I tried, in case they're preferred:


 Nice you went with the hot rod method for metallic red, didn't see that coming.


 I'm a fan of all the colors. And the glow is killin.