| Author |
Message |
 |
|
|
|
|
Advert
|
Forum adverts like this one are shown to any user who is not logged in. Join us by filling out a tiny 3 field form and you will get your own, free, dakka user account which gives a good range of benefits to you:
- No adverts like this in the forums anymore.
- Times and dates in your local timezone.
- Full tracking of what you have read so you can skip to your first unread post, easily see what has changed since you last logged in, and easily see what is new at a glance.
- Email notifications for threads you want to watch closely.
- Being a part of the oldest wargaming community on the net.
If you are already a member then feel free to login now. |
|
 |
2014/12/05 18:23:22
Subject: Painting before placing model on base
|
|

Fresh-Faced New User
|
All,
I am looking to paint up some of my models, however, I want to do something that I have never done with bases before and actually have some texture etc. rather than just putting sand/gravel/whatever on it. This is going to mean painting my model up before putting it on a base as otherwise I could potentially ruin the base and I couldn't spray the models to prime them.
How do you guys spray/paint your models without attaching them to the base first?
Cheers!
|
|
|
 |
|
2014/12/05 18:31:17
Subject: Painting before placing model on base
|
|

Near Golden Daemon Caliber
|
What kind of model is it, game/faction/material. I used to make custom bases but recently I've switched to clear acrylics which present the same problem.
I've found a couple of ways dependent on the model in question.
You can take a simple nail and glue the model's foot to it, paint up as usual, prepare base, carefully snap or slice model off of the nail depending on the contact point (I usually use feet). Space marines usually pop off with my thumb, models with thinner ankles I tend to carefully remove with a sharp hobby knife. You can just get a block of stout foam, a roll of toilet paper, or any of a number of things to hold up various models on nails while you work through them. Works well for dipping too since you can spin off the excess by putting the nail end in your drill.
For metal models with slotta bases (like infinity) or really any model with a slotta base, I put them down into a standard sacrificial plain slotta base, paint them up, then carefully snap the slotta base around them. Usually I don't use much glue and a gentle flex will free them but you can just waste the base if you're supplying your own non standard bases. Then take a dremel or other rotary tool with a cut-off wheel, or a hobby saw or even something else that does the same thing  Carefully cut the remaining slotta tab off.
Both methods may leave a little chipping or lost paint around the feet but I'm assuming almost anything will. I guess for light enough models you could drill a hole in the foot and use a thin rod like for pinning, I've seen people put those into corks.
Also something to be aware of, depending on how you make your base, just think about how the model will attach when done. I just had a hell of a time getting some models onto a diorama base as it was covered in glued down sand, which nothing wanted to stick to, then superglue started to melt the underlying foam base So just something to think about. If it's a flat surface you may want to test fit the model, then take a sharp blade and score the surface under the feet, and or scratch away the paint so you bond to the material rather than the paint which could lead to the model coming off later.
Sorry this took so long to explain =/
|
|
|
|
|
|
2014/12/05 19:25:29
Subject: Painting before placing model on base
|
|
Yu Jing Martial Arts Ninja
North Wales
|
I've recently been putting in more effort with my painting and basing since getting some Infinity miniatures.
My plan involved cutting off the slotta-tab with a modelling saw, then putting a couple of wire pins into the feet - about an inch or so long. Shoved the pins into a block of polystyrene for handling during painting.
When everything was done, cut the pins short, drilled matching holes in the base and glued in place.
The problem with this is drilling holes up through the feet of the miniature; some of the feet and legs are really small, it gets rather nerve wracking!
|
|
|
|
|
2014/12/05 19:27:02
Subject: Painting before placing model on base
|
|
Near Golden Daemon Caliber
|
^What you've said is exactly why I've been doing them the way I said, my smallest drill bit is worn out and I've been waiting to get another one. Some of the feets on the ladies especially are super tiny.
|
|
|
|
|
|
2014/12/05 19:36:45
Subject: Painting before placing model on base
|
|
Focused Fire Warrior
|
I have a pair of reverse action tweezers, and they help me a lot with that sort of thing. You still have to be careful not to damage the most delicate parts, but they make it much easier and I don't have to mess with pinning. Just hold the model by 1 foot, spray, then dry and switch feet, slight touch up spray on the area that the tweezers covered.
http://www.amazon.com/Testors-8942T-Reverse-Action-Tweezers/dp/B003ZD1148
|
|
|
|
|
2014/12/05 20:50:48
Subject: Painting before placing model on base
|
|
Fresh-Faced New User
|
 GrimDork wrote: GrimDork wrote:What kind of model is it, game/faction/material. I used to make custom bases but recently I've switched to clear acrylics which present the same problem.
I've found a couple of ways dependent on the model in question.
You can take a simple nail and glue the model's foot to it, paint up as usual, prepare base, carefully snap or slice model off of the nail depending on the contact point (I usually use feet). Space marines usually pop off with my thumb, models with thinner ankles I tend to carefully remove with a sharp hobby knife. You can just get a block of stout foam, a roll of toilet paper, or any of a number of things to hold up various models on nails while you work through them. Works well for dipping too since you can spin off the excess by putting the nail end in your drill.
For metal models with slotta bases (like infinity) or really any model with a slotta base, I put them down into a standard sacrificial plain slotta base, paint them up, then carefully snap the slotta base around them. Usually I don't use much glue and a gentle flex will free them but you can just waste the base if you're supplying your own non standard bases. Then take a dremel or other rotary tool with a cut-off wheel, or a hobby saw or even something else that does the same thing Carefully cut the remaining slotta tab off.
Both methods may leave a little chipping or lost paint around the feet but I'm assuming almost anything will. I guess for light enough models you could drill a hole in the foot and use a thin rod like for pinning, I've seen people put those into corks.
Also something to be aware of, depending on how you make your base, just think about how the model will attach when done. I just had a hell of a time getting some models onto a diorama base as it was covered in glued down sand, which nothing wanted to stick to, then superglue started to melt the underlying foam base So just something to think about. If it's a flat surface you may want to test fit the model, then take a sharp blade and score the surface under the feet, and or scratch away the paint so you bond to the material rather than the paint which could lead to the model coming off later.
Sorry this took so long to explain =/
Thanks for the answer! I guess I'll just have to try a couple of methods and see what works best. The models are 40k Chaos, so for regular marines/cultists I will probably glue a nail to the foot like you say, but for the larger models like helbrutes I'm not sure. Maybe I could get away with a similar method with a nail on each foot and push the nails into some foam?
|
|
|
|
|
2014/12/05 21:00:39
Subject: Painting before placing model on base
|
|
Near Golden Daemon Caliber
|
You could do that. I've put nails on some pretty big feet though  You could also lightly glue him down to anything for painting. A thin bit of cardboard that's stout enough to work with, maybe use hot glue and then you can use a hairdryer to heat up the cardboard from the otherside, warming the glue and making it easier to remove. Something big like a dread you could probably mount on anything but his final base, just be careful that you can get him back off later
|
|
|
|
|
|
2014/12/05 21:10:03
Subject: Painting before placing model on base
|
|
Thane of Dol Guldur
|
the ways i use are. blu tacking to a paint pot you dont plan to use on the model, or drilling i hole in either or both of the models feet, putting a piece of pinning wire (paperclip) in the feet, and pushing it into corkboard.
|
  Heresy World Eaters/Emperors Children Heresy World Eaters/Emperors Children 
Instagram: nagrakali_love_songs |
|
|
|
|
2014/12/05 21:13:39
Subject: Painting before placing model on base
|
|
Near Golden Daemon Caliber
|
Yeah I use the bluetaking to a paint bottle thing all the time too. For any model that's still on a base like how I said I do my infinity stuff. I was nearly ecstatic when I saw other people doing that, sooo much better than holding model by just it's base.
|
|
|
|
|
|
2014/12/05 23:36:41
Subject: Re:Painting before placing model on base
|
|
Regular Dakkanaut
|
I just stick them to the base with GW superglue, paint up, the take him off the base. Its the only use I have for gw super glue XD
|
|
|
|
|
2014/12/06 06:23:25
Subject: Painting before placing model on base
|
|

Boosting Ultramarine Biker
|
Drill a hole in the bottom of one foot and crazy glue in a small length of a fine gauge paperclip. Use the same drill bit to drill a hole in a bottle top like a Gator Aid bottle. If needed, a small amount of blue tac under each foot also helps stop if from spinning around. When the figure and base are done, I drill a hole in the base and pin the fig to the base with a bit of superglue under the feet.
I have never painted a model stuck to a base.
|
|
|
|
|
2014/12/06 12:10:53
Subject: Re:Painting before placing model on base
|
|

Focused Dark Angels Land Raider Pilot
|
What I do is just pin the legs and put them in a plastic bottlecap. The bottlecap is filled with hotglue to give some weight. Then when I drill holes for the pinning the glue, since it is rubbery, grips the pins with no actual gluing on the pins themselves.
The bases I use for these are resin so I was going to pin them anyways.
I found this really help me with details on the lower part of the mini, also I can take my time with the base separately and don't have to be too careful not to hit the mini.

|
// Andreas
 Dark Angels 4th Company (3,830pts) 950pts fully painted Dark Angels 4th Company (3,830pts) 950pts fully painted
  |
|
|
|
|
2014/12/07 08:35:30
Subject: Painting before placing model on base
|
|
Fixture of Dakka
|
Wow, so much work for some of these solutions.
All I do is put double-sided tape on the bottom of a small glass spice jar and plunk the model on. It allows me to easily lift the model on and off to paint some of the awkward to reach areas.
If it's a slot job, I slice off the slot with clippers.
I do the base totally separately -- if it's a special model, I'll do just that base; otherwise, when I'm in the mood for something different, I will often do 20, 30 infantry-sized bases at a time, without a specific model in mind, either on a plain base or resin bases. I do them like that because of the glue, tools, and materials are just so different for bases.
Afterwards, I affix the models on the bases with superglue.
On models that are 40mm+ base size, I will usually pin one leg. In that case, I drill the model before I even prime it but I don't drill the base until I'm ready to join them. Once I decide where I want to put the model, I will a rough, 100-ish grit sanding stick (the ones that look Nintendo Gameboy pens with abrasive material on them) to get rid of some of the material on the base, if I need the foot sink in below the surface.
|
|
|
|
|
2014/12/07 11:11:39
Subject: Re:Painting before placing model on base
|
|
Focused Dark Angels Land Raider Pilot
|
My solution does take a bit of work, including preparing the bottlecaps. But then again... these termies will see around 10+ hours of painting each... so very much worth it. I am a slow painter but it doesn't really matter as long as it is fun
|
// Andreas
Dark Angels 4th Company (3,830pts) 950pts fully painted
|
|
|
|
|
2014/12/08 01:26:04
Subject: Painting before placing model on base
|
|
Stern Iron Priest with Thrall Bodyguard
|
i always paint the model separate from the base, and in sub-assemblies, so i pin everything...
i use old exacto handles to hold the mini while i paint...
for the body, i clip off the tab if there is one, put one pin in a foot, and then slap it into the exacto handle...
for resin bases, i just drill a hole in the base for the foot before painting it...
if i'm building a base using a plastic one, i drill a hole, and stick a toothpick end in the hole before i glue the sand on...
both styles of base require a dry fit with the mini before the pin goes in the foot, and before drilling a hole in the base, to see where you want it to sit...
good luck...
cheers
jah
|
Paint like ya got a pair!
Available for commissions.
|
|
|
|
|
2014/12/08 01:59:51
Subject: Re:Painting before placing model on base
|
|

Lone Wolf Sentinel Pilot
|
Alligator/crocodile clips on wood skewers: 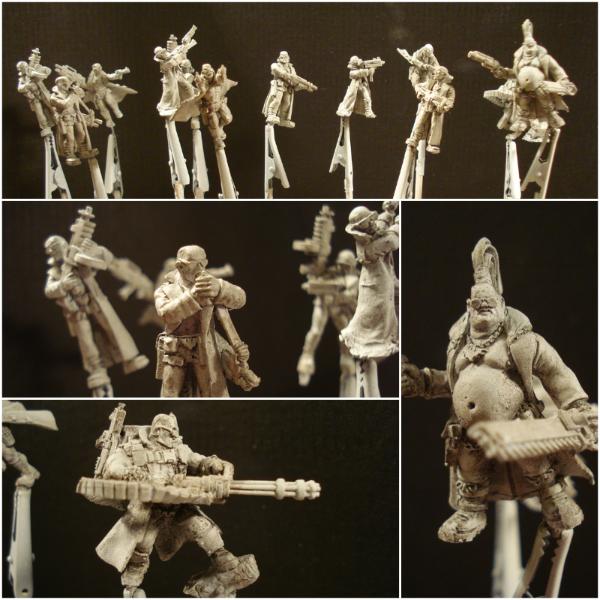 Clip holds the model from tab or pin, opposite end of the rod gets stuck on a foam block. Various clips sizes for different jobs/holding strength (usually available from hardware/electrical supplies stores), reusable, easy to assemble.
|
|
This message was edited 1 time. Last update was at 2014/12/08 02:00:27
|
|
|
|
|
2014/12/08 02:27:16
Subject: Painting before placing model on base
|
|
Stealthy Space Wolves Scout
Louisville, Ky
|
Im not even close to being a good painter, but im good for table quality and im quick about getting large groups down. Single projects like tanks or HQs take me two or three weeks. but a 10 man squad of GH or WGT is a week and a half worth of work.
That is 7 actual work days of 14 at about 5-6 hours each day I have a pretty convenient schedule
I spray my sprues and just add a small dot where it was cut from the sprue. I paint my bases, then add the ground effects and depending on the style of ground will put feet indentations in the base as if the marine was sinking into the mud or walking in the snow.
|
1000-6500 SW W/L/D 6/1/3
2014: 12/0/4
2015: 8/5/4
Adeptus_lupus instagram for BR
Ave Imperator |
|
|
|
|
2014/12/08 18:16:54
Subject: Painting before placing model on base
|
|
Gargantuan Gargant
|
Pin in the foot, held by a spare pin vice (the cheap, crappy double-ended one that I don't like to use for actual drilling). If I'm not painting the model on its base (my usual method, which makes the paint bottle + poster putty handle viable), it'll be pinned at the end, anyway.
Tried shoving the pin in a cork, but found that heavier models tended to spin during manipulation, as one side always had more weight and wanted to rest on the bottom. Since simple friction wasn't working, I switched to something with a bit more purchase, thanks to the collet I could tighten down.
With this method, I only need one handle - quick work is done with the pin held in my fingers, detailed/longer jobs just require poking them into the vice and turning them tight. Pinned parts that are waiting for work can be shoved in a foam block, held in a shallow jar, etc.
|
The Dreadnote wrote:But the Emperor already has a shrine, in the form of your local Games Workshop. You honour him by sacrificing your money to the plastic effigies of his warriors. In time, your devotion will be rewarded with the gift of having even more effigies to worship.
|
|
|
|
|
2014/12/08 18:34:47
Subject: Re:Painting before placing model on base
|
|
Drone without a Controller
|
I paint my models as much as I can while they are on the sprue. After removing the pieces, I touch up the parts and assemble them. Once assembled, I apply any other paint colors I want. Then I attach the model to the base.
|
|
|
|
|
|
|


