Forum adverts like this one are shown to any user who is not logged in. Join us by filling out a tiny 3 field form and you will get your own, free, dakka user account which gives a good range of benefits to you:
No adverts like this in the forums anymore.
Times and dates in your local timezone.
Full tracking of what you have read so you can skip to your first unread post, easily see what has changed since you last logged in, and easily see what is new at a glance.
Email notifications for threads you want to watch closely.
Being a part of the oldest wargaming community on the net.
If you are already a member then feel free to login now.
2015/11/25 05:33:54
Subject: 1850 ITC game Tyranids Endless swarm vs IG and friends?
Delayed due to wifely intervention. This game will likely happen in a couple of weeks.
All right, my next game is going to be against my Married papas in space buddy. I once again don't know the army going into the match. Exactly as it is when you get assigned an opponent at a tourney I suppose. I do know IG is in the mix. His most recent list if I remember right had the forgeworld thudd guns, a vendetta with vets, an admech super dude, some infiltrators, grav guns on tank dudes, and a lot of drop pods. So this would be quite the challenge to my list, with all those small blasts and a whole bucket of dice.
Of late he has been taking IG blob supported by Ad mech in Flesh torn drop pods. The only clue I have was mention of an Ogryn death star?
company command squad
3x melta
volkov's cane (Montka book)
priest
platoon command squad
flamer
4x infantry squads
power axe
melta bomb
flamer
veterans
3x melta guns
2x thudd guns
vulture
Space Marine CAD
librarian
lvl 2
hunter's eye (Kayuon book)
librarian
lvl 2
auspex
2x scouts
melta bomb
3x drop pods
Battle Congregation
dominus
raiment of technomartyr
2x kataphron destroyers
grav/cognis flamer
kataphron breachers
haywire guns
Pregame thoughts:
Spoiler:
So, I think it has been over a year now since the last time I beat Bogalubov, and seeing him pull out his tournament army fills me with dread. With the new super buffs added in by double CAD, plus the white scar ignores cover weapon. I'm going to have trouble here. I have to hope that even though he eats my army away super fast with tons of grav and blasts, I'll pop back up and flood him from the board. If I can get half my units back, I think I'll still stand a pretty good chance. Secondaries will be all about the roll, if I have to go to fight him for his objectives early in the game, there's no way. If I have to run back to pick up my objectives, I'll hopefully have guys coming in for that.
Trygon has one more chance to shine here, this is what I was aiming him for, big poison against those T7 artillery pieces, he should be able to kill a couple of them on arrival, and hopefully they break.
Bombs can be super deadly here, as many of his units can be instant deathified by my mucolids and spore mines.
Deployment:
Spoiler:
Mission: ITC big guns never tire.
Deployment: vanguard strike
Tyranid warlord trait: +1 to steal the initiative, and re-roll reserves. (A great warlord trait in this case.)
Super friends warlord trait: 3 pinning checks (on a fearless army)
An amazing warlord trait here, my opponent had first turn, and I could seize on a 5+! To top it off, I get to reroll reserves, making that trygon a near guaranteed arrival on turn two.
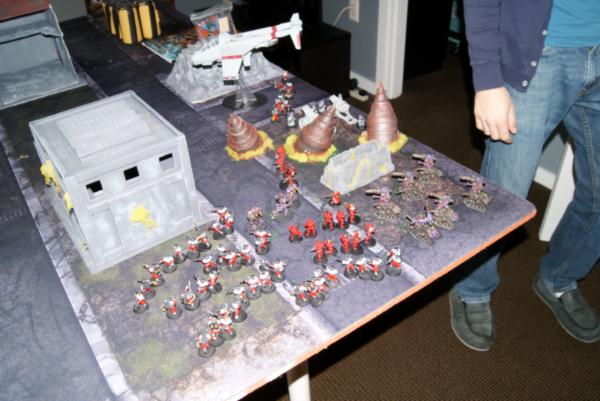
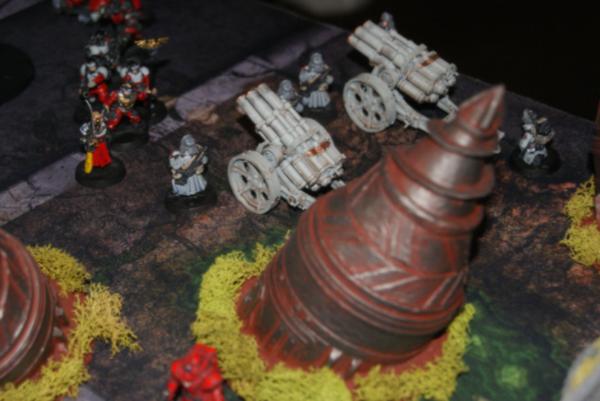
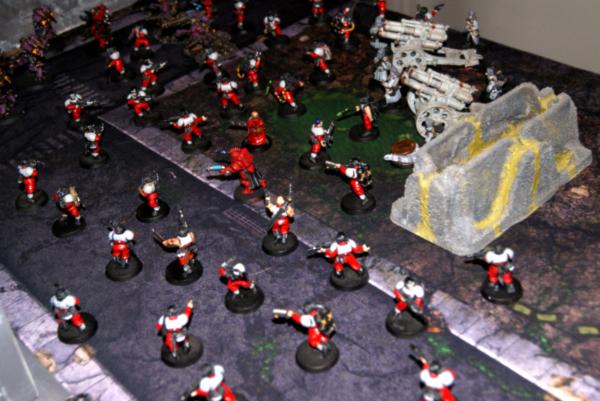
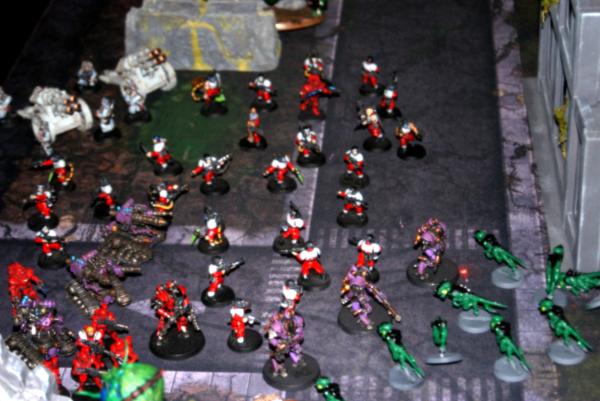
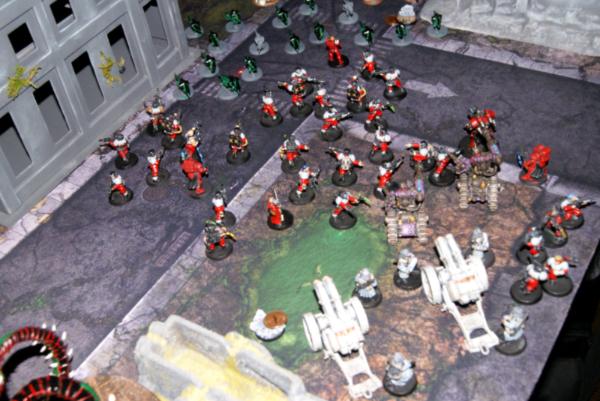
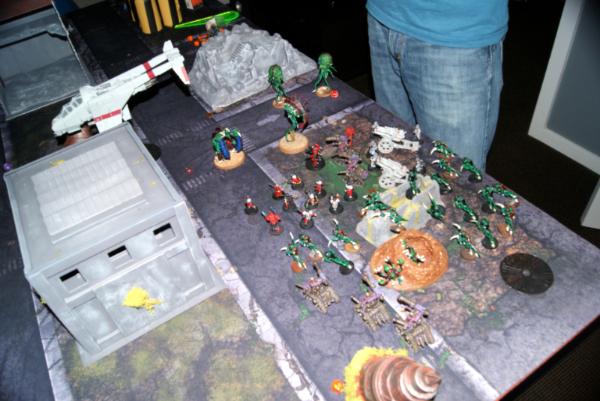
The imperial friends of awsomeness set up in the corner, really only sheltered by some in the way building protecting line of sight. I think if I'd had a couple of biovores he would have been in super trouble from the blasts. The artillery was all the way in the back, sheltered on one side by a piece of ruins. His deployment was flanked on my right side by anothe piece of ruins, that he once again did not enter. The squad of destructors were joined by the dominus and the librarian with ignores cover. The second librarian and a priest were with the blob squad. Four flamers, four power axes, hit and run, 52 dudes. That's a lot to hack through.
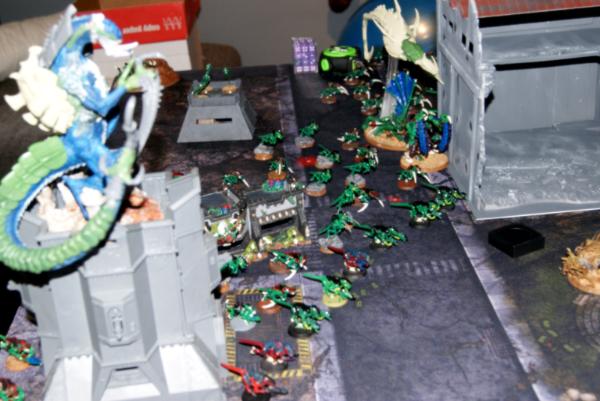
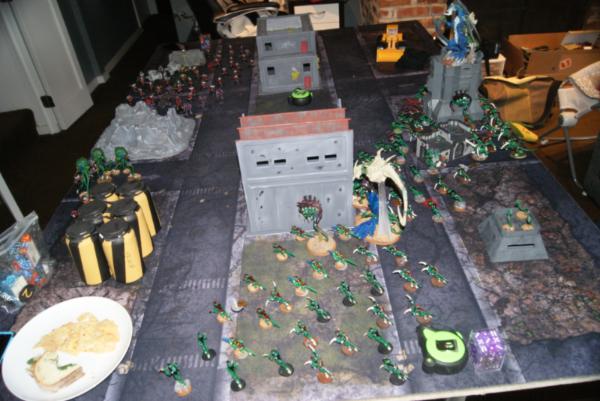
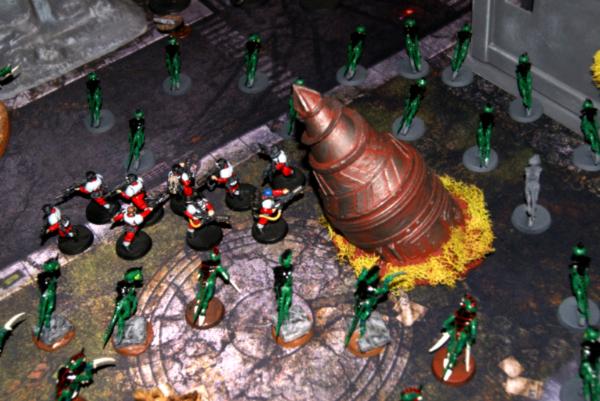
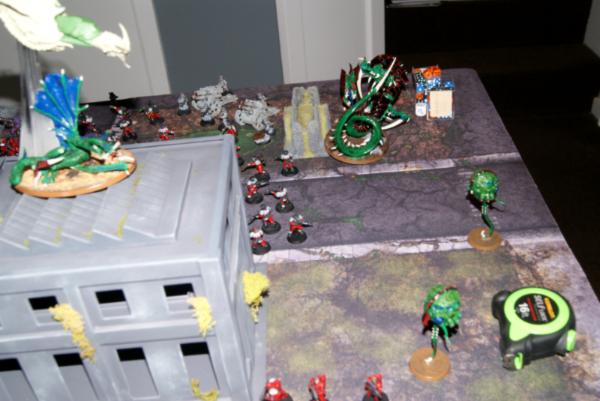
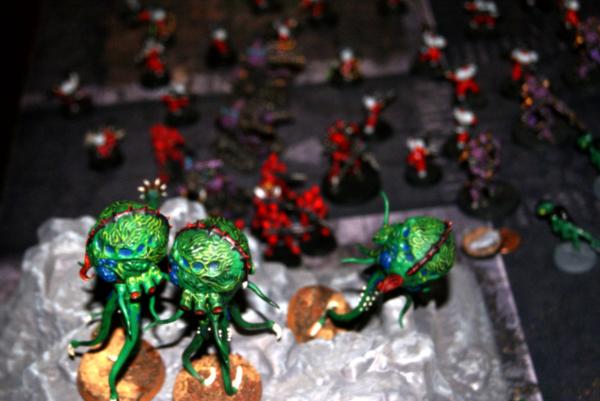
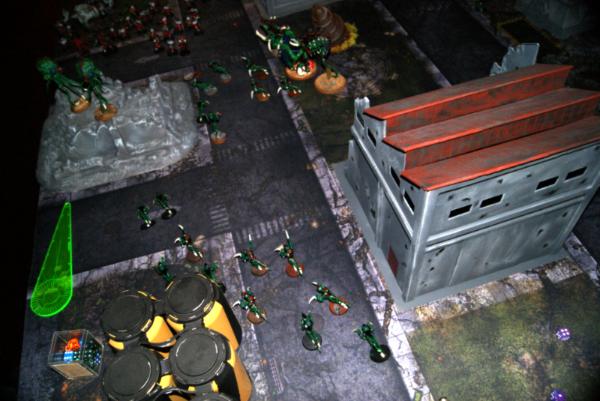
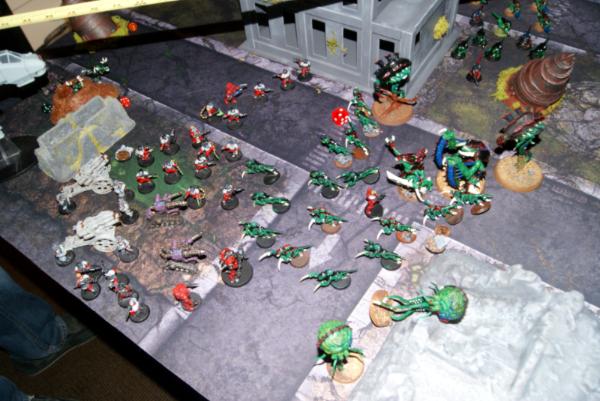
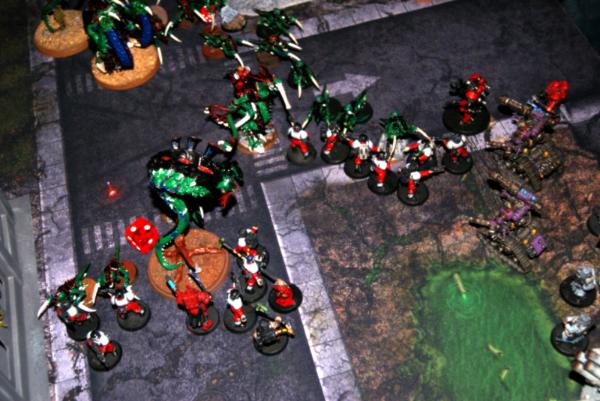
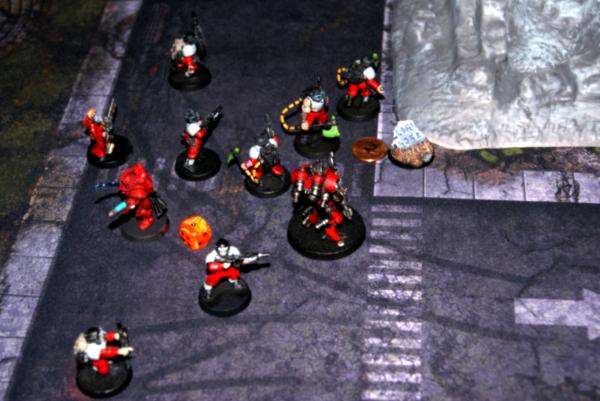
Tyranids set up behind the large ruined factory. My bunker was between that and the ruined bastion. Dimachaeron perched on top of the bastion instead of the bunker, I hoped that on the first turn I would be able to move farther, and get behind the left flank ruins. Termagants screened everything, while the carnifex and the crone were well placed behind the factory. My opponent has first turn, so everything is placed with 3+, 2+ cover, or just plain out of line of sight. Malanthrope and lots more gaunts and gants behind the factory. My opponent has three drop pods that might drop in to attack my bunker, though it is fairly well bubble wrapped at the moment. Just in case, I have placed three bombs to help dissuade him from such an action.
The spore field units were almost entirely infiltrated behind the large ruins to the left of this picture. It hides them from sight, allowing all of them to be 12" away. With a good first turn run I could assault turn two unless he retreats, if he dares to come forward towards my swarm, then they will have a chance to assault him and wreak havoc.
Turn one:
Spoiler:
Tyranid objectives: 1/3 (Hold opponents obj 1/hold my obj 1)
IG objectives: 1/6 (Hold opponents obj 1/Destroy a unit)
Tyranids Turn one:
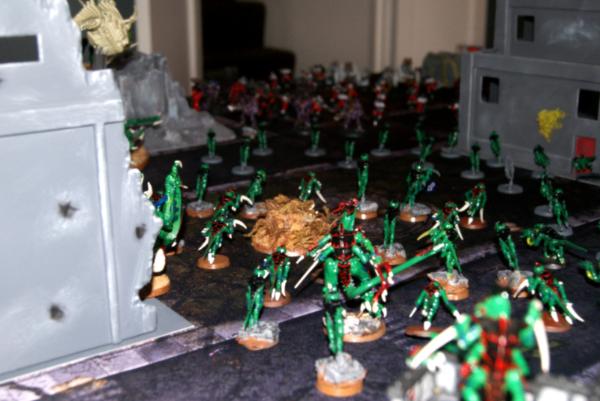
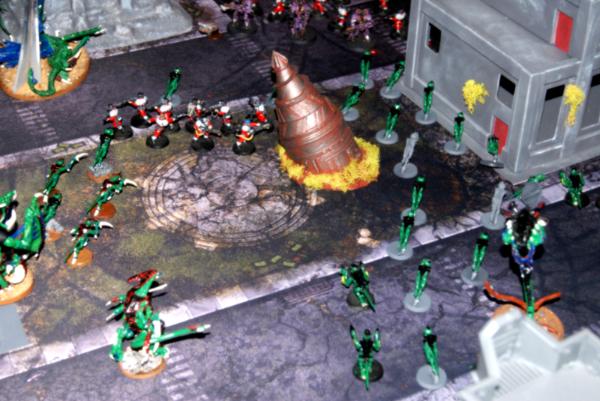
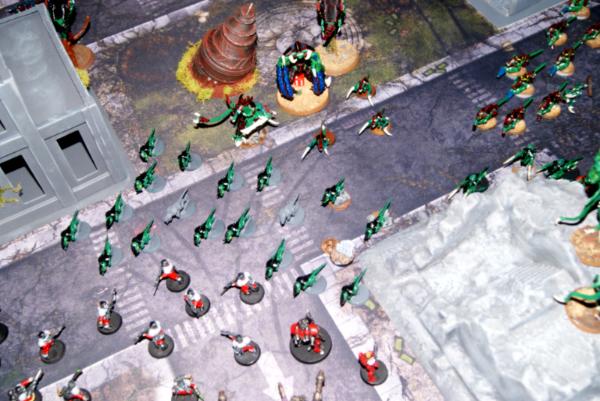
Surprise! I got to seize the initiative. This warlord trait might be even better then the three infiltrating units one. Entire army of tyranids went gung ho right at the IG lines. My twenty gaunts popped out and got a fantastic 8 inch run added to their 6" from the escape hatch. I'm literally inches from his front line on turn one. Dimachaeron got close to where I wanted him behind that ruin on the right, lots of screening gaunts and the malanthrope, so he should have some chance. The crone on the other side is actually has some good crowd control firepower with the cluster spines as well. Hormagaunts on my far left are farther away then I wanted, but they are making up ground quickly. Should be threatening turn two and assaulting turn three. The prime feels pretty safe in the middle of everything there, and the carnifex and malanthrope are well poised to get into assault turn three. There is a nice little hole right in the middle of things, but I didn't quite wrap up the potential pod trap as well as I could.
The impact of the escape hatch is just amazing. Easily the most valuable thing in the army for its points as it gets that first squad of hormagaunts in perfect range to charge nearly any opponent turn two. One I've used it the first turn though, the value nearly disappears unless squads get wiped out. My spores moved up onto the ruins on the left side of the battle as well, their run moved them into threat range for a turn two assault with the rest of the line. On the right side of the battle, two squads of termagants opened fire on the scouts and did nothing.
First shot with the new cluster spines! Scatters 8 inches right into my own hormagaunts and kills three. Whoops, well I spent 15 points to kill 15 of my own points. It could have been great if I had nailed some guardsmen. Drool cannon does its thing and doesn't hurt anyone. Wanh wanh. \
IG turn one:
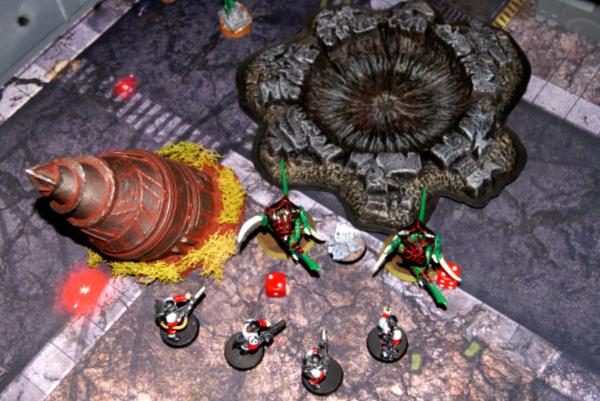
Drop pods come in, the first filled with melta guns lands directly behind the bunker. That spells the end of the bunker likely, perhaps I shouldn't have thrown the tyranid warriors in there. Ah well, those bombs I left directly behind them should have no trouble assaulting next turn.
Drop pod number two scatters deep into the tyranid swarm and now I regret not closing in that pod trap as there is just enough room for everyone to get out. However, he has scattered to a point where his melta weapons have very few viable targets. The stonewrecker or the Malanthrope are the most likely.
The primary group of units did not move to any great extent. Perhaps a touch of shuffling to make sure line of sight was good. Then they opened fire. The artillery managed to kill 3/4 of the warrior primes escort, and the guns of the 50 managed to kill a handful of the front hormagaunts. The dropped pod in the middle fired at the carnifex and were unable to do anything to it.
For a moment I thought the grav cannon ignores cover unit were going to blow away the prime, but instead...
They focused on the dimachaeron, deleting it from the battlefield like it was never there.
The first drop pod that had landed next to the bunker fired off their melta guns and watched the bunker explode. Hoping to keep objective 1 in my deployment zone, I had my warriors disembark there, which prevented the guard from getting it. Shaking from the falling building killed one of the warriors.
Tyranid: 0
IG: 1
Wrap up:
That could have gone better, and it could have gone worse. I would really like to take out the grav squad as quickly as possible. I don't have a ton of units back in my deployment zone, the warriors and one bomb squad should be able to handle the guard there, but if anything else heads that way I will need some regenerated units to pop up there. Dimachaeron would have been nice to have, but it was a big scary looking monster and will likely be a primary target for most armies.
Tyranid turn two:
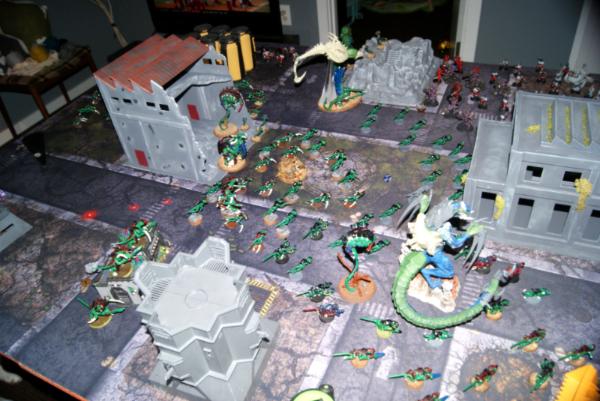
Reserves all arrived! The trygon popped up on a piece of ruins for some extra protection and fired off it's miasma cannon torrent! Killing one artillery man. That's it. My two troop mucolids also came in on the right side of the boar, hoping to threaten the guardsmen in a turn or two.
The crone flew up onto the building and used cluster spines and drool cannon much better, killing off a handful of guardsmen. The two termagant squads I had on the right flank continued to move around the building and prepared to charge the scouts still there.
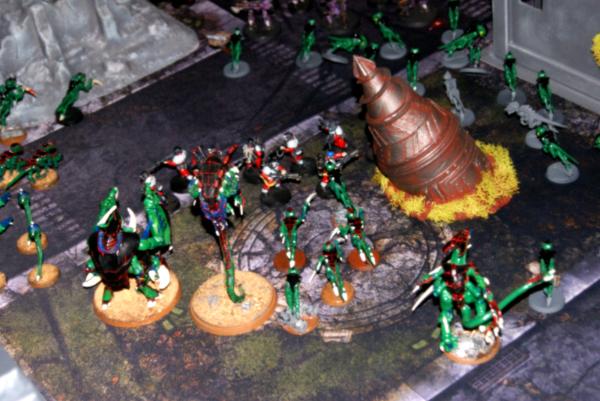
In the center of the battle, the hormagaunts who had left the escape hatch last turn sidled up within an inch of the battle servitors. Hormagaunts and termagants from the far left continued to run their way into the battle. The spore field all crossed over the ruins and prepared to join in on the turn two assault. In the center of everything the carnifex, malanthrope and remaining five bug squad of gaunts prepared to assault the drop podded guardsmen. (Prime had joined the unit prepping to assault the battle servitors.
In the tyranid deployment zone the two surviving warriors and the spore mines charged the guardsmen. Bombs blew up all but one, and he was finished of quickly by the warrior. Instant death for the company commander from the str 6 bomb. Rending claws on the second warrior managed to cause one glance to the drop pod. (Those things are so durable it's crazy. The spore mines failed their come back to life roll.
In the guard deployment zone, I feel like I have them pretty well hemmed in. Hormagaunts predictably make it into assault with the servitors. Mucolids and spore mines also attempt to assault, they target the scout marines as my blasts from close combat will still effect nearby units. Hopefully killing some grav cannon guys. Two mucolids fail their charge, but one makes it, as do the spore mines. None of these spore field units came back either. 0/4 on reappear.
Bombs do manage to kill all but one of the scouts, and cause a wound to the servitors. One of the grav cannon destroyers also dies. Hormagaunts tear apart the servitors and consolidate within an inch of the guardsmen blob. In the center the podded vets vanish beneath a hail of attacks, and allow more bugs to consolidate closer to the imminent battle.
Imperial guard turn two:
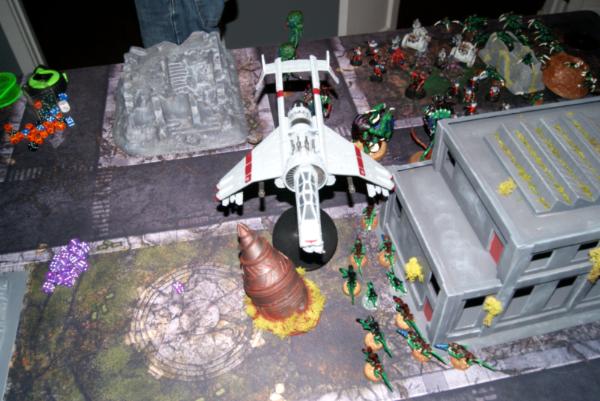
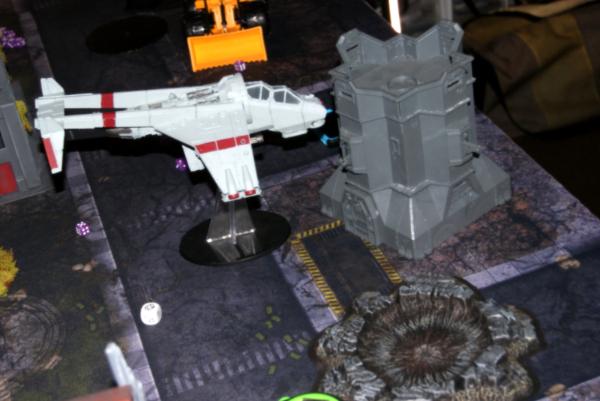
All of the IG reserves came in, a drop pod with more grav destroyers landed next to the trygon prime. The vulture also arrived, it's twin linked guns ripping the crone to shreds. The guardsmen shuffle farther back into their corner. Flamers come up to the front of the line, kataphron destroyers find some intervening models to cover them, and the scout moves right into the middle of it all.
Flamers do their thing, killing of 13 of the 15 hormagaunts that had made it to the battle line. Artillery targets the swarms coming from the left flank and sets them back another turn.
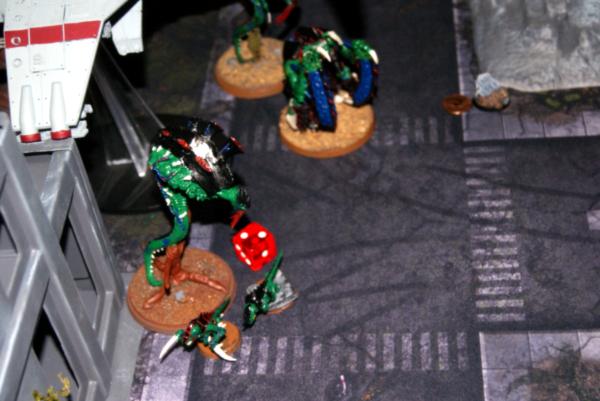
Once again the warrior prime finds himself in a very small unit. Although none of the synapse creatures were hurt at this point. The ignore cover grav changed that though. They turned and fired on the trygon along with the podded in kataphron destroyers who had landed next to him. The trygon had no chance and collapsed under its own weight. Having killed only a single guardsmen for 255 points. Ugh, trygon you are fired.
Tyranids: 1
IG: 1
Wrap up:
Opponents objective one is easily the hardest one for me to get. He has ob sec units literally surrounding the objective. I won't be able to claim it until the end of the game when I have wiped him from that corner. Things are going pretty well aside from the maelstroms though, I've reached his lines, and I can't imagine that he will be able to shift nearly 60 bugs in a single turn. Those flamers are scary, but I should be able to trap that unit in close combat next turn. Return rolls have been underwhelming, but I'm sure it will balance out eventually. The Trygon hole has replaced the escape hatch for easy way to get across the field. The super slow battle in my deployment zone between the warriors and the drop pod can and likely will take the whole game. That's okay though as it gives me a control and synapse unit in my zone for any returning units.
Turn three:
Spoiler:
Tyranids Objectives: 1/3 (Hold opponents obj 1/Hold my obj 1)
IG Objectives: 2/5 (Hold opponents obj 2/Destroy an enemy unit)
Tyranids turn three:
The termagants who had been circling around the building to threaten the right side returned to the center to try and get a good shot at the guardsmen and contribute more quickly. Monsters and hormagaunts from the left side rushed forward and assaulted the large guard blob along with the mucolids. The mucolids failed their charge, as did the carnifex rolling double ones for it's assault range. While the prime and hormagaunts were able to cause a lot of wounds and kill nearly half of the guardsmen, the unit didn't break due to the priest, and very happily used the white scar hit and run ability to leave my bugs standing in front of allll the guns. Really bright side though, I killed all of the flamers.
The two mucolids who had dropped in with the trygon on the right side of the battle field charged the drop pod there and blew up. Neither came back, and I didn't do more then glance the pod. Waste of those bombs. (0/6)
IG turn three:
In the guard turn the vulture lined up and shot all of the termagants that were coming around the corner in one of the squads. They too were uninterested in endless swarming. (0/7 for reappear, sensing a pattern here?)
More firepower unloaded on the hormagaunts, one squad was wiped out, but did make it's
At the end of the IG turn, we had the assault on the drop pod in my deployment zone. Warrior with the rending claws finally managed that third hull point, smashed the pod, and rejoiced in their lack of being trapped in close combat.
Tyranids: 2
IG: 2
Wrap up: Well, I had forgotten about the hit and run from the white scars model. I challenged and when he said no, I took the librarian out thinking that if you weren't in the challenge, surely your powers can't confer onto the unit anymore. Sadly I was wrong. So while I killed a dozen guardsmen including all of the flamers, that big blob still just hopped out of close combat and will shoot the heck out of me next turn. On the plus side, in the process of charging in, a unit of 2 hormagaunts were shot to pieces and made their return roll! (1/9 return rolls) If I can keep the pressure up on him and take out his blob, everything will fall into place. Perhaps I should have charged those grav guys....
Turn four:
Spoiler:
Tyranid Objectives: 1/6 (Hold enemy obj 1/destroy an enemy unit)
IG Objective: 2/5 (Hold enemy obj 2/destroy an enemy unit)
Tyranid turn four:
Returned hormagaunts did as they were supposed to, swarming up out of the trygon crater and threatening the backside of the blob, and more importantly the terrifying artillery pieces. To be fair there weren't that many blobs left for them to shoot at though. This turn, I'm going to get the mucolids into the fight, I'm going to throw the fex, malanthropes, and prime with his buddies into the blob and hopefully either take out the librarian, or the priest, ending fearless or hit and run.
In my deployment zone, the warriors booked it across the rubble strewn landscape and hopped into the destroyed bastion. My thought was, they could be safe inside and can't be shot. However we rolled off to see if it was an actual building, or if they had embarked onto the roof for ruins. They decided to be out in the open instead of safe within a building.
In the center, the second squad of termagants moved forward towards the main fight.
While the prime, malanthropes, and a handful of hormagaunts made it into the combat, the carnifex stubbed his toe for a second turn in a row. Three inches rolled out of a five inch charge. The mucolids also failed to get into combat as the guard have slowly been backing away. At least the carnifex as the first to charge ate the overwatch, all the flashlights being unable to hurt him just bounced off. Prime made a heroic go at it, killing six guardsmen. Hormagaunts and malanthrope managed some violence too, but the squad of two gants died, failing their return roll. (1/9 for resurrection)
IG turn four:
Those warriors that decided the roof was better then hiding inside, they got to meet mister vulture who pummeled them with fire power, wiping them from the battlefield with little to no effort.
In the deployment zone of the guard, the cover ignoring grav cannons of doom focused on the prime and his five hormagaunts. The poor bugs did not survive, falling to a hail of super firepower, however the gaunts were interested in coming back (2/10 returning). Artillery fire reduced the squad of reborn hormagaunts around the trygon crater to only 3 bugs. The other kataphron destroyers unloaded at the carnifex causing two wounds. (Not as bad when they don't ignore cover.) Malanthrope also suffered a pair of wounds at the hands of what was left of the blob. The dominus moved from the destroyer squad over to the blob squad, to give them just a touch more punch.
Oh, and some guardsmen walked onto the board from reserves, hanging out next to the artillery.
Tyranids: 3
IG: 3
Wrap up:
That nasty hit and run is going to cost me this game at this rate. I hope my three remaining hormagaunts can take out the artillery, while the malanthropes attempt one more time to take out the blob. I feel like if I can take them out, I can still pull this one out. My last two mucolids should really make it into combat this turn, barring a stubbed tentacle. I've abandoned my side of the board due to a lack of reinforcements, I really need to wipe him out. This is the first time I've started to run out of synapse, although I don't have much for that synapse to control either.
Turn five:
Spoiler:
Tyranid Objective: 3/5 (Hold my obj 1/destroy an enemy unit)
IG Objective: 1/2 (Hold enemy obj 1/hold enemy obj 2)
Tyranid turn five:
I had to make a choice here, hoping to take out my opponent, I had to go big or go home. The second reborn squad of hormagaunts came out of the crater, cutting off the blobs avenue of escape. I planned on the malanthrope and the carnifex charging them this turn. There is always the chance the fex could do a ton of damage. Let them wrap around him at initiative step 3 and let that bio-flail smack a bunch of them. The mucolids also moved forwards, planning on charging the kataphron destroyers.
Those frightening artillery pieces just had to be reached. Three hormagaunts were all that had survived from the first reborn squad, and that was enough. All but one of the guardsmen were slaughtered, with no return wounds caused. He broke and the gaunts ate him.
Poor positioning from me made my first target with the carnifex his Dominus. Hammer of wrath was only a pair of hits, both of which failed and would double him out, if only the priest in the group hadn't used battle hymns to re-roll saves! Invulnerable saves re-rolled, and the fex hits bounced off. The carnifex never got a chance to use his fearful bio flail, as instead all of the ax wielding guard sergeants decided to puncture his hide with 6's. The guardsmen then did their now patented hit and run, making it all the way to the second objective.
The mucolids blew up the guard command squad I believe, and as par for the course, they did not come back. (2/12 returning)
IG turn five:
Having left the malanthrope out in the open, it was not too hard for the kataphrons to wipe him out. The stray termagants who had been behind the corner were shot to pieces by the speedy blob. More weaponry killed a bunch of hormagaunts, and without synapse...caused them to flee. The three stray bugs were also gunned down, they knew better then to try and come back. (2/13 returning.)
Tyranids: 4
IG: 5
Wrap up:
Well, that went from I think I have a chance to....well not so much. I have around ten bugs on the ground, and they are currently running. The game goes on perhaps I could...tie one of the objectives up?
Turn six
Spoiler:
Tyranid Objectives: 4/6 (Hold my obj 2/destroy an enemy unit)
IG Objectives: 1/2 (Hold enemy obj 1/hold enemy obj 2)
Tyranid turn six:
The game did go on, and miracle of miracles, the bugs regrouped on their leadership of six! However they could only run back into the range of allied weaponry, contesting the one objective there. That was the extent of my turn.
IG turn six:
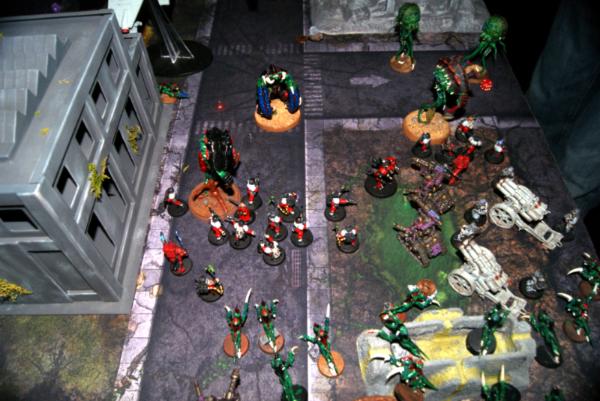
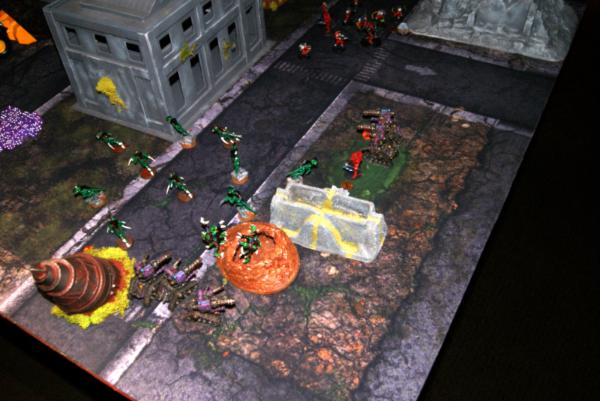
Like fish in a barrel, that was what this turn was. The vulture on the other side of the world had claimed the tyranid home objective a turn or two ago and was just sitting on it. Why not? The remaining blob squaders, and the two squads of destroyers blasted at hormagaunts, reminding them they were scared mindless beasts who should now run away.
The blob took an objective.
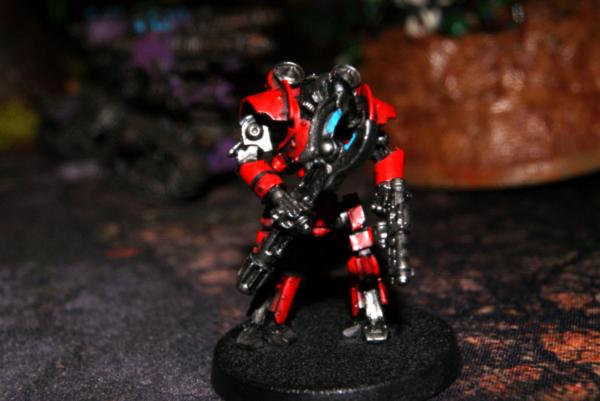
The destroyers took the other one. Just for good measure, here is a cool looking dominus:
Tyranids: 4
IG: 7
Wrap up:
There was nothing I could do at this point. Up until that last turn I did feel like I had a chance, but this one was just so that he could get those extra maelstroms and claim any tertiary points.
Turn seven
Spoiler:
No bugs left, game over man. Game OVER!
Final thoughts:
Spoiler:
Well my first thought is it must have been the dice right? It must have!
Funny how that is an automatic assumption when you lose a game, and how you don't quite find as much time to work on the write up afterwards.... Or that was life taking over, I'll blame it on that. Okay, mistakes by turn, there were plenty.
Deployment:
I could have just placed the dimachaeron far right in my zone, giving him total line of sight coverage from the entire guard army except for the scouts. That would have been great! I could have even potentially charged the scouts turn one and catapulted me into the enemy area for turn two. That quite the mistake, I just got carried away with the setup on the buildings and using his jump ability. Other then that, not too bad. Too make room for said dima, I should have pulled a squad of termagants and put them around the bunker. It could have created a pod trap so his models would die, or too far away so they couldn't melta the bunker. If models were coming back like they should that avenue of advancement can be important. Placement of objectives for that matter. If I had placed my second objective for his deployment zone in a farther off spot it would have naturally drawn him a longer line of deployment I expect.
The spore field was the bright spot, I'm pretty happy with where they ended up. The only other thought I could have had was with the super warlord trait, I could have potentially deep struck them to guarantee them surrounding the enemy. I really wanted him to focus some of his firepower on them though.
Turn one:
Seizing the initiative, it might have been better to let him go first. I could have drawn him towards me before I sprung from the escape hatch. My bunker would have been super bubble wrapped. I could have sling shot more units forward with his various deep strikers and infiltrators. I would have been more protected from grav and artillery.
Aside from that, the movement was pretty standard and not much could change with the setup and the taking first turn. I could have left a squad of gants backwards to bubble wrap the bunker, but that's about it.
Turn two:
Dima down! Really should have had him out of line of sight, though I would have lost a malanthrope instead likely. After assaulting the servitors I should have positioned my guys back to draw the flamers and blob farther forward if they wanted to fire. Even bugs don't have to go forward every turn. The crone needed to be near a malanthrope with a flyer coming in. 2+ cover would have been the difference for that, and the crone was doing a good job of taking out guardsmen.
Turn three:
The trygon, what a waste.
The mucolids charging a drop pod? What was I thinking! The drop pod couldn't secure an objective there, couldn't shoot much, and was out of the way. Anywhere else would have been better. Though the flamers were scary, I really needed to assault the kataphron destroyers and remove them. They could hit and run, but they likely would have been out of grav when they did. That would bring back a trygon, a prime, and later a malanthrope. They were more damaging even then the artillery.
Turn four:
I continued to focus on that blob which I couldn't make run, and once the flamers were gone it's teeth were really gone too.
Turn five:
I got desperate and tunnel visioned on the blob still. Couldn't adjust to the true danger and it has cost me the game at this point.
Final, final thoughts:
All in all, even though I made some big mistakes and couldn't endless swarm to save my life, I was somewhat in the game until the last turn. Adjustments to make... A biovore would be great, possibly lose the bioflail, the spine banks I forgot about, and more devourers to pay for it. I'm also going to turn the trygon prime into a regular trygon, (I need the crater) Then put a zoanthrope out there as synapse instead. The trygon never survives more then a turn anyway, so it's synapse is useless. I was loathe to introduce a psychic phase, but seeing a small psychic phase for the IG didn't really slow things down, I think I'll give it a go. If the powers are bad I can always ignore it and just have that two extra dice to roll against enemy powers.
This message was edited 18 times. Last update was at 2015/12/11 22:37:51
~seapheonix
2015/12/05 16:47:26
Subject: 1850 ITC game Tyranids Endless swarm vs IG and friends?
Game has been rescheduled. It should be Sunday, barring a wife or child intervention on either side. I am going to make a slight tweak to the list post two games in.
Miasma cannon, this is your last chance.
I removed the devourers from one squad of termagants, used those points to give the crone cluster spines, and one of the warriors rending claws.
This message was edited 1 time. Last update was at 2015/12/05 19:08:45
~seapheonix
2015/12/07 05:29:48
Subject: Re:1850 ITC game Tyranids Endless swarm vs IG and friends?
Here is the opposing Guard/Space Marine/Mechanicus list. I was kidding about the Ogryn Death Star. I had just finished painting some Ogryn I've had for years and thought about throwing together a fun list with them. Seeing that Seaphoenix wanted tournament practice, I took my non-fun list. I justify this 5 source abomination to myself by knowing that there is worse out there and all the models in the list have a theme. Mechanicus masters and their thralls.
The list uses 2 CADs, a formation and two recent battle zone books for relics. I ran the first version of the list using the Flesh Tearers' Strike Force, but now that the ITC allows double CADs, I switched to White Scars as a source of the pods. This gives me independent characters who confer hit and run and more importantly the Hunter's Eye. A ridiculous relic that gives "Ignores Cover" for 20 points. Pairing that with the kataphron destroyers is pretty gross. Having reliable option to ignore cover also let me drop the phosphor blasters that I used for a poor man's version of that effect in that unit. Having the cognis flamers is a much better option for deterring assaults and clearing out low armor save hordes.
Imperial Guard CAD
company command squad
3x melta
volkov's cane (Montka book)
priest
platoon command squad
flamer
4x infantry squads
power axe
melta bomb
flamer
veterans
3x melta guns
2x thudd guns
vulture
Space Marine CAD
librarian
lvl 2
hunter's eye (Kayuon book)
librarian
lvl 2
auspex
2x scouts
melta bomb
3x drop pods
Battle Congregation
dominus
raiment of technomartyr
2x kataphron destroyers
grav/cognis flamer
kataphron breachers
haywire guns
2015/12/09 05:49:20
Subject: 1850 ITC game Tyranids Endless swarm vs IG and friends?
I think infiltrating your sandwich behind the fuel tanks really set the tone for the game. Luckily the dog didn't have +1 inch to her movement to snag it.
2015/12/10 00:42:34
Subject: 1850 ITC game Tyranids Endless swarm vs IG and friends?
The final game score ended up pretty lopsided, but it was close throughout. The horde took a ton of casualties, but it certainly kept me cooped up in my deployment zone. We both had back luck with maelstrom missions as we kept getting the ones to hold each other's objectives. If the Nids just got a couple missions to hold their own objectives they might have run away with the maelstrom.
I was sweating it for sure when I got seized on and the whole horde was basically in my deployment zone turn 1. I was hoping to use first turn to blast away his synapse at range and then collect profit as the gaunts tried to act normally with their leadership 6. My first turn of shooting was pretty bad. The whole blob killed 3 gaunts. I certainly needed every single buff from an independent character to pull this one out.
The struggles the Nids had with the 3 drop pods leads me to think that battle company is probably the worst match up for this army. All the grav can pummel the MCs while that's the only way you have to get the cans open. Plus both the transports and all the jerks inside are objective secured.
My final thought is that I hope the residents of this planet aren't picky eaters as they will have quite the feast from all those BBQed bugs. I probably killed 50-60 with flamers alone.
2015/12/12 01:05:14
Subject: 1850 ITC game Tyranids Endless swarm vs IG and friends?
Half the bombs would have been the most important, as each one could have deep struck right into his lines. Especially in the last turns, he was reduced to only four shooting units. The super destroyers, the regular destroyers, the guardsmen and the artillery. Artillery isn't going to waste shots, destroyers are wounding on a 6, and the blob was being pressed by the hormagaunts. Each bomb when it finally made it into combat took out half a dozen pieces, and caused wounds in nearby units. I think half the bombs arriving would have made a huge difference.
As to the endless swarm. One or two units of termagants would have instantly been a potential tie. One termagant squad in the last turn or two could have come in and shot the flyer in the back. AV 10 is fragile and I believe the vulture only has two hull points? Maybe I'm thinking of the forgeworld one.
Also the mucolids could have knocked the plane out of the sky if I dropped them in my own deployment zone.
All of this is supposition though and relies on deep strikes not scattering away, or having an angle on the rear armor of the flier. A lack of synapse in the backfield was quite a mistake that I would have had trouble overcoming either way.
Really the mistakes I made throughout the game likely still would have caused me to lose, if I had overcome them, I wouldn't have needed to rely on the returning models as much.
~seapheonix
2015/12/12 03:18:50
Subject: 1850 ITC game Tyranids Endless swarm vs IG and friends?