| Author |
Message |
 |
|
|
|
|
Advert
|
Forum adverts like this one are shown to any user who is not logged in. Join us by filling out a tiny 3 field form and you will get your own, free, dakka user account which gives a good range of benefits to you:
- No adverts like this in the forums anymore.
- Times and dates in your local timezone.
- Full tracking of what you have read so you can skip to your first unread post, easily see what has changed since you last logged in, and easily see what is new at a glance.
- Email notifications for threads you want to watch closely.
- Being a part of the oldest wargaming community on the net.
If you are already a member then feel free to login now. |
|
 |
2016/03/27 20:04:45
Subject: Photographic Tournament Report: High Elves go to Fall of the Old World
|
|

Foolproof Falcon Pilot
Livingston, United Kingdom
|
Hey all,
With the newish game of Age of Sigmar, there has been a lot of unrest in the tournament scene here in my local area, but the event circuit has started back up again with a vengeance. This weekend I went to Fall of the Old World 2, and I decided to turn my experiences into a battle report, as I did a few times for 8th. After rebasing my High Elves for Age of Sigmar, and acquiring laser-cut tokens for their abilities and whatnot, I was pretty keen to play some games with them. However, I don't have a lot of time for wargaming (too much D&D), and as such I was mostly untested with this army before I arrived. The end result was an embarrassing amount of time spent looking up warscroll information, but also a LEARNING EXPERIENCE that made me GROW AS A PERSON. Or, at least, grow to hate my dice. Let's begin this probably monumental account by talking about the tournament itself.
The event itself was using the SCGT comp pack, and for this you build a 150 point army (see this website for an army builder) but only deploy 100 points in each individual game. It has some other elements - scenarios, changes to summoning and the like - but none of that is really important for our purposes here. (I do not intend to get into such a nitty-gritty of the battles that specific wording changes will matter.) Anyway, here was the army that I decided to take, which added up to 127 points in total.
 Heroes:
Alarielle the Radiant, Everqueen
High Elf Mage
High Elf Prince (Horse, Polearm, Shield)
High Elf Prince (Bow, Banner)
Loremaster
Handmaiden of the Everqueen
High Elf Prince on Griffon
Units:
15 Phoenix Guard
20 Swordmasters
20 Lothern Seaguard
5 Elyrian Reavers
5 Dragon Princes
10 Sisters of Averlorn
Warmachines:
Bolt Thrower
Monsters:
None
As you can see, I went heavy on the Heroes, and light on the Monsters. I would struggle to project force across the table all tournament, and I think that my lack of big stompy things was the source of that; but I never did get any Dragons or Phoenices for my army, so hey-ho.
That should do for the preamble. Let's move onto game one.
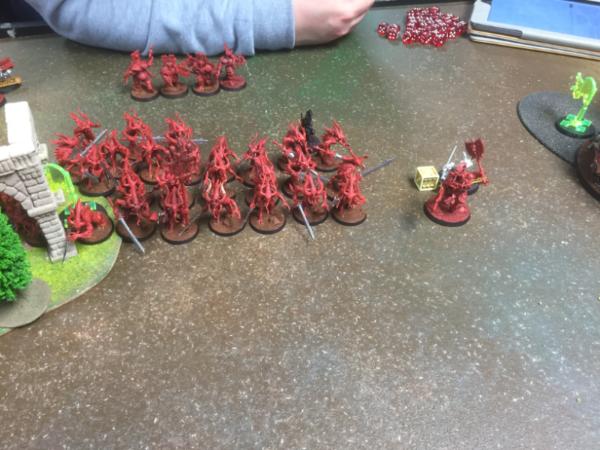
Game One: Joe's Destruction army
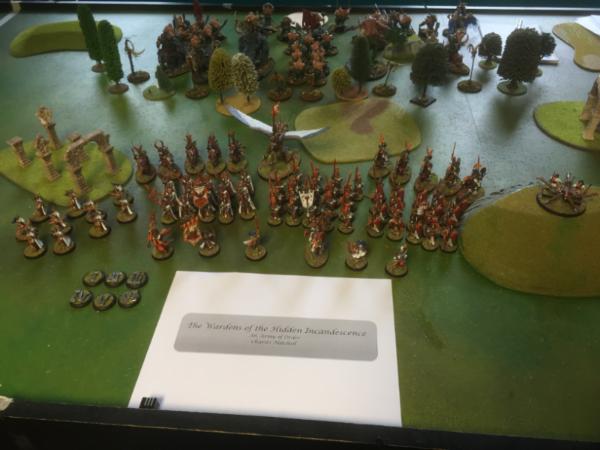
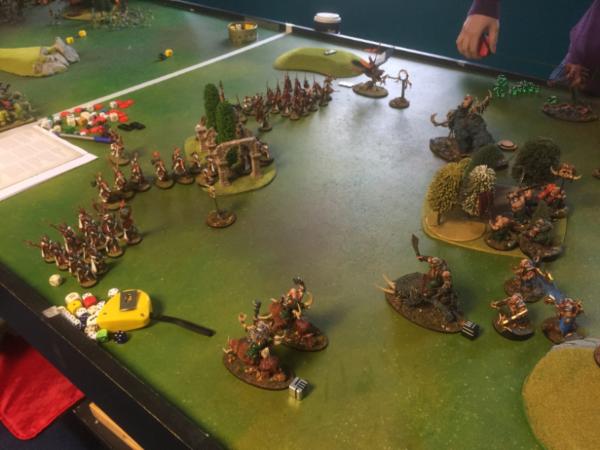
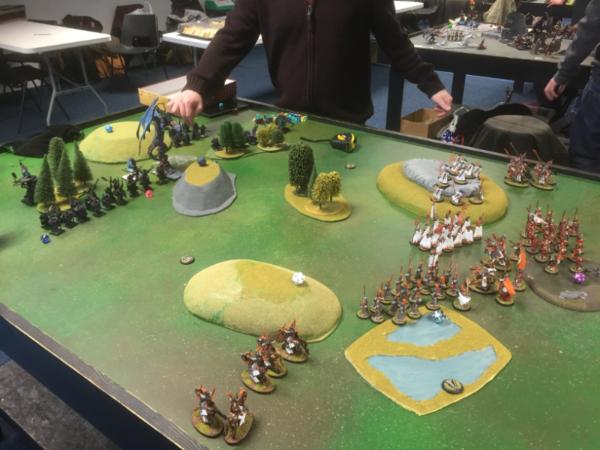
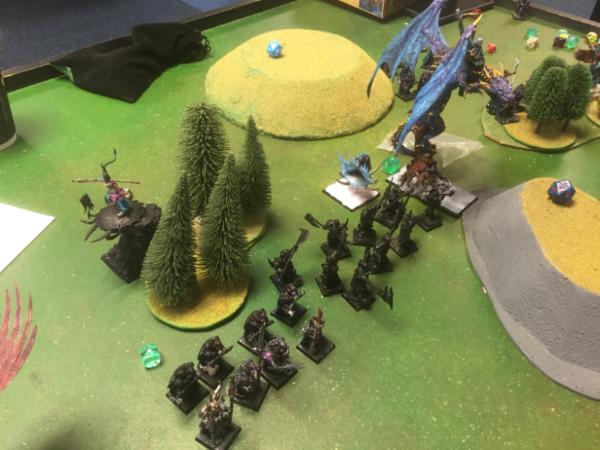
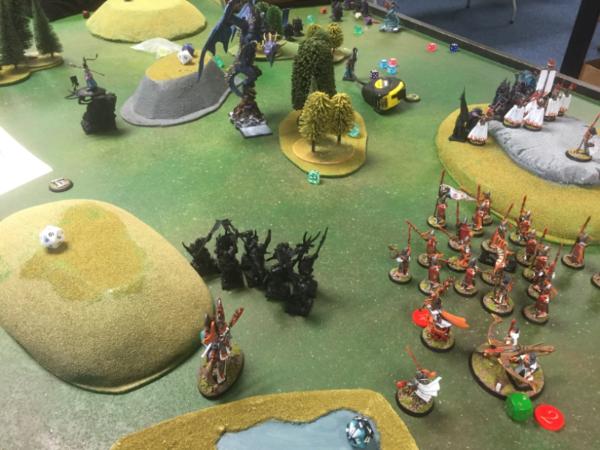
This game was an objective based one, with a storm front being pushed back and forward by the players. Basically, there are four objectives on the table (the big things with Ogre bits hanging from them); at the end of each battle round, whoever controls the most pushes the storm front 6" into their opponent's table half. At the end of the game, whoever has pushed the storm front the most wins. In addition, only Heroes and Monsters count as scoring for this mission.
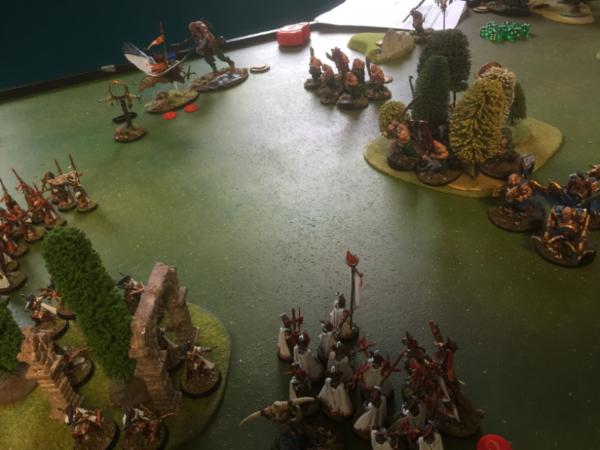
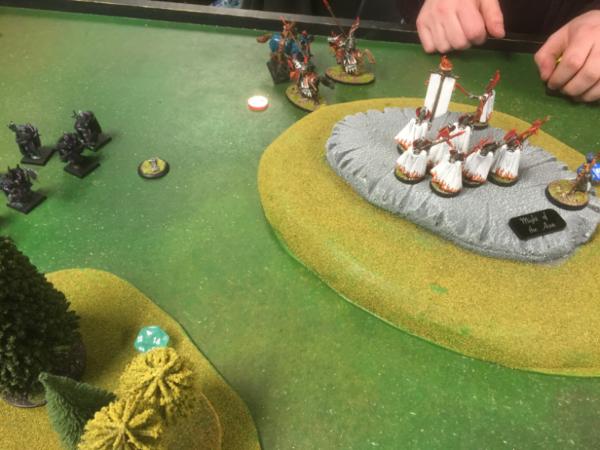
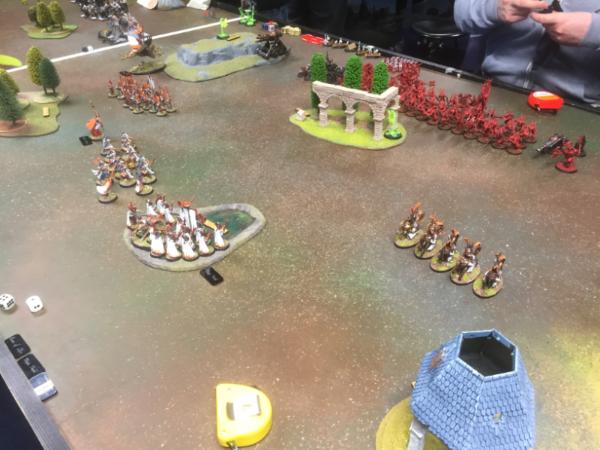
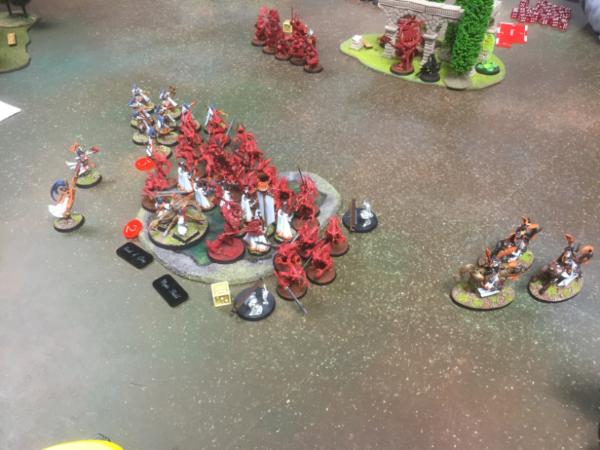
This is what the table looked like after deployment:
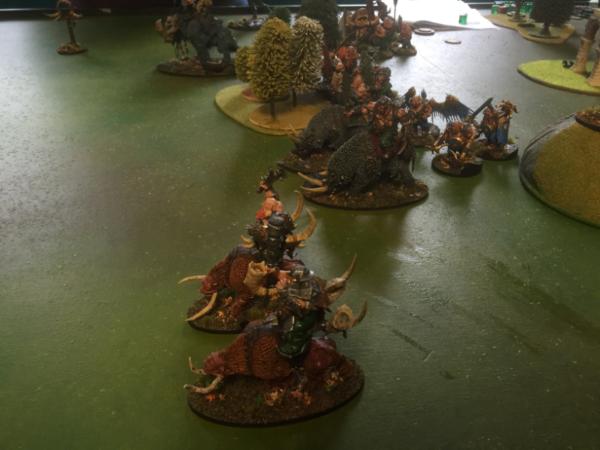
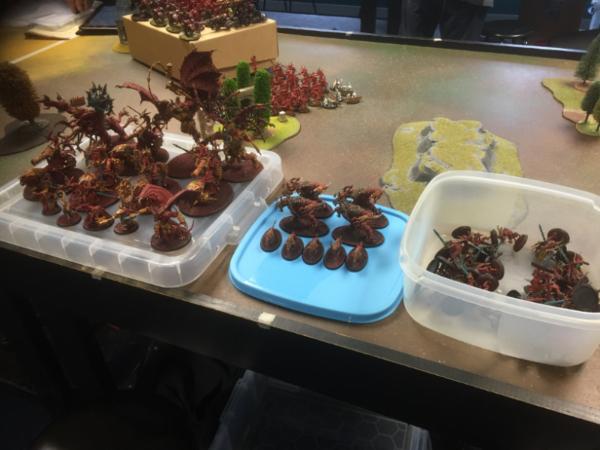
And here you can see a bit more of my opponent's army. He took (roughly, from memory):
Tyrant
Butcher
Butcher
Bruiser (Banner)
3 Maneaters
3 Ironguts
6 Ogres
2 Mournfang
2 Mournfang
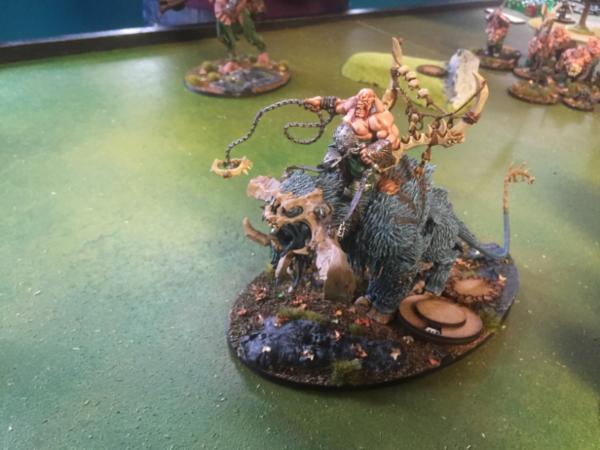
Giant
Stonehorn
This forest was Deadly, meaning that I could extract a heavy price from anything trying to charge my Sisters.

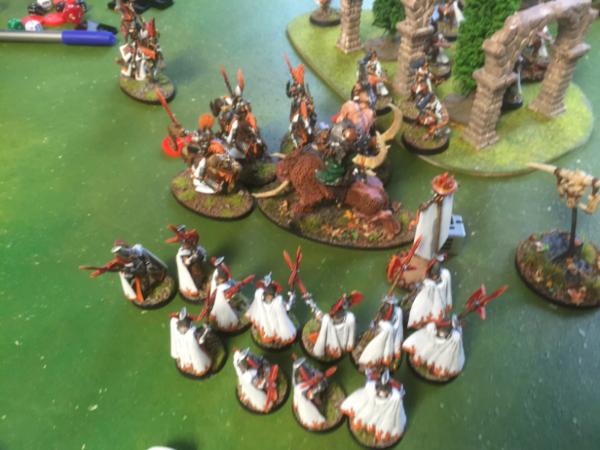
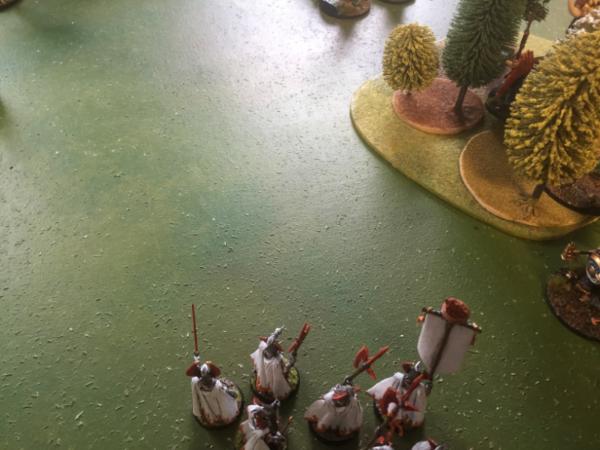
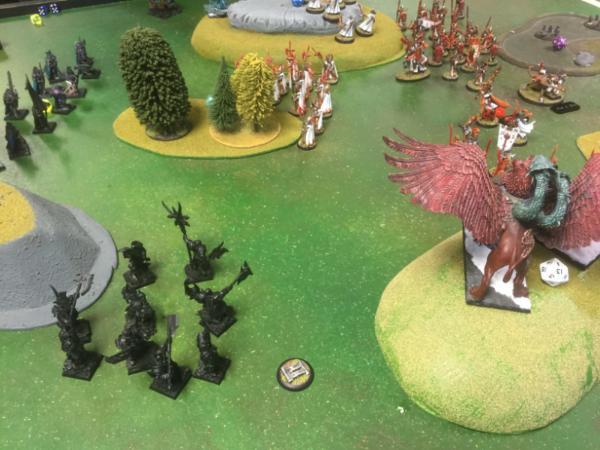
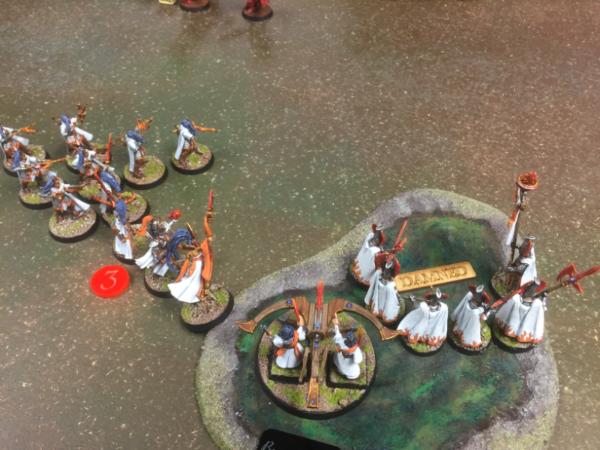
I had deployed defensively, with my left flank somewhat refused. With shooting units front and forward, I hung my combat units back a bit, intending to counter-charge and not be caught in combats unless I chose them. Alarielle was in the centre, intending to use her bubble of battleshock-immunity to keep the army together.
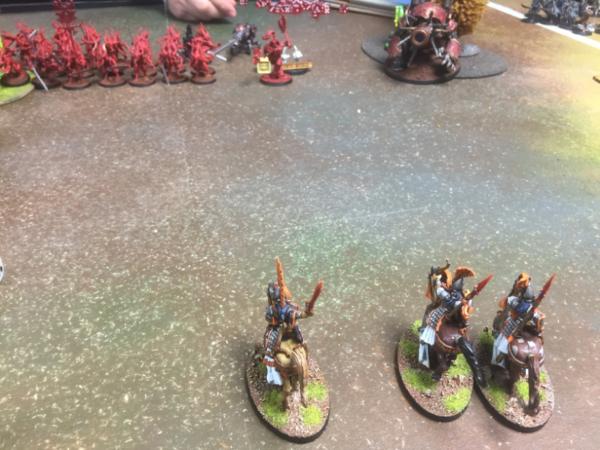
Joe went for his cavalry on my right flank, intending to speed into the Reavers and Sisters, his monsters on the right, against my Griffon, and his Ironguts and Ogres in the centre.
Round One - Ogres have Initiative
The Ogre big hitters pushed forward across the line.
The Mournfang ran, getting into range for a turn two charge.
The Ogre infantry, meanwhile, moved up a little more cautiously, with the characters sticking to the objectives like glue.
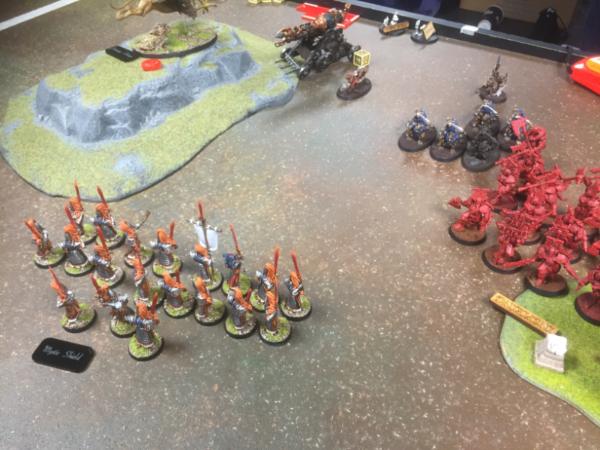
I responded by shuffling my line. The shooting units all stayed still, and drew back their bows. The Phoenix Guard moved forward to protect the flank of the Sisters, even as the Reavers moved back a touch.
In my haste, however, I completely forgot to move a Hero onto this objective, despite having a cavalry Prince not ten inches away. On the other side of the battlefield, the Griffon flew onto the other objective. I finished by making the Ogres march in the shade, as a volley of arrows crippled the Stonehorn, as well as damaging the Mournfang advance.
At the end of the turn, the storm moved into my table half, as Joe held 2 objectives to my 1. The storm did some damage to his models as it passed over them.
Round Two - Ogres have Initative
The Ogres trotted forward again, eager to close the distance and do some damage.
Fluffy the Stonehorn charged my Prince with Banner, not having liked the damage from his Reaver Bow last turn, and aiming to kill my scoring units.
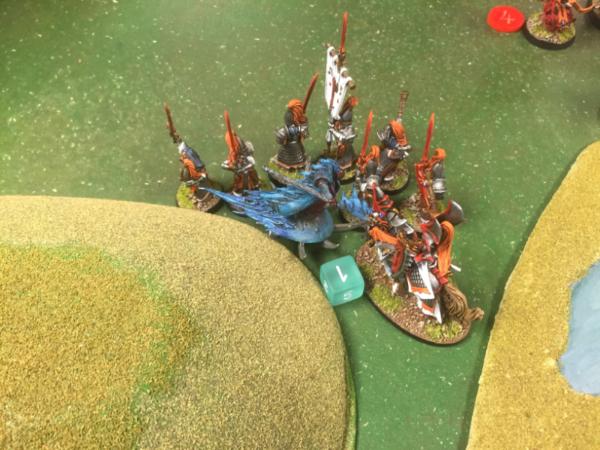
The Mournfang then charged my Reavers on the other flank, although one of the Mournfang failed his charge distance and so hung back in no-man's-land.
My Phoenix Guard leapt into the fight against the Mournfang, and in the melee the Reavers and the Mournfang each lost a model, while the Phoenix Guard lost three brave Elvsies. All my units were within Alarielle's bubble, and thus were immune to battleshock.
Fluffy smashed my Prince down, while my Seaguard and Handmaiden both surged against him like the pointy-eared Zerg that they clearly are. He took a bit more damage from them, being on his last legs by this point.
In my turn, I used my shooting to eliminate both the Stonehorn and Mournfang that were in combat, aiming to clear my front line. Meanwhile, my Prince on Horse moved up to help the Phoenix Guard with the last Mournfang.
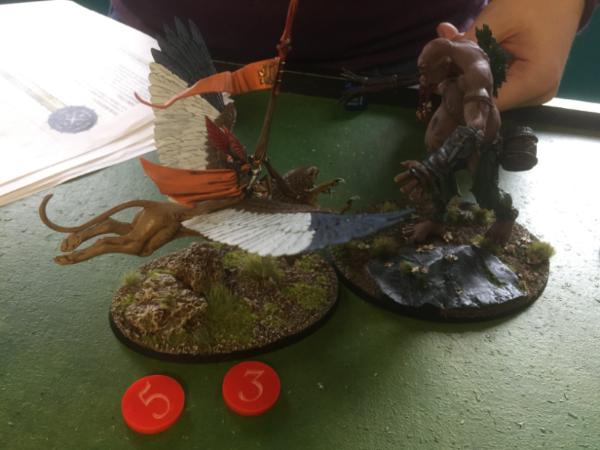
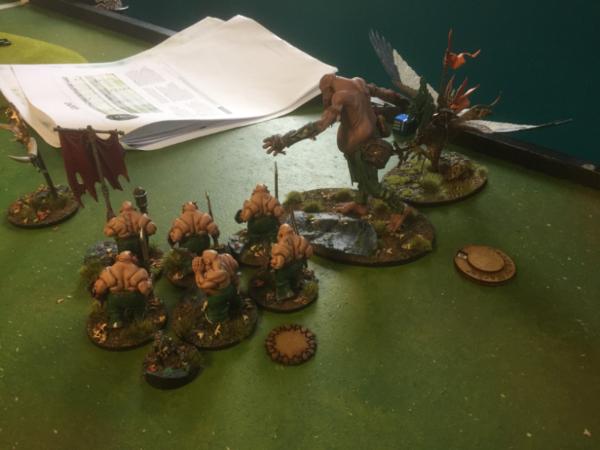
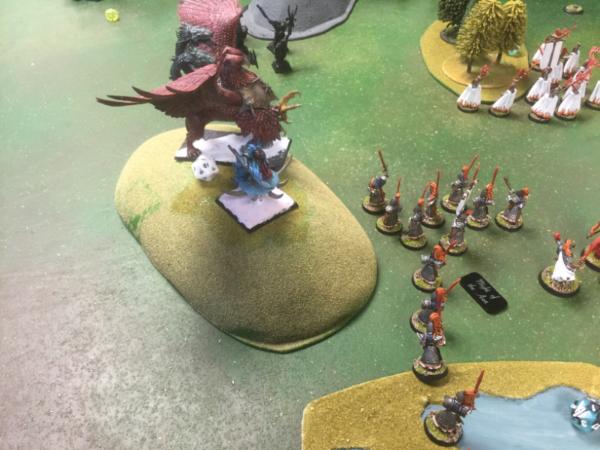
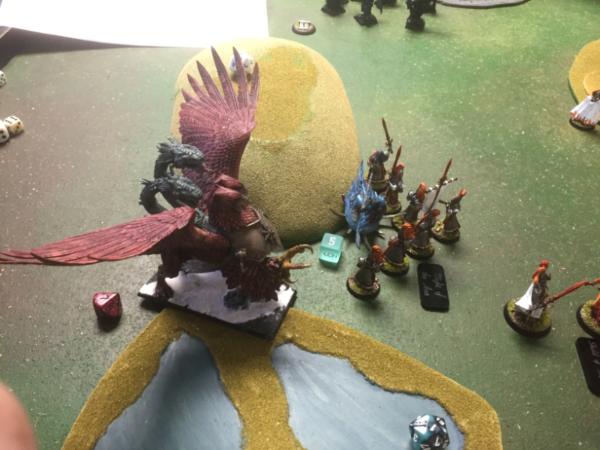
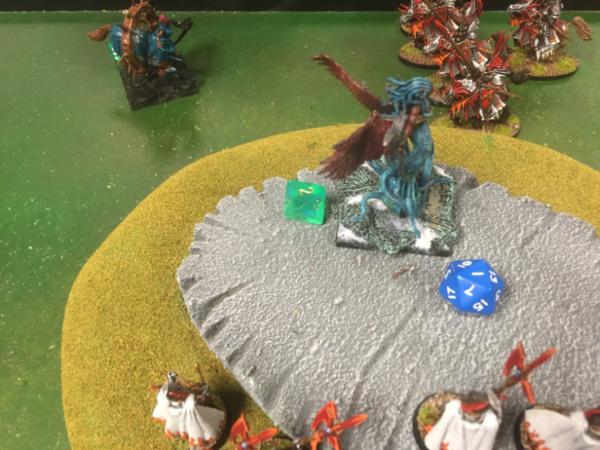
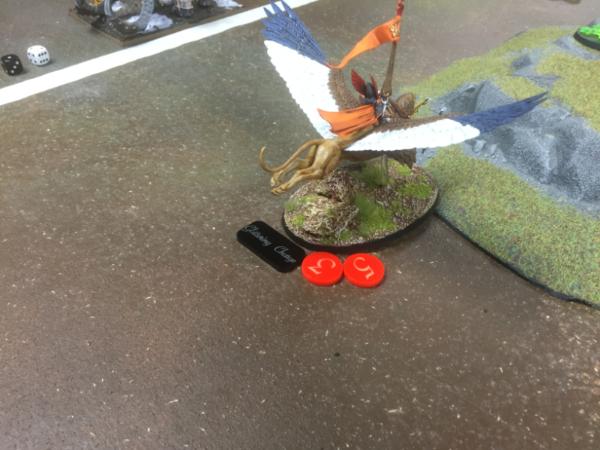
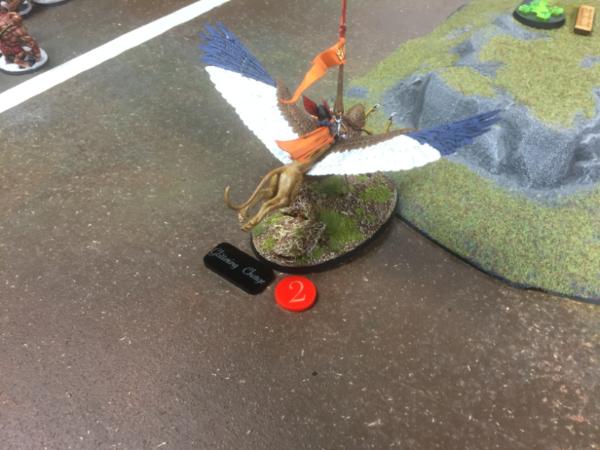
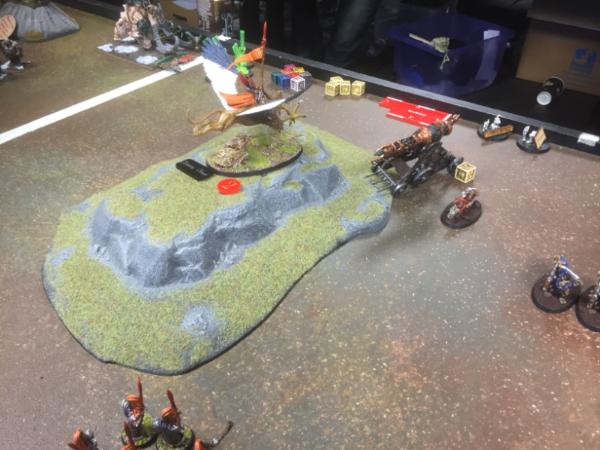
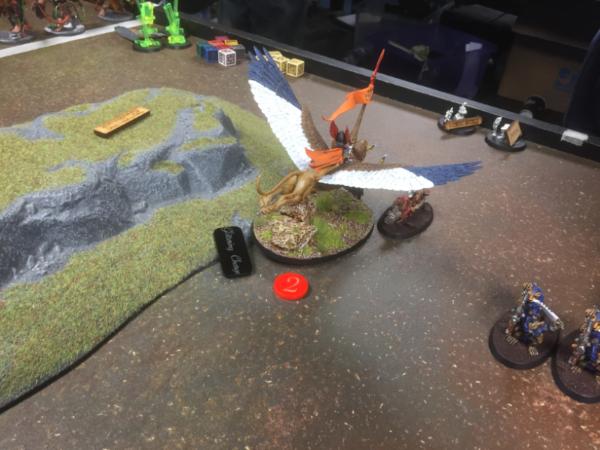
My Griffon Prince swooped into combat with the Giant, not only scoring the objective but also savaging him, leaving him with two wounds remaining. The Giant could not do much damage in return.
The Phoenix Guard and Prince easily removed the last Mournfang, but not before my Prince took a bit of a beating. Characters really are quite hard to protect in this game!
Despite my successes in removing Joe's models, and being able this turn to reclaim the objectives to ensure that his lead did not widen, I was still somewhat intimidated by the wall of Ogres emerging from the forest...
 Round Three - Elves have Initiative
I moved my forces forward, intending to press the advantage and eliminate the enemy units.
The Phoenix Guard prepared to attack the Maneaters in melee...
...while my shooting managed to eliminate the Ironguts in a single turn, much to my elation.
In the melee I managed to cut down a pair of the Maneaters. Joe's army was starting to look thin on the ground at this point.
In the Griffon-Giant combat, I managed to fluff all of the Griffon's attacks, while the heavily wounded Giant scraped another wound off. Disappointing.
In Joe's turn, the Phoenix Guard took a royal battering from the last Maneater, who managed to kill a whole bunch of them before going out.
The six-man unit of Ogres charged into the Giant-Griffon combat, and I was not fancying my chances. I decided to be very clever indeed, and use the 'Predatory Leap' ability to Pile-in 6" - and to the other side of the Giant. This ability specifically says that you do not have to go towards the nearest model. Great. However, in my rush to do this clever thing, I overlooked my need to keep claiming the objective, and so Joe got another turn of the storm front moving into my table half.
The Griffon then failed to kill the Giant again, to add insult to injury.
Turns 4 & 5
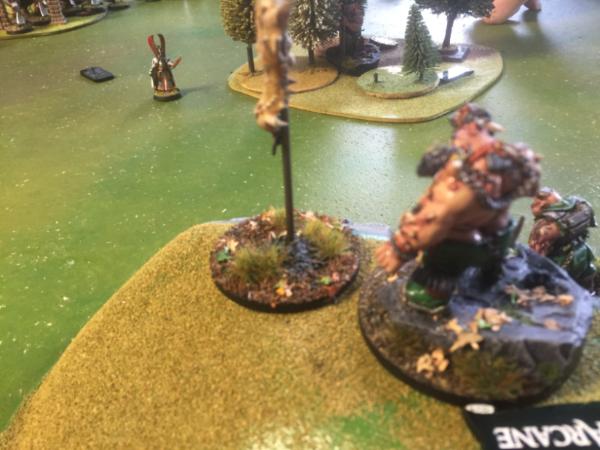
At this point we were running out of time, and so my photographic record cuts out. So let's summarise. Joe now had a unit of Ogres, and all of his characters. He moved the two Butchers onto one objective, and used their Arcane Bolts to eradicate the Phoenix Guard over the two turns.
Meanwhile, Joe's Ogres were wiped out by another round of my shooting (and his terrible save rolls), while the Griffon retreated from that combat to contest the objective held by his Tyrant. This allowed me to move the Stormfront back, and as it passed over the front line it killed his Giant.
However, I needed to prevent him from holding both objectives in order to move the Stormfront back to the centre line, which would give me a draw. I was able to use some stellar shooting rolls to kill Joe's Tyrant, yet his Bruiser remained in range of the objective to again claim it. I decided not to charge with my Griffon, fearing that he would be killed by the Bruiser; but this was base foolishness, as instead the Bruiser charged the Griffon and killed it before it got to swing. With the stormfront staying still as a result, it remained in my table half, giving Joe the victory.
At the end of the game, Joe had lost all but 15 points worth of characters, while I had lost only the Griffon and Phoenix Guard, making it a 85-29 kill count; but this didn't matter as Joe claimed a Major Victory from holding the objectives better than I had, and so he ascended to the high tables as I descended to the low.
The lesson - hold the objectives - is a valuable one. I claim as my fig leaf the usual problems with AoS tournament scenarios - surprising complexity and variation from round to round, making it hard to remember what the goal is - but in reality my defensive stance that did not include stationing characters on the objectives cost me this one. Either one more turn, or a couple different decisions made, would have allowed me to combine the combat victory with the actual victory, but hey ho; and Joe did a good job of sticking to the game plan, and not allowing my table domination to prevent his win.
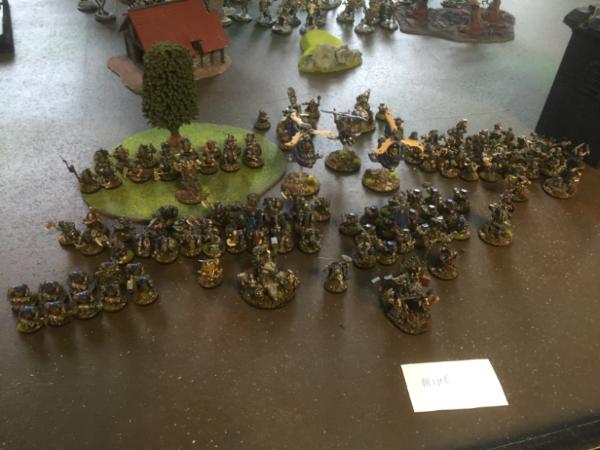
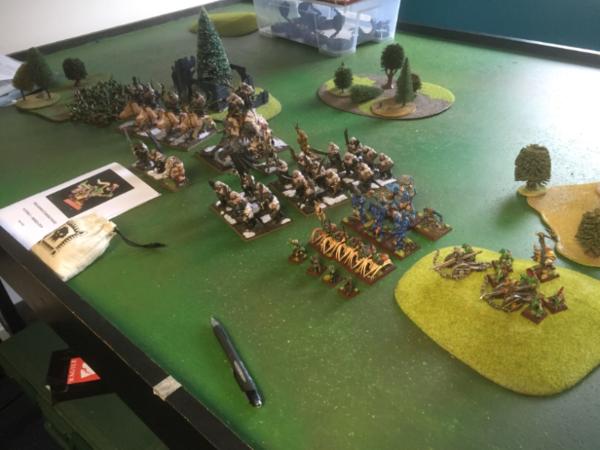
At this point, I shall take a break from typing, and return to finish this report another time. Firstly though, I shall show you the armies on parade element of the tournament, starting with Mike's Dwarves, which won best painted.


Coming up next: I take on Craig's Chaos army, which was focused around the Tzeentch Arcanites formation.
|
|
This message was edited 1 time. Last update was at 2016/03/27 20:14:16
|
|
|
 |
|
2016/03/27 22:31:11
Subject: Photographic Tournament Report: High Elves go to Fall of the Old World
|
|

Dakka Veteran
|
Great report! I thought at first it might be an ogre stomping by how you sounded but seems like you dominated kill-wise, just took your mind off the objective. Enjoyed reading and look forward to the next one.
|
|
|
|
|
2016/03/28 00:55:17
Subject: Re:Photographic Tournament Report: High Elves go to Fall of the Old World
|
|

Regular Dakkanaut
|
Thanks for posting the photographs of the different armies.
|
|
|
|
|
2016/03/28 11:25:03
Subject: Photographic Tournament Report: High Elves go to Fall of the Old World
|
|
Steady Space Marine Vet Sergeant
England
|
Yep, definitely a good battle. Shame you lost out on the game though.
|
 If you can't believe in yourself, believe in me! Believe in the Dakka who believes in you! If you can't believe in yourself, believe in me! Believe in the Dakka who believes in you! |
|
|
|
|
2016/03/28 20:33:38
Subject: Re:Photographic Tournament Report: High Elves go to Fall of the Old World
|
|
Foolproof Falcon Pilot
Livingston, United Kingdom
|
Game Two - Craig's Tzeentch Arcanites
This game I was up against my friend Craig, who I have somehow never played at either WFB or AoS, despite attending several tournaments with him, and going to the same wargaming club as him. Anyway, he was using the Tzeentch Arcanites formation from the new GA:Chaos book, a decidedly odd beast which combines a bunch of 9-man Chaos Warrior units with a whole load of characters, and which gives all of said characters a free Arcane Bolt each turn. This formation costs more than two of my characters, but it was a bit of a nightmare to face, as you shall see.
Manticore Lord
Daemon Prince
Sorcerer on Disc
Lord on Disc
Lord on Horse
27 Chaos Warriors
9 Chaos Chosen
Chimaera
The objective for this game was to hold six markers on the table; at the end of each round, the player who held the most would get a point. This scenario was, I thought, just about the most boring thing ever. Presumably to add interest, there was a scenario rule that involved units (but not heroes) randomly taking mortal wounds each round. Finally, neither Warmachines nor Heroes could score, only Monsters and Units.
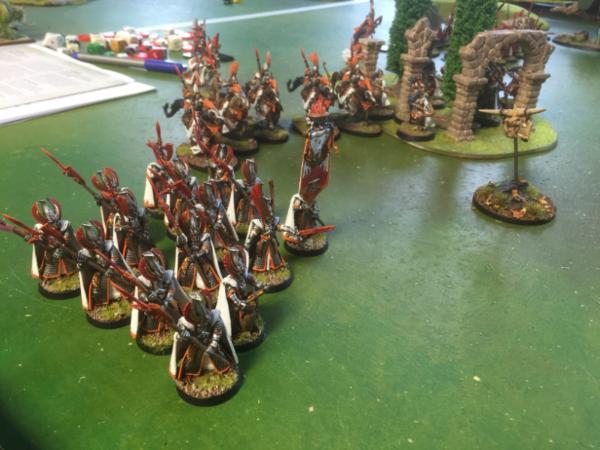
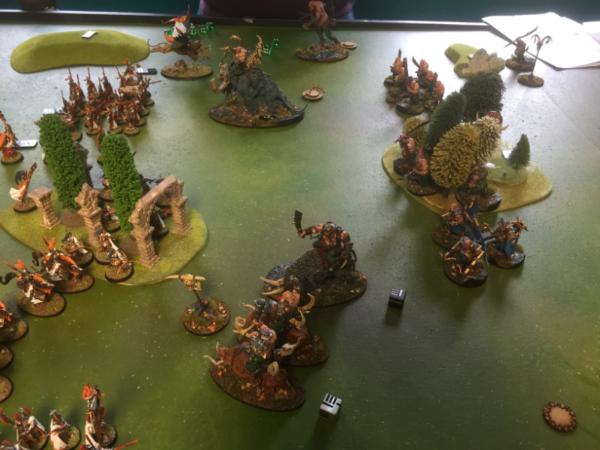
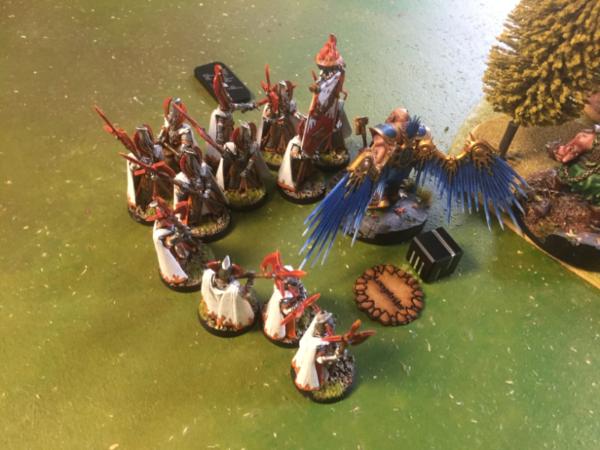
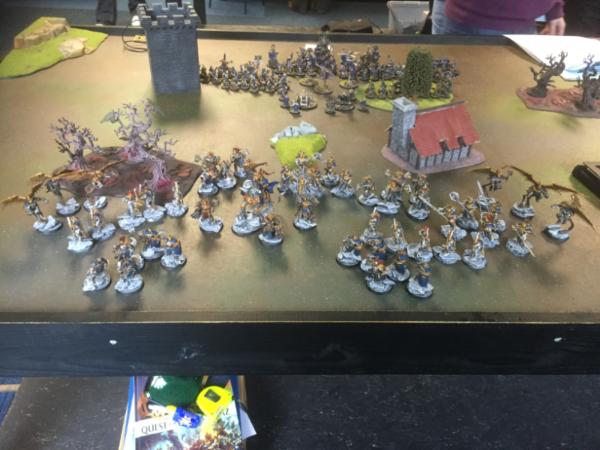
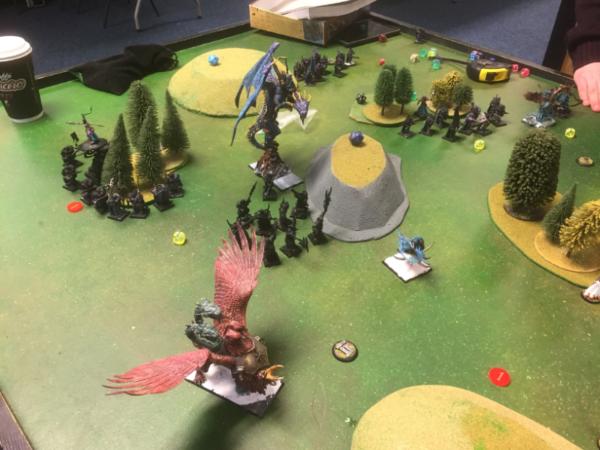
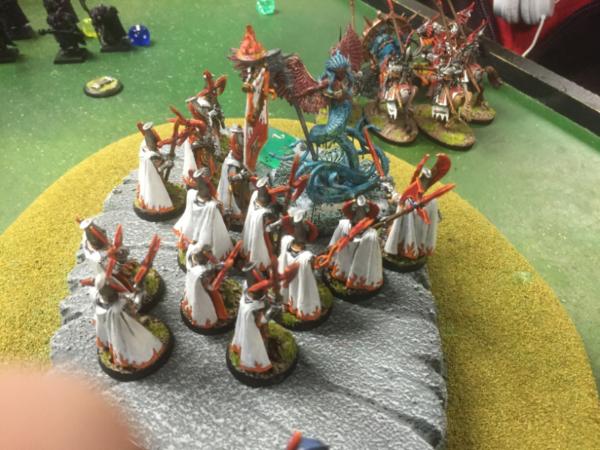
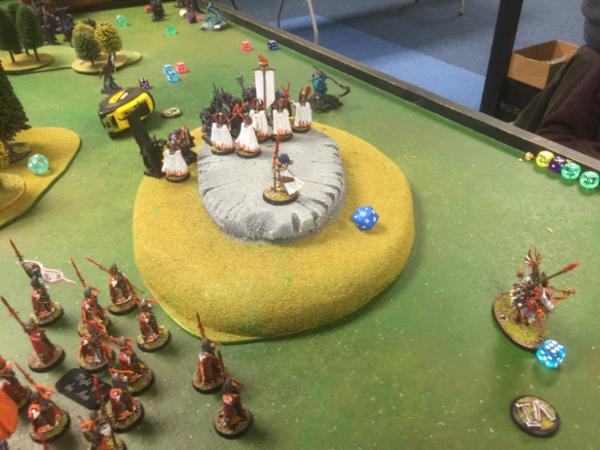
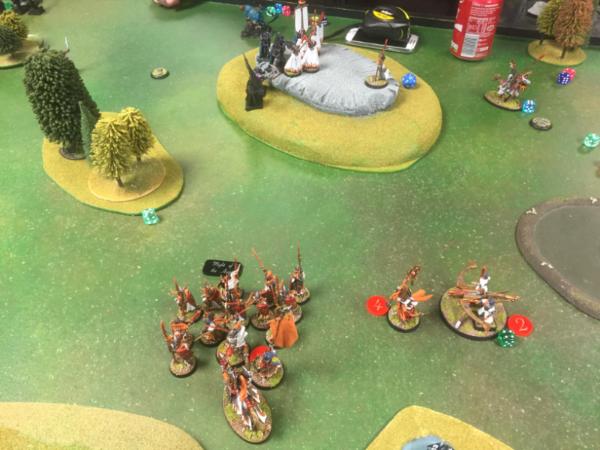
In light of the scoring restrictions, I opted to deploy all of my big infantry blocks, intending to cut Craig's guys down in a general melee.
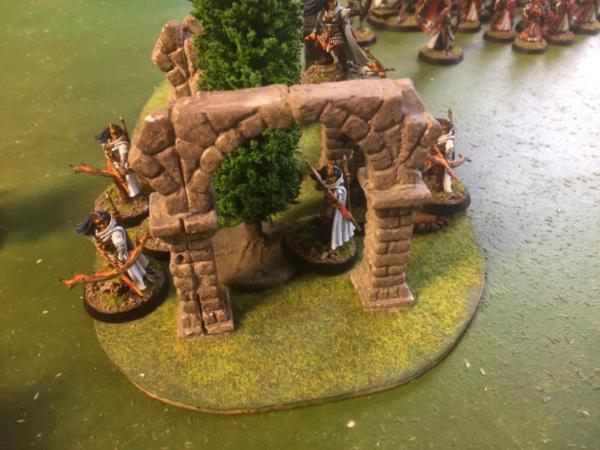
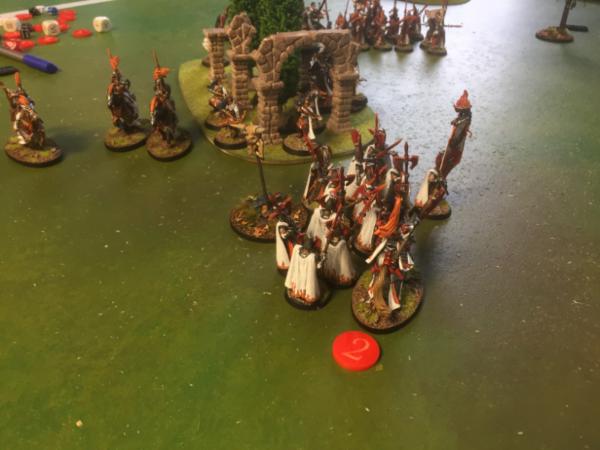
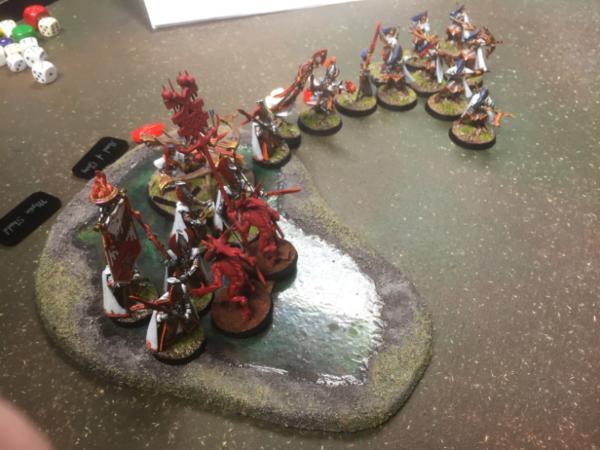
The Sisters were deployed on the hill at the front, where I hoped they would replicate their successes of last round.
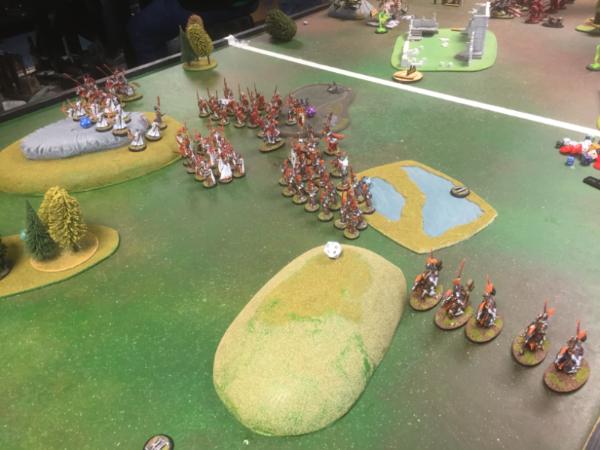
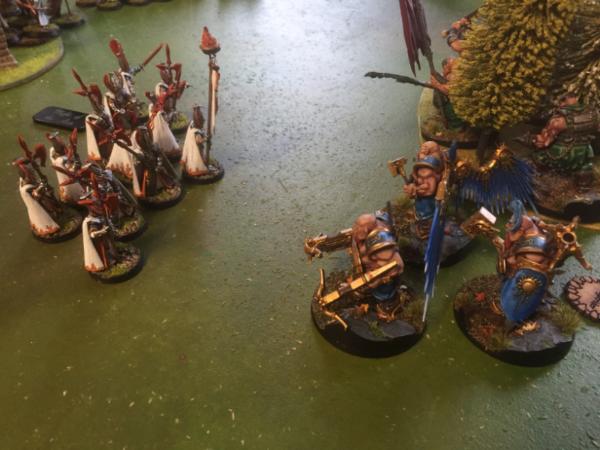
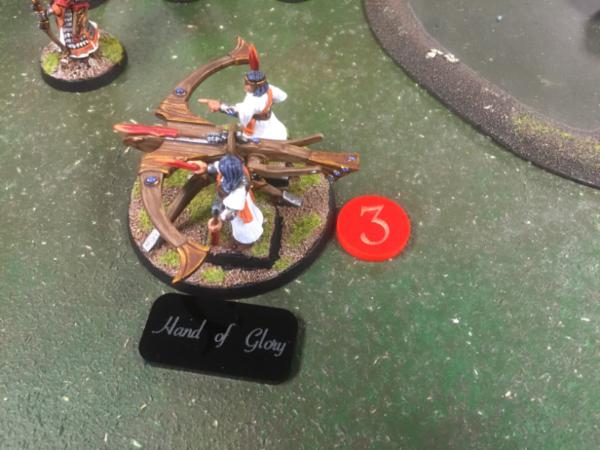
I amused myself by forming a little court of heroes around the Bolt Thrower.
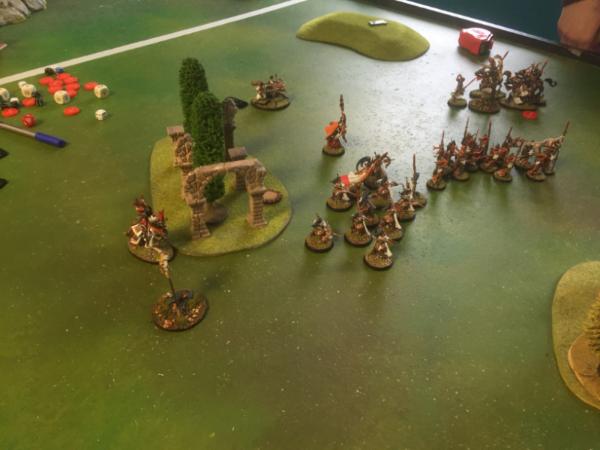
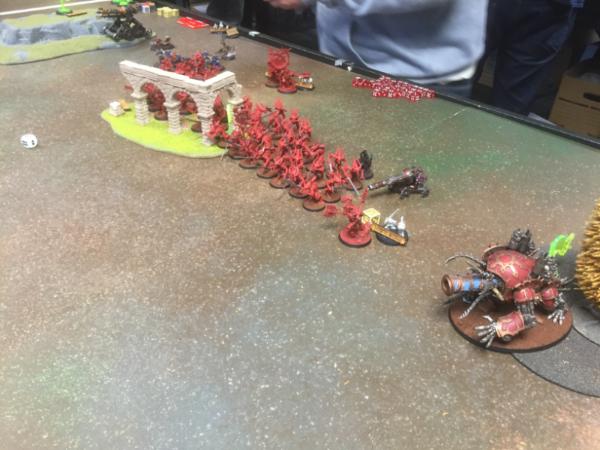
Meanwhile Craig deployed his Warriors in a line, with various horrible heroes and monsters sprinkled throughout.
 Round One - Elves have Initiative
Craig had the choice of who went first, as he finished deploying before I did, and he opted for making me begin. Being out of range, and still in my defensive mindset, I shuffled my units about but was not able to do a lot of damage. The Bolt Thrower took some wounds off of the Manticore (which the Forgeworld Carmine Dragon was proxying for), while the Reavers rode forward onto an objective, and put a single solitary wound on the Chaos Warriors opposite.
In Craig's turn, his various monstrosities raced forward, while two of his Chaos Warrior units retreated to claim objectives in his table half. My Reavers were annihilated by his magic and shooting, leaving me holding only one objective to his two, and so Craig got a victory point for round one.
 Round Two - Chaos have Initiative
Craig achieved the coveted double-turn at this critical early stage, and took advantage of it to press his hard hitters into my formation. Arcane Bolts took their toll upon my Swordmasters and Mage, who lost 6 wounds between them.
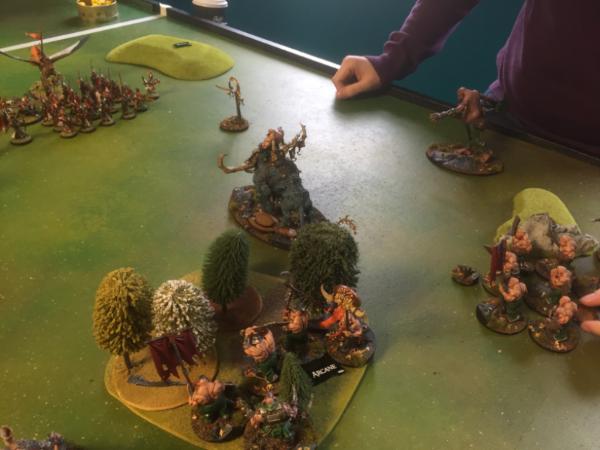
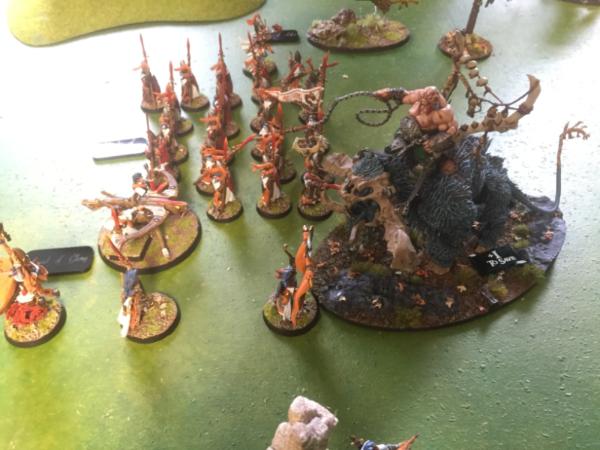
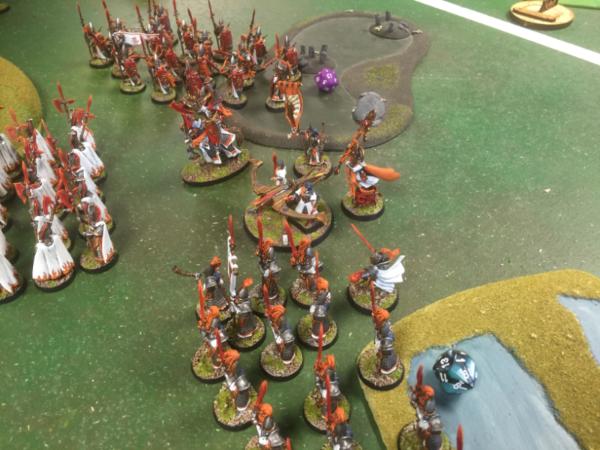
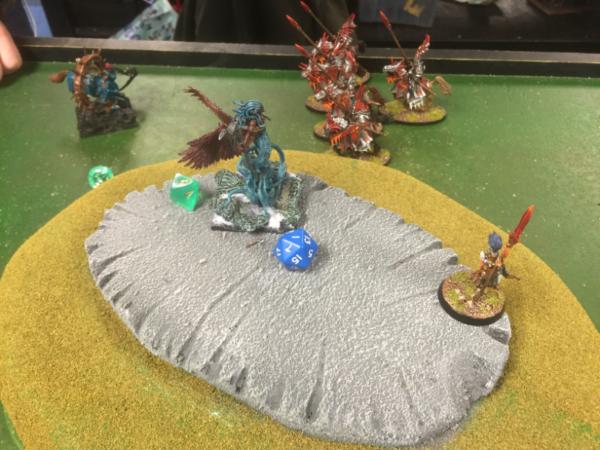
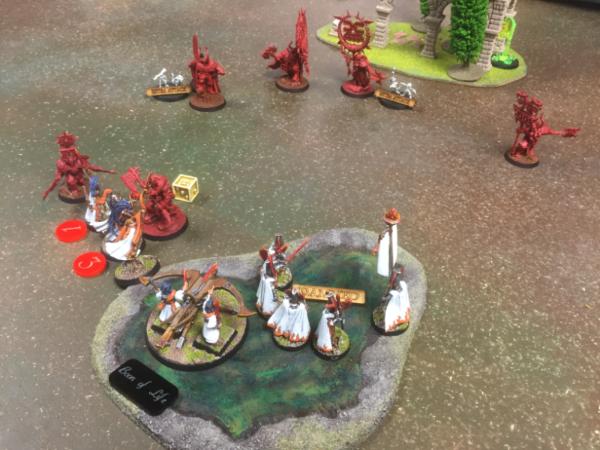
A daemon prince and a chaos lord moved up to menace my Sisters on their hill, while the Dragon Princes looked on.
On the other flank, my Swordmasters were threatened by a double-team of the Chimaera and a disc lord.
Meanwhile, some Chosen were footslogging their way across no-man's-land, and were claiming another objective.
The Chimaera shot its breath weapon at the Bolt Thrower, and did a single wound to the machine.
In the combat phase, the Chimaera and Disc Lord leapt into combat with the Swordmasters, looking to pull them off of the objective.
Though the Swordmasters did some damage to both, they definitely took a pounding, and did not look healthy once all the shouting was over.
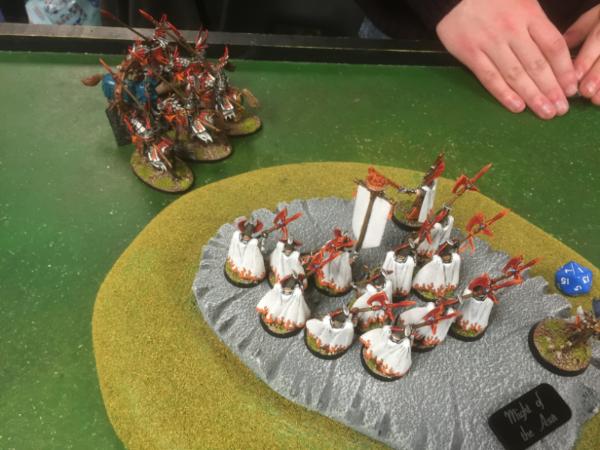
Meanwhile the Daemon Prince charged the Sisters, who only managed to take a single wound off with their stand&shoot ability. Note that the Lord behind tried but failed to charge the Dragon Princes.
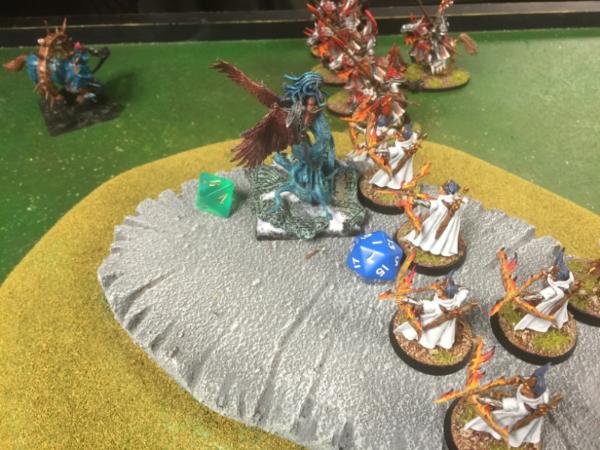
She promptly slaughtered them in melee, with the last survivor fleeing in the Battleshock phase. (In this game, I realised how amazingly useful Alarielle's ability actually was!)
In my turn, I was somewhat panicking at the onset of so much unpleasantness, especially as my scoring units were the ones taking the hits. Craig's double turn and aggressive assault had definitely put me on the back foot; I decided that it was time to push back. On the left, the heroes moved out of the court and prepared to help out in the combat; I used their magic and shooting to slay the Chimaera and punish the Disc Lord.
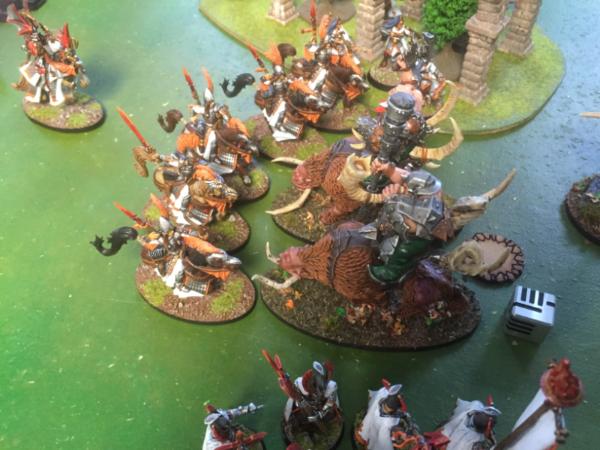
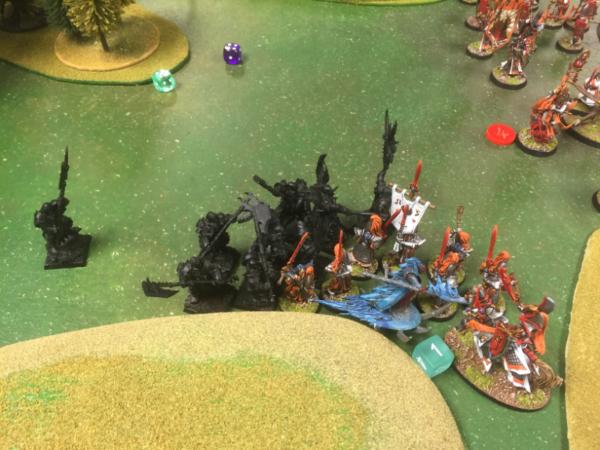
On the right, the Dragon Princes and Phoenix Guard moved up to threaten the Daemon Prince and Lord.
The Prince on horse, along with the depleted Swordmasters, managed to put the Disc Lord on his last wound.
The Phoenix Guard and Dragon Princes both charged into the fray, hoping to strike down their respective opponents...
...which worked out for the Phoenix Guard, who were able to cut down the Daemon Prince in short order, but not for the Dragon Princes, who suffered from rubber lance syndrome.
Craig scored another victory point this round, as my Swordmasters had been killed off of their objective, while Craig held not only his own but also the mid-field ones. Once more, my defensive stance had left me in a poor place to actually score games, and Craig's aggressive push into my half had only compounded that issue.
Round Three - Chaos have Initiative
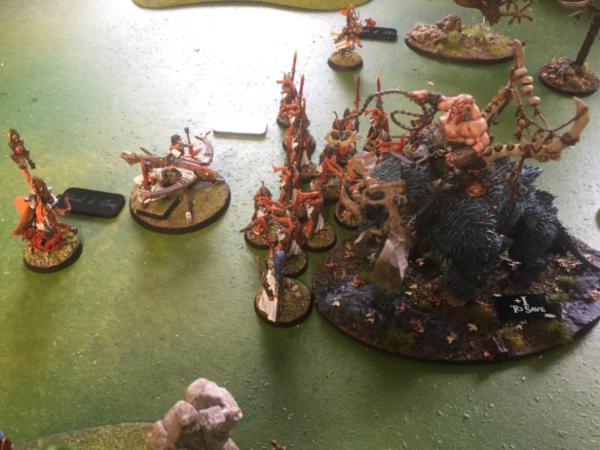
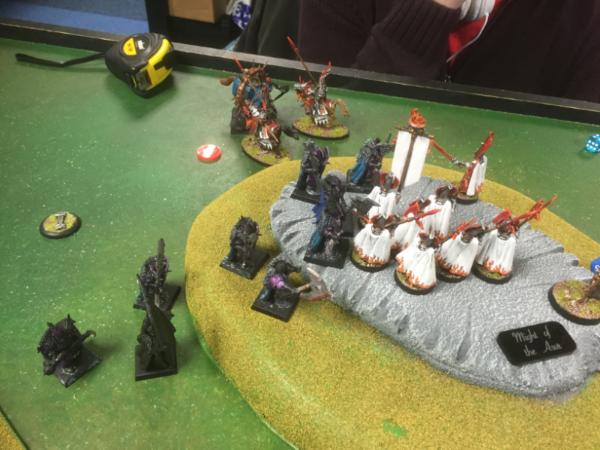
I was not able to get a double turn of my own, and the Chaotic advance continued apace. By this point, Craig had numerous characters within 18" of my units, and he made good use of the free Arcane Bolts from his formation to rain down fire on them. The Dragon Princes and Phoenix Guard were looking distinctly depleted as a result of this barrage, even as the Chaos Warriors (who moved after this photograph was taken) closed in on them.
On the other flank, the Chaos Chosen stormed in to help out the Disc Lord, who was on his last wound, and Craig started to pick up a decidedly concerning number of dice for their attacks...
The Chaos Warriors connected with my Phoenix Guard, keen to kill another of my scoring units upon this now rather blood-soaked hill.
In the various combats, the Phoenix Guard and Warriors gave each other a minor savaging, with only a half dozen of my elves left; the Dragon Princes were reduced to their last model; and the Swordmasters were wiped out by the Chaos Chosen. I was starting to run out of units!
In response, I retreated the last remaining Dragon Prince out of combat, and onto an objective...
...while the Seaguard and my various characters all prepared to focus down the Chosen. Also of note was the Bolt Thrower, which cut down the Manticore in another display of precision shooting.
The combat against the Chosen was glorious, a loud clash of bellowing brutes and elegant elves.

And though it cost me in bodies, the Chosen lay dead at the end of it.
The Phoenix Guard were also winning their fight, but not quickly, and their numbers continued to dwindle. At the end of this round, Craig held the objectives again, and thus had an unbeatable lead over me, with 3VP in a 5 round game. Although the fighting continued for a few turns, our time was low, and with Craig's win assured we mainly just fought out the last few combats. To add insult to injury, an Arcane Bolt killed the last Dragon Prince, leaving me with only two scoring units, not enough to hold more objectives than the Chaos Warriors still loitering at the back of the field.
In this game, I lost about half of my army and killed about half of Craig's. However, I lost control of the game very early on, and was unable to both score objectives and hold off the Chaos advance at the same time. By the time that I managed to clear my lines of enemies, it was simply too late, and I had lost all of my units that would be able to do something about it. A particularly stupid mistake was the throwing away of my Reavers on turn one, who would have been a prime unit to keep my army scoring objectives in later turns.
|
|
|
|
|
2016/03/28 21:46:29
Subject: Re:Photographic Tournament Report: High Elves go to Fall of the Old World
|
|
Foolproof Falcon Pilot
Livingston, United Kingdom
|
Game Three - Ryan's Chaos
For the final game, I had sunk to the second-bottom table, along with the other dregs of competition. On the plus side, I was now among my own kind. On the down side, I was going to be fighting an army with both more models and more shooting than me. Ryan had brought along a 'new style' Chaos army, which had broken free of the 8th edition army parameters and was combining Clan Skyre Skaven with the Blood God's followers.
Skarr Bloodwrath
Slaughter Priest
Bloodsecrator x 2
Aspiring Bloodsomething
Skaven Warp Engineer
Skaven Warlock
30 Bloodletters
15 Blood Warriors
7 Jezzails
1 Ratling Gun
Skullcannon
Warp Lightning Cannon x 2
The mission for this game was probably my favourite one. We each had 3 terrain pieces in our objective zone, and we would be trying to both claim the enemy pieces of terrain while keeping our own intact. At the end of the game, whoever had the most claimed would be the winner. There were some dice rolling mechanics for doing this, and you could only claim one piece per turn during your Hero phase, so it would reward working on the task throughout the game.
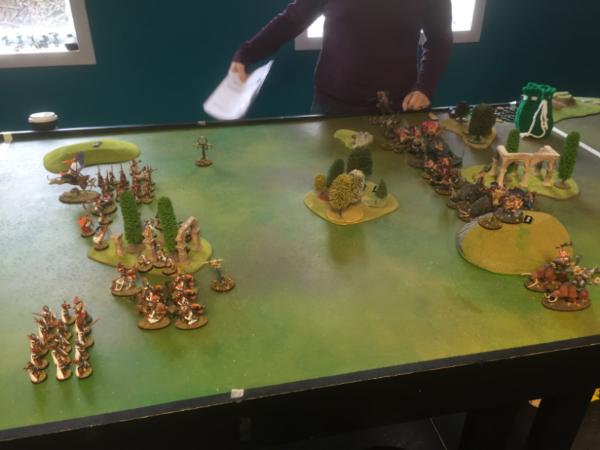
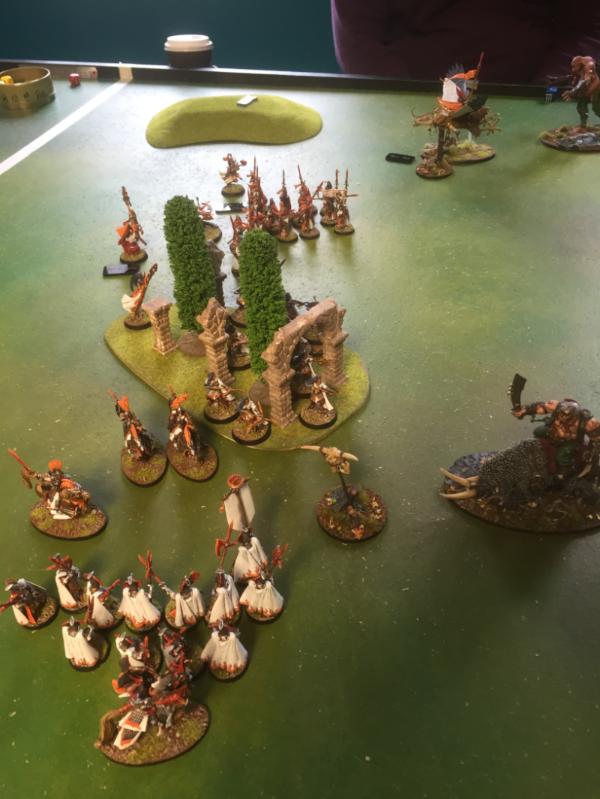
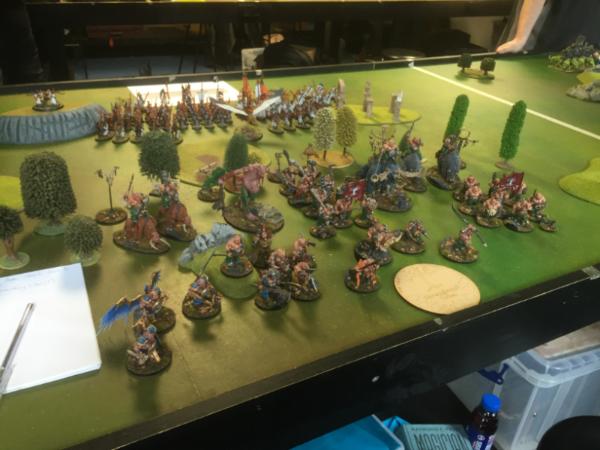
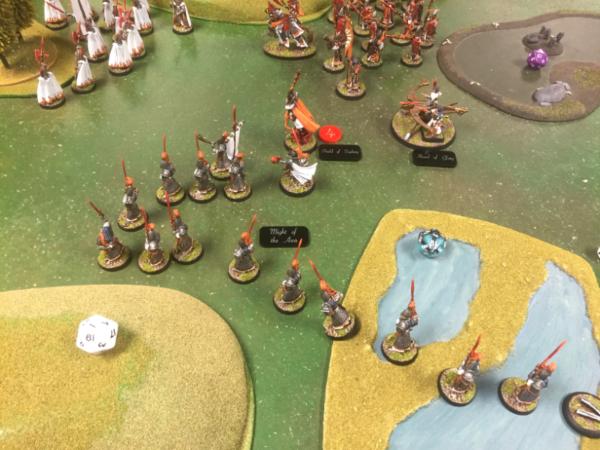
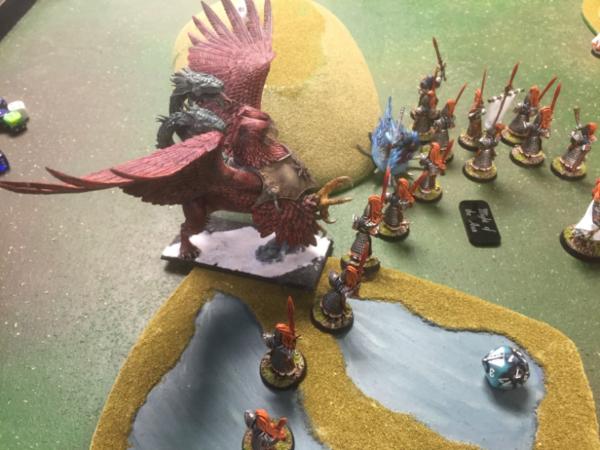
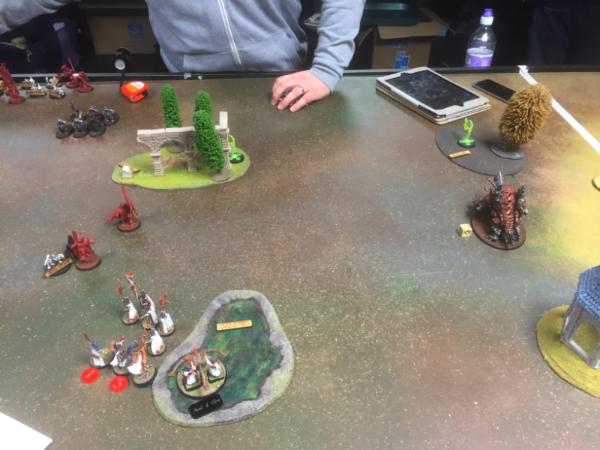
I decided to bring out the Griffon and Alarielle again, in order to give myself enough forward movement to push against Ryan's army, while also keeping my own formation together under his bombardment. The end result of my deployment was something that looked about as generic as a deployment can do - fast stuff on the flanks, infantry in the centre.

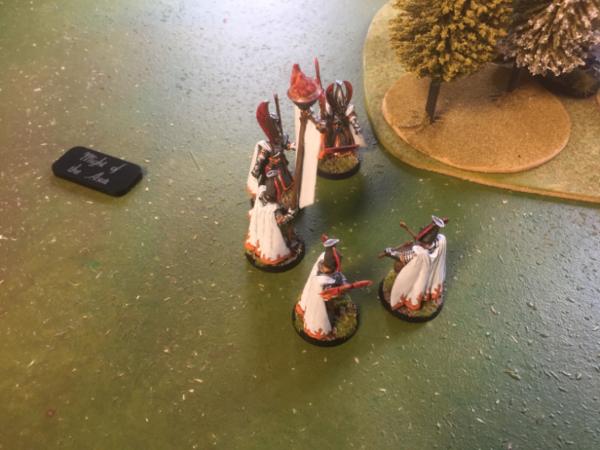
I had put the Phoenix Guard and the Bolt Thrower in a piece of terrain for the cover bonus, and I intended to advance on my left flank (against the Blood Warriors and Skaven artillery), while delaying contact with the massive phalanx of Bloodletters on my right. The Khorne and Skaven heroes were mainly placed behind the infantry blocks, and the Skaven artillery was deployed on the flanks, another fairly traditional set up.
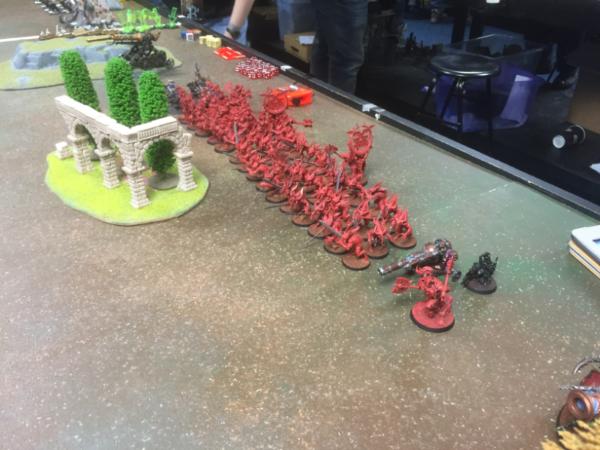
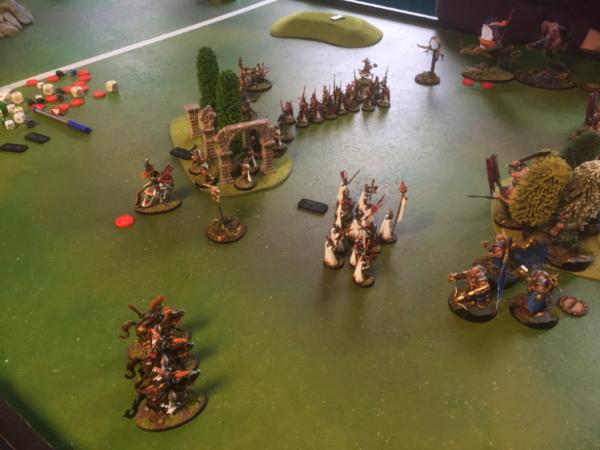
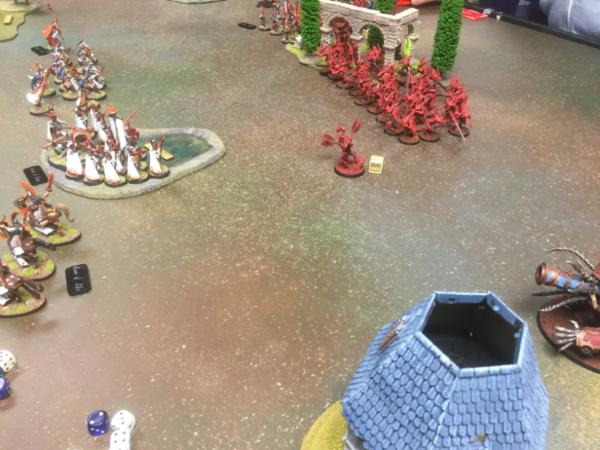
The view from the front lines:
 Round One - Elves have Initiative
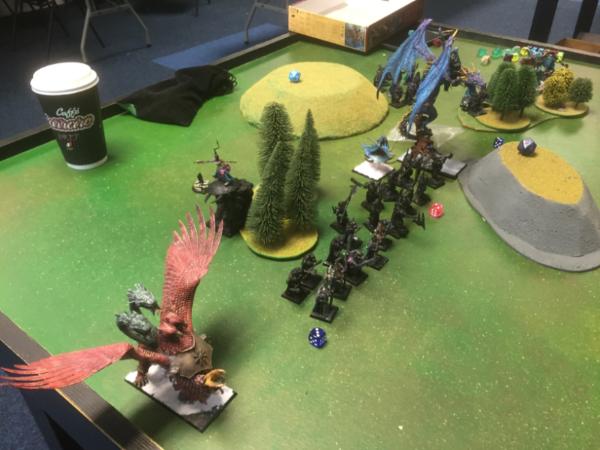
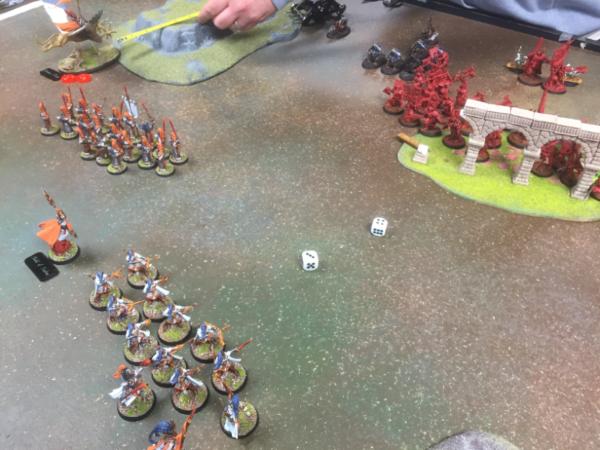
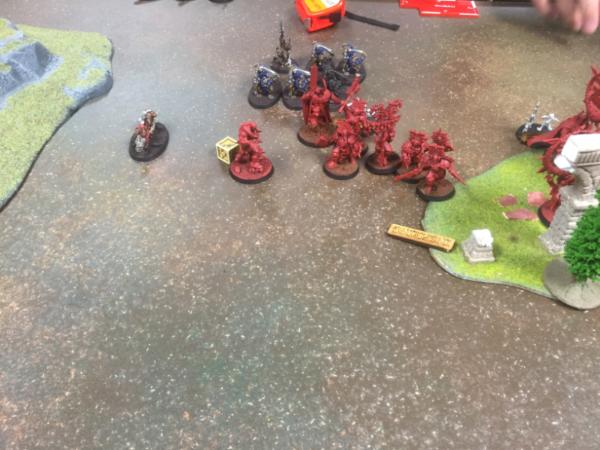
I cannot remember who decided to let me go first, but in either case I decided to be more aggressive than I had in the last round. The Griffon flew up to one of the terrain pieces on Ryan's half, hoping to both claim it and eliminate some of his artillery. The Reavers rode forward, their bows trained on Skarr. Meanwhile the Swordmasters marched forward, angling themselves so as to prevent a counter-charge by the Blood Warriors next turn. The Sisters were out of range, so also shuffled forward a bit in order to get better range for next time.
The Bolt Thrower opened up on the Jezzail unit, removing only one in a disappointing display of shooting. The Reavers did a bit better, plinking a wound off of Skarr Bloodwotsits.

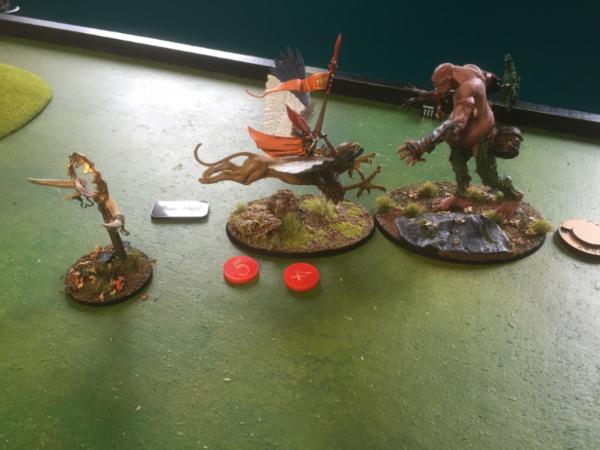
The Skaven Engineer began the festivities by zapping the Griffon for a couple of wounds.
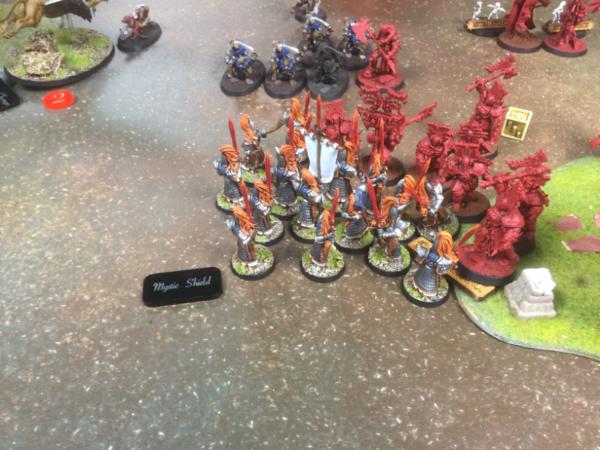
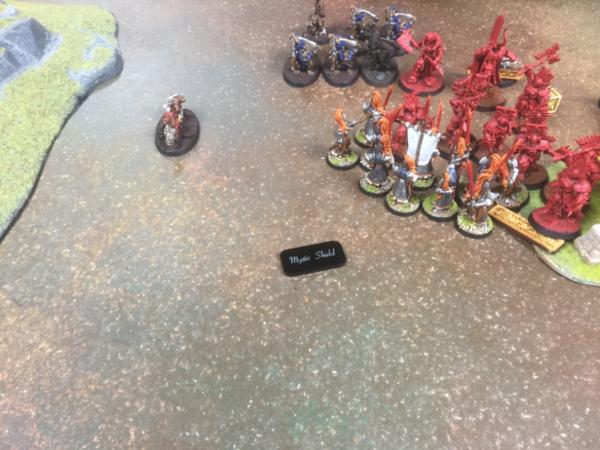
A general advance was sounded, and the blood-red phalanx started trotting forward, no doubt singing some kind of cheerful ditty. Mystic Shield was cast upon Skarr Bloodwrath, which seemed deeply wrong somehow.
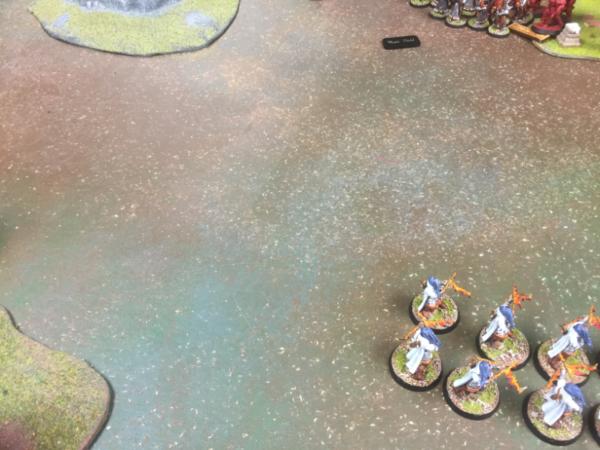
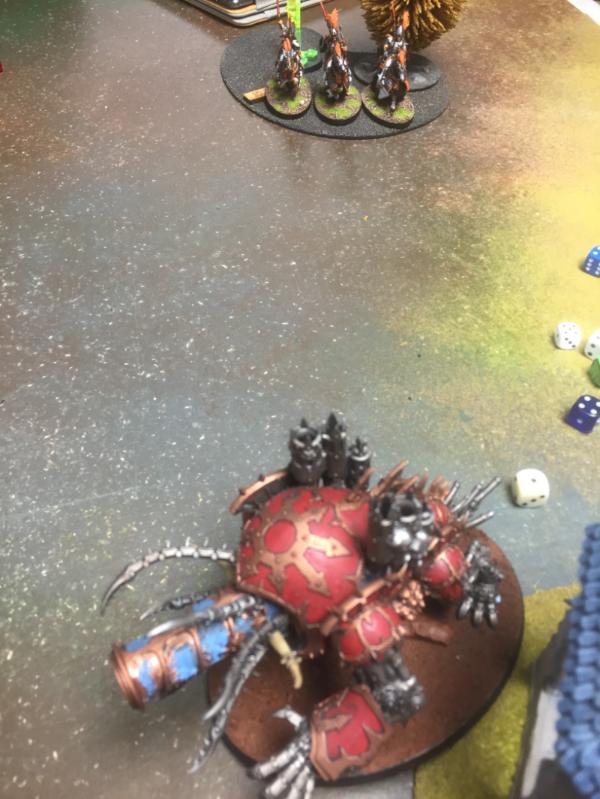
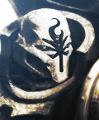
Here you can see the relative position of the left flank units:
In the shooting phase, the Skaven artillery pounded the Griffon, leaving him on two wounds, and rather reducing his chances of a glorious sweep through the enemy lines.
Meanwhile the Skaven and Khorne artillery pieces on the right flank killed two of the Reavers.
 Round Two - Elves have Initiative
I began my turn by claiming Ryan's terrain piece with my Griffon, giving me the objective advantage. Finally, I was remembering to play to the missions! However, with a heavily wounded Griffon, I was unlikely to keep this for long, unless I could eliminate some enemy shooting.
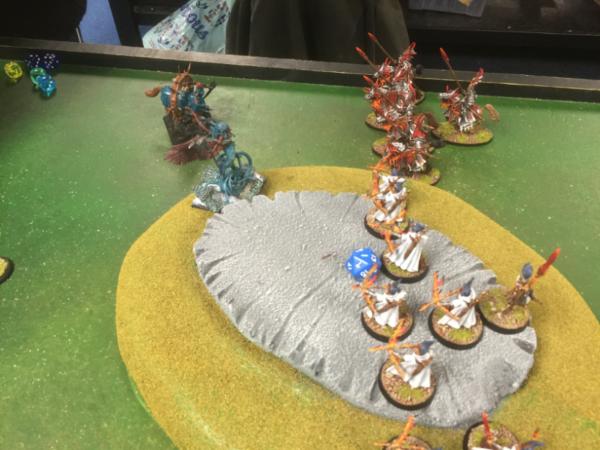
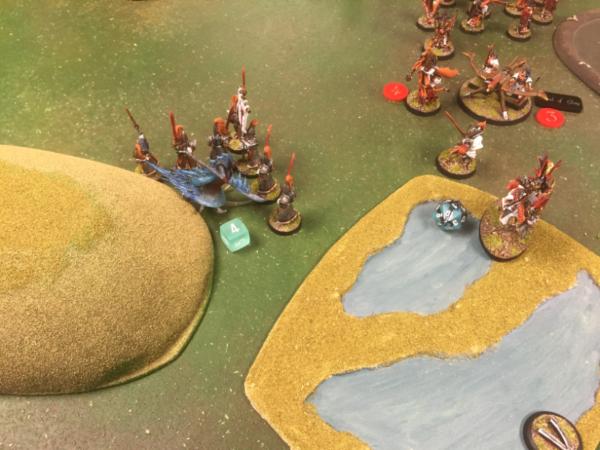
The Swordmasters, bolstered with a Mystic Shield, marched towards the Blood Warriors, intending to delay them and pick a fight on my terms.
In my shooting phase, I managed to remove four Blood Warriors with the Sisters of Averlorn, while the Bolt Thrower served its counter-battery role with style and eliminated the Warp Lightning Cannon on the right flank.
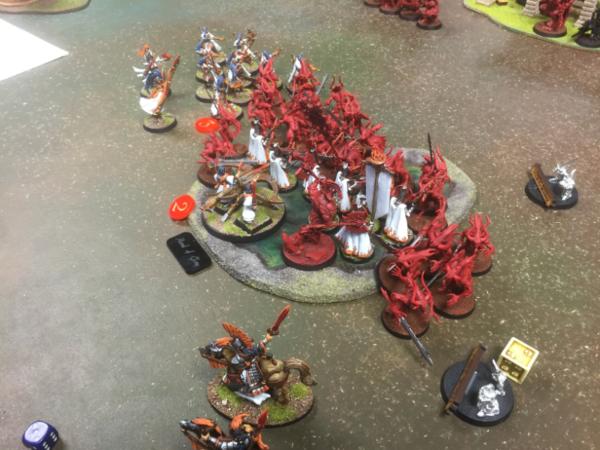
As the Swordmasters charged the Blood Warriors, both sides prepared fairly monumental piles of dice, and many fell in the melee.
The Griffon, for its part, managed to kill the Warp Lightning Cannon (thus taking both out of the game), but could not manage to also slay the Ratling Gun.
The Khorne Bloodletters and Skarr Bloodwrath continued their advance, but were still a turn away from making contact with my Phoenix Guard bunker.
Shooting, magic and melee accounted for both the Griffon, cut down in the prime of its life, and the lives of several Swordmasters.
The Ratling Gun, tired of the buffs being cast by the Mage, gunned him down as well. Ryan tried to repeat this with the Skullcannon against my Bolt Thrower, but it failed do real damage.
 Round Three - Chaos have Initiative
A double turn here gave Ryan's army a potent advantage, and he pressed it home by slaughtering my Swordmasters in the melee, and by advancing his Bloodletters on the right flank. Things looked bad for me here...
...however my Swordmasters had managed to delay the Blood Warriors and all of their characters, meaning that the Bloodletters were engaging the rest of my battleline with only Skarr to assist them.
On my turn, the Reavers started making a run for the enemy-held forest on the right flank, hoping to claim it and lengthen my objective lead.
I then used the very considerable weight of firepower concentrated around the Phoenix Guard to scythe down the Bloodletters, leaving only a pair of the gits left after the melee phase was done.
The Reavers, meanwhile, had reached the forest, and while waiting for the next Hero phase they managed to put a few wounds onto the Skullcannon. It is easy to forget how much more vulnerable big things are to random shooting and melee in this game than in 8th edition; I'm always caught off guard when this sort of chancy effort succeeds.
 Rounds Four and Five
As before, my photographic record gets scattered here, but it is fairly easy to recount how it went. The Blood Warriors and assorted characters continued to stomp forwards, being showered with arrows the whole way.
By this point, the Bloodletters had all been removed.
However, the enemy shooting on the left flank remained as deadly as ever, and the Sisters were virtually wiped out.

The Chaos Skullcannon was able to wipe out my Reavers before I had a chance to score the terrain, and since it had also claimed one of my pieces, we were now drawing and had no likelihood of that changing in the limited time left. Both armies were eager to claim more kills, in the hope that this would have some kind of score-table benefits.
As the game drew to an end, there were really very few models left on the table. However, those that were left were all very expensive, meaning that we both had about 45 points still ambling about. And thus the game ended on about as close a draw as can be.
 Overall Thoughts
With two loses and a draw, I can safely say that I am totally crap at Age of Sigmar. (On the plus side, I came 12th out of 16, so there are at least people worse than I am...) In particular, I could do with actually paying attention to scenarios, especially if they continue to be as complicated as these ones were inclined to be. I would note that my opponents all played well, and did not give me any openings to take, so we should remember that my loses were really their wins, and accord them the credit. However, there was definitely room for improvement in my list - I had a very slow list, which could shoot like blazes but couldn't get across the table in any kind of meaningful way. I think that I need to have a more diverse list going forward - by which I mean that I need to bring monsters and bolster my heavy cavalry contingent.
As the App was updated with new scrolls even while I was at the tournament, this actually formed my last opportunity to use High Elves as a discreet faction in Age of Sigmar. Going forward, I now have models drawn from Order Draconis, Eldritch Council, Wanderers, Phoenix Temple and the legacy section of High Elves. This seems the perfect opportunity to look closely at the options, and pick up some new stompy stuff accordingly.
Thanks for reading this rather lengthy report, and I hope that you have enjoyed it. I would love to hear your thoughts and comments, so leave them below! Until next time.
|
|
|
|
|
2016/03/29 03:37:15
Subject: Photographic Tournament Report: High Elves go to Fall of the Old World
|
|
Regular Dakkanaut
|
Awesome reports dude 
|
|
|
|
|
2016/03/29 07:03:56
Subject: Photographic Tournament Report: High Elves go to Fall of the Old World
|
|
Steady Space Marine Vet Sergeant
England
|
See guys? AOS isnt just a melee-fest if you play the right missions.
Great report.
|
If you can't believe in yourself, believe in me! Believe in the Dakka who believes in you! |
|
|
|
|
2016/03/29 12:51:59
Subject: Photographic Tournament Report: High Elves go to Fall of the Old World
|
|
Dakka Veteran
|
Enjoyed the read. How did the sisters of avalorn do overall for you? Never had an interest in elves in my life until the reorganization of Order this last week. Now for some reason they appeal to me.
|
|
|
|
|
2016/03/29 14:39:40
Subject: Photographic Tournament Report: High Elves go to Fall of the Old World
|
|
Foolproof Falcon Pilot
Livingston, United Kingdom
|
They were devastating in the first game, putting loads of wounds onto enemy units, and helping to nickle-and-dime the Stonehorn down. In the second game their short range (18") led me to deploy them far enough forward that they got slaughtered before getting a chance to shoot anything. In the third game they again put loads of wounds out, helping to thin both the Bloodletter and Blood Warrior units.
In general, they are lovely models that come with a good profile. They hit hard at range, but their range is short enough that you have to be careful with how you use them. They also drop like flies if targetted by any enemy shooting, so you need to keep that in mind. For sure, I would suggest that you keep them shielded by other units, and inside cover, if possible.
Their 'Loose Until the Last' ability is also easy to circumvent for opponents, as all they have to do is charge a nearby unit, then use Pile-In moves to contact the Sisters, so do not rely upon that if you are using a mixed formation.
|
|
|
|
|
2016/03/29 23:42:43
Subject: Photographic Tournament Report: High Elves go to Fall of the Old World
|
|
Regular Dakkanaut
|
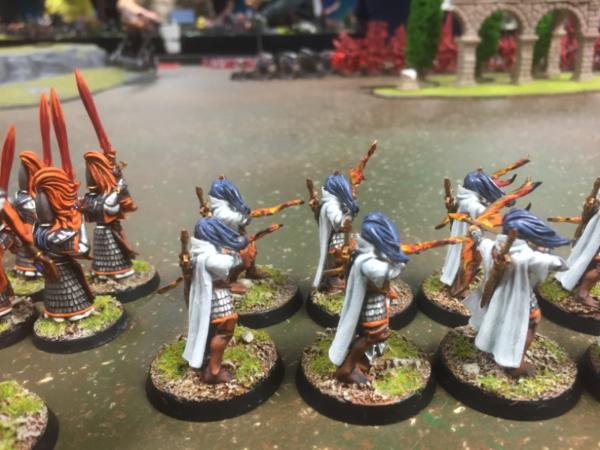
Really enjoyed the read, but even more so I love the paint scheme!!!
|
|
|
|
|
|
2016/03/30 14:50:09
Subject: Photographic Tournament Report: High Elves go to Fall of the Old World
|
|
Omnipotent Lord of Change
|
Superb report! Written AOS reports are rare creatures, and written AOS tournament reports are even harder to come across, so count me extra appreciative  Also nice to see SCGT comp in action, as it's probably the only pool comp I actually like (tend to prefer SDK's faux-points). Did you feel like the extra pool choices over 100 helped you adapt or whatever they're supposed to do? Noting that you changed things up for Game 2 ... and then kind of regretted it I think? I look forward to trotting my Khorne Daemons out to similar events in the future, but honestly my hobby time is bogged down by more pressing games at the moment  So nice to game vicariously  Anyway, thanks much! - Salvage
|
|
This message was edited 3 times. Last update was at 2016/03/30 15:32:23
|
|
|
|
|
2016/03/30 15:05:16
Subject: Photographic Tournament Report: High Elves go to Fall of the Old World
|
|
Mighty Vampire Count
|
Really enjoyable read and some lovely models
|
I AM A MARINE PLAYER
"Unimaginably ancient xenos artefact somewhere on the planet, hive fleet poised above our heads, hidden 'stealer broods making an early start....and now a bloody Chaos cult crawling out of the woodwork just in case we were bored. Welcome to my world, Ciaphas."
Inquisitor Amberley Vail, Ordo Xenos 
"I will admit that some Primachs like Russ or Horus could have a chance against an unarmed 12 year old novice but, a full Battle Sister??!! One to one? In close combat? Perhaps three Primarchs fighting together... but just one Primarch?" da001
www.dakkadakka.com/dakkaforum/posts/list/528517.page
A Bloody Road - my Warhammer Fantasy Fiction |
|
|
|
|
2016/03/30 16:50:40
Subject: Photographic Tournament Report: High Elves go to Fall of the Old World
|
|
Foolproof Falcon Pilot
Livingston, United Kingdom
|
 Boss Salvage wrote: Boss Salvage wrote:Also nice to see SCGT comp in action, as it's probably the only pool comp I actually like (tend to prefer SDK's faux-points). Did you feel like the extra pool choices over 100 helped you adapt or whatever they're supposed to do? Noting that you changed things up for Game 2 ... and then kind of regretted it I think?
The pool thing is quite interesting. I like it in theory - though I did not really have the (painted!) model selection to make full use of it, the idea is that you can bring options that you can deploy in response to enemy stuff. However, I did find that it was quite annoying to calculate the points as I went through deployment, and I quickly started wishing that I had some pre-formed lists to use when deploying. For my next tournament, I am thinking of just picking out a 100pt list and then using the 50pts extra as mind game stuff...
For Game 2, I did regret not having Alarielle, nor the Griffon, but it made sense in the context of a heroes-not-scoring scenario. To be fair, Alarielle is now useless rules wise, since all the units now no longer share the right keywords to be affected by her, so I'll have to grow used to battleshock tests in the future!
|
|
|
|
|
2016/03/31 01:02:43
Subject: Photographic Tournament Report: High Elves go to Fall of the Old World
|
|
Death-Dealing Devastator
|
Thanks for the write ups. Good looking army.
|
2500 pts  |
|
|
|
|
2016/03/31 17:46:44
Subject: Re:Photographic Tournament Report: High Elves go to Fall of the Old World
|
|
Arch Magos w/ 4 Meg of RAM
|
Fantastic report! I really enjoyed reading this. The tactical objectives of each scenario sounded great and were backed up by a beautifully painted army (love your white and orange colour scheme) - in fact now I am dreaming up adding all sorts of Aelves to my army. Thanks for posting, really great to see an AoS Tournament like this.
|
Bye bye Dakkadakka, happy hobbying! I really enjoyed my time on here. Opinions were always my own :-) |
|
|
|
|
|
|
|