| Author |
Message |
 |
|
|
|
|
Advert
|
Forum adverts like this one are shown to any user who is not logged in. Join us by filling out a tiny 3 field form and you will get your own, free, dakka user account which gives a good range of benefits to you:
- No adverts like this in the forums anymore.
- Times and dates in your local timezone.
- Full tracking of what you have read so you can skip to your first unread post, easily see what has changed since you last logged in, and easily see what is new at a glance.
- Email notifications for threads you want to watch closely.
- Being a part of the oldest wargaming community on the net.
If you are already a member then feel free to login now. |
|
 |
0023/07/07 07:15:59
Subject: My first Grey Knights!
|
|

Rampaging Carnifex
|
|
|
|
 |
|
2017/01/08 17:02:13
Subject: My first Grey Knights!
|
|
Fireknife Shas'el
|
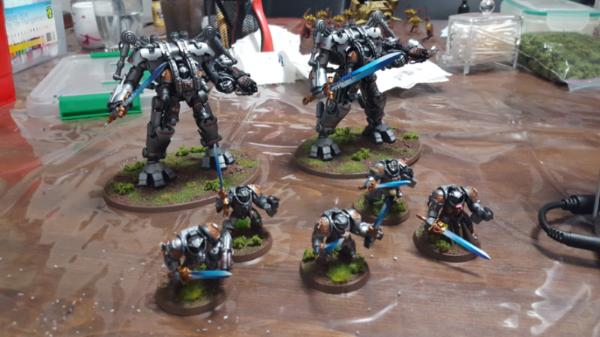
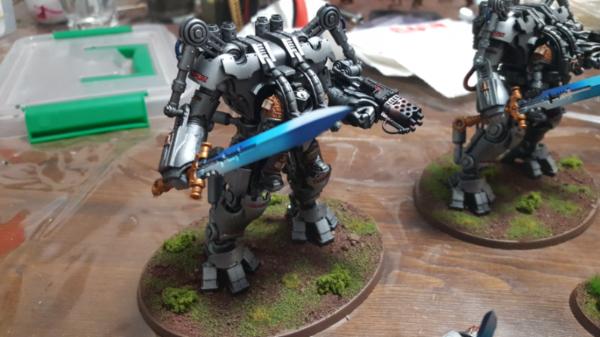
 creeping-deth87 wrote: creeping-deth87 wrote:I don't often post pictures here because of how insanely good a lot of the painters on this forum are, but I'm quite proud of how these turned out so I thought I'd share.
You should be proud, these turned out really nice!
|
|
|
|
|
|
2017/01/11 15:32:28
Subject: My first Grey Knights!
|
|

Been Around the Block
|
I think some touches on those kinghts would improve them a lot. I would use wash to bring details up and apply dirt pigments on foot to blend them in.
You can use soft oil pastels instead pigments, sand them with sandpaper and apply with brush. You can then fix them with white spirit / turpentine (color change may follow). Pigment may hide those mold/connection lines a little.
Just wanted to share my ideas to improve.
|
|
|
|
|
2017/01/08 20:40:13
Subject: My first Grey Knights!
|
|

Longtime Dakkanaut
|
Very nice and clean looking. Keep sharing as you paint more. 
|
|
|
|
|
|
2017/01/02 10:02:43
Subject: My first Grey Knights!
|
|
Rampaging Carnifex
|
 hunter_sk wrote: hunter_sk wrote:I think some touches on those kinghts would improve them a lot. I would use wash to bring details up and apply dirt pigments on foot to blend them in.
You can use soft oil pastels instead pigments, sand them with sandpaper and apply with brush. You can then fix them with white spirit / turpentine (color change may follow). Pigment may hide those mold/connection lines a little.
Just wanted to share my ideas to improve.
Thank you for the feedback. I've tried my hand at pigments a few times before and never seemed to get a knack for it, ended up ruining quite a few otherwise good paintjobs with it so I just stopped using them entirely. I've never tried pastels though, might give those a shot. Thanks for the tip.
|
|
|
|
|
2017/01/09 06:32:02
Subject: My first Grey Knights!
|
|

Veteran Knight Baron in a Crusader
|
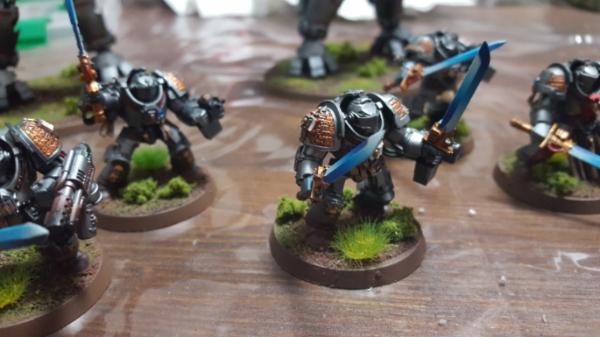
I agree with Hunter_sk on the metals needing a recess wash, just a little bit of Nuln Oil would go a long way from making your brilliant painting into more brilliant painting. Your brushwork is really clean in these photos so I'm sure you could pull that off no problem.
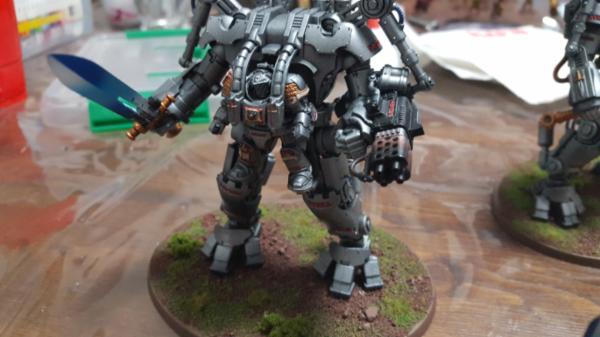
I love the non-metallic metal blue you did on the blades (particularly on the Dreadknights, as that effect does get more difficult to get perfect on larger scales) looks really clean. The scorching of the Inferno Cannon (I don't know what it's called) is also really effective.
|
3000pts Blood Angels (4th Company) - 2000pts Skitarii (Voss Prime) - 2500pts Imperial Knights (Unnamed House) - 1000pts Imperial Guard (Household Retainers)
2000pts Free Peoples (Edlynd Fusiliers) - 2000pts Kharadron Overlords (Barak Zilfin) - 500pts Ironweld Arsenal (Edlynd Ironwork Federation) - 1000pts Duardin (Grongrok Powderheads)
Wargaming's no fun when you have a plan! |
|
|
|
|
2017/01/09 08:08:53
Subject: My first Grey Knights!
|
|
Renegade Inquisitor with a Bound Daemon
Tied and gagged in the back of your car
|
Good start. Next up, as others have said, they could use a wash and some highlights to make things pop. Additionally, you should get in the habit of scraping off the mould lines before you paint your next batch, it'll make them look even better.
|
|
|
|
|
2017/01/09 19:51:46
Subject: My first Grey Knights!
|
|

Clousseau
|
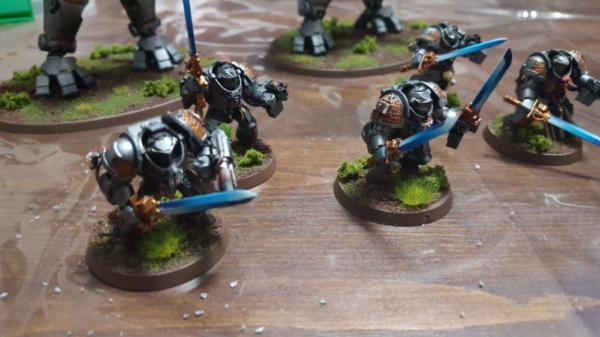
really nice work
I also really like your bases. very realistic looking terrain, an often overlooked detail that you did very well.
|
 Galas wrote: Galas wrote:I remember when Marmatag was a nooby, all shiney and full of joy. How playing the unbalanced mess of Warhammer40k in a ultra-competitive meta has changed you 
Bharring wrote:He'll actually *change his mind* in the presence of sufficient/sufficiently defended information. Heretic.
|
|
|
|
|
2017/01/09 23:02:22
Subject: My first Grey Knights!
|
|
Been Around the Block
|
creeping-deth87 wrote:Thank you for the feedback. I've tried my hand at pigments a few times before and never seemed to get a knack for it, ended up ruining quite a few otherwise good paintjobs with it so I just stopped using them entirely. I've never tried pastels though, might give those a shot. Thanks for the tip.
Hm, interesting... I wonder how it is possible to ruin paintjob with pigments. Because they can be applied dry. You can wipe excess off with dry brush, or dipped in water.
Other than pigments you can always use sponge method of aplying dirt on those feet to make them connected with the base. It's up to you at the end. 
Some pigment techniques: https://www.youtube.com/watch?v=v3BGQaPoQiQ
|
|
This message was edited 1 time. Last update was at 2017/01/09 23:34:29
|
|
|
|
|
2017/01/09 23:35:07
Subject: My first Grey Knights!
|
|
Rampaging Carnifex
|
hunter_sk wrote: creeping-deth87 wrote:Thank you for the feedback. I've tried my hand at pigments a few times before and never seemed to get a knack for it, ended up ruining quite a few otherwise good paintjobs with it so I just stopped using them entirely. I've never tried pastels though, might give those a shot. Thanks for the tip.
Hm, interesting... I wonder how it is possible to ruin paintjob with pigments. Because they can be applied dry. You can wipe excess off with dry brush, or dipped in water.
Other than pigments you can always use sponge method of aplying dirt on those feet to make them connected with the base. It's up to you at the end.
Basically what would happen is that I would apply them for a dusted look and was always very happy with the results until I tried sealing the pigments in with pigment fixer. It would change the final result and really subdued the effect, to the point you could barely tell I used pigments at all or it would just look awful and not at all what I wanted for the miniature i was working on. It was very frustrating.
|
|
|
|
|
|
|