Switch Theme:

Junk Mek's Junk Orks - Scratch Building a Mechanised Ork Army - Updated 2/2/21  [RSS] Share on facebook Share on Twitter Submit to Reddit
»
Author Message
Advert


Forum adverts like this one are shown to any user who is not logged in. Join us by filling out a tiny 3 field form and you will get your own, free, dakka user account which gives a good range of benefits to you:
  • No adverts like this in the forums anymore.
  • Times and dates in your local timezone.
  • Full tracking of what you have read so you can skip to your first unread post, easily see what has changed since you last logged in, and easily see what is new at a glance.
  • Email notifications for threads you want to watch closely.
  • Being a part of the oldest wargaming community on the net.
If you are already a member then feel free to login now.


Made in gb
Fresh-Faced New User


I decided on a new project for a new year. After not having hobbied for a couple of years, and previously been a below average Alpha Legion painter/player (with little conversion work) I decided I needed to get my hobby groove back, and learn new skills. The issue is I am currently jobless due to Covid, and my savings are for covering my share of the bills (wife and 2 young kids) whilst I retrain to another sector.

So I hit on a new plan - to make an Ork army out of trash, charity shop buys, Poundland buys and occassional craft shop purchase. No bits box or wargaming kits (aside from the boys themselves) allowed.

The target - 1500 points of mechanised Orks by the end of the year, built and painted.

This plan is so far out of my skill set it's a bit of a joke. But hopefully by the end of the year I'll have learned a ton of new skills!

I've been working on this the last 2 weeks and have managed a few bits and pieces.

My first test was some legs for a dred/walker. I did this by cutting up a peg from Poundland (36 for £1).


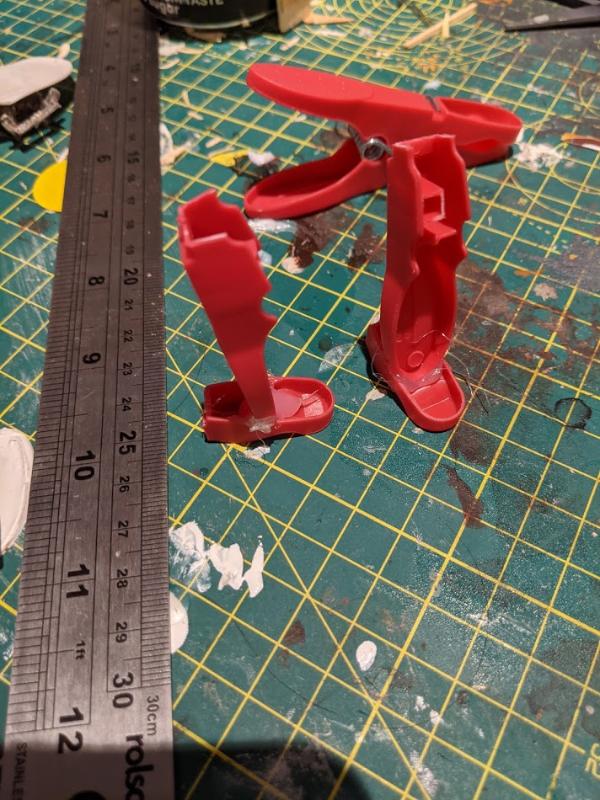
I then cut them up a bit more and made my first ever effort at modelling clay to give them a bit more bulk


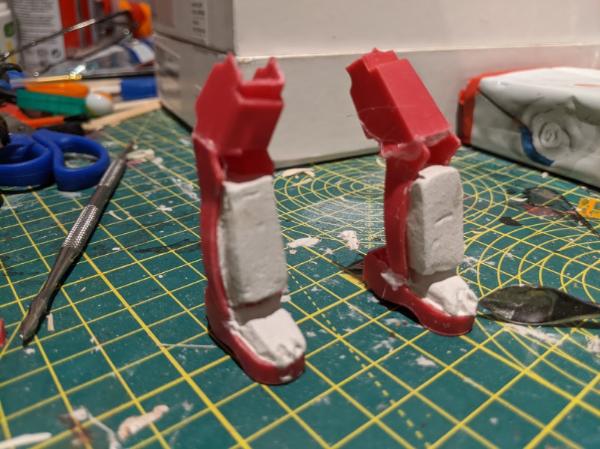
Whilst not great quality, I was happy with these as a proof of concept. I intended to use them later, but my eldest son had other ideas (more on that in a bit)

Whilst I started on a few concepts for the body of the walker, I wasn't happy with any of them. So I decided to do a buggy instead (I know they're not current, but I can't say I care, I'm not much of a gamer and prefer narrative to competitive when I do play).

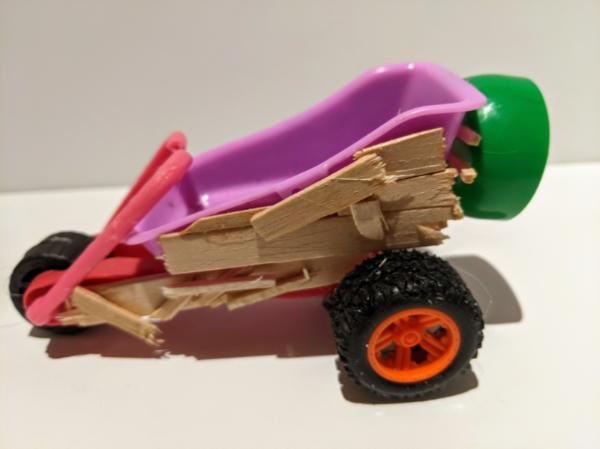
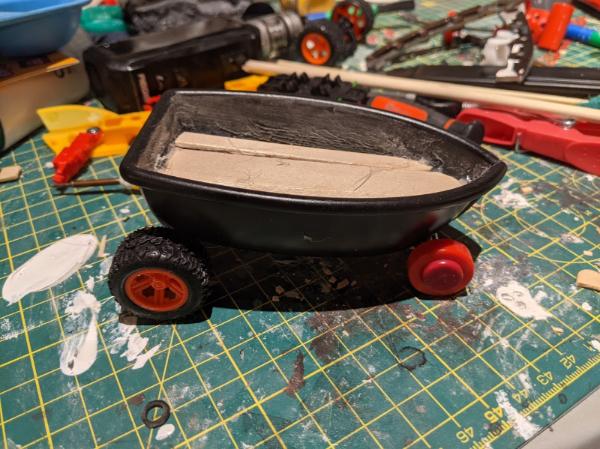
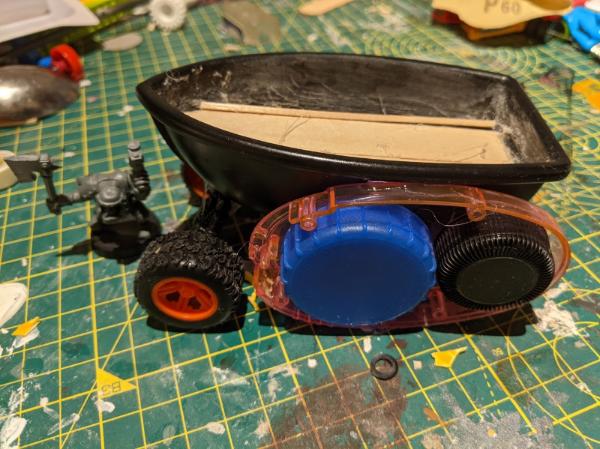
I had a bunch of lollipop sticks from a homework project one of my boys had, and some Duplo as both my kids have since progressed to Lego. So I took one of the Duplo boats and added a rouch wooden plank floor above the usual Duplo bumps.

I then took some wheels from old toys, and formed it into a buggy.


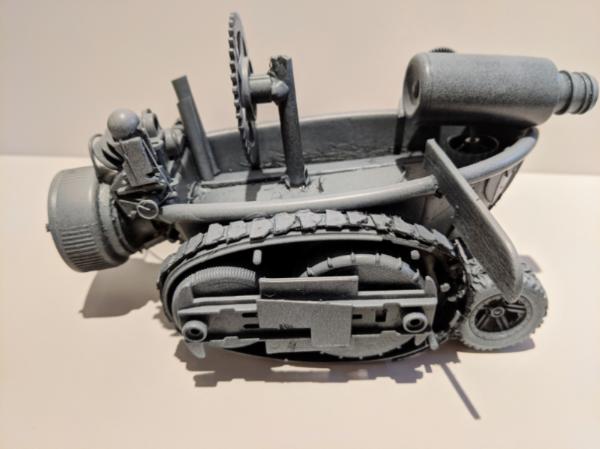
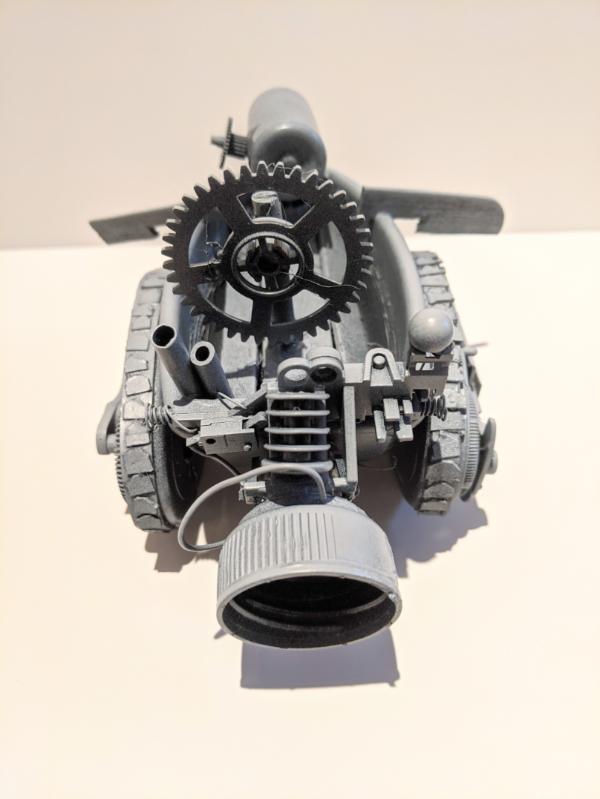
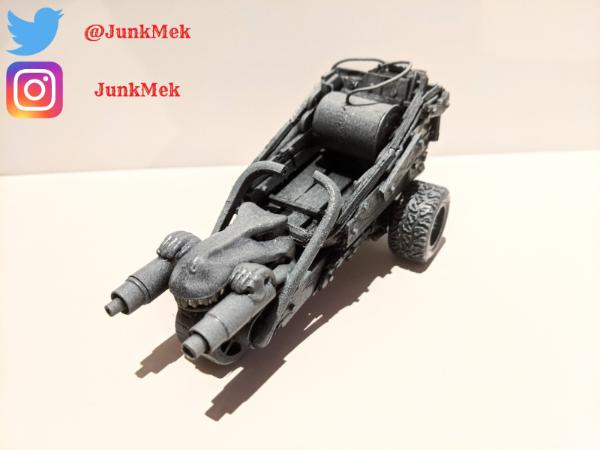
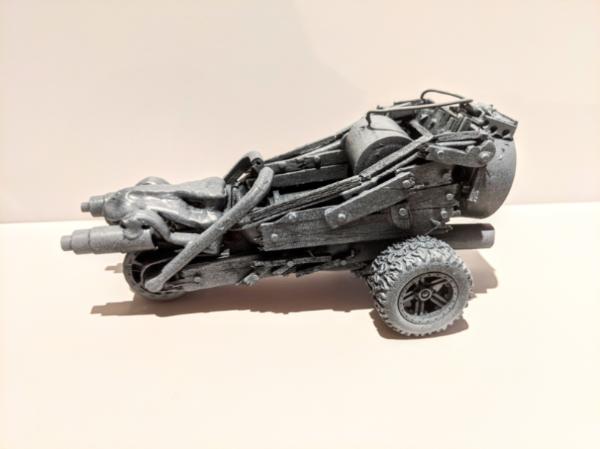
I wasn't a big fan of this, so I went up poundland and bought a tape dispenser, and hacked it apart. Boom, instant half track shape.


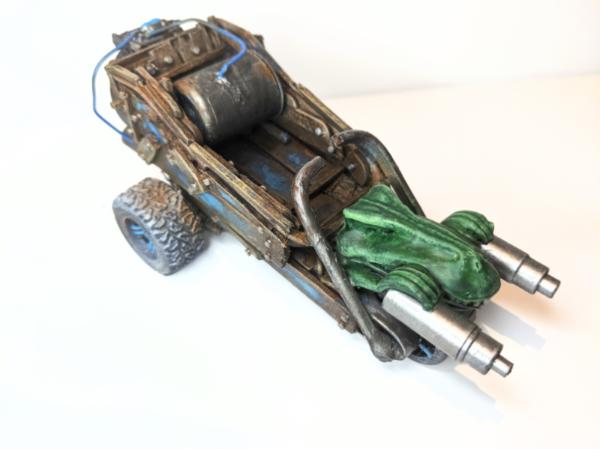
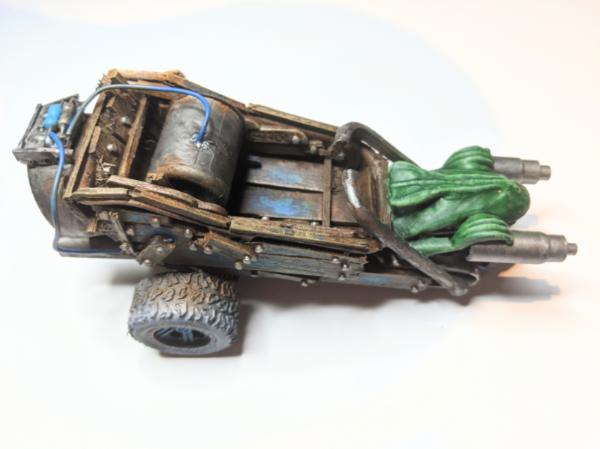
Some playing around with lids to get the internal parts working, and I settled on a milk bottle top and a top from a pop bottle. It's the same on both sides


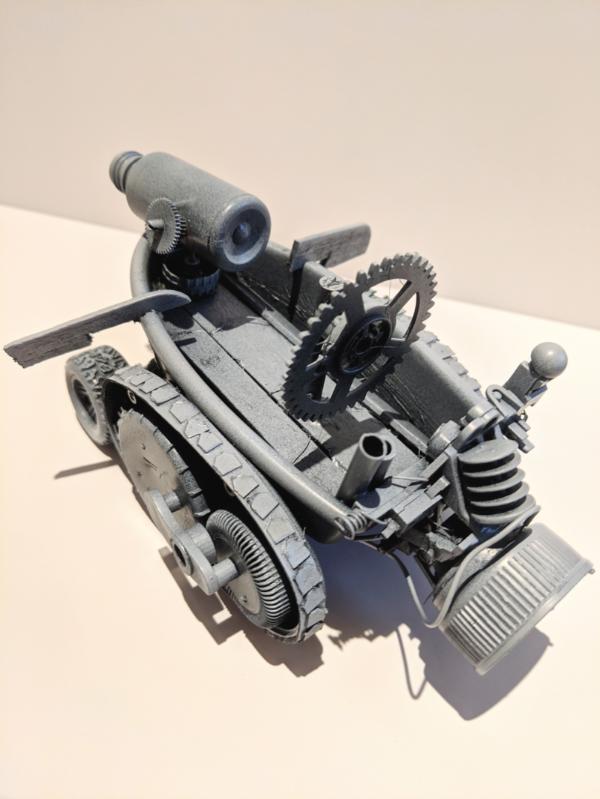
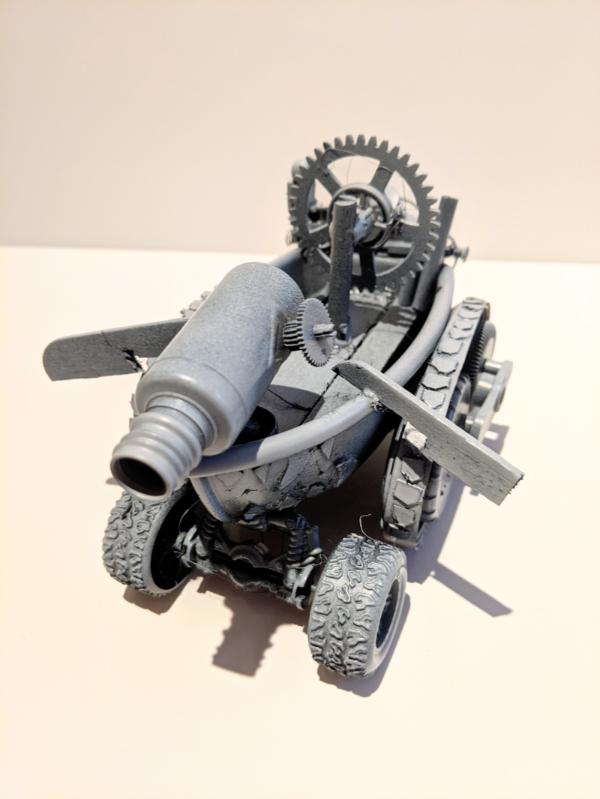
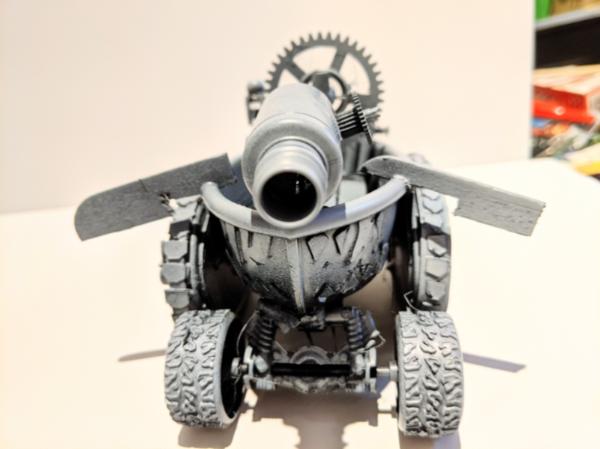
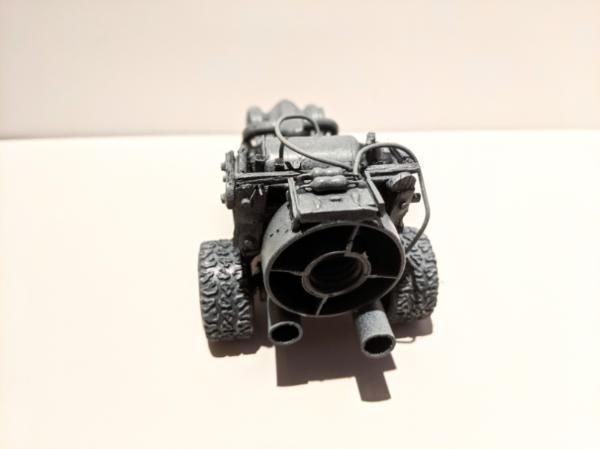
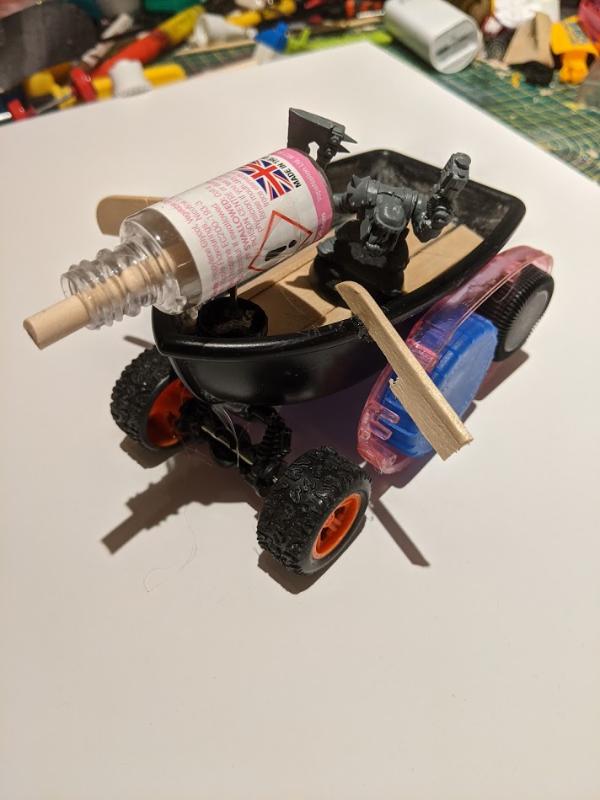
Then on to gubbins. I decided that a harpoon gun may be the best bet, so I've done a crude WiP/test gun here. I also hacked up another lollipop stick to make oars (and sawed into the boat a little to make the sit in it)


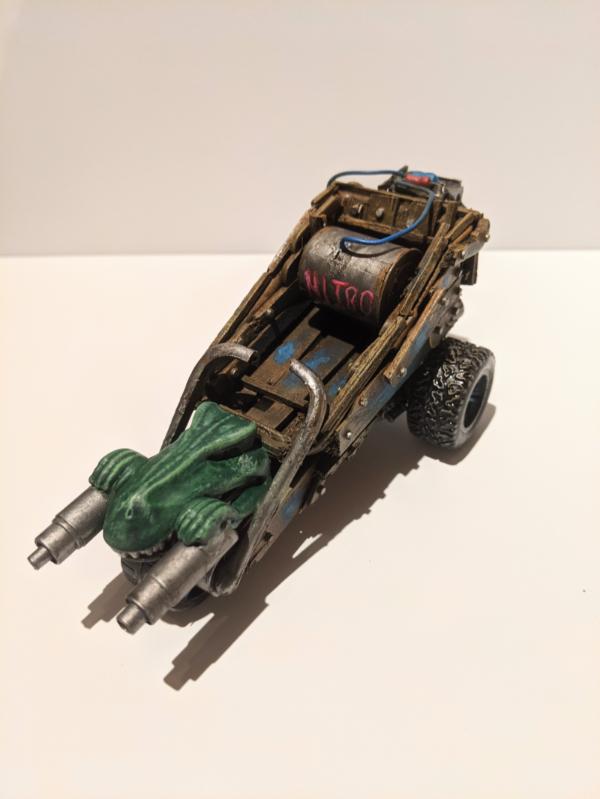
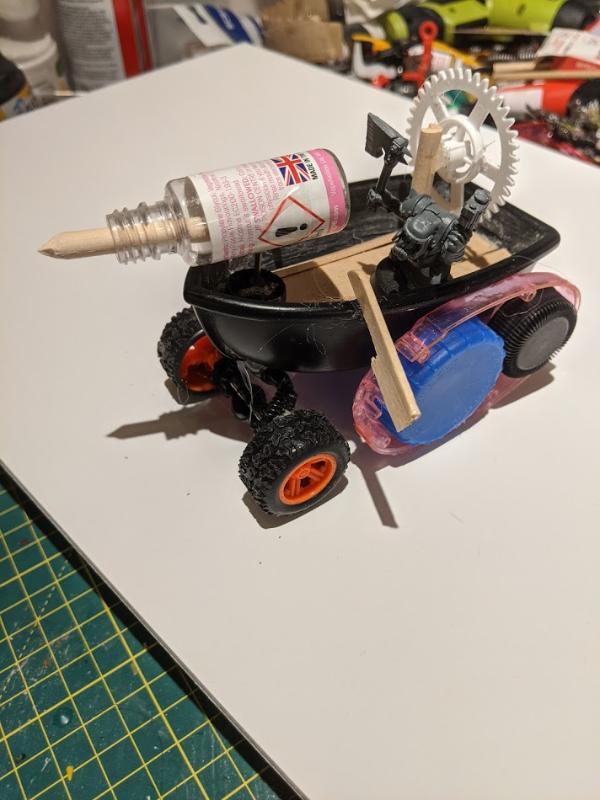
I then added the cog that was inside the tape dispenser as an over sized wheel, attached to some dowling. I also whittled the hartpoon in the gun. I'm not happy with this wheel. either it, the gun or both are too big I think


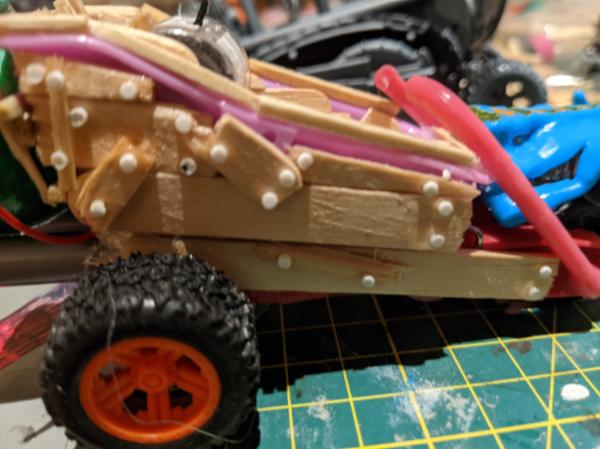
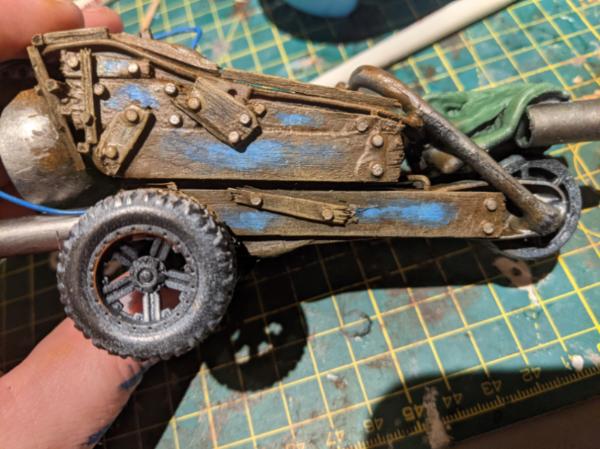
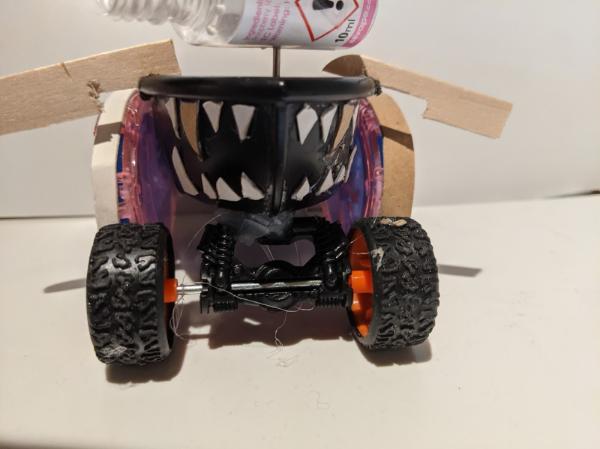
I have started work on detailing now, adding some cardstock (a cereal packet) teeth


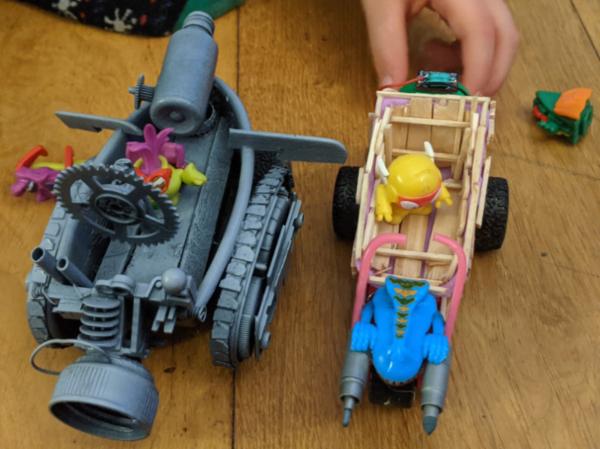
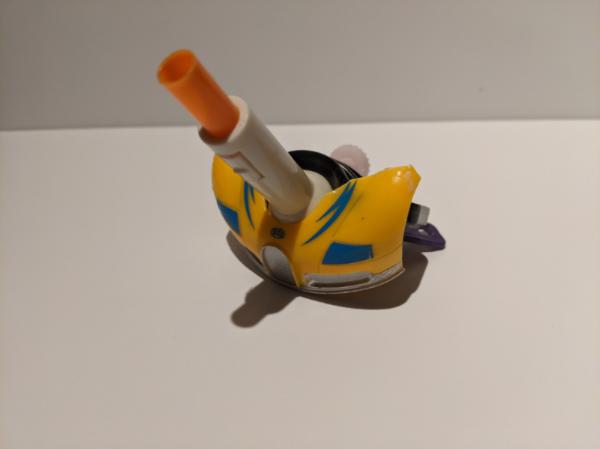
Whilst doing this I found this big ol' boy in a charity shop for £5 (the day before lockdown number 3 hit the UK).


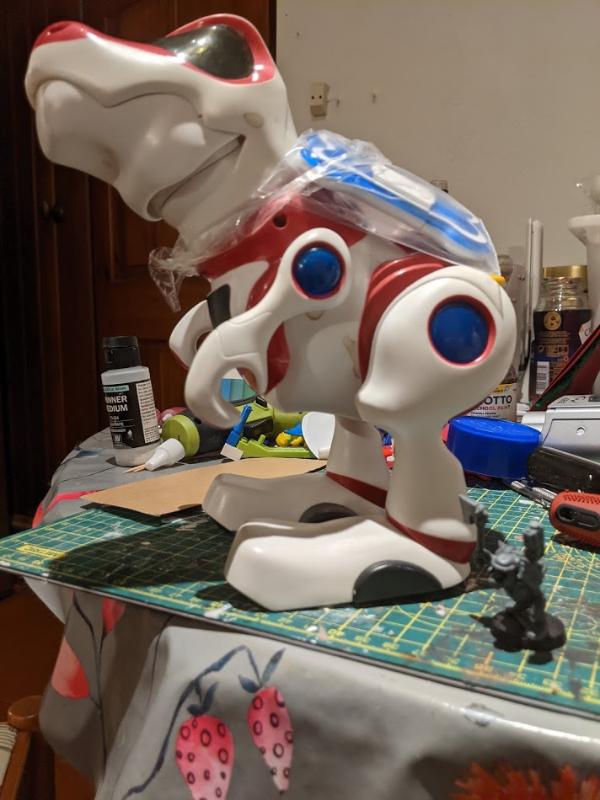
I hacked his head off to get gubbins for detailing. I've lowered the body as I'm thinking of converting into some kind of mekka squigoth, but I'm unsure

The lowered body


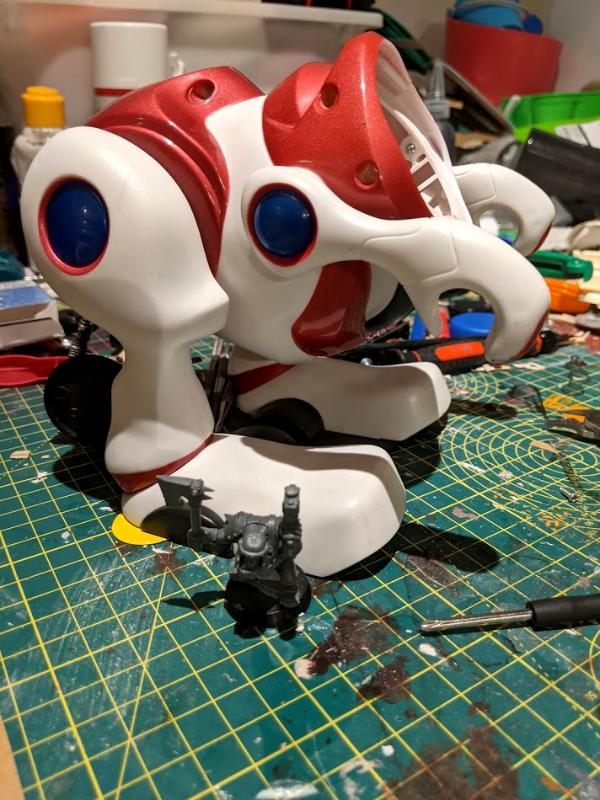
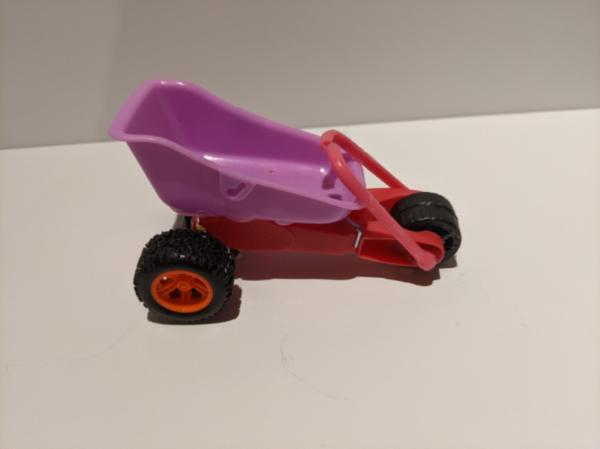
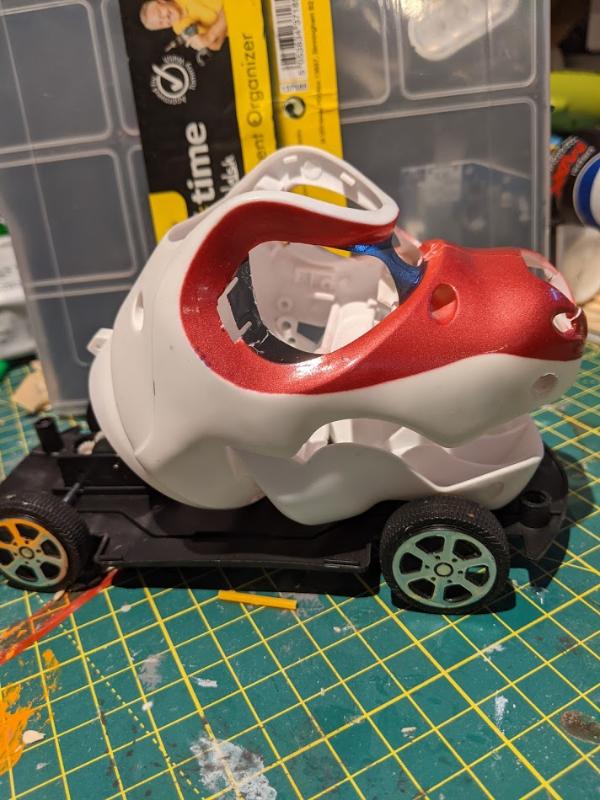
The reason I'm unsure is that the head wouldn't look quite right for me, so I may need to source another head. If I do that then I can build on this other idea I had which I think would look awesome with guns coming out of the various holes, orks and grots climbing over and a built up back section. (base is from a poundland car)


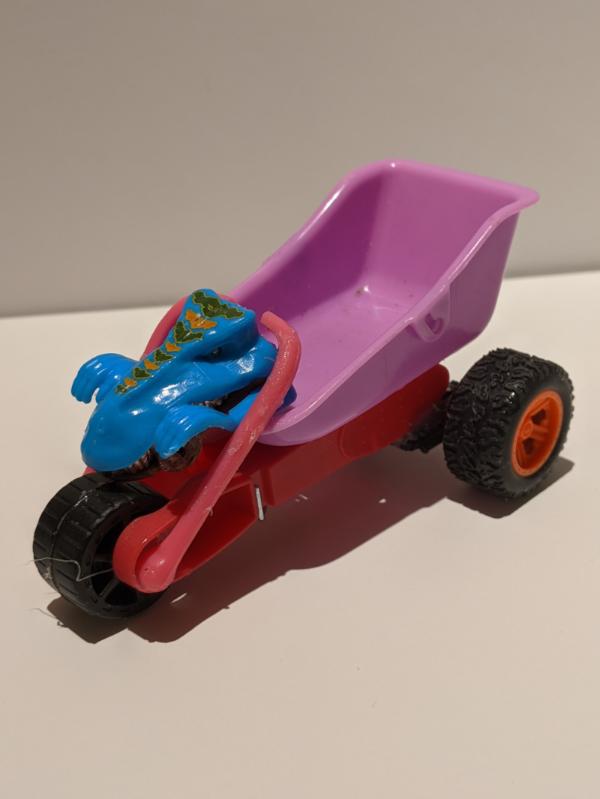
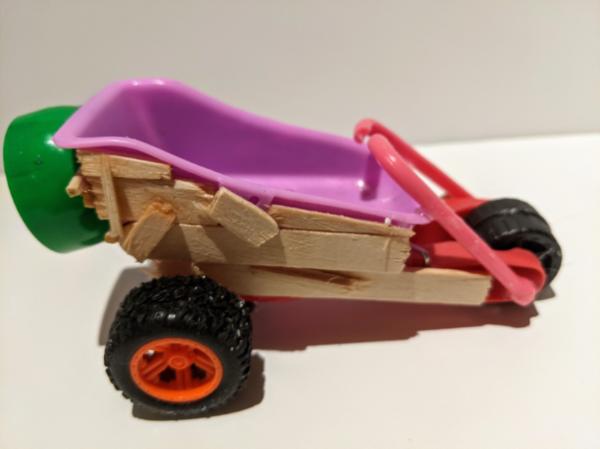
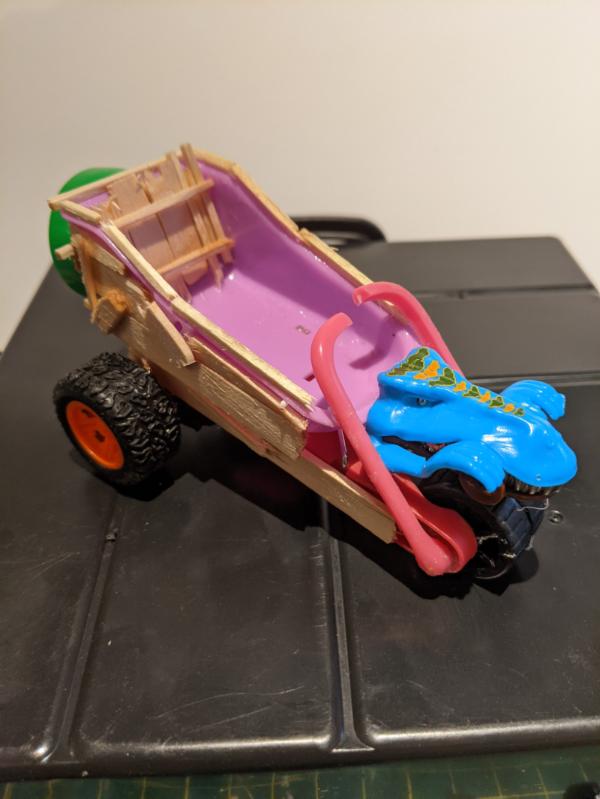
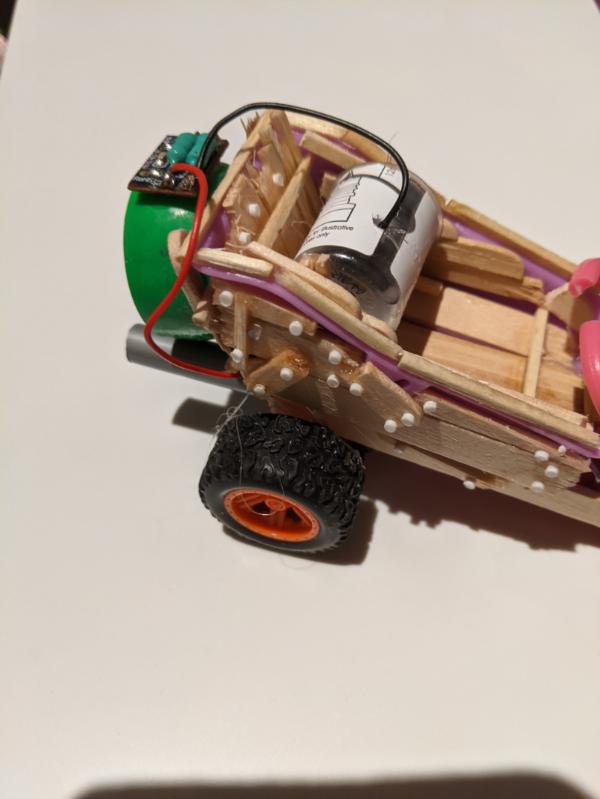
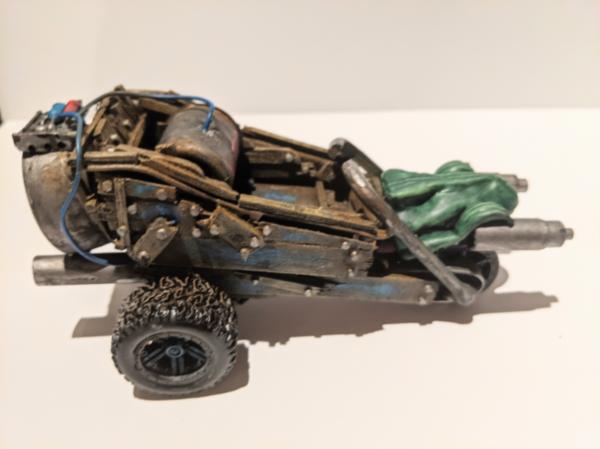
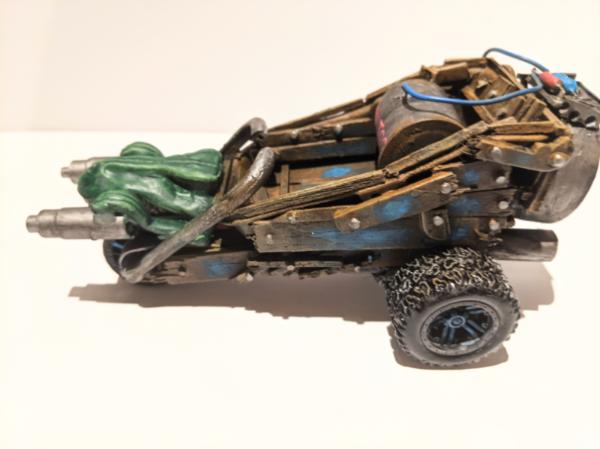
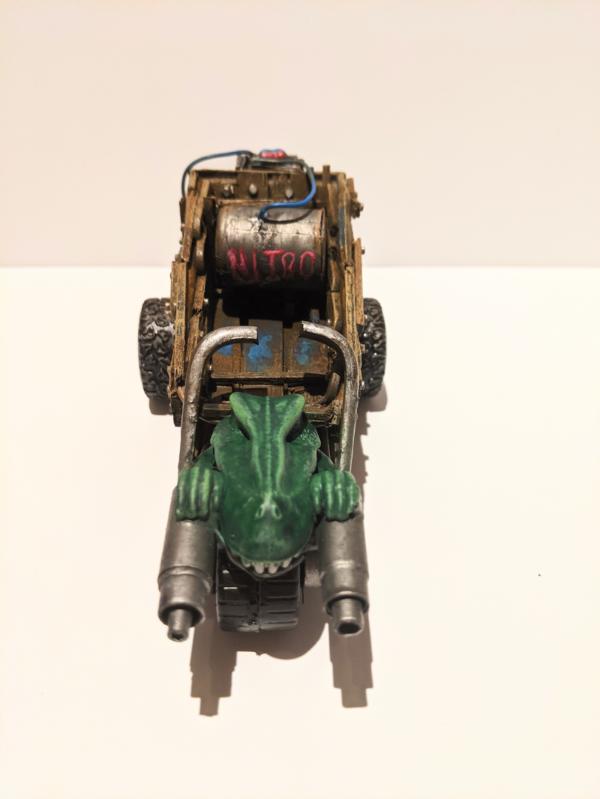
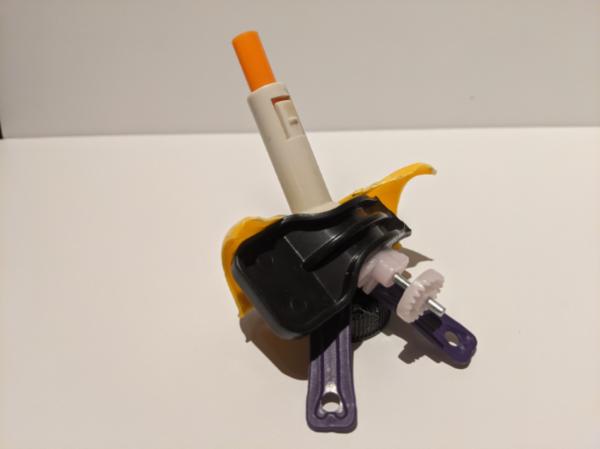
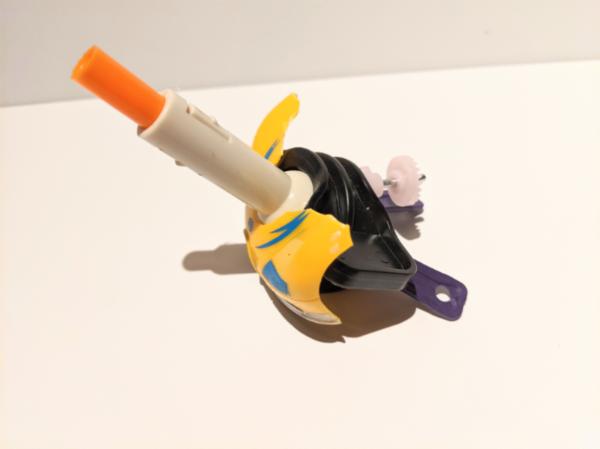
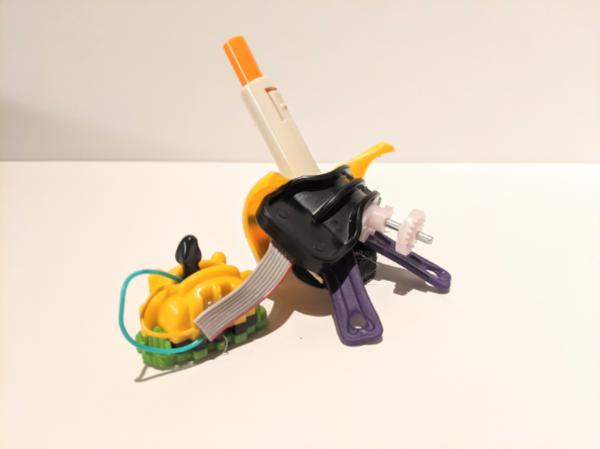
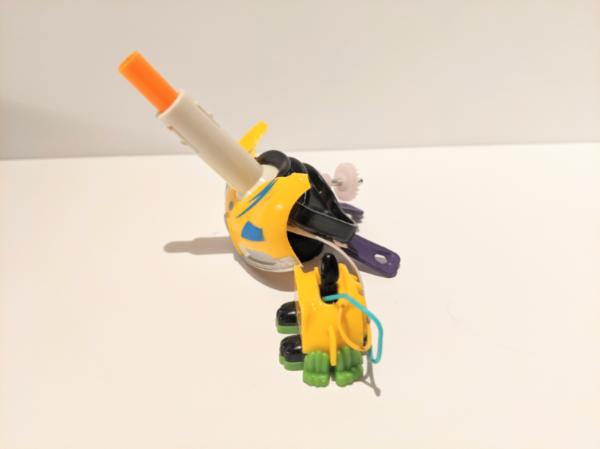
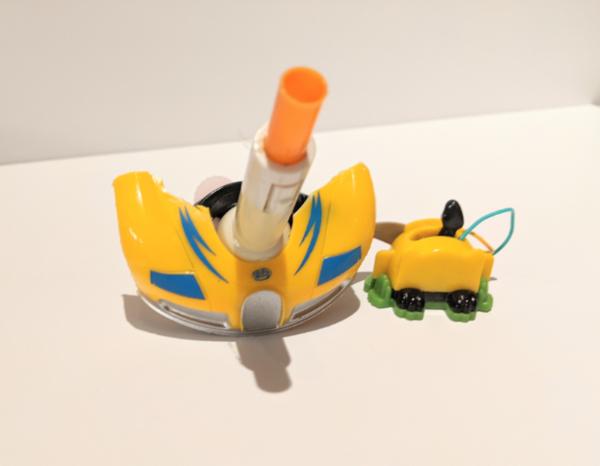
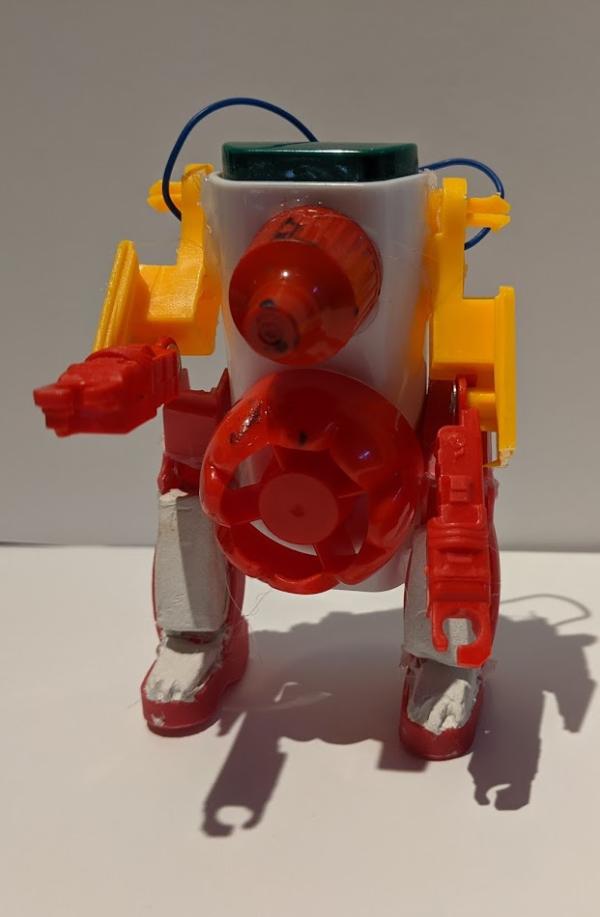
Oh and finally, those legs for a Dred I mentioned? My eldest son (7) saw me messing around with making things from junk and decided he wanted in, so this morning we made this together (he told me what to put where, I did the hot glue/cutting)


That's it for now. Hopefully I'll be back in a week with a finished half track and a good start on whatever the next build is going to be! Thanks for reading


Automatically Appended Next Post:
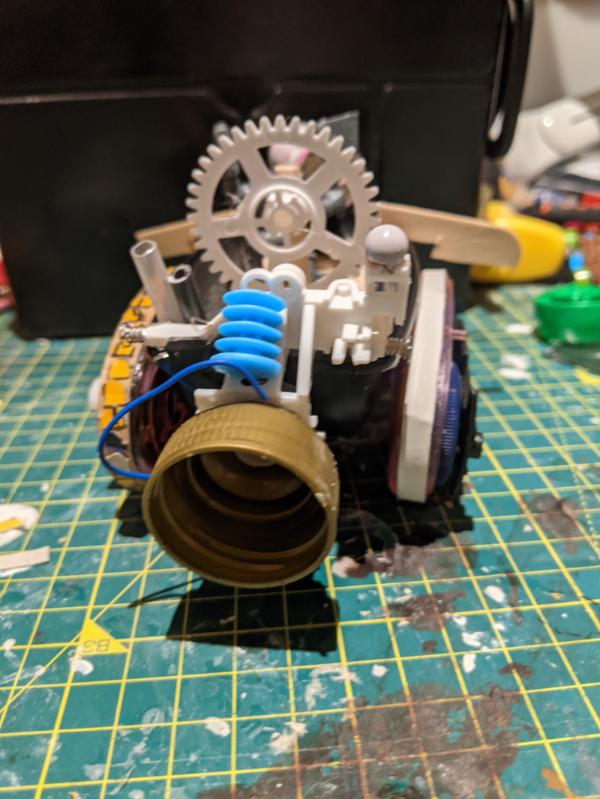
So I've played around a bit with the engine section. Going to need a chunkier wire.


To the left is a god awful attempt at tracks. I need to find a good tutorial for that.

I've also ordered a belt hole punch thing that I'm told is good for making rivets, so I'm looking forward to that coming on Sunday

This message was edited 14 times. Last update was at 2021/02/02 08:02:20


Made in ca
Stormin' Stompa


Ottawa, ON

I wasn't sold on the boat at first, but once you added the treads and the engine it's started to look promising.

Ask yourself: have you rated a gallery image today? 
   
Made in gb
Fresh-Faced New User


So I added some more of my awful tracks. Really need to find a way of doing those properly

Once done I added a few small bits and pieces before deciding I'd had enough and moved on to priming. I should've held off a little though as I forgot rivets, and quite frankly the cannon of the harpoon is very plain. I'm going to have to add those things before painting.

So primed slightly earlier than it should've done and it's (cannon and lack of rivets aside) starting to look like an Ork vehicle.


Still, for a first time trash bash and a first time scratch build, I'm happy enough that I can manage something on the right lines.

Tomorrow I'll add the missing bits and start getting paint on it. Today I'm going to kick ideas around for the next build


Automatically Appended Next Post:
 Mr Nobody wrote:
I wasn't sold on the boat at first, but once you added the treads and the engine it's started to look promising.


Thanks. Yeah, the all wheel look didn't fit. Hopefully this (gun aside) is now looking more like it

This message was edited 2 times. Last update was at 2021/01/24 18:04:29


Made in us
Stealthy Warhound Titan Princeps


Now this is some proper Ork stuff! I've always been suspicious of any prepackaged ork vehicles. Much better to build your own.


Automatically Appended Next Post:
Tracked boats are always good. Lots of nice little bits, could maybe use a few more bolt on plates.

This message was edited 1 time. Last update was at 2021/01/24 21:34:51


Made in gb
Fresh-Faced New User


Whilst I'm deciding on paint schemes and how to gubbins up the harpoon gun on the boat half track I got to work on the next vehicle. I'm going for a wartrike this time.

Using a peg, some wheels from a couple of sources and a random pink toy thing I found on the floor when out for a run (and promptly looted) I put together the basic shape


I wanted to at least fit it into the nautical theme of my half track, so I hacked up a toy car I had knocking around (I went through a "buy all the cars" gaslands phase everytime I passed a charity shop a couple of years back). The idea was some kind of sea creature would link it


It didn't really work for me. So I reluctantly took it out. It may yet get added back in

I mentioned to some friends I was having an issue creating a nautical link and a good suggestion was made of using wood. So the concept of "the Driftwood Drifter" was born.

Unfortunately I went a bit OTT. I may scale it back a bit. Going to sleep on it.


I'd appreciate any thoughts you have on this build as I'm not sold.


Automatically Appended Next Post:
 kestral wrote:
Now this is some proper Ork stuff! I've always been suspicious of any prepackaged ork vehicles. Much better to build your own.


Automatically Appended Next Post:
Tracked boats are always good. Lots of nice little bits, could maybe use a few more bolt on plates.


Yeah, what good Mek reads a blueprint?

Going to chuck some volt on plates on the gun I think. Was going to elsewhere, but wasn't sure if they'd "fit"

This message was edited 5 times. Last update was at 2021/01/26 08:56:13


Made in gb
Fresh-Faced New User


More progress, to the point that the build is complete sans rider (and possibly seat) which will get added when I sort through my Ork minis

I reattached the sea monster as my 5yo was very upset I'd taken it off


I then started adding a bunch more lollipop sticks, and dried up felt tip pens for guns


At this point my 5yo decided to things

1) that they're now communal property
2) they're not for orks, they're for Superzings

He is, apparently, my boss now


I started adding the rivets (well, nails as it's wood)


And a nitros fuel tank/injector, which was a cut up vape bottle and some bits from a broken robot toy


I was happy with leaving it there, but for priming.


As this is only my 2nd ever attempt at trying something like this, I'd love to know your thoughts.

Next build is going to be me trying a Mek gun, but first I'm going to take a crack at getting some paint on these. Wish me luck!


Made in gb
Nasty Nob


Dorset, England

These are great! They remind me of the Commando Elite vehicles from Small Soldiers.
   
Made in ca
Confident Halberdier


in the computer?

Great start to the project. There’s something joyous about Ork scratchbuilds, an opportunity to just go wild and slap stuff together. Keep it up!


Made in gb
Fresh-Faced New User


Kroem wrote:These are great! They remind me of the Commando Elite vehicles from Small Soldiers.


I've not watched it, but now I'm going to have to!

Thumpingbear wrote:Great start to the project. There’s something joyous about Ork scratchbuilds, an opportunity to just go wild and slap stuff together. Keep it up!


I can't believe how much fun this is. It's been on my "to do list" for about 5 years, kept putting it off.

So glad I'd decided to pull the trigger!
   
Made in gb
Fresh-Faced New User


Been busy painting away at the trike/buggy "driftwood dragster". I'm a distinctly mediocre painter at best.

I need to tone down the metal on the guns, and do the tyres. Unfortunately that has to wait till Tuesday as I need some more paints and have parenting/husband/training things getting in the way.

Ork rider will be added a bit further down the line

I tried to make it look like the paint had slowly worn off the wood. Didn't really succeed, but not terribly unhappy with the result either.


I then toned down all the metals but the guns (the guns need to wait till Tuesday), did some general tidying up and some of the green skin. The skin needs it's highlights toning down a touch in places but that'll wait till I finish everything off (tyres, guns, skin)

So far


Going to get back to working on a Mek gun tonight

   
Made in gb
Fresh-Faced New User


I've finished off the painting of the driftwood dragster and moved on to starting to build a Mek gun.

The dragster is lacking a rider, that will be sorted at some point, but I'm not in a hurry for that due to funds.

Considering that this is the first mini I've painted in 3 years, and the first time I've ever painted wood, I'm pretty happy with how this is turned out - I've never been a good painter, or even enjoyed it much, but this was surprisingly fun!


I then move on to a Mek gun and got some basic shapes down.

The front is from a broken Poundland transformer my kids once wasted some pocket money on. The gun is the top of a broken fan and a felt tip pen, it's based on a pop bottle top (hidden) and has "Yollie" stick recoil leg support things. I have no clue what the black bit is from. I think the cog is from a broken toy robot, but won't swear to it.


My 5 to then handed me a odd toaster looking thing that I think came from a kinder egg once upon a time. He declared that this was just what my "big gun" needed.

So now we have an odd toaster firing mechanism. I need to cover the wire join, but I'm thinking of ripping it off, and joining it to the main body (I have to use it, my 5yo was very proud of himself for suggesting it)


The aim is to finish building this first Mek gun by Friday. Undecided whether to move on to painting then, or build up 3 of them to batch paint at the same time.

This message was edited 2 times. Last update was at 2021/02/02 08:01:08


Made in gb
Legendary Dogfighter


Edinburgh

Keep it up, the paint scheme really pulls it together so I wanna see more!

   
Made in gb
Rampaging Reaver Titan Princeps


Earlobe deep in doo doo

I'd suggest googling up Paperhammer and taking a look at some of the kits available. During a period of being out of work I did something similar. Rawl Plugs were my friend and favourite poison.

"But me no buts! Our comrades get hurt. Our friends die. Falkenburg is a knight who swore an oath to serve the church and to defend the weak. He'd be the first to tell you to stop puling and start planning. Because what we are doing-at risk to ourselves-is what we have sworn to do. The West relies on us. It is a risk we take with pride. It is an oath we honour. Even when some soft southern burgher mutters about us, we know the reason he sleeps soft and comfortable, why his wife is able to complain about the price of cabbages as her most serious problem and why his children dare to throw dung and yell "Knot" when we pass. It's because we are what we are. For all our faults we stand for law and light.
Von Gherens This Rough Magic Lackey, Flint & Freer
Mekagorkalicious -Monkeytroll
2017 Model Count-71


Forum Index » Dakka P&M Blogs
Go to: