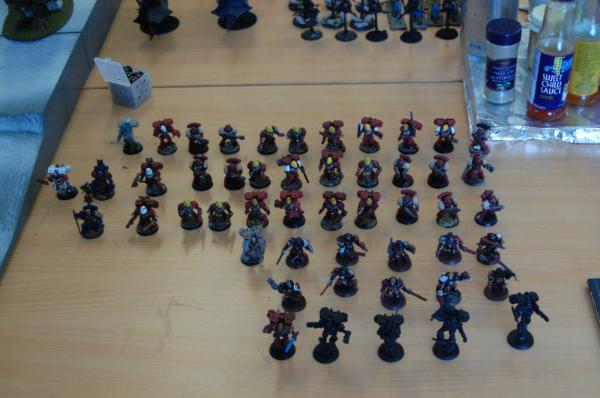
2000 point Blood Angels vs. Dark Eldar
Blood Angels Librarian with Shield of Sanguinius, Blood Lance and Jump Pack
Librarian with Shield of Sanguinius, Blood Lance and Jump Pack
Vanguard Veterans (Shield1) with Sergeant with Power Fist/Infernus Pistol, 1 Vet with Infernus Pistol and 3 Vets with Storm Shields. All with Jump Packs.
Vanguard Veterans (Shield2) with Sergeant with Power Fist/Infernus Pistol, 1 Vet with Infernus Pistol and 3 Vets with Storm Shields. All with Jump Packs.
Vanguard Veterans (Power weapons) with Sergeant with Power Fist/Infernus Pistol, 1 Vet with Power Weapon/Infernus Pistol, 3 Vets with Power Weapons. All with Jump Packs.
Assault Marine Squad (Flamers) with Sergeant with Power Fist/Infernus Pistol, 2 Marines with Flamers, 7 Marines with Bolt Pistol/Chainsword.
Assault Marine Squad (Melta1) With Sergeant with Power Fist/Hand Flamer, 2 Marines with Melta Guns, 7 Marines with Bolt Pistol/Chainsword.
Assault Marine Squad (Melta1) With Sergeant with Power Fist/Hand Flamer, 2 Marines with Melta Guns, 7 Marines with Bolt Pistol/Chainsword.
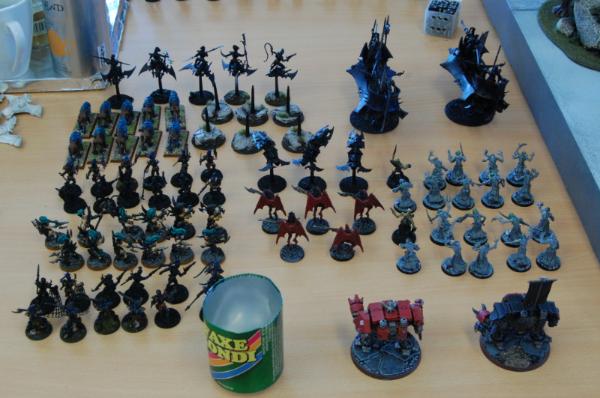
Dark Eldar Haemonculus with Web Way Portal
Haemonculus with Web Way Portal
Wracks (9) with a Liquifier Gun and a Raider Transport
Wracks (9) with a Liquifier Gun and a Raider Transport
Wyches (12) with a Hekatrix with Blast Pistol/Agoniser, 2 Hydra Gauntlets
Wyches (12) with a Hekatrix with Blast Pistol/Agoniser, 2 Hydra Gauntlets
Wyches (12) with a Hekatrix with Blast Pistol/Agoniser, 2 Hydra Gauntlets
Beastmasters with 5 Beastmasters (one with Agoniser), 10 Khymeras and 6 Razorwing Flocks.
Scourges with a Solarite with Blast Pistol/Venom Blade, 2 with Heat Lances, 2 with Sharcarbines
Reavers with 1 Heat Lance, 1 Cluster Caltrops, 1 “plain”
Cronos Parasite Engine with Spirit Probe and Spirit Vortex (Proxied by a sode can, never came into play)
Talos Pain Engine with
TL Heat Lance, Chain-Flails and an additional close combat weapon (proxied by Dreadnought).
Talos Pain Engine with
TL Heat Lance, Chain-Flails and an additional close combat weapon (proxied by Dreadnought).
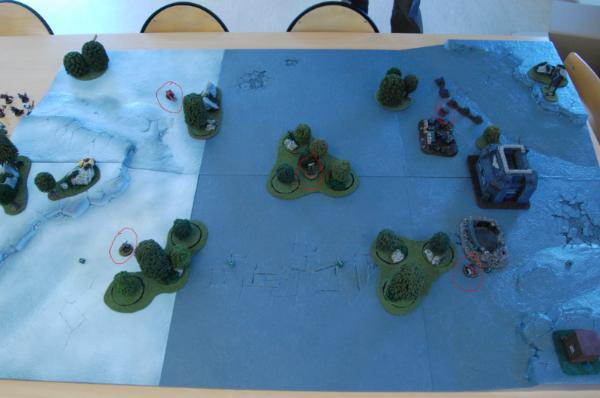
Mission was supposed to have been 5 X 5 proposed by the infamous Stelek, but as we both forgot to assign the Kill Points we simply went with the 5 objectives Marked in red.
Blood Angels rolls for Red Thirst and no units are afflicted.
Dark Eldar rolls for Combat Drugs and gets a free Pain Token.
We made a mistake concerning the Heroic Intervention rule, but just ignore that. You can consider it a one-time house-rule

.
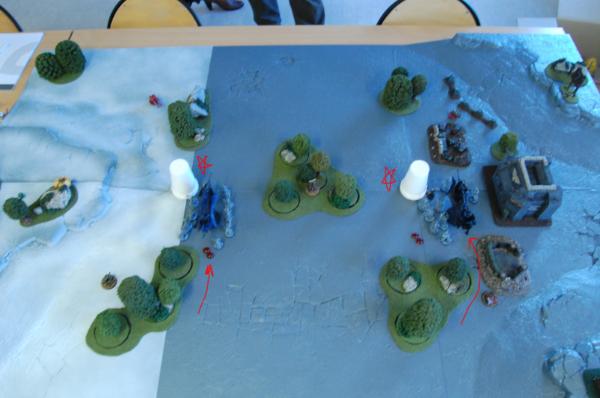
Deployment Blood Angels wins the roll to go first and chooses to go second.
Dark Eldar deploys the two Wrack squads in their Raiders with a Haemonculus attached to each.
Blood Angels keeps entire army in Reserve to Deepstrike.
 DE Turn 1
 Raiders moves up, Wrack squads disembark and the Haemonculi throw down their Web Way Portal centrally and equal distance apart.
 BA Turn 1
 Nothing as everything is in Reserve.
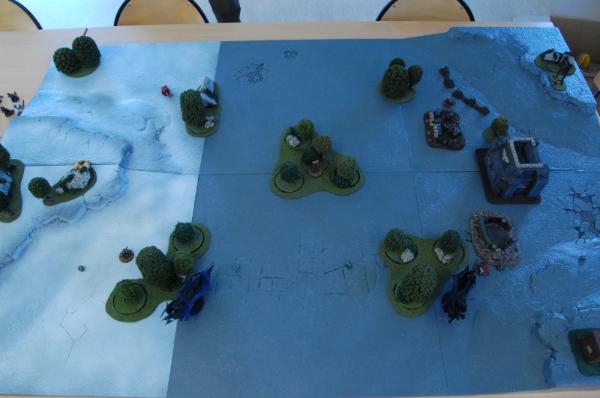
DE Turn 2 Wych squad 1, Wych squad 3, Scourges, Reavers and a Talos comes in from Reserves.
In order to contest more ground and make Deepstriking more difficult, everybody spreads out a bit.
Scourges moves to the left, Reavers moves way back on the left, Both the Wych squads and the Wrack squads moves into cover.
Talos just moves a bit. Raiders moves out to annoy.
 BA Turn 2
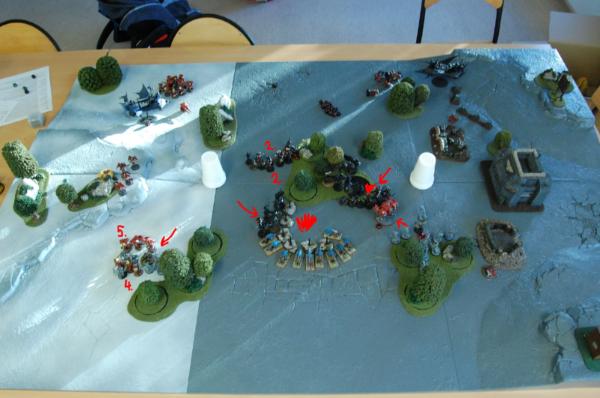
 With rerolls from Decent of Angels every single unit Deepstrikes in from Reserve.
Assault Squad (Flamers) with an attached Sanguinary Priest drop in the south-west to threaten the Wrack squad there. They scatter a bit (4”) but narrowly avoid hitting the nearby terrain.
Vanguard Squad (Shield1) with an attached Sanguinary Priest drops into the center of the
DE table half to assault the Talos and scatters a miniscule amount (1”).
Vanguard Squad (Power Weapons) drops in the center right. Unfortunately they scatter right on top of the left Web Way Portal and are destroyed in the ensuing Mishap.
Vanguard Squad (Shield2) drops in the center left to go for the nearby Wyches and scatters 2”.
Assault Squad (Melta1) with an attached Librarian drops in a bit back in the
BA deployment zone to take out the Raider hiding there.
Assault Squad (Melta2) with both a Sanguinary Pries and a Librarian attached drops in the center of the
DE deployment zone (behind the Vanguard Squad already dropped there) to lend support wherever it is needed.
Shooting sees the Librarian of Assault Squad (Melta1) roll a “1” for the armour penetration on the Raider and yet another “1” when trying to wound the two Scourges he also hits. Fortunately for him his Melta Gun-carrying squad mates does slightly better and Wrecks the Raider.
Vanguard Squad (Shield2) guns down a single Wych before preparing for assault.
Assault Squad (Melta2) fails to use the Blood Lance and the Melta Guns to wound the Talos.
Vanguard Squad (Shield1) put a single wound on the very same Talos with an Infernus Pistol before leaping into combat.
Assault Squad (Flamers) shoots at the Wrack squad in cover nearby and kills 3.
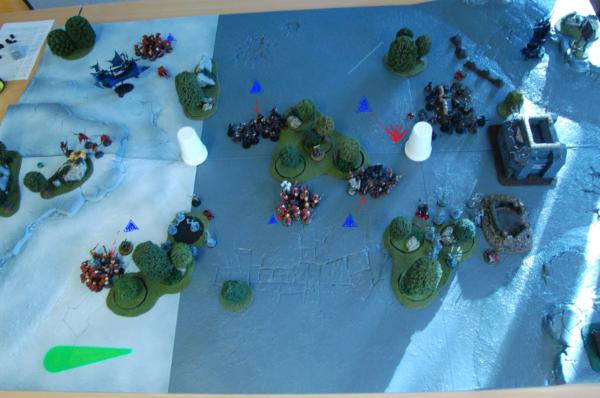
Vanguard Squad (Shield2) assaults the Wyches they shot at. Combat is a draw with a single casualty on each side.
Vanguard Squad (Shield1) assaults the Talos. They lose two members, but the Powerfist ends up killing the Talos. They consolidate into the nearby wood previously occupied by the Wyches.
 DE Turn 3
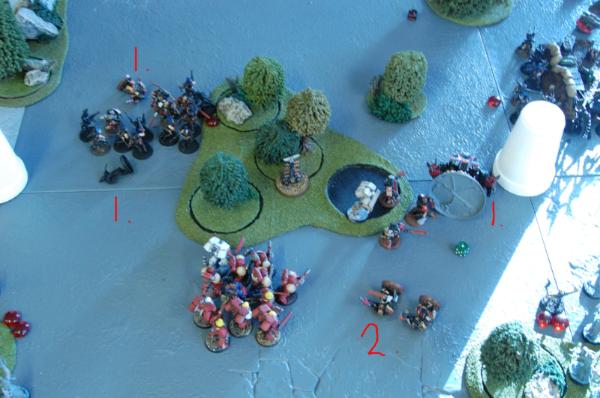
 The Beast Master unit and the other Talos comes in from Reserves.
The Beast Masters moves towards Assault Squad (Melta2) with the Priest and the Librarian using the left Web Way Portal.
The Talos use the right Web Way Portal and moves in on the remains of Vanguard Squad (Shield1) to avenge his fallen brother.
The right Wych Squad also moves back towards the Vanguard Squad in case the Talos fails to make an impression.
The right Wracks Squad, not wanting to be left out, moves up a bit to try out their Liquifier gun on the, now rather worried-looking, Vanguard Squad.
To add insult to injury the Reavers decides to Turbo Boost over the same Vanguard Squad and manages to kill the Sanguinary Priest.
The left Wracks Squad moves in on Assault Squad (Flamers) to give them a taste of their own medicine Wracks Style.
The Scourges moves back a bit to support the left Wracks Squad with some much needed firepower.
Shooting is pretty uneventful.
Liquifier Guns, rolling “6” and “5” for
AP, kills 1 model each from their respective targets and the Scourges Heatlances a single model from the Assault Squad facing the left Wracks Squad.
The Assault Phase is decisive though.
The remaining three members of Vanguard Squad (Shield1) pays for killing the Talos and are cut down by the Wyches before they can react.
The second Wych Squad continues their fight with the remaining Vanguard Squad. The combat is another draw with two kills per side, leaving 2 Vanguard and 8 Wyches still in combat.
The left Wracks Squad charges Assault Squad (Flamers) and that combat is also a draw with three casualties per side, leaving 7 Marines and 5 Wracks.
Extreme results on the dice rolls means the Beast Master unit completely vaporizes Assault Squad (Melta2) including the Priest and the Librarian (36 Razorwing Flock attacks, 21 hits, 7 Rending “6”s on the to-wound roll. Gah!).
 BA Turn 3 BA
 concedes the game as he is left with one undamaged Assault Squad (with Librarian) and two depleted units locked in close combat about to be destroyed facing the entire Dark Eldar army.
On a whim we decided to keep track of the number of die rolls made throughout the game. The result was;
Dark Eldar: 477
Blood Angels: 200
Take from that what you will.


 18.000
  3.500
3.500  8.200
8.200  3.300
3.300  2.400
2.400  3.100
3.100  5.500
5.500  2.500
2.500  3.200
3.200  3.000
3.000


