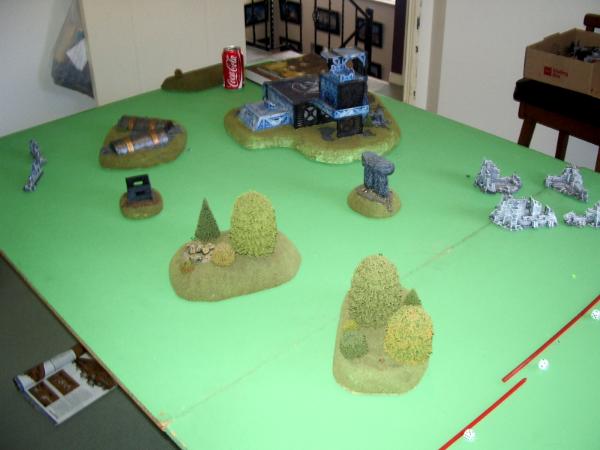
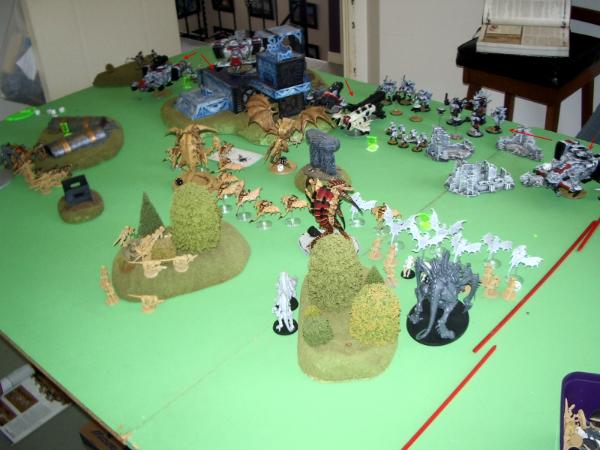
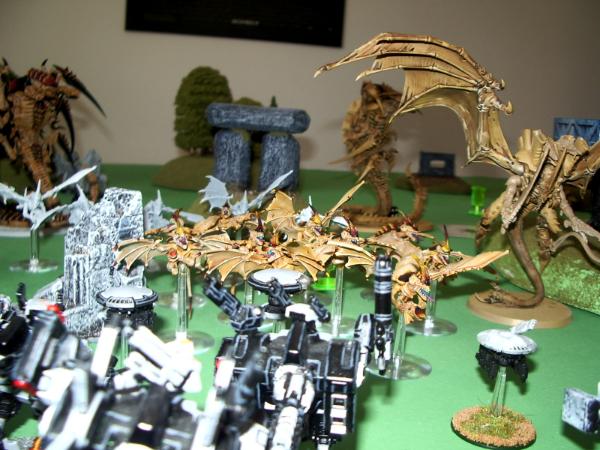
Switch Theme:

1,500 Tyranids vs Tau - Scouring (Lots of pics) Complete  [RSS] Share on facebook Share on Twitter Submit to Reddit
»
Poll
Who do you think will win?
Tyranids: The Tau will be overwhelmed by the swarm - no way they'll survive 50% [ 15 ]
Tau: Far too many guns, the Nids will be mowed down in droves 37% [ 11 ]
Too close to call: Could go either way 13% [ 4 ]
Total Votes : 30
Author Message
Advert


Forum adverts like this one are shown to any user who is not logged in. Join us by filling out a tiny 3 field form and you will get your own, free, dakka user account which gives a good range of benefits to you:
  • No adverts like this in the forums anymore.
  • Times and dates in your local timezone.
  • Full tracking of what you have read so you can skip to your first unread post, easily see what has changed since you last logged in, and easily see what is new at a glance.
  • Email notifications for threads you want to watch closely.
  • Being a part of the oldest wargaming community on the net.
If you are already a member then feel free to login now.


Made in au
Regular Dakkanaut


Australia

Our first larger game (over 1k) using the new rules and the new FAQ.

Tsa Tetsa glided towards the ground besides the firebase, his jump jets hissing loudly as they controlled his decent. Looking around him, it was easy to see what had occurred here. An alien infestation had wiped out the Tau guarding this outpost – neutralizing its effectiveness.

Tsa Tetsa turned to his squad leaders awaiting his orders, “Scour the area, remove any trace of this infestation!”

As the Tau fanned out to comb the area, light was just starting to break on the horizon. And that’s when Tsa Tetsa saw them through his Blacksun Filters – Tyranids. Lots of Tyranids. Hoping they hadn’t noticed them yet, Tsa Tetsa gave careful orders to his squad leaders over the comms relays to get into position ready for the attack.


Mission - Scouring
Deployment - Standard (Tau win roll off and choose to deploy first)

Tau Force (approximately)
Commander (clyclonic blaster, missile pod), 3 Bodyguard (plasma rifles and missile pods), 1 Shield drone and 1 gun drone
3 Crisis Suits (plasma rifles and missile pods), 1 shield drone, 1 gun drone
10 Firewarriors
10 Firewarriors
10 Firewarriors in a devil fish
Hammerhead – Ion Cannon
Hammerhead – Ion cannon
3 Pirannas
10 Kroot

Tyranid Swarm
Flyrant (2 twinlinked devourers)
2 Hive Guard
2 Hive Guard
Troop Tervigon (Scything Talons, Catalyst, Toxin and Adrenal Glands)
Troop Tervigon (Catalyst, Toxin and Adrenal Glands)
10 Termagants
10 Termagants
18 Gargoyles (Toxin, Adrenal Glands)
2 Trygons

The Board


Automatically Appended Next Post:
Deployment

Tau - Deployment from Right to Left:
Two Tau Hammerheads and ten Firewarriors overlooking a '3' value objective, with the Kroot infiltrating out in front.
Three Piranhas hiding behind the fire base, with three crisis suits.
Another 10 Firewarriors overlooking the '4' value objective.
The body guard and Devil Fish off screen in the back left corner.

Nids - Deployment from Right to Left:
Gants, Hive Guard and Tervigon overlooking a '2' value objective
A long screen of gargoyles running from middle through to the far left
Trygon, Flyrant taking cover behind the trees with Gants within the trees over the '3' value objective
HiveGuard, Trygon and 2nd Tervy taking cover behind the far left clump of trees

Tau start the game in the lead, 7 VP to 5.


Automatically Appended Next Post:
Warlord Traits

Tau - Target Priority
Nids - Immovable Object (Flyrant)

Psychic Powers

I decided to roll on the biomancy chart for all my psychic powers:

Flyrant - Iron Arm, Endurance
Tervy 1 - Iron Arm, Endurance
Tervy 2 - Haemorage, Enfeeble

This message was edited 6 times. Last update was at 2012/09/21 06:08:35


--Brute force always works. The only time it doesn't is when you don't use enough--
Hive Fleet Inferno - Dakka P&M Blog | Black Legion Blog
Hive Fleet Inferno goes to Ball And Chain Tourney 
   
Made in au
Regular Dakkanaut


Australia

Unfortunately for the Tau, the darkness was not enough to conceal them completely from the Tyranids. Sensing life forms up ahead, the large Trygon let out a terrible roar, as the Tyranids seized the initiative and charged forwards towards the Tau gun lines.


Tyranid Turn 1

Planning on overwhelming my opponent with targets, I decided to surge forwards as quickly as possible. My Flyrant cast Iron Arm on himself, increasing his strength and toughness to a huge 9! He then proceeded to Swoop straight towards the enemy, hopefully distracting their firing away from the rest of my army.

The gargoyle screen also flew up as fast as possible, under the protection of Endurance from the Tervigon. My beasts then used them to cover their advance, My Trygons running for a total of 11 and 12 inches!

The right hand tervigon spawned an additional 10 gants without burning out. The right hand one was less lucky, only spawning 6 and rolling doubles.

Shooting saw little in range, the Hive Guard on the left loosing their impaler cannons onto the Kroot to slay three, whilst the Flyrant blasted down three Fire Warriors in front of him with his Brainleech Devourers.

The Kroot promptly fled for their lives...


but the Fire Warriors held firm.

The Tau were now faced with some difficult target priority decisions – to ignore the Flyrant in their midst would be suicide, but to expend all their firepower in trying to bring it down could be just as bad...


Automatically Appended Next Post:
Tsa Tetsa muttered a curse as he saw the Tyranid swarm surge forwards before his squads were ready. He really wanted to get jump on these aliens from a distance. His annoyance quickly turned to horror as a large winged beast swooped down right in front of his fire warriors, felling three of them with its biological weaponry.

Tsa Tetsa yelled over the comms, “Bring that beast down, now!”


Tau Turn 1
There wasn’t much movement on the Tau front, the Kroot rallied, whilst the rest of the army positioned itself to take down the winged menace that was the Flyrant. only one squad of Fire Warriors, the Kroot and one of the Hammerheads were not in position to target the fearsome creature.

The rest of the army opened up on the Flyrant in earnest. The Firewarriors managed to score some hits, but it remained in the air. Tsa Tetsa and his body guard opened fire, but failed to score a single hit! Another squad of fire warriors (deployed from the devil fish) opened up scoring a few hits, but again it stayed in the air. Finally, the crisis suits managed to bring the beast crashing to the ground, causing a wound in the process.

The Piranhas and one of the Hammerheads then fired into the grounded beast, hitting it several times but failing to breach its thick Toughness (enhanced to Toughness 9 with Iron Arm), leaving it with three wounds.

The other Hammerhead (who could not see the Flyrant) fared much better, targeting the nearest Trygon and quickly whittling him down to 2 wounds in a fearsome display of what the Tau weaponry is capable of!


So Turn 1 ended still with Tau on 7, and the Tyranids on 5. Not much damage had been inflicted thus far, but now the Tyranids were in position to pounce!

Stay tuned for Turn 2

This message was edited 3 times. Last update was at 2012/09/20 08:20:59


--Brute force always works. The only time it doesn't is when you don't use enough--
Hive Fleet Inferno - Dakka P&M Blog | Black Legion Blog
Hive Fleet Inferno goes to Ball And Chain Tourney 
   
Made in au
Regular Dakkanaut


Australia

Tyranids Turn 2
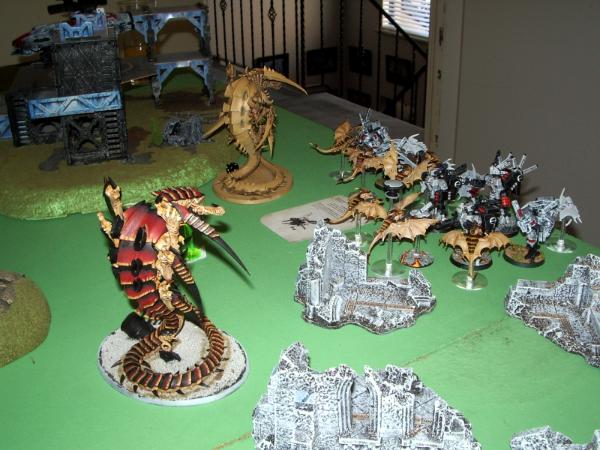
Angry about being shot out of the sky, the enraged Flyrant (this time enhancing himself with Endurance) Glided over in front of the Piranhas and prepared to unleash death. Meanwhile, the gargoyles swarmed towards the central fire warrior unit, whilst the rest of the swarm continued their steady advance, the right hand Tervigon casting Endurance on the wounded Trygon. He also spawned 7 gants and burnt out.

Firing started with a bang, with the Hive Guard on the right flank exploding the Devil Fish in front of them. The Hive Guard on the left flank had modest success, destroying the smart missile system on the central Hammerhead and bringing it down to 1 Hull point.

The Tervigon and Gants on the right peppered the right hand Fire Warriors with Cluster Spines and Flesh borers, slaying four of their number.The Gants and Tervigon on the left flank did not fair so well, failing to kill any of the Kroot.

The Flyrant let rip with his Devourers into the Piranhas, destroying 1 and removing a hull point from the second.

The Gargoyles and Trygons fired into the central Fire Warrior unit, but only managed to take down a single warrior.

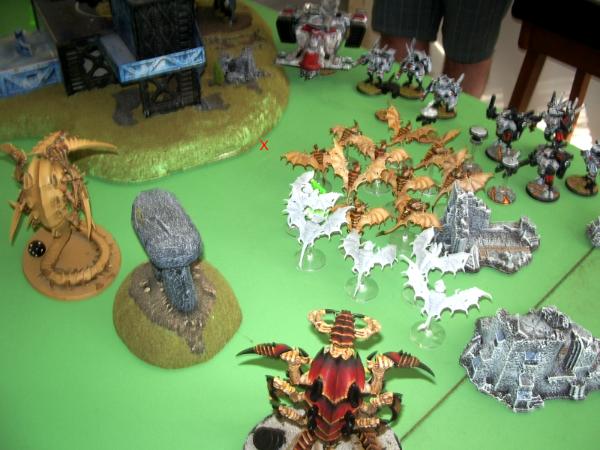
The Assault began in earnest, with the Flyrant charging into the Pirahnas and the gargoyles charging the Firewarriors. Overwatch saw two of the winged beasts cut down, but they still made their charge and set about wiping out the whole squad for no loss.

The Flyrant Smashed his way through both of the Pirahnas, tossing them aside with contempt before bellowing loudly at the Tau commander.

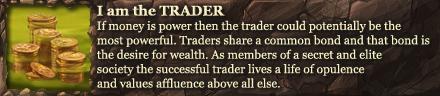
The Flyrant and Gargoyle Assault


End of Tyranid Turn 2
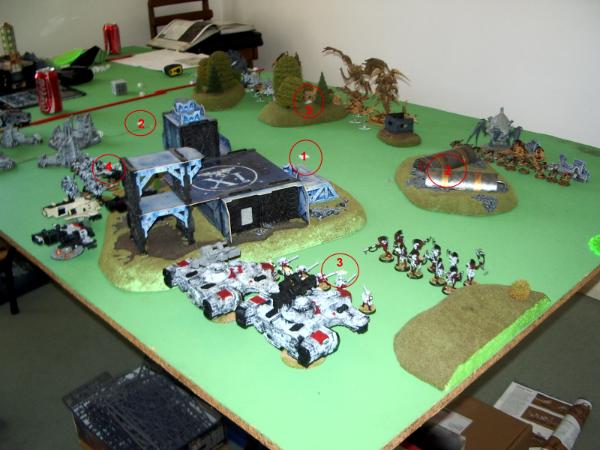

Tau Turn 2
Tsa Tetsa watched with horror, as the Tau Piranhas were tossed aside by the Flyrant like toys. To his left, the Devil Fish exploded and he could see to the right that one of the Hammerheads was taking serious damage as well.

Not only this, but he could see the two Trygons looming just behind the gargoyles. Although the one on the left looked like it was far enough away to ignore for now, the wounded one to the right was getting dangerously close. He pointed his gun in the direction of the Flyrant, “Take that thing down, we won’t get a second chance at this!”


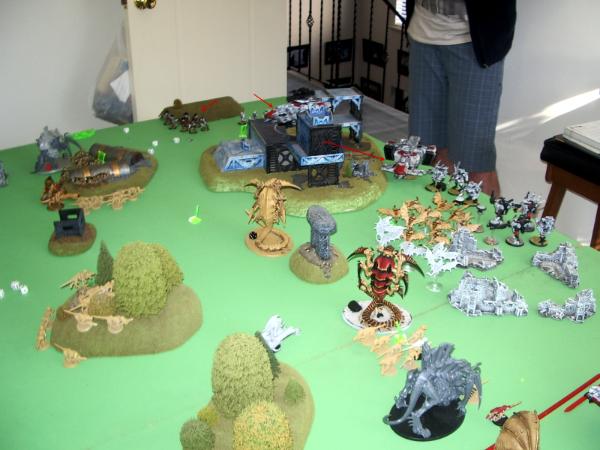
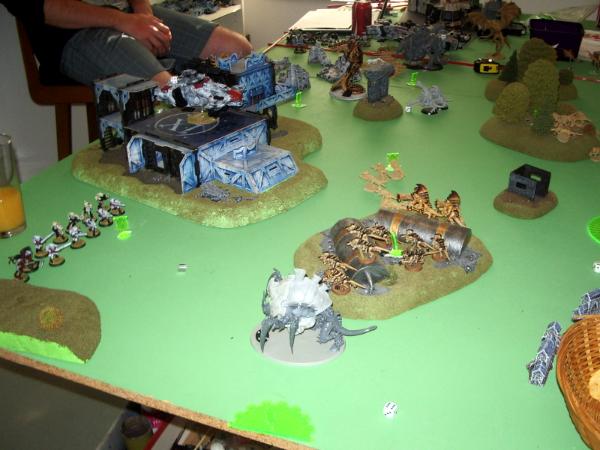
Their wasn’t a lot of movement on the Tau front. In the centre, the two groups of suits positioned themselves for maximum fire power onto the Flyrant, whilst the Hammer heads settled in to both draw lines on the FLyrant and wounded Trygon.

Firing saw both the crisis suit squads unleash the full potential of their fire power into the Flyrant. Being easier to hit and well within rapid fire range of both units saw the Flyrant cut down in a withering hail of plasma and missiles.


The Firewarriors on the Tau left flank fired into the gants, cutting down 7 of their number with their rapid fire weaponry, whilst the Firewarriors on the opposite flank managed to wound the Tervigon.

The two Hammerheads then fired into the wounded Trygon. The first must have had its targeting system knocked out by the Hive Guard, as it failed to hit at all with its ion cannon. The second only fared marginally better, taking the Trygon down to a single wound.

End of Tau Turn 2


With the gargoyles largely unscathed, and the Trygons closing in, things were looking grim for the Tau.

Victory points at end of Turn 2
Tau

Objectives - 3
Slay the Warlord – 1
Total – 4

Tyranids
Objectives – 7
First Blood – 1
Line Breaker – 1
Total - 9


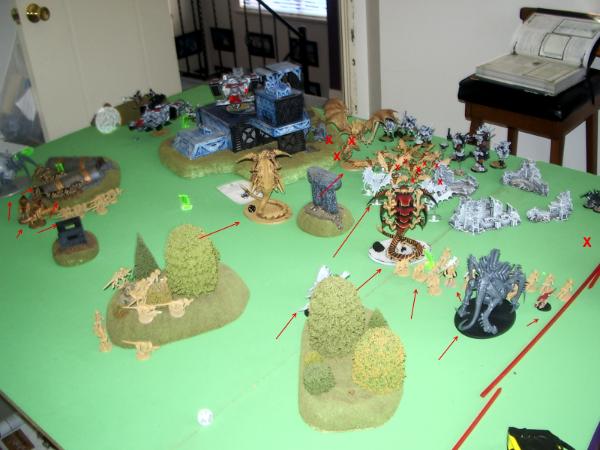
Automatically Appended Next Post:
Tyranids Turn 3
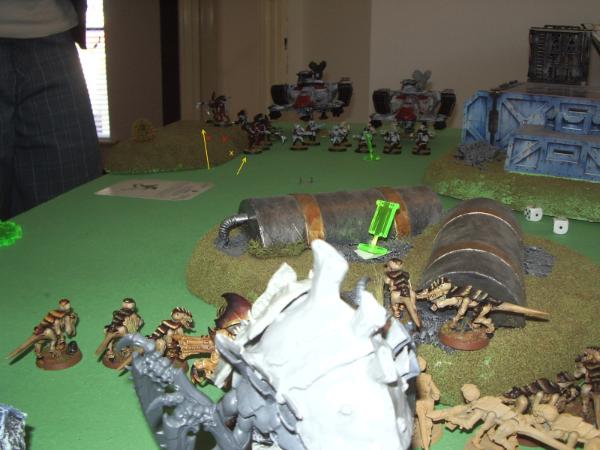
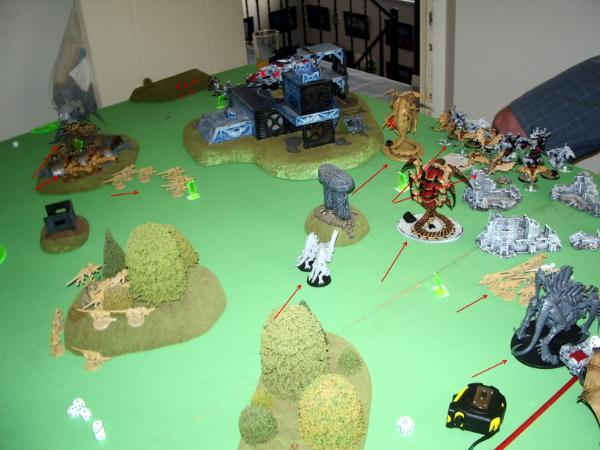
With the Crisis suits continuing to provide a hail of firepower for the Tau, it was time to tie them up until the bigger bugs could come in and crush them.

The Gargoyles (enhanced with Endurance from the Tervigon) swarmed in to engage both Crisis suit units. Meanwhile, the Hive Guard continued to Tank Hunt whilst the Tervigon and Gants advanced on both flanks. The Trygons also moved up, eager to get into the action.

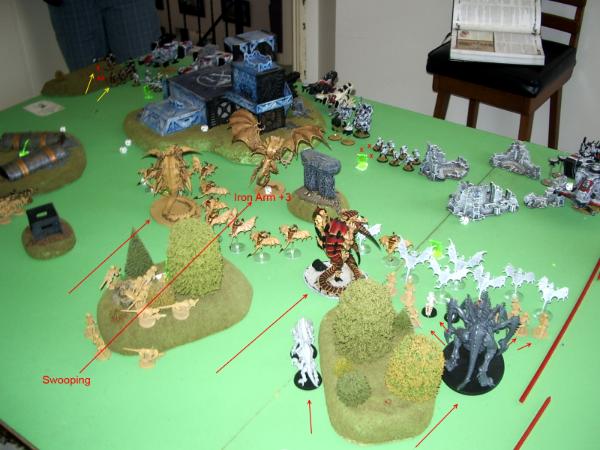
Firing saw the Left hand Tervigon and gants take down 5 Kroot in a blast of cluster spines and flesh borers, sending the last two fleeing for their lives. The Tervigon and gants on the other flank had similar success, taking down the last of the Firewarriors on that flank.

The Gargoyles and one Trygon fired into the suits squads, taking down a couple of drones, whilst the left hand Hive Guard Shook and Stunned the Hammerhead on the landing pad (reducing it to 1 hull point as well. The right hand Hive Guard had less success, failing to penetrate to hull of the damaged Hammerhead.

Assault saw the left hand Trygon charge into the damaged Hammerhead, flipping it easily with its scything talons. The gargoyles swarmed over both the crisis suit squads, who only managed to down 1 of the winged beasts in overwatch fire thanks to their enhanced Endurance. The gargoyles managed to take down a single Crisis suit, for the loss of two gargoyles, locking both squads in combat.


With the odds increasingly against them, Tsa Tetsa gave the single for all out retreat.

End of Game - Tyranid Right Flank


End of Game - Tyranid Left Flank


Tau Concede defeat at end of Tyranid Turn 3

Victory Points
Tau

Objectives – 3
Slay the Warlord – 1
Total – 4

Tyranids
Objectives – 8
First Blood – 1
Line Breaker – 1
Total - 10

Tyranid Victory

Hope you enjoyed this Battle Report – please leave comments/suggestions and criticisms.
End of game review to come...

This message was edited 2 times. Last update was at 2012/09/21 04:49:29


--Brute force always works. The only time it doesn't is when you don't use enough--
Hive Fleet Inferno - Dakka P&M Blog | Black Legion Blog
Hive Fleet Inferno goes to Ball And Chain Tourney 
   
Made in hk
Outraged Witness


Hong Kong

Good rep ... Nice paint jobs on all the figures. What sept is the Tau playing as ? I can't quite put my finger on it...

"My Lord, what fools these mortals be!"
~ Puck the Fairy King
From Shakespeare's
Midsummer's Night's Dream
 
   
Made in au
Regular Dakkanaut


Australia

@ Valgaurd: Thanks! - I'm not sure what Sept it is, I'll have to ask him

On to after thoughts - well what can I say?

I really like the Nids in 6th. I've only played a few games with them in 6th so far, but I see big things in their future.

Swoop on the Flyrant has made it a very competitive choice. Getting Iron hand just makes him absolutely nasty! (especially when I could have given him FnP from my Tervy as well!)

I can't really say much about the rest of my army, the Hive Guard were just as good as always (though I don't need to rely on them as much anymore with HtH being a valid way of taking out armour now), and My Tervies were great in support of my swarm. Despite many complaints that Stealers were nerfed, I for one am looking forward to adding these beasties to may army to put even more pressure on my enemy early on.

I'll have to play more before I come to any strong conclusions - but I think the Nids are plenty threatening (and I believe their Fast Attack section got a big boost!).

Hope you all enjoyed the report - please post your feedback as I will be putting up more reports in the future and would love to give you what you want

--Brute force always works. The only time it doesn't is when you don't use enough--
Hive Fleet Inferno - Dakka P&M Blog | Black Legion Blog
Hive Fleet Inferno goes to Ball And Chain Tourney 
   
 
Forum Index » 40K Battle Reports
Go to: