Done using Terminator Powerfists.
I hope this helps someone as It has helped me quite a bit...
I love Powerfists. They are just Awesome!!!
The problem is they are sometimes difficult to get a hold of as I find they are quite pricey in bits stores and kits...
A while ago I found that I had plenty of Terminator Powerfists and no Terminators to put them on.
I also had plenty of Power Armour guys that needed some Powerfists but the problem was that I had no Power Armour Powerfists.


Then a thought occurred to me.

I had to try it out.

I don't know if the Terminator kit is the same these days but I found after building my Termies I still had a fair few Powerfists left over, especially since I used Chainfists in the squad.
So this just seemed like the smart thing to do.
This guy was the first trial run I had for this Method.
So without further ado I shall end my ramblings now and write the Tutorial.
Things You will Need!
- Terminator Powerfist
- Power Armour arm (I used the one of your averave bolter pair arms)
You could use any arm with a bit of playing around I suppose but these work best!
Obviously both arms will need to be from the same side...
- Clippers
- Sharp Hobby Knife (with New Blades if possible)
- Plastic glue
- Green Stuff
- Sculpting tools
And if you're a clumsy person like me you'll need...
- Copper wire (thin)
- A vice
- Super Glue
I'll explain later...

I apologise in advance for the somewhat crappy photos my camera is broken and I had to use my phone.
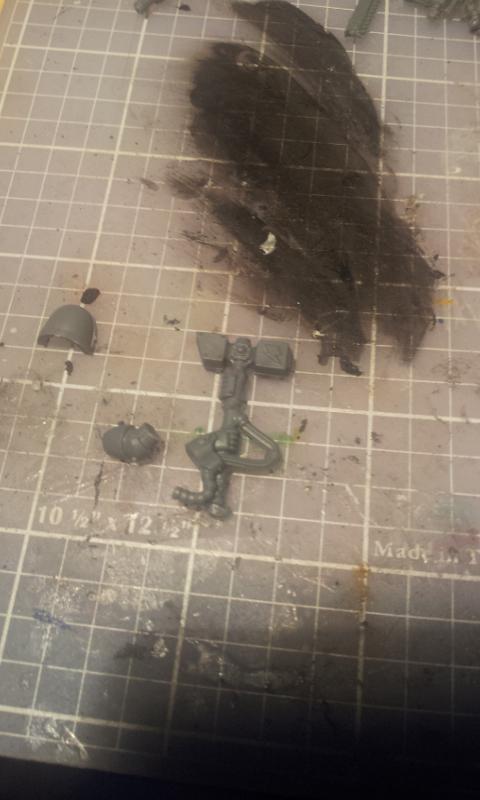
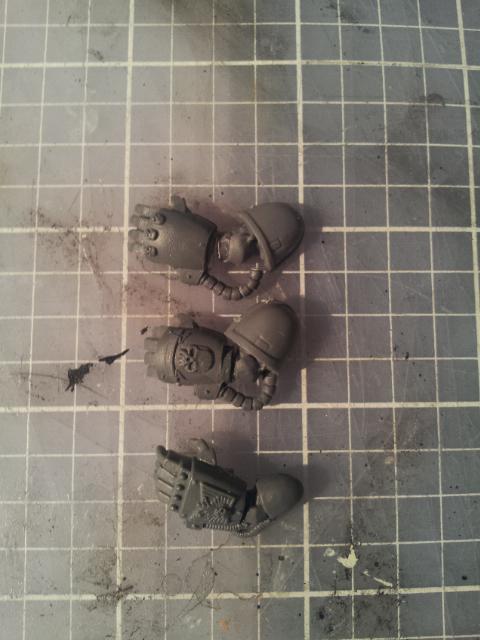
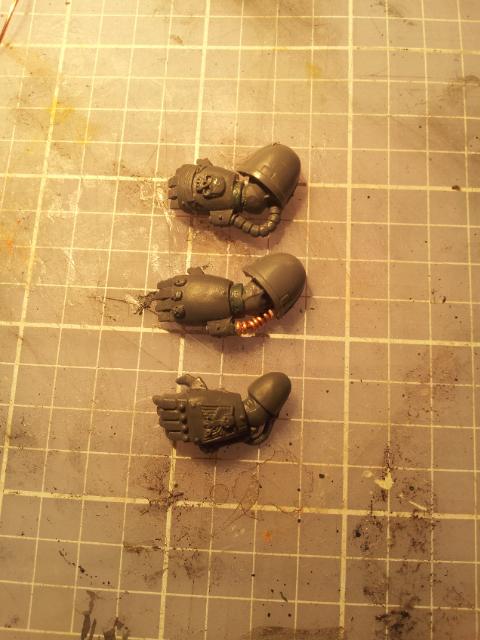
 Step One
Cutting
Step One
Cutting
Cut the
PA arm and the Termi one at the marks indicated.
See!! When you fit it together it already looks like a Powerfist.
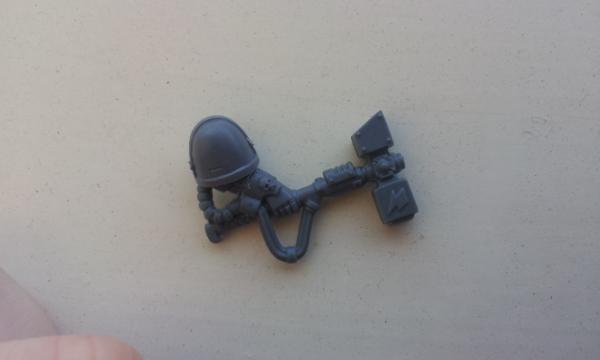
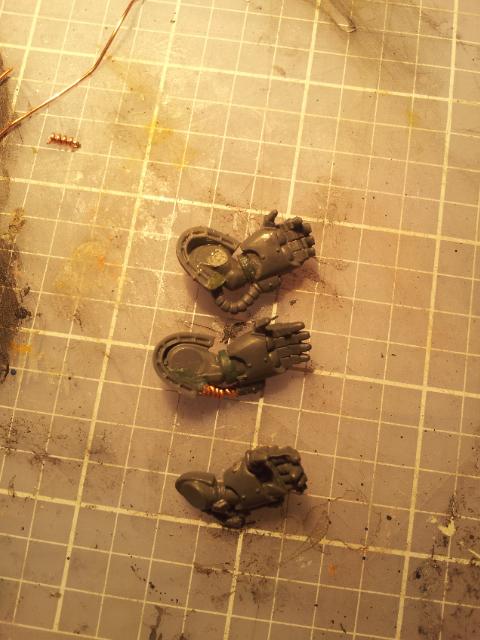
 Step Two
Gluing
Step Two
Gluing
Glue it together
and wait for it to dry You'll want it to stay in place during the Green Stuff phase... Don't worry about the Green stuff just yet..
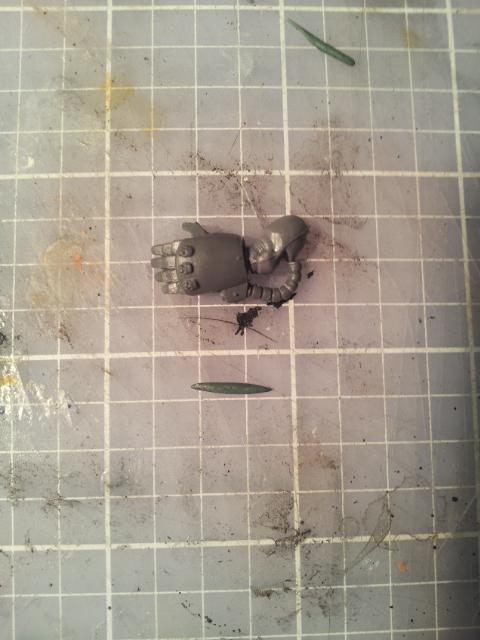
This does take a bit of fiddling around.
Also depending on what arms you use and what angles you glue them at, different poses are possible.
Sometimes it just doesn't fit because the power cable thingy keeps getting in the way.
You could cut it off and use a similar looking, easier to work with and more flexible replacement (which is what I had to do later).
Although this is not necessary and sometimes does not look as good.... as was in my case.
But if you do use a more flexible replacement more options are possible.
Step Three
Green Stuffing (sculpting)
Mix and roll out A Green Stuff Sausage about this size... No, this is not the same picture as the last. I don't know what you are talking about...


Now wrap it around the join between the arm and the fist and smooth it out like so.
Sculpt a kind of clasp? (I don't know what else to call it) at the end of the fist...
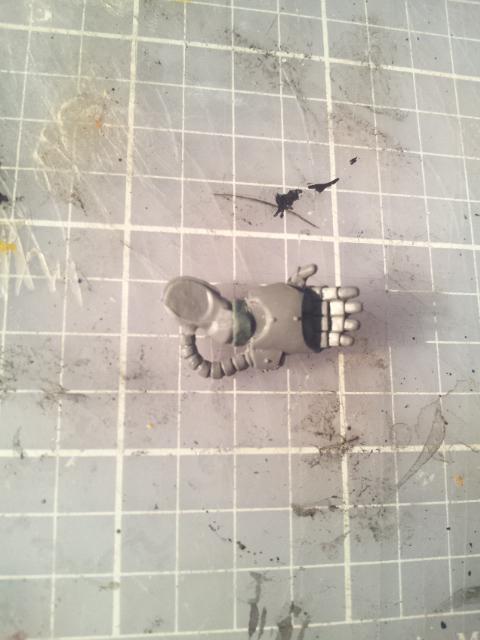
Not perfect yet??? Mine isn't in the above pictures.
Wait for about 10 mins or so depends on the type of
GS (or whatever else you are using) and also the ratio really, as It is easier to sculpt when slightly less pliant.
To make sure your tool doesn't stick to the
GS and to ensure smooth curves use some kind of lubricant.
I always rub my tool at the base of my hairline where there is natural oil that works really well.
Just make sure everything is level and straight edged...
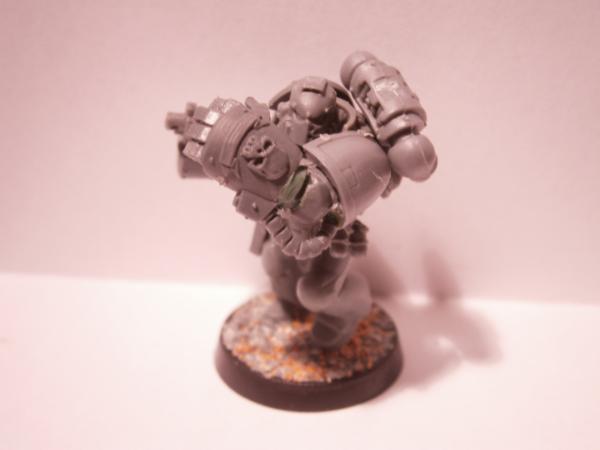
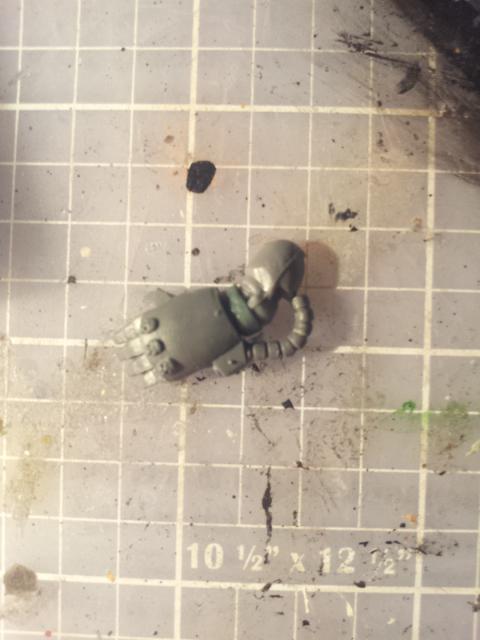
Finished Result
I have cleaned up the
GS work in this pic and because I fiddled around with it too much the power cable thingy snapped.
So....
What I did was...
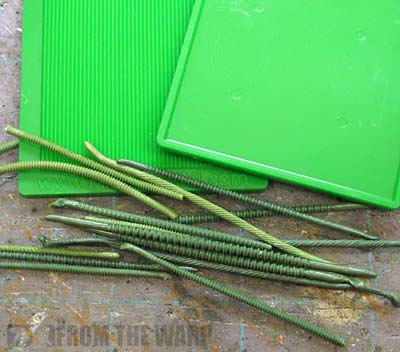
I wrapped a copper cable around another one using a vice to hold it in place.
This made a suitable looking replacement.
Better replacements are out there; like that tool that helps you turn
GS into cables and a flexible cable that some Online store sells. (can't remember just yet).
Then I glued it in with superglue and fixed it up with
GS.
In hindsight I should have made it longer as it looks a bit short... oh well.
Just look at my first fist instead. It's much better...
Here is the finished product pictured with a standard Powerfist and the first one I did before, which it much better because everything went to plan then.

As I said before Many other options and posed are possible but I hope this gives you a rough idea which you can improve on.
This can also be done with Chaos parts and for Lightning Claws (Very useful if you have built some
SS TH Termies).
You could also use
PA Fists for
IG with this method with a bit of fiddling around.
I hope this helps someone,
Thanks for reading!
Sorry, I can't be bothered proofreading more than once. I hope this is even somewhat understandable...
Hopefully the pictures do most of the explaining.
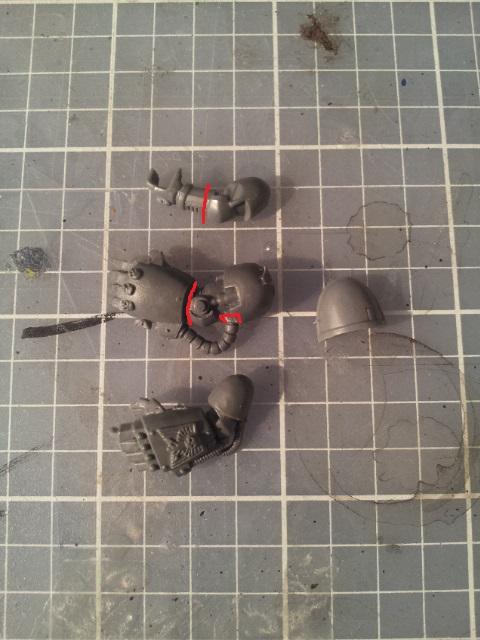
Those of you with a keen eye will notice I swapped a bit in between stages... kudos to you if you spotted it!
a mould line gives it away...


 "Whilst we stand, we fight. Whilst we fight, we prevail. Nothing shall stay our wrath"
  Guilliman and the Ultramarines are like Manchester United, everyone hates them because they are so awesome!
 750
750  875 My p&m blog where there are space marines


 Iron warriors - 6500 pts WIP
 necrons 1700 pts WIP
 Dark Eldar - Getting Started