
- by Iain Wilson
Anyone who scratchbuilds terrain knows that the best part of the process is finding new things to turn into terrain! I recently wound up with a whole box full of black hot glue sticks, and had been looking for a good project to use some of them up. Then my wife came home with a bag of seed pods she had collected from a tree she saw somewhere, and an idea was born. Read on to see how these alien ... er... plants? Yes, that'll do... came to life!
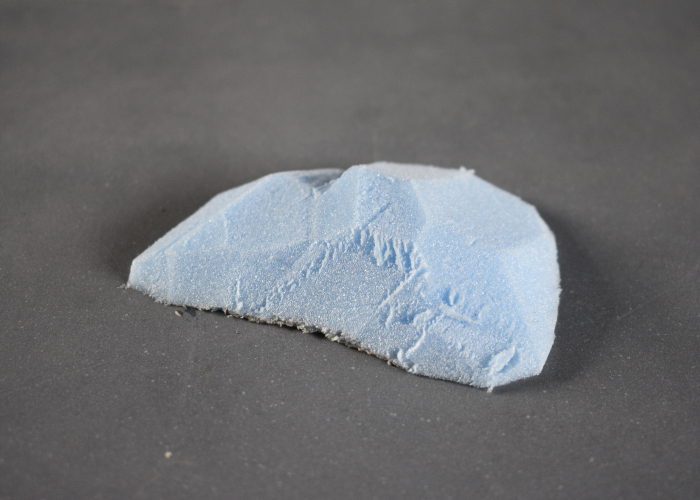
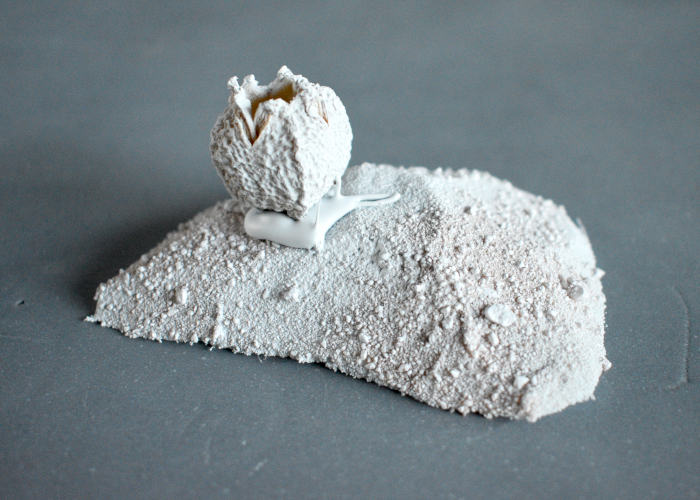
I started out with some blue insulation foam. If you haven't used this stuff before, it's a very firm expanded polystyrene sheet that some people use for insulating walls or somesuch boring thing, and sensible people use for making terrain as it's more solid and durable, and easy to work with than the more common white foam sheet.
Using a sharp knife, I cut the foam sheet into a low, hilly shape. You can use a hobby knife for this, although I used an old kitchen knife. (Don't use your good knives, as cutting foam will dull the blade!)
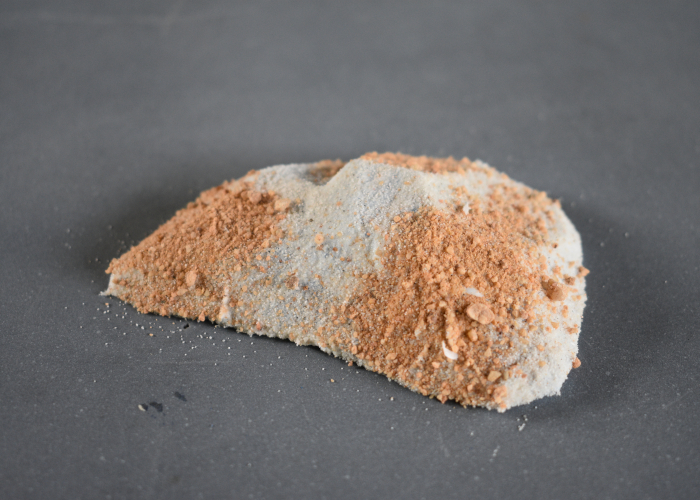
After painting a generous coat of PVA glue over the foam, I sprinkled on a couple of different types of sand, to create some varying texture over the whole thing.
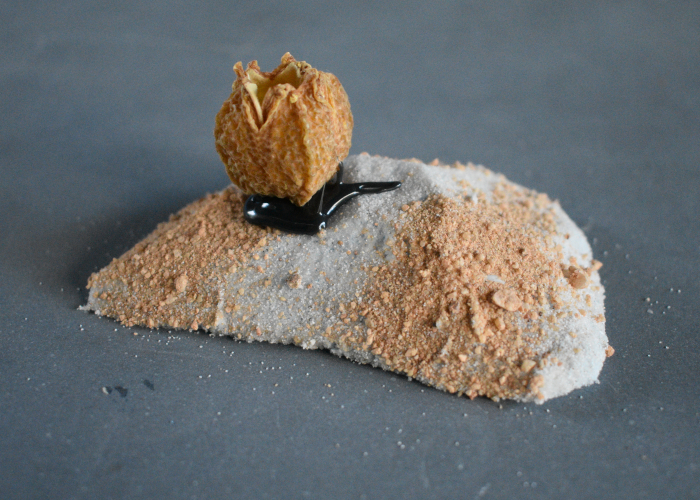
Once the PVA had time to dry, I used a blob of hot glue to stick a seedpod in place. (For multiple pieces, making the base pieces different sizes and using different numbers of seedpods on each will help avoid them all looking too similar on the table!)
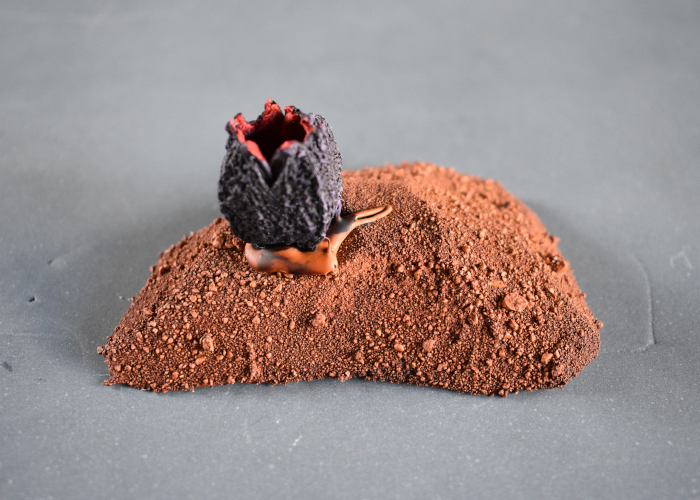
At this point, as I wasn't intending to paint over the hot glue parts of the plants, it was time to get some paint on, starting with a spray of matte white.
I then added some colour using Army Painter Speedpaints - Blood Red on the inside of the pod, Hive Dweller Purple on the outside, and a generous coat of Hardened Leather over the sand. A coat of matte sealer can also be a good idea here, to make sure that the seedpod is not exposed to the air so it will be preserved.
After giving the paint plenty of time to dry, it was time to go to town with the glue. Using a hot glue gun, I placed tentacle-like trails of glue outward from the seedpod, working around the pod to completely enclose the bottom of it.
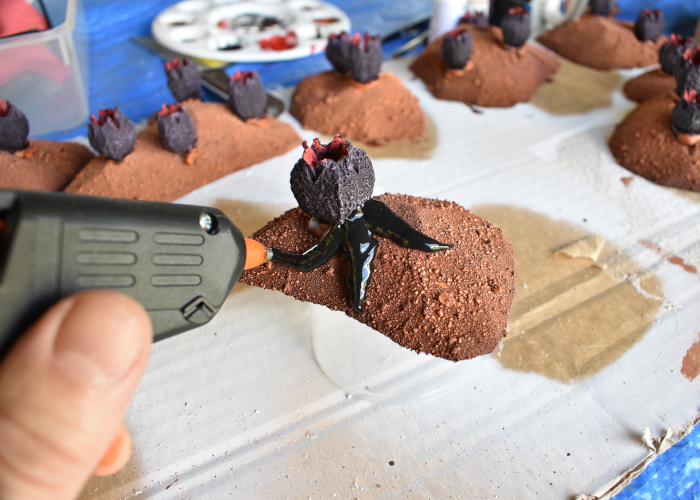
A couple of tips here:
- Allowing a minute for the previous tentacle to cool before doing the next one helps to avoid them sinking into each other. If you're working on a piece with multiple pods, then doing one at a time on each pod is a handy way to go.
- Depending on how good your glue gun is, it may build up more heat (making the glue runnier) the longer it is on. This can make it harder to keep good, defined tentacle shapes, so taking a break and turning the gun off for a while can help if you're having trouble making good shapes. Although just working faster can also help, as the glue stays firmer if it is not sitting in the gun for as lone - by varying the speed you push the glue through, you can make the tentacles gloopier looking or more defined, to suit your preference.
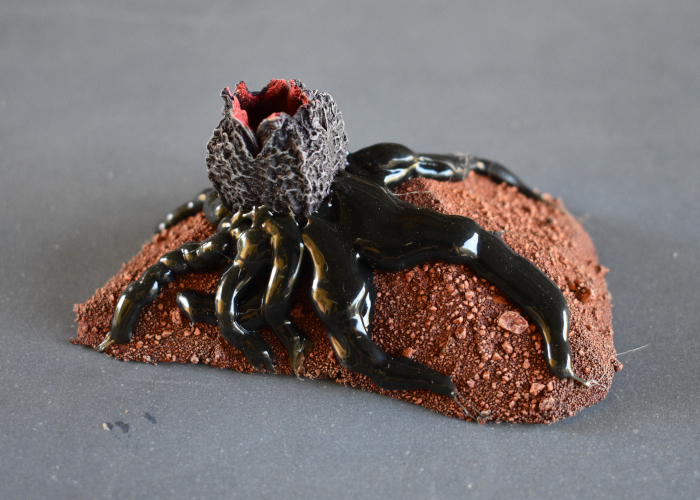
The tentacles all in place:
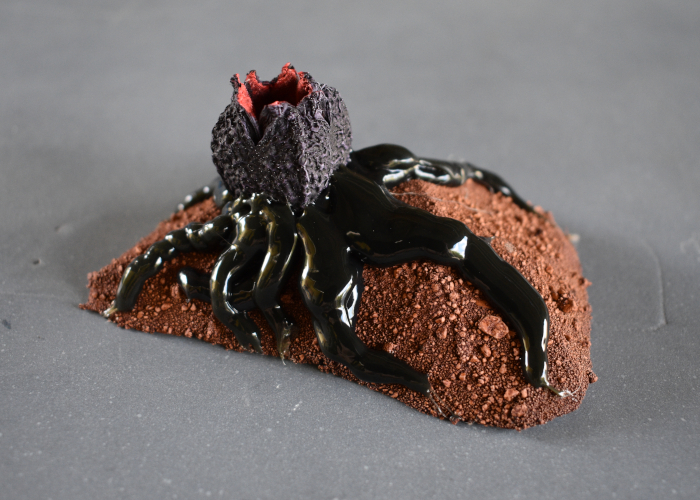
(A couple of these are a little gloopier than I wanted, due to me taking a bit longer to place them while I was trying to get pics of the process, but they'll look fine in the overall terrain patch!)
To finish up, I added a light drybrush of Game Color Bonewhite over the exposed sand areas, and a mix of the Bonewhite and White over the outside of the seedpod to pick up some of the texture.
A gaggle of pod pieces all ready for the table:
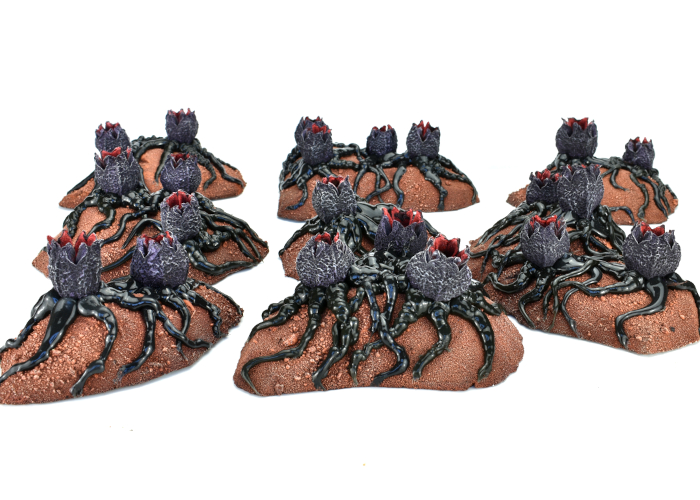
You could easily vary this to suit your own table by using different coloured glue sticks, and obviously you'll get very different results depending on the type of seedpods you use!
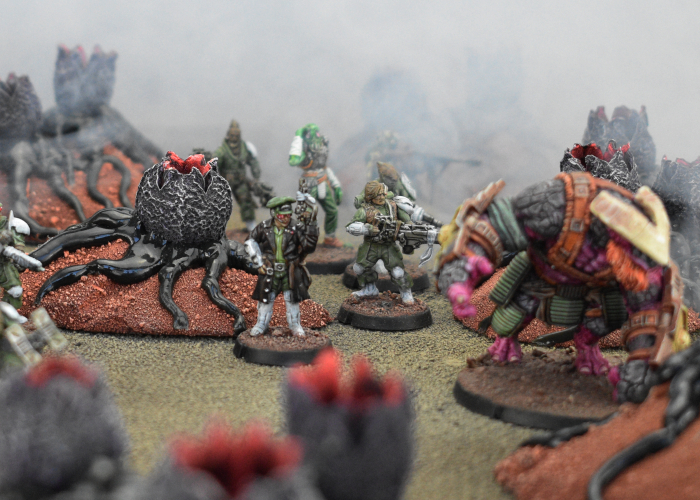
Once you have your vast plain of sinister biological doom, head on over to the Maelstrom's Edge webstore
here, to pick up an army to run around in it!
What are you working on? We would love to see your models and terrain in the
Comm Guild Facebook group!
For other building ideas, modeling tutorials, army spotlights and conversion walkthroughs, check out the Hobby section of the Maelstrom's Edge website
here. And while you're there, grab a copy of the
Maelstrom's Edge V2 Beta rules!


