Forum adverts like this one are shown to any user who is not logged in. Join us by filling out a tiny 3 field form and you will get your own, free, dakka user account which gives a good range of benefits to you:
No adverts like this in the forums anymore.
Times and dates in your local timezone.
Full tracking of what you have read so you can skip to your first unread post, easily see what has changed since you last logged in, and easily see what is new at a glance.
Email notifications for threads you want to watch closely.
Being a part of the oldest wargaming community on the net.
If you are already a member then feel free to login now.
[DCM]
Chief Deputy Sub Assistant Trainee Squig Handling Intern
How do!
Didn’t see an existing thread, so started this one, obvs.
During my trip to Tokyo, I of course visited the Gunpla store. Not the big one. That one is ticketed and so demands a better organised trip. But I did get into the ickle one downstairs, by the Gundam Unicorn statue.
I’ve never had a Gunpla before, so as well as opening a new topic, I’m looking for any pointers. Spesh as with my usual style, I went and got the Gunpla Store Exclusive. I also got a cheap one at the airport to use up the last of my paper Yen.
Fed up of Scalpers? But still want your Exclusives? Why not join us?
I've never had a gunpla but I've looked into them a bit in the past - a lot of the techniques and tools carry over into other modelling hobbies
From what I understand gunpla kits are coloured plastic so you do NOT want to use clippers right at the end of the sprue gates, that will cause the plastic to stress and leave marks. Instead cut them a little further away from the model and file them down with a glass file for a smooth finish.
Panel lining (with pens or panel liner) will really make the finished model pop
Matte varnish is popular as a top coat to give the plastic a painted look (if you're not actually painting it)
And this may seem obvious but practice on smaller/cheaper kits before you tackle that store exclusive!
I only ever did a few kits, but: HG (high grade) is the more basic line, with simpler builds and fewer parts. RG (real grade) is the deluxe, fancy line that aims to pack all the black-magic tier engineering of their larger kits into the smaller scale.
Honestly the only real tip I have is that the cleaner you can get the parts off the runners the better, unsightly sprue nubs and marks will bring down the visual aspect once constructed more so than with tabletop minis. Also maybe consider buying a cheap HG set just to practice with as the post above said. Tamiya makes panel liner paints that allegedly is much easier to work with than normal paint for that specific purpose.
This message was edited 2 times. Last update was at 2026/05/01 10:40:27
I'd say most high end scale modelling advice applies.
Remove parts from the sprue with ample gate, then remove the excess nubs carefully after the part is off the frame. You can use nippers or modelling knife for removing most of the remaining nub, but stop before completely removing the nubs. Finally, Use sanding sticks/sponges, for the final sprue gate cleanup, first going with a wet larger grit (300-400ish maybe?) sanding stick, then progressing to a dry medium stick (600ish), and lastly use the fine sticks (1000+) for getting the parts to shine (this will make it easier to see the neatness of your finish). The important thing here is using the correct grit at the right time, using too fine grits before you have removed enough material and you end up potentially messing up the part geometry in a way which might be visible later, in some form of dimple or bump..
If you need to remove very fine mold imperfections, a glass fibre pencil can be a godsend. Any mold lines, use your mold line remover and then sanding sticks for the finishing touch.
For tricky glueing of parts, use a "thin cement" style poly cement which works by capillary reaction. The way you use it is, hold the part together in the final intended position (tweezers might help here, just watch out the tweezer contacts do not eat into the plastic!), gently dab the join with the brush applicator, and hope the capillary action does the rest. IME Mr Hobby SP thin cement is much better than the Tamiya one, but even the Tamiya one will do in a pinch.
As for painting, airbrushing and rattlecans, combined with masking tape, seems to be the favoured way to paint over brush painted acrylic. Elite tier painting uses solvent based paints, as this will partially fuse into the plastic, making superb finishes, but acrylics, suitably thinned down should be sufficient as well. For panel lines, enamels and specialiced panel line products seem popular (apply a clear coat before panel lining if you intend to clean up with white spirits, unless you painted with acrylics and let everything cure properly beforehand). And of course you will want to use some sort of clear/semigloss coat for that candy, straight off the car store finish. Most small details are usually added via transfers, your main concern in painting should be towards achieving consistent color coverage and smooth finish with as little visible brush strokes/paint grain as possible.
Above all, remember that pracice makes perfect. Indeed, maybe better to practice all these techniques on some "spare" miniatures before you start working on an exclusive, limited edition kit which will be hard to replace.
Good luck! It will take a different approach to how you've tackled your miniature armies (quality and neatness of work over getting a large amount of models done), but I'm sure the learning process will up your modelling game in general. Just take your time at every step of the journey, and never work when tired or intoxicated
This message was edited 24 times. Last update was at 2026/05/01 11:16:34
[DCM]
Chief Deputy Sub Assistant Trainee Squig Handling Intern
Definitely need to invest in some suitable files I think. Will do branded ones if I can. Same principle as GW selling branded tools. Even if they’re not the best value in the market, you can be assured they’re up to the job at hand.
Fed up of Scalpers? But still want your Exclusives? Why not join us?
Tamiya and Gunze/Mr Hobby are the brands you want to look into in that case. They offer decent results every time, when used as intended.
As for files, they are good for square parts, IME sanding sponges are best for curved parts since they conform to the round shape a bit. Test wet sanding always before dry sanding when using coarser grits, dry sanding with too coarse a grit will create "rash"
This message was edited 6 times. Last update was at 2026/05/01 11:20:30
[DCM]
Chief Deputy Sub Assistant Trainee Squig Handling Intern
Ta! I’ve used the Tamiya Super Thin before, so will pick some of that up too.
Gonna do the RG one first so I’m used to the techniques necessary before mucking about with vac metallic pieces.
Whilst I’ll defo need my glasses (a pair of which I lost in Japan, but have a second), the instructions seem nice and clear. Whilst some bits seem fiddly? If I can build LI stuff, I should be fine here.
Automatically Appended Next Post: Also…under gates. Better to just sand them down, or do the same as when clipping free from the frame and clipper most, file to finish?
Automatically Appended Next Post: Sorry for the light artillery barrage of questions.
Best to stick with Tamiya for panel liners? I’ve now watched some videos on YouTube and yet to find someone using a different brand.
Also..quill pen does seem like a better applicator. Only seen the one video featuring it, but just from that video whilst there is a learning curve re pressure, it seems to “blob” less at the point of application.
Finally, for cleaning up. One guy used lighter fluid which seems excessive. Another used I think it was Mr Hobby thinners. Any recommendations there?
This message was edited 2 times. Last update was at 2026/05/01 13:08:18
Fed up of Scalpers? But still want your Exclusives? Why not join us?
Honestly, half the fun of these for me is they don't require a lot of effort to look nice. They don't need paint or glue and honestly still look great. It's more of a process of pure sprue clipping and clicking together for me.
That said, tauist has great advice to taking things to the next level. There are a lot of options for DIRT cheap sets to experiment on before taking on something special, though I suspect the sheer amount of metallic plates on that set will mean you won't have a ton to improve on.
It's a big hobby in general so you can find a million tutorials and the like online but like the rest of the hobby, its often better to just enjoy doing what you enjoy doing and don't worry about whether your models look as good as people online who have been doing this for years. It's fun, so have fun with it.
They're delights to build, aside from the stickers. Those stickers can feth right off, still need to do half of those on my Perfect Grade RX-78-2, one day I will find the time and patience for that gak, but not today.
But yeah, fun to build, marvels of plastic engineering in how they go together and everything works, without really needing any glue, almost like witchcraft in plastic form. Having built everything from the entry grade RX-78 to the Perfect Grade, if you find a model you like the look of, you're in for a treat. I wish they'd do more Master Grade SD kits, as those have been my personal favourites thus far.
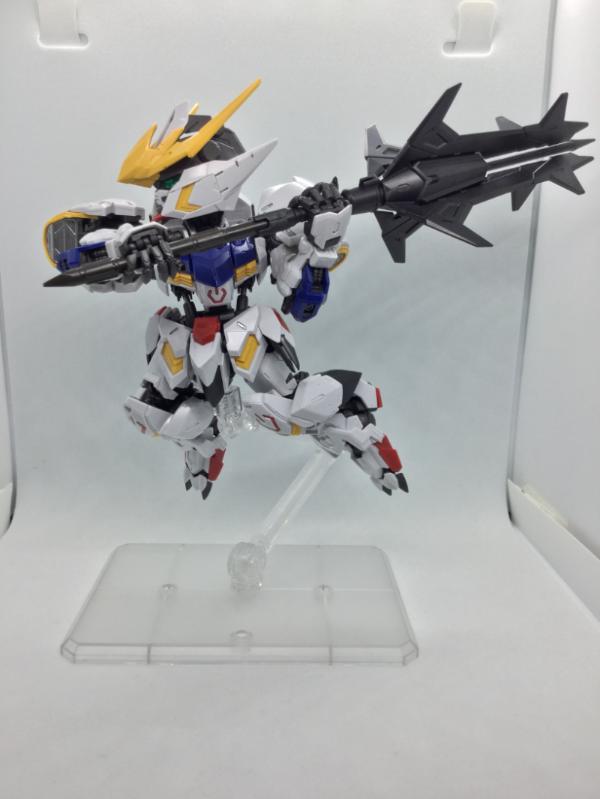
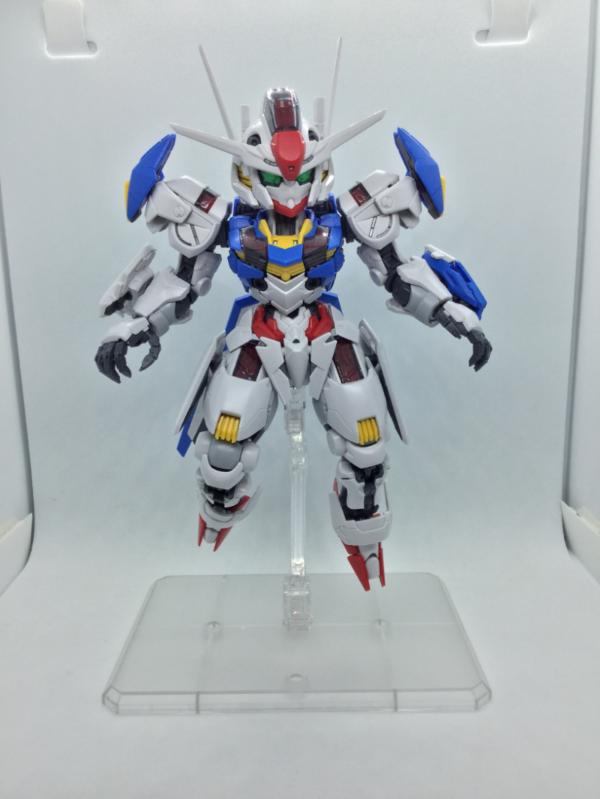
Also, when you have the right base for it, then comes the fun task of putting the model in a proper pose:
Don't let it get too much to your head now haha, lest you no longer fit through the door! Nah, she's been working on this video for ages now, so happy coincidence for sure.
[DCM]
Chief Deputy Sub Assistant Trainee Squig Handling Intern
Righty dokey!
Got me sanding boards, got me sanding sponges, got me Tamiya plakky glue.
I intend to make a start late in the hobby cave. But I’m mildly worried about the underchannel bits that need removing. Are they super obvious as to what needs to come off? Do you recommend dry fitting first to get a better idea?
Fed up of Scalpers? But still want your Exclusives? Why not join us?
Ahh yes. Since many of these kits are snapfit, you need to be careful when dry fitting. Dont push the pieces in too deep, or they might prove to be impossible to pull apart again without damaging them.


 Fatum Iustum Stultorum
  5000pts
  6000pts
  3000pts