This article is a follow-up to Blackmoor goes to the Las Vegas GT (40K)
The Las Vegas GT
The Battle Reports
My army list
Let’s start with my list for the LVGT:
- HQ
- Inquisitor Lord w/Scourging, Bolter, 2 Sages, 2 Familiars, 2 Gun Servitors w/Heavy Bolters, 1 Gun Servitors w/Plasma Cannon
- Inquisitor Lord w/Emperor’s Tarot, Psychic Hood, Null Rod, Psycannon, 2 Mystics, 2 Sages, 3 Familiars, 2 Gun Servitors w/Heavy Bolters, 1 Gun Servitors w/Plasma Cannon
- Troops
- 9 Sisters of Battle w/Melta Gun, Heavy Flamer, Veteran Sister Superior, Book of St. Lucious, Rhino w/ EA and Smoke
- 9 Sisters of Battle w/Melta Gun, Heavy Flamer, Veteran Sister Superior w/Book of St. Lucious and Rhino w/ EA and Smoke
- 5 Storm troopers w/2 plasma guns Chimera w/Multi Laser, Heavy Bolter
- 5 Storm troopers w/2 plasma guns Chimera w/Multi Laser, Heavy Bolter
- 5 Storm troopers w/2 melta guns Chimera w/Multi Laser, Heavy Bolter
- Heavy Support
- Exorcist
- Exorcist
- Exorcist
No assault in the army at all, but it has the ability to throw a lot of shoots down range, and even more short range shooting, and it has 8 vehicles.
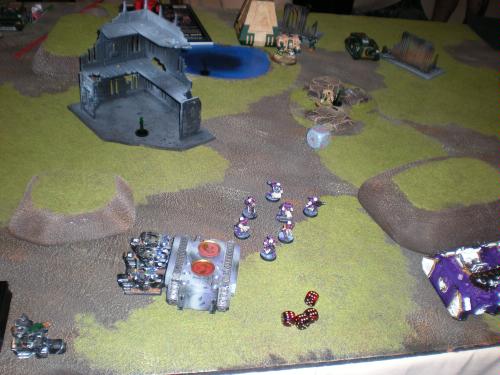
Game #1: Blackmoor’s Witch Hunter’s vs. Eric’s Dark Angels
I started out on table #43 and met my opponent Eric and his Dark Angels. Eric is from Holiday Utah, and I use to live just south of him in Cottonwood Heights Utah. When I looked at his list nothing really stood out. It was a bunch of Dark Angels units all coming together. As a general rule you want your whole army working together. You want to go all Deathwing and overload your opponent’s ability to kill 2+ save, or all Ravenwing and strike fast and hit your opponent with your entire army or all Mech and put to more vehicles on the table that your opponent can kill. His list was sadly not optimized.
[b]Eric’s Dark Angels:[/b]
- HQ
- Elite
- Venerable Dreadnought w/Assault Cannon, Heavy Flamer, Searchlight, Smoke, Extra Armor
- Troops
- 5 Deathwing Terminators w/ Apothecary and Assault Cannon.
- 9 Space Marines w/Plasma Cannon and Plasma Gun
- 9 Space Marines w/Plasma Cannon and Plasma Gun
- 9 Space Marines w/Plasma Cannon and Plasma Gun
- Sergeant w/Power Fist
- Rhino w/Searchlight. Smoke, Extra Armor
- Fast Attack
- Ravenwing Attack Squadron
- 2 Ravenwing Bikes w/2 Meltaguns
- Sergeant
- Space Marine Attack Bike w/Multimelta
- Ravenwing Attack Squadron
- 2 Ravenwing Bikes
- Sergeant w/Meltabombs
- Space Marine Attack Bike w/Multimelta
- Heavy Support
[b]Mission: Seize Ground (5 Objectives)
Deployment: Pitched Battle[/b]
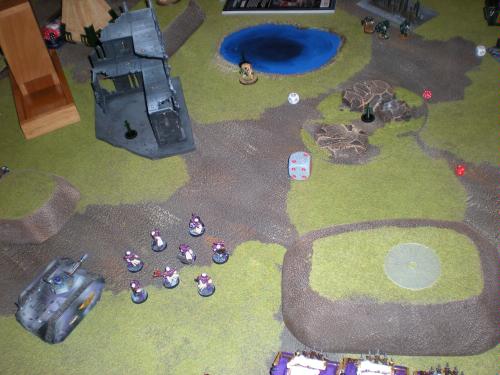
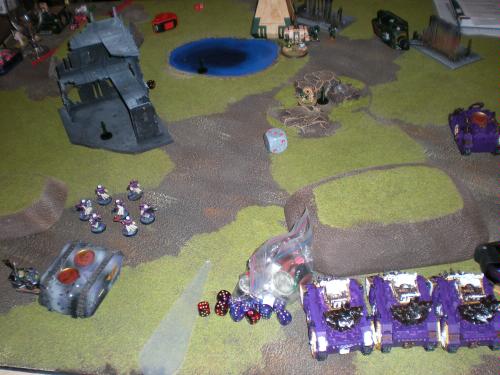
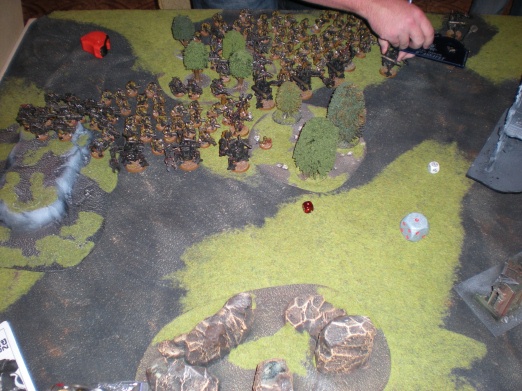
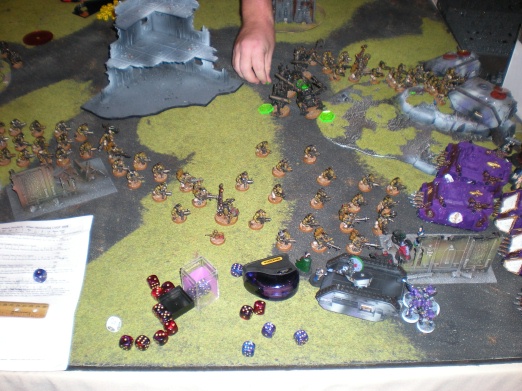
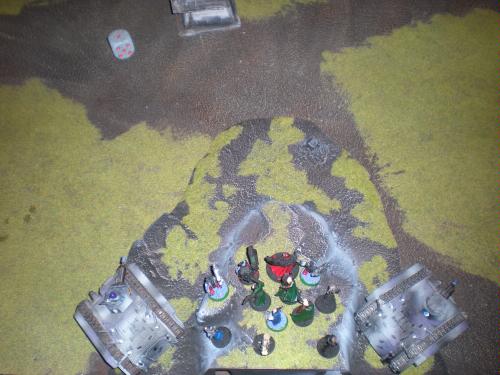
The setup:
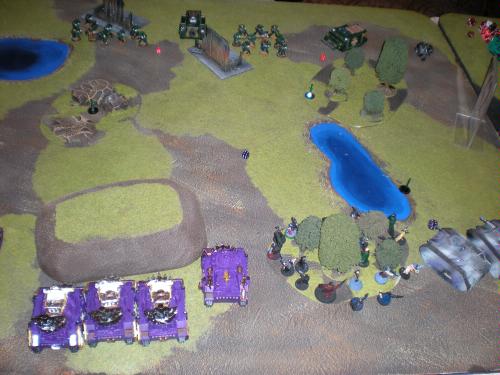
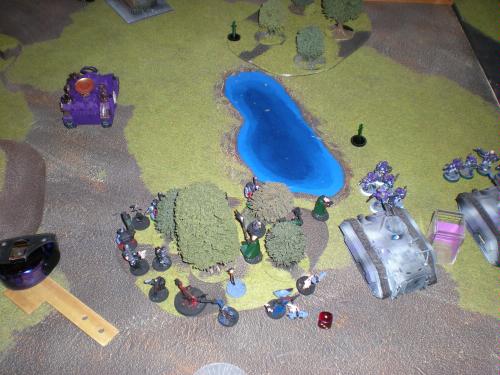
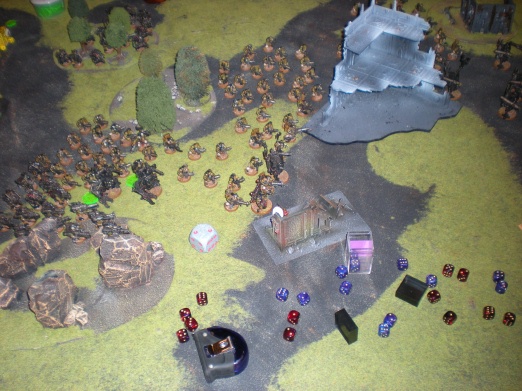
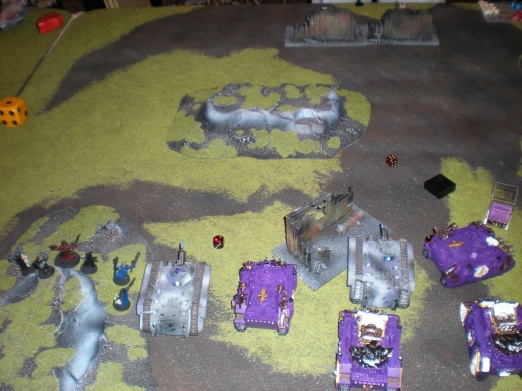
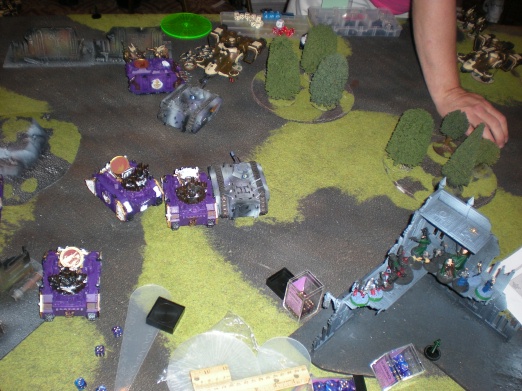
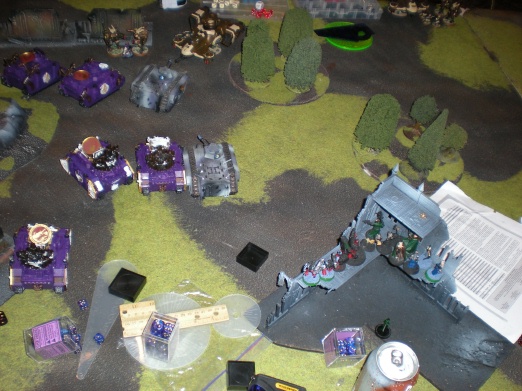
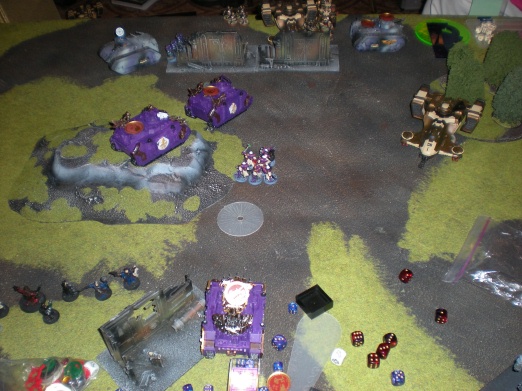
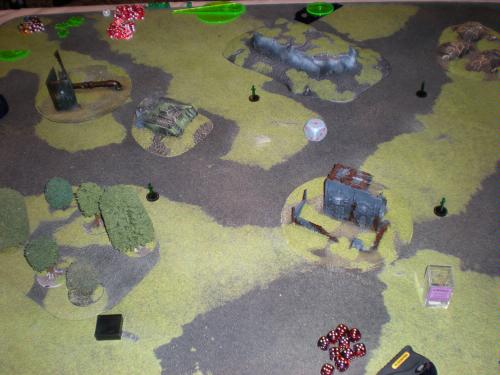
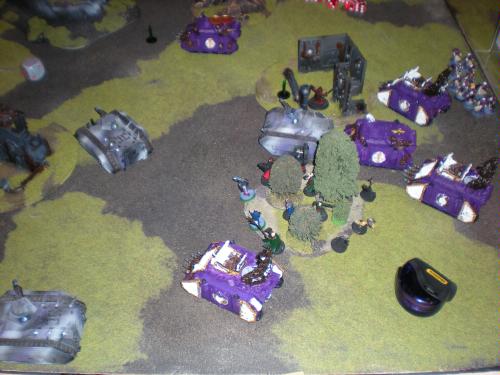
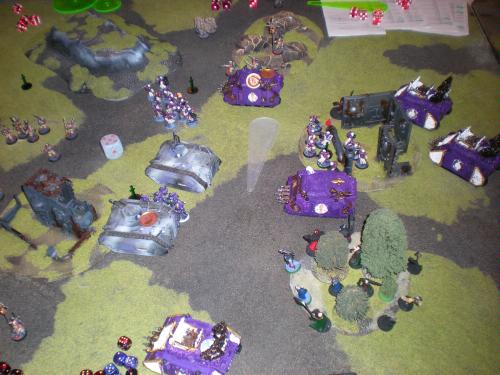
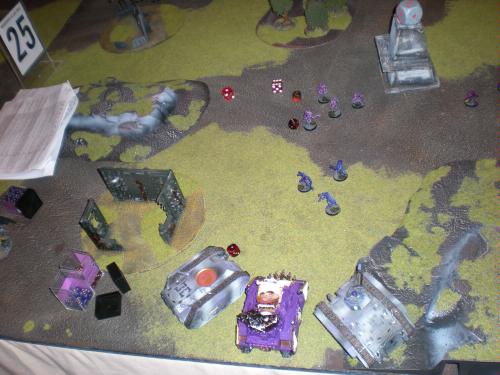
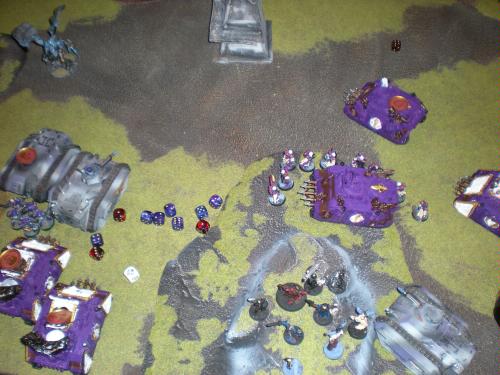
This is the right side of the table. There is an objective just in front of the chimera's in the lake to the lower right and another in the rock pile in the middle left.
I started with everyone in the vehicles, and all of the Ings in the forest. His deployment was his 10 man plasma cannon squads out in the open, his vindicator in the left, powerfist squad is on the right in the rhino, and lone attack bike on the far right.
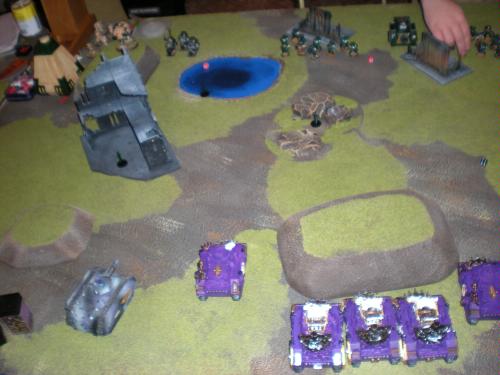
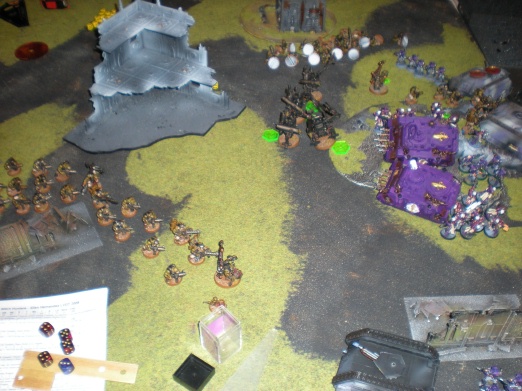
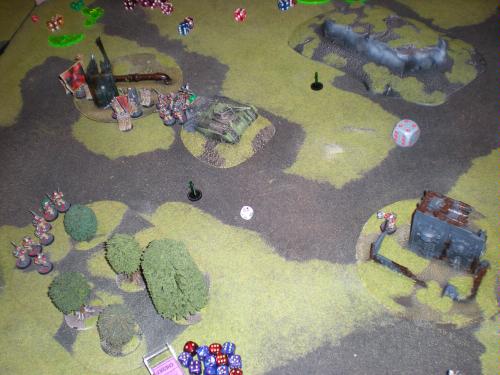
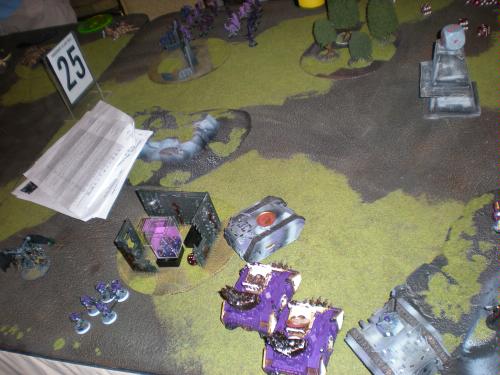
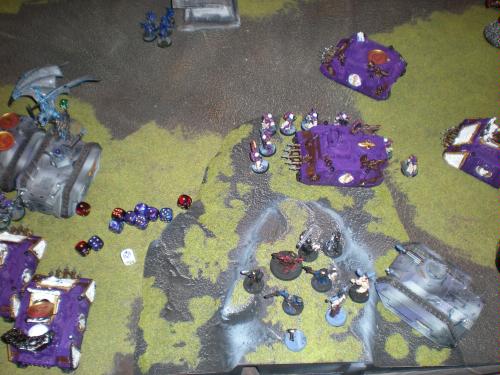
Here is the left side of the board. The units in the back left are held in reserve. He is keeping off the Dreadnought, one attack bike, and his 2 ravenwing squads. The last 2 objectives are on left in the building and in the lake.
I like that there is a lot of water on this board. Chimera power activate!
I win the dice roll to go first, and I take it.
Turn 1
Top of turn #1 Witch Hunters
I shoot my Inq at the plasma cannon squad and kill 6 out of 10 marines. My Chimeras on the right shoot at the attack bike on the right killing it, and my exorcists shoot at the vindicator shaking it.

Bottom of turn #1 Dark Angels
He moves his rhino up. He shoots mostly at my vehicles with his plasma cannons and does nothing. He drops his terminators on turn #1 and kills my rhino. He gets a bike squad and hides them behind the hill on the left.

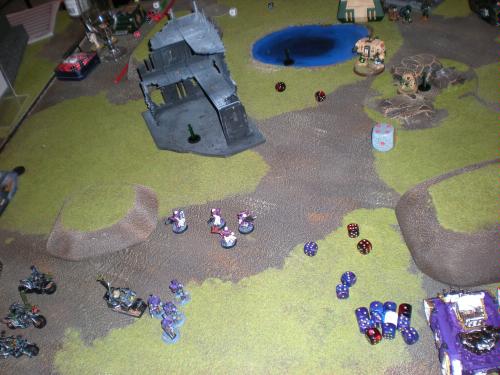
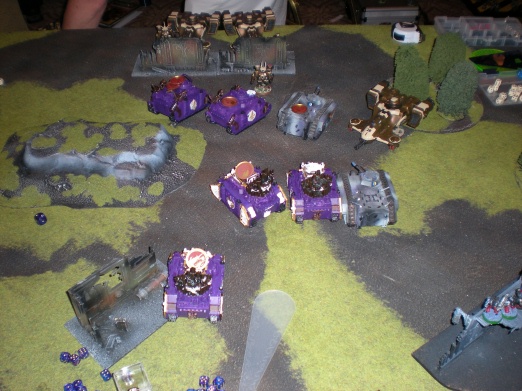
Right side
Left side
Turn 2
Top of turn #2 Witch Hunters
My Chimeras kill the Rhino on a penetrating hit of 6. The Inq finish off the first Plasma Cannon squad, and the Exorcists unload on the Terminators killing 5 of them.
Bottom of turn #2 Dark Angels
From his reserves he gets a Bike squad. He moves his marines forward. His Dreadnought scatters 12” strait back. His bike squad damages the Chimera on the left in assault. His Attack bike shoots and misses and Exorcist.
Turn 3
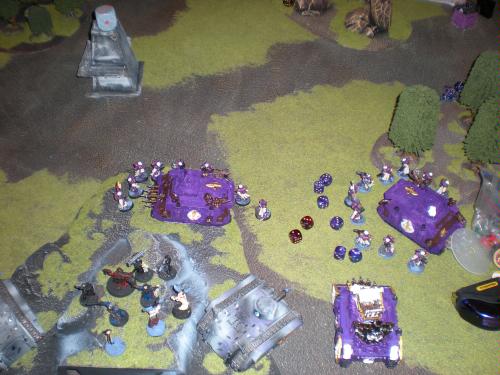
Top of turn #3 Witch Hunters
I finish off the last of the 2nd plasma cannon squad with the Inq. His bike kills the Chimera in assault. The sister squads kills 2 of the bikes. One exorcist kills one attack bike, and the other 2 kill the vindicators. The storm troops get out and with the help of the Inq hill the last of the marines.
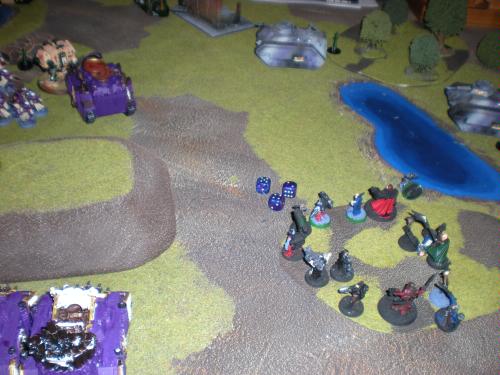
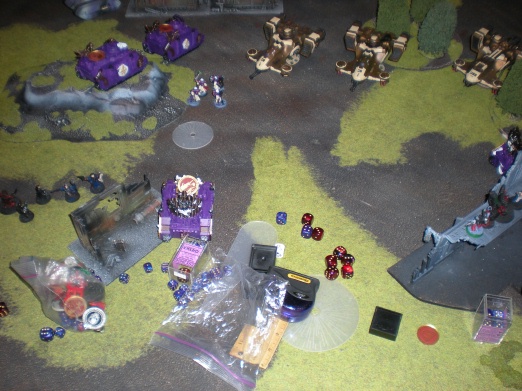
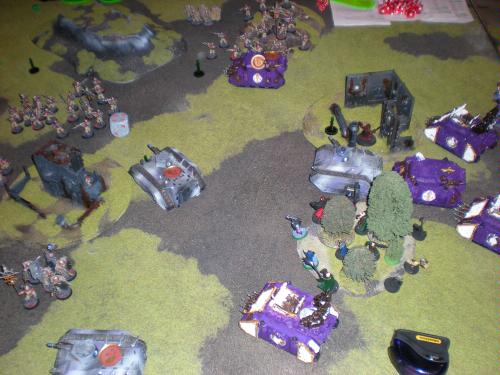
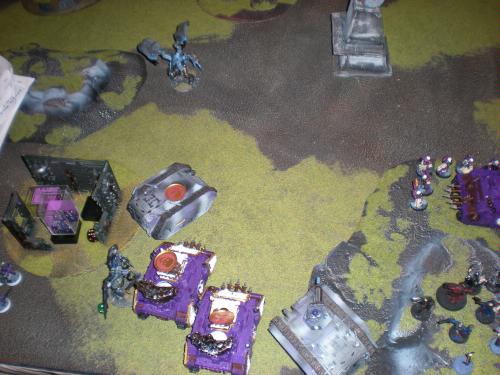
Right Side
Left Side
Bottom of turn #3 Dark Angels
He kills my chimera. His last bike squad rolls on and shoots the vehicles.
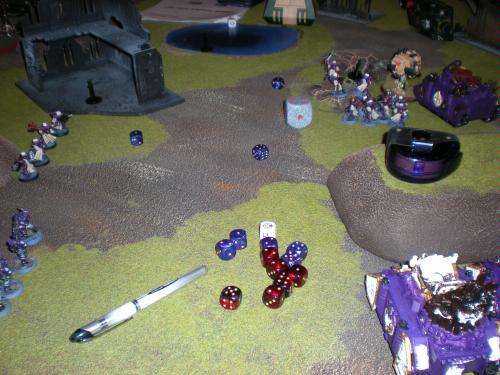
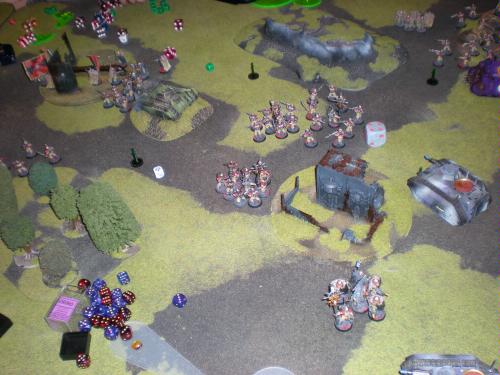
Right side
Left side
Turn 4
Top of turn #4 Witch Hunters
I shoot up the bikes leaving just one.

Bottom of turn #4 Dark Angels
His last bike assaults the sisters and dies.
Turn 5
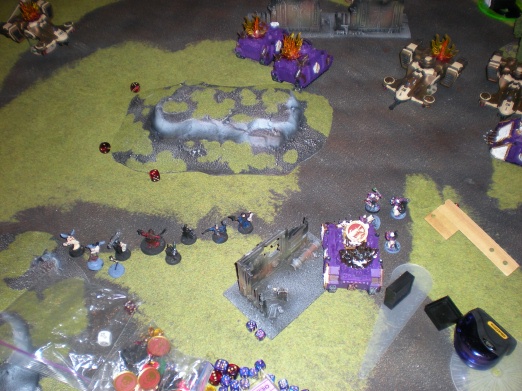
Top of turn #5 Witch Hunters
I run the units on the left to get to the objective, and hold the others. I shoot the crap out of the Ven. Dread and can’t kill it.

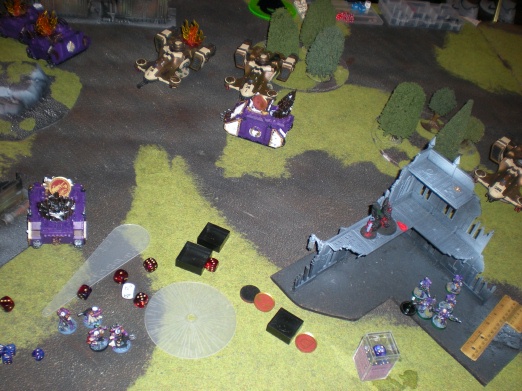
Bottom of turn #5 Dark Angels
His Dreadnought assaults my rhino
Turn 6
Top of turn #6 Witch Hunters
I kill his dreadnought ending the game.
I ended up with a full 20 points, and a trip down to table #8 where I get to play Shep's Orks.
Game #2 Blackmoor’s Witch Hunter’s vs. Ryan’s (Shep) Orks
LVGT Game #2 Blackmoor’s Witch Hunter’s vs. Ryan’s (Shep) Orks
After massacring my first opponent, I am moving on up to table #8. I find that I am playing Ryan’s (Shep on this board) Orks. Ryan is from the west side of LA and I think I might have seen him around before. We do have some friends in common though.
I will say that there are few things I hate as much as the new Orks. They went from everyone’s whipping boy to one of the hardest lists out there. I made my army around trying to beat them and I get to see if I can get it done.
His List
- HQ
- Big Mek w/Kustom Force Field, ‘Eavy Armor, Cybork Body, Grot Oiler, Mek’s Tools
- Big Mek w/Kustom Force Field, ‘Eavy Armor, Cybork Body, Grot Oiler, Mek’s Tools
- Elites
- Troops
- 29 Shoota Boyz w/3 big shootas
- Boyz Nob w/Power Klaw, Bosspole
- 29 Shoota Boyz w/3 big shootas
- Boyz Nob w/Power Klaw, Bosspole
- 29 Shoota Boyz w/3 big shootas
- Boyz Nob w/Power Klaw, Bosspole
- Heavy Support
- 3 Killa Kans, w/3 Big Shootas
- 3 Killa Kans, w/3 Grotzookas
- 3 Killa Kans, w/3 Grotzookas
[b]The Mission: Annihilation
The Deployment: Spearhead[/b]
Points:
Player A gets Double or more Kill Points than player B he scores 17 to 3 points.
Player A gets more (up to double) Kill Points to Player B then he scores 13 to 7 points.
If they achieve an equal number of kill points then you go to VPs
Player A scores 175+ more VPs then he scores 11 to 9 points
If the VPs are less than 175, then they both score 10 points.
Great…I am going up against a very durable Ork army with only 10 kill points to my 17 kill points, with fragile vehicles.
He won the dice roll to go first, and choose to take it.
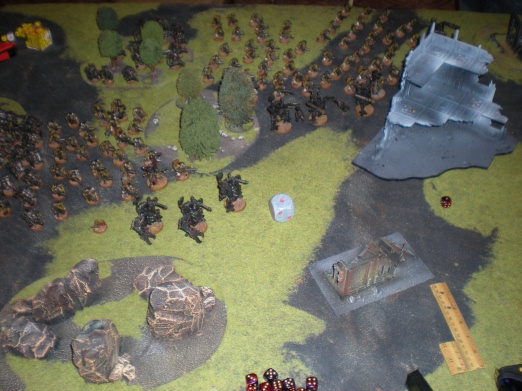
The Ork set up
He set up in the corner and screened all of his boyz with killa kans and the lootas behind them (they are the darker Orks in the woods). This is shaping up to be a tough nut to crack with Kans getting a 4+ save from the KFF and all of the Orks getting a 4+ save from shooting through units.
My set up
I stayed the farthest away from him as I can. The table quarter deployment helped me a little because he put his lootas in the rear and I tried to stay 48” away. Why Phil Kelly did you make lootas 48” range?
Turn 1
Turn #1 Orks
The mob surges forward. I was hoping he would try to shoot his lootas on the left that were way out of range and thus losing a round of shooting, but he did not, moving them instead. He shot his other lootas on the right at a chimera and lucky for me he only had a few in range and only stunned it.
Turn #1 Witch Hunters
I open up on the Orks and kill a disappointing few. I do manage to kill 2 Kans though on the left. I move my Chimera a little bit back so it will not get shot so much.
Turn 1
Turn #2 Orks
The tide moves forward. The lootas on the left are still moving, and they ones on the right do not do any damage.
Turn #2 Witch Hunters
The killa kans are getting way to close do to him running. So I unload the exorcists on the kans in the front killing them.
Turn 3
Turn #3 Orks
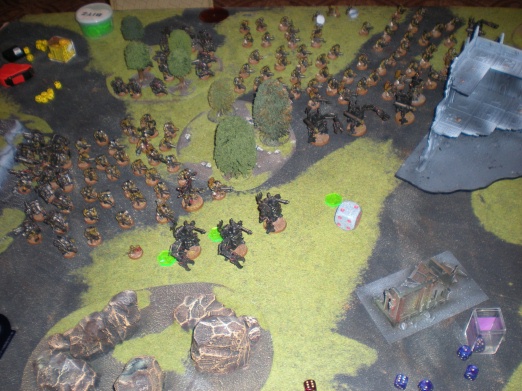
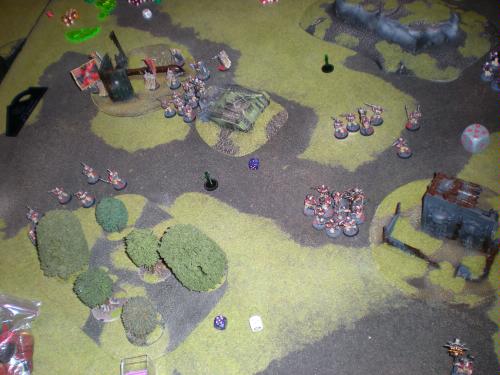
He relentlessly moves forward. As you can see by the dead chimera, the lootas on the left are now in range.
Turn #3 Witch Hunters
The orks on the right have been getting some good run rolls and are dangerously close. The WH Inq which was hiding between the chimeras at the top run away, and the chimeras back up as far as they can. I learned the day before that stationary vehicles are dead in assault, so I try to at least move 6”. My shooting kills the last of the Kans, and shooting kills some more orks.
Turn 4
Turn #4 Orks
The orks Waagh and they crash into my lines. They hit my 2 Chimeras on the top and wound both badly (Immobilized, weapons gone, etc.). The DH Inq that was in the building on the bottom got hit by the orks and I survived with only 3 models. I choose to fail my LD check and ran a whole 3”. He did not pursue and spread out.
Turn #4 Witch Hunters

It is time for my counter assault. My DH Inq ran off the board. The Orks at the top that are assaulting the chimeras get hit with 2 Storm trooper squads and my SoB. They guys are pretty tough and the Big Mek and a handful of guys survive. The unit that killed my DH Inq is not so lucky when they get shot with a SoB squad, the WH Inq, a storm trooper squad and a few exorcists wiping them out.
Turn 5
Turn #5 Orks
His Big Mek at the top of the board assaults my storm troopers wiping them out. The remains of his Boyz are still trying to kill the chimeras and the Nob is only able to the kill one (on a penetrating 6 killing several guys on both sides in the process). He want to assault the SoB with his last boyz squad but is out of range, and manages to run 6” to get right up next to them.
Turn #5 Witch Hunters
My turn the squads at the top kill the Big Mek and the remaining boyz. I unload on the last shoota boyz and kill half of them. (in the pics the down models are dead).
The game ends here because we run out of time. That is a lot of running that the orks have to do, and moving that many guys forward takes a while. We tally up the points and we come up with:
Witch Hunters lose:
- 2 Chimeras
- 1 Rhino
- 1 Storm Trooper Squad
- 1 DH Inq
- 1 Inq Retinue
Total= 6 units
Orks lose:
- 1 Big Mek
- 2 Shoota Boyz
- 3 Killa Kans
Total= 6 units
All that work for a tie!!! When you tie, you then go to VPs to see if it is a 10-10 points split, or a 11-9 points split and I ended up winning by a quite a few VPs. I received the +2 point bonus for having more total units and he received the +1 bonus for having a unit in my deployment zone.
So the points came out to 13 for me, and 10 for Shep. It was a great game that was a huge challenge. I am glad to know that I was one of the very few to slow him down because he ended up with 81 battle points on his way to winning a much deserved best sportsman award.
Game #3 Blackmoor vs. Scott Simpson's Tau
After my tie on table #8 I fall all the way down to table #12. Oh, how the mighty have fallen.
Well, when I get to the table I am surprised to see Scott waiting for me. Ironicly I spent some time with him the night before when I was hanging out with some of the guys from the 40kWrecking Crew.
If you do not know who he is, Scott is one of the best players in the country. I have always wanted to play him, and now I finally get the chance.
His list (Note Scott’s list is the only one that I did not get after the game, so I this is what he had from memory):
- HQ
- Shas’O w/Plasma Gun, Missile Pods, Fusion Guns, Hard Wired Multi-tracker
- Shas’O w/Plasma Gun, Missile Pods, Fusion Guns, Hard Wired Multi-tracker
- Elites
- 2 Crisis Suits w/Team Leader, Plasma Gun, Missile Pods, Target Array, Hard Wired Multi-tracker
- 2 Crisis Suits w/Team Leader, Plasma Gun, Missile Pods, Target Array, Hard Wired Multi-tracker
- 3 Stealth Suits w/Positional Array, Black Sun Filter
- Troops
- 6 Fire Warriors w/Team Leader, Bonded
- Devilfish w/Target Array, Smart Missiles, Disruption Pod, Multi-tracker
- 6 Fire Warriors w/Team Leader, Bonded
- Devilfish w/Target Array, Smart Missiles, Disruption Pod, Multi-tracker
- 6 Fire Warriors w/Team Leader, Bonded
- Devilfish w/Target Array, Smart Missiles, Disruption Pod, Multi-tracker
- Heavy Support
- Hammehead w/Target Array, Smart Missiles, Multi-tracker, Disruption Pod, Target Lock, Rail Gun
- Hammehead w/Target Array, Smart Missiles, Multi-tracker, Disruption Pod, Target Lock, Rail Gun
- Hammehead w/Target Array, Smart Missiles, Multi-tracker, Disruption Pod, Target Lock, Rail Gun
Mission: Capture and Control
Deployment: Pitched Battle
Points:
Player A Controls both Objectives- A scores 17, B scores 3
Player A Controls 1 Objective, and Player B controls none- A scores 13, B scores 7
Players achieve an equal number of objectives refer to victory points
If Player A scores 175+ more Victory Points than Player B- A scores 11 points, B scores 9
If the scores are less then 175 points difference then the result is a draw, then Player A scores 8 points and Player B scores 8 Points.
Bonus Points:
+1 If you destroy your enemies highest point unit.
+2 If you wipe out all enemy non-scoring units.
I think he won the dice roll and deferred to me.
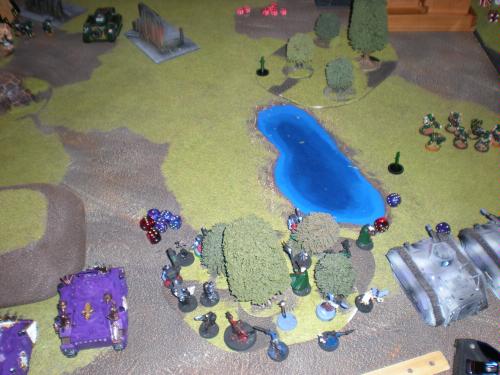
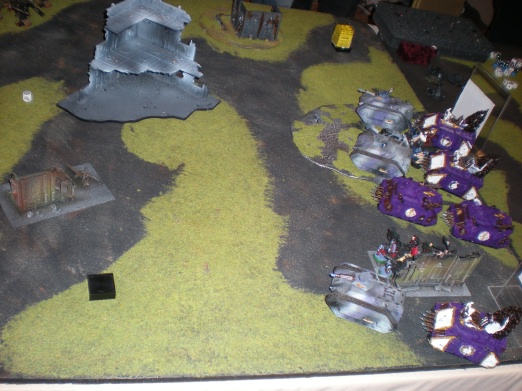
The set up
This is the left side.
I set up with my transports forming a wall to protect my Exorcists. I knew that they are going to be my most valuable asset, to deal with the Tau skimmers so I want to protect them. I know that the wall directly in front of me will be crisis suit central with him using it to JSJ. He places his objective marker behind the wall on the table edge.
Right Side
My objective is behind my Inq. in the building. I put my Inq on each side to try to get anything hiding behind those walls in a cross fire.
In this picture you can barely see his setup. He puts one of he HQ and a Crisis Suit team behind the wall, and his Stealth Team on the far right. Everything else he puts into reserve.
Turn 1
Witchhunter Turn #1
I get to go first and I never know what to do when facing nothing. I do know that he has an objective marker on the other side of the table with my name on it, and if I am going to get a massacre I need to get it. So I drive everything forward and try to maintain my formation. I drive one Exorcist so that it gets a little difficult terrain where I roll a ‘1’ which always happens to me. That is why I know never to drive in difficult terrain.
(No Picture)
Tau Turn #1
He shoots my rhinos with his suits and stuns them.
Turn 2
Witchhunter Turn #2
Well I did not know what to do, so I panicked! Those suits where bothering me, so I thought I would take them out. I ended up charging them with a sisters squad and took them out. But I had to break my defensive formation to do it.
Tau Turn #2
He gets a Devilfish and a Crisis Suit Team that moves on and they all shoot at my sisters killing them down to about 4, and then he assaults them down to about 2 and they stay locked in assault. He also gets 2 Hammerheads that come on in each corner and get my Exorcists in a cross fire to hit side armor, but he only manages to take off the EML on one of them.
Turn 3
Witchhunter Turn #3
Well, not that there are things on the board to comes to grips with, let’s get busy!
I drive up with the chimera with the storm troopers with the melta guns to the Hammerhead on the left and spin it around, disembark and destroy it. I move my second rhino up and get ready for the next turn to get out and have some fun. My Chimeras kill some Firewarriors but they stay. My Exorcists take down the other Hammerhead. The combat with the sisters/crisis suits is a draw.
Left Side
Right Side
Tau Turn #3
On his turn he gets everything in except a Hammerhead. He castles his 2 Devilfish around the objective. His other Devilfish take out a gun and stuns a chimera. He throws his commander and what firewarriors he has left into the combat with the SoB and beats them. He consolidates back, and everyone makes it into cover but he rolls a “1” for his commander and he gets left out in the open.
Turn 4
Witchhunter Turn #4
My Storm Troopers get into my Chimera on the left and drive closer. I shoot and kill the commander out in the open with an Exorcist. My Inq takes a shot at those annoying Stealth Suits that have been shooting at him the whole game, but I failed my night fight roll. One of my plasma cannon Storm Trooper squads gets out and tries to rapid fire his Crisis Suits but because of my bad rolling and cover saves I just do a couple of wounds on the commander and a Suit. My other Storm Trooper squad rapid fires at his Devilfish immobilizing it.
Note: My SoBs did nothing. Although I drove the rhino up last turn, I forgot to get out and kill his Crisis Suits.
(No Picture)
Tau Turn #4
His last Hammerhead finally comes on the right and kills an Exorcist. He unloads on my rhino with the SoB squad and kills it. He kills the plasma gun storm troopers that rapid fired his suits.
(No Picture)
Turn 1
Witchhunter Turn #5
I finally remember to move my SoBs up (it helps to remember them when they are on the board from a destroyed vehicle), but everything that I can assault has moved back and is hiding. My Melta Gun storm troopers move up and kill a devilfish. In the explosion I lose 3 sisters and because I took 25% casualties I failed my morale roll and they ran. This is the time that I remember that I need to have a troop unit to control my objective, so my other Storm Trooper squad jumps in it’s Chimera and heads for my objective, but they can’t get within 3”
Tau Turn #5
He shoots up my SoB squad and gets within 6” of them so I can’t rally. His suits shoot up my Chimeras.
He rolled a 4 so we play another turn. Whew! I was off my objective!
Turn 6
Witchhunter Turn #6
As a last hope I try to burn a faith point to make my SoB’s fearless, but I have to roll under the squad size to do it, and I fail. I run for my objective with my last storm trooper squad. My Inq shooting and kills the Stealth Suits. My immobilized Exorcist shoots and kills his Devilfish because he was shooting my Inq to get a bonus point. I move my gunless Exorcist to contest his objective, but it is too little to late.

Tau Turn #6
He moves his hammerhead up and misses the Exorcist.
We roll again and we get to play another turn…
Turn 7
Witchhunter Turn #7
My Exorcist unloads on his Hammerhead hitting it 4 times. I fail to roll above a 4 though for damage, and it is unharmed.
Tau Turn #7
He moved his Hammerhead on the my objective to contest it.
We ended the game with him contesting one objective and him owning another. Minor Loss with out any bonus points 7-13.
I made a lot of mistakes in this game. I have always said that when you play a very good player, the one who does not make any mistakes wins. Normally it is me that capitalizes on others mistakes, but this time it was me making them. The funny thing is that 2 ½ years ago I said that your mind will wander in tournaments, and you should drink an energy drink before the 3rd game over on the B&C about tournament tips. Full Thread here: http://www.bolterandchainsword.com/index.php?showtopic=85162&st=0 After a 5 hour drive, late nights of painting and poker, and a day of playing in the team tournament and then another day of GT and I was losing focus, and I could have used an energy drink.
The fact that this was my 3rd game with this army and the 5th game of 5th edition hurt me.
[u]My mistakes:[/u]
The biggest one has to be not getting my SoB squad out of their rhino for a turn when I could have tied up all kinds of Tau units.
The second one is my unfamiliarity with 5th edition and I had no troops holding my objective and had to head back to claim it.
The third is that I had an Exorcist with out a gun that should have made a run to his objective as soon as it could. Or at least rammed things.
The fourth is knowing how important it is to hold your objective, and I should have had both Inq surrounding it. As it was, my second Inq squad did not do anything.
The fifth is that I did not see the value of transports for contesting objectives in 5th edition so I pretty much ignored them, and did not even think about preserving them for contesting.
The sixth is that when rolling for Light of the Emperor to make your SoB squad fearless you need to roll over the number of sisters, not under it like I thought.
[u]Unlucky:[/u]
I had a tie on turn #6 if the game ended then.
I shot the crap out of his contesting Hammerhead and I could not kill it.
He never failed a morale roll (and he had to make plenty).
The fact that I lost enough SoBs to have to take a morale roll from a exploding vehicle that I killed.
My one morale roll I had to make with my SoBs with a LD9 they ended up running.
The start of the LVGT day #2.
I knew that things were not going well when everyone I know came up to me at the start of the day and asked me if I was doing ok. As a general rule, when everyone asks you if you are doing ok, you are not doing ok. The night before I went to the Bellagio with a bunch of the guys and we ended up at the buffet there. We all paid $45 for it and the one big problem with paying $45 for a buffet is that you want to eat $80 worth of food. I must have gotten some bad seafood or something because that night I did not sleep well, and the next day at the GT I was not feeling well at all.
So after 3 games I find myself with 20+13+7 battle points for a total of 40. I am not doing very well, and I need to get 2 massacres if I am going to equal last year’s total.
Game #4 Blackmoor vs. Sean's (dvdhwk) IG
I find myself at table #20 and I am playing against Sean's (dvdhwk) drop troop IG.
Son’s of Sek
- HQ
- Command Squad[Drop Troop]
- Junior Officer w/Honorifica Imperialis, Carapace Armor, Bionics, Reactor Field, Power Weapon, Iron Discipline
- 3 Guardsmen w/Vox Caster
- Standard Bearer
- Special Weapons Squad
- 6 Guardsmen w/x2 Flamers, Demo Charge
- Special Weapons Squad
- 6 Guardsmen w/x2 Flamers, Demo Charge
- Elites [Drop Troops]
- 4 Hardened Veterans w/3 Melta Guns
- 4 Hardened Veterans w/3 Melta Guns
- 4 Hardened Veterans w/3 Melta Guns
- Troops[Droop Troops, Close Order Drill]
- 1st Infantry Platoon
- Junior Officer w/Power Weapon
- Infantry Squad
- 9 Guardsmen w/Vox Caster, Flamer
- 9 Guardsmen w/Vox Caster, Plasma Gun
- 9 Guardsmen w/Vox Caster, Plasma Gun
- 9 Guardsmen w/Vox Caster, Plasma Gun
- 2nd Infantry Platoon
- Junior Officer w/Power Weapon
- Infantry Squad
- 9 Guardsmen w/Vox Caster, Flamer
- 9 Guardsmen w/Vox Caster, Plasma Gun
- 9 Guardsmen w/Vox Caster, Plasma Gun
- 9 Guardsmen w/Vox Caster, Plasma Gun
- 3rd Infantry Platoon
- Junior Officer w/Power Weapon
- Infantry Squad
- 9 Guardsmen w/Vox Caster, Flamer
- 9 Guardsmen w/Vox Caster, Plasma Gun
- 9 Guardsmen w/Vox Caster, Plasma Gun
- 9 Guardsmen w/Vox Caster, Plasma Gun
- Fast Attack[Drop Troops]
- Sentinel w/Heavy Flamer, Smoke Launcher, Improved Comms
- Sentinel w/Heavy Flamer, Smoke Launcher, Improved Comms
I will say that Sean had a great painted army with a lot of nice conversions. If you want to see some more pictures of it, check out his blog:
http://runningfromthelaw-dvdhwk.blogspot.com/
Mission: Seize Ground (5 Objectives)
Deployment: Spearhead Deployment
- Points:
- Player A achieves 2+ Objectives more than Player B- A scores 17, B scores 3
- Player A achieves 1+ Objective then Player B- A scores 13, B scores 7
- Players achieve an equal number of objectives refer to victory points
- If Player A scores 175+ more Victory Points than Player B- A scores 11 points, B scores 9
- If the scores are less then 175 points difference then the result is a draw, then Player A scores 8 points and Player B scores 8 Points.
- Bonus Points:
- +2 for killing the highest point enemy unit
- +1 if your highest point unit is still alive
I think he won the dice roll and deferred to me.
Objectives:
I wanted to place the objectives out in the open so when he comes out to hold them I can blow him off of them. I am pretty happy with the placement.
The set up:
Since he was dropping down, I deployed in my standard anti-drop formation. I turtled up in a corner, and had my Inq squad in the middle to keep Deep Strikers at a reasonable distance.

Turn 1
Witchhunter Turn #1
I clean my guns and load up on ammo.

Imperial Guard Turn #1
Turn 2
Witchhunter Turn #2
Waiting…
Imperial Guard Turn #2
It’s raining men! He tried to keep as many squads off the table as possible off with Improved Comms, but he still gets his Command Platoon, a Hardened Vet squad, 2 Infantry Platoons, and a Sentinel.
His Sentinel drifted too close to my Inq and was destroyed by the Mystics on the Initial drop. 3 Infantry Squads had Deep Strike mishaps and one died, 2 others went back into reserves.
One of his Infantry Jr. Officers scattered into rocks at the top.
3 Infantry Squads dropped around my WH Inq and shot her and killed some of her retinue. They were to far way from my DH Inq.
A Hardened Vet Squad dropped to the far right and shot their Melta Guns at my Rhino and they stunned it, and blow off its Storm Bolter.

His Command Squad came on in the upper left as far away as possible.
A Special Weapons squad scattered way back to the upper right.
A Special Weapons squad dropped in front of the Chimera terrain piece.
The First Platoon Jr. Officer drooped to the far left in the middle.
The last Infantry Squad dropped below the ruin in the middle of the table.
There is an Infantry squad behind the chimera terrain piece.
Turn 3
Witchhunter Turn #3
Time to get to work, so I get out and unload on them.
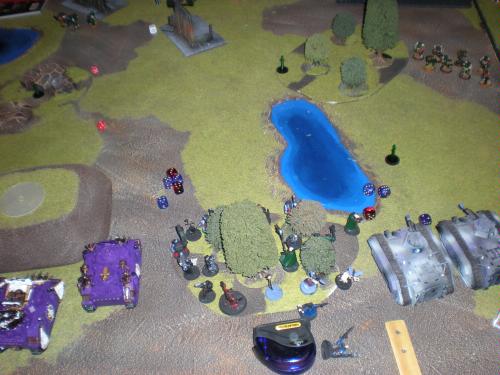
An Exorcist killed the Hardened Vets on the far right (with some minor help), my DH Inq killed a squad, and my WH Inq and the SoB killed squads down to one guy each. Also in the bottom left my Storm Troopers with my Chimeras killed the Infantry squad below the ruins. I also take some shots with an Exorcist at the Special Weapons in front of the ruined Chimera team and knock them down to one guy, and my last exorcist shot at the Jr officer in the rocks knocking them down to one guy. So he ends up with 4 solo guys running around and does not fail any tests.

Right Side
Left Side
Imperial Guard Turn #3
He does not get much on, and everyone runs for cover!!!
Right Side
He gets one squad that got sent back to reserves on and drops it below the ruins to shoot and kill my Storm Troopers.

Left Side
Turn 4
Witchhunter Turn #4
It is starting to get late so I move out to head for the objectives. The SoBs on the far right are in the rhino. I kill the squad that killed my Storm Troopers, and pick of the solo stragglers.
Right Side
Left Side
Imperial Guard #4
Now everyone comes on. It rains down IG. He damages my Chimeras, but does not do much.
Right Side
Left Side
Turn 5
Witchhunter Turn #5
I run forward and grab as many objectives as I can. I try to kill as many of them as I can, and even though they are dropping like flies there are thousands of them.
Right Side
Left Side
Imperial Guard #5
All he has to do is run for the objectives.
He knew it was going to be the last turn because we ran out of time. That is what made it a little bit easier for him. Even though we really did not start till the bottom of turn #2 we still only made it to turn #5. Just to see if the game could have gone on he rolled, and the game would have ended, so we did play a full game.
At the end of the game he held 2 objectives, I held 1, and 2 were contested giving him a minor win. I think both of our highest point units were alive so he ended up with 14 points, and I ended up with 8 points.
Sean was fun to play, and is from Tucson, and now that I am living in Mesa I have a feeling I have not seen the last of him. I think I will see each other at least in the ‘Ard Boyz semi-finals.
After thoughts.
I am still stuck in 4th edition. I kill guys like crazy, but 5th edition is only about the objectives. I should have moved out earlier to be in position to take or contest the objectives on the far side of the board. He really did not have the army to beat me since he lacked a lot of anti-vehicle fire power. Perhaps I should have set up in the middle of the table rather than in a corner.
Also when you are playing against a Deep Striking army the dice roll to go first is huge. If I had gone second, that would have given me an extra round of shooting at him, and he would have had nothing left.
Talking about bad match ups, I get to play against the small, hard as nails ork army in Kill Points, and a million guys raining from the sky in objectives? If they could have been reversed, I could have been on my way to glory, now I am at 1-2-1 and need to win my next game just so I do not have a losing record.
LVGT Game #5 Blackmoor’s Witch Hunter’s vs. Matt’s (Unseth) Chaos Demons
I know Matt from the LA area and we last played at the Southern California Game Workshop League (http://scgwl.com/) league playoffs just before I hit the road to Jacksonville.
Matt’s Chaos Demons List
- Group A
- HQ
- Bloodthirster
- Bloodthirster
- Troops
- 5 Pink Horrors w/Bolt of Tzeentch
- Heavy Support
- Demon Prince w/Flight, Iron Hide, Unholy Might, MoT, Bolt of Tzeentch
- Demon Prince w/Flight, Iron Hide, Unholy Might, MoT, Bolt of Tzeentch
- Group B
- Troops
- 6 Horrors w/Bolt of Tzeentch
- 6 Horrors w/Bolt of Tzeentch
- 6 Horrors w/Bolt of Tzeentch
- 6 Horrors w/Bolt of Tzeentch
- 6 Horrors w/Bolt of Tzeentch
This is a very bad match up for Matt because I have Mystics.
Mission: Annihilation
Deployment: Dawn of War
- Points:
- Player A achieves double or more kill points than Player B- A scores 17, B scores 3
- Player A achieves more (up to double) Kill Points than Player B- A scores 13, B scores 7
- Players achieves an equal number of Kill Points refer to victory points
- If Player A scores 175+ more Victory Points than Player B- A scores 11 points, B scores 9
- If the scores are less then 175 points difference then the result is a draw, then Player A scores 8 points and Player B scores 8 Points.
- Bonus Points:
- +2 If the enemy has no scoring units in your deployment zone.
- +1 If you have more scoring units alive than your opponent at the end of the game.
I think I won the die roll to go first.
The set up:
Turn 1
Witchhunter Turn #1
Wait for it…
Demon Turn #1
He rolls for which group of demons that he gets. He wants group A to come on, but he ends up with Group B.
He forms a ring around my Inq and he rolls very well and stays out of Mystic range, but within 18” to shoot. He shoots up my Inq retinue some, and shoots some BoT at my Chimeras and does not do much.
[No Picture]
Turn 2
Witchhunter Turn #2
I get a couple Exorcists and a few other units and I shoot up his horrors some. That 4+ inv save is tough to get through.
Demon Turn #2
He only gets his Demon Prince from reserves.
He moves forward with his horrors and kills my Inq.
His Demon Prince lands far off of in the left corner and shoots his BoT at my Chimera and blows the multilaser off.
Turn 3
Witchhunter Turn #3
I get out of my Chimera and shoot his DP with my storm troopers. I don’t kill it.
I shoot up most of his Horrors.
Demon Turn #3
He gets another DP and lands and shoots my Exorcist stunning it. He assaults my other Exorcist and destroys it.
Turn 4
Witchhunter Turn #4
I get my other Melta Gun Sroorm Troopers to hel; the plasma gun Storm Troopers and they unload on his DP that is assaulting my vehicles killing it.
Demon Turn #4
His DP flies forward and assault the only thing he can reach which is a chimera. He gets his last horror squad and lands in the middle. He also gets a bloodthirster and you can see its base in the upper right. It tries to whip my Exorcist and fails to damage it.
Turn 5
Witchhunter Turn #5
I unload everything on the Bloodthirster and I kill it. My SoBs kill the new Horror Squad, and I shoot at the DP, but it lives.
Demon Turn #5
He gets his last Bloodthirster in. He assaults my SoB with his DP, but he only has one wound left and gets killed by them in assault.
Turn 6
Witchhunter Turn #6
My army unloads on the Bloodthirster killing it and ending the game.
I won a massacre 20 points to Matt’s 3
Matt was a good guy and took his beating in good humor.
This illustrates what I say about Demon armies, is that one game, the dice rolls are not going to go your way, and you are going to be in trouble. He would have been much better off landing his MCs and overloading my ability to kill them, and then get into a bunch of assaults, but he rolled the wrong group, and it just went downhill from there. Then he only got one MC a turn so it just dropped down, and got shot to pieces.
So I ended the GT with 2 massacres, 1 tie/minor win and 2 minor losses for 68 battle points and 27th place.
Epilogue
So there you have it. I scored 2 massacres, a tie, and 2 minor losses for a total of 68 Battle Points and 27th place out of 128 people. Not bad looking at the big picture, but a rather disappointing finish for me. I scored the same sportsmanship score that everyone else did, and my paint score was below average. I was going to go to a back up army due to the lack of time because of work and RL issues, but felt that I needed to finish this article and so what little time I did had I used to paint and bring this army.
I did have 5 fun games with 5 great players. While some people played similar armies, I got to go against a wide variety. I played against Dark Angels, Orks, Tau, IG and Demons. You can’t ask for a better spread of different armies with different play styles.
Overall I think that my list held up pretty well. I had a chance to win against all of my opponents and that is all you can ask out of a list. It was my unfamiliarity with 5th edition let me down. I just made so many mistakes that it cost me wins in very close games against very good players. For the next time I need to learn how to manage, control and contest objectives, and the strategies around the first turn and the various deployment possibilities to increase my chances of winning.
I also feel that I got somewhat unlucky with the match ups. Hard and durable orks in a kill point mission, a lot of drop troops in an objective mission, etc, but those are the breaks. Sometimes you get easy match-ups the whole way through, and other times you get bad match ups against very good players.
Unit assessment
Demon Hunter Inquisitor+Retinue
This unit preformed very well. Not only did he have mystics to help shoot up drop troops IG and Demons, but the threat of them getting shot kept those units back at a respectful distance. As far as offense goes they were devastating when shooting. The sages letting the plasma cannon re-roll getting hot, and bad scatter rolls means that I never lost one to overheating, and it hit almost every time. The whole unit was also big enough to have a lot of bullet catchers so they were quite durable against enemy shooting, and the one game I lost them to shooting was more do to me placing them out in the open. It does take a lot of shooting to take them down, but I need to protect them by sticking them in cover, or have some bodies in the way. In Game #2 against Orks I placed them a bit too far forward, and they did get assaulted before I was ready for it. In the future when facing opponents that are assault based, I need to place them far to the rear since they have no assault ability at all.
Overall score A+
Witch Hunter Inqisitor+Retinue
This Inq did not perform as well as her DH brother. Of course she can’t take mystics or a psycannon so her range and functionality was compromised, and she did not have inexpensive bullet catchers to increase her survivability. Also the placement of this unit was problematic. Normally there was only one good spot of cover to shoot from, and to have 2 Inq packed into it was a bit much. Dawn of War missions were also a major hindrance because she had to be left behind to walk on to the board in turn #1 to set up to shoot, and the fact that she and her retinue was only 6” on to the board was not good. But when properly placed she could deal some damage, but I do not think she was worth the price.
Grade C-
Sisters of Battle+Rhinos
What is not to like about them? They have a rhino that provides them mobility, and a built in protection from shooting (now that there is no more entaglement), and cover too. They can get out and dish out a large amount of damage to everything. I also like there versatility by having both a flamer and a melta gun and faith points to fill a variety of roles. Also the fact that they are a troop unit that can hold objectives is always a bonus. There were a couple of down-sides with them. The first is that they are a short range fire-fight unit. That means that they are not good in the role of sitting back and shooting. If they have to hold an objective near my deployment zone it was a waste of this unit. They also have a weakness to MCs, vehicles and other durable units. I also took only 2 Faith Points which I thought were plenty at the time (I originally did not upgrade the Veteran Sisters to Veteran Sister Superiors for 0 faith points), but the more I used them, the more faith points I wanted
Grade B+
Storm Troopers+Chimera
These did better then I thought. For the Chimeras the front armor of 12 is a hard nut to crack. The downside is that the 10 sides are easy to get through. With 5th edition making vehicles more survivable, they were able to take multiple penetrating hits and still survive. They were also mobile cover to obscure my Exorcists. The chimeras added a bunch of vehicles to make my army a Mech army and overload my opponent’s ability to kill all of my vehicles. I also like that they are able to throw 3 shots at strength 6, and 3 shots are strength 5 downrange. They also moved my Storm Troopers around to take objectives and keep them safe. The storm troopers did a lot of damage at short range. The plasma guns would unload on something with BS4 and hurt them. The downside is that they are only 5 models with crappy leadership and a bad save. So once the unleashed their volley of shots, they were killed shortly afterward. The one unit that worked better than I thought was the Melta gun squad. They would stay safe in there chimera until they got into a position to kill a vehicle, and when they were in range they would take it out.
Grade: Storm Troopers with Plasma Guns C+, Storm Troopers with Melta Guns B-
Exorcists
These along with my DH Inq were my MVPs. They took out Deathwing Terminators, Hammerheads, Killa Kans, Bloodthirsters, etc. They are able to counter a lot of units out there that some armies just can’t deal with. When I was making the army I wondered how I could take out 9 oblits and Exorcists were the answer. An added bonus was the 13 front armor value was a tough nut to crack. Even units that I worry about like Lootas have trouble damaging them. They ended up surviving for the most part, and doing a great job.
Grade A
The Monday morning quarterback Improvements to my list
I think the changes I made to my list because I running out of time hurt me. The storm troopers over the Grey Knights brought mobility and a lot of short range firepower. Also it changed my list to a mech list. The downsides are that since it was a short range shooting army to utilize my units, I needed to get in to close range, and that pulled me off of objectives. To hold objectives I often needed to have an expensive Sisters squad hang back, or have a Storm Trooper squad hold it, but they were unreliable for holding them because of risk getting shot off of the objective. Another draw back is that they give up 2 kill points, and both units are relatively easy to kill. I think that my original plan of having Grey Knights would have been much better. They are a troop unit can sit back on an objective and shoot to full effect. They can also be protected from long range shooting by their shrouding making them hard to kill in kill point missions. Then when orks or other units try to assault them off an objective, they can hold their own. The downside is that they are rather immobile, and are not moving very far, very fast.
The WH Inq was too expensive for what she did. I might drop the unit all together, or take them as an elite DH Inq with heavy bolters. That way they can still shoot to good effect, and stay cheap.
SoB will now have a veteran sister superior that will now carry an eviscerater. There are a lot of mean and nasty creatures out there that they can act as a tar pit for. The ability to kill some of the things that you are going to tar pit is a huge bonus. Also a dreadnought, killa kan or even a sentinel can kill your whole squad, and there is nothing that you can do about it. One thing about 5th edition is that vehicles are a lot more vulnerable to assault. I found this out on Friday with a large squad of Kroot took down 2 hammerheads. I like the flexibility that the eviscerater brings to the unit. I also found myself using my Faith Points more than I thought I would. They come in very handy, and are very useful. I think I will add a canoness to add 2 more faith points for cheap.
Conclusion
I had a lot of fun at the GT even though I was not feeling well for most of it. At the Vegas GT unlike the Baltimore GT I know about half of the people there from all of my RTT trips to all over California, and from knowing the WC guys and the Toledo guys that fly in from the east. The hotel was great, and the fact that the GT being held in the hotel was very convenient. The hotel being on the strip right in the middle of everything was also very nice. Last year it was held in a bad part of town in a convention center that was far away from everything. So my thanks goes out to Dave Taylor for scouting out the location for the much needed improvement.
I did end up winning around $800 at the Blackjack and Poker tables so with this money look for my next article: Blackmoor goes to the Baltimore GT.