Dakka Detachment One
at Adepticon 2008
The Military Industrial Complex
(Tau Army Construction)
The actual mechanics of assembling and painting our armies are covered extensively elsewhere (Dakka Detachment 1 Adepticon 2008 Tau Army), so I won’t go into it here. Suffice it to say that it was not the most efficient of processes, but the end product was quite satisfying. Also, if we decide to do joint army assembly again, we've learned a lot about how (not) to do it.
Chain of Supply
(Tournament Logistics)
Aside from some concerns over whether we would all make it to Adepticon (thanks for nothing, American Airlines), and the requisite strange looks at the x-ray machine in the airport, nothing major to report here on my end. Not having to bring any portion of the team army simplified packing tremendously.
(Post-Adepticon, getting home added some spice to my trip, as I got booted off my United flight Sunday night. I did get home Monday, with a free flight voucher for my troubles. Also, the shoulder strap broke off my army transport, which is extremely annoying – the lack of a standard carryon-style handle is a design flaw.)
Disembarkation and Reconnaissance
(Setup and Scoping the Competition)
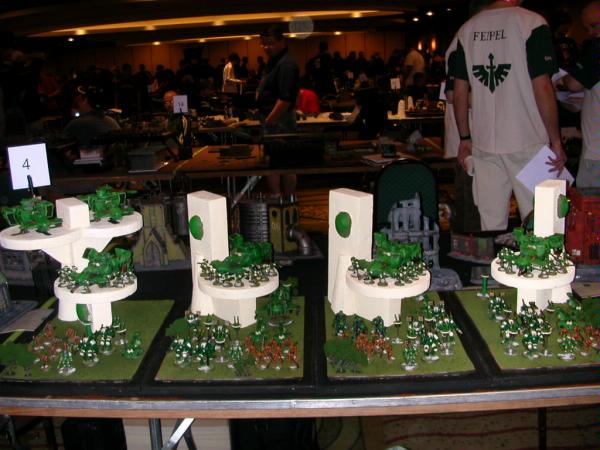
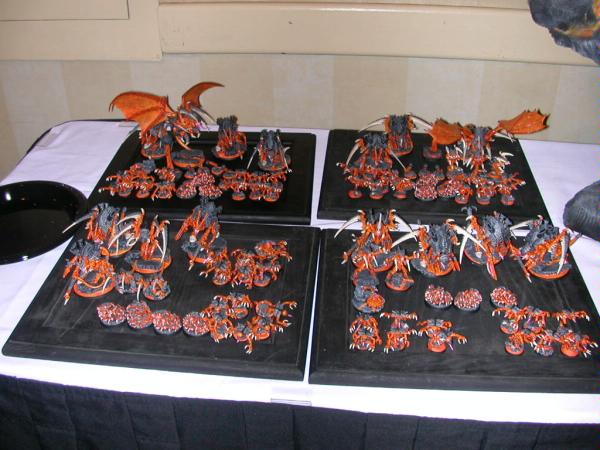
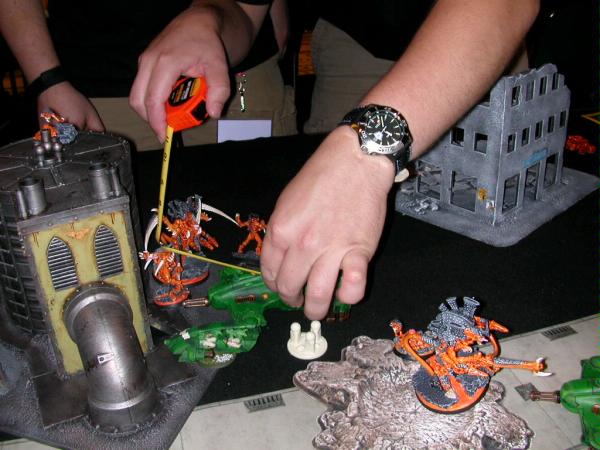
As yakface noted elsewhere, he can’t be bothered to sleep before major tournaments. Instead, he must sit up all night and paint highlights. I don’t know how he does it, but it *works* for him – the results are wonderful. He was still touching up minor details until we pried the paintbrush from his fingers – it was time to setup.
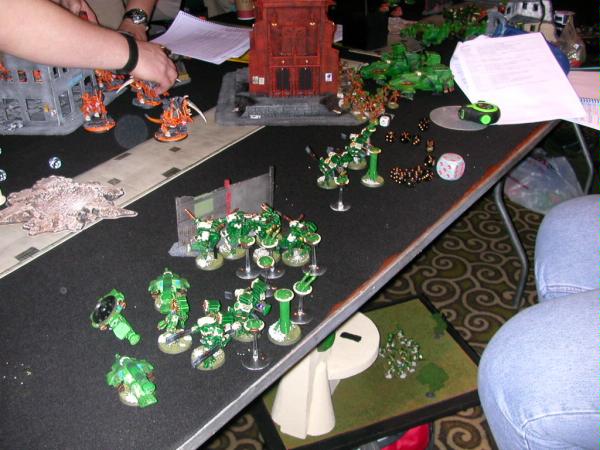
Here’s a nice picture of Jon’s hand, obscuring our army. Note the fine highlights and subtle shadings – the veins look so real!
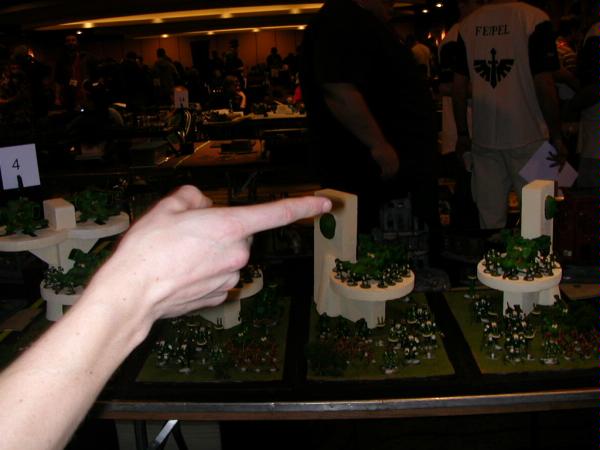
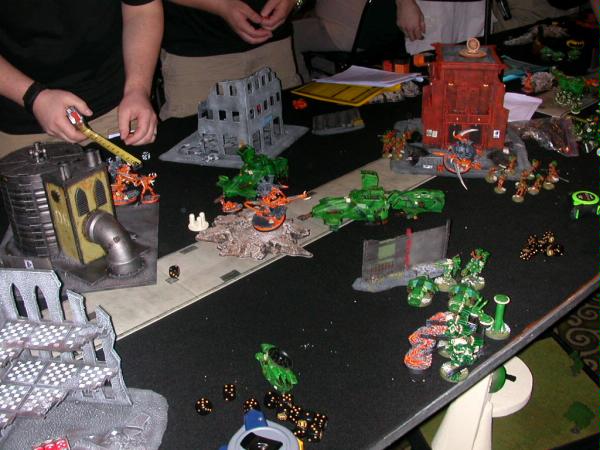
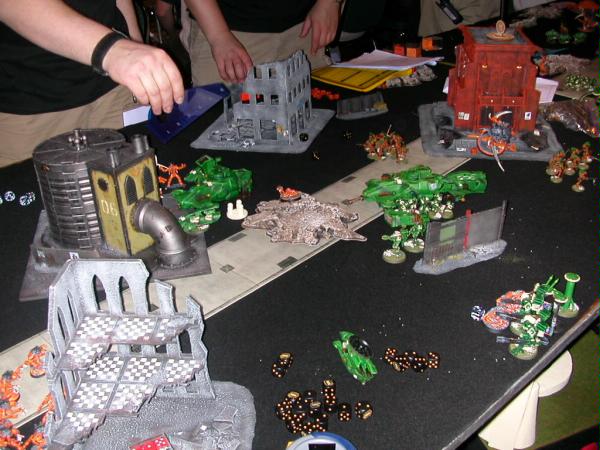
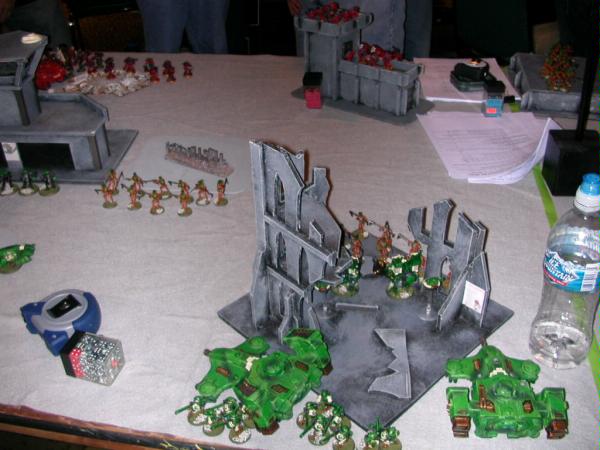
And here’s a picture of the displayed force:
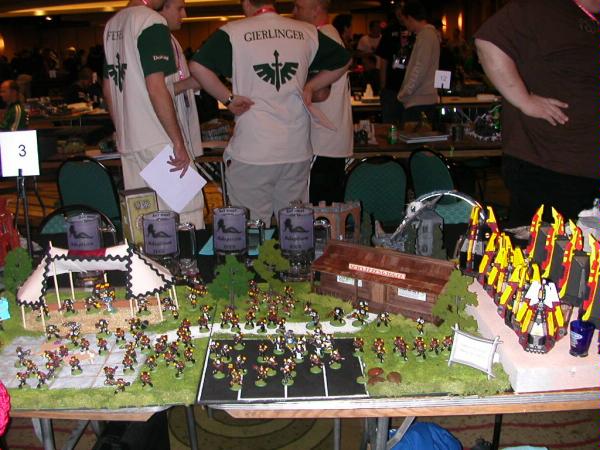
I snapped a few shots of some of the competition. It doesn't suffice to say that the armies were again gorgeous across the board, and the displays continue to get larger and more extravagant.
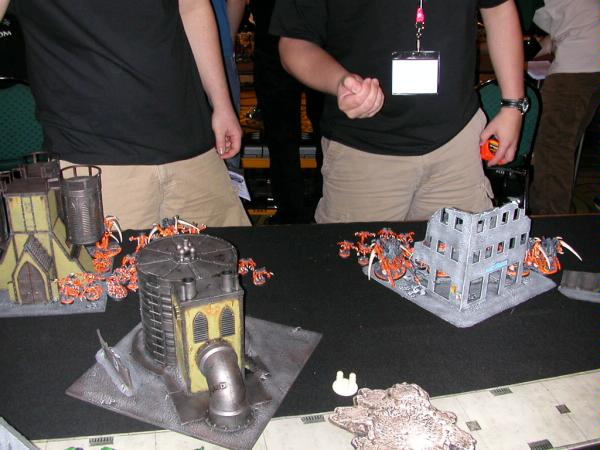
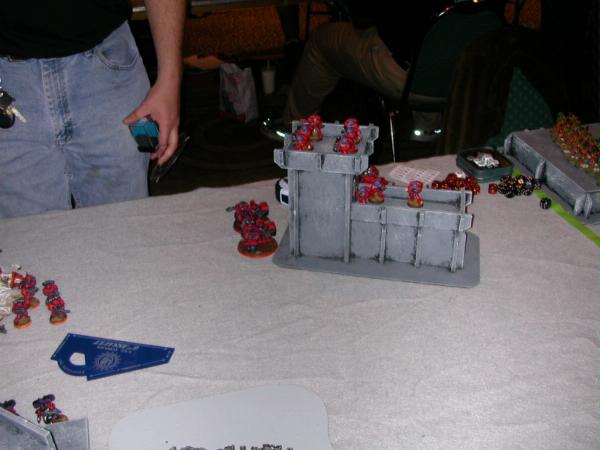
The army we thought we’d face in round one, loaded up with drop pods:
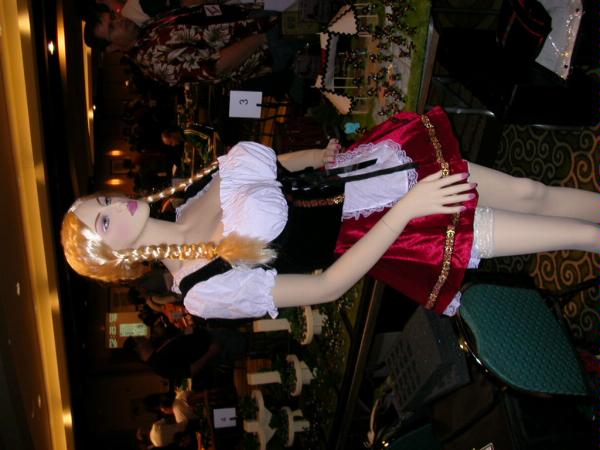
The beer-wench who was standing nearby:
Casus Belli’s “Orange Crush,” back for an encore appearance:
Cold Steel Mercs, complete with bright pink marines:

The Calm Before the Storm
(Pre-battle considerations)
We expended a decent amount of skull sweat on analyzing how we’d react to those drop pods, setting up contingencies, and generally theory-hammering out the game. Then the drop pods redeployed elsewhere, and were replaced by BRIGHT ORANGE BUGS.
“I've got my spine, I've got my Orange Crush….”
So, new plans were needed – how do Tau deal with Nidzilla? Flying Hive Tyrants? Multiple TMCs parked on the objectives? That last was the easiest to address, actually – you tank shock them OFF the objectives. Accordingly, keep a tank or two alive until end-game. Easy, right?
Adepticon Refresher
For anyone who hasn't been to Adepticon, here are a few of the features of the team tournament:
-When your team registers, you are provided two tournament packets, each containing a summary of the TT rules, every mission you will play, and recordation sheets for each mission. (Tournament organizers, please note: the recordation sheets are the last pages in the packet, and are in DESCENDING order. As such, the results sheet for round 1 is the last page in the packet, and can be torn off and turned in with a minimum of hassle, leaving round 2 as the last page. Genius!)
-Team Tournament – 4 players per team, each with 1000 pts. 4 rounds, 2.5 hours per round. One team plays against another team in a given round. Each team fights as 2 “coalitions” of 2000 pts each round; your partner will rotate through the day, such that you will play with each of your teammates once. The fourth round is “Captain’s Choice,” in terms of who plays with whom.
-“Commander’s Heads” – this started a few years back. For each enemy HQ you slay over the course of the day, you gain a “Commander’s head” point. For each of your HQs which die, you lose one. The Commander’s Heads points are included in the Overall scoring, as well as their own category (“Headhunters”). Provides a little extra incentive to keep your HQs alive, and kill off your enemies’. We don’t consciously seek these points; they’re just nice when they happen.
-Mulligans – these also started a few years back. Once per game, each coalition of 2 players may re-roll a single die roll. Using your Mulligan will give your opponent one point (and cost you one); these points are included in Overall scoring, as well as their own category (“Let the Dice Fall Where They May”). As some teams discovered, a point or two here can make a significant difference in overall placement.
Light in the Darkness (Round 1: Casus Belli)
“Case for War” indeed! The top few tables were populated by a bunch of very familiar faces, as Jeff Chua had set up round 1 as if it were a hypothetical round 5 of Adepticon 2007, at least for the top finishing teams. As such, we found ourselves staring at the beautiful orange Tyranids of Casus Belli, who finished 4th in 2007 to our 3rd.
The Opposition:
My partner in Round 1 was Allan Hernandez (Blackmoor). We were opposed by Erich (CaptKaruthors) and Scott (who didn't include their last names on their army lists). Their combined coalition looks something like this (stat upgrades omitted):
HQ: 2x (Hive Tyrant (VC & Devourers) w/2 Guard)
Elite: 2x (Carnifex w/2x Devourers)
Troops: 4x (6 Extended Carapace Genestealers)
4 leaping Ripper Swarms
3 leaping Ripper Swarms
Fast Attack: The Red Terror
Heavy Support: 2x (Super Gunfex: 5 wounds, T7, 3+ save, VC & BS)
The Mission:
12” Long-edge deployment, Infiltrate, Night Fight (turns 1 & 2)
Primary Objective: Capture a beacon by having a scoring unit partially within 6” of the objective, and denying your opponent the same.
Secondary Objective: Score 200 or more VPs than your opponent.
Tertiary Objective: Destroy designated enemy models, while keeping yours alive.
Bonuses: Control more table quarters; prevent enemy scoring units from crossing the center line.
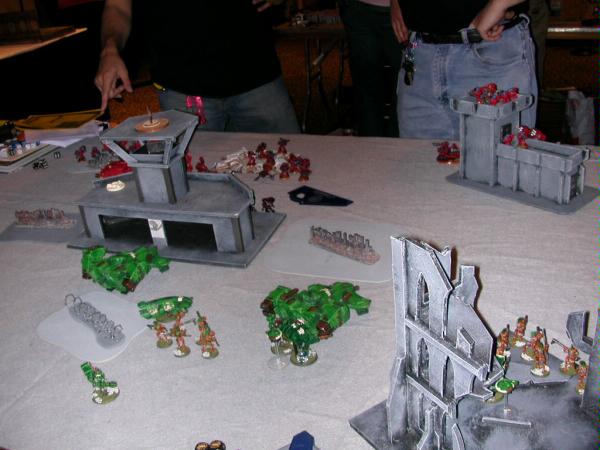
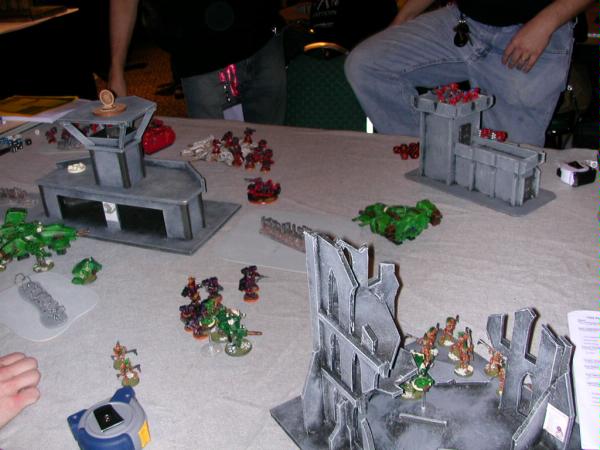
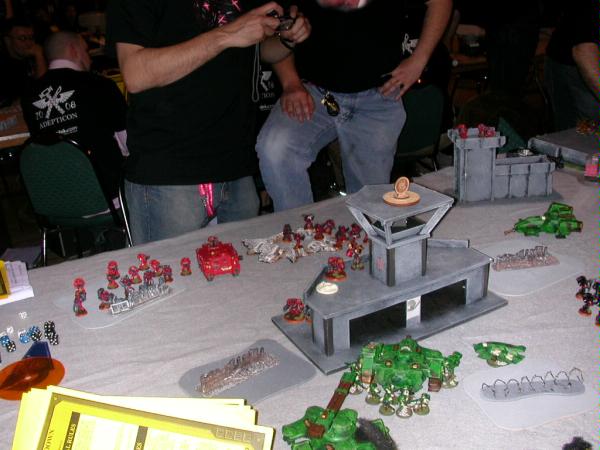
The Battlefield:
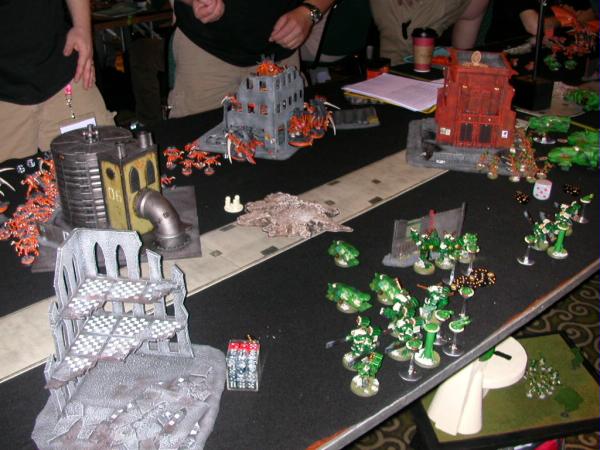
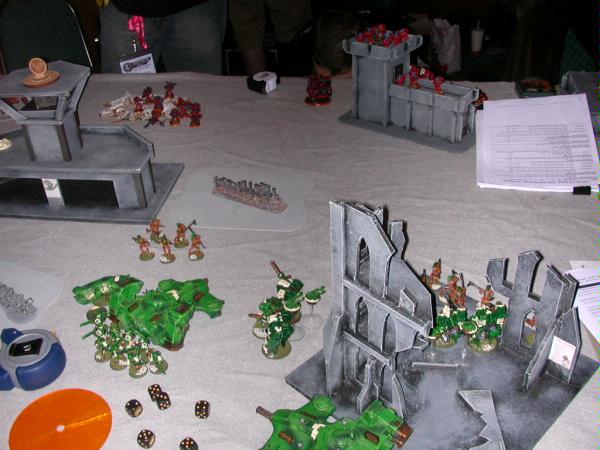
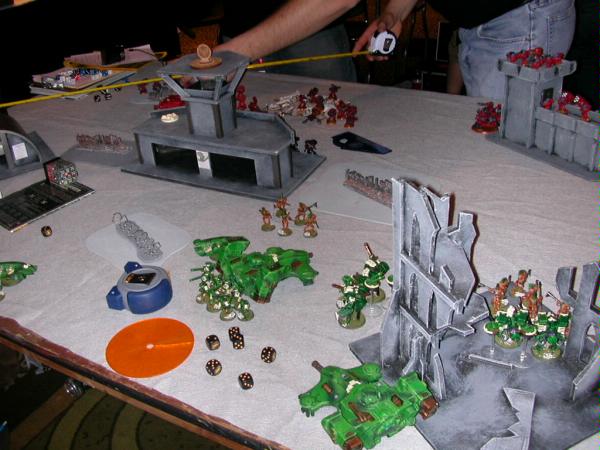
We were in a city-themed area of the convention hall – lots of ruined buildings. As such, we had a lot of area terrain (buildings), a few craters, and a little 6” section of 4” tall wall.
Deployment and Tactical Considerations:
As we deployed, Allan and I pondered how to deal with TMCs, while avoiding swarms of Genestealers. Fortunately, Casus Belli hasn’t adopted the Scuttlers gene for their Genestealers, which would give us a little more breathing room…or so we though. What proved relatively decisive was our opponents dropping nearly all their Genestealers on our left flank, and most of their TMCs on our right. We were able to setup something like a modified refused flank, with most of our firepower concentrated (or able to concentrate) on the right flank first. As this was our very first game using Tau, neither Allan nor I had a good feel for exactly how mobile Tau firepower can be; I’d love to replay this game, with our improved understanding.
The objective scatters 2d6” from the center point of the board, along the center line. Unfortunately, it scattered towards our left flank, which was less than optimal.
We gave our Team Objective Markers to some Broadsides. They gave theirs to their Hive Tyrants.
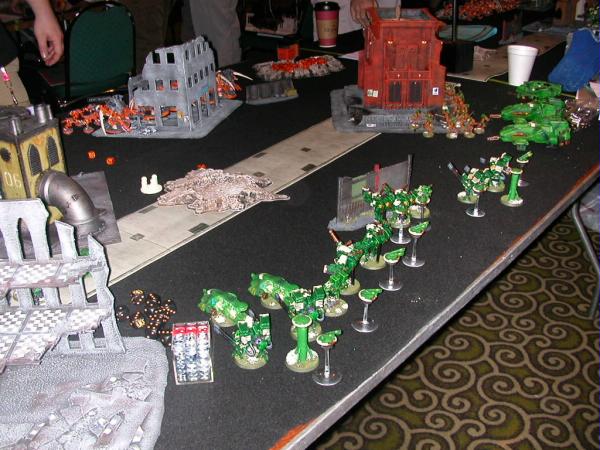
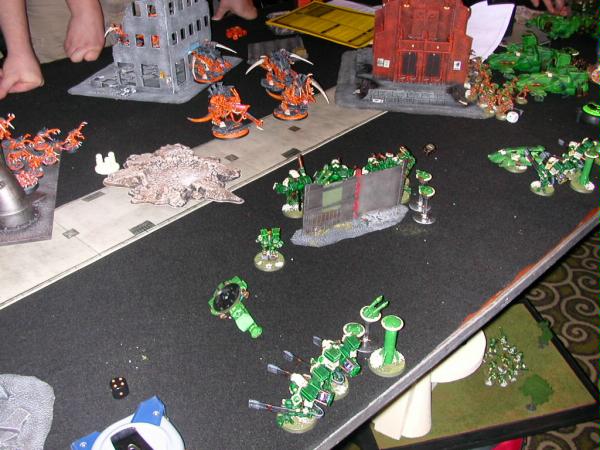
A few items to note in the deployment pictures: that orphan steel wall segment found its way to the front edge of our deployment zone; all of our infantry (and the devilfish) were clustered on our right flank, while all of the genestealers were on the left flank. And Janthkin, like an idiot and in spite of advice from Blackmoor, dropped his Stealth Suits behind a building less than 18” from the Tyranid lines (you can barely see them behind the ruins in the left of one shot).
Night Fight on turns 1 & 2 meant that our Tetras would be crucial, providing markerlight coverage to light up big bugs for Railgun attention.
Battle Commences:
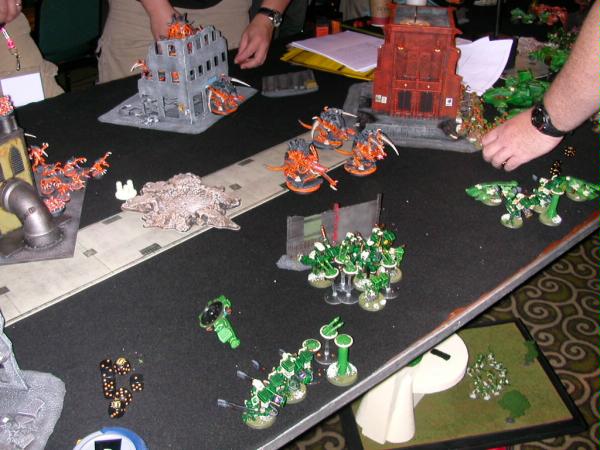
Turn 1:
After shaking hands and wishing each other well, the dice gave the Tyranids the first turn. It was a fairly uneventful turn, as the darkness denied them many shots, mostly filled with a general trend towards skittering forward. One major exception: 4 leaping ripper swarms leapt out, through the intervening terrain, into my Stealth Suits. They killed one or two, the others broke, and were run down. The rippers moved back into the cover, giggling to themselves. *sigh*
Our turn 1 saw a general shifting towards our right flank, away from the stealer horde (and the pesky ripper swarms). Broadside shooting put a few wounds into the heavy gunfexes (priority targets), and concentrated Crisis Suit fire killed off the ripper bases. In what was probably a surfeit of caution, the kroot, fire warriors, and devilfish continued to hide. We had a plan for the devilfish and fire warriors involving the objective, turn 6, and tank shock, but we could have made better use of them initially. They did contribute some smart missile fire in the early stages.
Turn 2:
More forward-moving orange bugs. Some shooting got through the darkness, killing a Tetra and blowing the marker lights off of both of the others. So much for those!
Our turn, and more side-stepping. A few more wounds on some Carnifexen, but none have been slain yet, which is a concern. The Crisis Suits begin to realize how great the little wall segment is – all the suits, including the commanders, can hop out, fire, and hop back, safe from all shooting retaliation.
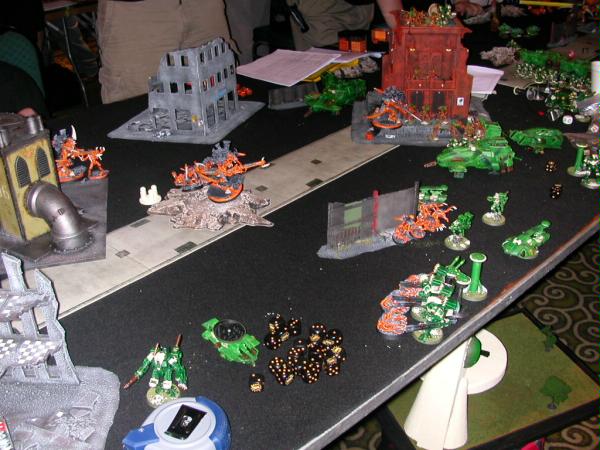
Turn 3:
The Carnifexen get closer. Devourer fire from the Elite fexes kill off the shield drones attached to the right-side Broadsides, but fail to wound the suits themselves (and who don’t fail their morale check).
Our turn, and massed firepower from just about everything in the army kills the 3 leading carnifexen. Special praise goes to our Commanders: those Cyclic Ion Blasters are very handy against T6 TMCs, and they have enough volume of fire to be useful against small ‘stealer units as well. We began to move the Devilfish as well, as they’ll need some time to get to the objective, and we figured (hoped) the heavy gunfexes would be dead before they could be a threat.
Turn 4:
More buggy motion. The Hive Tyrant in the right-hand building finally climbed out of it and headed towards the middle. Fire from the remaining Dakkafex into the Broadsides was ineffectual.
Our turn sees our first attempt at “Fish of Fury,” as Allan’s Fire Warriors dump fire into the Dakkafex. Unfortunately, we aren't as lucky with the failed 3+ saves this turn, and the last ‘fex still had 2 wounds left. Some genestealers are heading our way on the left flank, and we kill most of those. The Red Terror popped his head out on the left flank, eats a Railgun shot, and troubles us no more.

Turn 5:
Some genestealers finally got close enough to assault, and chewed up both sets of crisis suits. Fortunately, their “Massacre!” roll was a whopping 1”, which kept them off our Commanders. The unit of 3 ripper bases got to my Broadsides, but were ineffectual against T4 2+ armor. The last Carnifex assaults the fire warriors who wounded him, kills one, breaks them, runs them down, and Massacres into the nearby Kroot. Ooops.
Our turn, and we’re missing the firepower the suits provided. Commanders & the Tetras (remember those? They have a BS4 pulse rifle) deal with the genestealers in the backfield. The Devilfish move up further (one with Firewarriors intact, the other empty), while the second unit of Kroot move AWAY from the Carnifex killing their buddies. Combined fire from the Devilfish and the Pirahna (which we underutilized this game) strip the forward Tyrant of his Guard and leaving them *at* half strength for the unit. The Dakkafex kills one kroot, which breaks them, and they start fleeing. The Broadside *win* their combat against the rippers, for what it’s worth.
Turn 6:
Combined fire from the Tyrants and the Dakkafex down both the Pirahna and the loaded Devilfish (leaving us with Entangled Fire Warriors). But they can’t touch the Tetras, both of which are scoring units and hiding behind the uber-wall. The Broadsides win their combat AGAIN.

Our turn. Movement is crucial, as we use the tetras to define a wedge, and try to use the Devilfish to tank shock the Tyrant & his Guard away from the objective. The only minor disagreement in the game occurs here, as we try and figure out where the Devilfish will stop, where they have to move (and can they just move behind the Devilfish). We eventually reach a consensus that the single Devilfish just can’t move them all more than 6” from the objective. Our shooting ends up removing the lone Tyrant (could have tried to put just a wound on him, to make him non-scoring, then tried to range-snipe the one Guard within 6” of the objective with our commanders…and decided that was a lousy way to end a great game). The Broadsides win their combat for a THIRD time, having inflicted 4 wounds on the Rippers over 3 rounds of HtH and taking zero losses. I’d rather they have been shooting….
Aftermath:
A draw on the Primary, but a win on both the Secondary and Tertiary objectives. We picked up a single bonus point for Quarters.
Survivors:
Tyranids: One Tyrant with Guard, one (wounded but still scoring) Dakkafex, one unit of Rippers, and one unit of Genestealers.
Tau: 2 Broadside teams (one with no drones), 1 Kroot unit (the other fleeing), 2 Tetras (weapons damage), 1 Devilfish, 1 (entangled) unit of Fire Warriors, and both Commanders.
Analysis:
The lost of the Stealth Suits was stupid, avoidable, and ended up costing us. Had they lived, those genestealers and rippers wouldn’t have made it to combat, leaving us with the necessary firepower to deal with the last Tyrant. On the other side of the coin, our opponents’ deployment gave us the time we needed to deal with their army in waves, letting us focus-fire on Carnifexen before having to deal with Genestealers.
Games are won and lost in deployment!
Our dice were consistent under-performers, in terms of hitting and wounding. But their dice were poor at 3+ saves for TMCs. I guess it balances out in the end.
MVP goes out to this fellow:
This wall was fundamental to our success, in that it gave us a safe place to shoot from.
We were very happy to play the Casus Belli guys – they are great sports, bring fantastic-looking models and dead ‘ard armies to every game, and are just plain top-notch competition. I do wish we had met later in the day, when our battle scores brought us together, instead of in Round 1.
Shield Generator Down (Round 2: Blood Angel Blues)
The Bill/Jon coalition pulled a straight draw out of the other half of Casus Belli (which was quite impressive given the pair of Flyrants they had to deal with). The magical number manipulation paired us up with team Blood Angel Blues; Jon and I would face Aaron Phipps and his teammate who didn’t put his name on his army list.
The Opposition
Unsurprisingly, “Blood Angel Blues” brought Blood Angles.
We faced off against:
HQ:
2 jumpy Chaplains
Elites:
1 Terminator squad (5 models, 1 assault cannon)
7 model Death Company
9 model Death Company
Troops:
10-man Las/flamer Tac squad
10-man Las/melta Tac squad (Heavy Bolter Razorback)
Fast Attack:
2 Attack Bikes w/Heavy Bolters
Heavy:
1 4 ML devastator squad
1 2 ML/2HB devastator squad
1 Whirlwind
The Mission
12” long edge deployment, Concealment, Infiltrate, Deep Strike
Primary Objective: “Destroy” a shield generator objective, by having at least 1 model of a unit designated as “Combat Engineers” within 6” of the objective at the end of the game, and preventing your opponent from accomplishing the same.
Secondary Objective: 200+ more victory points than your opponents.
Tertiary Objective: Control more terrain pieces than your opponents (via scoring units in/touching the terrain).
Tactical Bonuses for rendering all enemy Troops non-scoring; having no units in your starting deployment zone.
The Battlefield
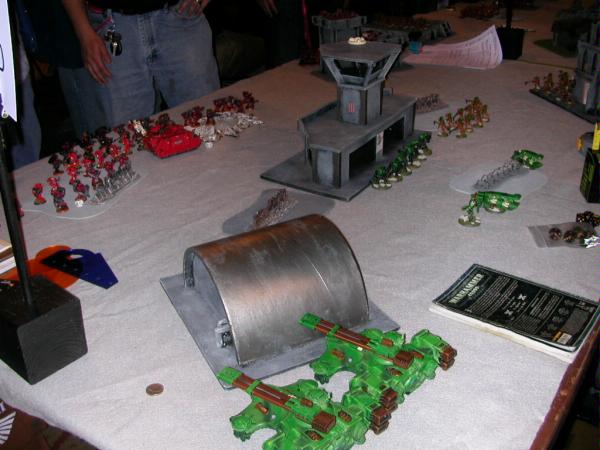
Different area of the hall, but still a lot of buildings (and nothing like a forest to be seen). Our opponents assembled a wall of level 2 & 3 area terrain across the middle of the board, with a large building sitting in the center (and holding the objective). Some nice building placement gave them overwatch-like positioning for their Devestator squads, which kept our vehicles pinned down.
Our table had a road (in segments) and a large gold spaceship on it. By agreement with our opponents, we put these under the table; it was a crowded table to begin with, and the road in particular is extremely awkward to play on/around.
Note to self: MUST play Tau more aggressively!
Deployment and Tactical Considerations
Our opponents won the “Choose Side” roll, and stayed on their side of the table (which also had better terrain for them). We held our Crisis teams and Jon’s commander in Reserve for Deep Strike (thinking about their Whirlwind); they did the same with their Terminators. The Kroot and the Stealth Team infiltrated.
First, we mis-read the mission. EACH player was supposed to choose a Combat Engineer unit; we only chose 1 (my Stealth Suits), while they chose their Terminator squad. When we discovered the error in Round 2 (after the Stealth Suits were dead, and before the Terminators arrived), it seemed too late to fix the problem.
Second, we were out-deployed: the large building in the middle gave the Death Company all the cover they could ever want for advancing on our lines, while the over-watch like positions gave their heavy weapons pretty good fields of fire, which kept our vehicles pinned down.
Third, I placed the Stealths badly AGAIN, as will become apparent.
If the above lacks resemblance to “tactical considerations,” that’s appropriate – I did not keep the mission objectives or LoS in mind during terrain placement OR deployment. And we suffered for it.
Battle Commences:
Turn 1:
(I neglected pictures of Turn 1; my apologies.)
Our opponents took the first turn (though I misremember if they rolled it, or we gave it to them). It quickly became apparent that I was an idiot, at least when it comes to placing Stealth Suits – the Death Company came jumping forward, hugging the building in the middle of the board, and I wasn’t going to be able to get away from them. I don’t recall their shooting accomplishing anything this turn.
I’ll take this moment to mention their Whirlwind. It was parked behind the right-side building, which gave it range to threaten the right-side of our deployment zone. It didn’t hurt much all game – I believe we lost a couple kroot to it, and possible a drone.
Our turn 1, and I pulled the stealths away from the building; the forward Kroot shuffled a bit as well. Shooting *might* have killed a single Devestator marine from the right-flank building.
Turn 2:
Here’s a picture:
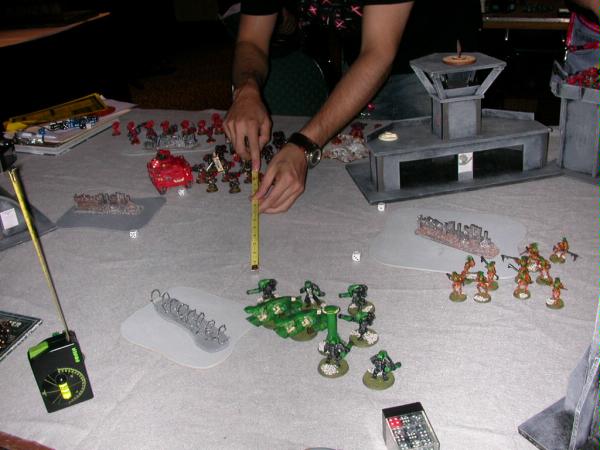
And another:
The only surprising thing is that the Stealth Suits (the 3 in the kill zone) killed TWO Death Company marines in HtH. I lost 3 in return, was outnumbered, broke, and fled off the board.
Some shooting killed off half of the forward kroot (attack bikes), and inconvenienced a Tetra (stunned).
Our turn: that Death Company had to die! My suits and Jon’s HQ came in; Jon’s suits did not. We dropped in close, moved up the Devilfish, and proceeded to dump most of our army’s firepower into killing 7 marines. We succeeded, but it was a near thing. The most effective unit? Those 5 kroot, rapid-firing. The dice were unkind.
Turn 3:
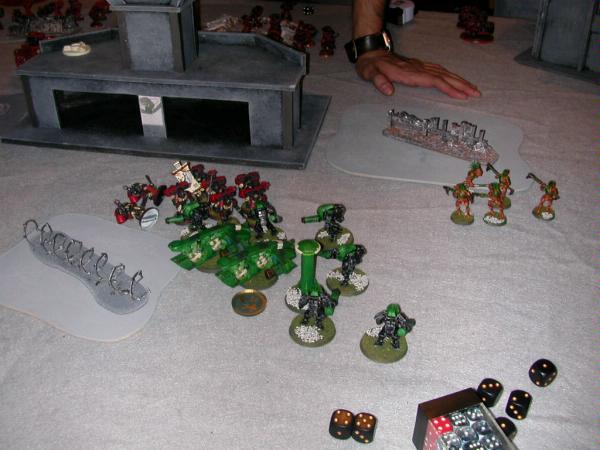
The problem, of course, is that there were TWO Death Companies over there. The other Death Company moved up to hug the building, much as the first group had. The picture helps illustrate part of our problem – their heavy weapons were well positioned to interdict our vehicle movement.
Our turn was forgettable (as in, I forgot to take pictures of it). You can safely assume that we shot what we could at them, mostly at the Devestators in the right-hand building; we may even have killed one or two.
Turn 4:
Their Terminators arrived, and joined the horde of hidden Blood Angels behind the building:

They shot some, and blew a tetra away. The Death Company stayed camped on the building, essentially denying us access to that space. Well-played, particularly since our Combat Engineer squad was gone (and theirs wasn’t). Shooting from their Dev squad killed some of my Crisis team.
Jon’s Crisis Team arrived, and we were faced with a puzzle: where to drop them? Eventually, we decided to gamble on dropping near the whirlwind. He picked up the scatter dice….
Sometimes, you just don’t want to see “Dakka Dakka.” The Crisis Team scattered directly off the board.
Some broadside fire killed an attack bike this turn. Otherwise, not much to advance the Greater Good. We advanced the (still loaded) Devilfish a bit, looking to bring their Seeker Missiles into play, but didn’t accomplish anything with them.
Turn 5:
The two chaplains joined the Terminator squad, and they all advanced on the objective. The Death Company moved a bit, putting our Crisis suit (and Jon’s Commander) at risk. I believe the Whirlwind actually managed to pin that unit this turn, as it’s the only rational explanation of what followed.
Our turn, we disembarked the Fire Warriors near Jon’s commander, in a vain attempt to screen him from the soon-to-be-charging Death Company. We also moved the Hammerheads, the other Devilfish, the surviving Tetra, and my commander closer to the objective, in order to bring as much firepower to bear on it as we could.
Turn 6:
The Blood Angels come “over the top!” The Death Company hop the building, assault the Fire Warrior screen, kill them, run down the survivors, and Massacre! into Jon’s commander. The Terminators move into the building to properly secure the objective. The Whirlwind kills off a few Kroot from the half-strength squad, and sends them packing. And Jon loses a Hammerhead to heavy weapons’ fire.
And in spite of all that, we still almost pulled it out….
Massed fire from a Devilfish, my Commander, the Tetra, and a squad of rapid-firing Fire Warriors (at +1 BS) killed 4 out of 5 Terminators, and put one wound on each of the Chaplains. Had either Chaplain not been there, the Terminator squad would have gone away. In retrospect, we could have gotten that last Devilfish’s seeker missiles in, but we were trying to kill the Attack Bike.
Jon’s Commander did not, as I recall, survive his encounter with the Death Company.
Aftermath:
We lost on both Primary and Secondary objectives (largely courtesy of the scattering Crisis Team), and drew on the Tertiary (largely because I had insisted on Jon’s pulling his Hammerhead forward, which left it stunned away from the terrain it had been covering). In all, not my best performance.
Survivors:
Tau:
Broadsides, 1 Hammerhead (stunned), 2 Devilfish, 1 squad of Fire Warriors, 1 Tetra, 1 squad of Kroot
Blood Angels:
2 Chaplains (both wounded), smaller Death Company, 1 Terminator, 1 Razorback, 1 Whirlwind, 1 Attack Bike, 2 tac squads, 1 Dev squad (untouched), 1 Dev squad (below-half).
Analysis:
I regret this game, starting from the very first piece of terrain deployed. I misread the mission, mis-deployed the Stealth Suits, and didn’t act on the secondary and tertiary missions properly, once the primary was lost. Sorry, Jon!
But it was a joy to see what Tau firepower, properly employed, could do to Terminators. If nothing else, I was at least beginning to get a glimpse of how Tau should be played, and it wasn’t at all like I had expected. Tau are AGGRESSIVE!
