Here is a way to get a quick table top quality painted miniature. I've been writing up howto's lately, and plan on covering some daemons in the coming weeks. Today is Plaguebearers, and this style of painting can be useful for a ton of armies that go towards are more grimy and dirty style.
Welcome to painting Quick and dirty with Thomas aka GoatboyBBMA
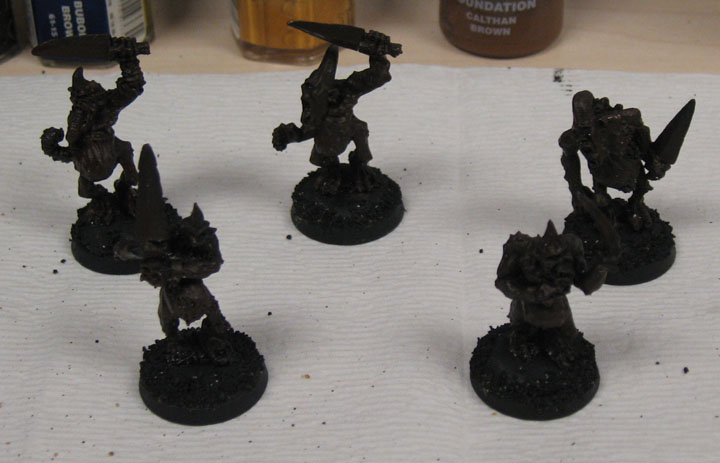
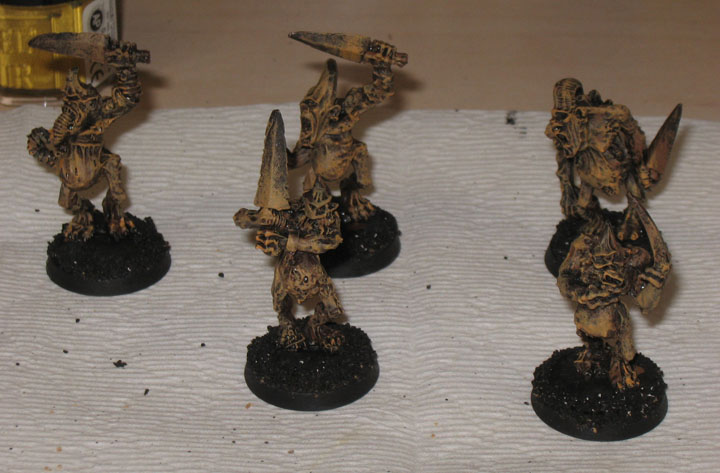
Step 1 - Black base
A broken ankle means I have to hand paint black. It sucks. It is a pain in the butt, but it must be done. The Plaguebearers are heavily detailed and it makes it a little bit annoying to get all the nooks and crannies filled with black. I try my best, water down the paint etc. Good thing I use a lot of washes to fill in the spaces.
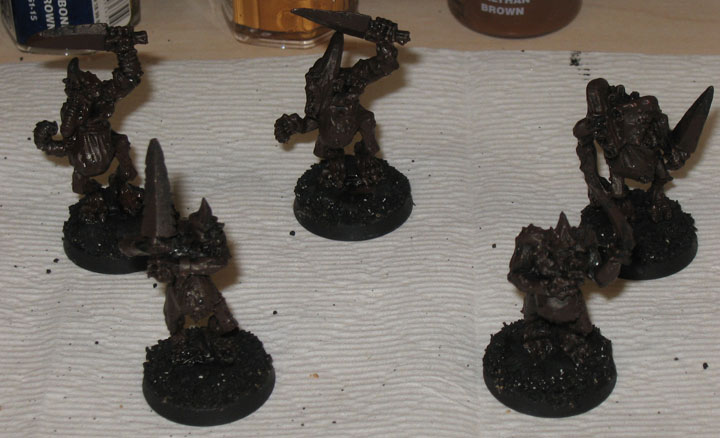
Step 2 - Scorched Brown
Here I start the layering of brown. I decided to go with scorched brown as my first layer. It is pretty dark, and it has enough red to make it a more interesting looking brown. This is a heavy dry brush layer. What that means, is that I didn't really pay attention to pull the brush along the raised edges. I wanted to cover the majority of the model and have tiny bits of black showing. It is easy, just do it messy.
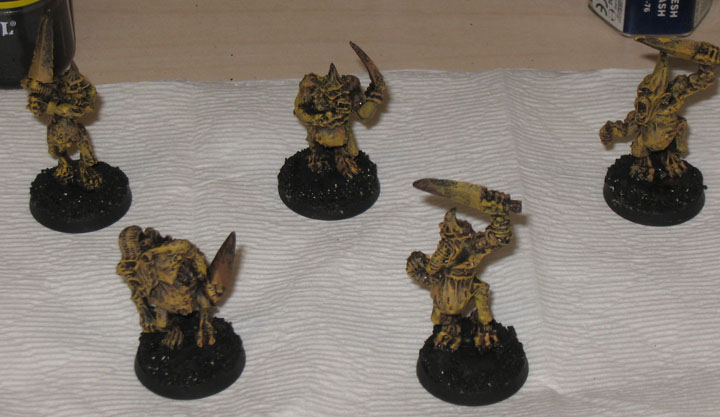
Step 3 - Calthan Brown
Next I dry brush a layer of Calthan Brown. I go not as heavy as before, but enough to pull up the color from the scorched brown.
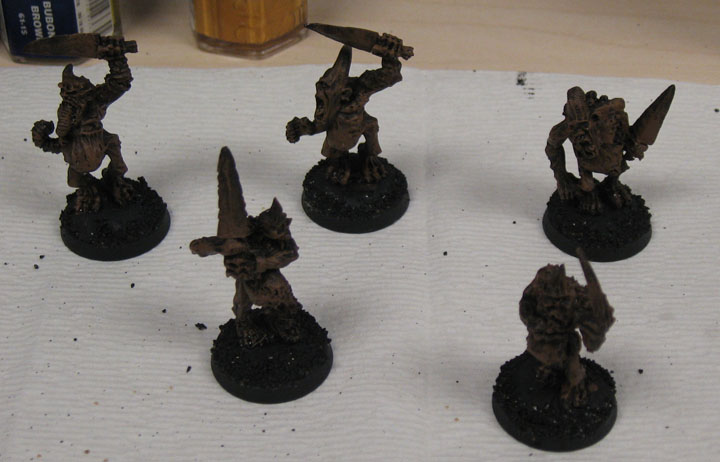
Step 4 - Vomit Brown
Next up on the brown, is Vomit Brown and I dry brush a bit lighter and pull the brown to a higher color again.
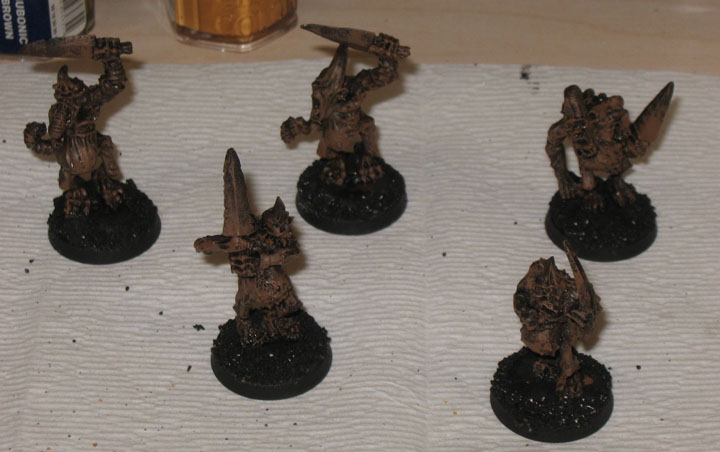
Step 5 - Bubonic Brown
After that is Bubonic Brown. The dry brushing is lighter and pulls the color up higher, making the the brown a much more, gross throw up color.
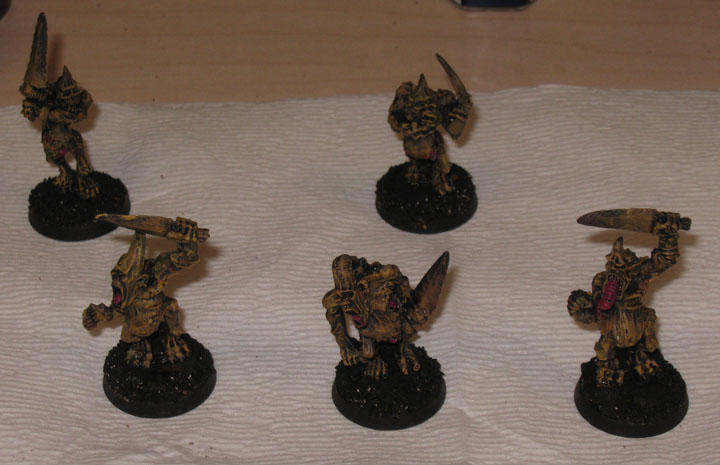
Step 6 - Devlan Mud
Next I used the new wash Devlan Mud to darken the model and fill in the recesses. It brings the overall color down. It also unifies the browns, by placed a colored layer. The biggest thing I have found with the washes, is that they do a great job of bringing all the colors together on the model.
Step 7 - Warlock Purple
Here I added a contrasting color. This makes the model pop more, and gives it a much more interesting look. Just like my plague marines before, the red shoulder pads break up the monotony of the color scheme. Here I added Warlock Purple on the tongues and other fleshy bits. This is a good dark base, and for a purple color, it really isn't too gaudy.
Step 8 - Tentacle Pink
Next I did a highlight of Tentacle Pink on the warlock purple. This is just a lighter color, used to create a start contrast. Start contrast help make things look wet or gooey. Thus the reason I put it on tongues and other rotten flesh bits.
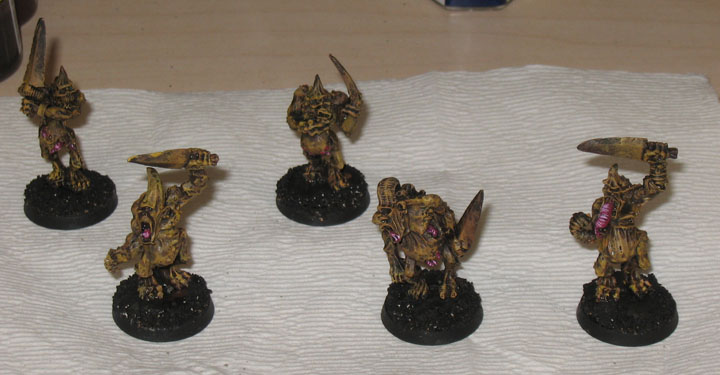
Step 9 - Lime Green
Here I created another contrast color on the model. I painted a Lime Green on the edge of the swords. I wanted to give an otherworldly look to their plague swords. GW color wise, it would be more like a snot green if I would pick one of their colors.
Step 10 - Neon Green
Next I highlight the green with a more neon green color. I don't know what would be the name of it in GW kind, but it was just a more neon green.
Step 11 - Antique White
Here I finished off the final highlight using my tried and trusted Antique white. I used it lightly to pull the highlights to the final level.

Step 12 - Flesh Ink
Finally I add the Flesh Ink wash to the crevices of the model. This brings the dark parts down and creates even more of a 3d effect. Also the Flesh Ink creates more contrast within the shape of the model, and creates a nice sorta rusted, old look.
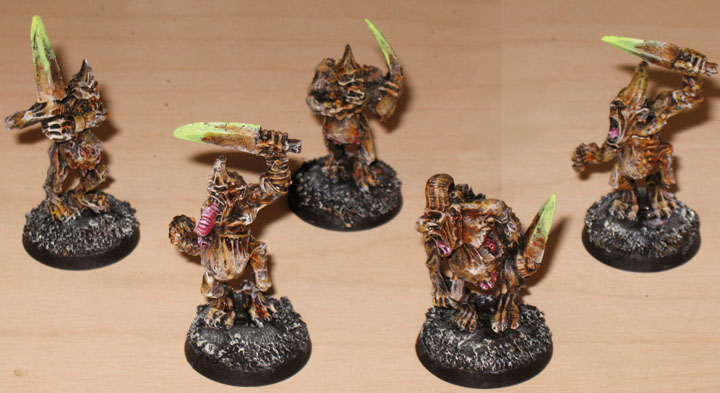
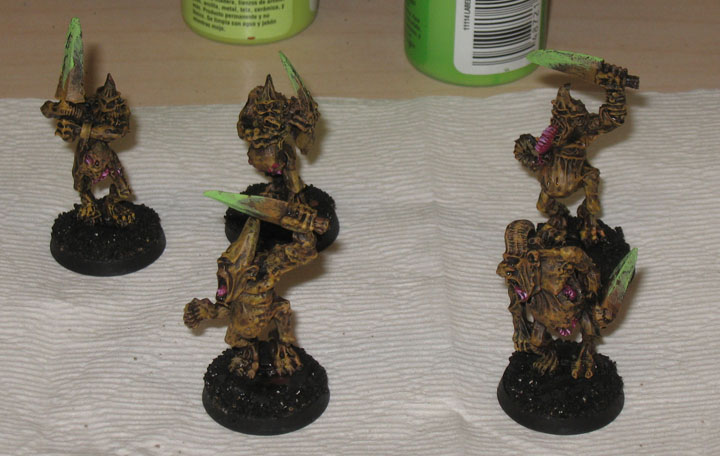
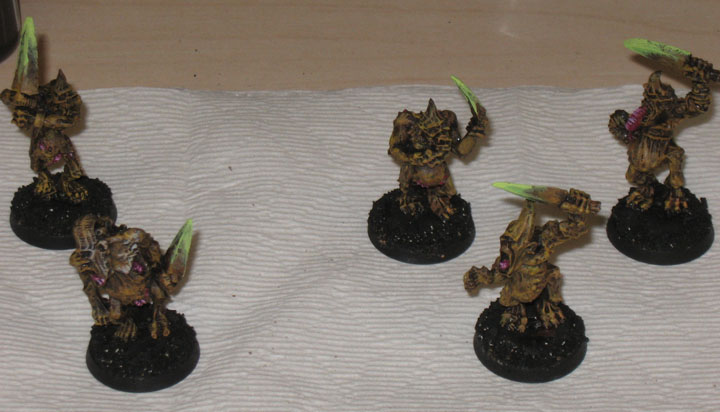
Finished
Total time to finish these 5, 2 hours. If I had 5 more, it would have been about the same, due to having more of an ability to control the drying times. I find 10 models to be the best to work with in this assembly line manner. Once you get up to the 20's it might be harder, but easily doable if you keep layering system fairly simple.
Next up is some Flamers of Tzeentch. After that the plan is to paint up my Skulltaker on a Juggernaut, then my convert Avatar/Keeper of Secrets and finally end with some new Bloodletters and Daemonettes. After that, the plan is to go into how to paint some Dire Avengers and other Eldar stuff, as I start that army.
Any questions, please feel to PM me.