Land Speeder Storm Conversion, (Pimp my Speeder).
The Land Speeder Storm is a vehicle ripe for easy conversion and general tinkering with. After a few requests about my ‘elongated’ Land Speeder Storm’s I so have decided to have a go at putting together an article for anyone else wanting to do this simple and quick bit of converting
Why I did this (If I have to write all this, you have to read it):
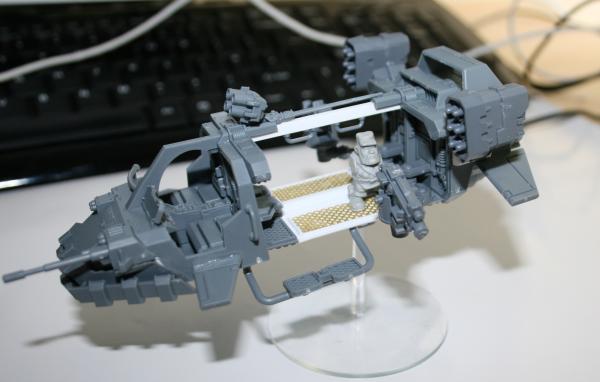
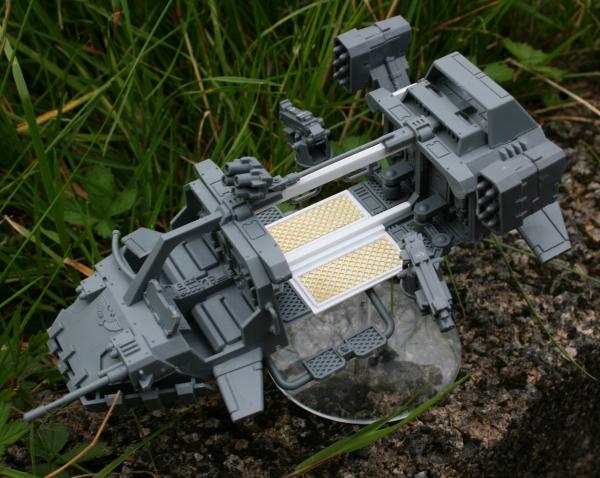
This conversion was designed/built for my Squat force in Rogue Trader (as they only move 3”) as the more elite parts of my (mainly foot) force needed a high-speed delivery system. The Land Speeder Storm was announced, released and I instantly bought three of them. With a simple bit of elongation I figured I could make a Huey like vehicle with a number of variants to form small gunships, troop carriers and med-evacuation vehicles.
This is an easy conversion using basic conversion skills. I’ll show the basic principles but won’t go into drastic levels of detail as its not necessary and working it out is part the fun. I don’t have WIP pics so you’ll have to make do with before and after pictures, a description and the power of imagination.
What you need:
• A Land Speeder Storm kit.
• Metal mesh – mine came from the WH40K Basing kit, as it was the closest in pattern to the existing floor pattern.
• Plasticard. I used evergreen scale models strip and sheet styrene and have given the description and codes on its packaging but not specific lengths as this depends on you.
o 2mm x 3.2mm strip (.080 x .125”) Item No. : 166.
o 1.5mm x 1.5mm strip (.060 x .060”) Item No. : 153.
o 2mm thick sheet (.080” thick) Item No. : 9080.
o Assorted smaller strip for edging etc.
• Tools. A razor saw, clippers, metal rule, scalpel and glue. I use that super precision plastic glue as it doesn't generate mess even when you’re being lazy.
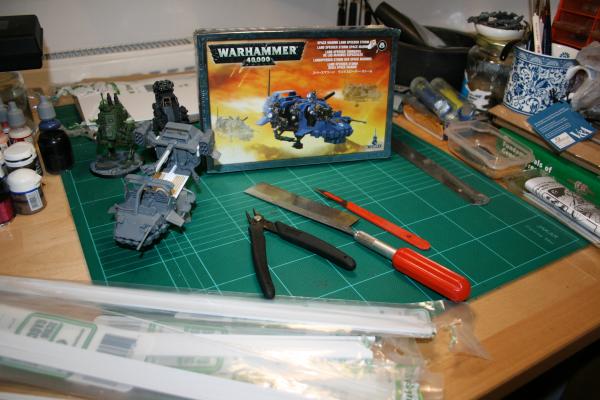
Conversion Process:
• You’ll see how, all we are doing is extending the central region of the Land Speeder Storm (LSS) by adding additional flooring and another support beam. This means you can change the length to suit you. That said if you make it too long it’ll look daft.
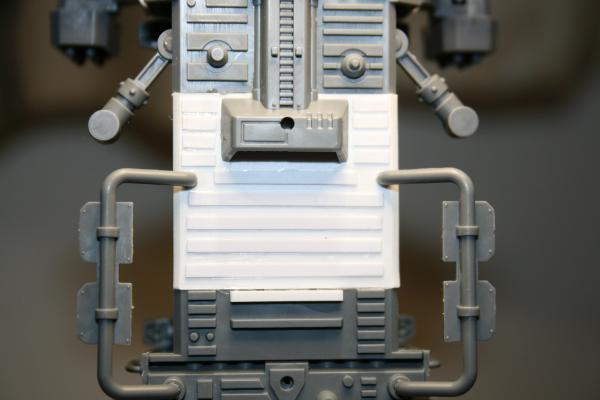
• Locate the storm sprue with the base-plate on it. This single sprue contains all the parts you’ll have to cut. The base-plate itself, the central strut and the top and winches.
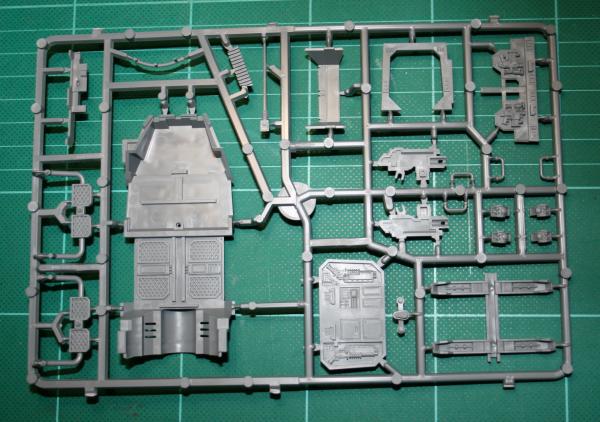
• Remove the three components needed and cut them as shown in the diagrams below.
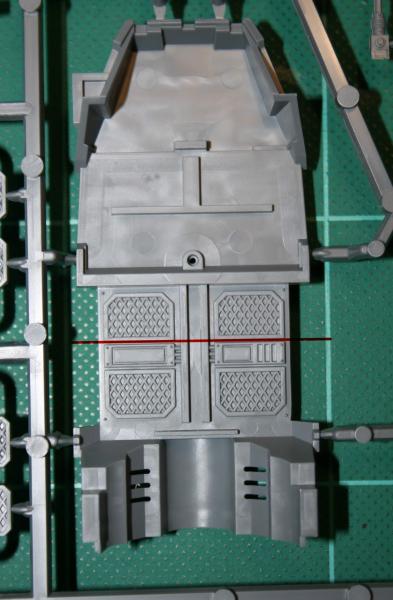
The base-plate needs to be cut squarely and if possible between the pre-molded features (so that the conversion doesn't look like one).
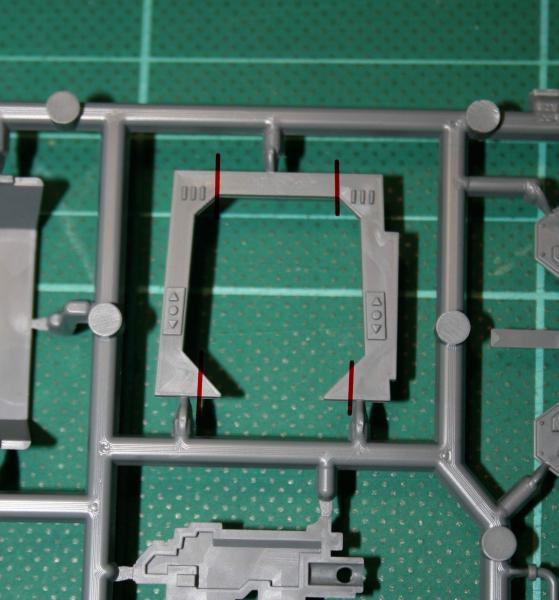
The central support needs to be cut to accommodate a longer top support and the new bottom beam. If possible you should hold a piece of the 2mm x 3.2mm strip up to the piece to see where it will interact and bond on the finished model(if you’re anything like me you can measure three times and it still won’t look right in the end).

Simply cut this piece in half. It will aid the bond with the added parts.
• Assemble the two half’s of the Land Speeder sticking the two half’s of the central support in their relevant places.
• Decide how much you want to increase the floor by (A). I wouldn't go much over 40mm personally. Cut out this piece of plasticard from the 2mm sheet as a rectangle A x 36mm.
• Place this rectangle between the two parts and assemble the speeder in your mind. Now measure between the two ends of the central support and cut a new bottom support beam out of 2 x 3.2mm strip.
• Glue the beam into the molded slot at either end and onto the floor (you can also glue the edges of the new and old floor before joining them) making sure it’s aligned.
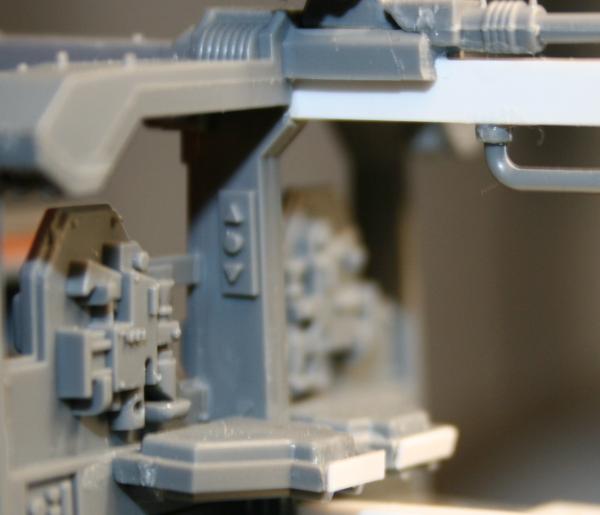
• Now you can cut and glue pieces of 1.5 x 1.5mm strips to replicate the channel that hold the central support in place.
• Measure the distance between the two ends of the central support on the assembled speeder. Cut this top beam out of 3.2 x 2mm strip and glue in place at either end.
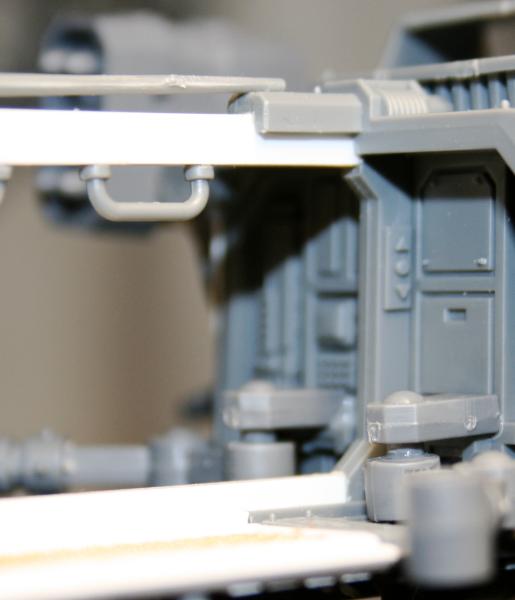
• To reinforce this bond and the overall rigidity; fit the cut portions of the winches onto the top of the new central beam.
• Use two pieces of mesh to represent the floor panels on your extension and edge these with small plastic strip.
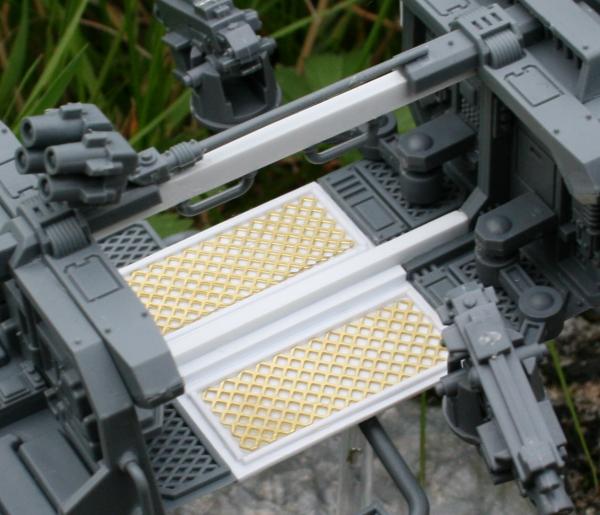
• Fit the vent piece to the bottom and replicate the original pattern using plasticard strip.
• From this point on you’re free to do what you want in terms of furnishing. I cut down the original benches and fitted them as seats, fitted valkyrie bolter pintles and typhoon missile launchers. I like the idea of a long central bench for troops. Go crazy.