Overview
Wow, the new plastic Valkyie kits came out and I had to grab one. There are lots of options for different weapons payloads as well as a description of the Valkyrie gunship, the Vendetta, though no model or conversion kit as of yet. So, I'm going to magnetize all of the options so that I can experiment with different payloads and, with the help of an extra set of Predator sponsors, make an extra pair of lascannons so that I can fly a Vendetta too.
As a note, I get my magnets from K&J Magnetics (http://www.kjmagnetics.com/ ) and have provided their part number when I reference a magnet size. However, you can find magnets from a wide range of sources.
For this project, not including the lascannons, you'll need 7 of the 1/8" x 1/32" disc magnets (D201) and 14 of the 1/16" x 1/32" disc magnets (D101-N50).
Step-by-Step
Wing Hardpoints
We're going to tackle the wing hardpoints first. Take a 1/16" bit and drill into the slot on the pylon right where you see the two supports. You just want to route out the actual slot. You don't need to drill into the actual base. Clean up the hole and then superglue two 1/16" x 1/32" disc magnets into each hole. The top of the second magnet should be flush with the small lip inside the the slot. We want the lip to help guide and align our weapons. Here's what it should look like.
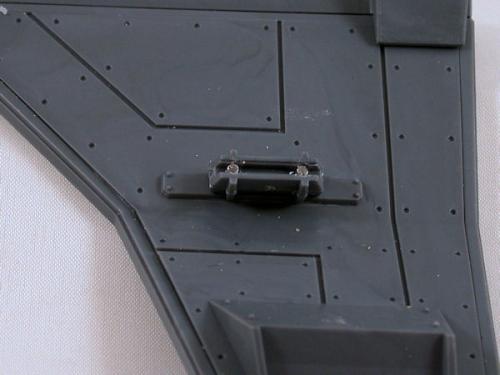
Next, figure out where your two hardpoint magnets line up with the mounting rail on the rocket pod. Drill a hole approximately 1/16" deep and superglue 2 1/16" x 1/32" disc magnets. I used two for additional strength. The magnets should be flush with the top of the mounting rail, which means that when you test fit it, the magnets should meet the magnets in the pylon.
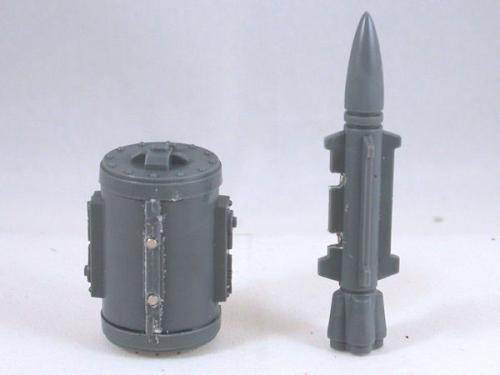
Magnetizing the Hellstrike missiles are a little more difficult. Because you have two magnets glued into the hardpoint slot, you need to cut out corresponding slots in the top fin of your Hellstrike missile. Do this with a sharp hobby knife and then use a file to clean up the edges. Before you drill into the body of the missile, test fit the missile on the pylon to verify it will fit over the magnets. Once you're sure, mark the center point with a scribe and drill another set of 1/16" holes. After that, glue in another pair of 1/16" x 1/32" disc magnets.
Here is what my rocket pod and Hellstrike missile look like after I'm done.
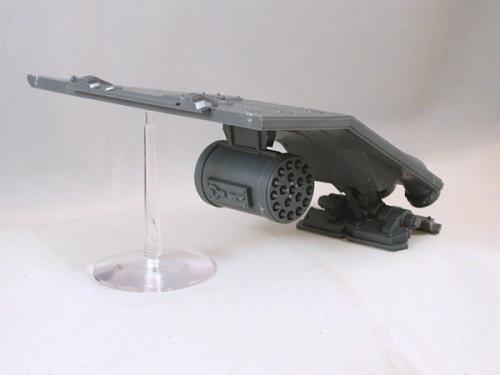
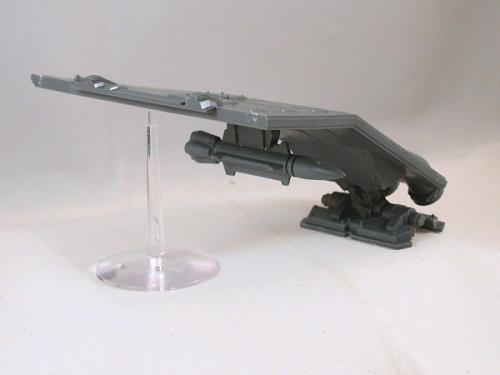
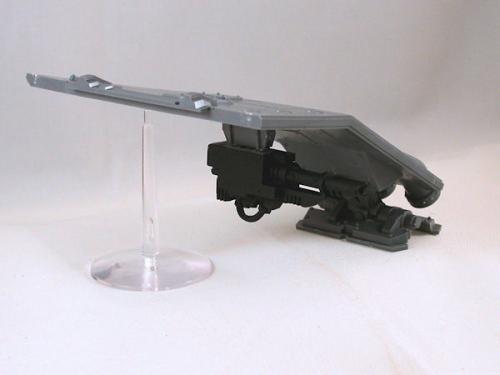
If you did everything correctly, you should be able to swap out weapons on the two wing hardpoints at will. I have an old pair of Predator lascannon sponsons that I cannibalized for the lascannons needed for the Vendetta, which have been magnetized to fit on the wings as well. They aren't double-barrelled, but sometimes you work with what you have. Here are the weapons mounted on the rails.
Nacelle Weapons
This turned out to be much simpler than I expected. You get a total of 5 nacelle options, the lascannon, a multi-laser, and 3 targeters. I used the two extra targeters as backing boards that will each hold a magnet. Pick one of the two targeters you DON'T want, and glue it backwards behind the gluing guides. Superglue one 1/8" x 1/32" disc magnets on the backing piece and the corresponding magnet to the back of your weapon and you're done.
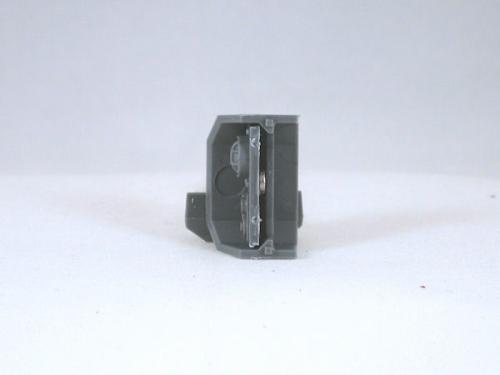
Here's a profile shot of what the backing piece looks like glued to the nacelle.
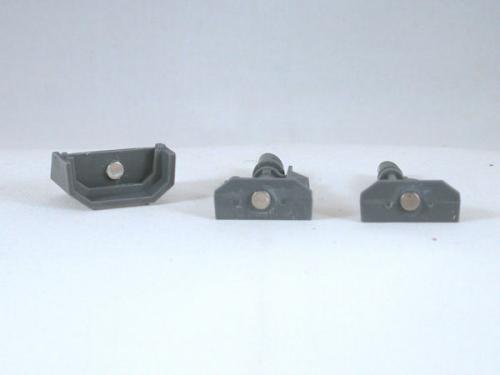
Back shot, showing the three magnets glued in place.
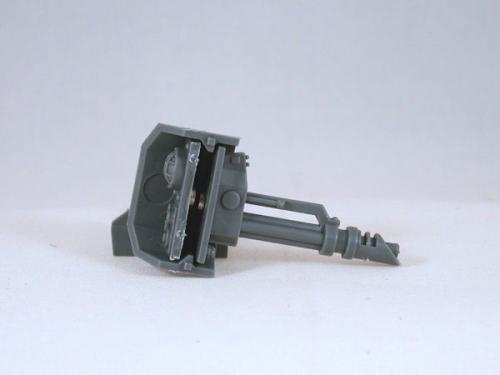
And finally, the multilaser in place. The nacelle will glue on the side of the fusalage nicely and you can swap weapons out as you like.
I did both sides. You might ask why. It's because in the future I may want to replace the targeter on the other side with a weapon. You never know, so I'm keeping my options option. You might be wondering how you'd get the targeter out of the shroud ... you just use another magnet to "grab" and extract it.
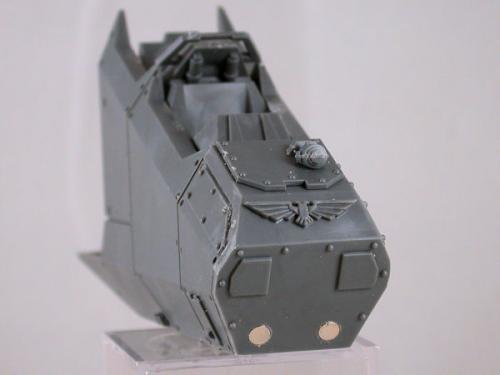
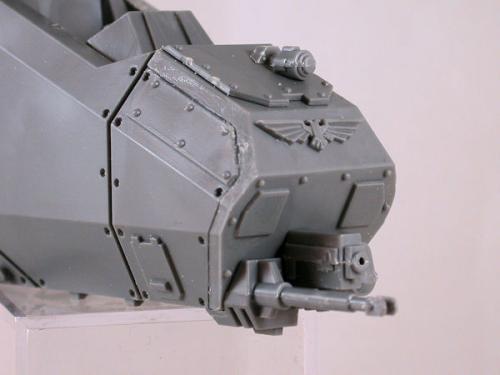
Nose Mount
The last component I tackled was the nose mount. Currently, I don't have anything planned for the nose, but you never know. Maybe I'll want to put some additional weapons for a Vendetta conversion or to have my Valkyrie count-as a Vulture. In any case, a little bit of effort gives you some nice flexibility.
First, drill two 1/8" holes. They don't need to be very deep and as you can see, the hole doesn't go all the way through the plastic.
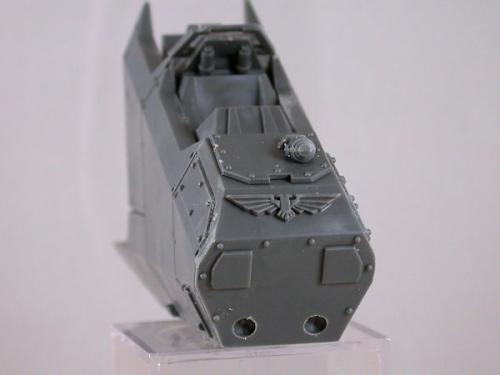
Next, superglue a single 1/8" x 1/32" disc magnets into each hole. I used a flat piece of plastic to press the magnet to ensure it was flush with the surface.
To magnetize the nose equipment, drill a 1/16" hole opposite each 1/8" x 1/32" magnet and drop in a pair of the 1/16" x 1/32" disc magnets. Similar to the wing hardpoints, I used a toothpick to apply the glue to the hole and then used the other end to push the magnets in until they were flush.

Here's the finished product.
Waist Weapons
For the sake of completeness, I'll address the waist weapons. After much deliberation with ways to magnetize the entire mount, I finally decided to glue the swivel arm but not to attach the gun mounts. Given the size of the cabin, the small size of the doors, I thought it would be more trouble than it was worth to magnetize or pin the swivel assembly for full removal. In any case, the gun feels secure enough not to fall out during normal play and if it gets too loose, I'll drop a magnet into the post hole and glue another magnet to the bottom of the post.
I thought this was a good compromise to provide the weapons flexibility I wanted without making the piece overly complicated. If I don't want the heavy bolters, I'll just pull them off the swivel arms and push the arm back into the cabin. I'm thinking that in the future, I'll see if I can find a pair of heavy stubbers to replace the heavy bolters.
Supplemental Notes
This turned out to be easier than I expected. It doesn't really take that much in terms of magnets and now I can swap out weapon options and get quite a bit of flexibility out of the single model. Next step is to finish painting the model and post completed pictures.