Rabid Ferret’s Ultra-Sturdy 6’x4’ Rolling Gaming Table

Introduction
Due to popular demand I have decided to post the plans for my 6’x4’ Rolling Wargaming Table.
Why did I build this table? I wanted a dedicated wargaming table that I could use that is a standard 6’ x 4’ size that would not break the bank. Retail options for a gaming table of these dimensions, while nice,
cost and arm and a leg. (and perhaps a first born child/and or testicle!)
See: http://www.geekchichq.com/
What is so great about it?
Its inexpensive (relatively) it rolls around on locking casters so it’s easy to move, and it is crazy sturdy. I am a big guy! I used to weight lift and I weigh about 275lbs and this table can easily support my weight.
It could probably hold 3-4 of me! It would also make an excellent workbench and craft table for any painting and modeling needs. It also has a handy storage shelf underneath that is awesome for storage of terrain, models, tools etc.
How much would it cost to build?: It cost me about $170 US. You will probably be able to build it for cheaper if you are more selective with where you buy your parts. I chose a very nice sanded plywood table top that cost me $44
a sheet. I could have settled for less, sanded my own, or done any number of things to reduce the cost.
What tools do I need?:
You will need an electric drill/screwdriver and a hand saw or jigsaw. 90% of the cutting work is done by the store you buy the lumber from. You will be pre-drilling a small percentage of screws and the rest you will just drill right in.
How long does it take to build?:
It took me about 2 hours, 3 if you count the shopping and cutting time at the hardware store.
A note about United States lumber terminology
I will refer to 2x4 lumber or ‘studs’ in this tutorial. It is important to note that 2x4 lumber is NOT 2”x4”, nor has it been for a LOOONG time. 2x4’s are actually 1 ½” x 3 1/2” or (38 mm × 89 mm) for reasons that I will not get into here.
Since when has measuring anything in the U.S. made sense? Keep this in mind if you choose to modify the dimensions of this table to make a 4’x4’ or 8’x4’ table to your liking. If the width ends of 2x4s are framing a piece you will
need to subtract 3” from the length of the cross beam and if the height ends are framing it you will need to subtract 7”.
Parts List
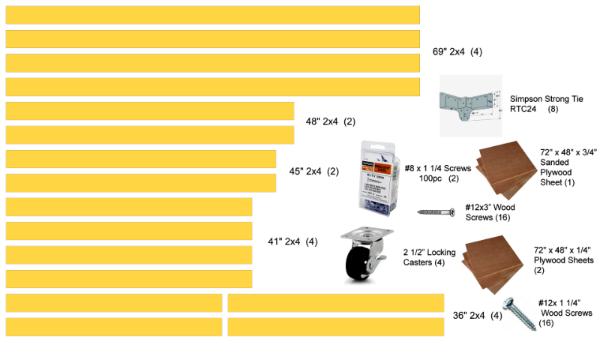
To assemble the table you will need the following:
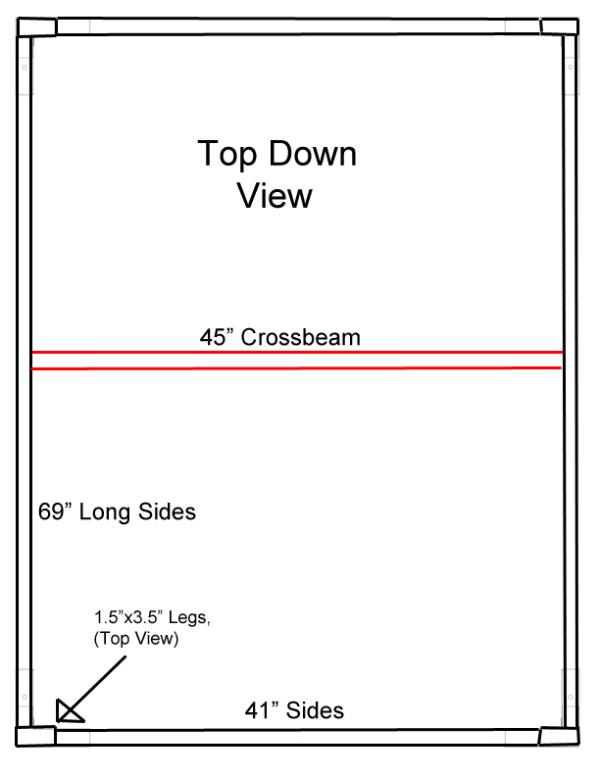
• 2x4 – 69” (4) Long end crossbeams.
• 2x4 – 48” (2) Additional supports for the casters. Skip if you don’t want the wheels.
• 2x4 – 45” (2) Structural crossbeams.
• 2x4 – 41” (4) Short end crossbeams.
• 2x4 – 36” (4) If you would prefer a shorter or taller table this can be reduced of increased. With the casters this makes a 40” tall table. Some would be more comfortable with a 36” table.
If this is the case, make these 32”. Use a measuring tape and decide what height feels right for you.
• Simpson StrongTie RTC24 (8) These pieces are amazing. Without these you would need a ton of angled braces. They make for an extremely sturdy table.
• #8x1 1/4 Wood Screws (2x100pc or 200) The bulk of the table is assembled with these.
• #12x3 Wood Screws (16) For the legs and crossbeams.
• #12x1 1/4 Wood Screws (16) For the casters. If you don’t want the wheels then skip them.
• 2 ½” Locking Casters (4) Optional but highly recommended. Makes the table a breeze to move.
• 72”x48”x1/4 or 3/8” Plywood (2) Shelving and structural support. Does not need to be sanded.
• 72”x48”x3/4” Sanded Plywood (1) Top surface. This is the only piece of ply where it is good to buy something with a nice surface.
Buying the parts.
Where to buy?
My store of choice was Lowes. They cut the wood to my dimensions for free, if you ask them I am sure other stores would do this as well. The plywood sheets come in 8’x4’ so I had them rip this down to 6’x4’.
The studs I had cut down to the proper dimensions. In all I bought 9 lengths of lumber that they cut down to my specification above. When choosing the boards, make sure they are straight and not curved.
They plywood for the shelf and the bottom of the tabletop can be slightly curved as the screws and gravity will flex it straight as you assemble it. I would recommend telling them that it is for a table and the cuts need to be exact.
The Simpson Ties will be in the Lumber department with the corresponding screws nearby or in the hardware department. Make sure you buy wood screws for your table and not screws meant for metal, drywall etc.
Assembly
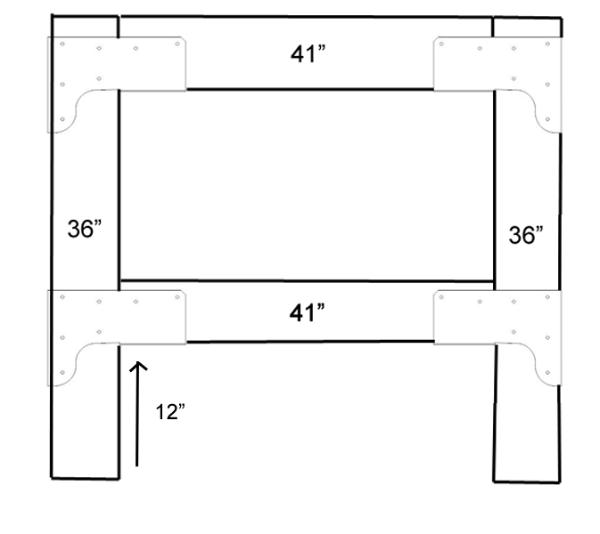
Step 1: Making the short side frames
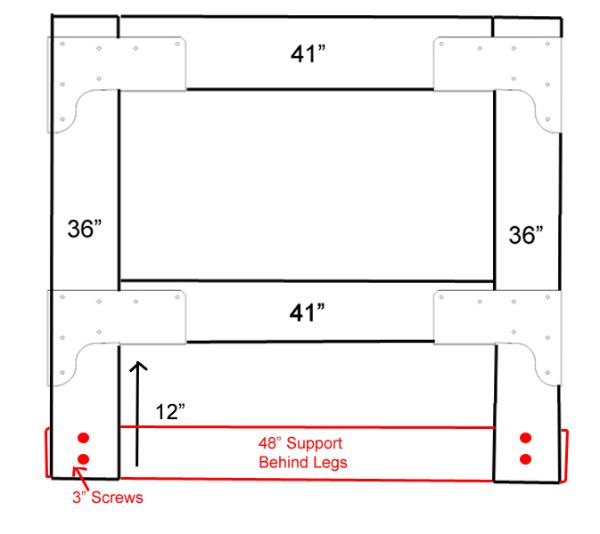
Start with the short ends. You will need all of the Simpson Ties, with 4 per end. 2 will be for the table top and two for the shelf. Taking care to line up the 41” studs with the 36” studs that make the legs, begin inserting the #8 screws into the ties. It is important that the protruding legs and the crossbeam line up because that is what you will attach the top surface to. The bottom ties should be 12” or less from the ground (make sure you put them all at the same height!). You should end up with two pieces that look something like Fig. A
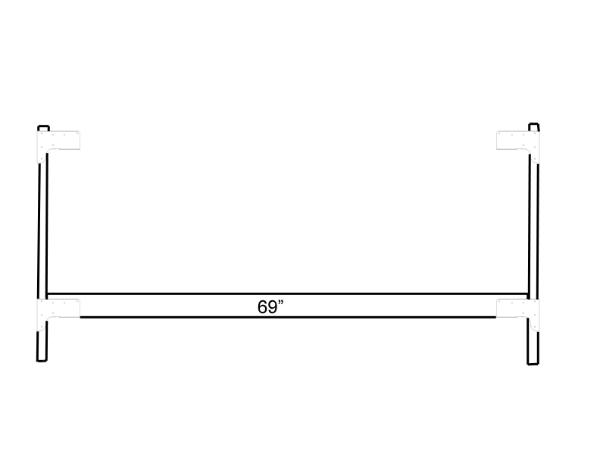
Step 2: Making the long side frame (Bottom)
Next we use two of the 69” cross beams to build the bottom part of the frame. Insert them into the bottom ties. See Fig B.
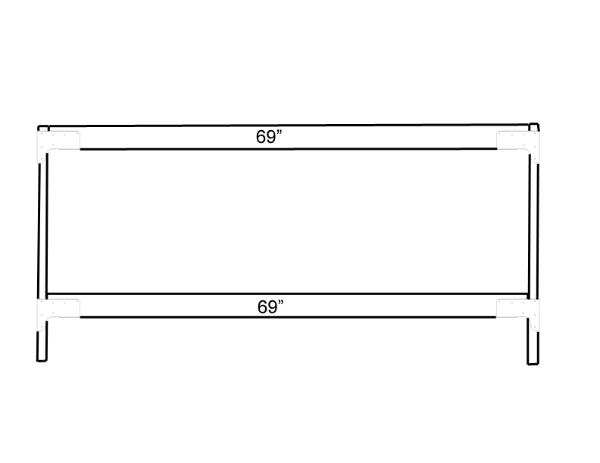
Step 3:Making the long side frame (Top)
Put the remaining two 69” cross beams on the top Simpson Ties and secure. See Fig C.
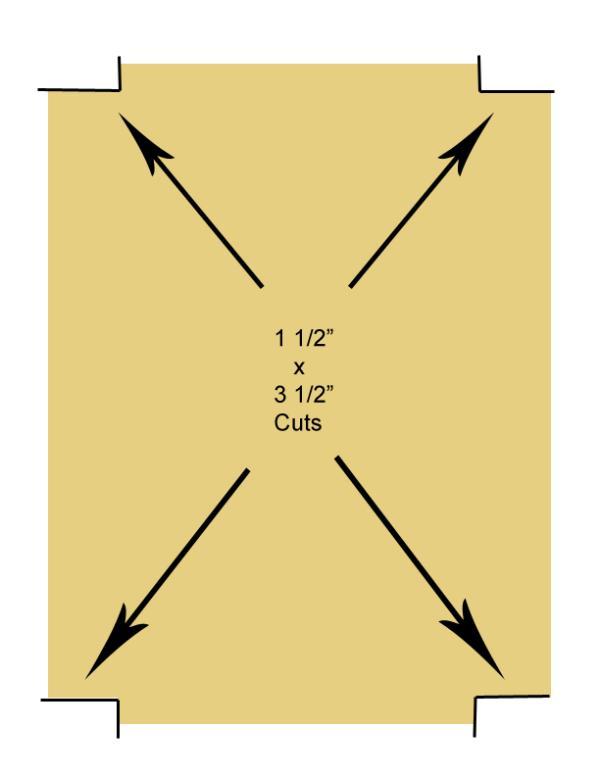
Step 4: Cutting the shelf top and bottom of tabletop
Using a 2x4 as a guide, saw notches into the thin plywood sheets to create room for the table legs on the shelf and bottom of the table surface. See Fig D.
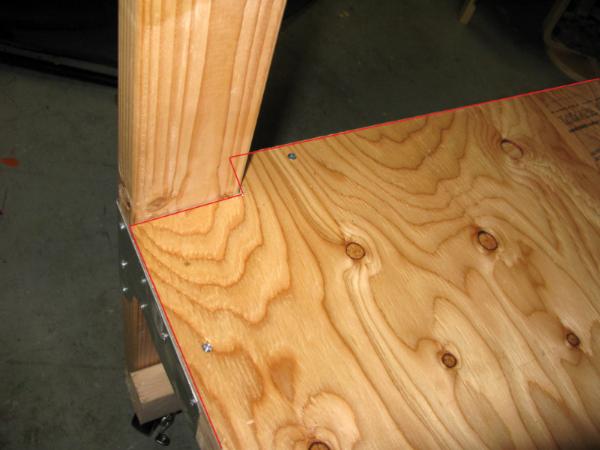
Step 5: Mounting the shelf
Insert the plywood shelf onto the bottom crossbeams to create the shelf. Secure with #8 screws every 12-15”. See Photo A.
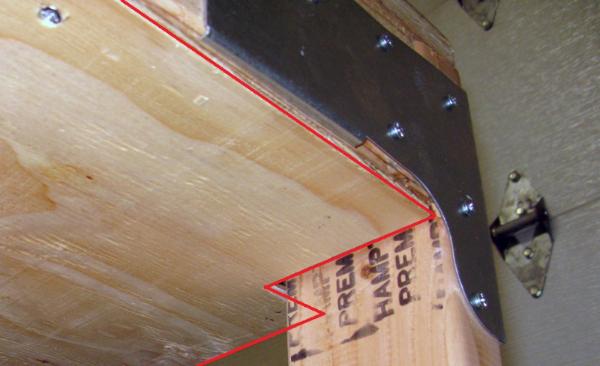
Step 6: Mounting the bottom of the table top
Turn the table over and do the same for the bottom of the table top. See Photo B.
Step 7: Adding support beams
Screw in the 45” support crossbeams to support the thin plywood sheets and top surface using 2 3” screws per side. I recommend pre-drilling these holes. See Fig E.
Step 8: Installing the play surface
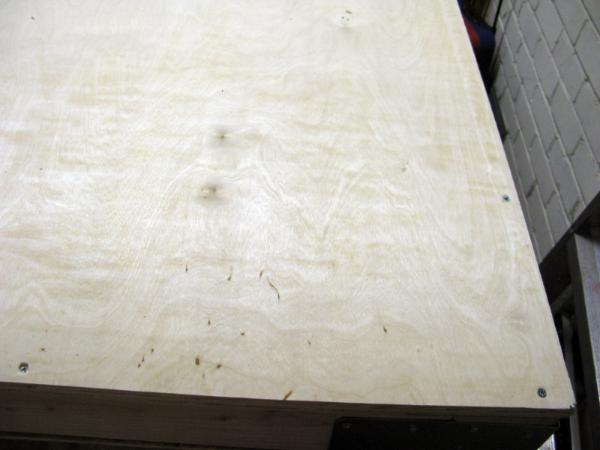
Turn the table back over and place the surface board on top. Taking care to line it up, pre drill holes for the top screws. Use #8 screws every 12-16” to screw the surface down. Take care not to hit any support screws holding in the Simpson Ties. See Photo C.
Step 9: (Optional for locking casters)
Screw in the 48” support crossbeams to the legs, flush with the floor to support the locking casters. Pre-drilling is recommended. See Fig F.

Step 10: (Optional for locking casters)
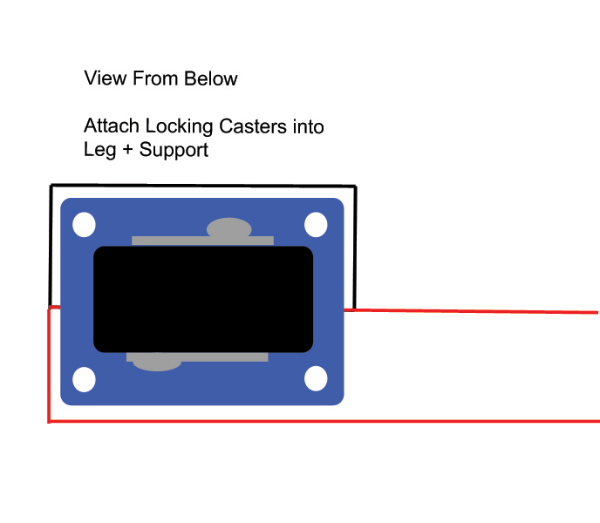
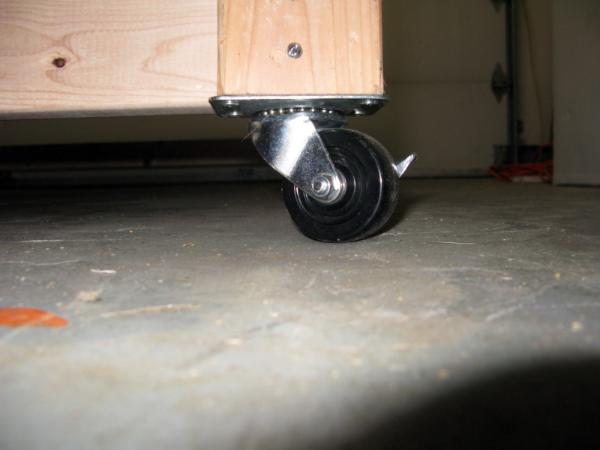
Turn the table over and screw on the locking casters with the #12x 1 ¼ screws. Pre-drilling is recommended. See Fig G.
Congratulations! Your table is now complete! You should have an extremely sturdy and mobile (if you went with the casters) table that should last a lifetime!