Hiya guys! Finally got my account activated, been looking at eye candy on Dakka for a little while now and thought I'd add a little of my own for everyone to look at!
I've been working on a defiler conversion, to the upright position, and after many long arduous days of wrestling with bits, card, rod, chains and creative block, I've come about to the end of the journey with a massive beast of 'chaosy' madness!
by lemmingspawn
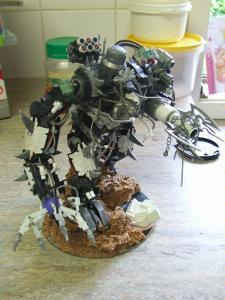
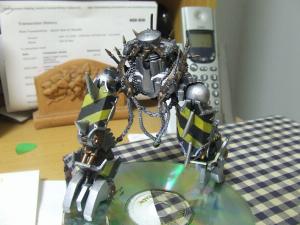
Unpainted
I am thinking going with an Iron Warriors type scheme, in black and various metallics, then utilising chevrons on the armour plates on the arms and legs and maybe one or two other places.
This model is more for display, as I don't own a chaos army....
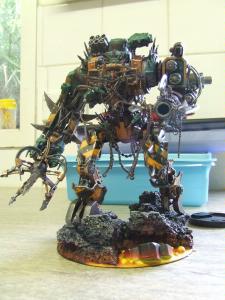
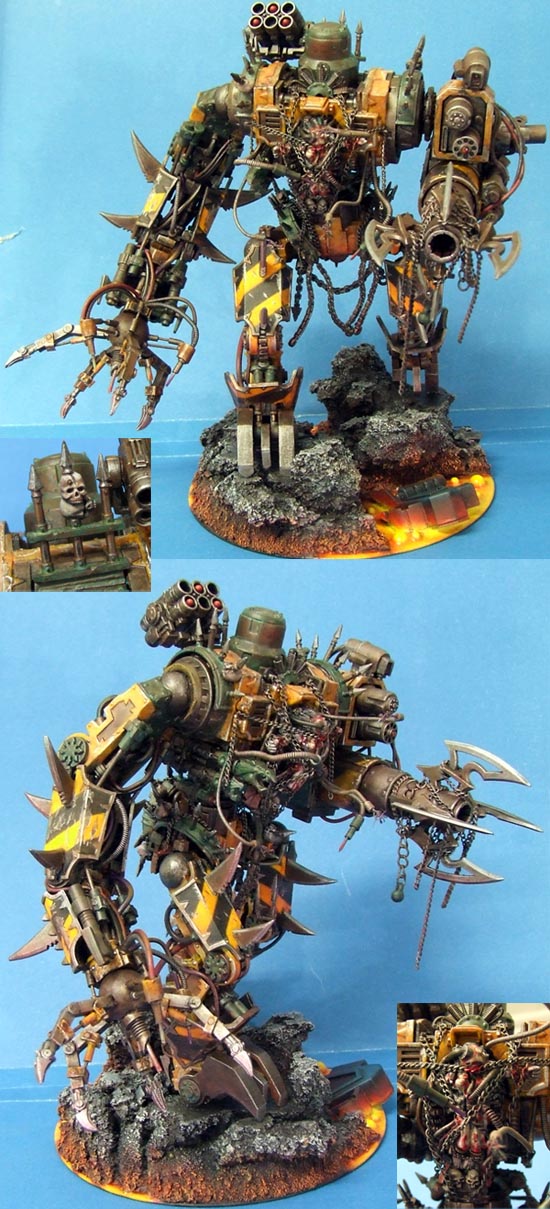
It's 7 1/2 inches tall, from bottom of base to top of havoc launcher. Predominantly defiler parts, with added Dark Eldar spikey bits, chains, wiring and tube and stuff. I've also used the penitent pilot out of a penitent engine as the central daemonhost, and a number of curved spikey bits pieces. There's even a dreadnaught ccw in there too. Lotsa bits, lotsa scratchbuild.
I started out Nurgle in mind, once I got partway through I started thinking Hellraiser meets Event Horizon and that's the main direction it's gone in.
The cabling on the defiler is made from numerous articles - guitar and bass strings (1guage from the guitar for thinner areas and 1 guage from the bass for the thicker cables) fishing line, whipper snipper line (edge trimmer), electrical wiring of a couple of guages, thin solder wire and steel wire, depending on the effect I wanted determined what type of wire I used. The hydraulic pistons are just a couple of sizes of plastic tubing stuck inside one another and the couplings are just square tube cut and glued in place.
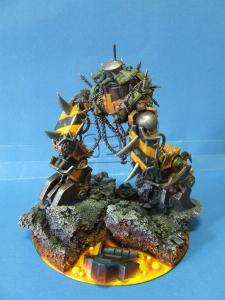
As to paint-job, the main thing I have decided on (and it's really minor) is that it is going to be a lava base. It appears partially painted because the defiler I used was one that I got when I first started back into the hobby after years of not doing it. I'd painted it up black and white, and after an accident or something - don't remember-it got broken. So I disassembled it and left it sitting around until I decided to build this one.
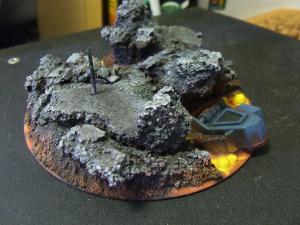
Base
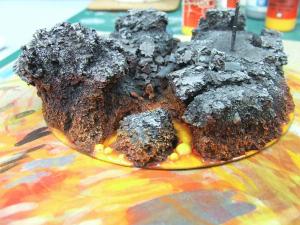
I've deepened the red glow and heightened the
heated metals to make it look more like they're
superheated to melting point. I still need to smooth
out the blends a bit, but it's coming along pretty nicely.
It's the busiest model I've put together, but I like how it's turned out. The toughest thing is, when there are extra bits I think I need to work on, whether I really should do it or not, because it's already up there in the business stakes!
I ended up using tapioca balls and ball headed map pins cut up fo the lava bubbles, then I glued them in place and put about 4 thick layers of PVA (elmers for you Americans!) over the top of that and it quite nicely gives me the effect I wanted.
Anyhoo - here are some pics of the base so far.
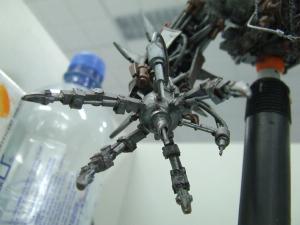
Legs
Anyways, I've done the first coats onto the legs,
they're mostly undercoated....a few more layers
of paint to get to the ready to bash stage....
The metal areas and largest sections are
mainly finished. Just need some more
black into the mix to add some extra
shading to the areas most needing it.
And some skulls and cabling that needs to
be picked out and painted....not far from
completing the legs, maybe another day
on it will see it done...
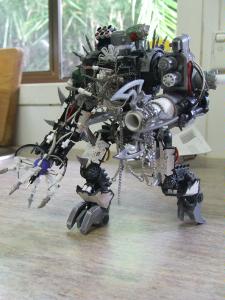
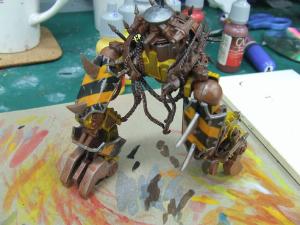
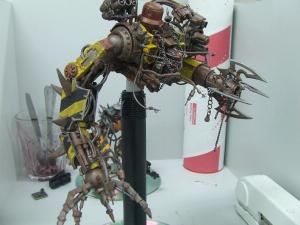
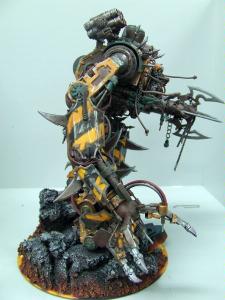
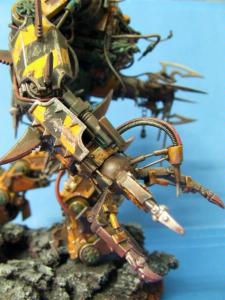
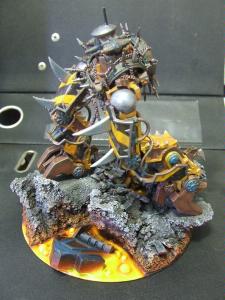
I got a lot of the metals done and must say, it ended up being too...hmm...not what I'd hoped. So I decided to take the advice of someone else and added in some yellow plating, sorta like a big industrial machine. Don't judge it on those panels yet, they'll be weathered and darkened like the yellow in the chevrons yet, so hopefully they'll fit in nicely. I haven't decided whether I really like the yellow yet (the extra bits I mean) or not, so I'm gonna take it to fruition and see how they work with the rest of the legs. Should be good, definitely better than not anyways....
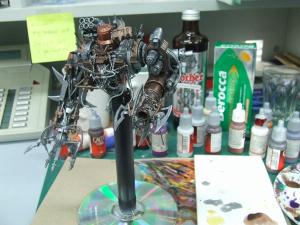
Torso

And here's the painting setup for
the upper body, ready for when I am....
After the metals were applied
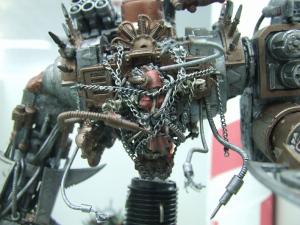
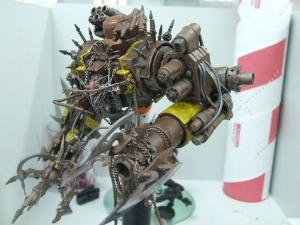
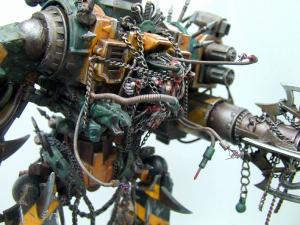
Some details on the "pilot" - still a lot of work to do
and this bit is the HARDEST bloody bit of the LOT

Sideview of the lot after the first slop run
And the last thing you see before you die!
Last Updates
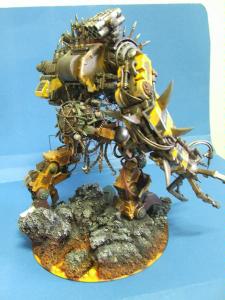
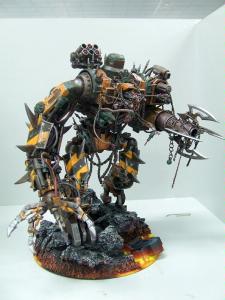
Ok guys, here it is. This is my last update before I post the finished model. It'll take me one or two days to finish but there's no point showing more updates before then, I fear, coz it's so close to finished now, and I've made a modification (slight) to the overall model. That little weird sentinel style head I had beside the main one? I ripped it orf....got sick of it and it was starting to throw off the balance of the beast I believe. But you guys be the judges....
I've tidied up stacks of bits, still got a heap more to tidy up but it's all the final straight, so if you have any final thoughts that this beast might need to have updated....other than his skinny legs... .... now's the time..
On to the photos! Behold! The RIPLEY PATTERN DEFILER!
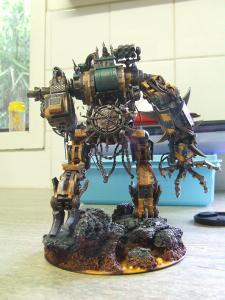
I'm thinking maybe there's too much
oxidised bronze, I think I'll have to drop
some and take it back to raw metal, such
at the two syringes in the front and the
things on either side of the claw.
Anyways, early days yet so I'll be doing
more tomorrow....
Ripley Pattern Defiler
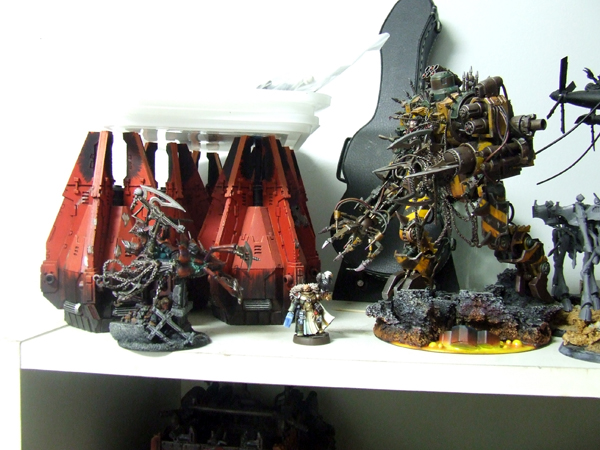
Inquisitor Lord Coteaz, meet Ripley. Ripley says pleased to eat you Mr Coteaz, now don't be shy!