by Felix Flauta
One of the frequent debates on the forums is about painting vs. not painting miniature armies. I'm a non-evangelical paint agnostic myself, meaning that I paint for my own pleasure and don't necessarily demand that others paint for my sake. People should partake of the aspects of the hobby that they enjoy.
However, there are events out there that may require a "three paint minimum" and so I put this article together in mind to try to make paint manageable and, perhaps, enjoyable for someone who finds the task tedious.
Building the List
Building and acquiring the miniatures for a single list is probably the difficult part of this process for a War-machine player. We play and adjust our lists, sometimes adjusting a squad here, or swapping out a war-jack. The worst is changing out a war-caster that sometimes makes you want to tune your entire list over to match her strengths.
The new theme lists and mercenary contracts seem like the best place to start as they limit your choice of war-caster and model options. For this reason, I considered building a Magnus Agenda force (leaning on the war-jacks) or maybe something from the Retribution Theme lists (the only ones known at the time), but finally settled on a "small army" of Iron Kingdom Dwarves.
- Gorten Grundback
- Grundback Gunner
- Grundback Gunner
- Ghordson Driller
- Ghordson Driller
- Wroughthammer Rockram
- Ogrun Bokur
- Hammerfall High Shield Gun Corps (Leader and 9 Grunts)
- Horgenhold Forge Guard (Leader and 5 Grunts)
- Horgenhold Forge Guard (Leader and 5 Grunts)
- Brun Cragback & Lug
- Thor Steinhammer
- Gudrun the Wanderer
In total, the models listed would be about 59 points, with average games being 35 or 50 points. Therefore I'll have models to swap in and out as I please (probably the Gunners and Brun would be the first ones to go).
Assembling the Models
Some people never get past this point. After dealing with glue I can see why. Assembling models is probably my bane. I hate getting the gunk all over my fingers and table. But assembling models is one of those tasks that can let you watch a film and assemble simultaneously. You can't really do it while painting, and it's definitely difficult while gaming. So if you're going to multi-task at any point it'll be here.
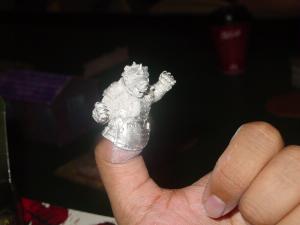
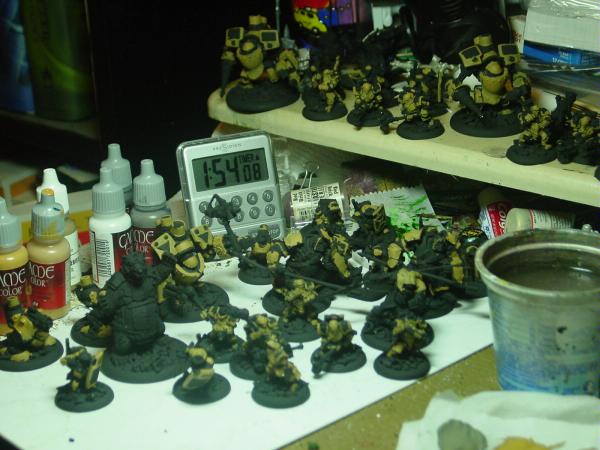
You can tell right under my thumb that it's chalky and gross from glue.
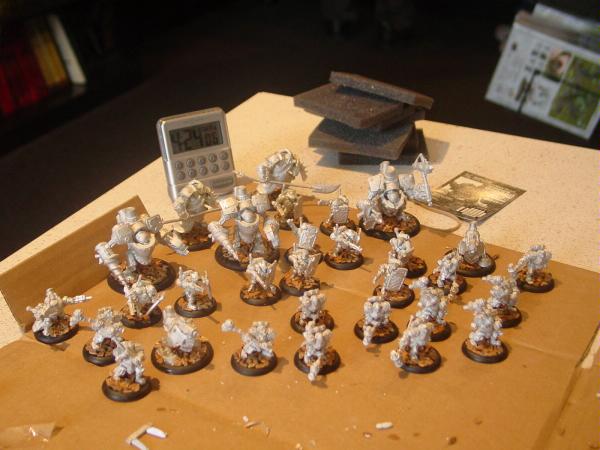
According to the timer in the picture, it took me 4.5 hours to assemble these models. I use a mixture of green-stuff (or in this case, grey-stuff) and zap-a-gap to keep my models together. No pinning whatsoever (small problem with that later on).
The trick to getting putty and glue to work is to not rely on one type of glue. Make sure Zap touches both the putty and that the metal contacts each other between the pieces. I usually don't have problems except with the smallest of joins.
4.5 hours also included the basing material. I used some stuff from Gale Force 9 that looked like the aftermath of Shaolin monks training their fists on shattering pottery. The part that made this take long was getting it to lie flat with a craft knife.
Why attach the basing? Chances are it's not the exact color you want, and rather than fiddle with a ton of different types of basing material I simply glue and prime the stuff with the model. The primer helps seal things, and preps the material for paint.
- Step time: 4 hrs 30 mins
- Elapsed time: 4 hrs 30 mins
Primering the Models
Priming models you usually choose from white, black or gray.
- White Primer: Lighter colors but you can't leave parts uncovered.
- Gray Primer: Not as light and not as dark (yay, duh)
- Black Primer: Darker colors, light colors might show primer through.
The most important consideration for me is this: what paints fastest? For me that means black. White glares out when you miss spots, but unpainted black primer often goes unnoticed. Also, black is very good for metallics and as the basis for weapon shafts. Usually if you paint around a weapon shaft people assume the black is intentional.
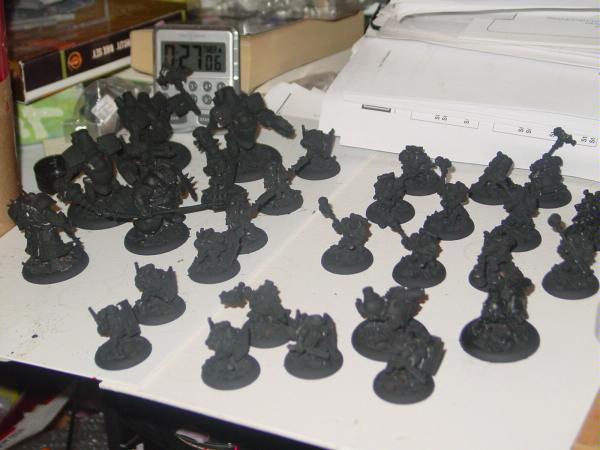
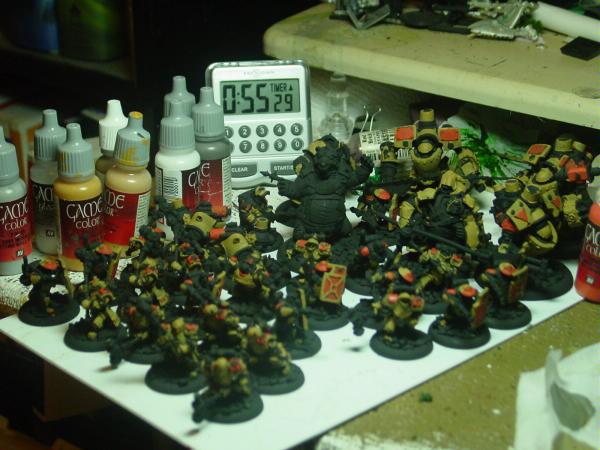
I spray in two stages to get complete coverage in one trip outside. As you can see from the picture, I miss spots, but usually its fine.
First I put the minis on the edge of my spray board and spray angled up. I rotate each piece individually to get all sides while spraying upwards. This lets me get underneath arms and into armor crevices and the like.
Then I place the minis in the center of the spray board and rotate the whole board between passes with the primer. I get some double coverage, I get the under angles you usually miss from the front, and I save myself a second trip that some people recommend.
- Step time: 30 minutes
- Elapsed time: 5 hours
Color Selection
This is probably what gets people worked up about not wanting to paint. The color they want doesn't match the one that they get, or they are guessing the whole time through how they're going to approach their minis, which eats up valuable time.
Consider picking a color scheme throughout. If you're going to mix, mix experimentally before ever touching a brush to a model.
I let a few weeks go by before deciding on a color scheme. I got a quick online and telephone lesson from my friend Aaron Schmidt[1] (xenite on the forums) in color theory, and he told me about three things that should contrast: Main Color should contrast with basing somehow, and the accent should stand out due to contrast or intensity.
So I spent some time mixing browns until I came up with the following color by mixing 2:1 Filthy Brown with Earth.
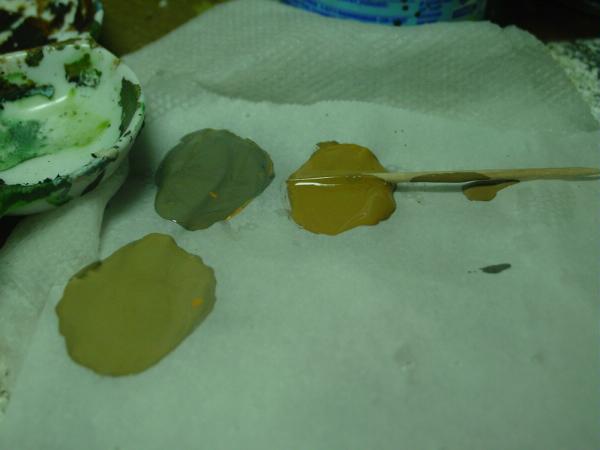
The color with the toothpick is the one I eventually settled on.
You can see that I'm mixing on a wet palette. It's a wettened paper towel with a piece of parchment paper on top of it. These help for marathon painting sessions as the paint stays wet as the water seeps through from the paper towel into the paint through the parchment paper without letting the paint escape from your palette.
It's a great tip picked up in a class with Mathieu Fontaine[2]. My paint lasts for hours this way.
- Step Time: 15-30 mins
- Elapsed Time: 5 hrs 30 mins
Color 1
Then there's nothing to do but take your selected color, your wet palette, your brush, and paint. I generally do single squads at a time to keep myself motivated, but if you're looking to start and stop all in one go, I decided to demonstrate that in this tutorial.
I picked my main color first (the one mixed above)
Yes, it's sloppy. It's a three color army! Who's going to care! If it bothers you, stop going for minimal and fast and slow down your paint time.
- Step Time: 2 hrs
- Elapsed Time: 7 hrs 30 mins
Color 2
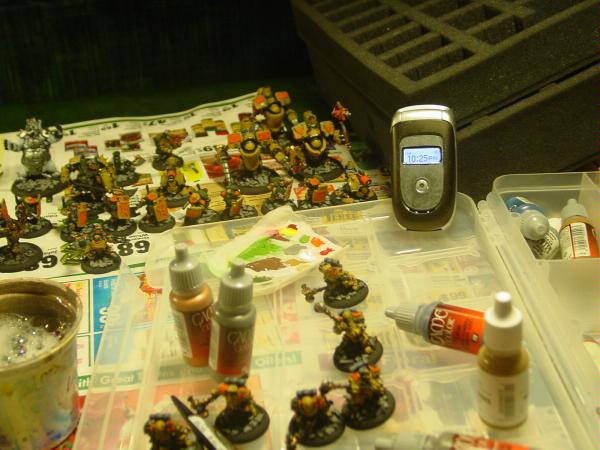
For my next color, I pick up my brush and paint Fiery Orange as my accent. The idea being that these troops represent Rhulic [3] mining interests and so their badges would represent highly visible safety colors. Because I have a light brown color as my main color, it was easiest to select orange as a strong contrast. If I'd selected gray as a main color I'd probably be painting the accents yellow or bright red.
Things I leave off: skin, anything metal, anything meant to be left black.
Here you can see that bright colors have trouble with the black primer. In some cases I have given the orange two coats, but orange is generally dark enough to cover on its own. If you were painting yellow or something equally light I'd recommend an extra step of some kind. Brown for yellow, white for light blue, etc.
- Step time: 1 hr
- Elapsed time: 8 hrs 30 mins
Colors 3 and More!
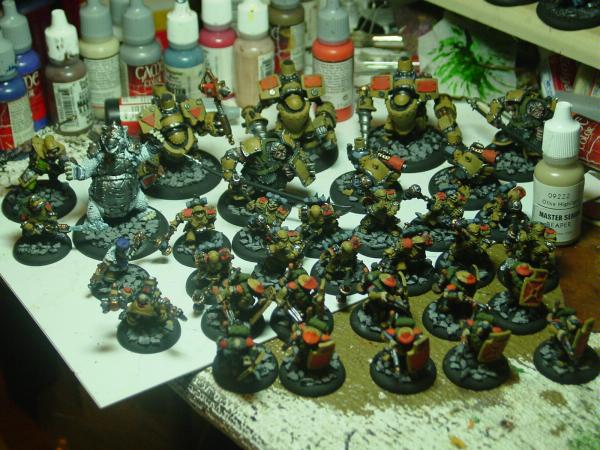
The easiest way to finish off the three color army is to hit the weapons and armor with metals. That would leave the skin black, but if you're going for minimal the metal would be the easiest way to distinguish that you had painted three colors. Another trick is to paint exposed skin the same as another neutral color or earth-tone on your miniature.
For this final step, I brought the miniatures to both my parents' place and my in-laws' place for Thanksgiving. I took up space somewhere and in-between gorgings I bought time to complete the project.
I did a number of things here that were beyond bare minimum. You could easily cut a couple hours off your finish time if you didn't do that.
If I were to do this project bare minimum, it would've been:
- Paint the basing (Gray in this case)
- Paint the metals (weapon blades and gun barrels mostly)
Things that took extra time:
- Prepping white onto any exposed Dwarven flesh and the fur coats of Brun and Lug.
- Using Russian Green for my backpacks, webbing and other portions and a light Green for Gudrun's pants
- Carefully avoiding the base under the basing material with gray paint so that the pieces would stand out against black
- Extra steps to paint skin and clean up goggles
- Alternating metal colors between Gunmetal and Bronze
Note: the time on my cell phone isn't the elapsed time, but the time I finished this step.
- Step Time: 3 hrs 30 mins (if you eliminate food)
- Total Elapsed Time: 12 hrs
Conclusion
And there you have it, a three color army in 12 hours. I think this process could easily be broken down into 2 hour steps, allowing you to finish a similar sized army in six sessions or so.
Of course, I have things down to a routine, so my steps might go faster than yours. For instance, I have a collection of paints that I use that makes color selection rather easy, and my brush strokes are practiced to this point where I can get fairly even coverage at a steady pace. A lot of this couldn't have happened without plans: a planned list, a planned color scheme, a planned approach.
If you manage a three color army in a similar fashion and wish to write about it, let me know. Pictures at each stage helps and if you want to time it, run a kitchen timer or your cell phone to help you remember the time later.
You can always edit this article to view how I put the code together. Just don't save any changes on this article if you can help it.
Post Script
I did, in fact, go on to finish the army the following day. I don't have things ready yet, nor did I time my steps, but if you're interested let me know. I'll get the material together faster.
Finishing the Three Color Searforge Army
References
- 1 http://xenite.wordpress.com/

- 2 http://akaranseth.over-blog.com/
- 3 Iron Kingdoms for "Dwarven"