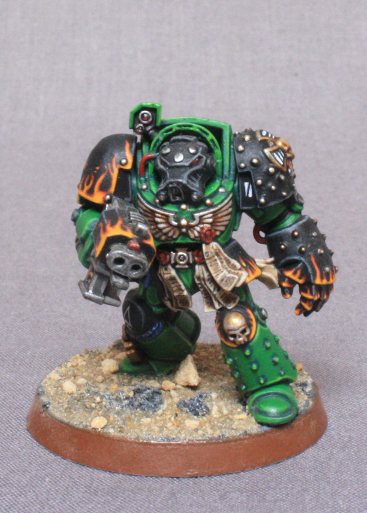
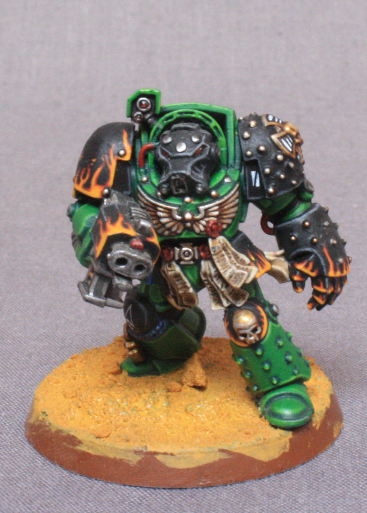
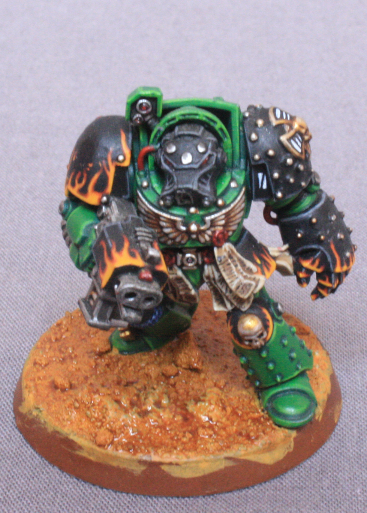
According to my recent attempt to re-base my Salamanders army, Google, (and therefore the total extent of Mankind's knowledge), has a mysterious absence of Desert basing tutorials. In the interest of expanding Dakka's dominion over all humanity (or just it's articles section - you choose o.O ), I've sought to rectify this. If there's one thing I hate, it's tutorials that have either no pictures or no clear explanation. With that in mind, here's my (hopefully) concise guide to creating Desert bases:
Materials Required:
-1x Model of Choice
-1x Tub of Sand, composed of fine, medium and coarse grit.
-PVA Glue
-Mordheim Turf or a similar choice of static grass tufts.
Averland Sunset
Seraphim Sepia
Tyrant's Skull
Abaddon Black
Step 1:
Having completed your model, it's time to begin basing. At this point I have to assume you've primed your base alongside your model. If not, go back and prime your base you Heretic!
First smother your base with a liberal layer of PVA glue, ensuring it completely covers the surface of your base. Having done this, take a moment to look around your model to ensure that the PVA hasn't found it's way onto your model. It may seem obvious, but there is nothing more frustrating than later finding sand encrusted on that gem you've laboured hours upon. If you come complaining later on that said catastrophe has occurred, expect to find nothing but my disgusted scorn and disdainful mirth at your failings - you have been warned...
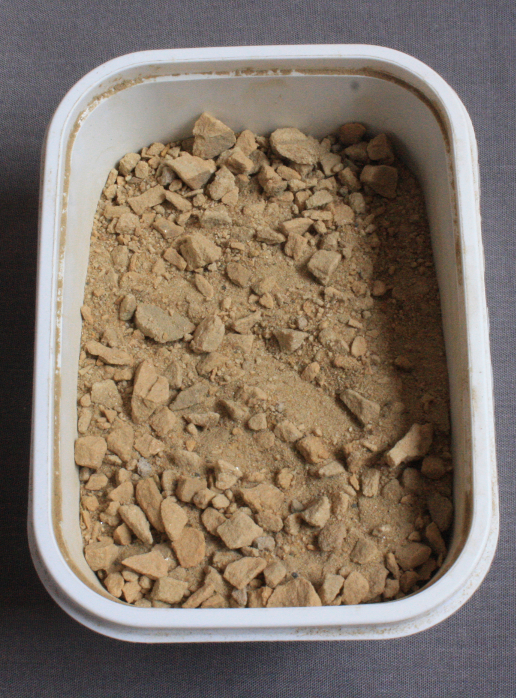
Next, take your model and pop it into your sand container for around 30 seconds, ensuring the PVA is fully submerged in the sand. As you can see in my sand container, there are quite a few large chunks on the surface of my sand - this is because the finer sand sinks to the bottom leaving the coarse grit at the top. It may be worth clearing a space in your container of the larger chunks first, unless you want a particularly rocky finish. After 30 seconds, to allow the sand to adhere properly to the PVA, remove the model and set it aside to dry fully - I usually leave mine overnight.
Step 2:
With your PVA fully dried overnight, you're ready to begin painting. First, give your model and the base a brush down with a clean fluffy brush (Need I say that I don't mean your Kolinsky Sable painting brushes?) to remove any sand and dust that has accumulated on your model or failed to bond to the PVA. Avoid blowing the dust off your base unless you wish to spend the remainder of your day brushing down the rest of your collection of models.
Preparation done, we can finally on to the painting! So, apply one liberal coat of thinned Averland Sunset. I say thinned, because the sand is highly absorbent, but also retains the colour very well. Hence, it makes no sense to waste your paint, especially if you're doing larger 40, 50 or 60mm bases.. So, slap on the Averland Sunset making sure it reaches all the little pockets in the sand. Then simply set it aside to dry.
Step 3:
With the Averland Sunset dry, give the whole base a liberal wash of Seraphim Sepia. Again, make sure your wash reaches everywhere. The wash is arguably the most important feature of the basing as this is what will determine the overall shade of the base. Applying a more liberal wash will give the sand an orange undertone and allowing the highlights to create greater contrast. However if you desire a lighter, yellow sand, then a less liberal shade may be better for you. Once again, allow the wash to fully dry before proceeding to the next step.
Step 4:
With your wash dry, the next few steps should progress rather quickly. Your next move should be to apply a heavy drybrush of Averland Sunset to the base to restore the base colour while leaving the wash to create the illusion of shadows around each grain.
Step 5:
Next, give the base a drybrush of Tyrant's Skull.
You'll want this drybrush to lighten up the base, but at the same time try to be slightly more restrained in your brushing to permit your last layer of Averland Sunset to set the mid-tone. You don't want to completely obscure the Averland Sunset or the contrast between the Tyrant's Skull and Seraphim Sepia will be too much.
Step 6
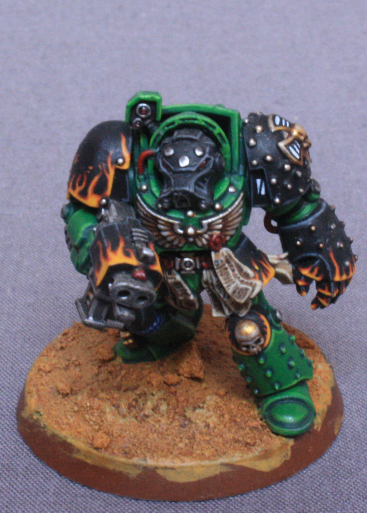
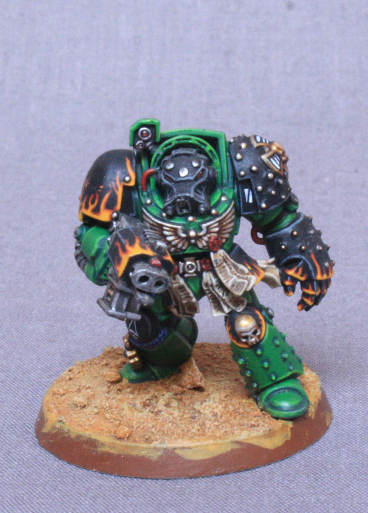
You're almost finished! As final detailing, paint the rim of your base with thinned Abaddon Black. You may require a few coats until the Black is solid, but thinning the paint will give the rim a smoother finish. It seems pedantic, but the fewer distractions the rim has, the more the eye is drawn to the base and model itself, enhancing the overall effect. The black also helps to draw a imaginary line under your model, forcing your eyes to alight on the model itself. Finally, dab a few spots of PVA glue onto your base and fix a few tufts of static grass on. I try not to go overboard with the grass for the obvious reason that grass is decidely sparse in a desert. A few clumps here and there create a bit of interest, but too much begins to look more like Savannah rather than true Desert.
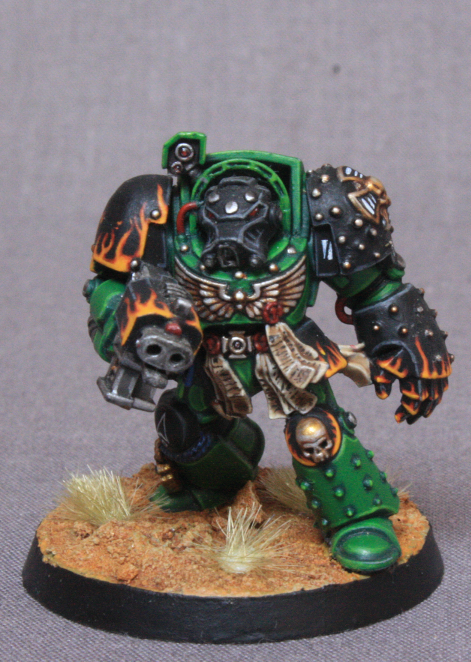
With that, your base is complete! As the purpose of this tutorial refers to the creation of the 'sand' itself, it's rather rudimentary. Some further points may be to add clump foliage of the kind railway modelers use to simulate gorse and other hardy shrubs that are typically found in arid locations. Similarly, you may wish to prime and paint some battlefield debris separately, such as discarded magazines, damaged armour or broken blades, and fix them on after the base is complete to add further interest.
