Hi Guys,
I am currently trialing out a new Nid list for upcoming 1,500 point tourneys, so please read, enjoy and comment
 My Nid army for testing is as follows:
HQ
My Nid army for testing is as follows:
HQ
Tervigon - Catalyst, Toxin, Adrenal
Elite
2 Zoeys in a pod with
TL deathspitters (deepstriking)
2 Hive Guard
2 Hive Guard
Troops
20 Genestealers with toxin
20 Genestealers with toxin
Tervigon - Catalyst, Toxin, Adrenal
12 Termagants
The Tau army consisted of (aproximately):
HQ
Suit with Plasma, missiles, upgrade to fire both and upgrade to
BS 5
Elite
3 suits with plasma, missiles and the ability to fire both
3 suits with fusion blasters (deepstriking)
Troops
8 Firewarriors with Devil Fish (disruption pods)
6 Firewarriors
10 Kroot with 5 kroot hounds
Fast Attack
5 pathfinders with Devilfish (disruption pods)
Heavy Support
2 Hammerheads (disruption pods)
3 Broadsides with missiles and the ability to fire both.
Mission - Capture and Control
Setup - Dawn of War
The Tau commander turned towards the squad leader - "We need to repair our satellite in this quadrant. We have report of many Tyranids in the area though. Bring a squad in a devil fish with me under the cover of darkness, and we'll try to spot their position before we move in to repair our satellite."
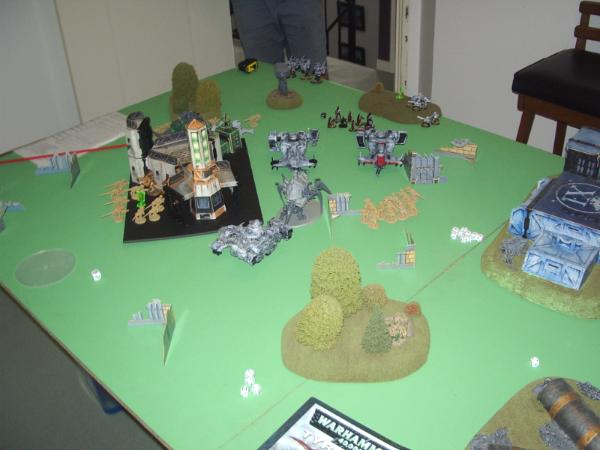
Board Setup (objectives are green flags)
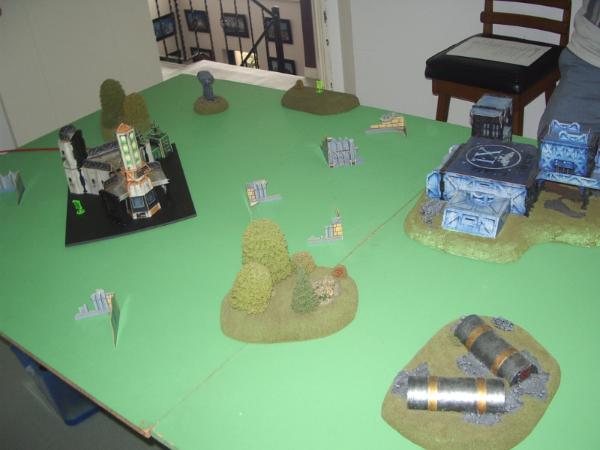
The Tau got first turn, and decided to place their
HQ and a Firewarrior unit in Devil fish as far forward as possible. The idea being to push my Nids back as far as they could, and pull back on the first turn.
The Nids then setup with the troops Tervy overlooking my objective and the
HQ Tervy central. The Genestealers infiltrated down each side of the board, allowing me to be close to the Tau side and within catalyst range of my Tervies. (Some hormagaunts are being used as proxy stealers, I didn't quite have forty... yet.)

The Nids then succeed in stealing the initiative!
 Nids T1
The Tervies both successfully cast Catalyst on both stealer broods. The
HQ Tervy pumps out 4 gants and runs dry (2 1's and a 2!

), however the other Tervy spawns 11 and keeps going.
Hive Guard move up behind the
LOS blocking terrain, along with the Troop Tervy, whilst the
HQ Tervy moves up behind some woods. The Stealers all close towards the middle.
Shooting sees the first Hive Guard unit spotting the Devil fish - 4 hits, 2 pens one glance, all saved by disruption pods... The 4 gants take pot shots at his
HQ but he saves the 1 wound they cause. Everything else wither runs or fails night vision.
 Tau T1
The Tau come on primarily over their objective, and start lining up Stealers in their sights. 6 Firewarriors, 4 Suits, 3 broadsides, 2 hammerheads, 5 pathfinders and two devil fish all open up on the Stealer brood on my left. Feel no Pain ensures he only brings 15 down, with the last five passing their
LD.
Objectives - Nids: 1, Tau: 0
"Oh my god!, they're all around us! Shoot, shoot, shoot!!!"
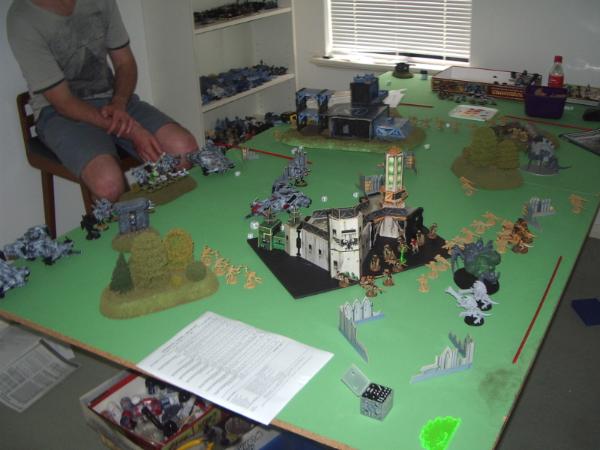
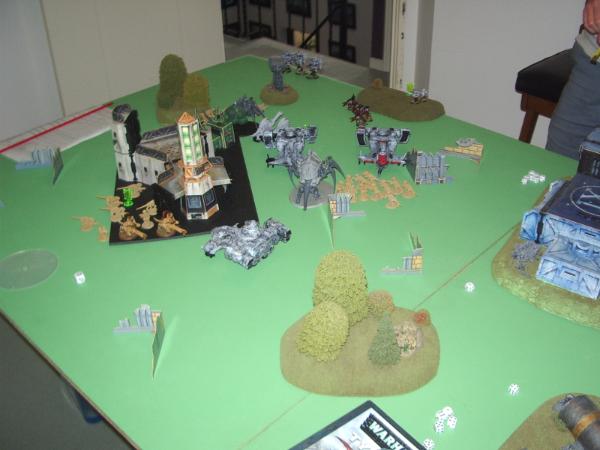
Nids T2
The Zoeys fail to arrive. The Troop Tervigon puts catalyst on the hiveguard, whilst the
HQ puts it on the large stealer brood.
The 5 remaining stealers advance towards the Tau, Whilst my Tervies hug the cover. My Troops Tervy spawns another 10 gants and keeps going.
Firing sees me put a lot of glancing/penetrating hits on the devil fish, but it saves all of them.
The five stealers multi assault the pathfinders and firewarriors, killing 3 firewarriors for no return. Both units than break and are swept by the stealers... leaving them open to return fire with no
FnP...
Tau T2
The Kroot arrive on his table edge to deal with any surviving stealers.
The Tau reposition slightly, and fire into the masses. The 5 stealers are quickly gunned down by a Devil Fish, whilst the rest of the Tau shooting results a few gants going down, mainly due to the very survivable large brood of stealers with
FnP and Cover.

Objectives - Nids: 1, Tau: 0
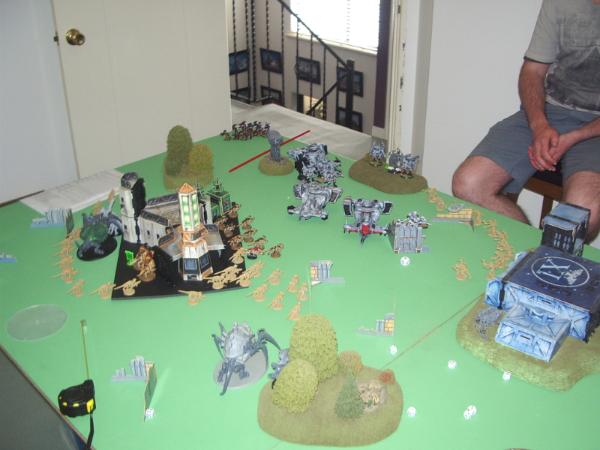
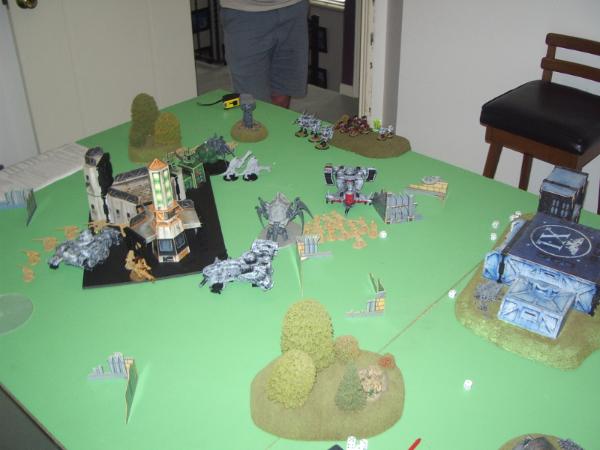
Nids T3
The Zoeys still don't arrive.
I decide that I'm going to need to get my gants and Tervies in the game if I'm going to win this, so I start sending everything forward. The
HQ Tervy puts
FnP on the stealers, whilst the other one puts it on Hiveguard and pumps out another 8 gants.
Shooting sees my Hive Guard blow up 1 Hammer head, whilst my other unit fails again to have an impact on the devil fish.
Assault sees the stealers assault the other hammer head getting 9 swings, and ripping off the main gun.
 Tau T3
The Fusion blaster suits come in near my
HQ Tervy, whilst the rest of the Tau reposition to take on my last stealer brood. One Devil Fish picked up the Kroot, whilst the other dropped off the 8 Fire Warriors to shoot up Stealers.
Firing sees the suits and broadsides take the
HQ Tervy down to 2 wounds.The rest of the army focus fires on the stealer brood and take down 10 of them. The remaining stealers pass their morale check.
Objectives - Nids: 1, Tau: 0
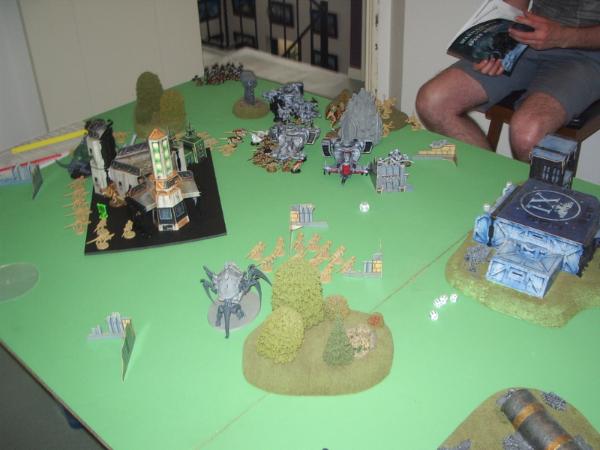
Nids T4
My Zoeys finally arrive and drop down in the middle of the Tau lines. Stealers advance on the broadsides whilst the
HQ Tervy and gants size up the newly arrived suits. The Tervy puts
FnP on himself, whilst the other one fails. The troop Tervy pumps out 6 gants and then runs dry (That's 35 gants from one tervy). The gants advance with the Tervy and the hive guard behind.
Shooting sees the
Spod immobilise, stun and shake a devil fish, whilst the Zoeys fail to do anything to his suits with their lances. One unit of Hive guard fires at the hammer head, taking its missile pods off, whilst the other one shoots at his suits and fails to do anything.
Assaulting sees the Stealers clean up the Broadsides for no loss, whilst the
HQ Tervy and gants take down the fusion suits. Other gants assault his hammer head but fail to do anything.
 Tau T4
The Tau reposition to try to take down as many stealers and gants as possible.
Shooting from the suits and firewarriors takes down the last of the stealers, whilst the Kroot jump out and combine fire with the devil fish to take out a handful of gants.

Objectives - Nids: 1, Tau: 0
Nids T5
The Nids move forward except for one unit of hive guard and one gant squad that stays on my objective.
Firing from my Zoeys
ID's one suit, whilst the
Spod kills a couple of Firewarriors. Firing from my gants takes down a handful of Kroot, whilst my other gants shoot into the back of the hammerhead for no effect. His Fire Warriors pass their morale.
My gants than assault the back of the hammerhead, but still have no effect. My Zoeys assault his suits to try and take out their shooting for a turn - they fail to do anything and take three wounds killing one. The remainder than makes all his Fearless saves, tying them in combat.

Tau T5
Tau reposition their tanks, with the hammerhead lining up for a tank shock next turn. Firewarriors advance onto their objective, whilst Kroot move to engage more gants.
Firing from the kroot saw another gant brood taken down.
In assault, the suits finished off the zoey.
Objectives - Nids: 1, Tau: 1
The game then goes onto T6
Nids T6
The Nids advanced to put as much fire power on the kroot and fire warriors as possible.
Termagants and Hive Guard moved to ensure the hammerhead would have to tank shock to contest.
Firing from the gants, Tervies and one hive guard brood took down enough kroot and firewarriors to force a morale check on both units. Firing from the other Hive Guard brood failed to have any impact on his other hammerhead.
 Tau T6
The Kroot and Fire Warriors consolidated onto their home objective, Whilst the hammer head tank shocked my hiveguard and gants. One of the hive guard attempted DoG, glanced, but failed to stop the tank, allowing it to sit near my objective. Another devil fish lined up for another go in case we went for another turn.
Firing didn't see much happen.
Objectives - Nids: 0, Tau: 1
We rolled for a seventh turn, and rolled a 2 - Victory to the Tau!
As always - would love to hear from Dakka in regards to the game, what you liked, what you didn't like, as well as C + C on the tactics and armies used. I will be providing my reflections on the game at a later date.
Hope you enjoyed!


 Chaos Marines
 Tau
Tau
 Necrons

 : 1/1/1
 : 6/0/1 (1 overall win)
 :8/0/2 (1 overall win)

 Lots
Lots