So, for Adepticon this year we've once again put together a team of 4 players from the Badab War. This time it's two freedom-fighters and two bureaucratic toadies. We tried mixing codecii but just couldn't get anything settled. Finally, in a fit of pique, we just said we'd all use the Blood Angels dex. It worked... and very shortly there-after everyone's lists settled down into a reasonably decent set of complimentary armies. Three of us however, had never played with
BA rules before... including myself. So I challenged myself to practice with the army as much as possible before-hand, and throw out some bat reps in the hopes of gaining some wisdom from more experienced players, and giving my
BA-newbie team mates the benefit of my experiences.
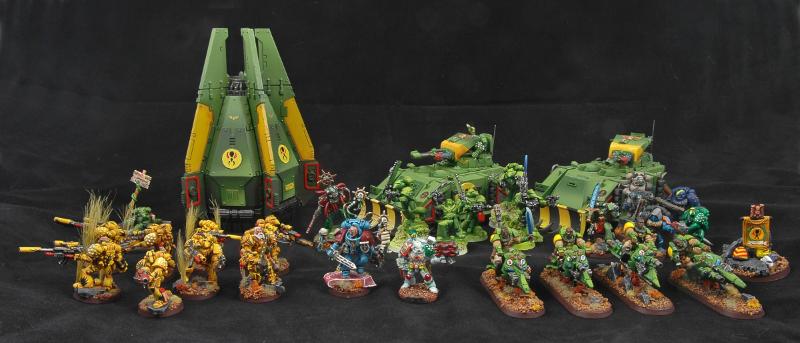
Now, the army I have is quite familiar to me as I've been playing it vanilla for a couple of years now (not exactly this configuration, but there's only one new element in this new army). What has changed is the fact that they're now
BA and as a result... instantly better. My vehicles are now fast... I have a chance for Blood Rage, I have assault units as scoring troops which, when I put them in the razorbacks (as I used to with my vanilla troop squads) are cheaper than tactical marines... and I can use the extra points to buy a sanguinary priest. I don't like the idea of codex shopping... but holy smokes... exact same army, exact same point total... only significantly better. *shrug* Guess I've kind of left my moral outrage at the door and jumped on the band wagon.
So, this is the first of what I hope will be numerous battle reports as I wade my way through learning how to play with this army... and how to use the
BA special rules that apply to it. Keep in mind I'm not really a very good player, but I always try to play well and try to improve my game. Comments are welcome. I am not, however... interested in a major re-write of the army list and there would be a cascading effect across the team. Tweak here or there perhaps... but that's about it.
So, without further rambling...
Game #1 I had planned on bringing along an old Adepticon mission, but it was just as well I didn't as at this stage, it's probably more important that I get comfortable with my army than worry about a convoluted, multi-tiered scenario. So we went out of the
BRB.
Opponent: wyomingfox
Mission: Take and Hold
Deployment: Dawn of War (I swear I roll this 75% of the time!)
The Armies Mantis Warriors:
 HQ
HQ: Librarian - blood lance, the sanguine sword
EL: Sanguinary Priest -
PW EL: 8x Sternguard - 5 combi-meltas, melta, heavy flamer, srg w/ combi-melta and
PF (in pod)
TP: 5x Assault Marines - flamer, srg w/
PW (in las/
plas razorback w/ dozer blade)
TP: 5x Assault Marines - flamer, srg w/
PW (in las/
plas razorback w/ dozer blade)
FA: 4x Scout Bikes - 3x astartes gren launchers, srg w/
PF,
MB, homing beacon
This is in essence... an alpha-strike list (albeit a weak one), however it's flexible and is a very good support list for my teammates' lists... which are a bit stronger. It can also function without the alpha-strike... something that I have strongly encouraged all team members to consider as in my experience... most good players won't give you the opportunity to do the alpha-strike.
Space Wolves: (sorry, forgot to take a pic)
I'm doing this from memory and haven't really seen a
SW dex... so forgive me if this is off.
HQ: Rune Priest,
LL,
JotWW, COTS (the water elemental)
TP: 10x Grey Hunters - 2 melta, mark of the wulfen, totem (in rhino w/ dozer blade)
TP: 10x Grey Hunters - 2 melta, mark of the wulfen, totem (in rhino w/ dozer blade)
TP: 7-8x Grey Hunters - flamer, Totem (in rhino w/ dozer blade)
Hvy: Predator - Autocannon, 2x
LC, dozer blade
Hvy: 6x Long Fangs - 5x
ML So, tons of long range fire power, 30 better-than-normal marines in little boxes that can counter charge, 4 melta... oh, and the damnable lightening attack.
The Table: 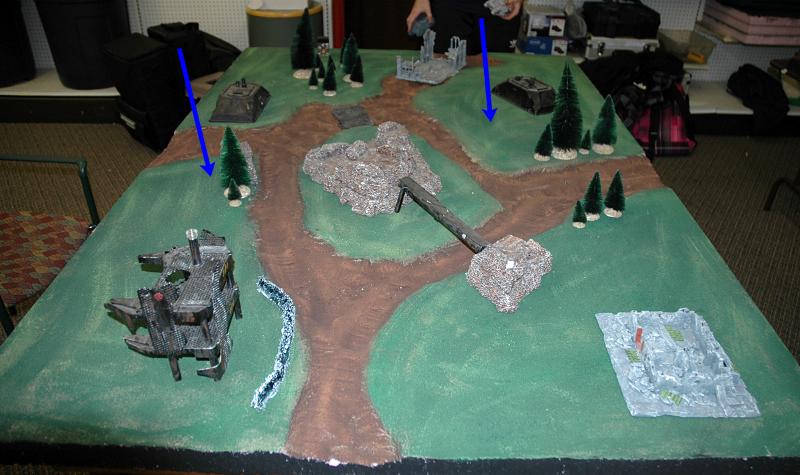
Nice table with decent amounts of sight-blocking terrain & open spaces. womingfox won the roll off and chose the right side of the table and first turn. I'm on the left with second turn. Unlike most
40k gamers, I actually believe in impassable terrain. No, tracked vehicles can not drive straight up 20 scale-feet vertical walls or rock faces... but I am in the minority. Luckily, wyfox feels the same way. The brown areas are actually dug into the board, but we decided there were enough obstacles already and ignored them for the sake of movement. They do make it a real PITA to move infantry though. Blue arrows indicate where the objectives would eventually be.
Turn 1 Space Wolves: 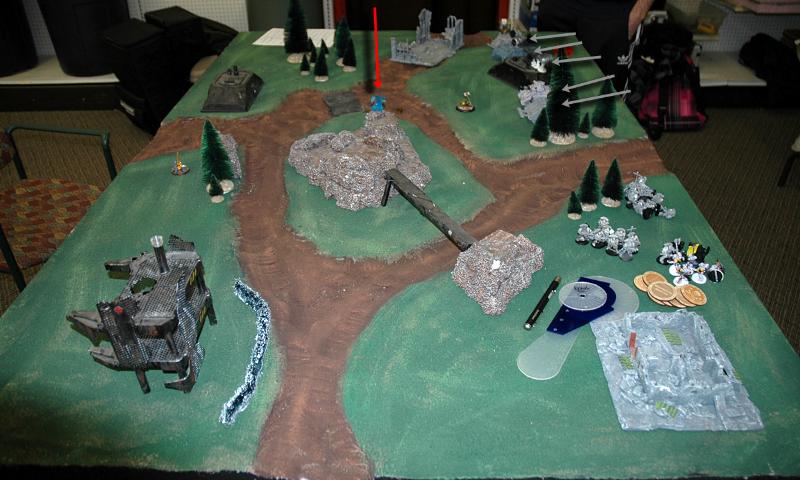
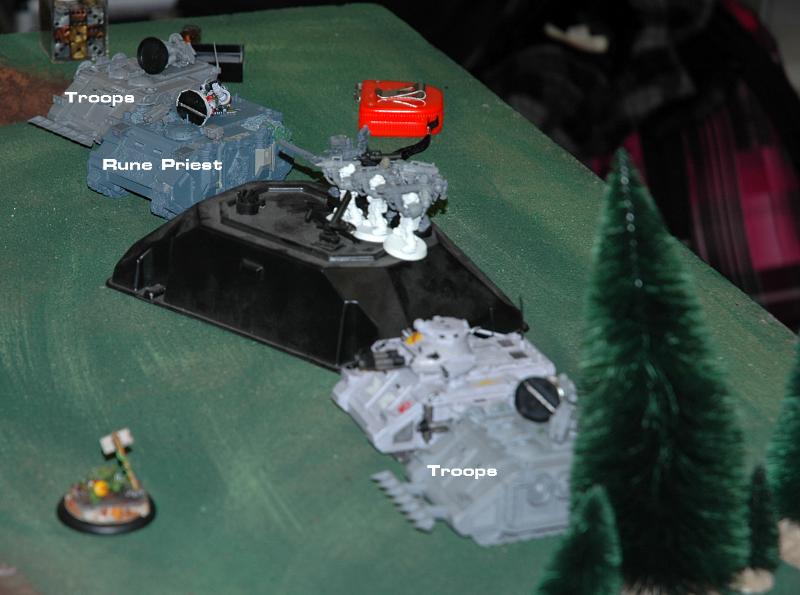
Wyfox decides to come in up in the far right, where (I assume) he feels he has the best firing and driving lanes. He puts his objective out in the open in front of his lines, so I assume he's either going to be aggressive himself or expect me to come flying in. He does have a ton of firepower though so perhaps he just figured if I went for it he'd blow me to Kingdom come. Then his priest summons the water elemental and puts in on a tall piece of terrain in the middle of the table, so he can lightening strike anything he bloody well feels like.
Here's a close-up of the Space Wolf deployment (i.e. Turn 1 roll-on)...
 Mantis Warriors:
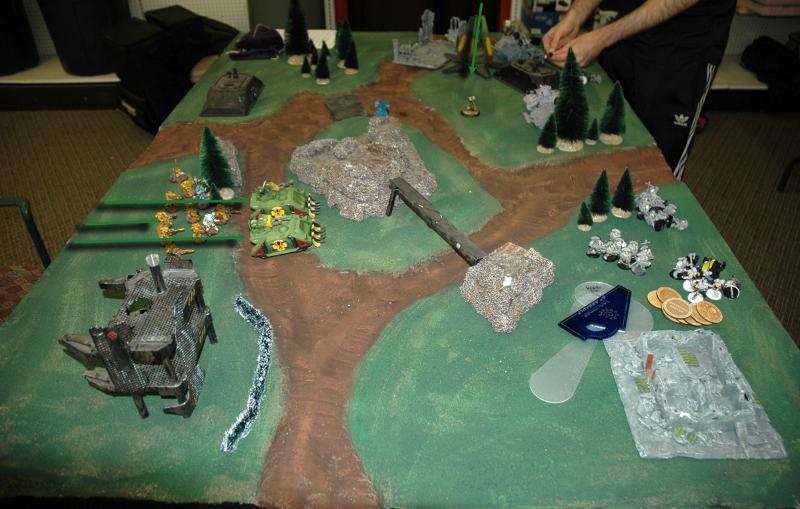
I am a bit more circumspect in my arrival on the board. I'd already decided not to try the alpha-strike as whatever damage I would have done would cost me my best unit and both
ICs (they usually run with the sternguard). So I outflanked the bikes hoping to make a late run on his objective and walked everything else on. Luckily I had a near continuous rock wall between the Wolves and my forces, and the fast vehicles made it into cover without a hitch. My plan at this point is to hide, and deal with his forces as I had to. Maybe use my fast vehicles to make a run on his objective if the bikes fail at the end of the game. My single (empty) pod dropped into a smaller gap in front of two of his rhinos in hopes of slowing down that leg of his advance.
Turn 2 Space Wolves: 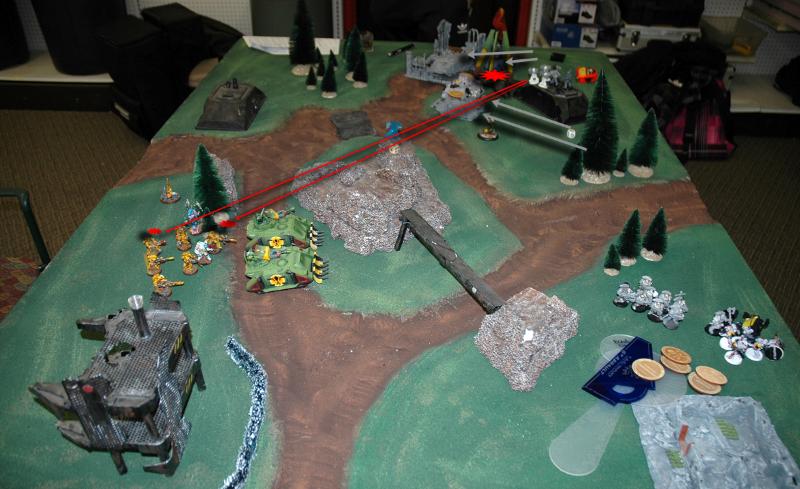
The Wolves move forward. I am covered well by the rocks, but the missile launchers pick off a couple of sternguard and the rest of the Space Wolves (with nothing better to do) wrecks the drop pod. No great loss, the pod's still in the way. Two rhinos are forced to move through cover to get around but they make their rolls.
Mantis Warriors: 
The Mantis Warriors continue to move towards the cover of the central rock. The two razorbacks have a couple of nice lascannon shots at the predator but they bounce off or are stopped by cover. The bikes (unfortunately) come on early and on the wrong side of the table to boot. I decide to try to bring them up through the cover of the trees in order to make a run at either the objective or the long fangs, however this was a bad error in judgement. Should have brought them in on my side of the board in order to support operations there.
Turn 3 Space Wolves: 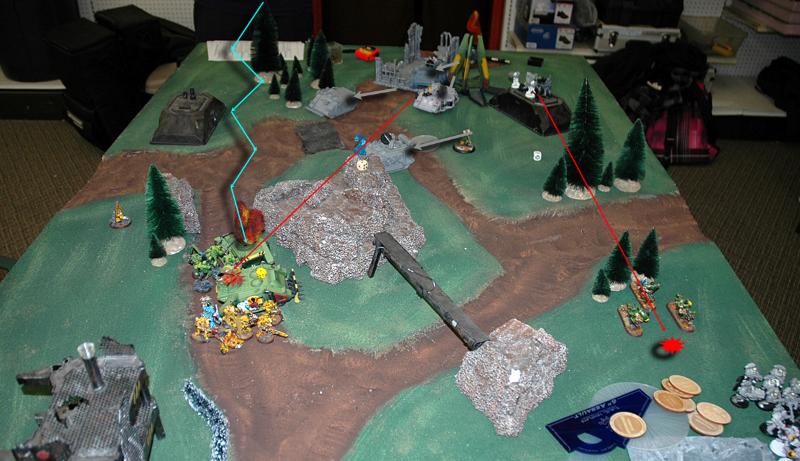
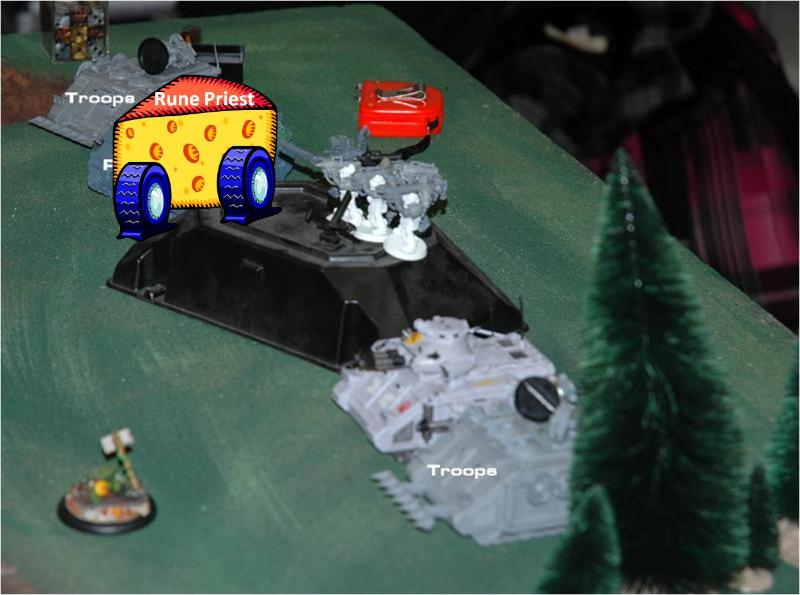
Two units of Wolves continue to move forward aggressively. The Rune Priest calls down lightening on one of my Razorbacks and kills it. The Long Fangs, having nothing better to do, kill one of my bikes. The predator manages to stun my other razorback (twice) with las cannon fire.
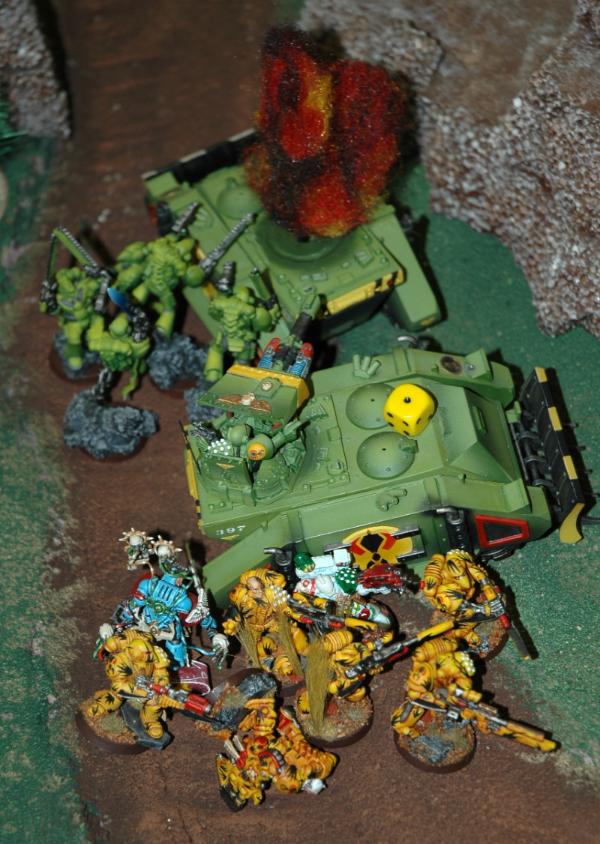
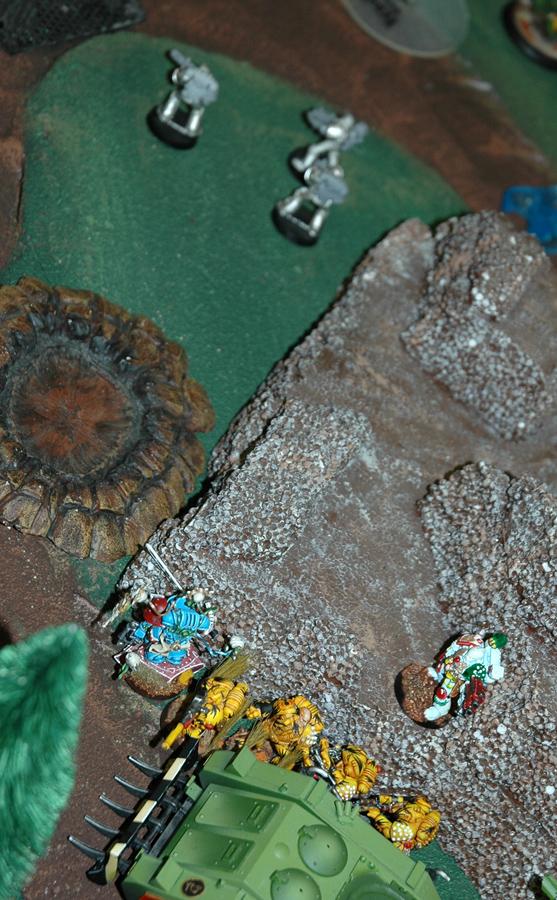
Here's a close-up showing the mess that was my center after the shooting phase was over.
 Mantis Warriors:
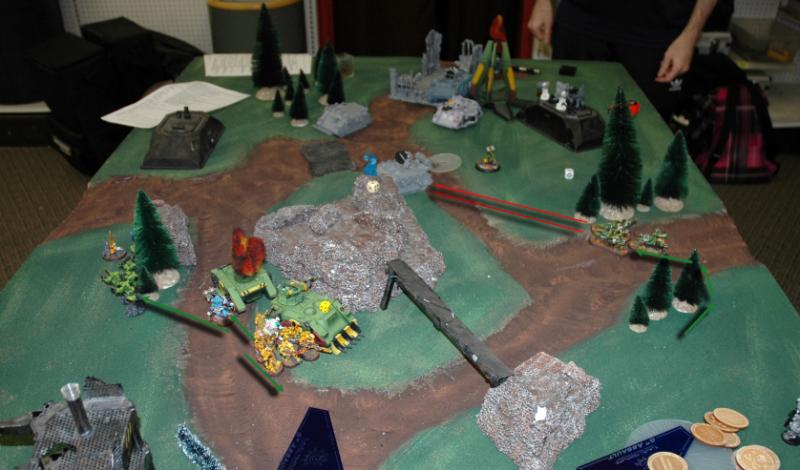
The "disembarked" assault squad makes a dash for my objective whilst the librarian separates from the Sternguard. There was a reason for this... something about being able to target a different unit I think. Made sense to me at the time... not so much now. There was plenty of cover around so I wasn't worried about losing him. The surviving Razorback moves forward a bit into cover as do the Sternguard. The surviving bikes swing around, still behind the trees... to see if they can grenade the rhino into submission... no such luck... all they manage to do is knock off the bolters. They're only one turn away from making a run at the objective or the Long Fangs.
Turn 4 Space Wolves: 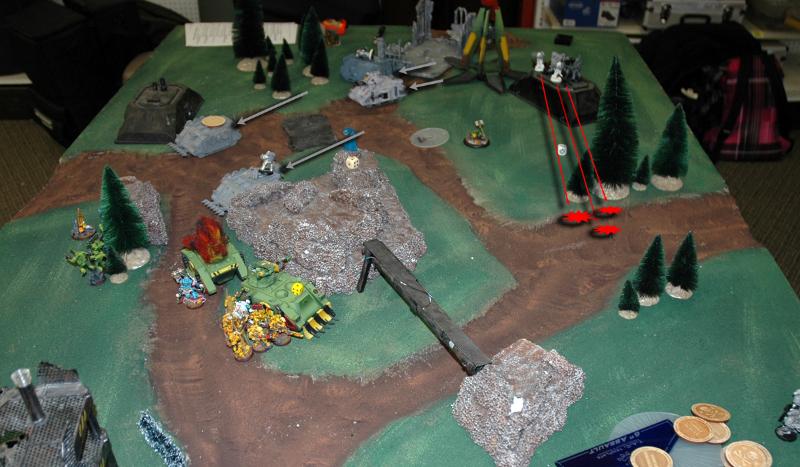
The Space Wolves are in full attack mode now and are knocking at the door. The hardest knock is made by the Long Fangs who wipe out my scout bikes.
Mantis Warriors: 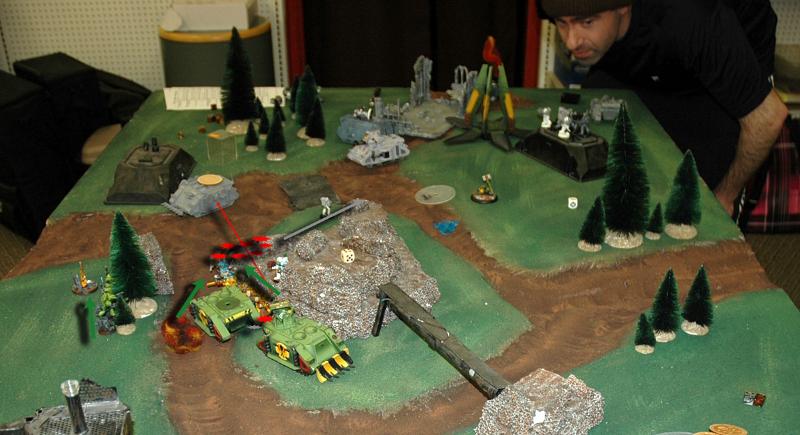
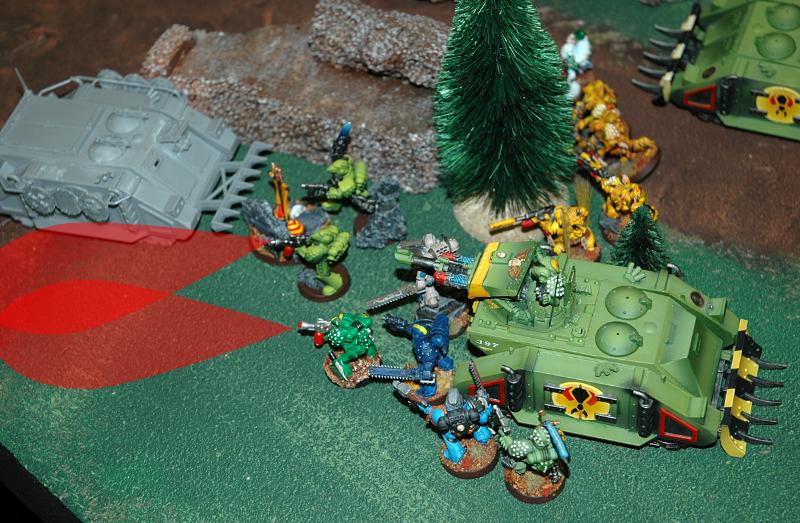
Here you get a nice view of wyomingfox lining up a shot... you can also see the kilt he wears whenever he's gaming. Now, I'm all in favor of a guy showing pride in his heritage & if he wants to go to battle kitled more power to him. I just wish I didn't get a full-throated rendition of "Scotland the Brave" every time one of my units goes down.
In desperation (I really thought I was toast at this point) the Mantis Warriors ambush the near rhino. A clean shot from a sternguard combi-melta blows up the rhino, stranding the marines in the crater. The sternguard the roll a 6 for their assault move... and sternguard, apothecary and then the libby pile in. Librarian successfully casts "Sword of Sanguinus" and when it's all over the Space Wolves, despite a successful counter-charge lose the combat by 5. They fall back out of harm's reach while the Mantis Warriors scramble back into cover.
 Turn 5 Space Wolves
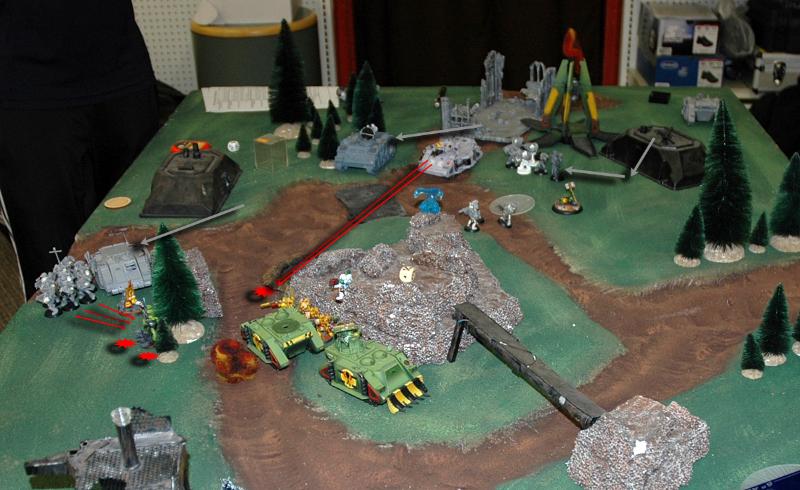
The remaining rhino screams up and unloads it's contents who rapid fire my poor assault marines. Three are shredded by bolter fire. The Predator turns my Librarian into mist with it's twin-linked, turret las cannons. (Unfortunately if you check the original army list you'll see it didn't HAVE
TL las cannons... it had an autocannon. But since the model had the las cannons we played it wrong nearly the entire game.)
Mantis Warriors: 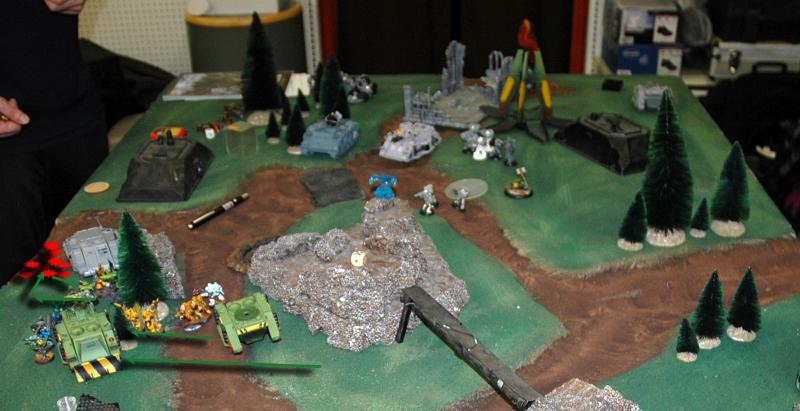
The Mantis Warriors execute a classic "student body left" play and unload everything they have on the tactical squad. When it's over, the squad is gone... having been issued into oblivion by the last two assault marines from the squad they'd shredded with bolter fire the turn before. Two flamers really made a mess of the squad...
Unfortunately I didn't have enough firepower for both the squad and the rhino as both contested the objective. So when the game ended on turn 5...
Space Wolves: 1
Mantis Warriors: 0
Victory Space Wolves! In summary:
A fun game but frustrating for the most part. I still can't get over how amazing the Space Wolf dex is... holy crap. The lightening thing is more annoying than anything else. I just ticks me off to no end. I'm sure I'll have to get used to more of the same as Imotekh does something similar.
I think my main mistake was bringing on the bikes where they could be shot to pieces before they could accomplish anything... just a waste of a unit. Had they been in back with the rest of my forces by the objective, they might have been able to take out the rhino or help with killing off the troops & freeing up something else to take out the rhino.
Things I learned...
- Much as they are cool, the dynamic... leaping from rock pile poses of my new assault marines (see my blog) have got to go. They're nearly the height of 2 space marines and there's just NO hiding them. The make the whole unit a sitting duck. So I'll need to disassemble them and re-do the basing.
- Fast vehicles are freakin' awesome.
- Same for the Sanguinary Priest.
- The Sanguine Sword libby power is very handy.
- Flamers are very nice... even against heavily armored units.
- Marines with furious charge are a frightening thing. +1 strength & initiative really changed the balance of combat.
Things I might adjust...
- considering swapping out the
HF and melta in the sternguard squad for a single las cannon (the other marine will keep his bolter with the special ammo) or perhaps even 2 missile launchers... so if they have to deploy on the table, they present a credible long-ranged threat. I don't expect many opponents will give us our alpha strike... and the heavy weapons are so bloody cheap for these guys it seems prudent to consider. However, they won't be able to fire if on the move... which cautions against more than one. Dunno... kind of a toss-up based on what I think is their most likely deployment and role. Right now they're outfitted for the alpha-strike... but how often will they actually get to do that?
I can scrounge enough points to bring the sternguard up to 10 men with 2
ML. Then take the srg & 4 combi-meltas and put them in the pod (with the
ICs) and take the other half with the 2
ML's and put them somewhere in the back for supporting fire. I can... I lose a little bit (have to give up one combi-mela & a scout bike) but it's doable and it doesn't damage the prime function of the list. The alpha-strike doesn't lose that much since everything in the pod can only target one unit anyway and I gain 2
ML shots with some ablative wounds.
Oh, crap... that means I need to paint more sternguard. Well, I'm open to suggestions anyway.
So... as a good first test with a new dex against a pretty decent opponent. I'll take it.
Thanks for reading! Hope you enjoyed it.
Gits


 :
: 

 3000 pts
 2000 pts
 1600 pts


 . You should have replaced the