To see the previous lession in my weathering series, follow this link:
Chipping Tutorial Time for the rust lesson! This isn't unique, or something I invented... it's just step-by-step what I've been doing on my ork vehicles. Enough folks have asked for it I wrote it down with some supporting pics. Hope you find it useful. This step takes a leap of faith... because you're going to deliberately *really* screw up your nicely painted figure in ways that can't be ignored or overlooked. Once you're ready to get past that... you're on your way!
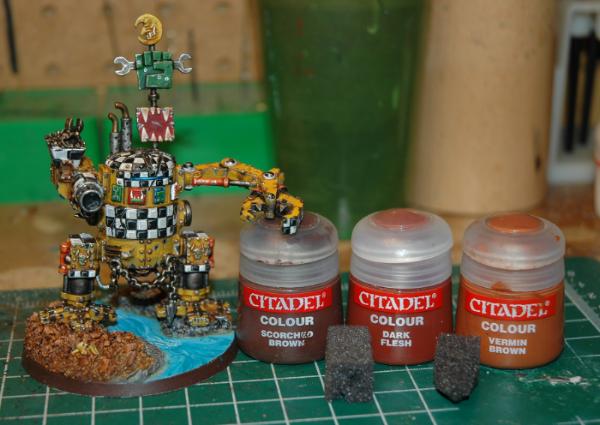
 Supplies:
 You'll need a few supplies to do rust the way I do. First, 2 or 3 rusty shades of paint. The darker, browner shades are for older rust, the lighter, orange colors for newer rust. You could go all the way up to blazing orange I suppose... I just usually stop at vermin brown. Also you'll need some open-cell foam or sponge. I usually cut up the surface a bit in order to make it a bit irregular. I also take one a taper it down to a smaller surface so I can get into those hard-to-reach places.
 Start:
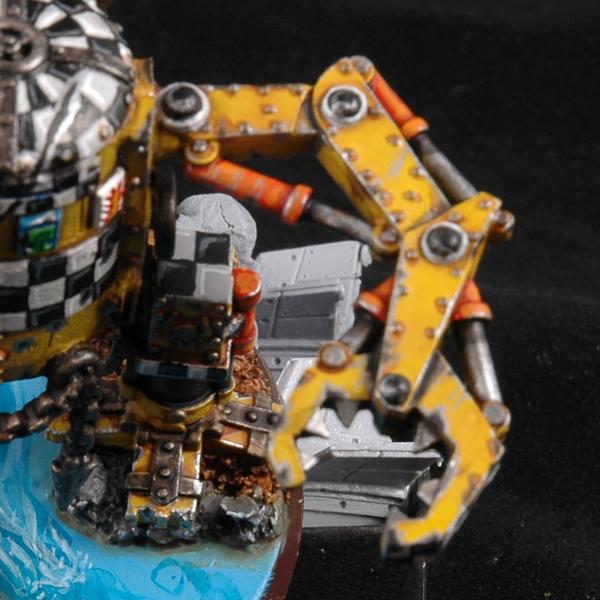
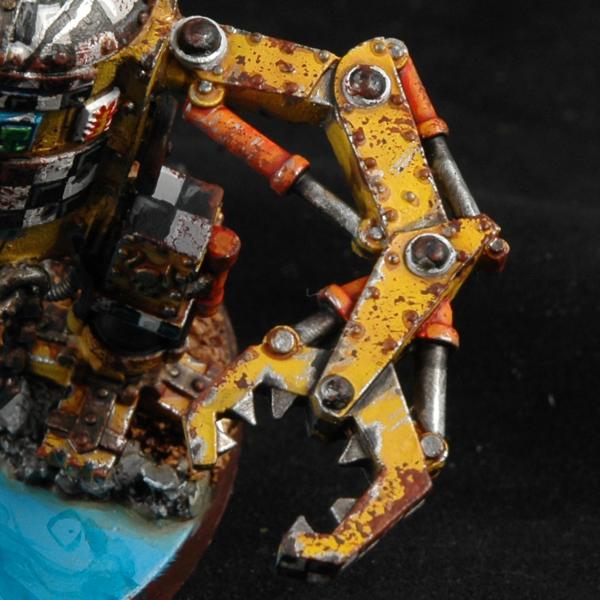
 Here's our Kan arm. Painting and chipping all done, I have the bolts washed in sepia to look a bit rusty (that doesn't need a tutorial). Sorry for the blurry pic, the rest are better.
 Step #1:
 Dab a sponge in your darkest color and blot on a paper towel until most is off... blot hard once or twice because there will be a lot of paint hiding in the inner parts of the sponge that can come out at very inopportune moments if you dab too hard on the figure. This is basically practice for what you'll be doing on your figure. Dab until the "solid" footprint it leaves breaks up. You get lighter rust by dabbing the sponge lightly on the figure, heavier rust by pushing harder and releasing more of the paint inside the sponge. Be very careful! you can easily drop a "block" of rust on your figure if you push too hard... Practice makes perfect.
Once the sponge is shedding the right amount of paint, begin to dab your figure. Rather than just covering the whole thing... I try to think about where this rust might form naturally... though this is a kind of "wearing with age" rust as opposed to the stuff around the bolts say where water is collecting and causing rust. I do like to concentrate it in areas that I think will see wear and damage... places like edges and such. A good speckling across a large plate or surface can really make for an interesting dynamic, as well as working the edges of a hatch where repeated banging would chip the paint and expose the metal beneath.
As with the chipping... adding rust is a great way of covering mistakes, distracting from the visible edges of a decal or a poor assembly job, or adding interest to an otherwise uninteresting surface.
 Step #2:
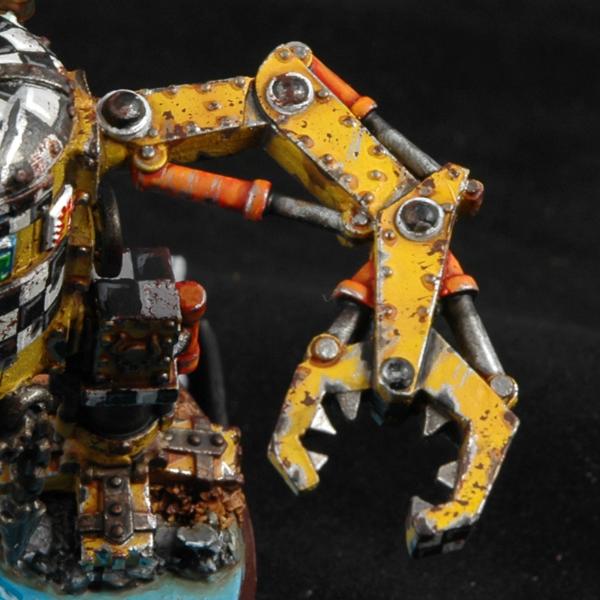
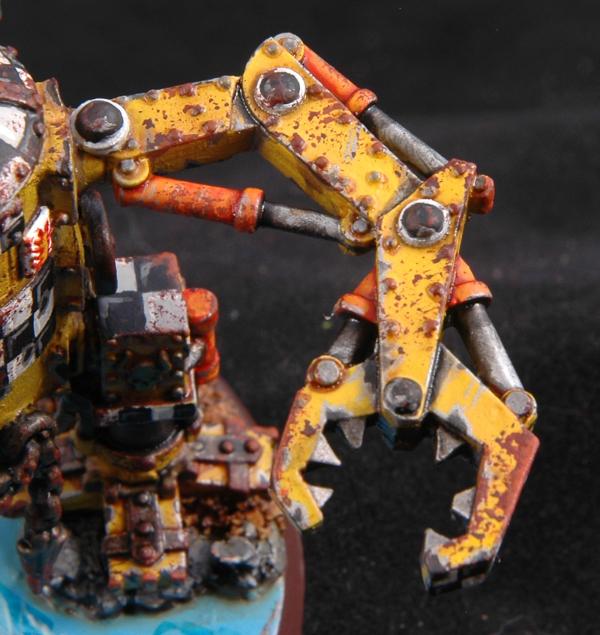
 As above with the next lightest paint. I usually try to stick in the areas that have already gotten the dark rust... this being slightly less old & having a lighter color. I don't get worked up over exact coverage or quantity here... all you're really trying to do is break of the visual "cleanliness" of the figure with the rust spots to show wear... and using multiple shades breaks up the rust so that it looks more confused, i.e. more natural.
 Step #3:
 Finally you hit it with your lightest color. With the light color, I don't necessarily limit myself to just the areas that have gotten the darkest rust. This is the new stuff... it could form anywhere. Edges especially are good choices... as well as anywhere that's looking a bit too clean.
 Step #4:
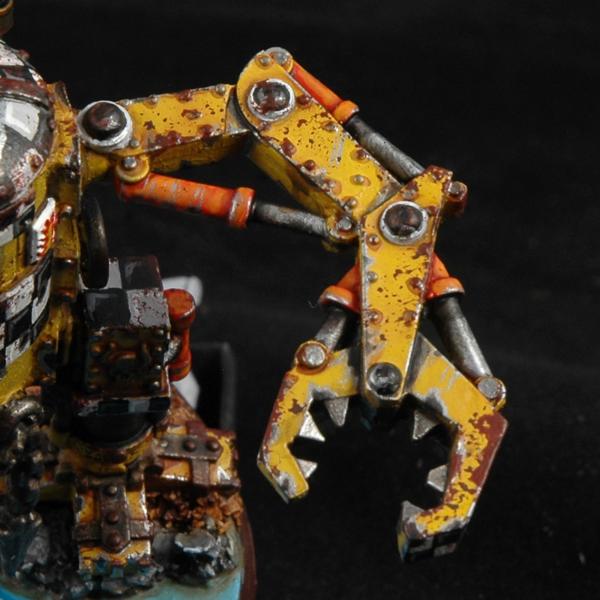
 Additionally... you can move your shades into the orange range if you'd like. After looking at the pics here I decided that some of the areas of heavy rust needed a little pop... so I mixed 50/50 vermin brown and blaze orange and used that very sparingly on the heaviest rust patches and some of the exposed edges and corners. It did the trick in my opinion.
 And that's it... rust is done!
 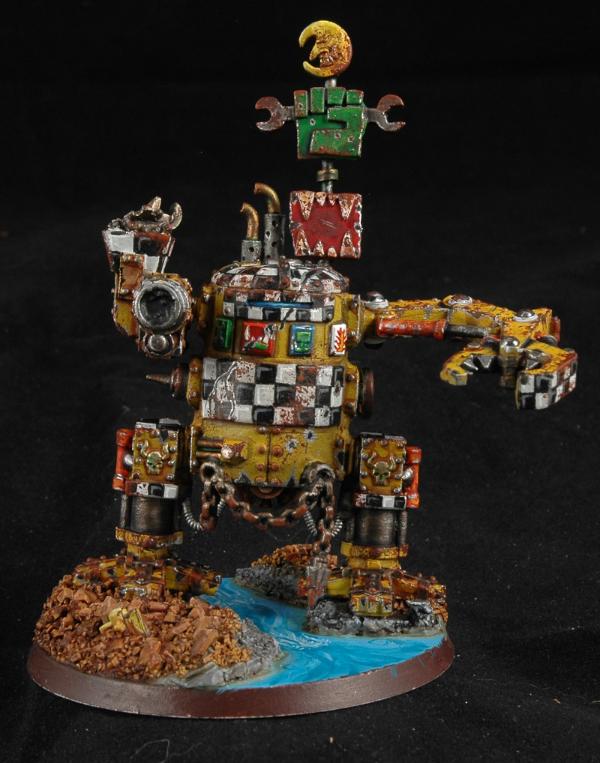 As a special bonus... let's talk about adding soot.
 Soot is a great thing to put around gun barrels, smoke stacks, etc to show the effects of flame or smoke. To do soot, I simply take some black weathering powder and mix it with acrylic air brush medium until is flows but is thick. The nice thing about using the air brushing medium is that it's its own sealer, so no special sealing step is required... *and* you use it just like any paint. Then I just paint it where I need it. It will dry quickly and is dead-flat black... making it perfect for other applications to, like painting the inside of gun barrels so there is no shine (I used it on the inside of the grotzooka barrel for example). Little touches can make all the difference. If you want a less than solid layer... just use it to do a dry-brush effect, which will make a nice transition from those areas you've sooted to those you haven't. I've used it here right under the yellow part of the legs in order to accentuate those parts of the pistons that probably have fresh oil and would be darker by comparison. A million-and-one uses as they say!


 ... but since I don't really have any on this model (no tracks on the vehicle, no mud on the ground), we'll have to settle for speckles of vaguely rust-like paint.