Forum adverts like this one are shown to any user who is not logged in. Join us by filling out a tiny 3 field form and you will get your own, free, dakka user account which gives a good range of benefits to you:
No adverts like this in the forums anymore.
Times and dates in your local timezone.
Full tracking of what you have read so you can skip to your first unread post, easily see what has changed since you last logged in, and easily see what is new at a glance.
Email notifications for threads you want to watch closely.
Being a part of the oldest wargaming community on the net.
If you are already a member then feel free to login now.
Background Played this game a couple weeks ago, but due to a combination of work + holidays + laziness I didn't finish the report until now... so enjoy!
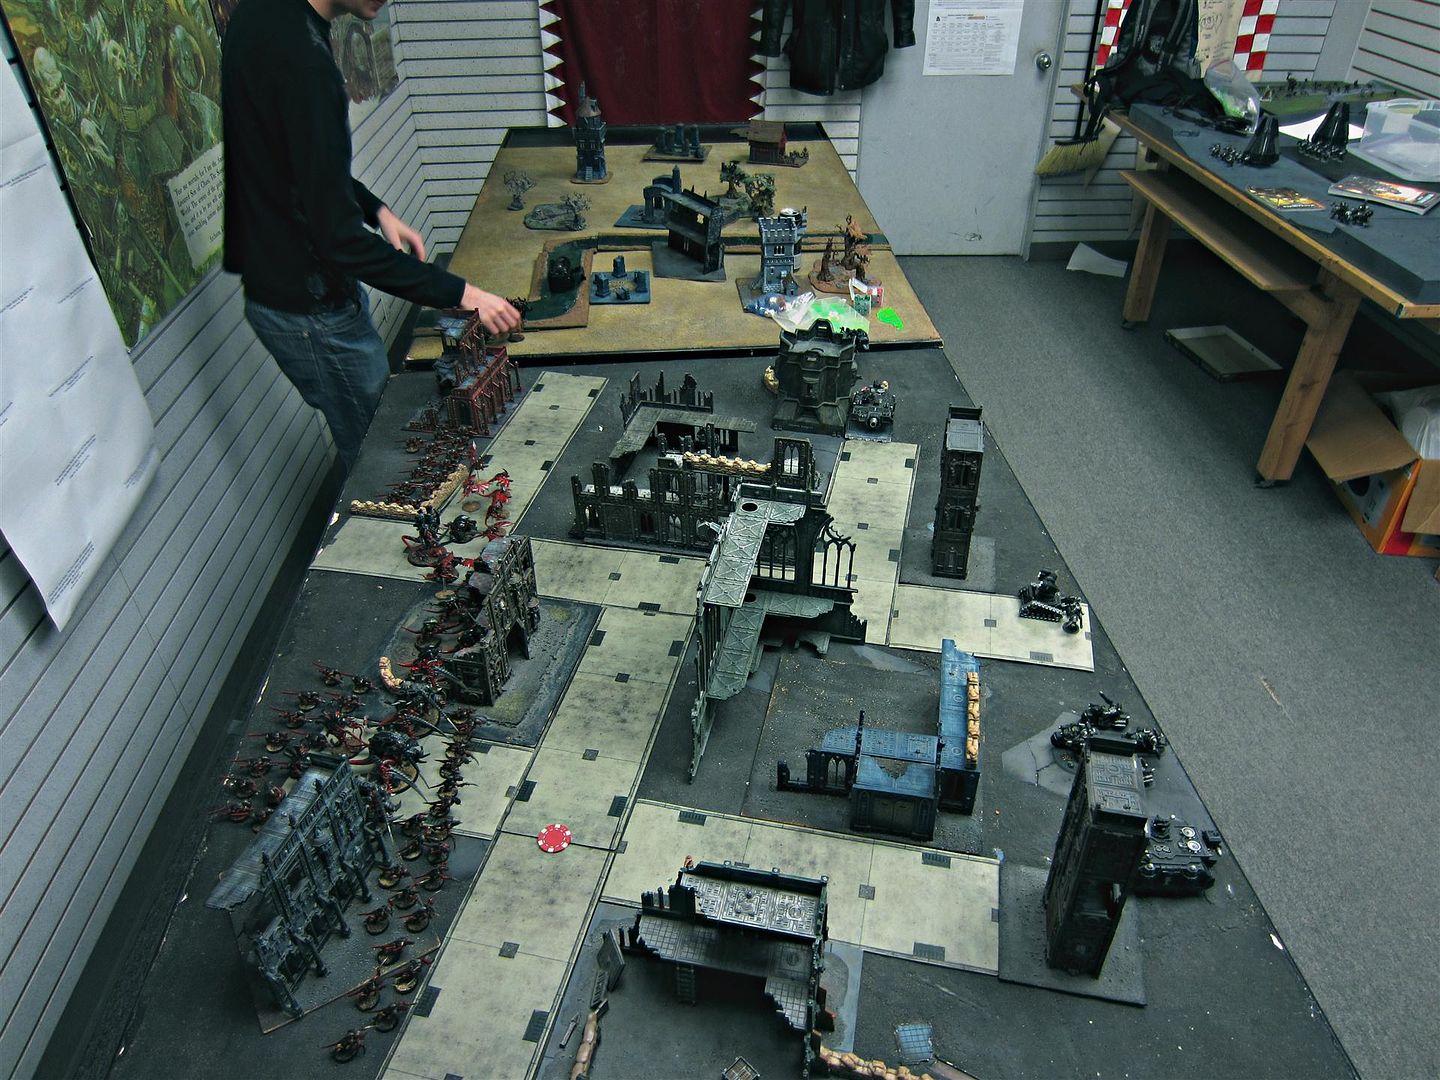
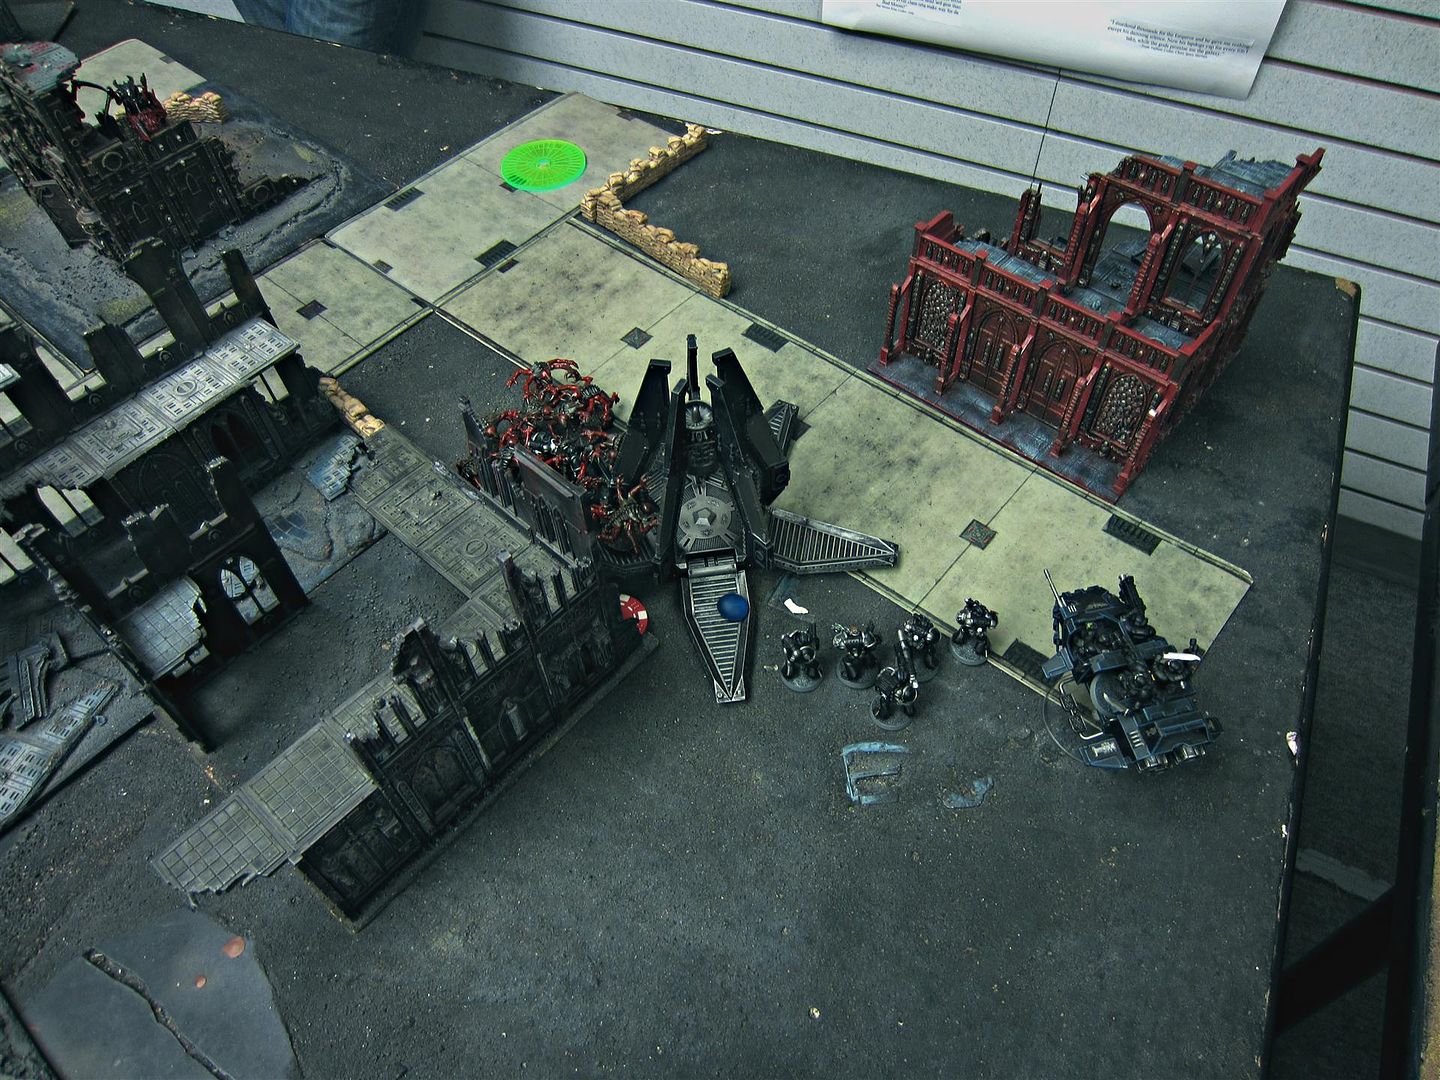
After reading my previous battle report, Crablezworth texted me and asked if I was up for another game and report, this time using my Tyranids. I'm enjoying Tyranids in 6th edition, even if I am still finding my footing with them (and need some Tervigons/Tyrannofexes to round out the collection). We initially settled on 2500pts, but changed it to 2000pts afterwards. We also decided to do our usual game set-up – ruins provide 5+ cover (makes going to ground a better option and is just generally more dangerous), no melting through cover, you get to pick your warlord trait (which is actually a very good set-up in all honesty, not at all overpowered, and rarely do we all end up gravitating to Immoveable Object) and Crusade as the mission.
Battle report images were taken by myself and Crablezworth. You can check out his impressive 40k photography on his gallery and his photography thread.
TROOPS
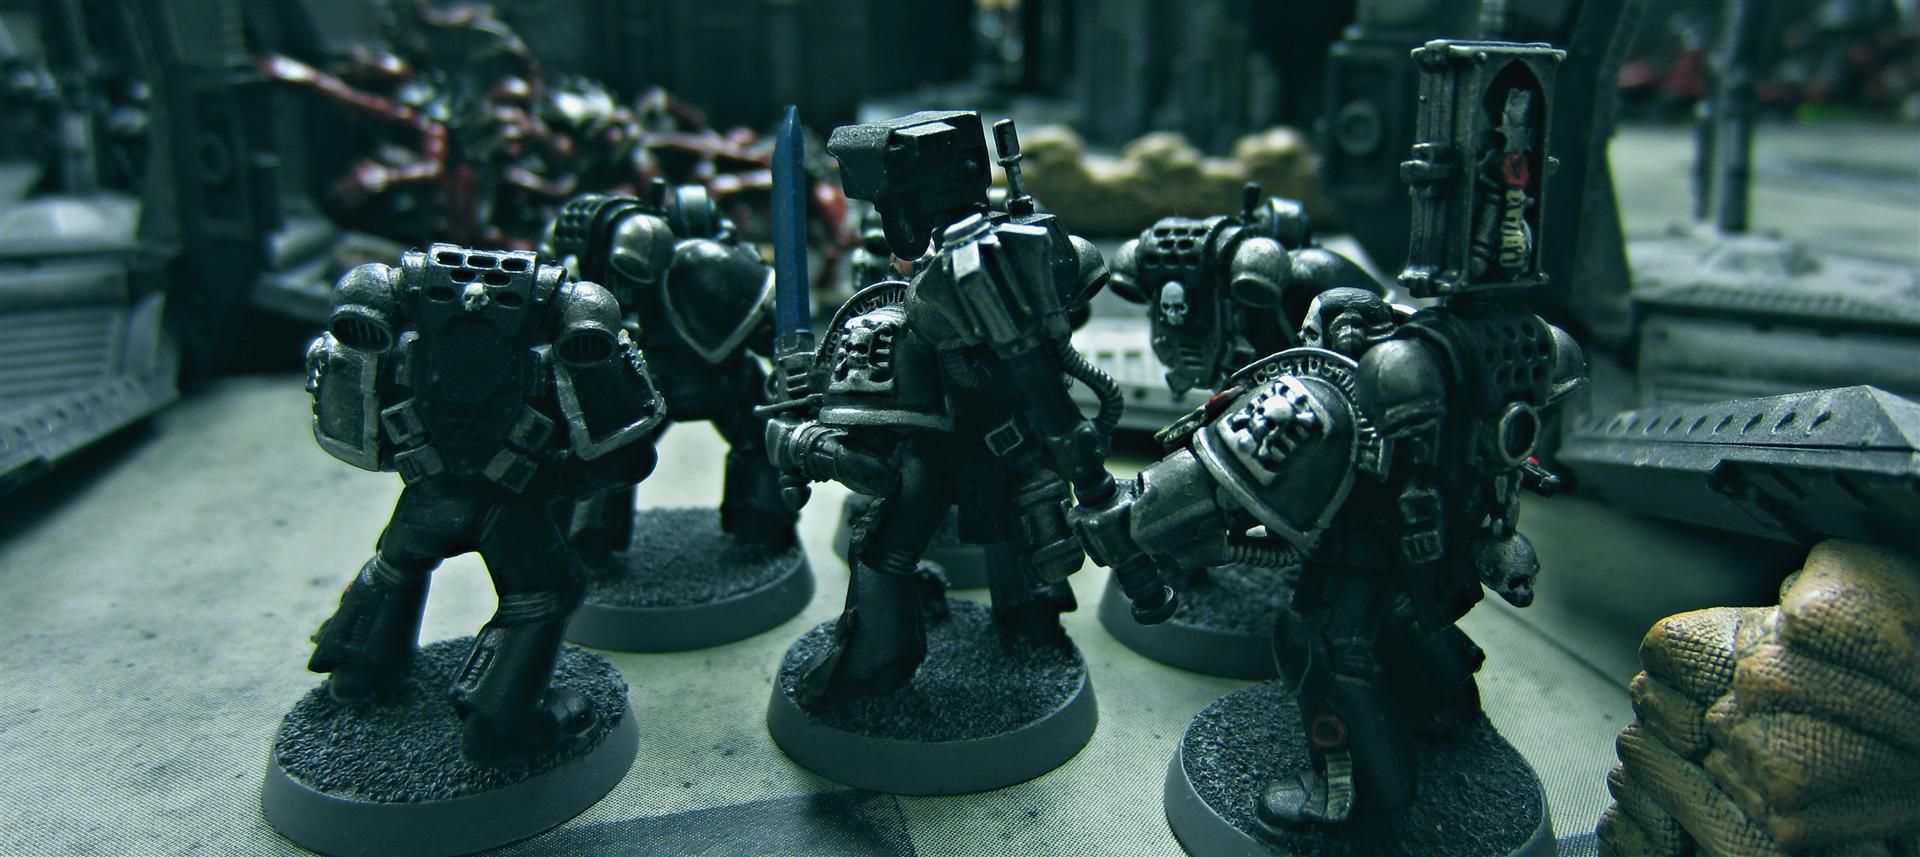
10x Tactical Marines (Meltagun, Lascannon, Sergeant with Power Weapon, Drop Pod with Locator Beacon)
10x Tactical Marines (Meltagun, Lascannon, Sergeant with Power Weapon, Drop Pod with Locator Beacon)
5x Scouts (Bolt Pistol/Combat Blade)
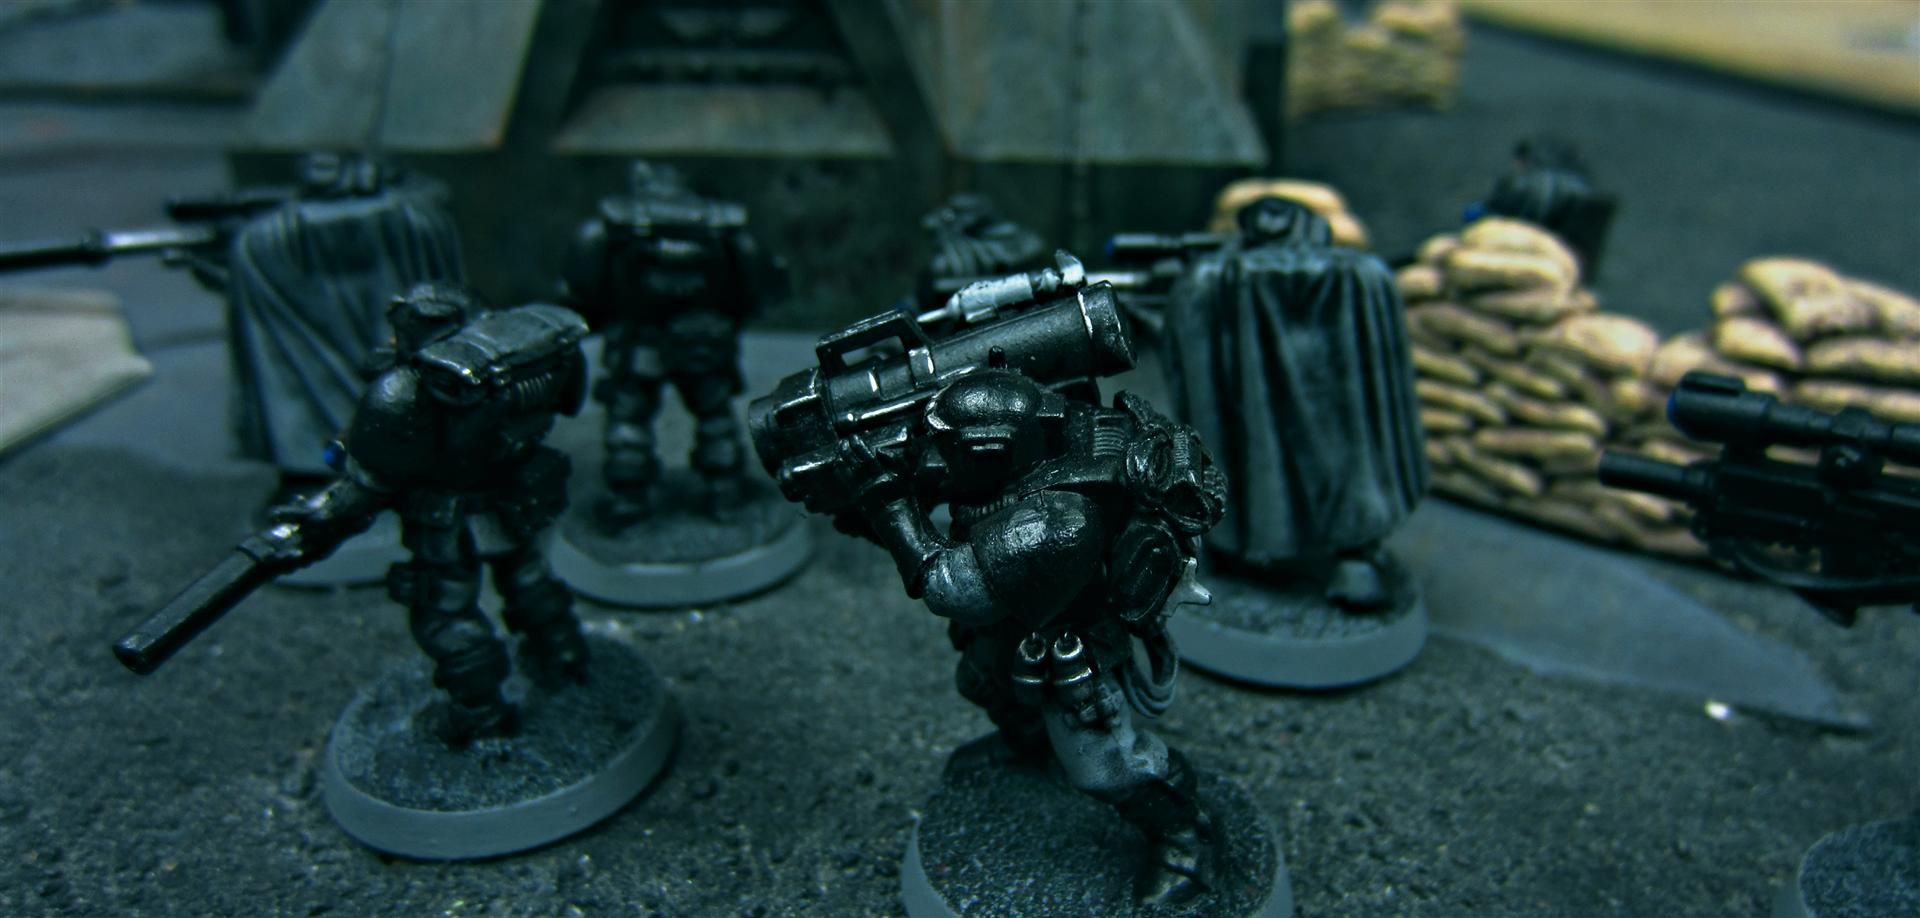
10x Scouts (Camo Cloaks, 8x Sniper Rifle, 1x Missile Launcher, Scout Sergeant Telion)
FAST ATTACK
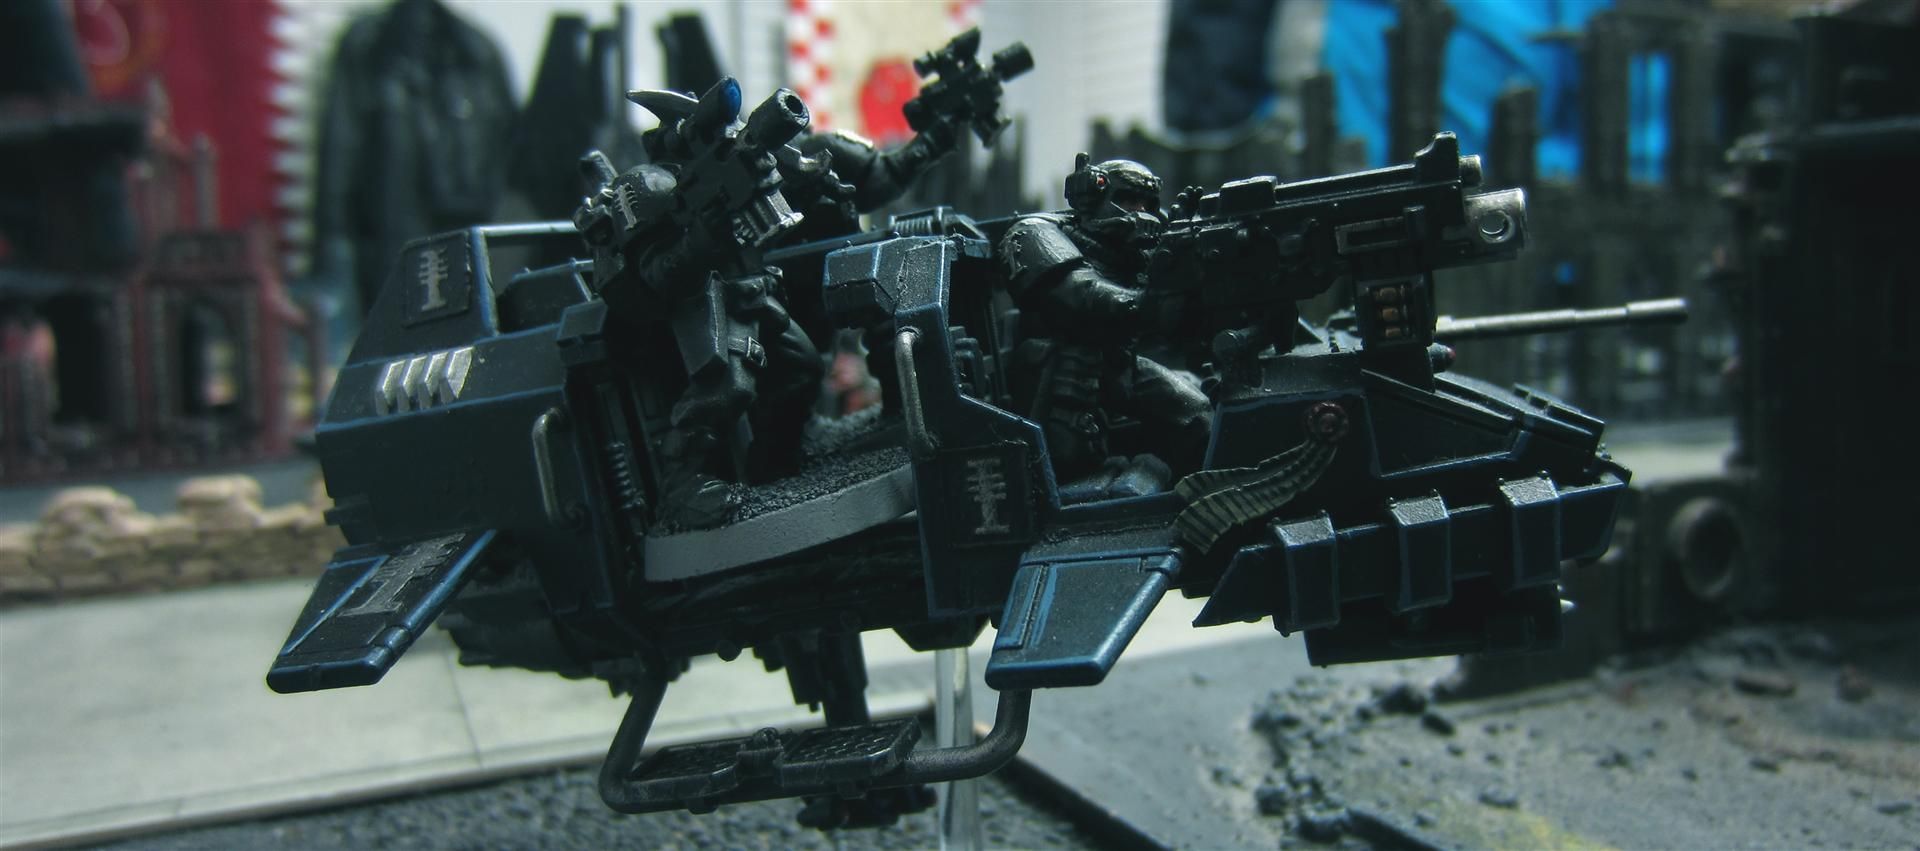
Land Speeder (Typhoon Missile Launcher, Heavy Bolter)
Land Speeder Storm (Heavy Bolter)
Bike Squadron (2x Plasmagun, Sergeant with Power Axe, Attack Bike with Multi-melta)
HEAVY SUPPORT
Vindicator
Vindicator
Thunderfire Cannon
*Warlord; Immovable Object
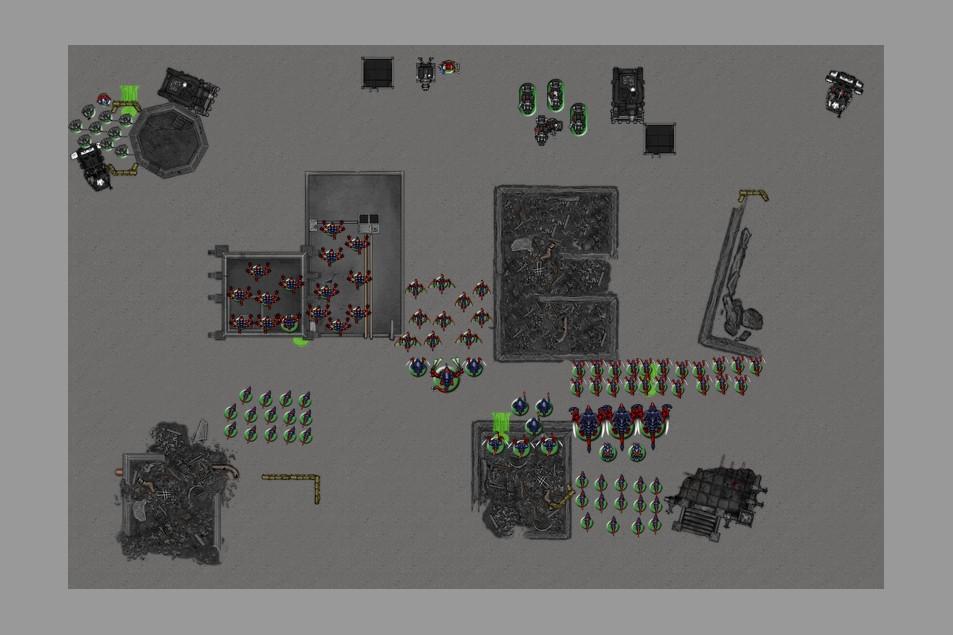
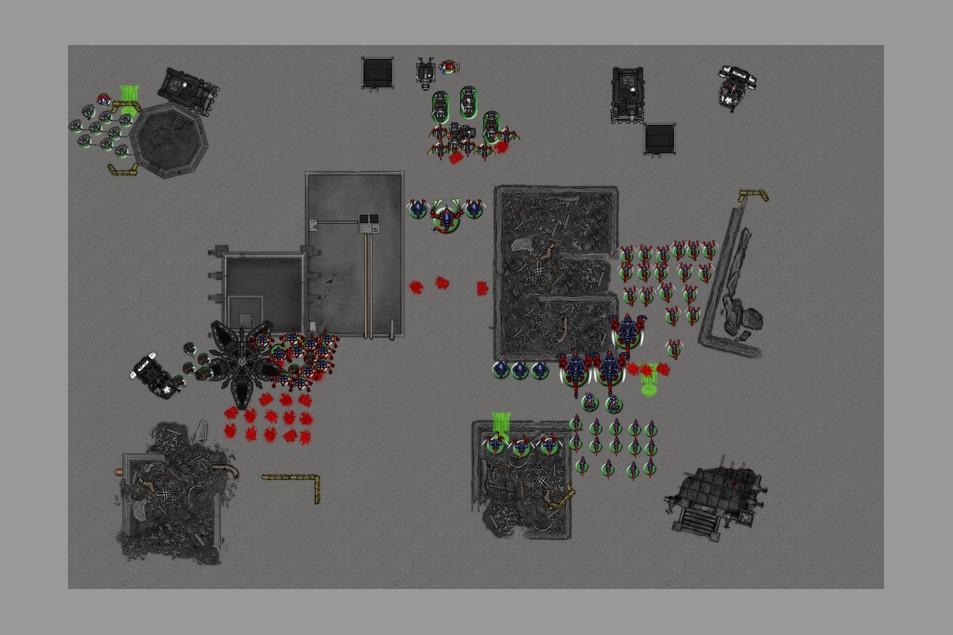
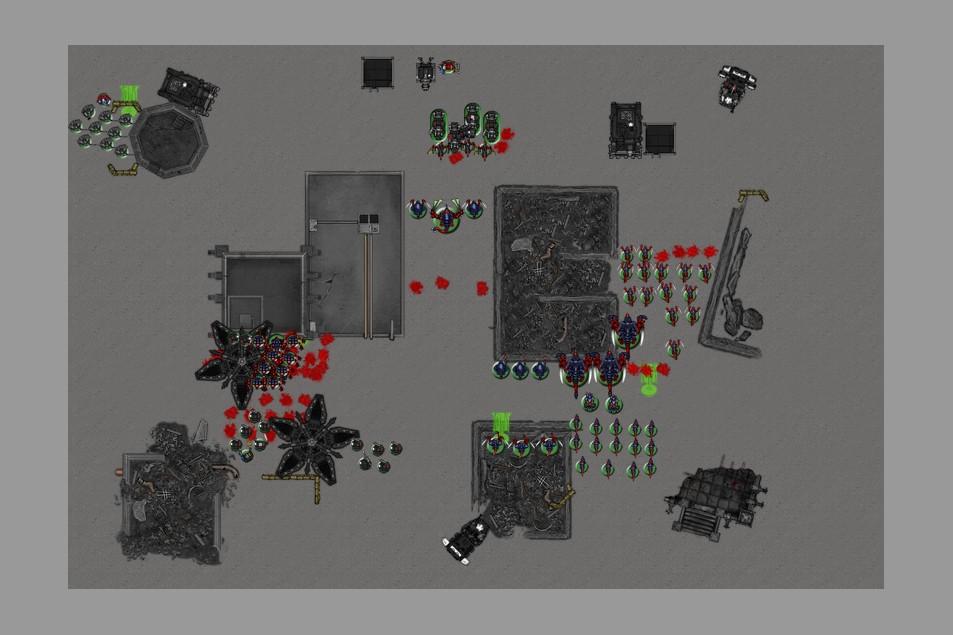
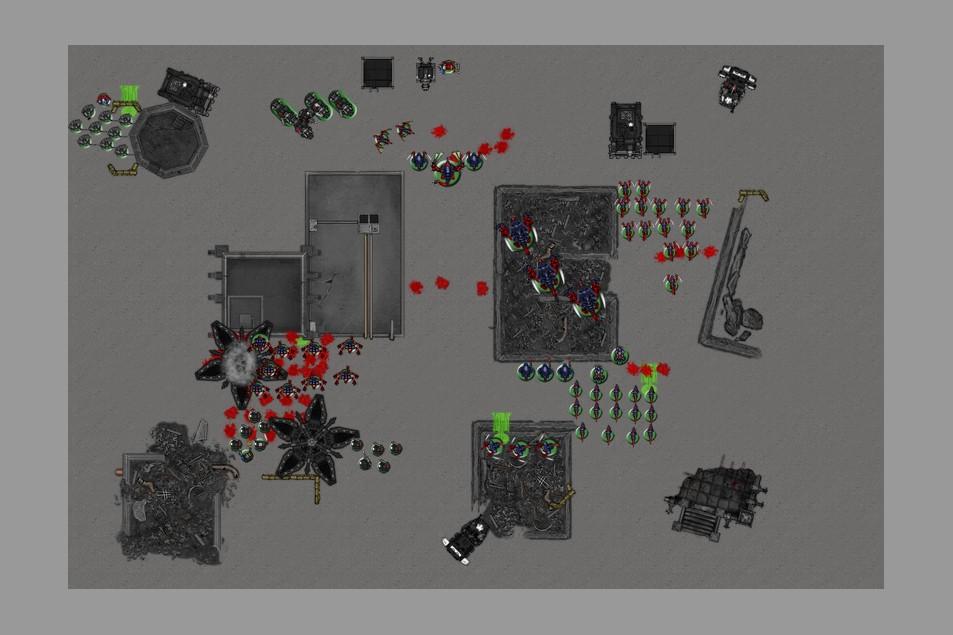
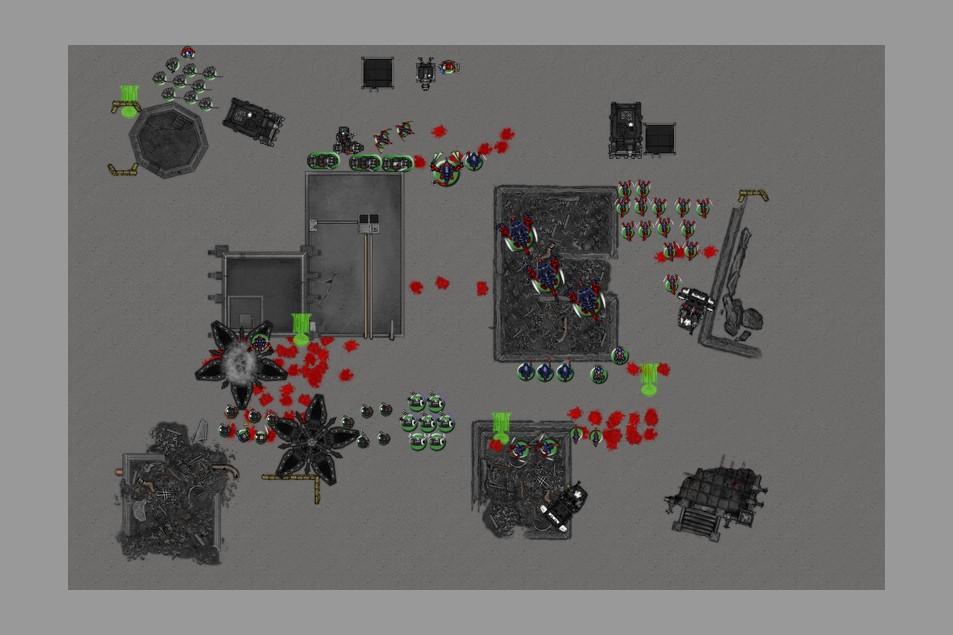
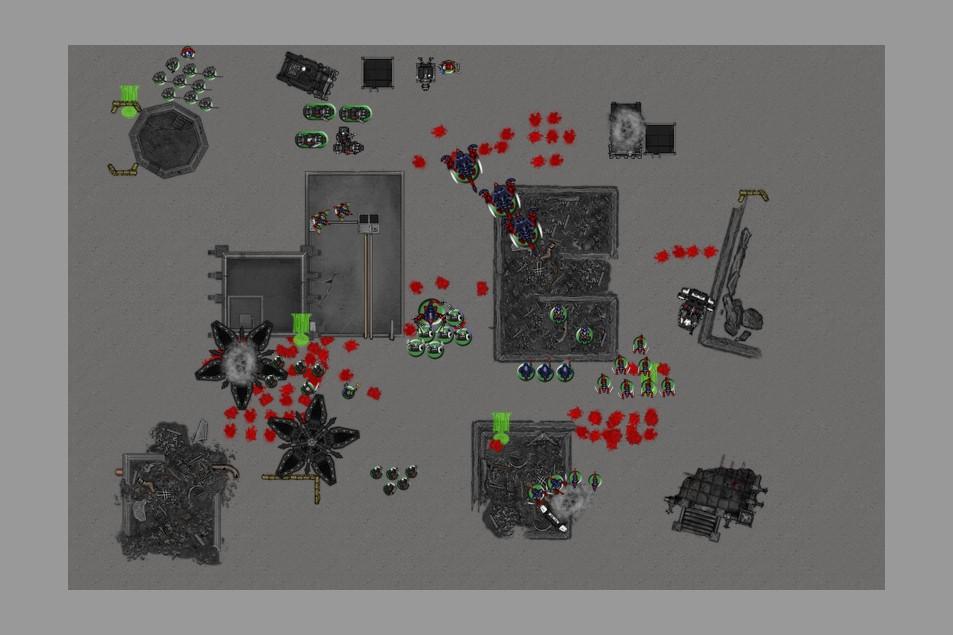
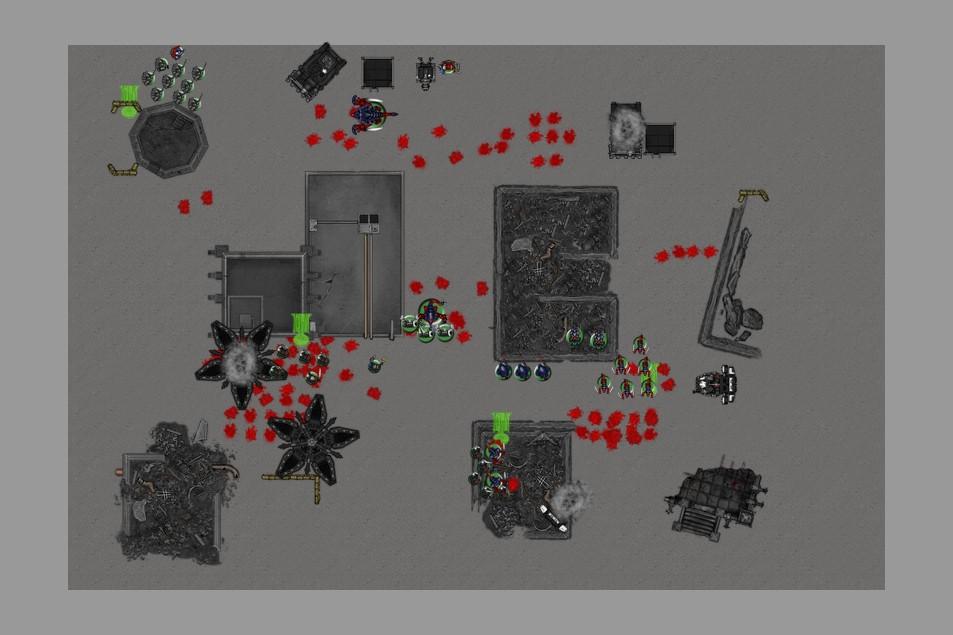
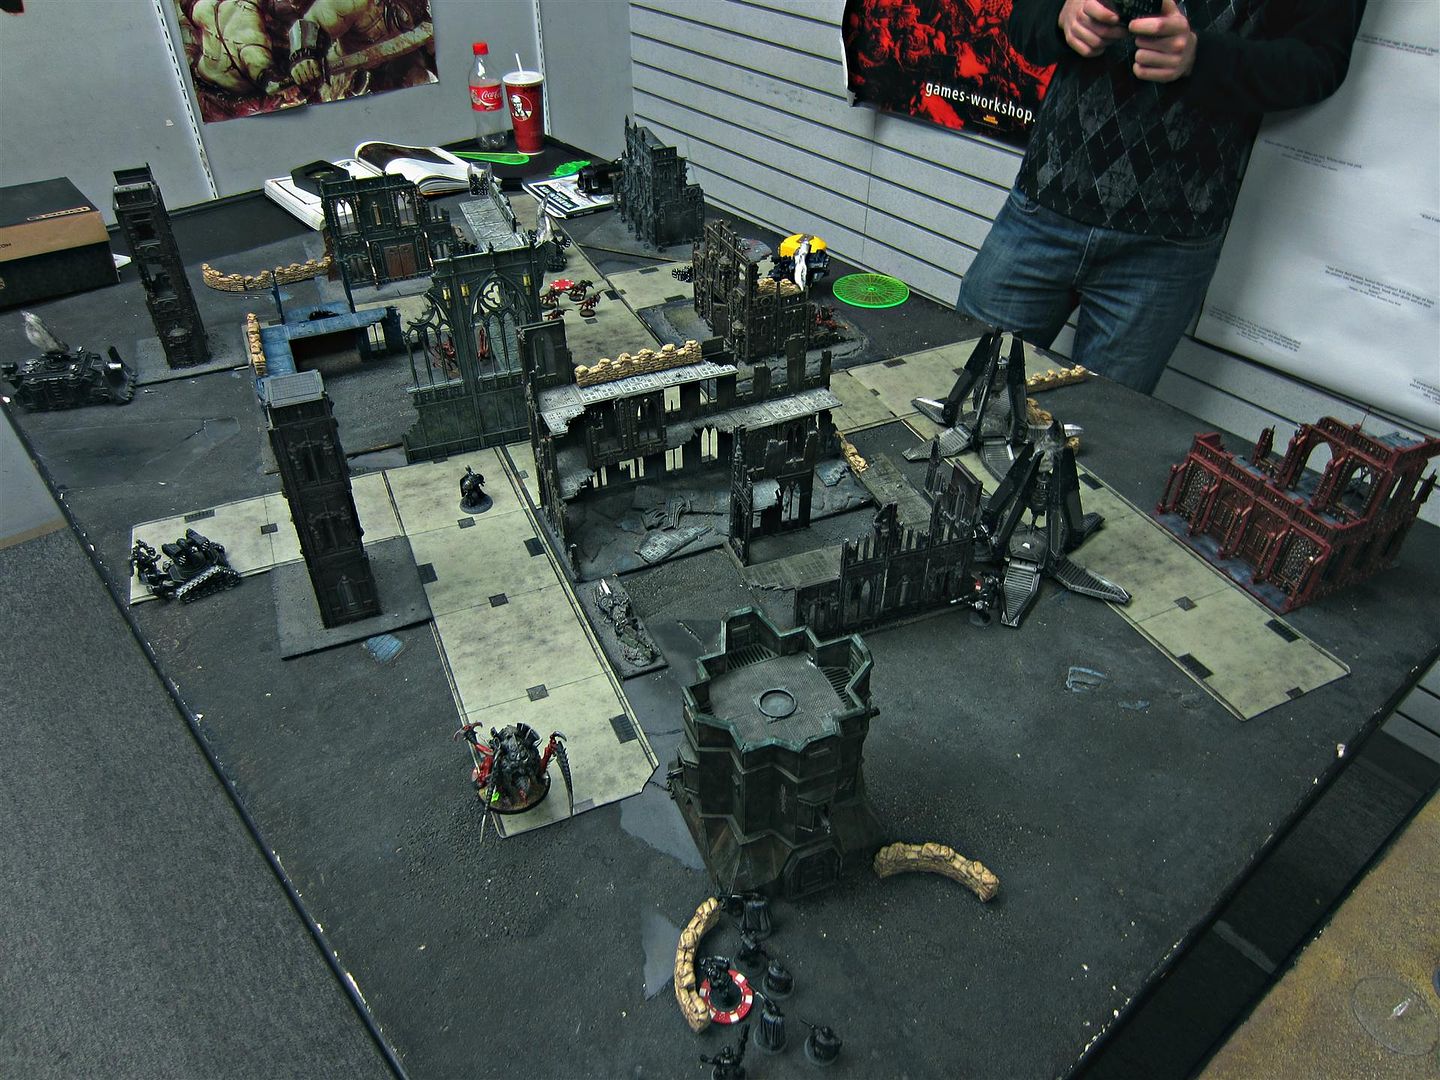
DEPLOYMENT I rolled for my psychic powers and got Iron Arm, Smite, Enfeeble and Life Leech on the Swarmlord. The Broodlord got Warp Speed and Smite (I totally forgot he had BS0 and so couldn't cast it, but the alternative was the equally terrible Haemorrhage). We rolled for the number of objectives and ended up with 4, and got Dawn of War deployment. We placed the objectives and then I won the roll to set up first.
Crablezworth declined to seize the initiative.
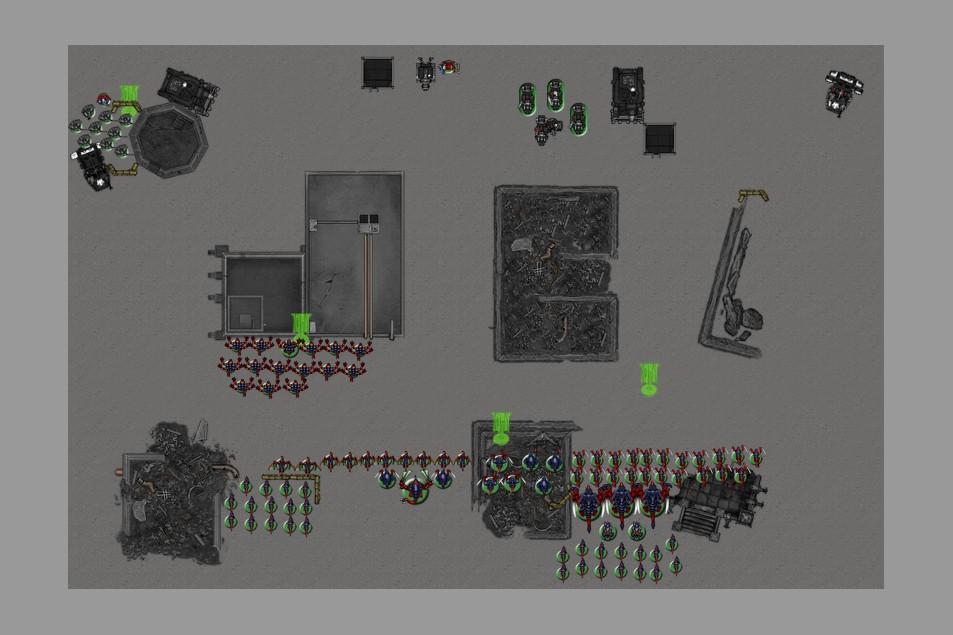
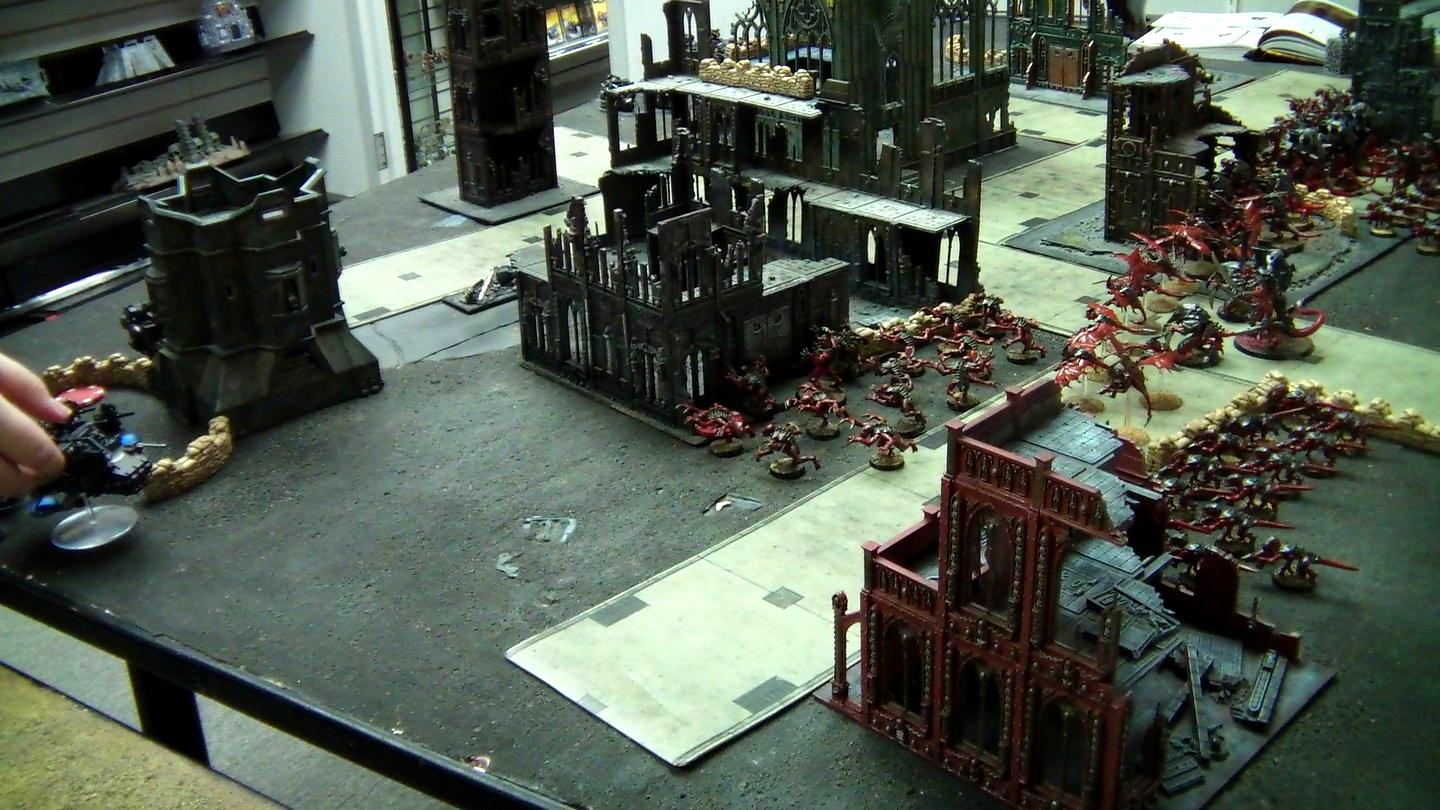
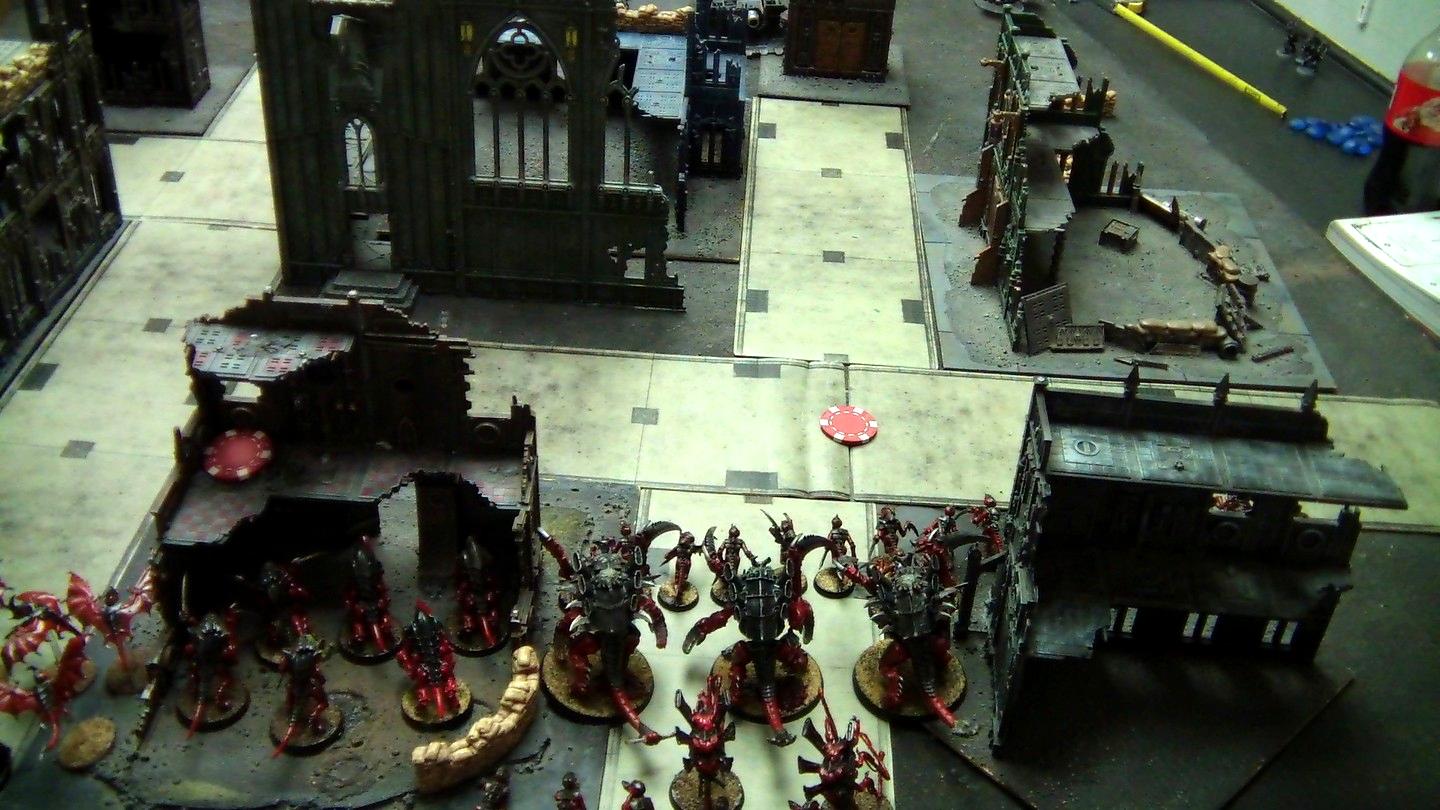
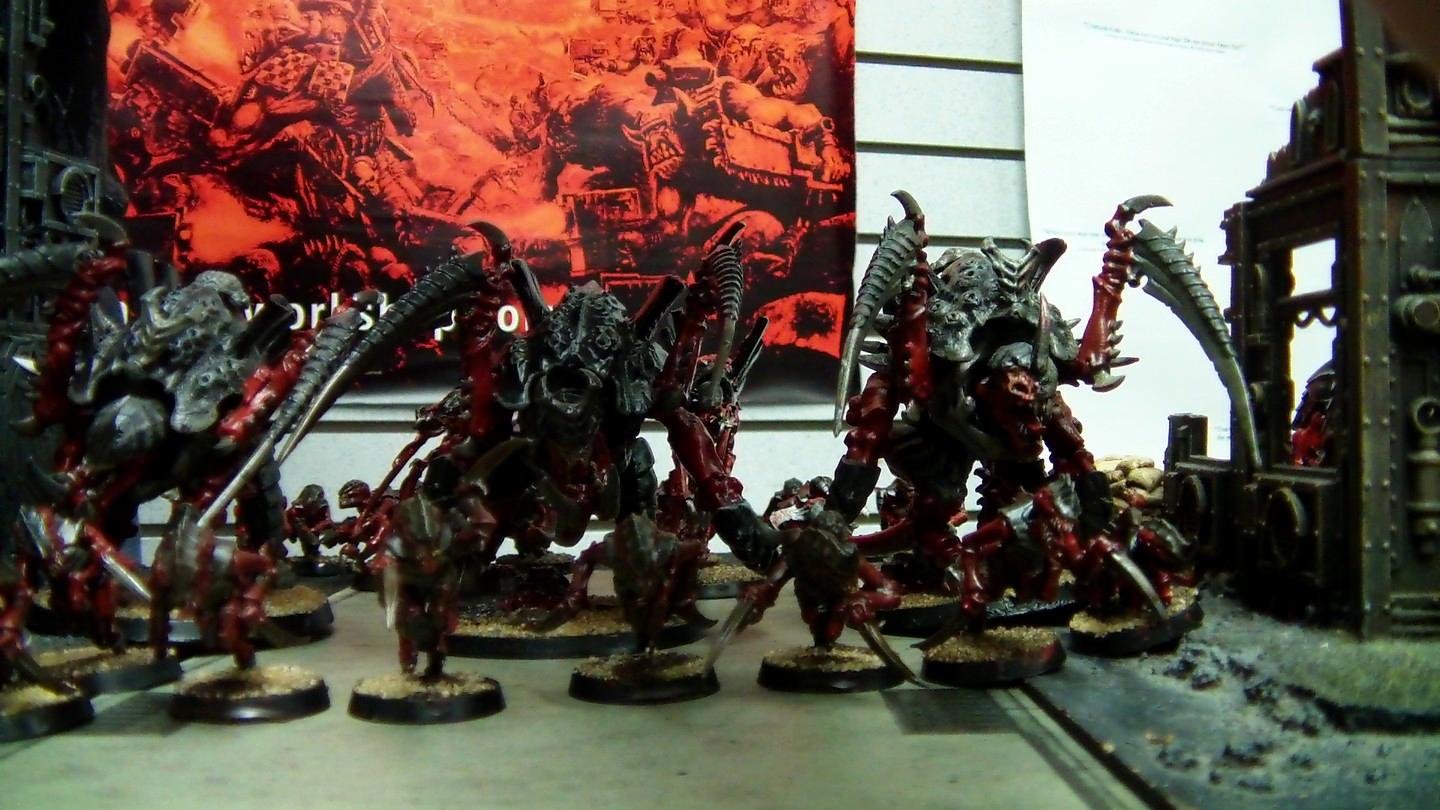
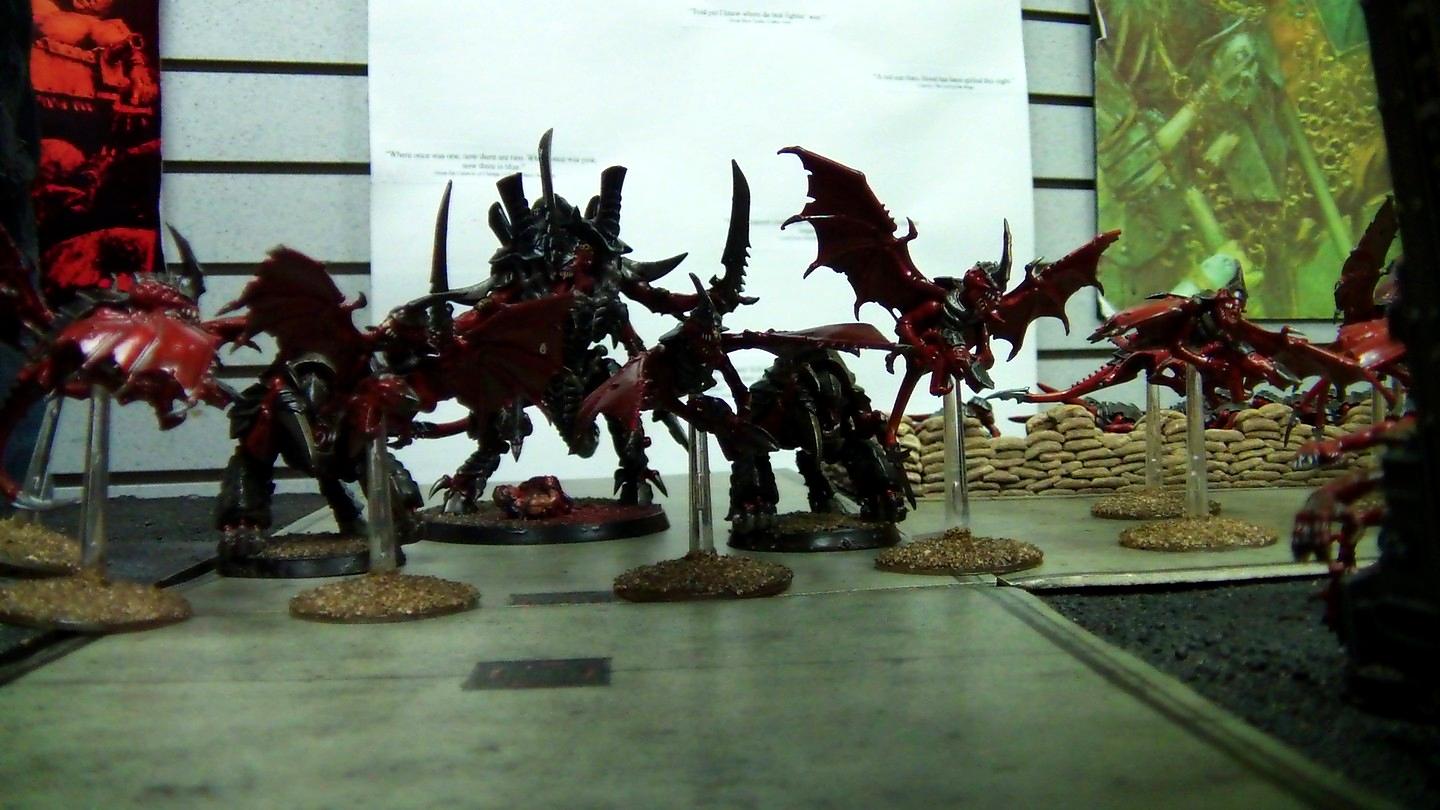
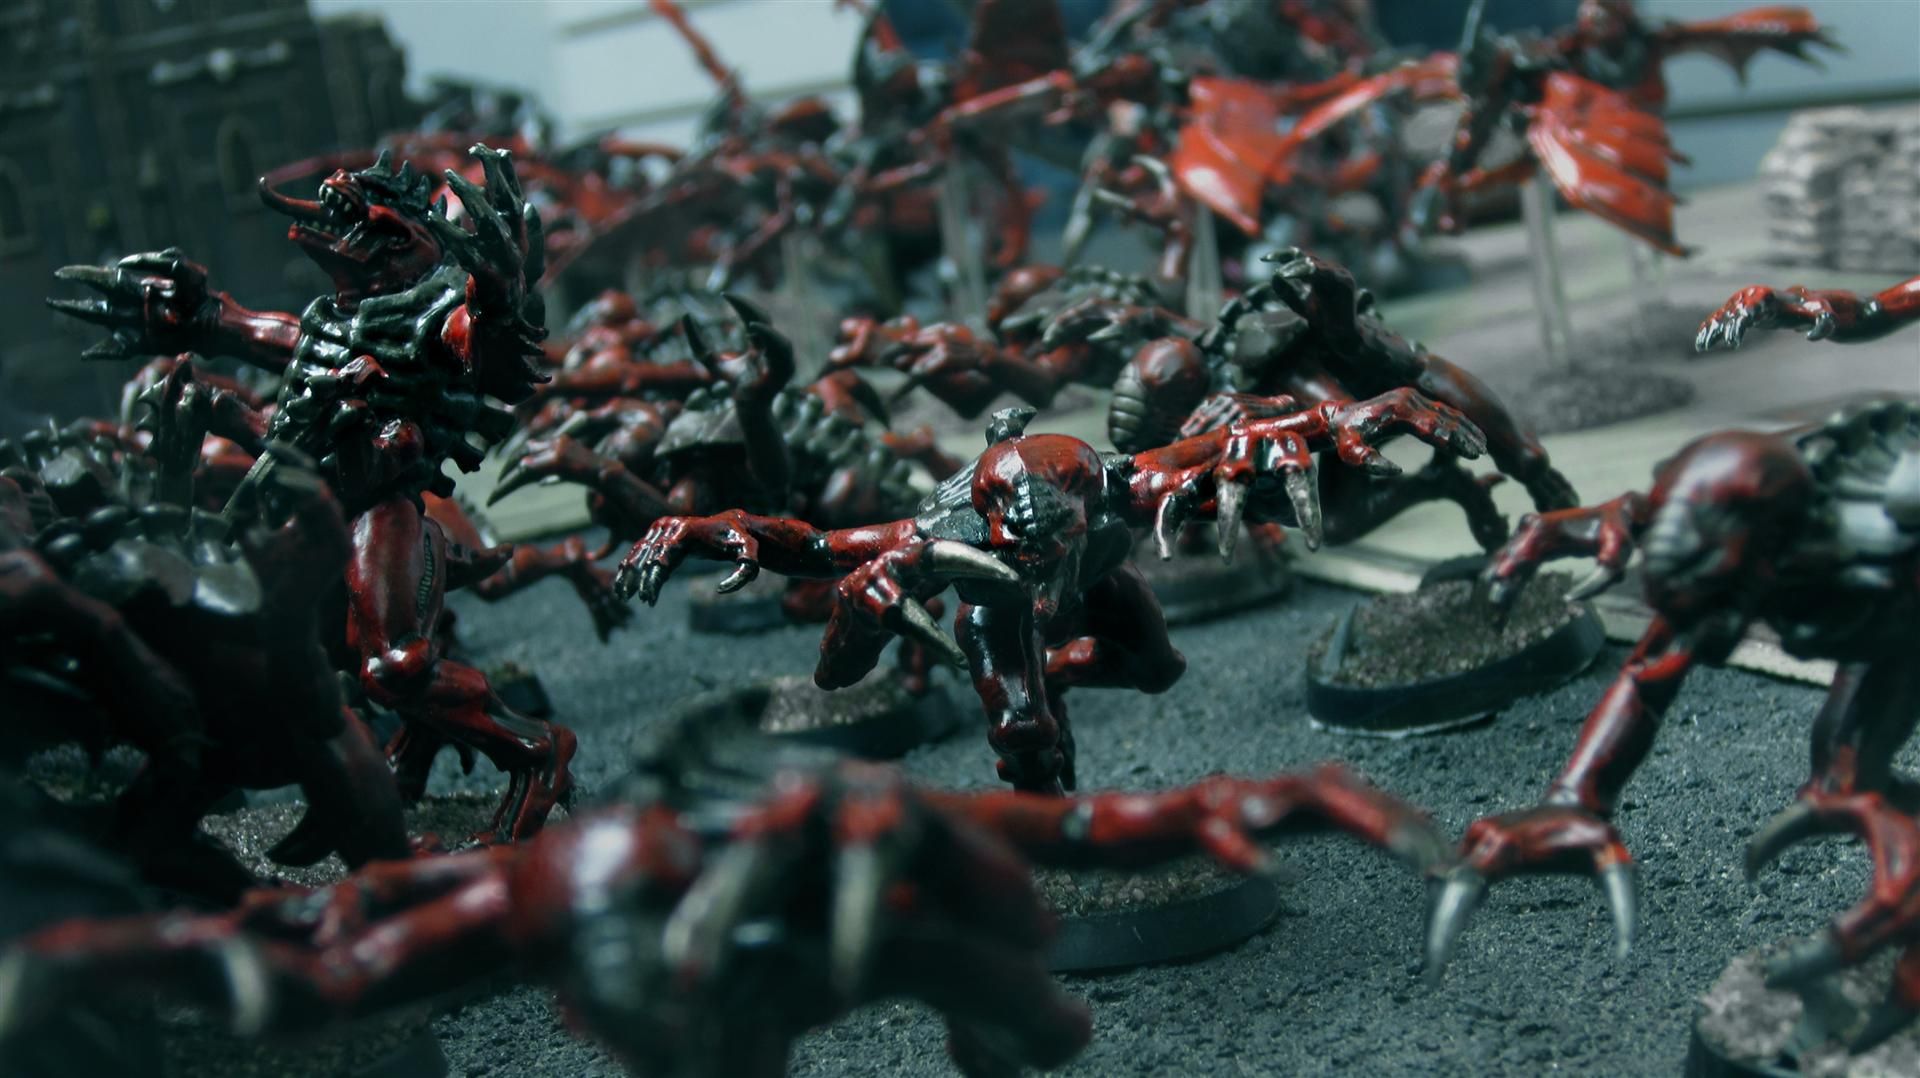
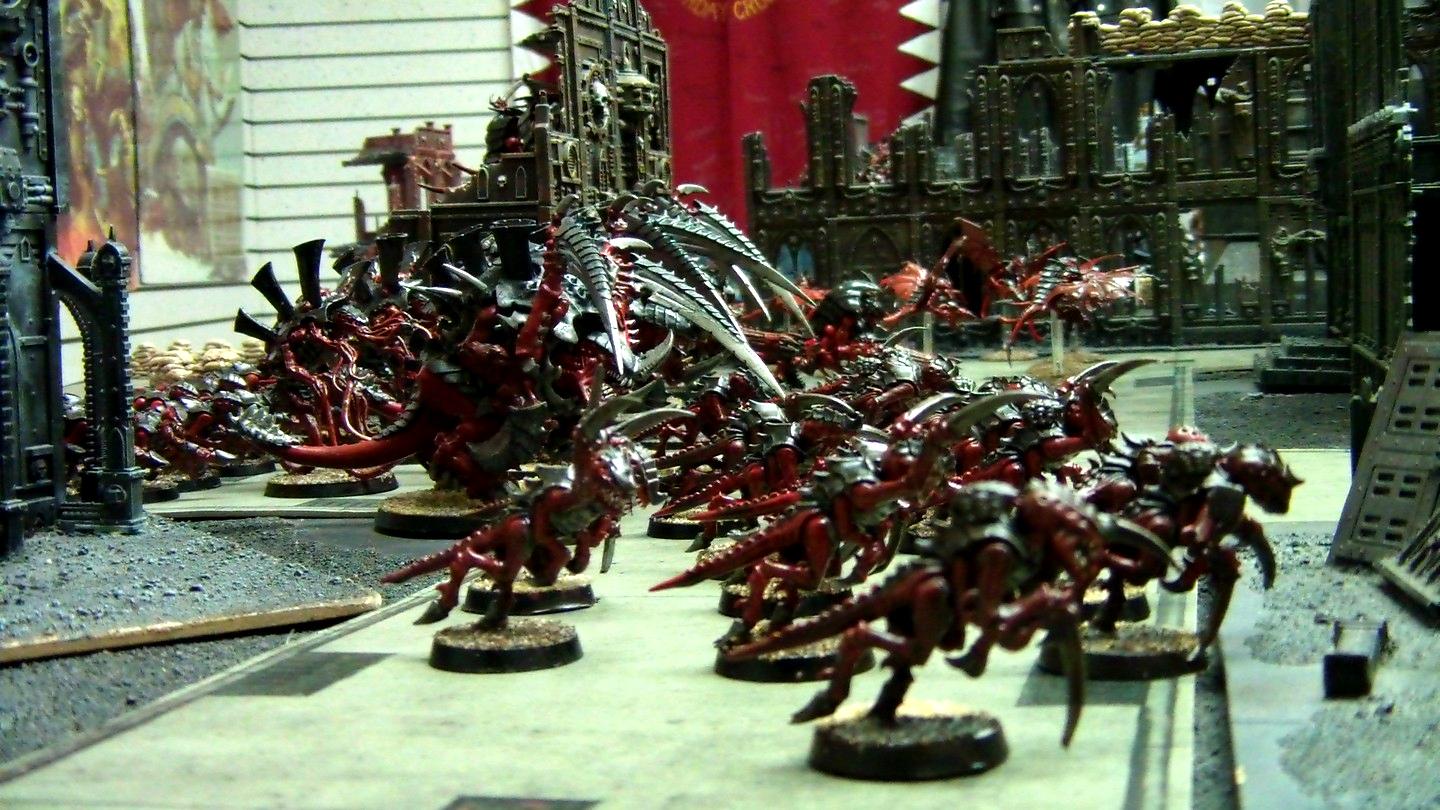
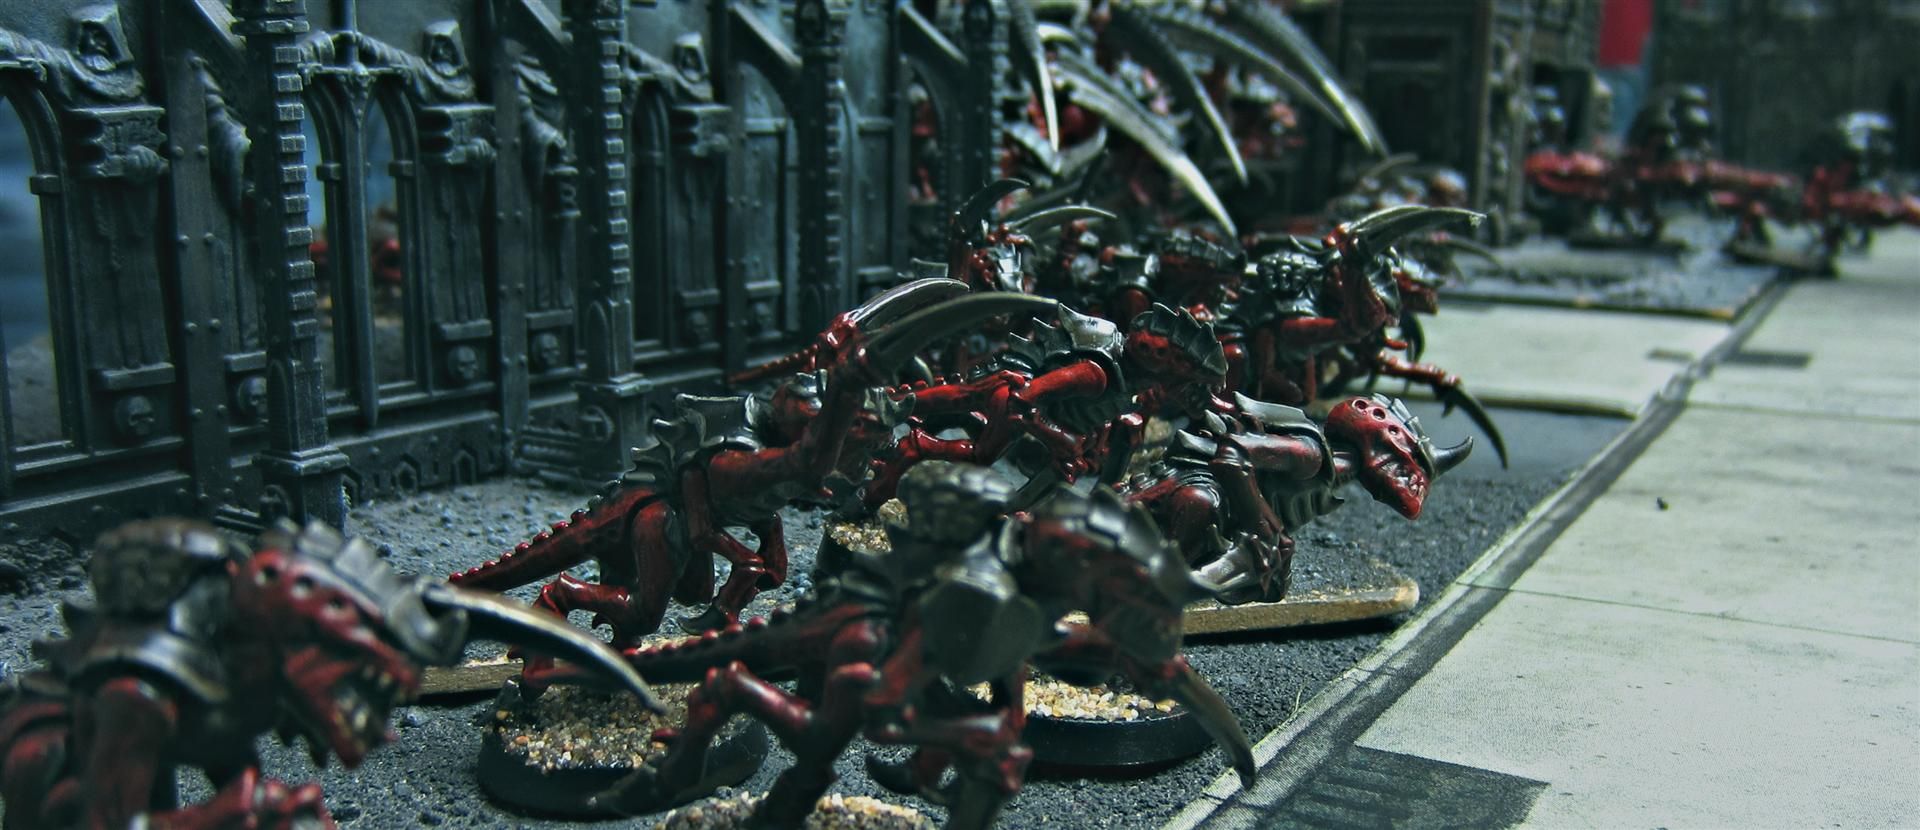
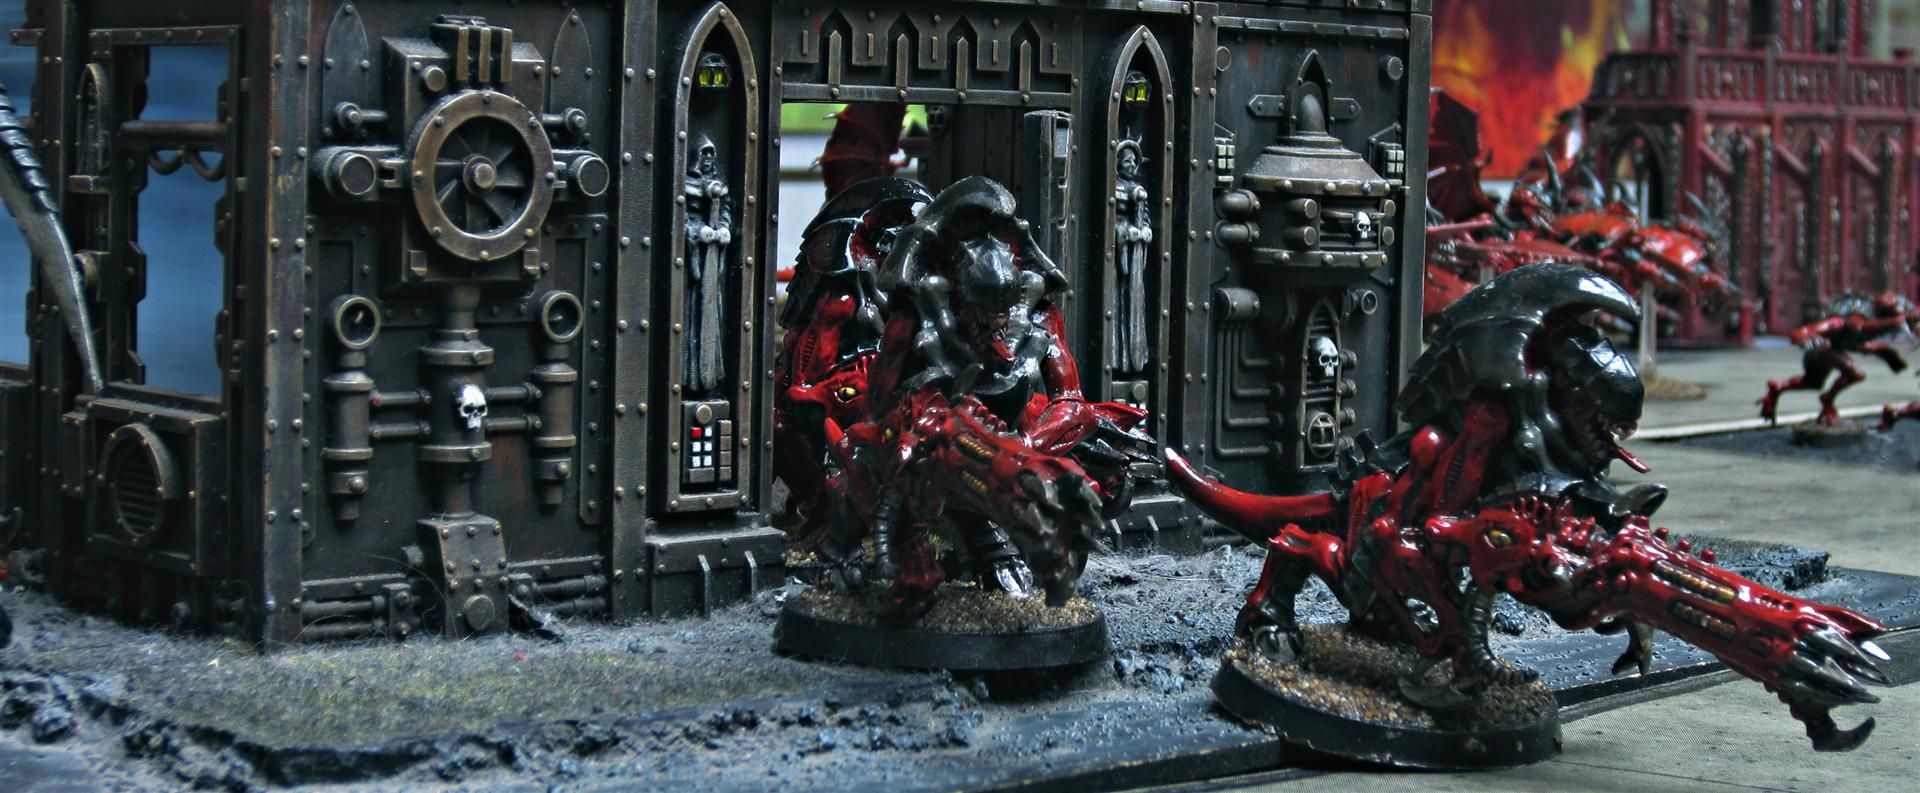
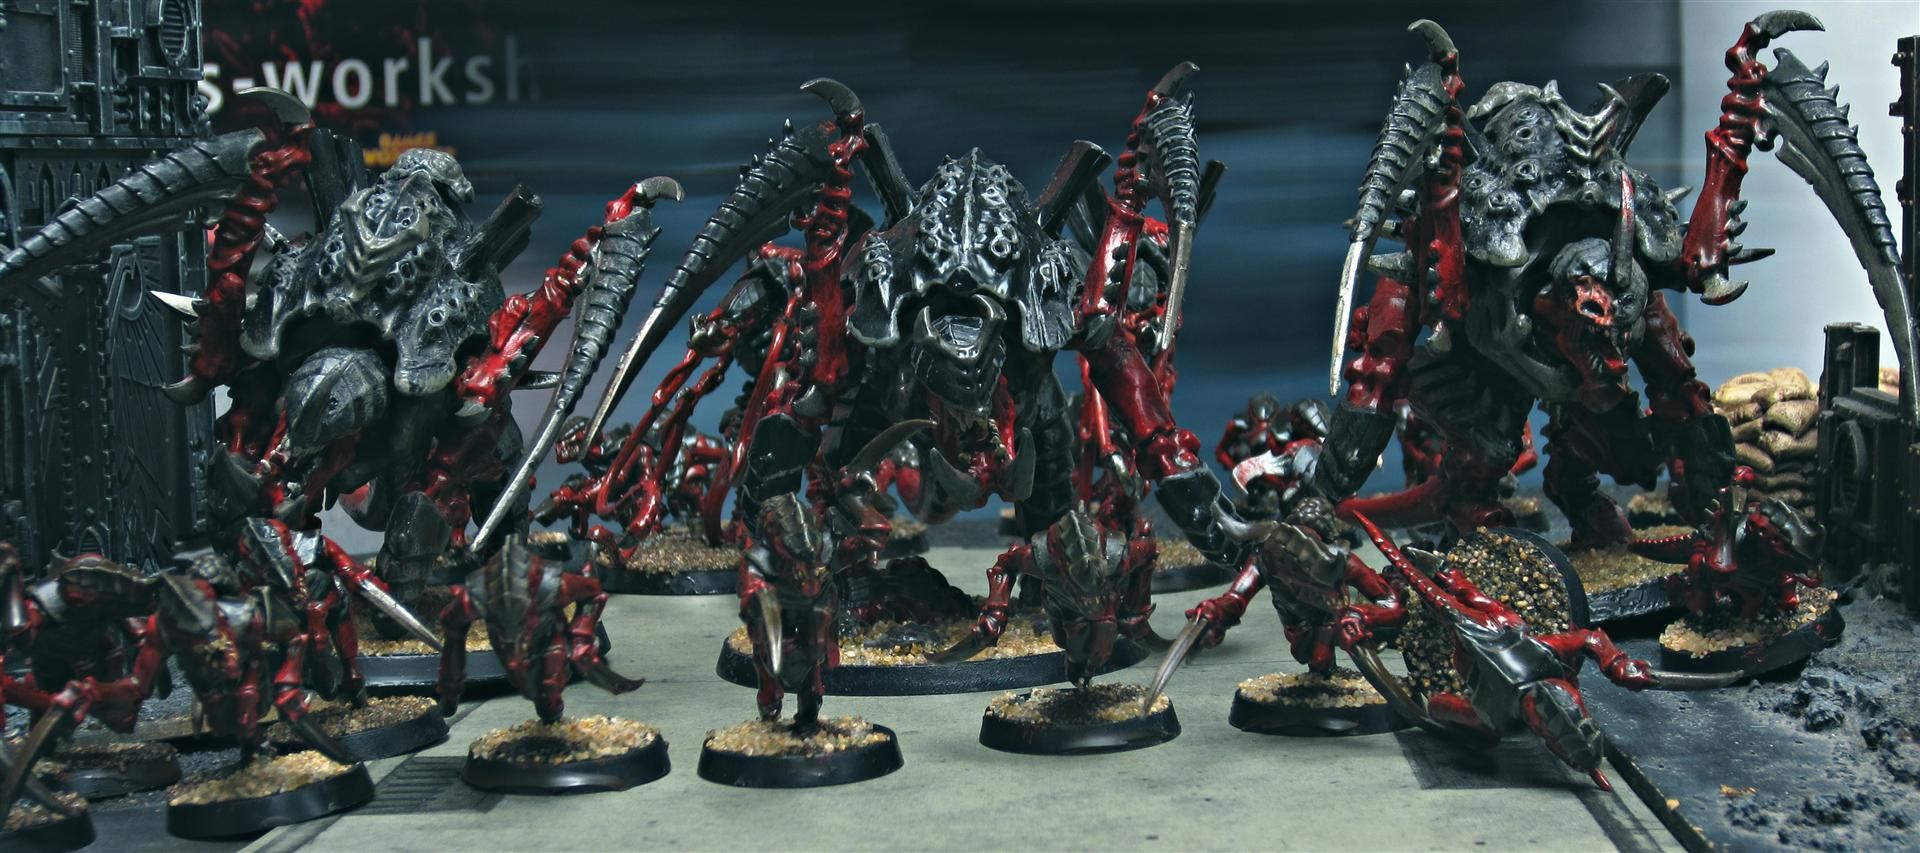
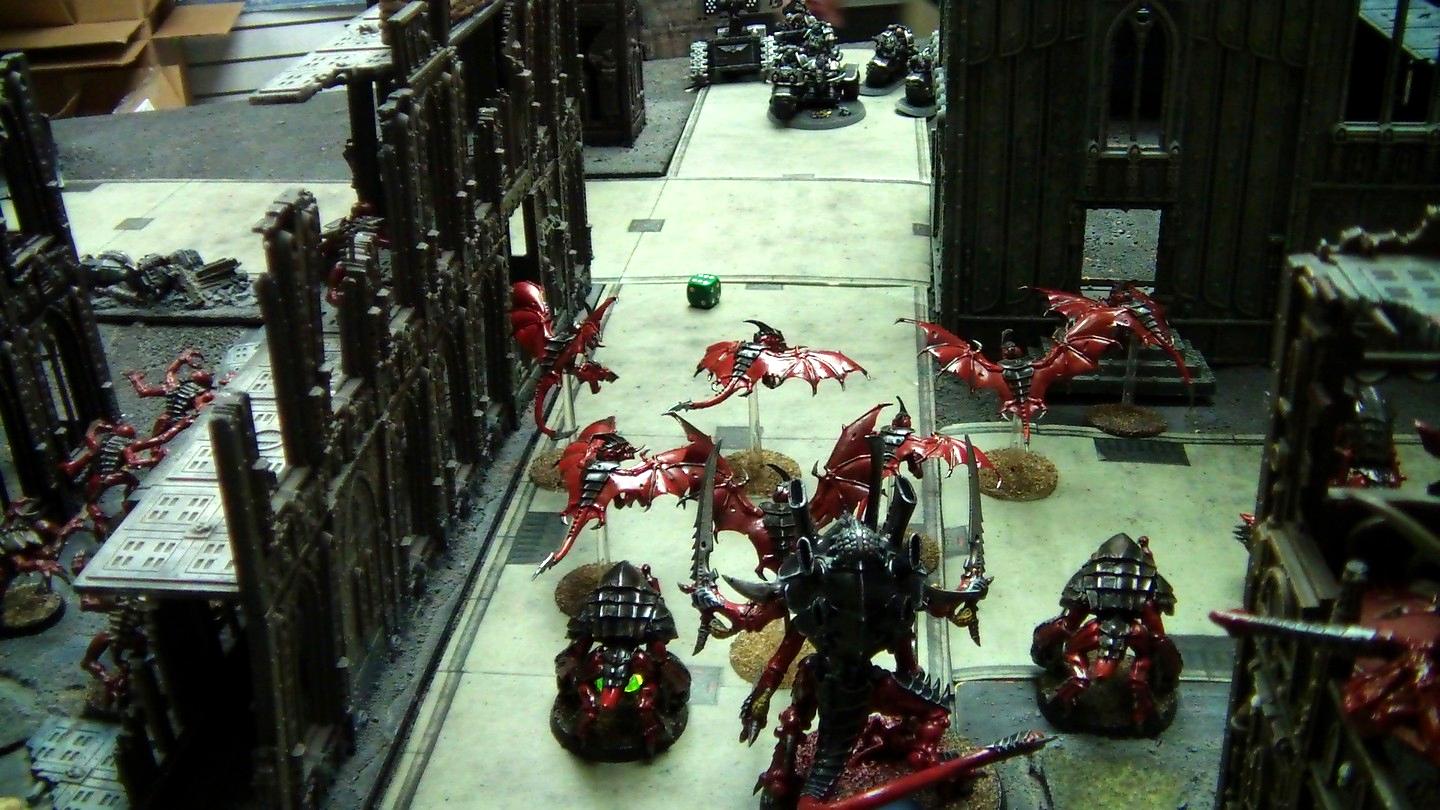
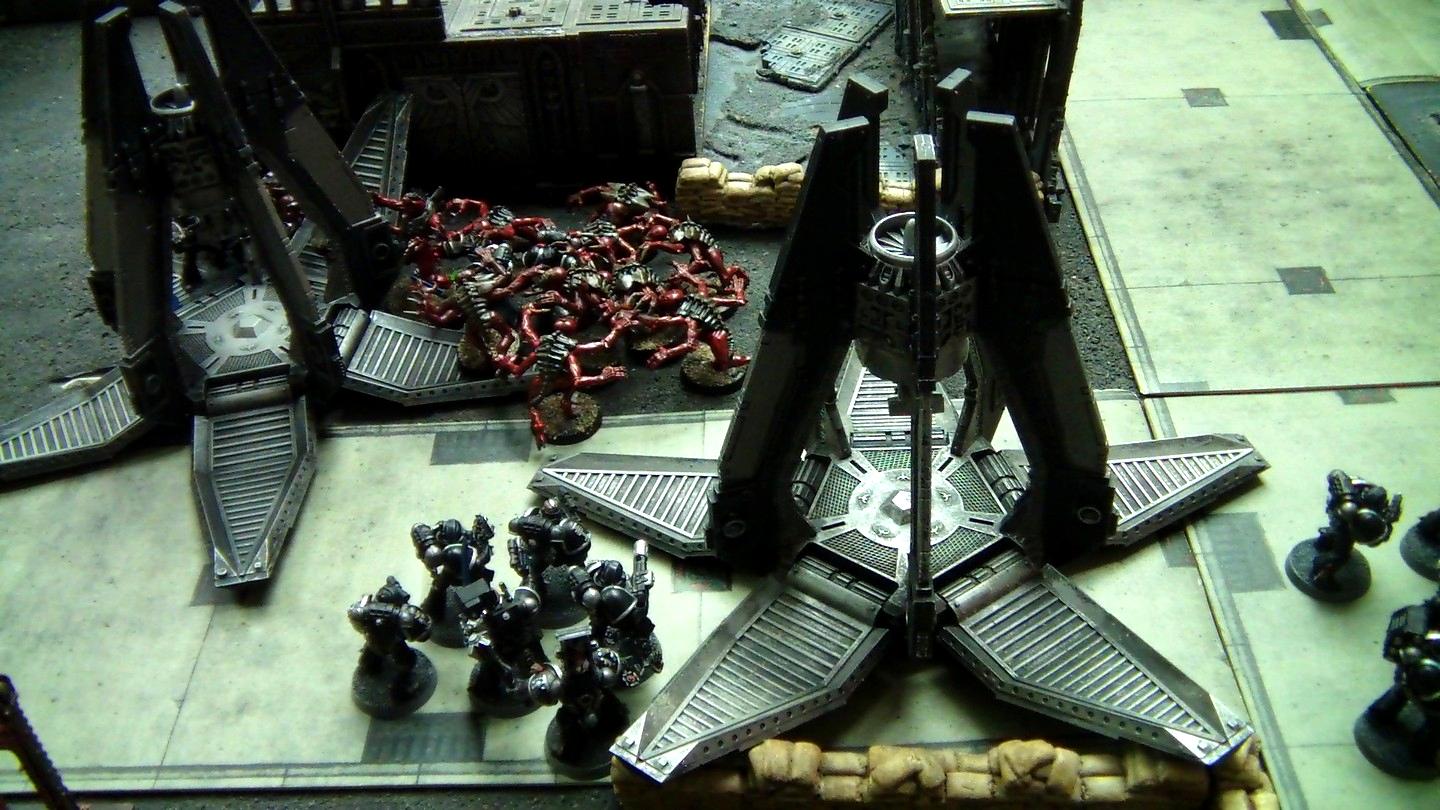
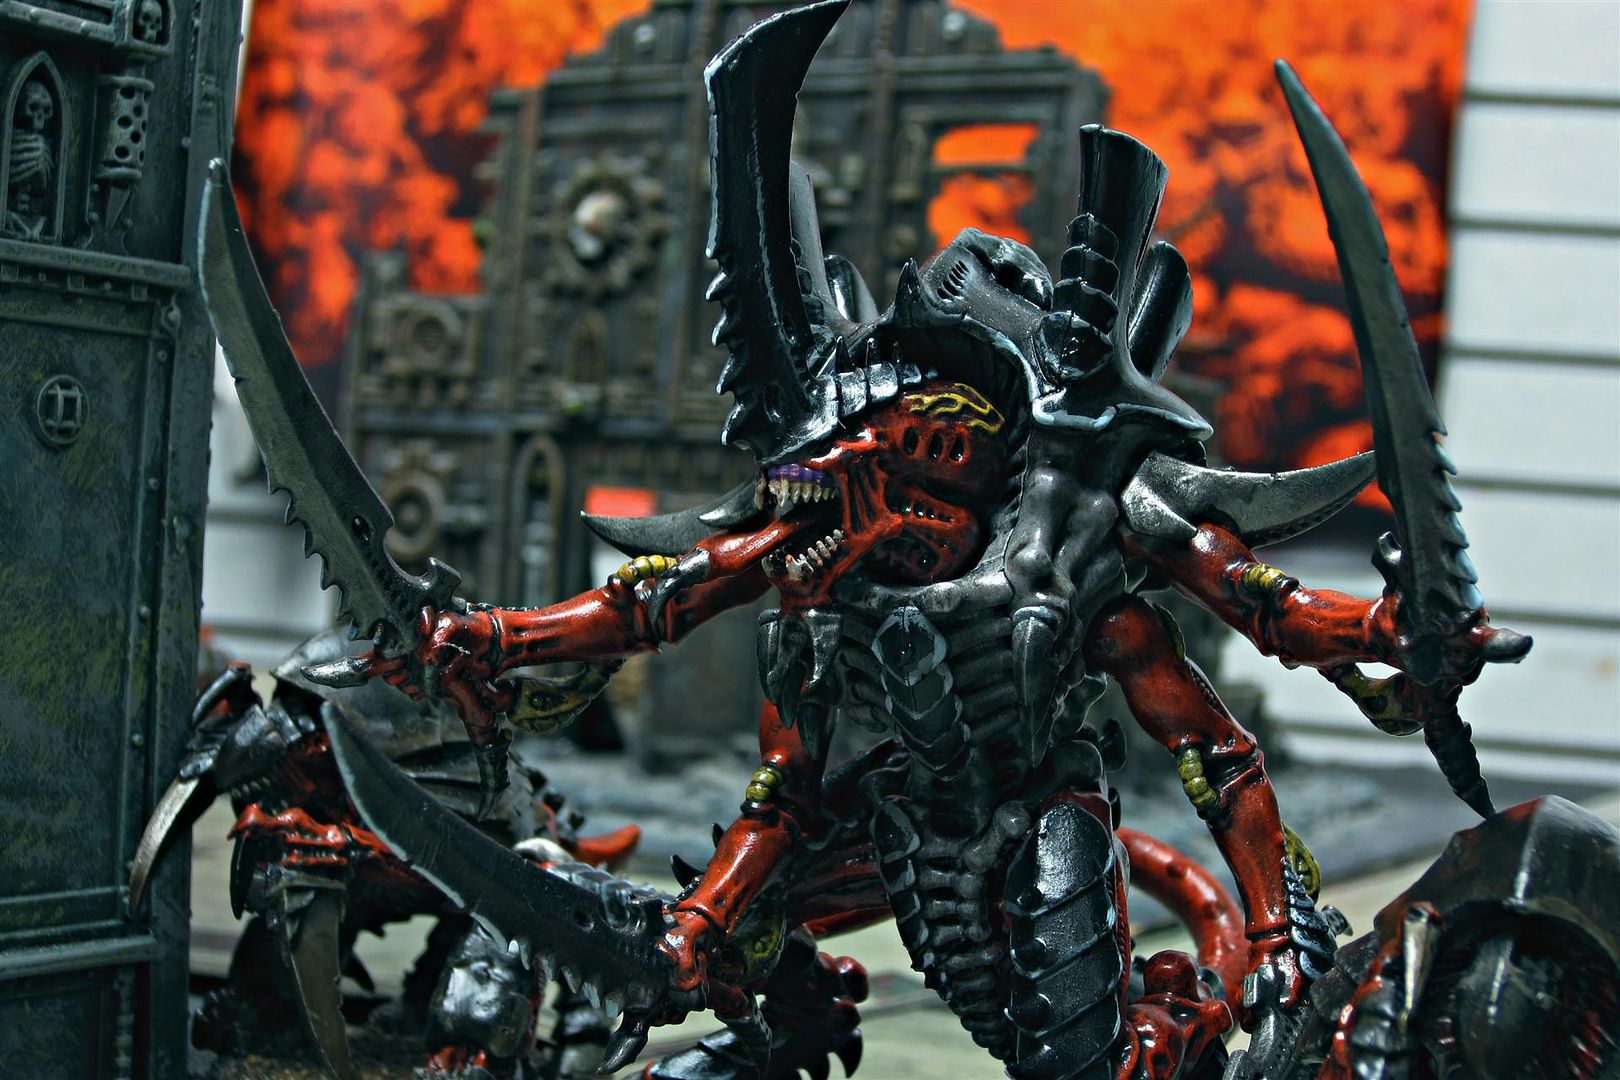
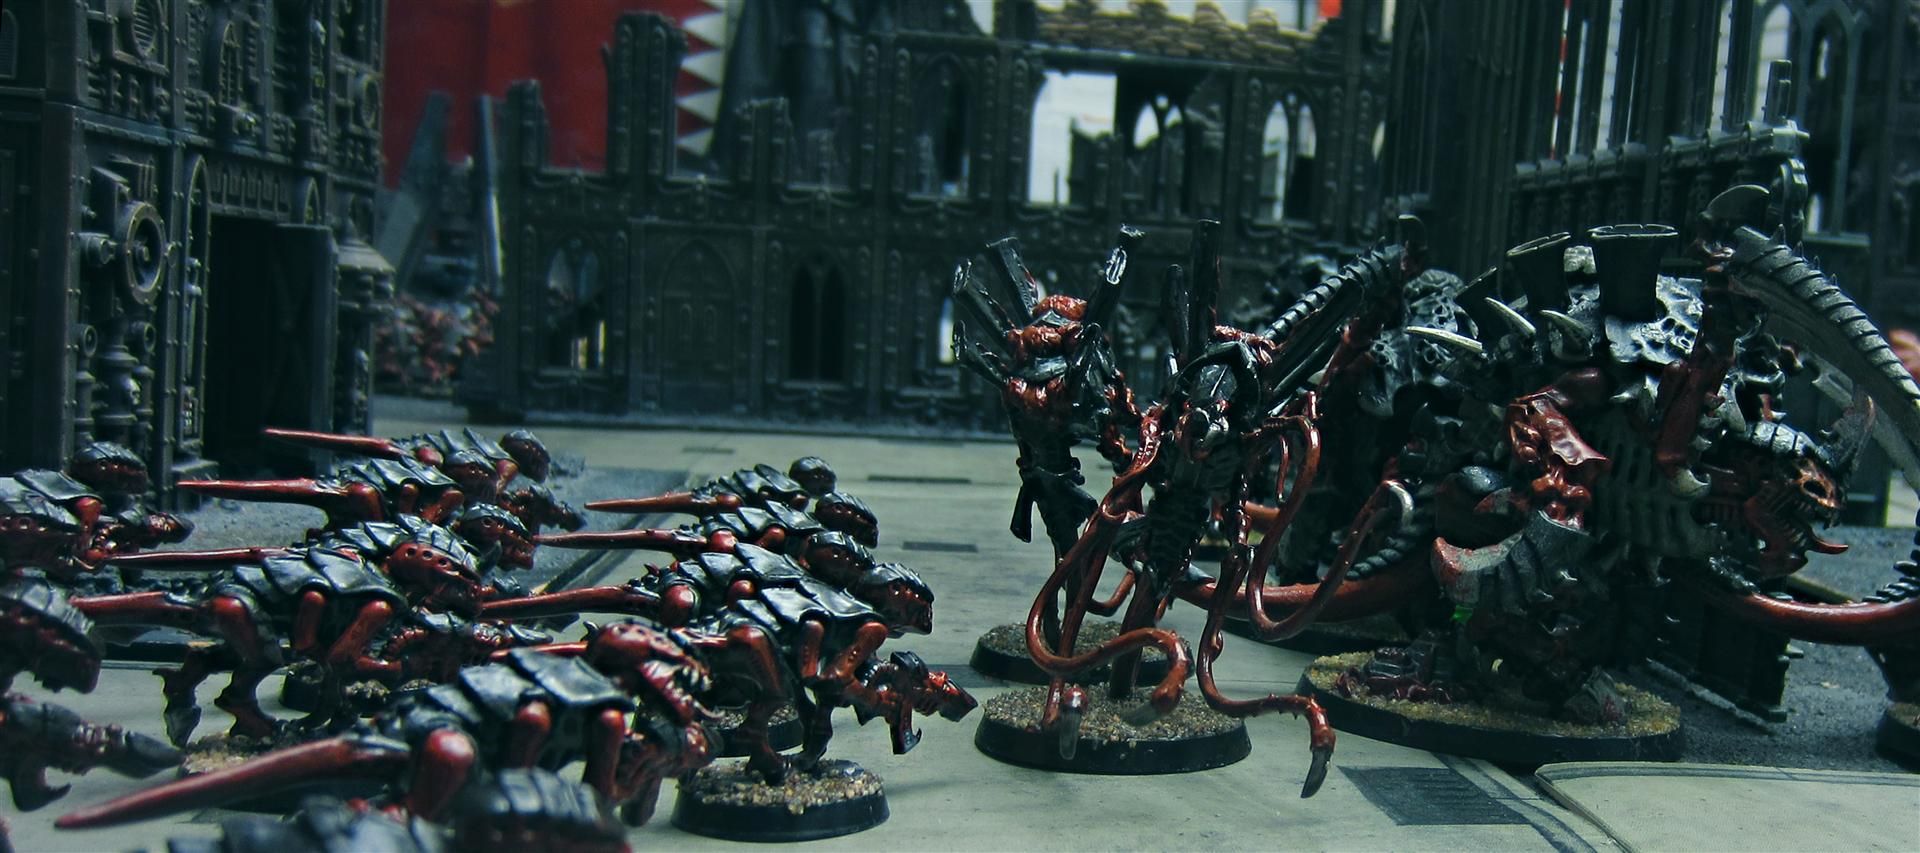
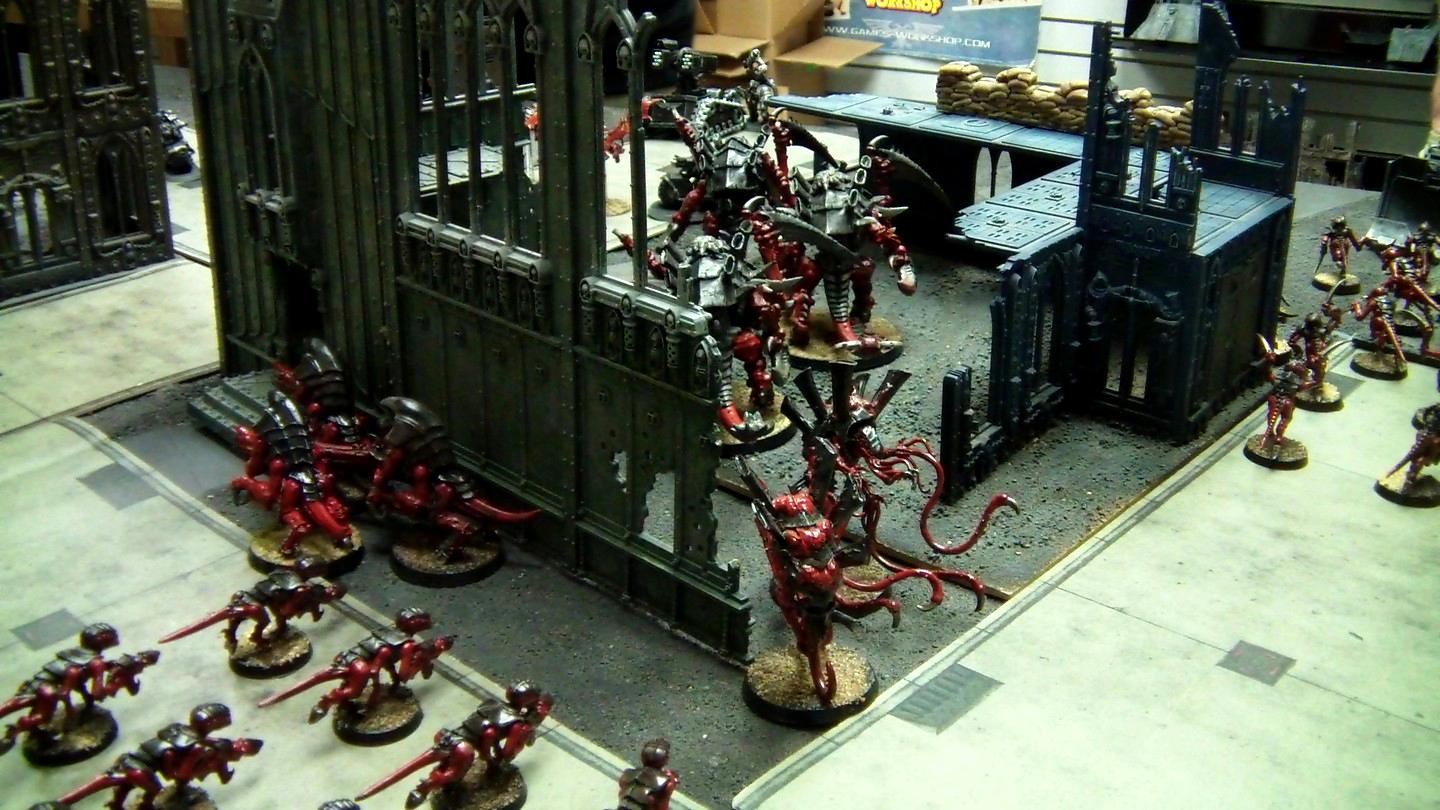
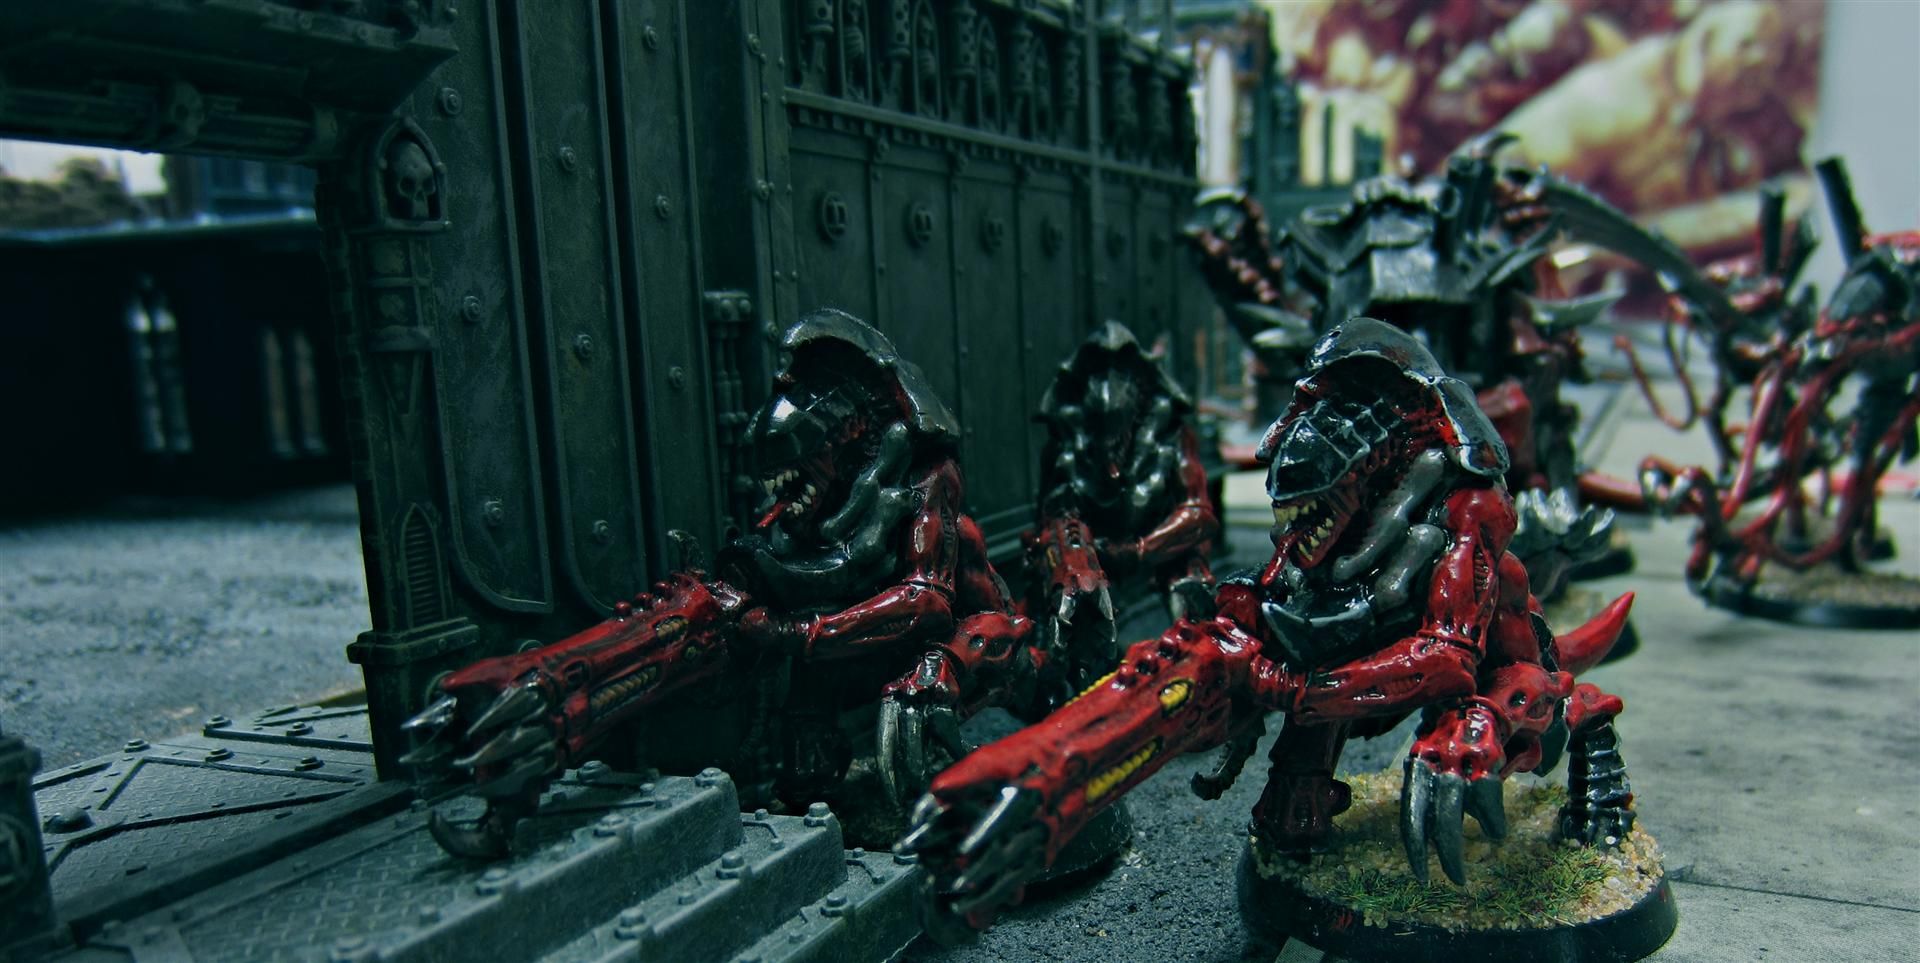
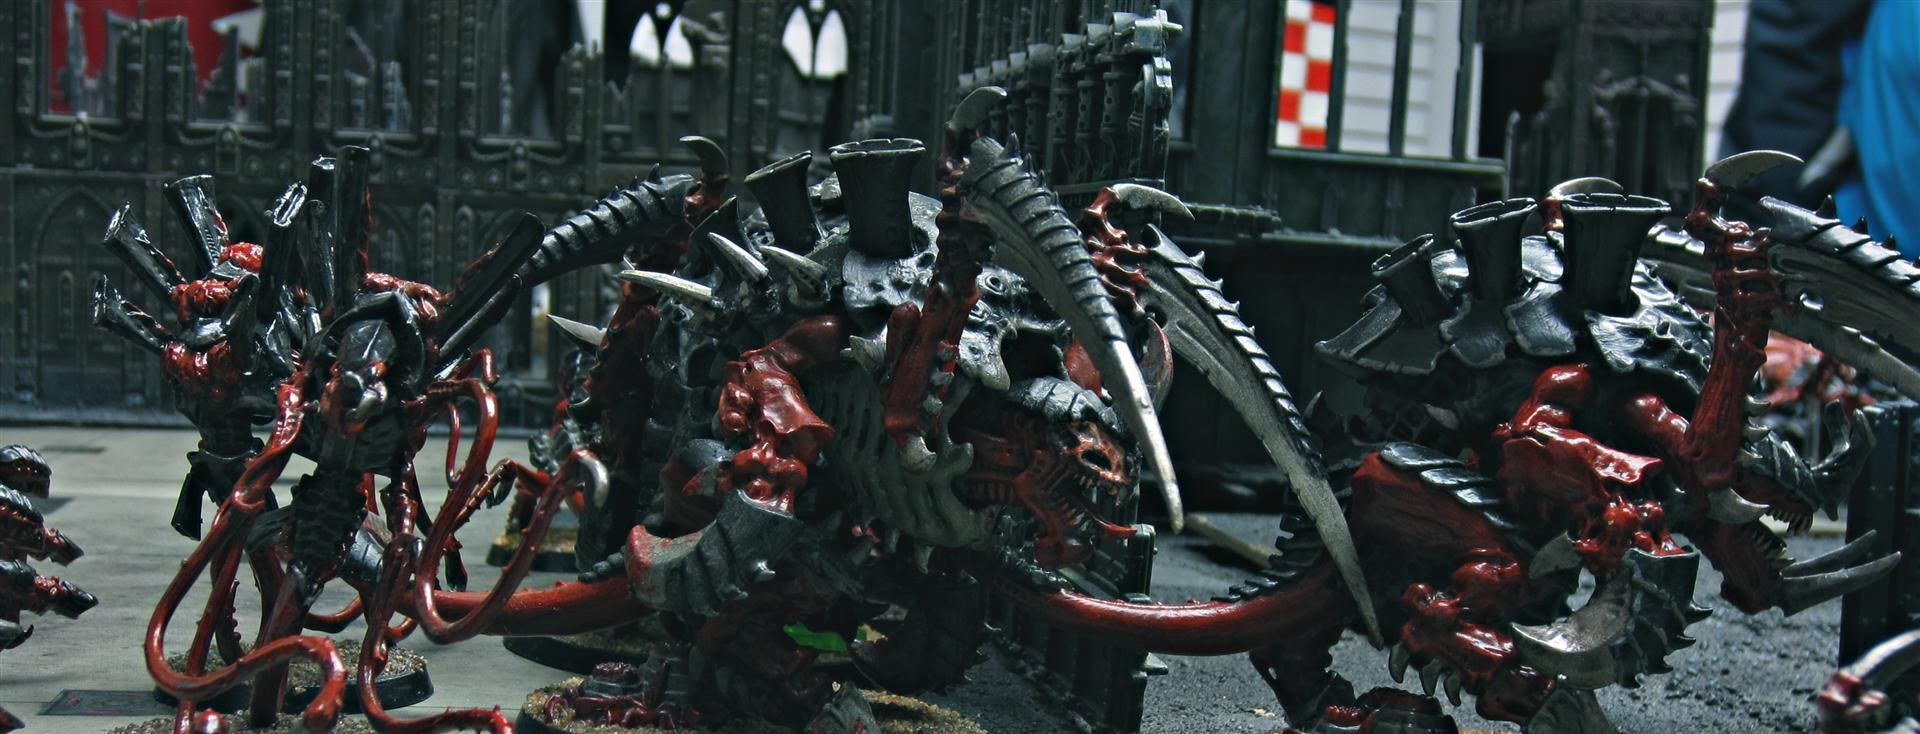
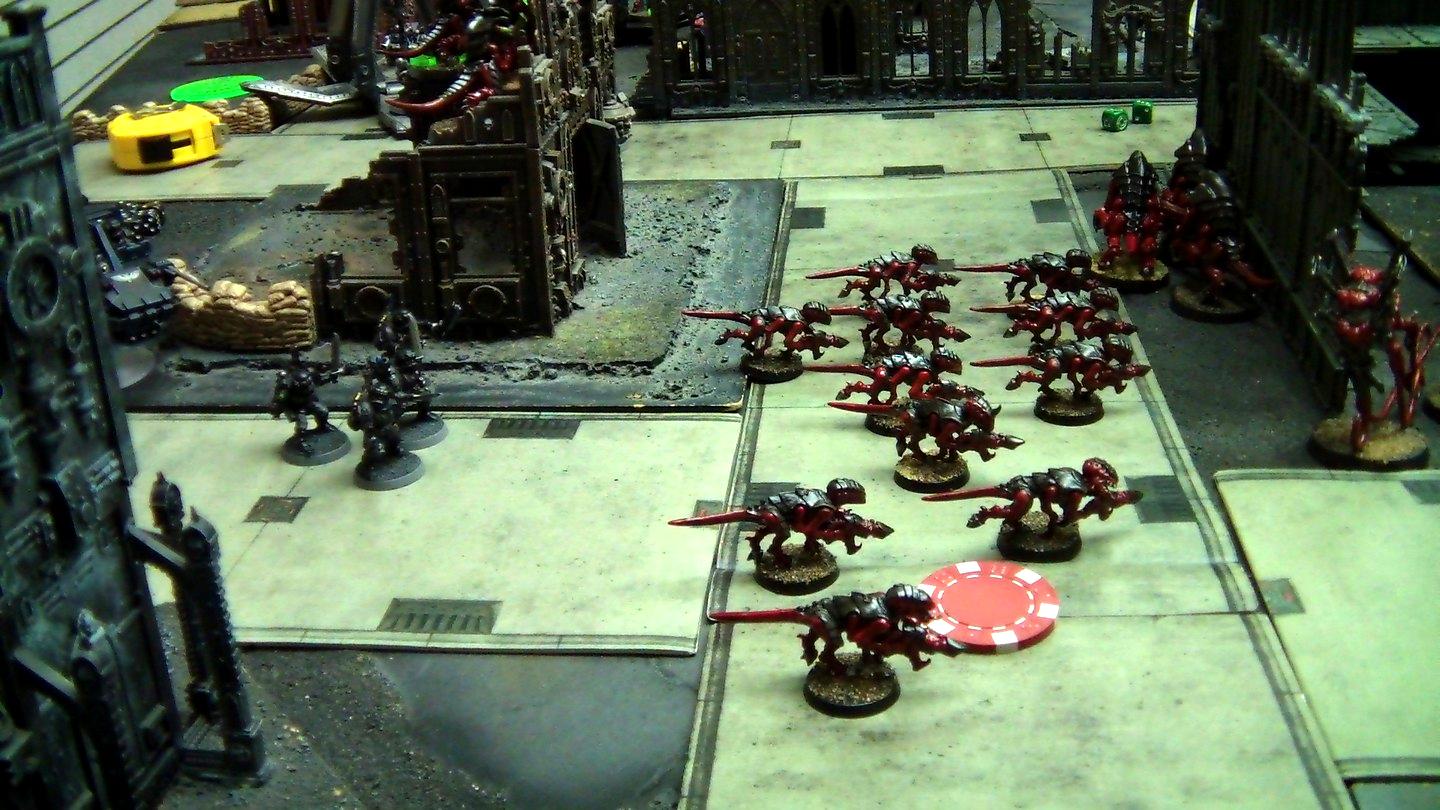
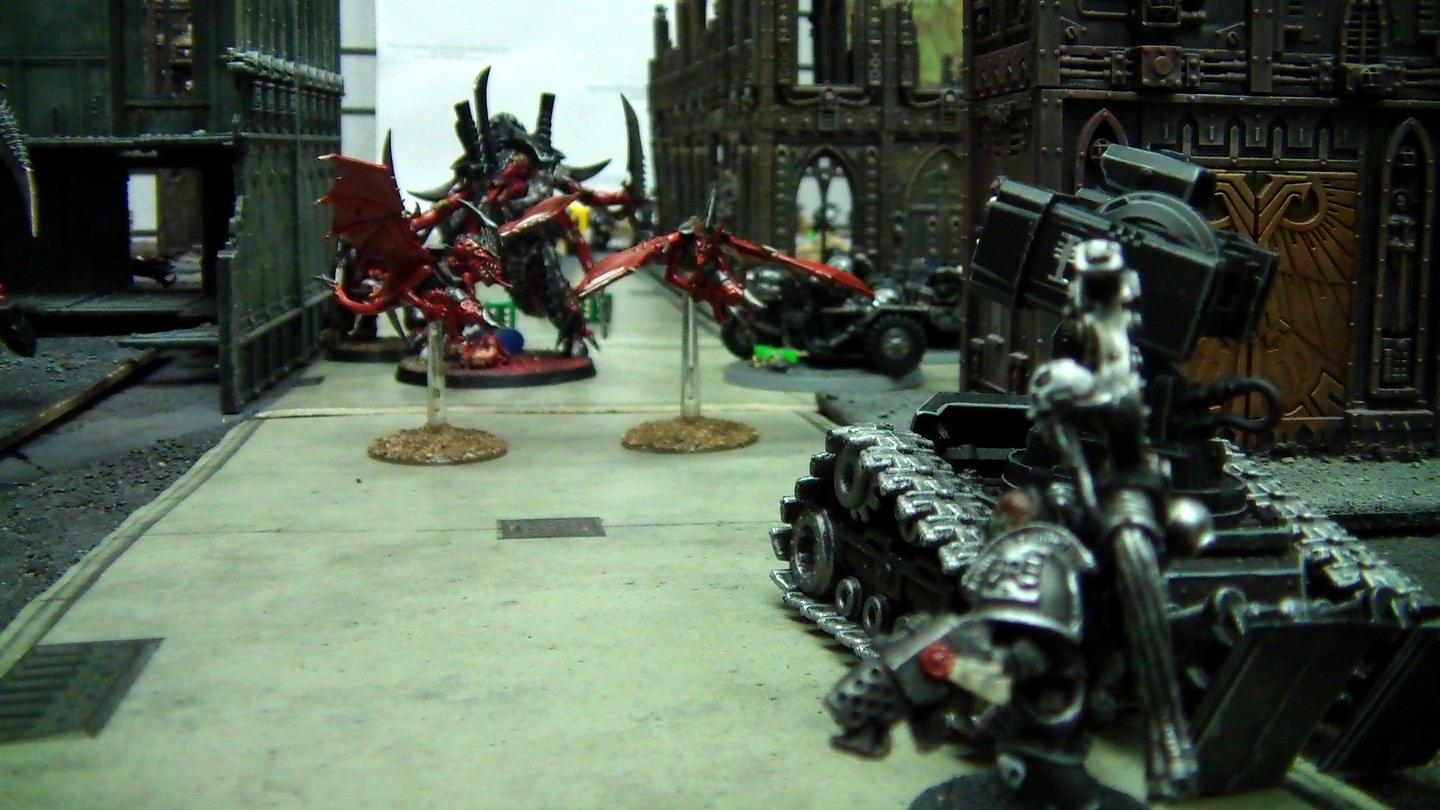
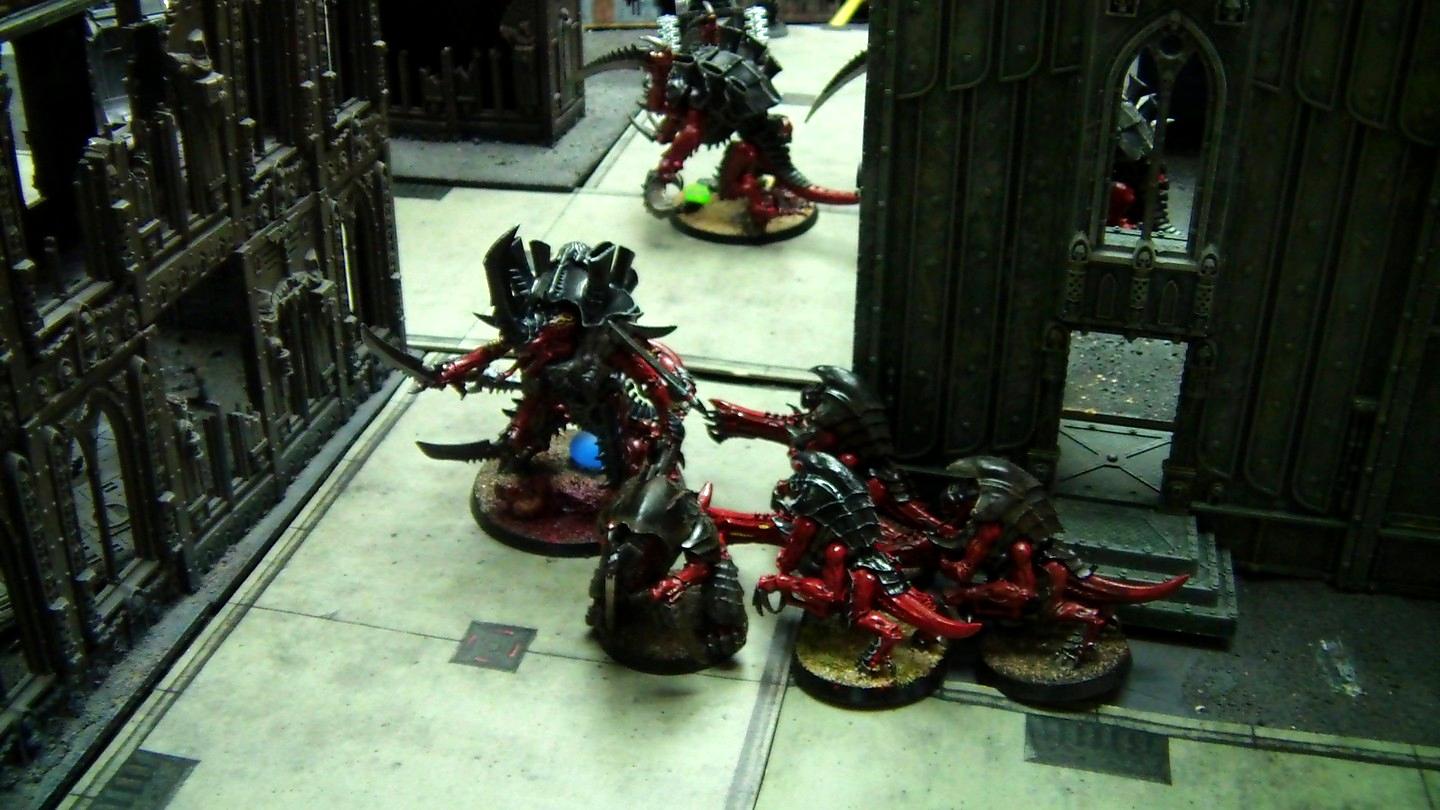
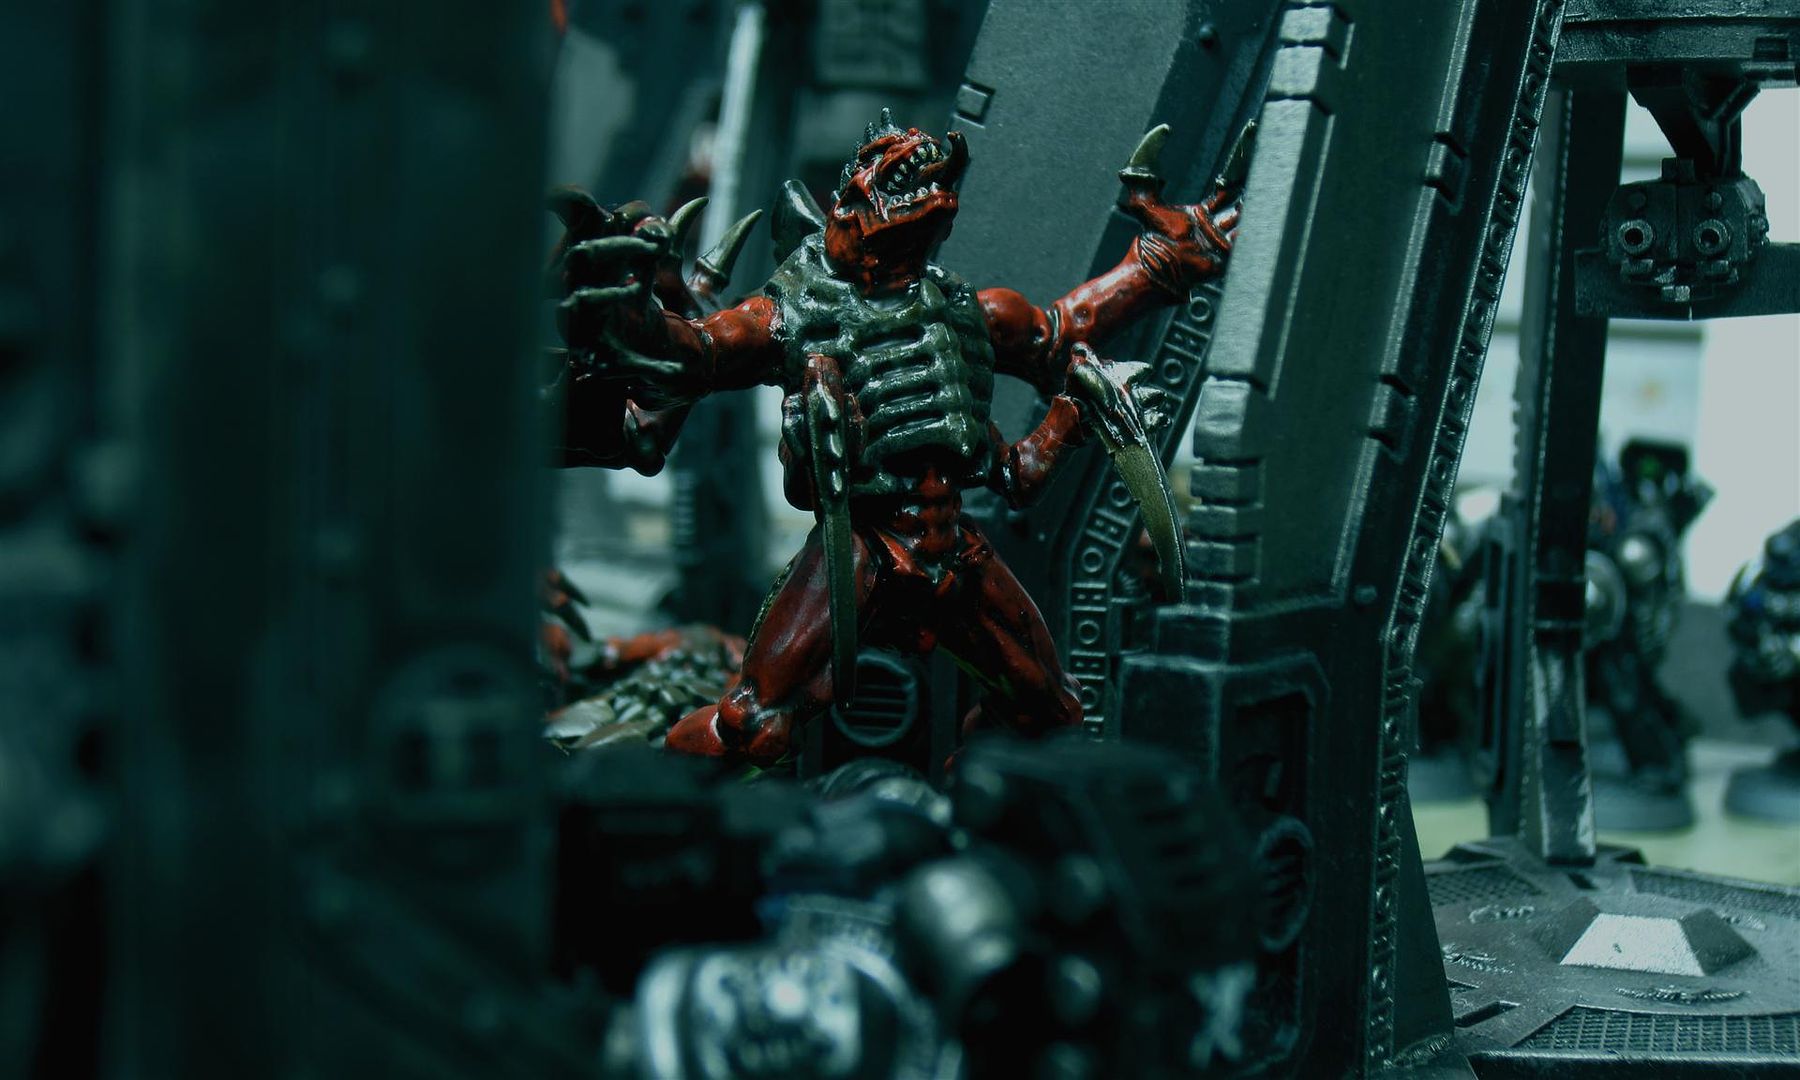
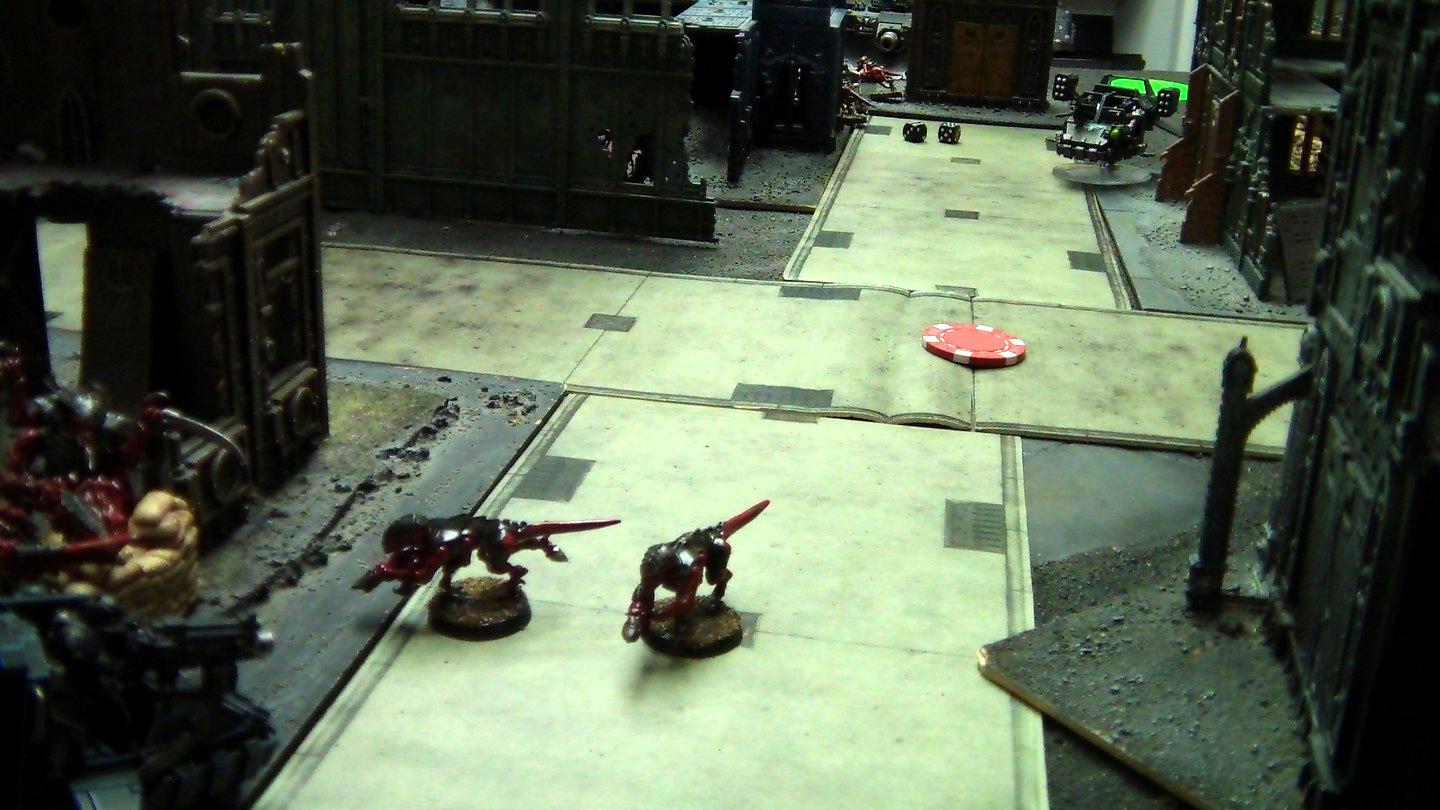
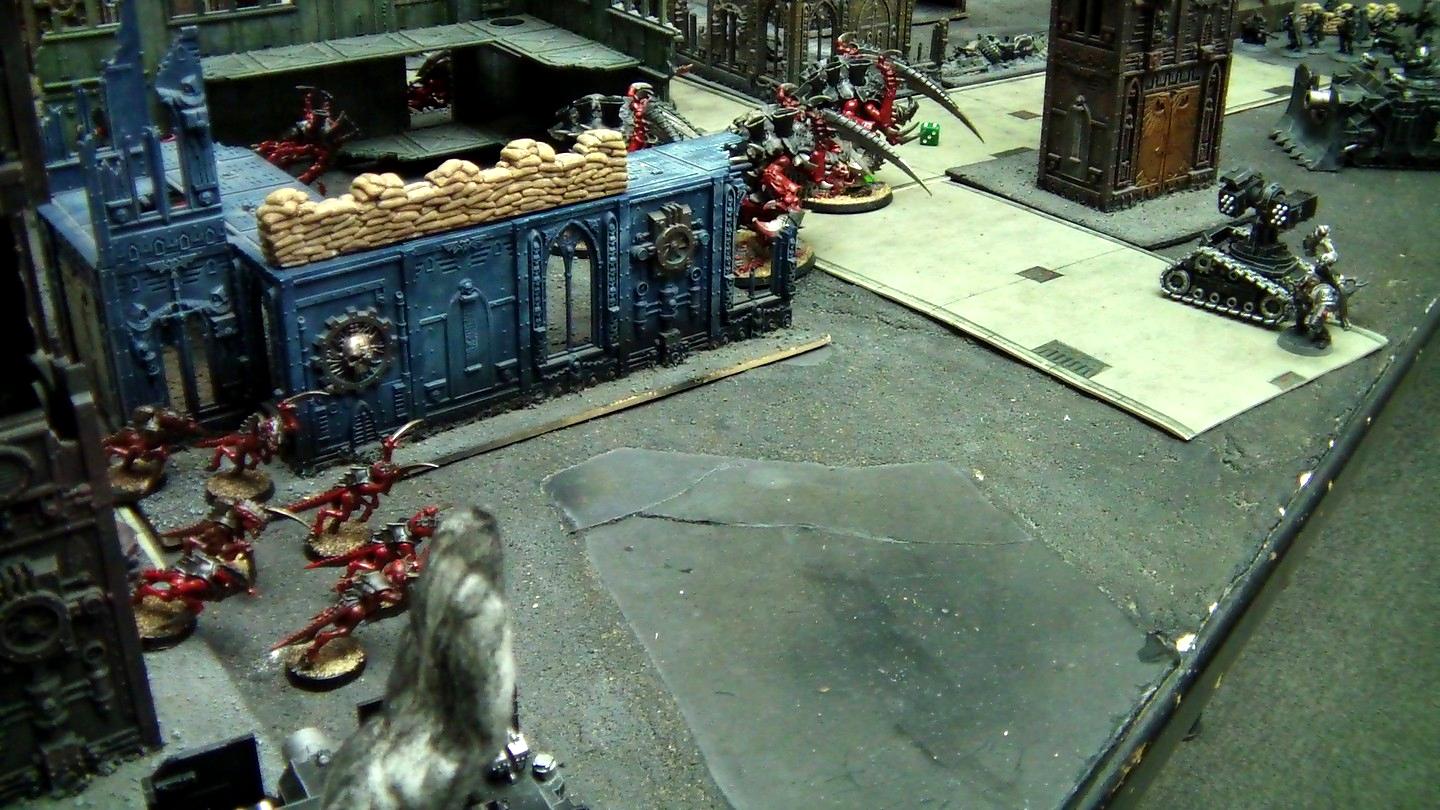
Turn 1 – Tyranids I took Night Attacker as my warlord trait because for my Tyranid battle plan, tons of 5+ to 2+ cover saves for my whole army are huge and mean most of my units should be able to reach the enemy relatively unscathed for a turn. The Swarmlord cast Iron Arm, just in case, getting +3S/T and EW. All of my forces advanced, the Warriors claiming my backfield objective and spreading enough so that they could provide synapse coverage for the Gaunts on the right flank. The Swarmlord and Carnifexes lumbered forward to attack the big things, while the Hormagaunts and Gargoyles were treated like meat shields.
No one could shoot or assault, so nearly everything just ran to gain extra ground, and thus ended my turn.
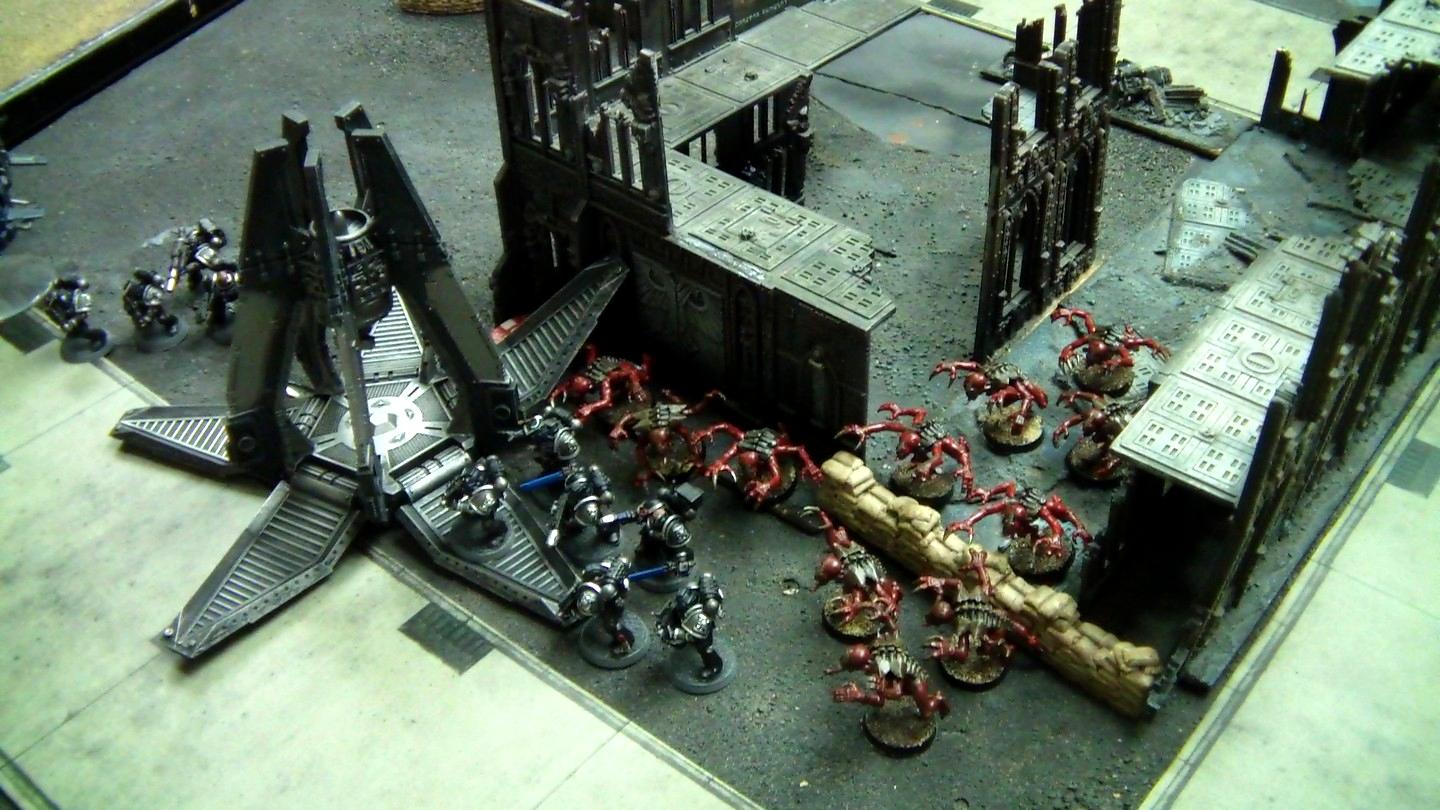
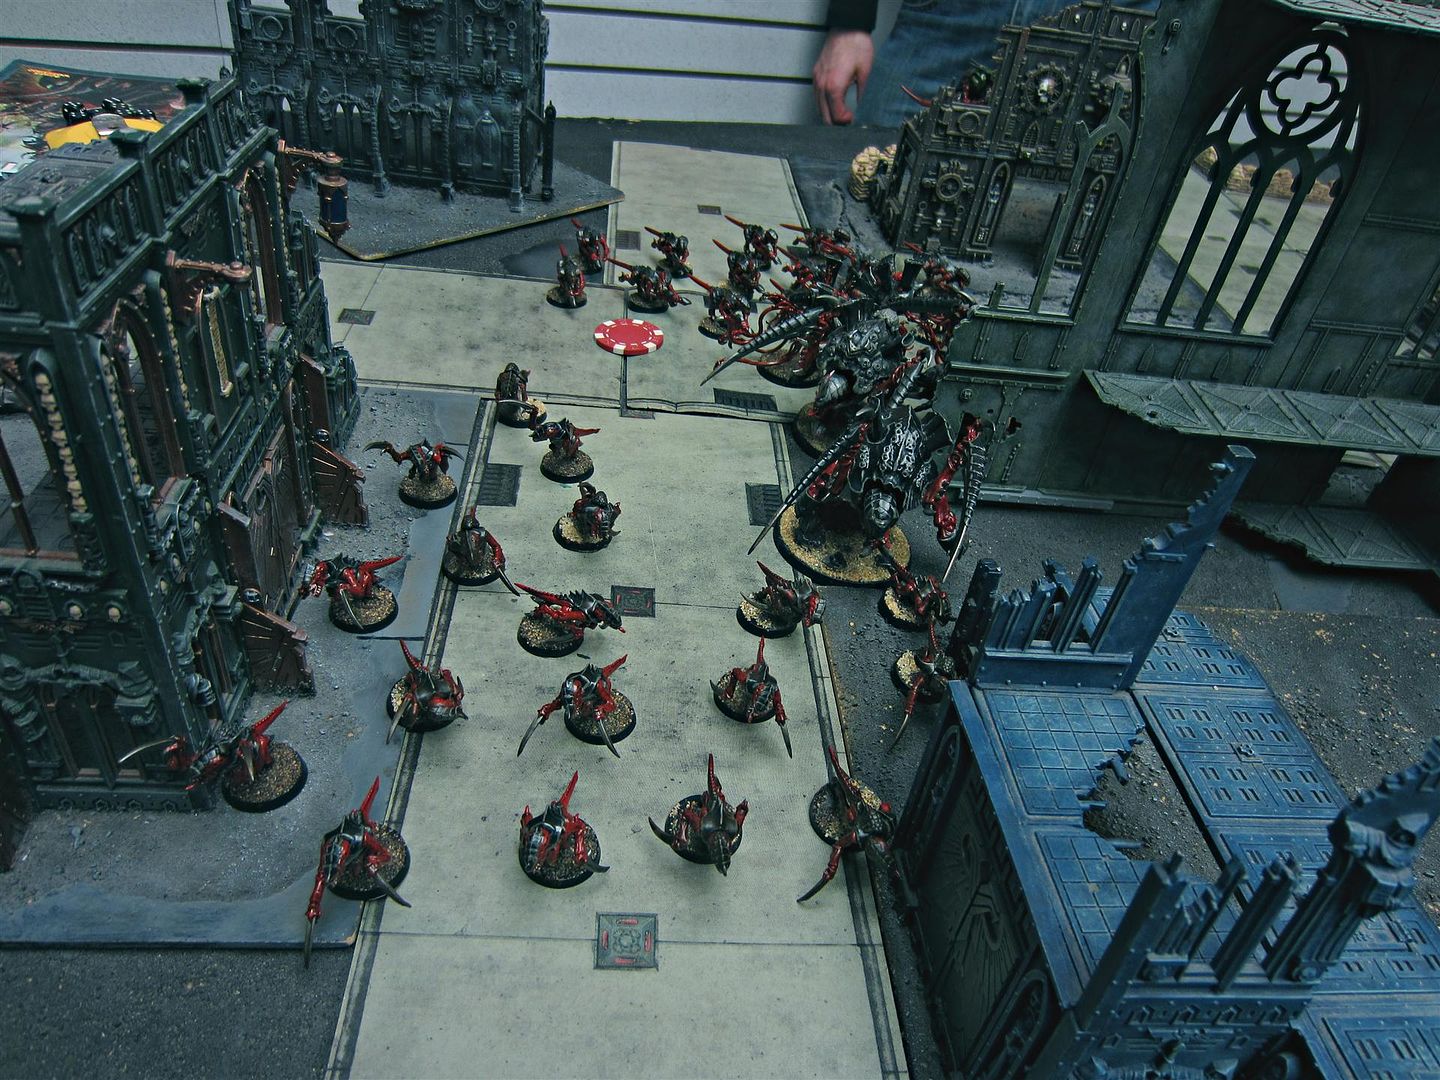
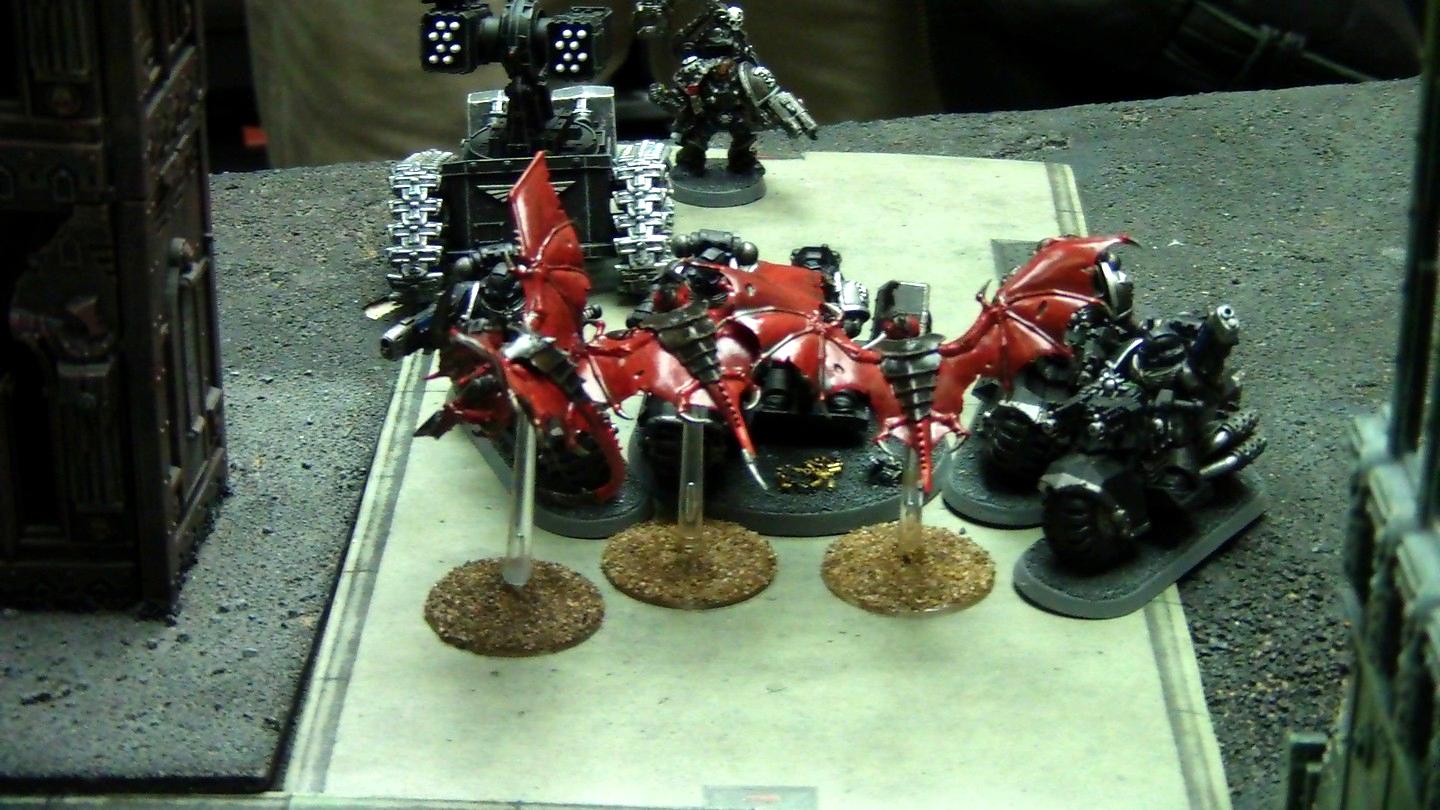
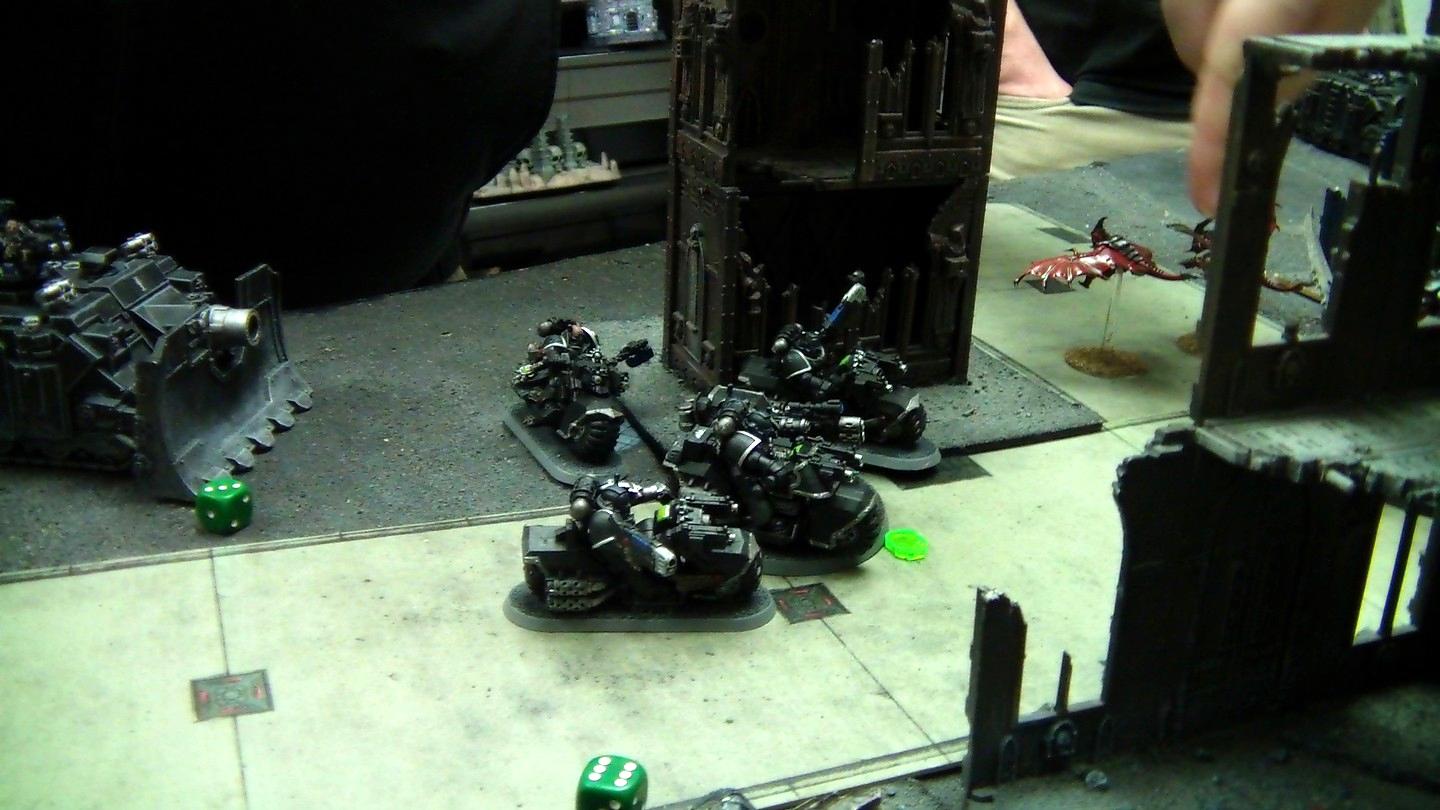
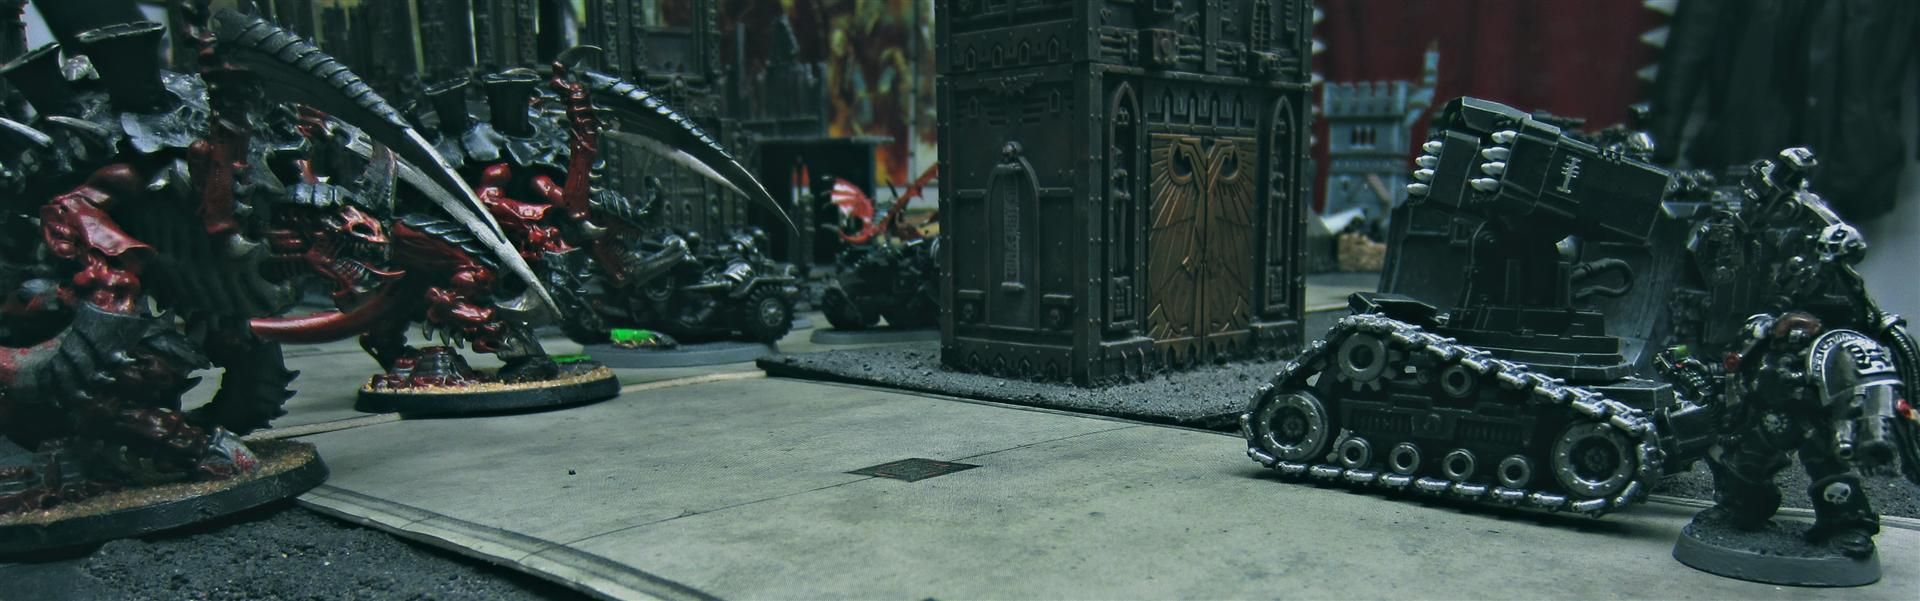
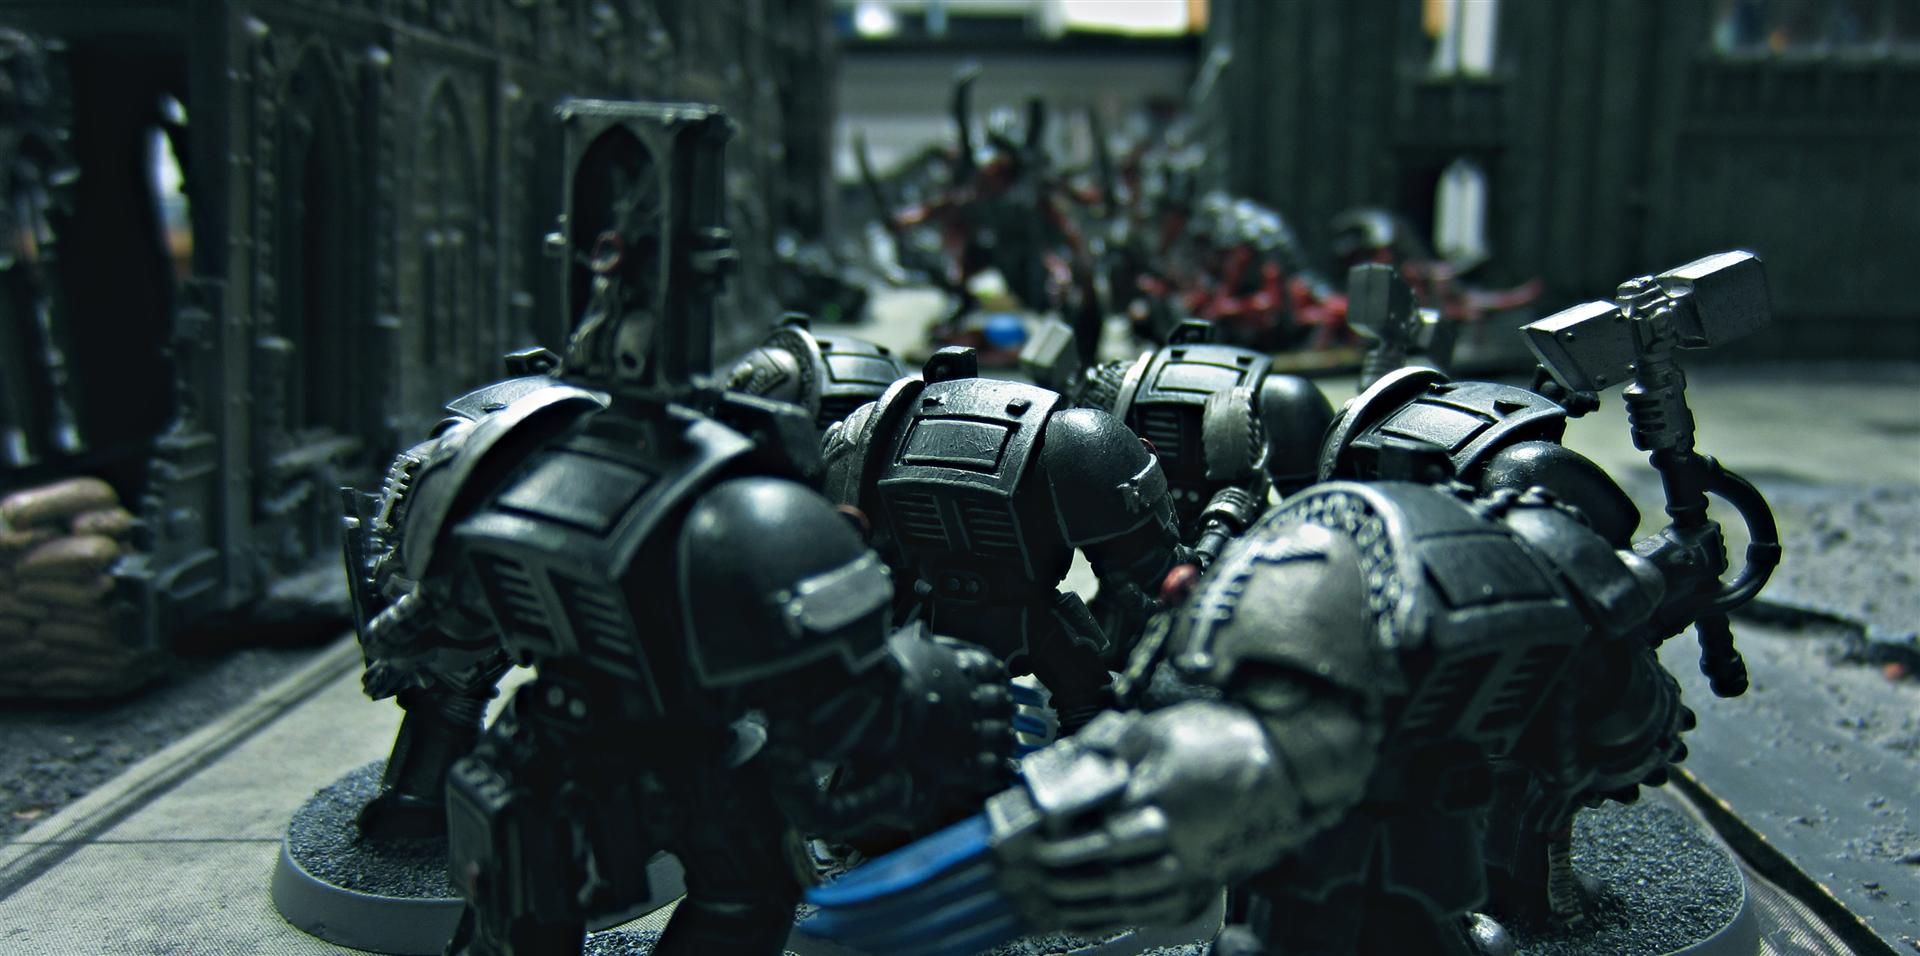
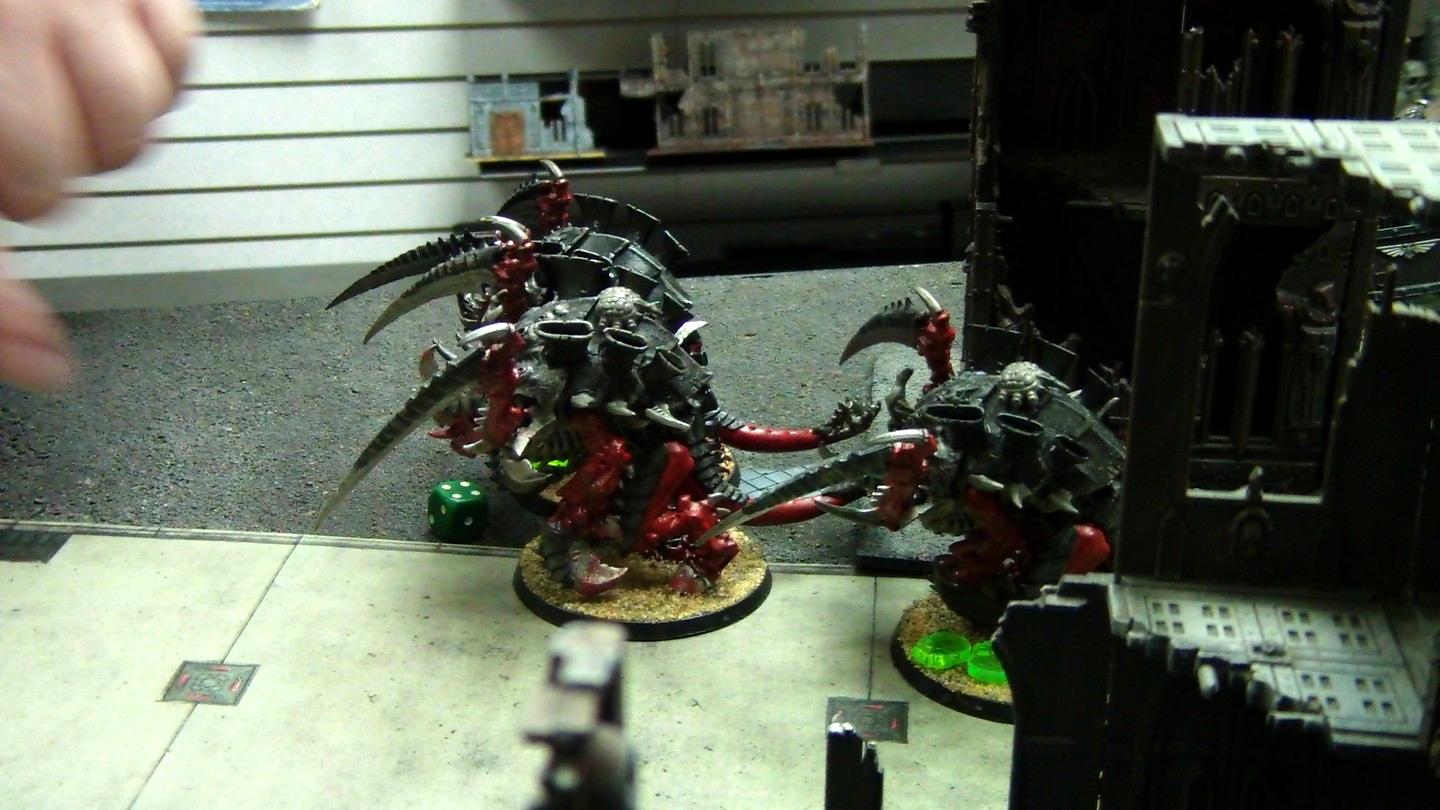
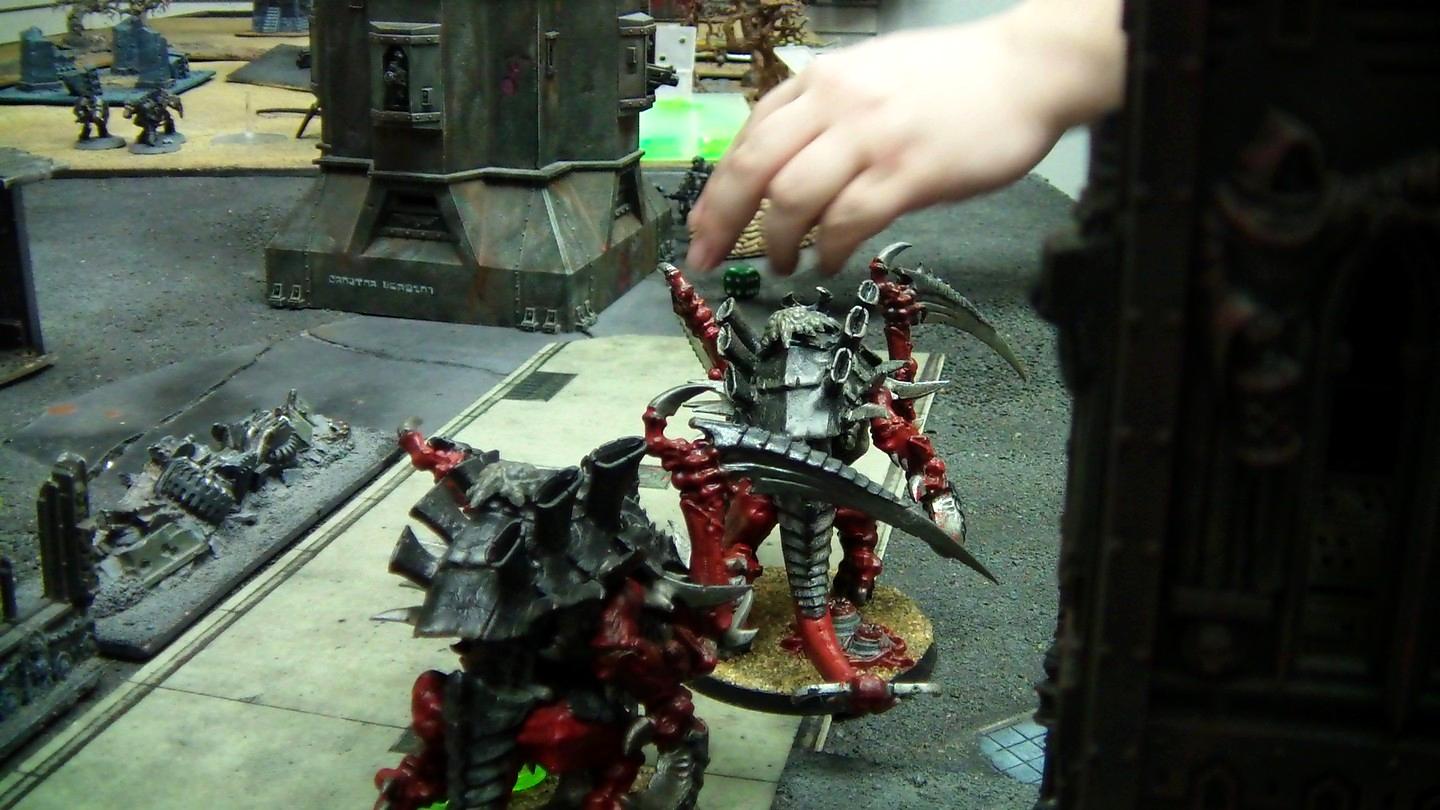
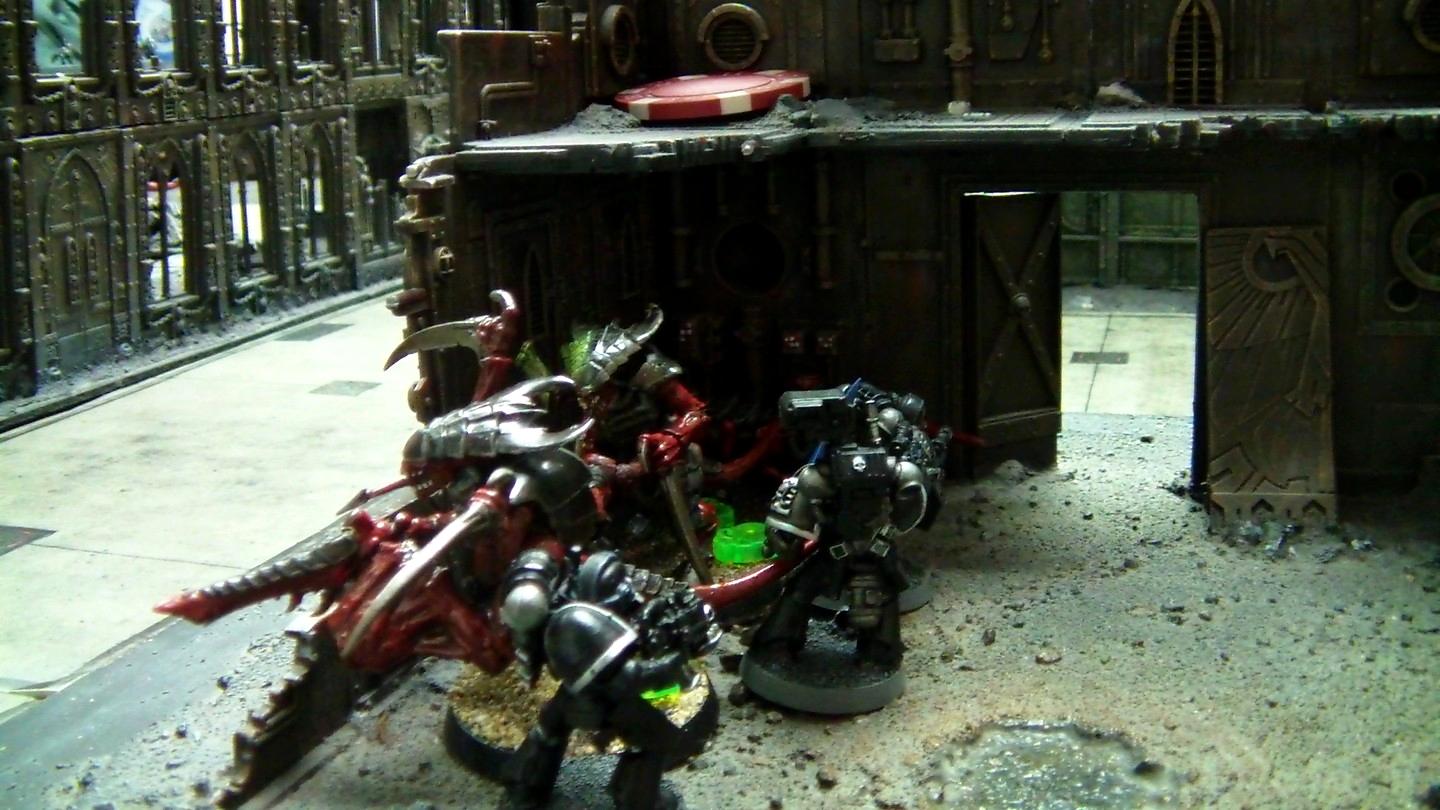
That cool blur effect in the background? That was just me walking by when Crablezworth was taking the picture. Turned out very cool though...
...so cool in fact that we had to do it again!
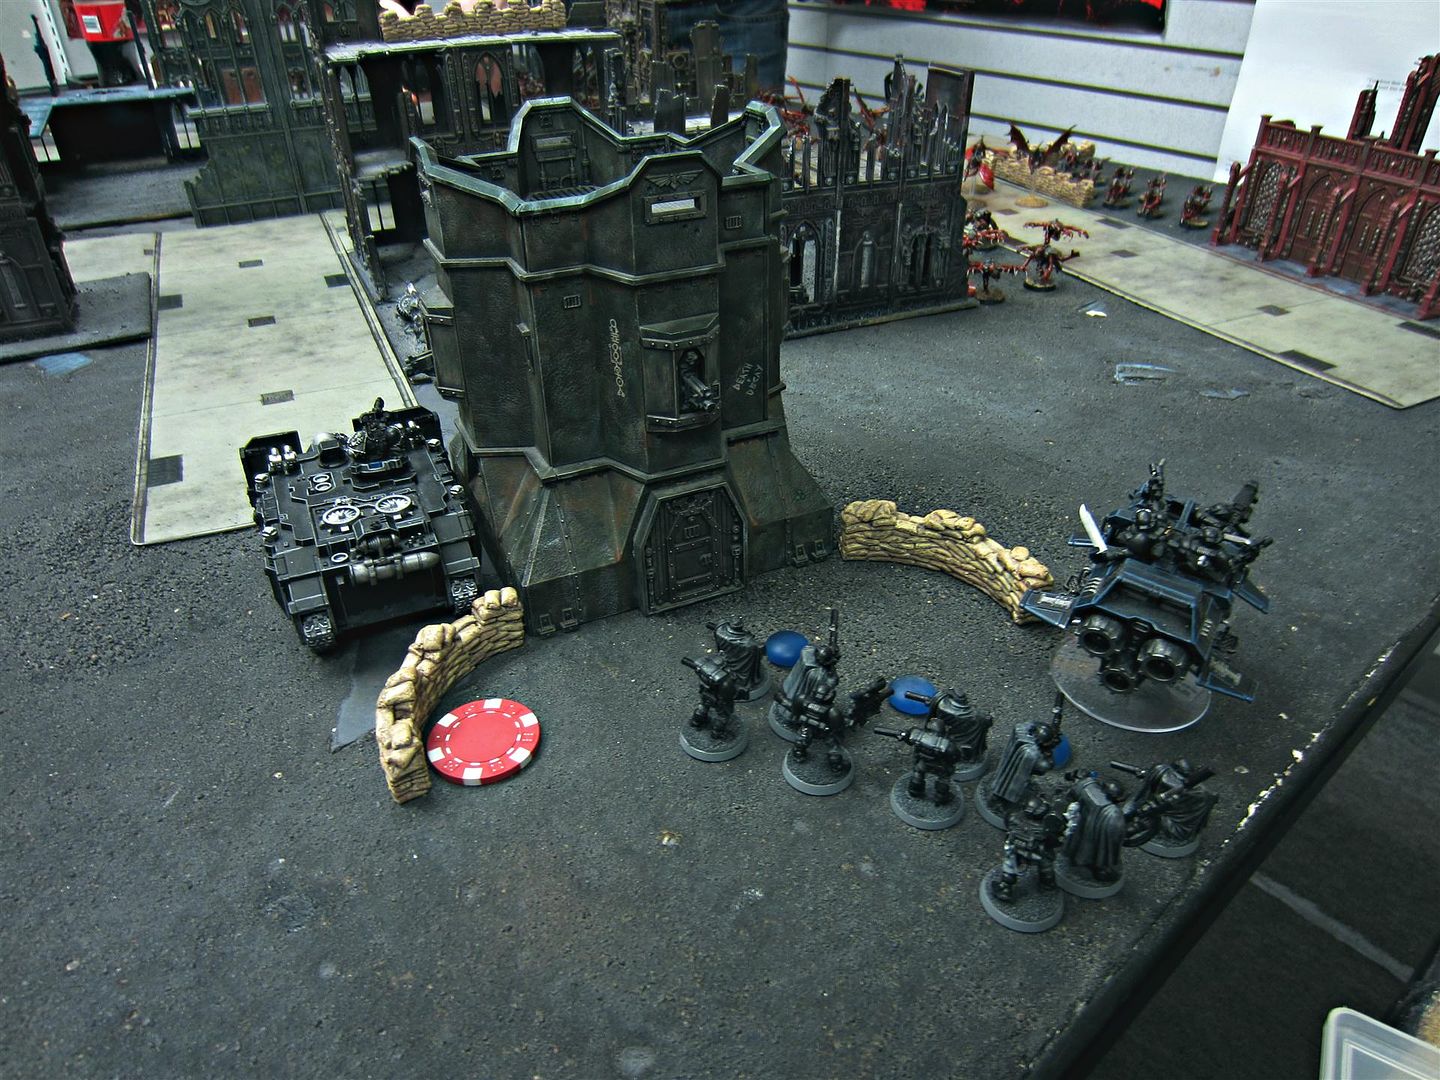
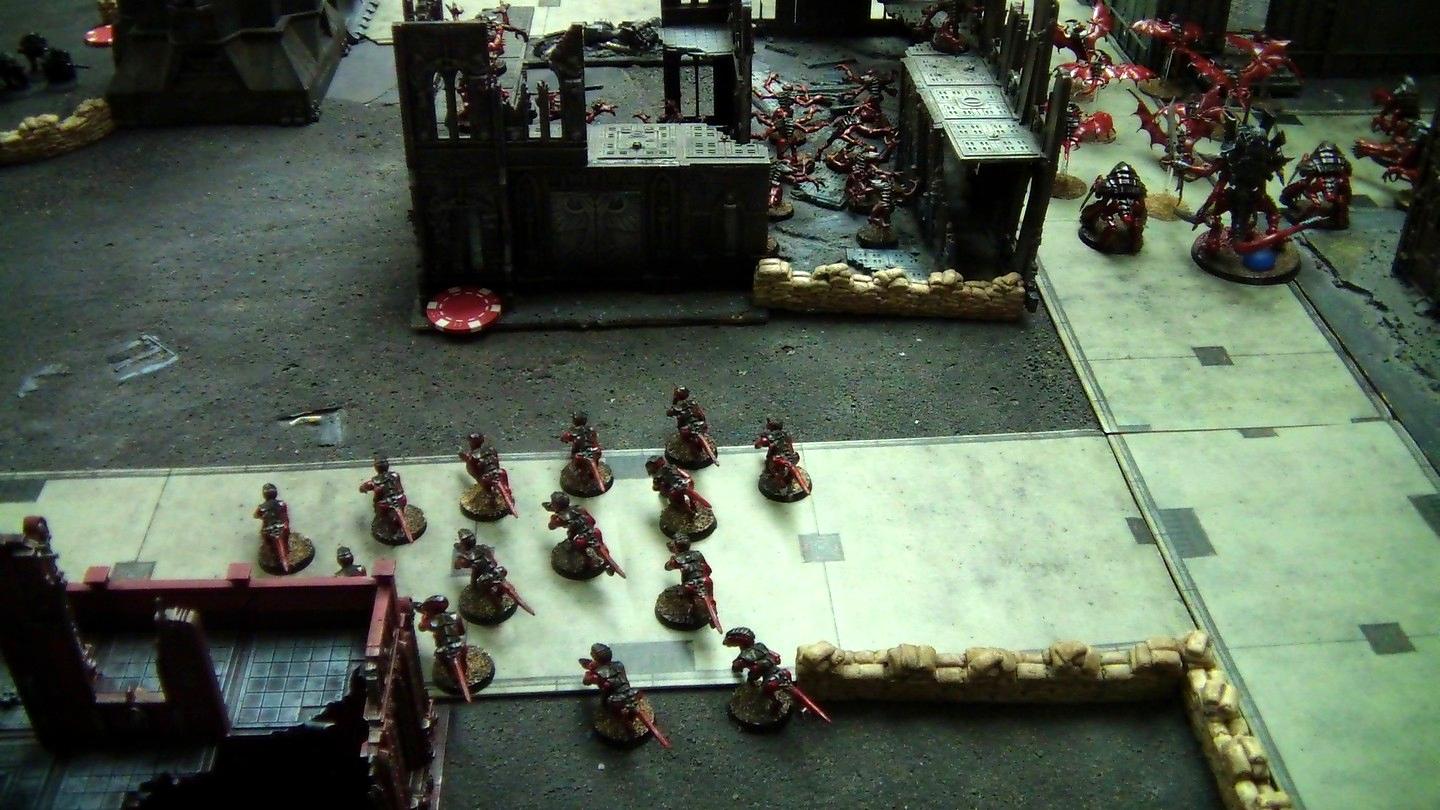
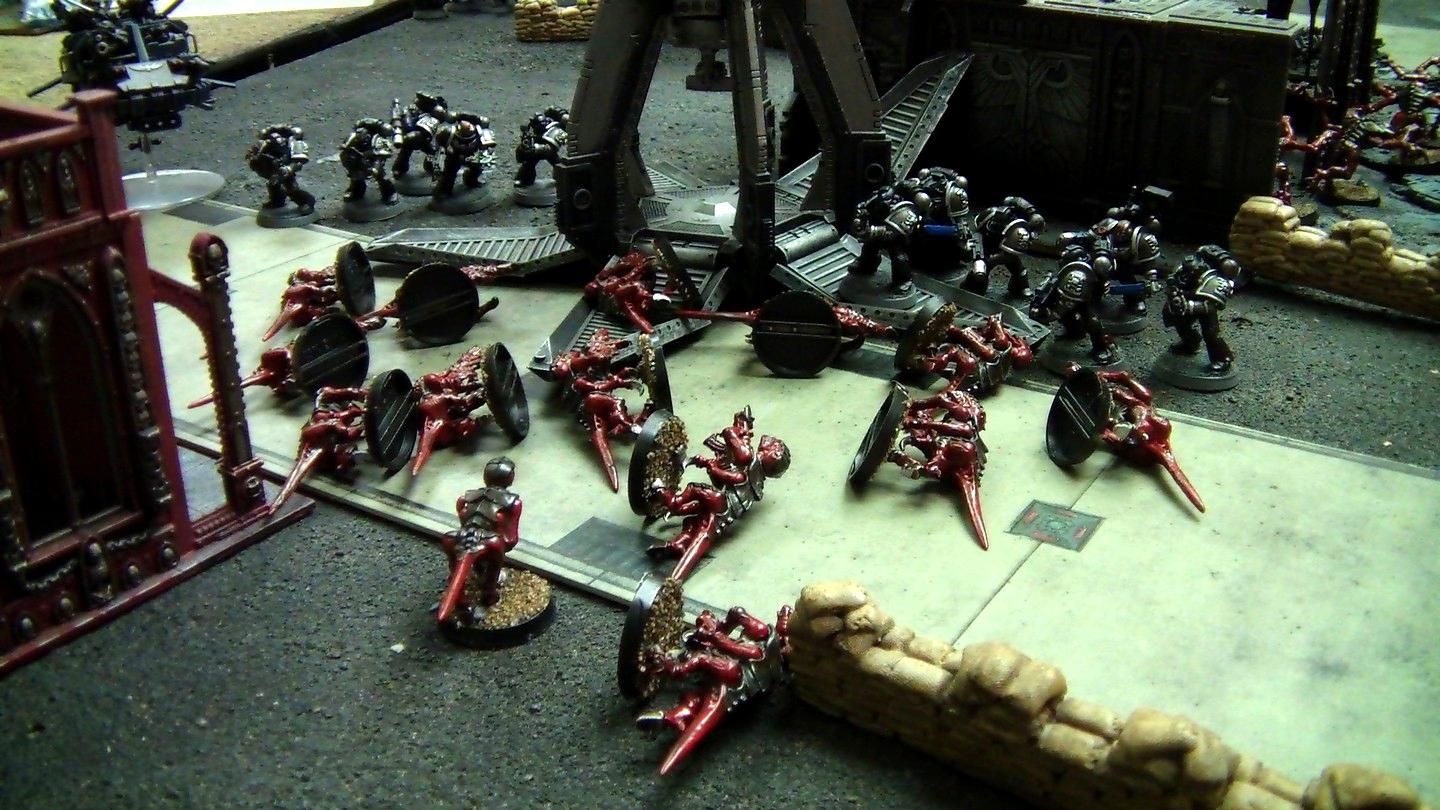
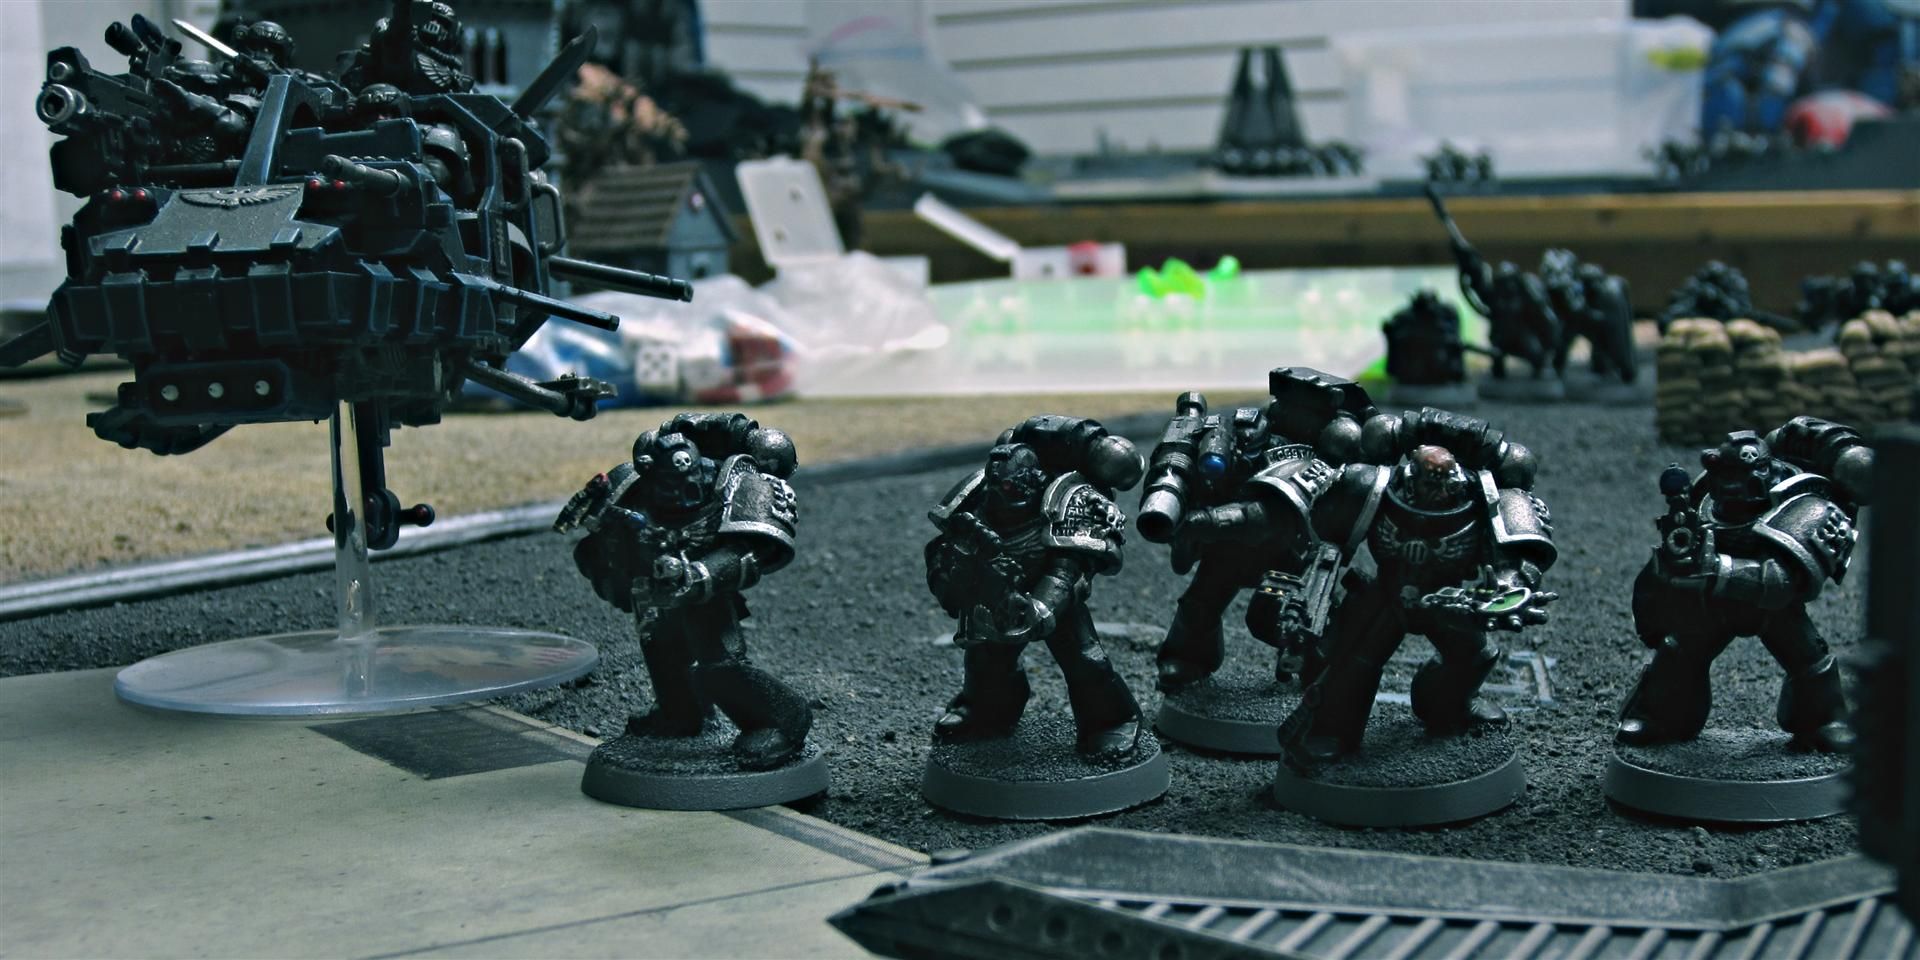
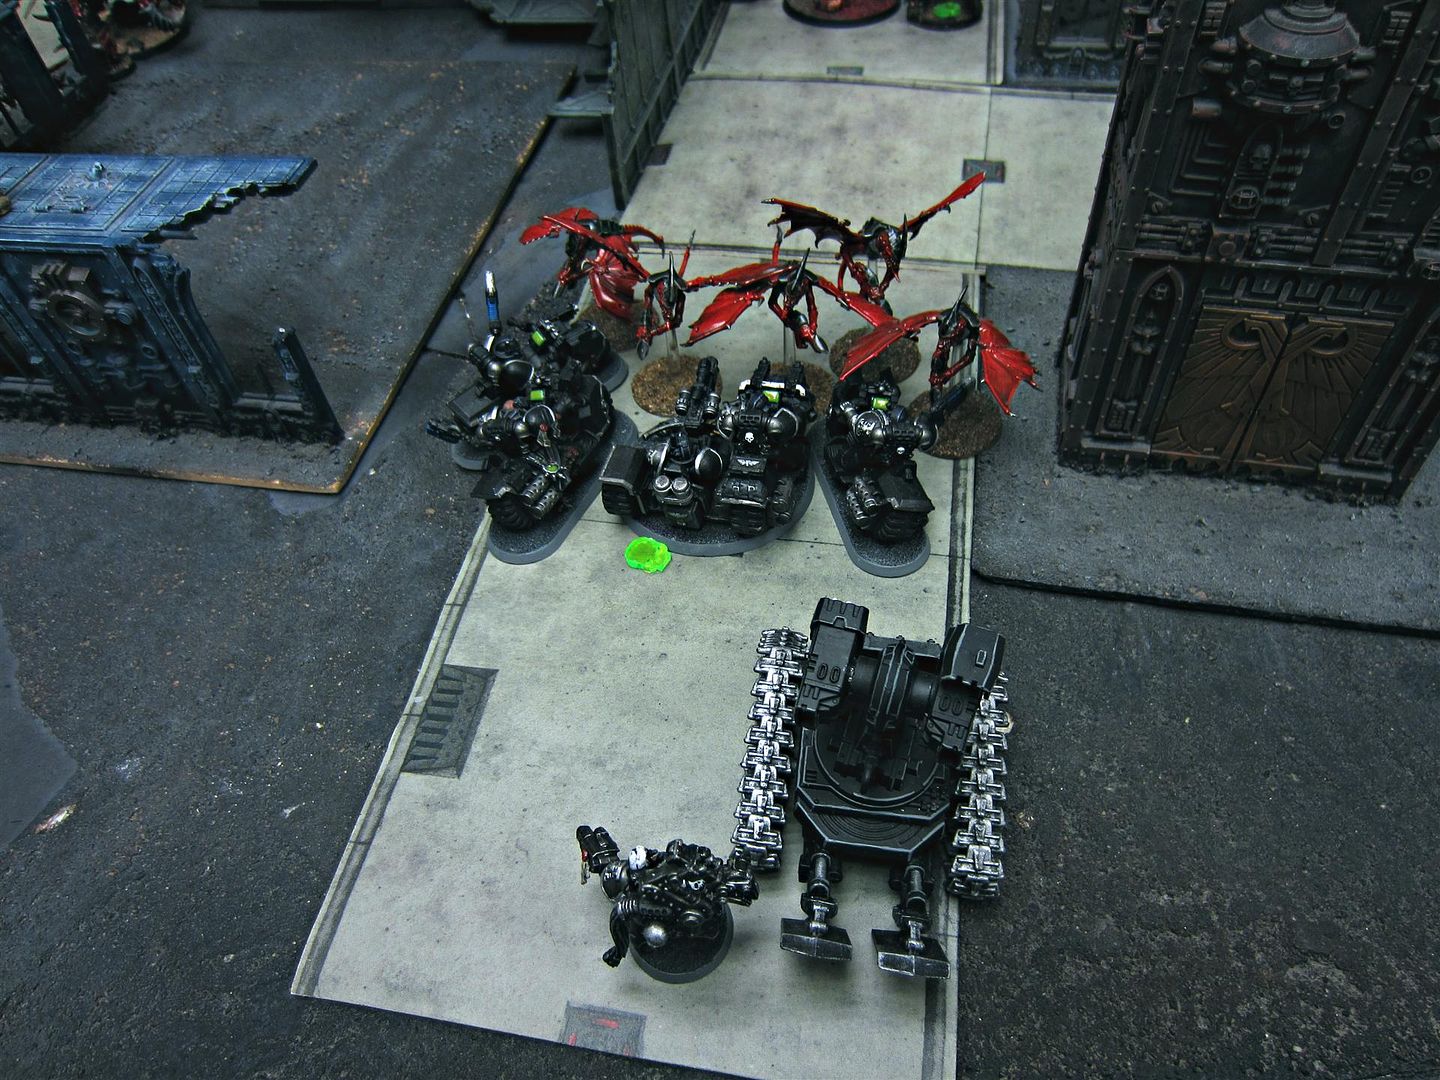
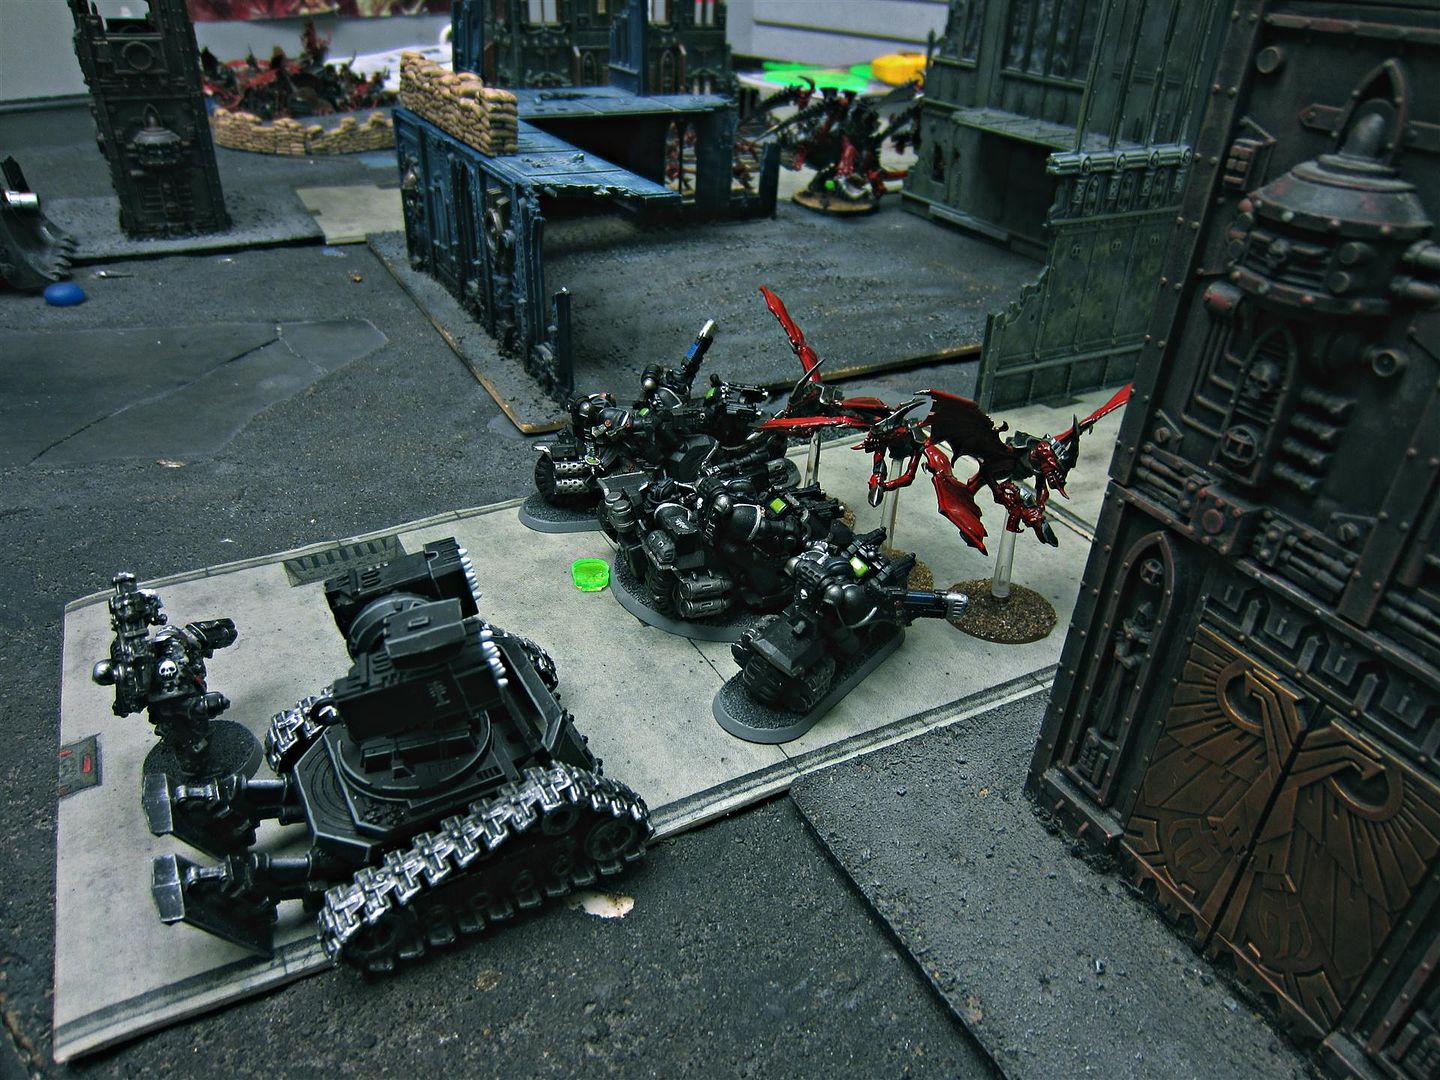
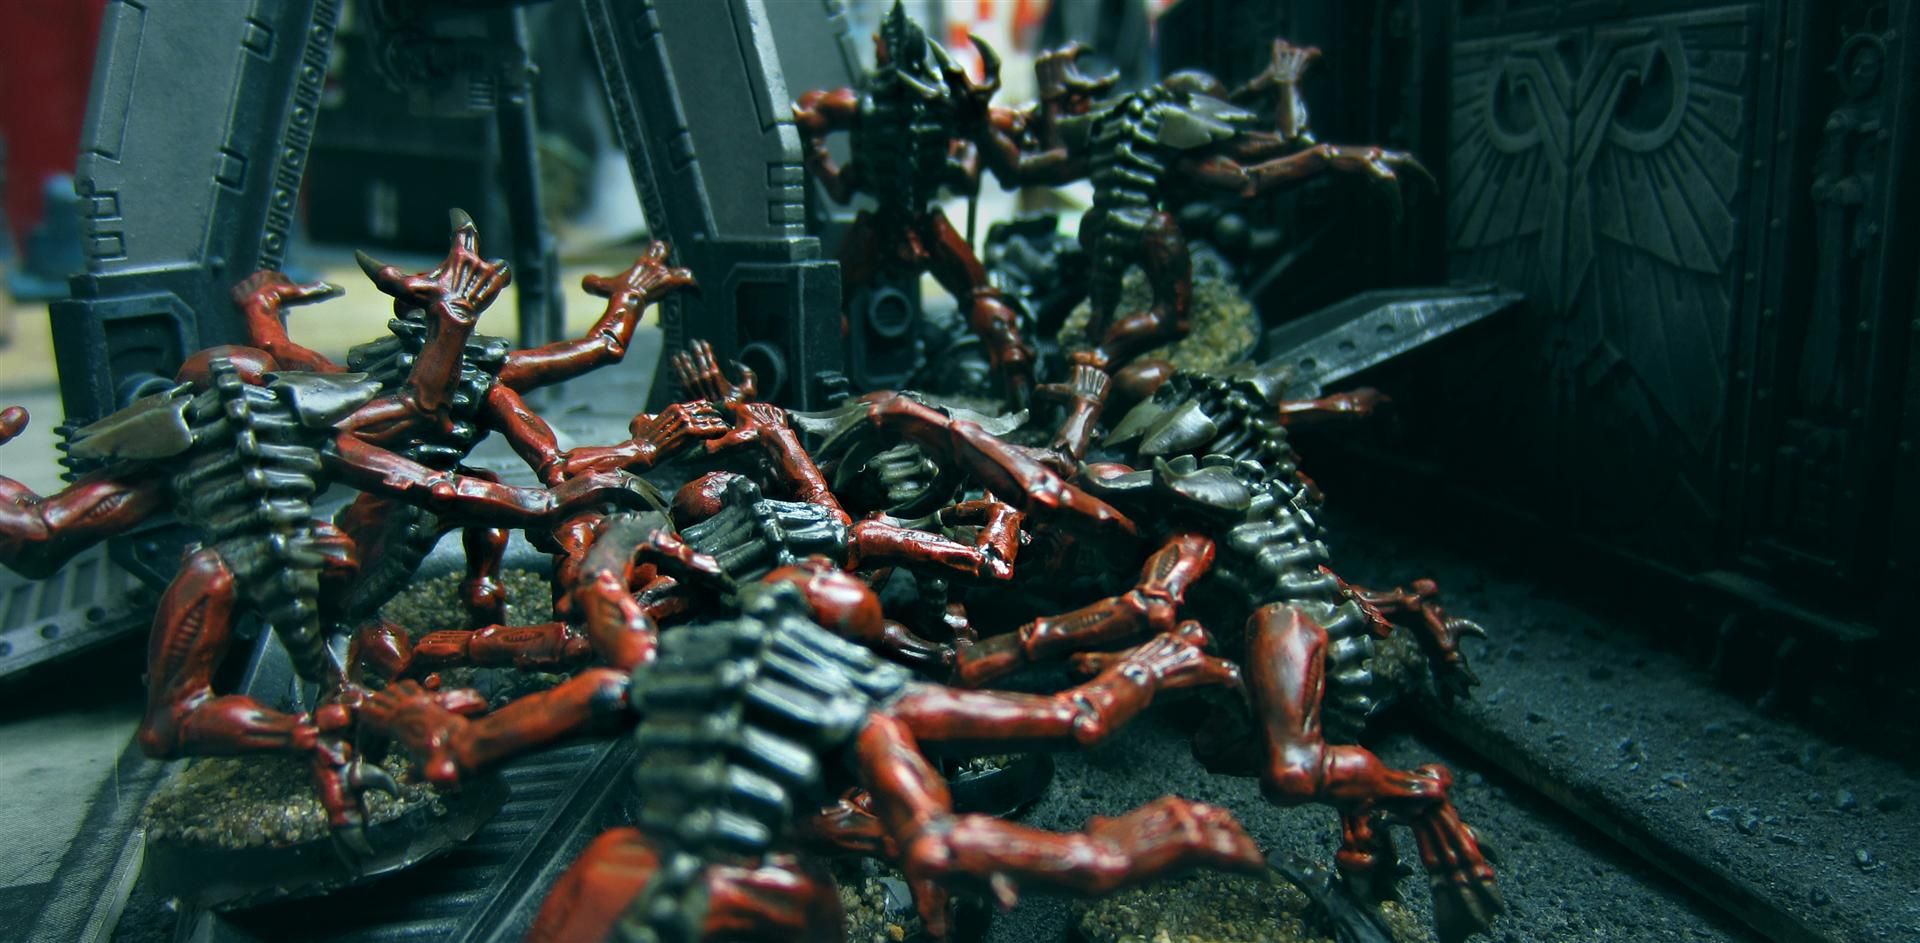
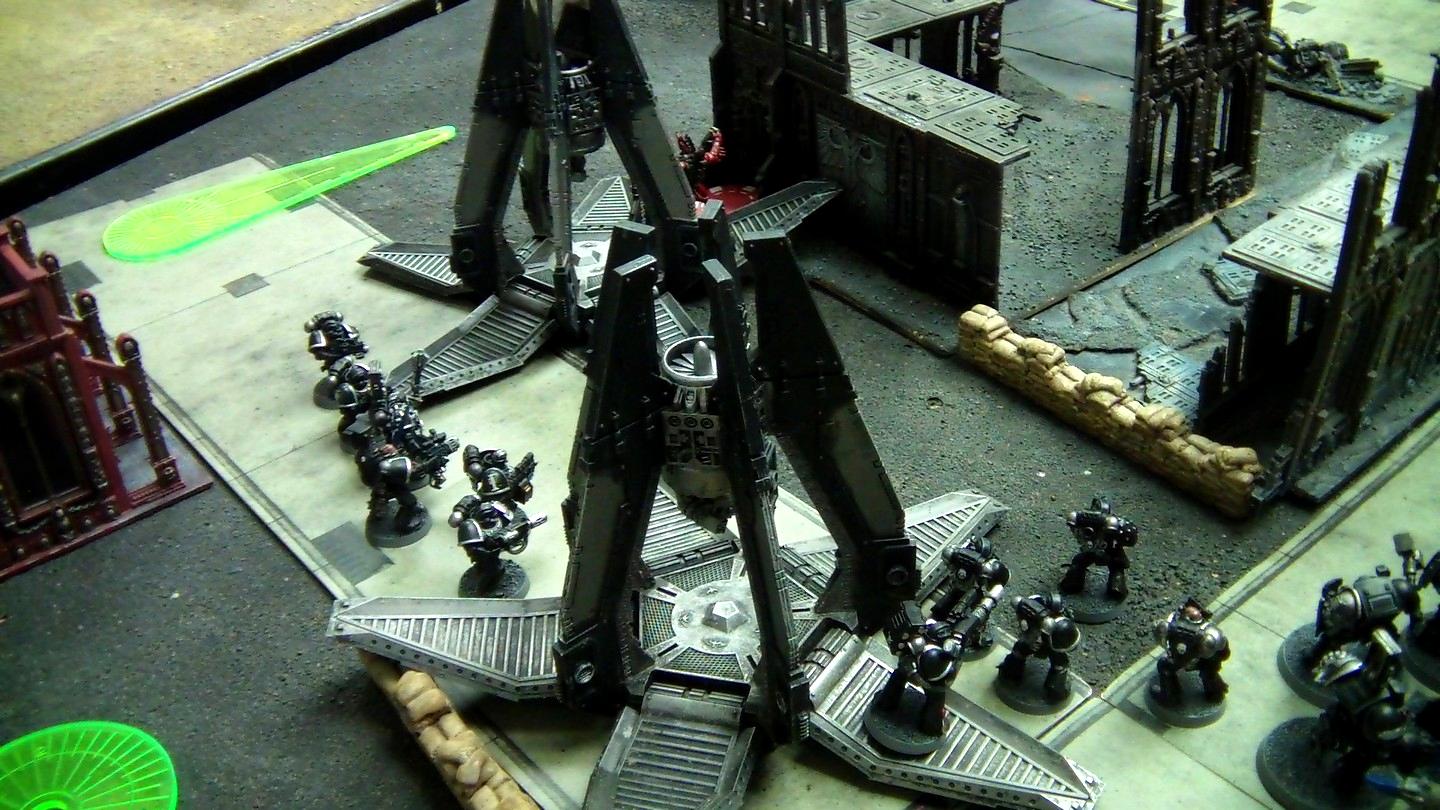
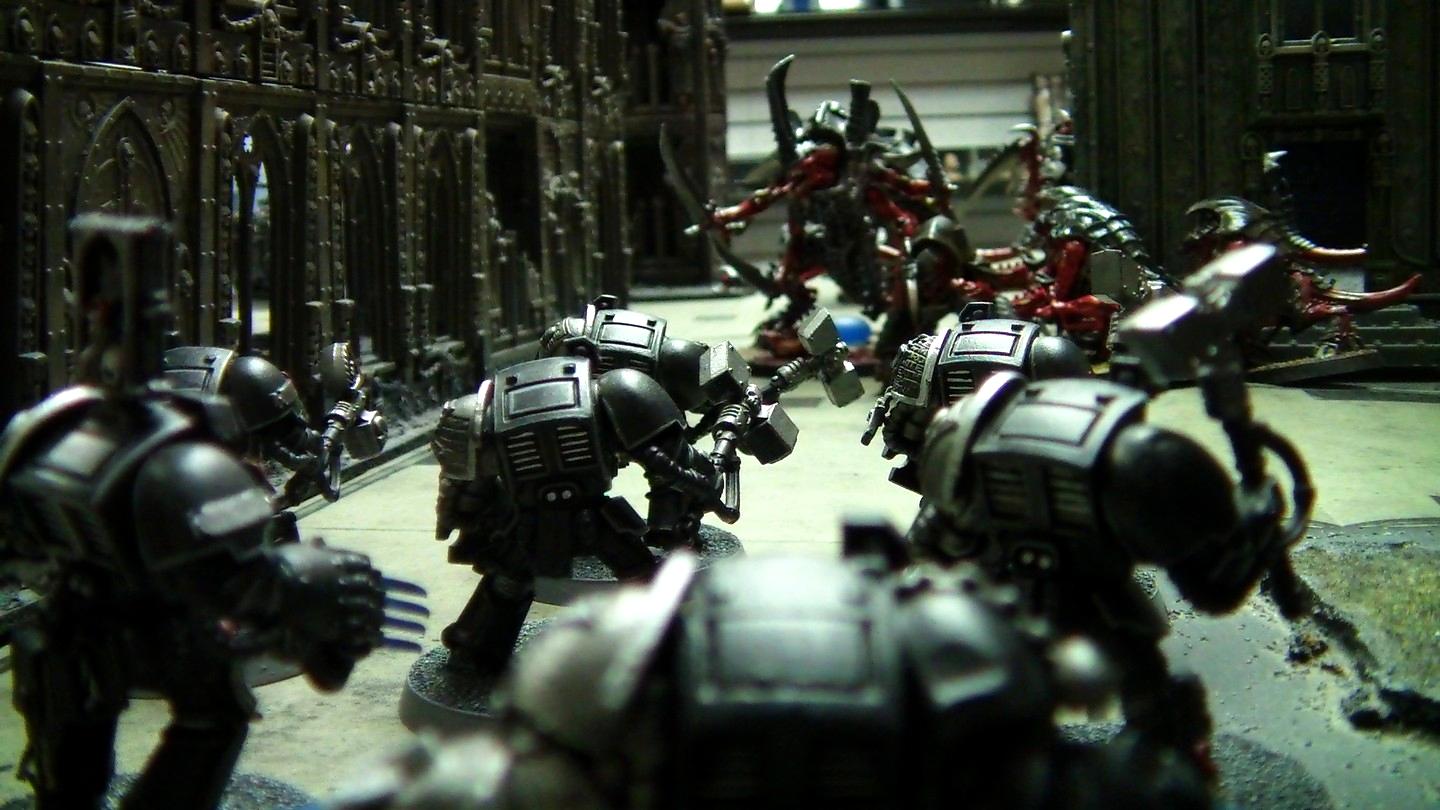
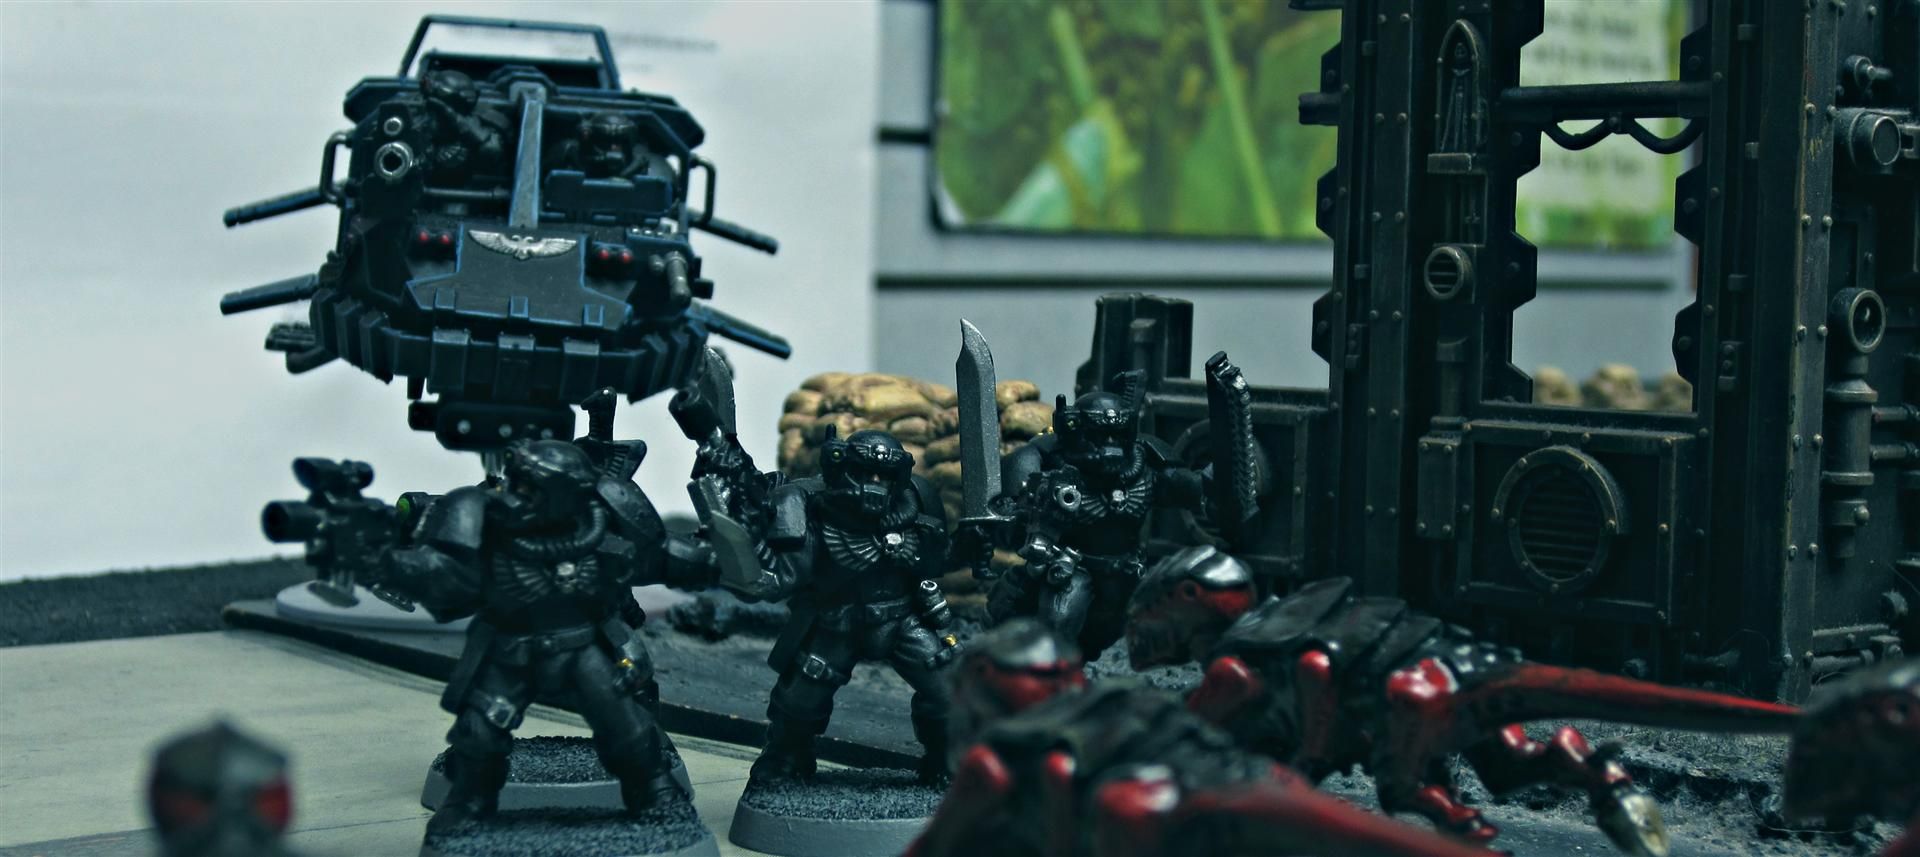
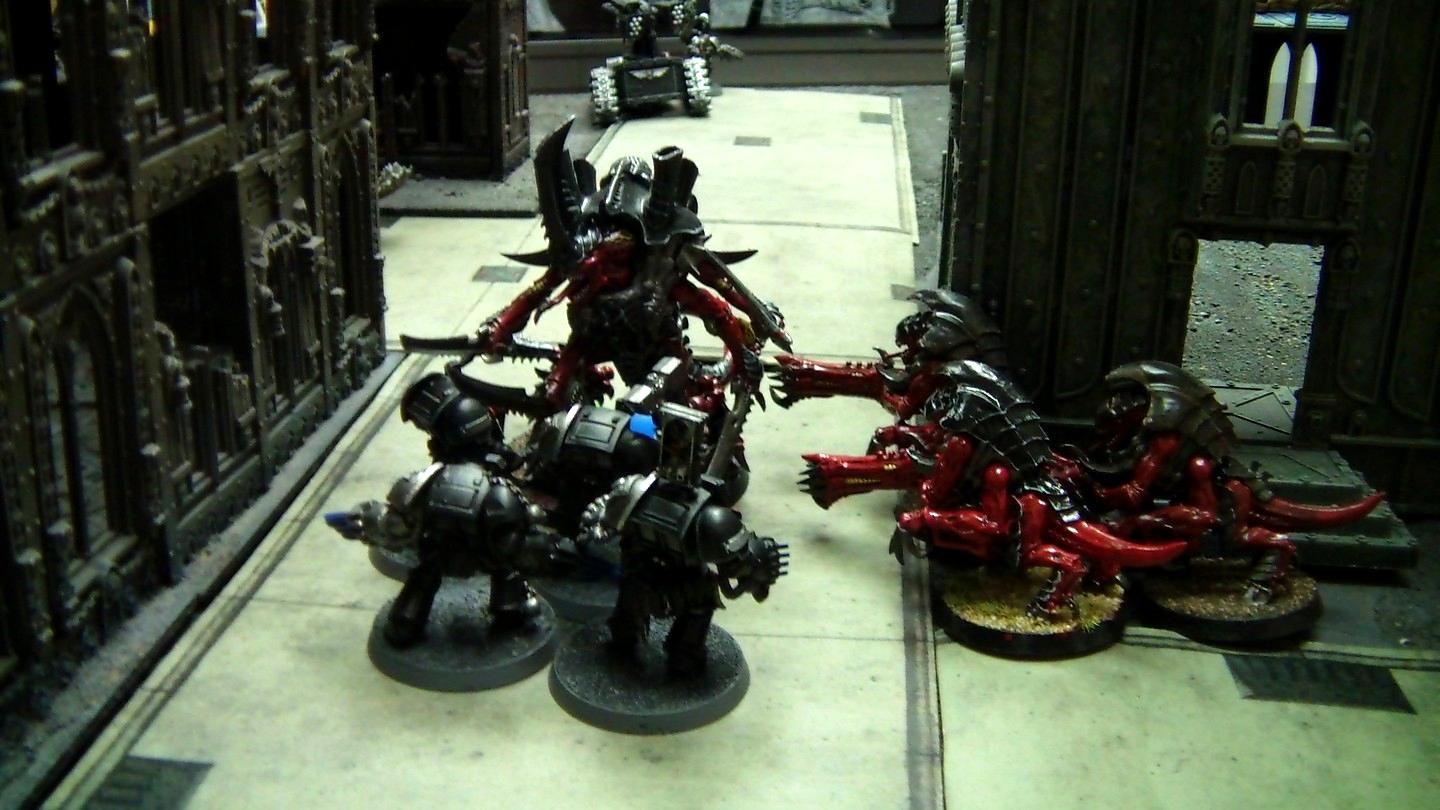
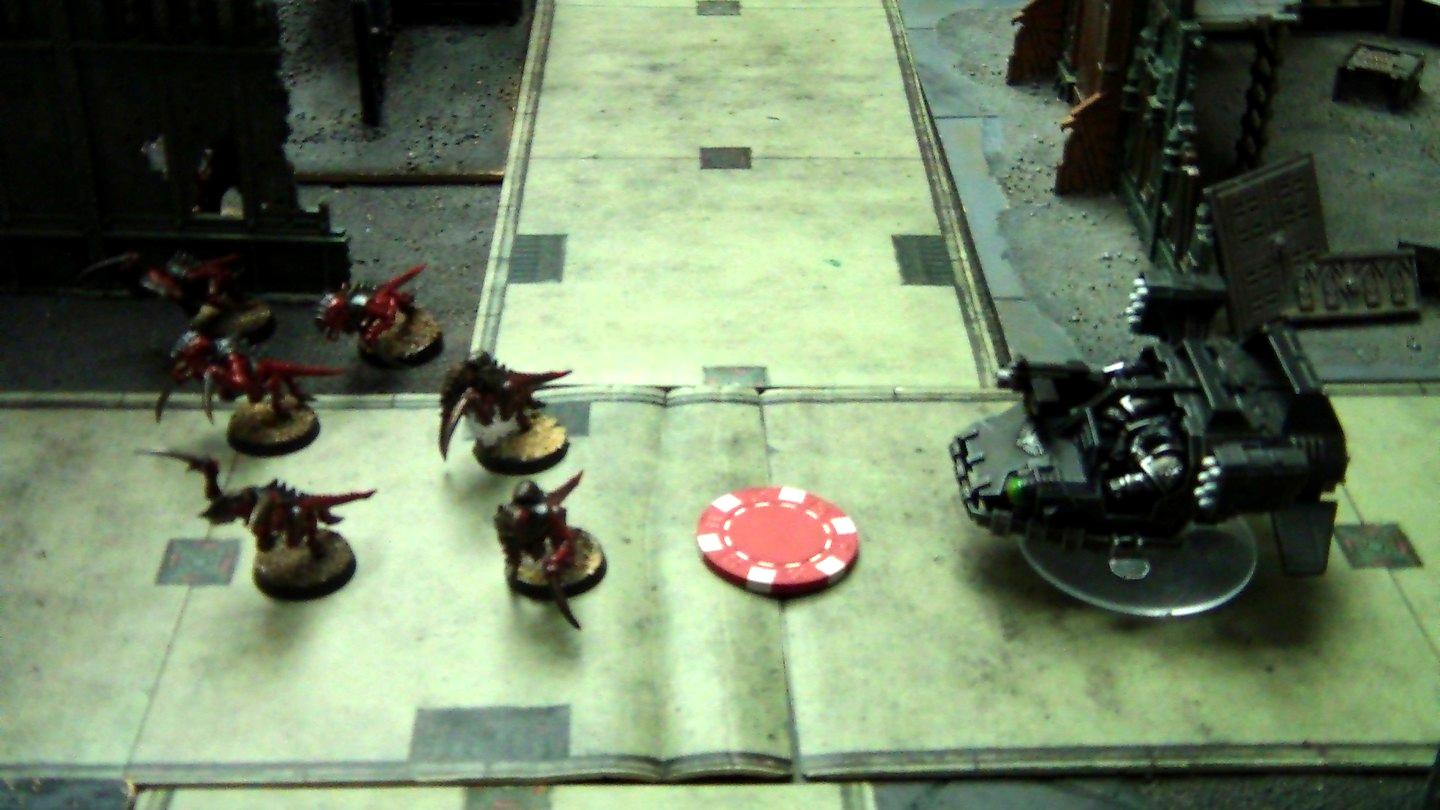
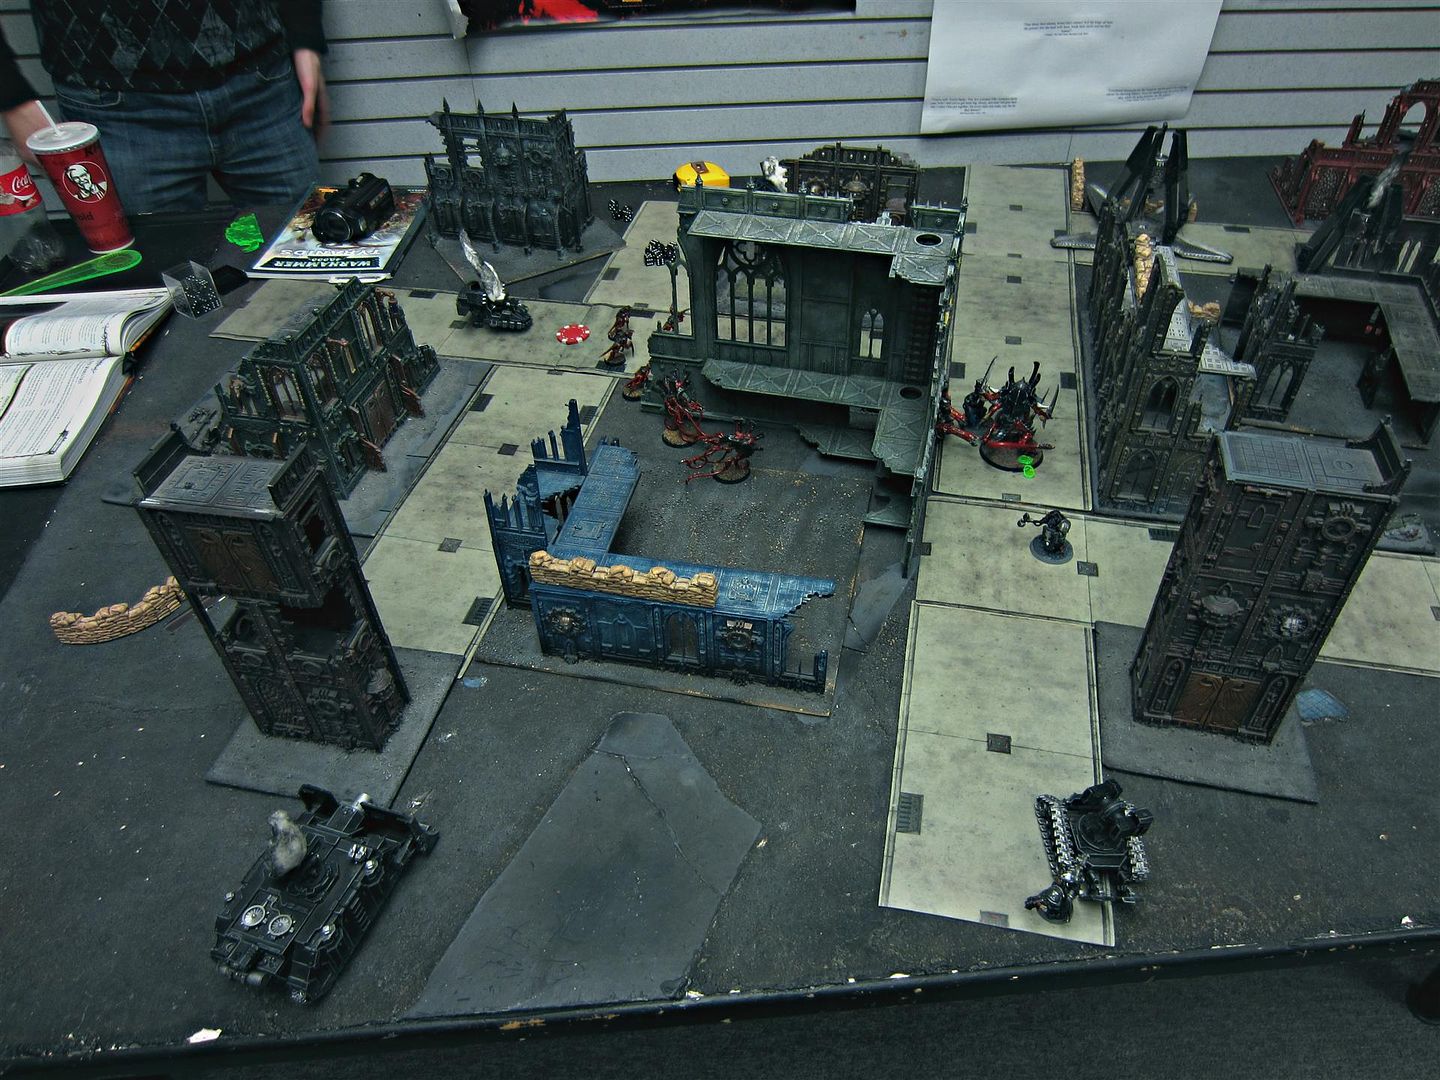
Turn 1 – Deathwatch Crablezworth's first drop pod landed on my left flank, between the Genestealers and Termagaunts. The Tactical Squad inside combat squadded, and decided to focus its efforts on the Termgaunts. As a result, Crablezworth then decided to send his Land Speeder Storm to back them up, and Telion's snipers prepared to open fire if need be. The Bikers also moved to intercept the Swarmlord and protect the Thunderfire Cannon.
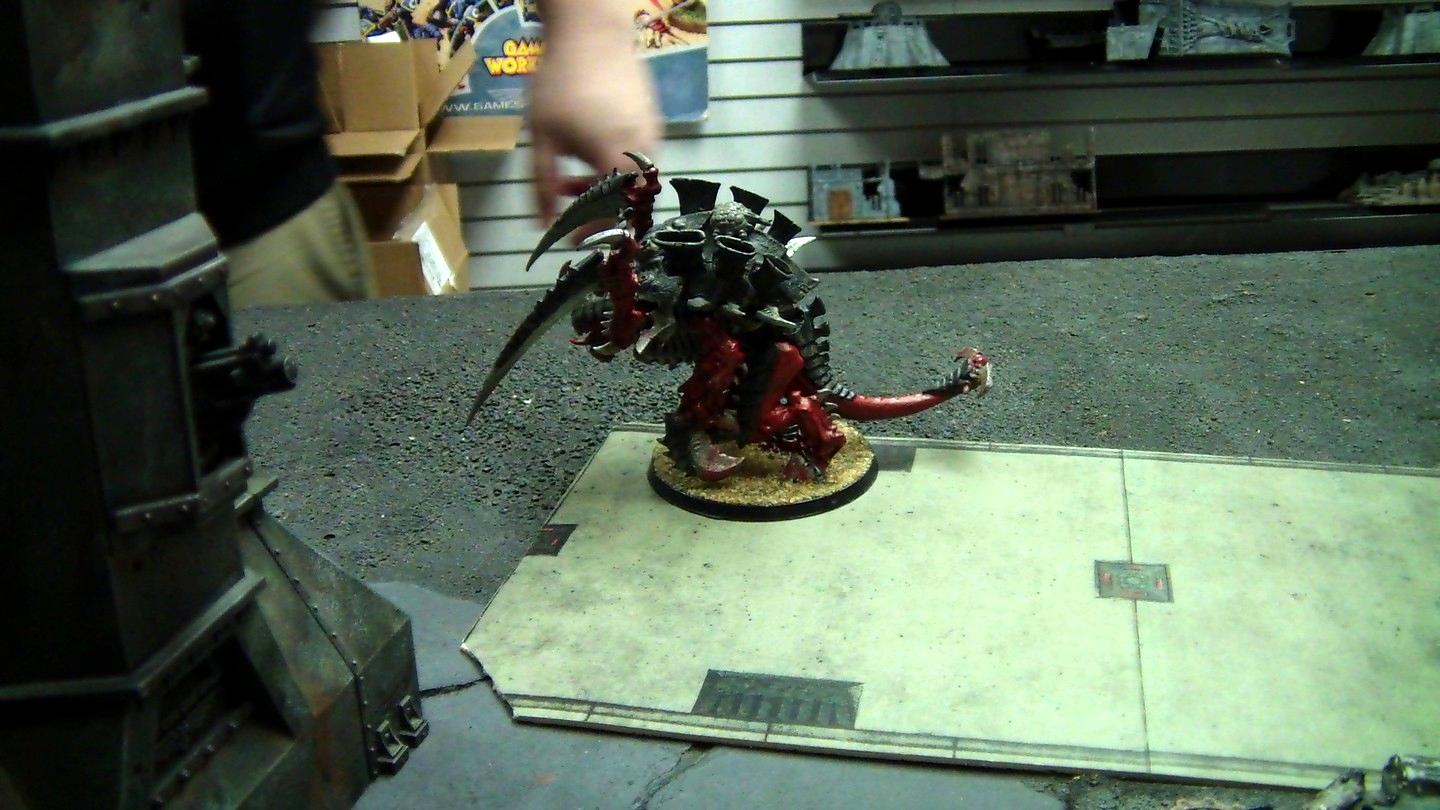
In the Shooting Phase, the Tactical Squad and Land Speeder managed to kill the Termagaunts to a man (bug?), and the last one was taken out by a lucky shot from the snipers (earning First Blood). The night fighting cover saves were more fortunate for the rest of the Nids though: despite taking fire from the Thunderfire Cannon and Bikers, only 3 Gargoyles were killed and 1 Tyrant Guard suffered a wound. In addition, a direct hit from the Vindicator and Typhoon Speeder only netted 3 Hormagaunts killed (thanks to the Venomthropes' spore cloud). One of the Carnifexes was less fortunate though, suffering 3 wounds... I was definitely going to have to manipulate the wound allocation rules to keep him alive!
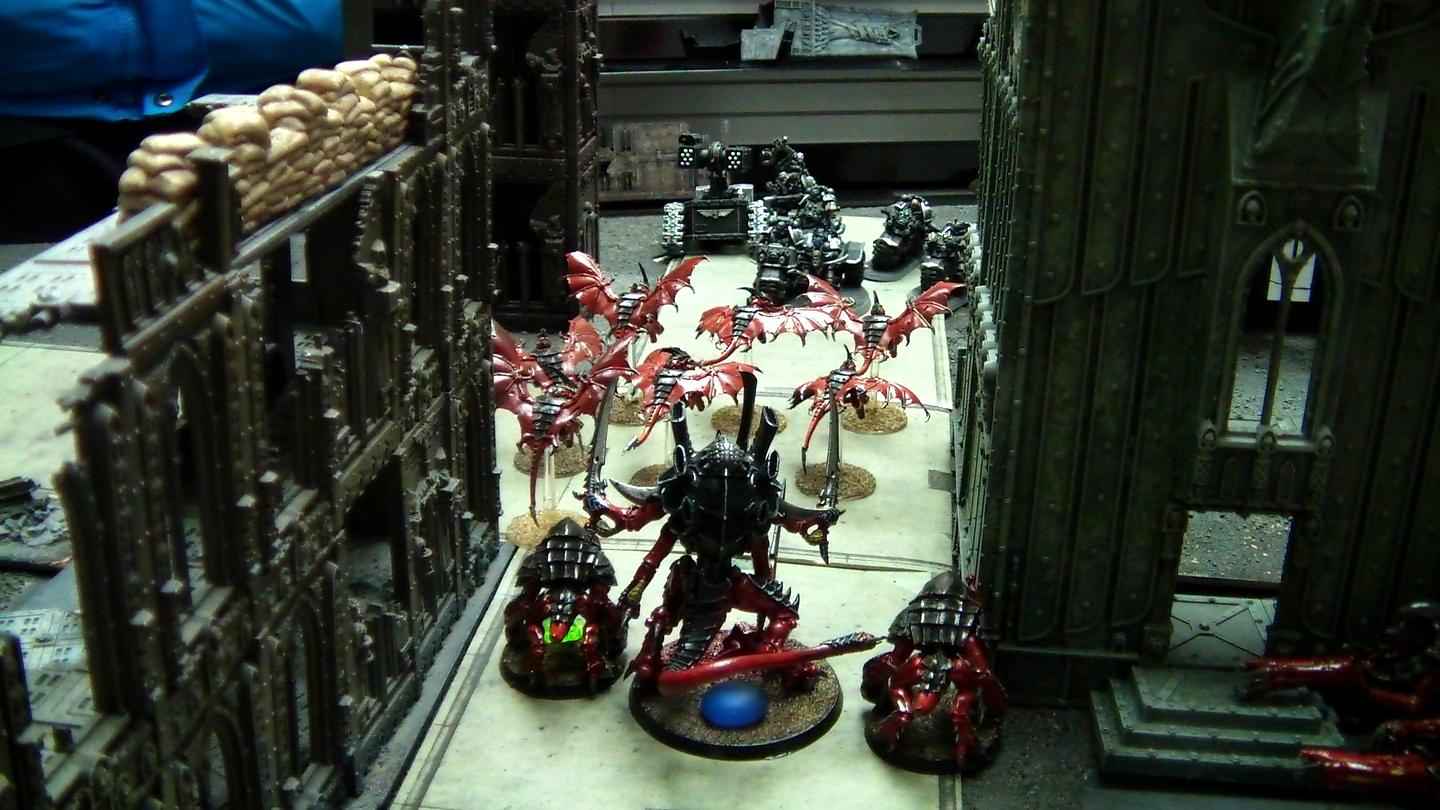
Turn 2 – Tyranids With the first pod in my deployment zone, and another on the way, I moved to destroy the Tactical Squad before any major damage was done. The Genestealers moved to attack one of the combat squads (the Broodlord should have cast Warp Speed, but I had forgotten he couldn't cast Smite and didn't remember until the Shooting Phase was underway...). The right flank also continued its advance, remaining in the Venomthropes' cover bubble. Finally, the Gargoyles moved to assault the bikers while the Swarmlord advanced behind them. It cast Enfeeble on the bikers, and Crablezworth rolled to Deny the Witch. The die rolled into the big building where the Genestealers had deployed (remember that, it's important ), and came up with a ! Damn, I was hoping to bring the Gargoyles onto even(er) footing...
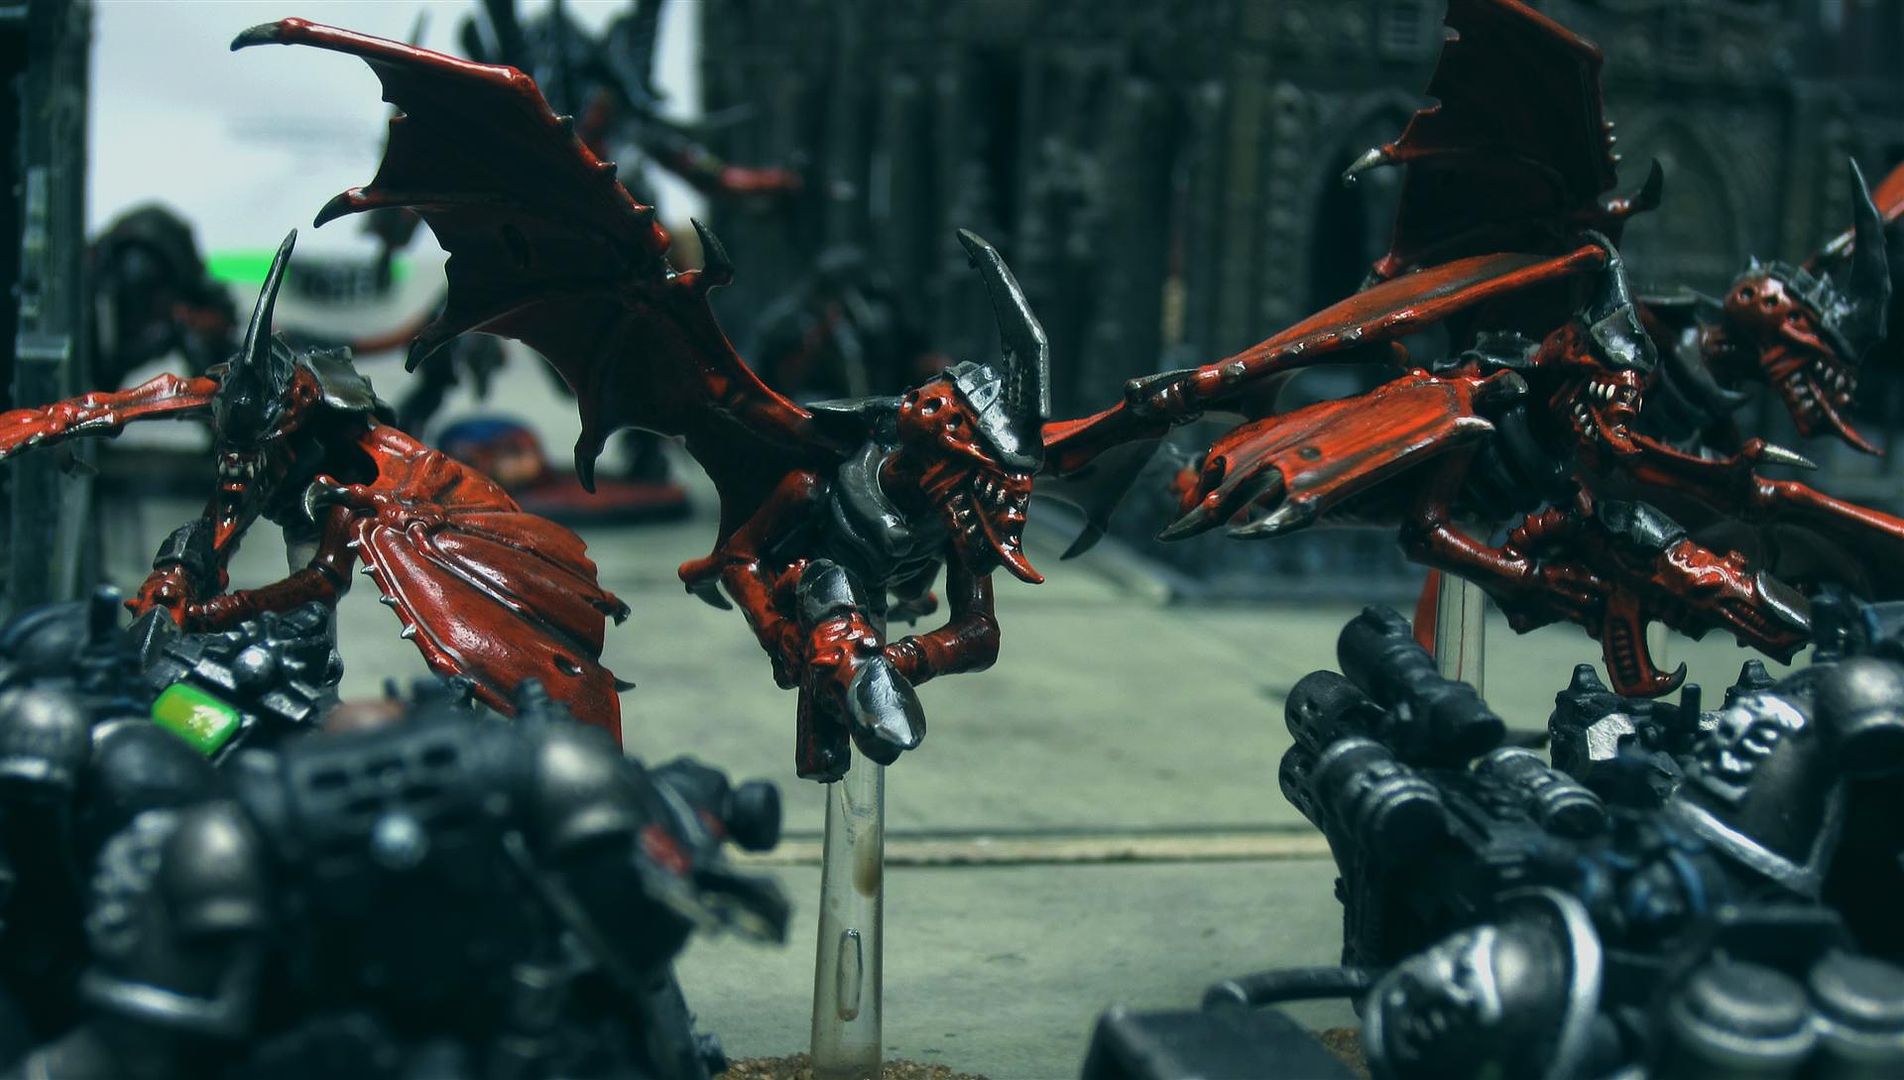
In the Shooting Phase, the Hive Guard shot the right Vindicator, knocking off a hull point. Pretty much everyone else ran. In the Assault Phase, the Genestealers multi-charged the Drop Pod and right combat squad in hopes of not wiping the squad out in 1 turn. They also were I1 since they were charging through cover, and so the Tactical Squad was able to kill 4 of them before they could strike. The Broodlord and Sergeant also challenged each other, and while the Broodlord (predictably) prevaled, he suffered a wound from the Sergeant's power sword before the Marine was torn to shreds. After the blows were struck, the rest of the Genestealers attacked, slaying 2 of the Marines and taking a Hull Point off the Drop Pod. Meanwhile, the Gargoyles charged the Bikers. Thanks to blinding venom, they were able to cause 1 wound on the Attack Bike, but 2 Gargoyles were killed in the process. Still, much better than I had expected.
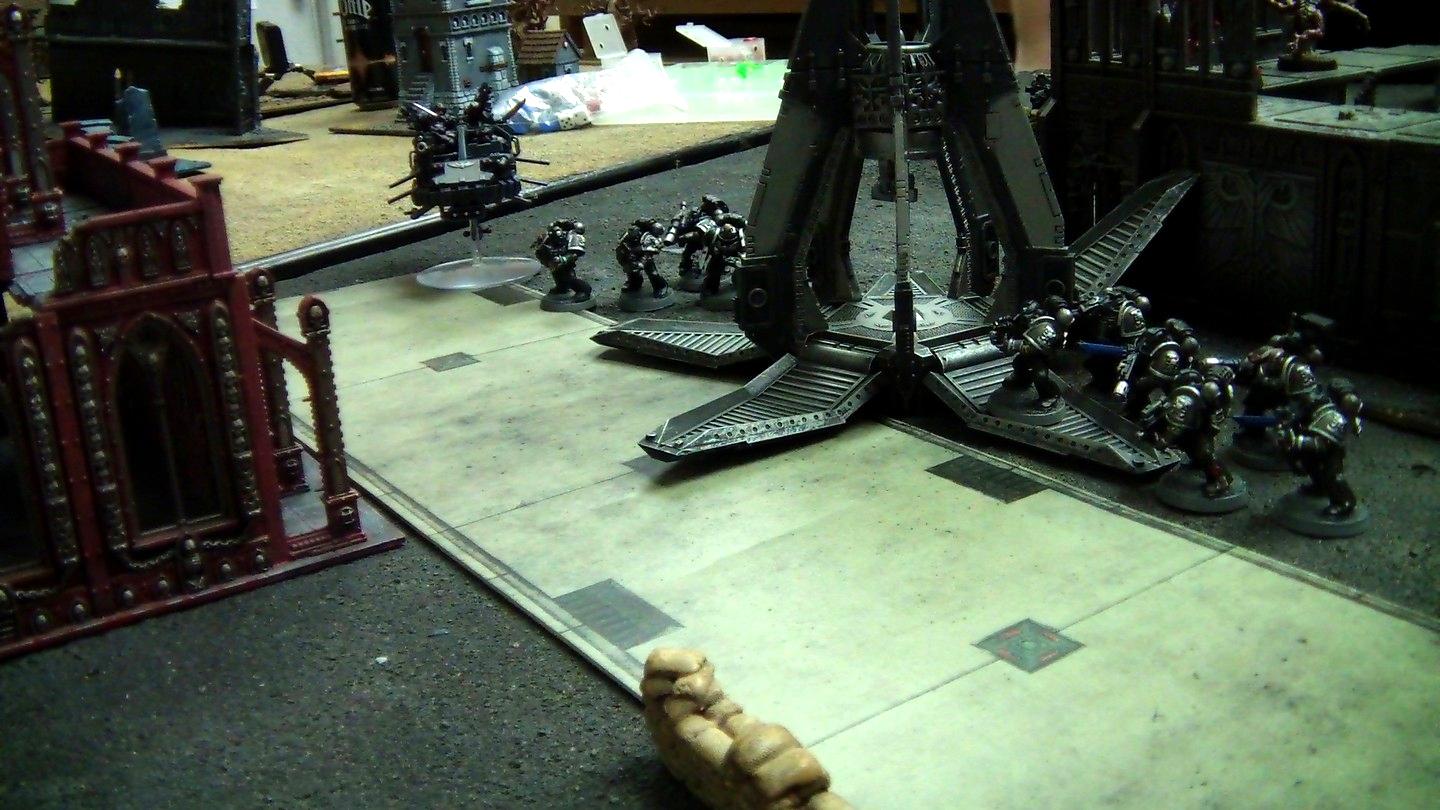
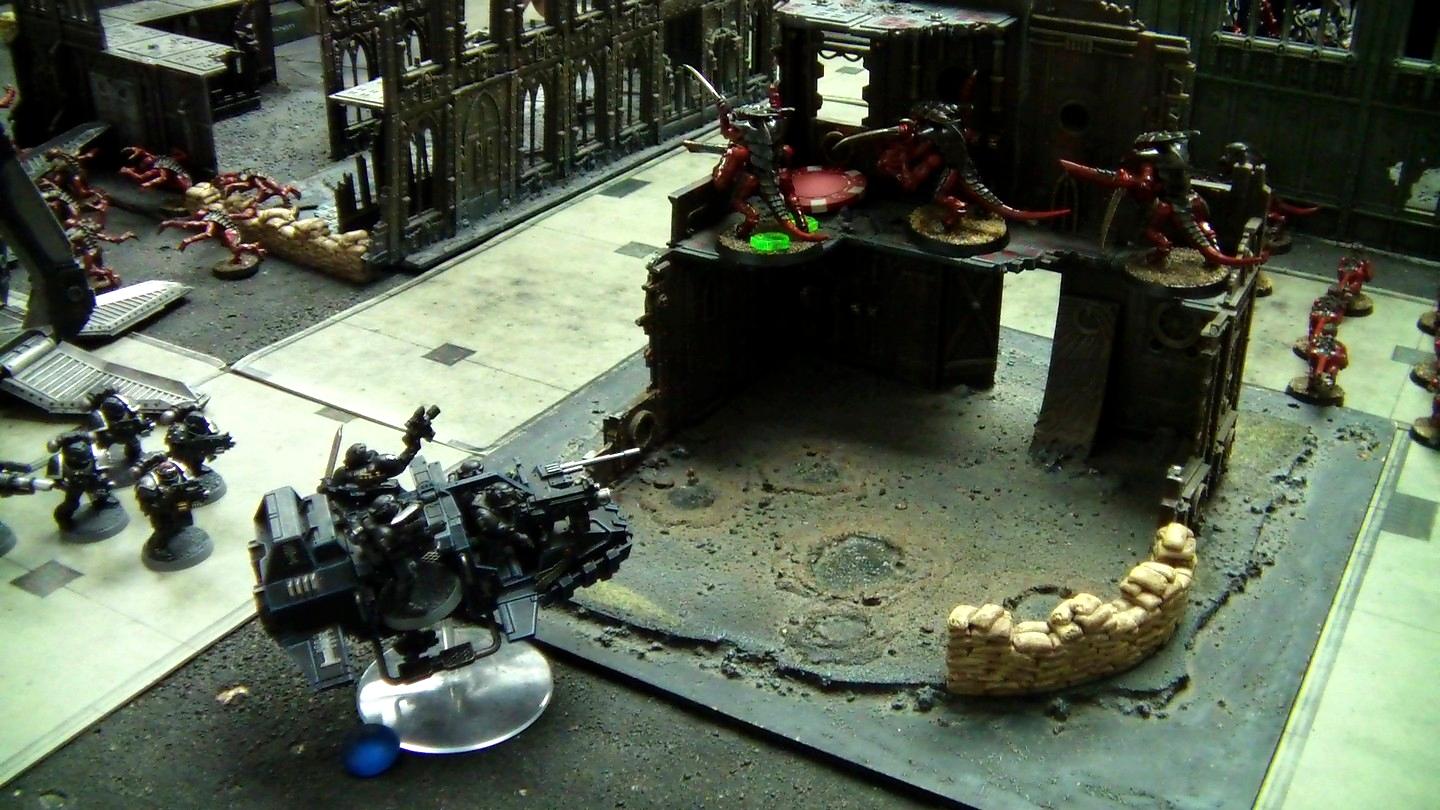
Turn 2 – Deathwatch Crablezworth's 2nd drop pod arrived this turn, landing a few inches away from the other pod due to their locator beacons. The Tactical Squad inside also combat squadded, and Baron Samedi went with the Sergeant's half. The Land Speeder Storm then moved to threaten my Tyranid Warriors' position. Finally, the other combat squad moved to assault the Genestealers and help their comrades out (and to keep me pinned down for another turn).
In the Shooting Phase, the left Vindicator took aim and fired on the Swarmlord, but failed to kill anyone. The Land Speeder Storm shot the Warriors, wounding one of them twice. The right Vindicator and Typhoon Speeder also shot at the Hormagaunts once more, but only killed 4 (those Venomthropes were paying for themselves in spades).
In the Assault Phase, the Genestealers finished off the first combat squad and killed 3 Marines from the new arrivals, but were stuck in combat. The Gargoyles also were faltering, losing 2 of their number without anything to show for it. Hopefully the Swarmlord would lend aid next turn...
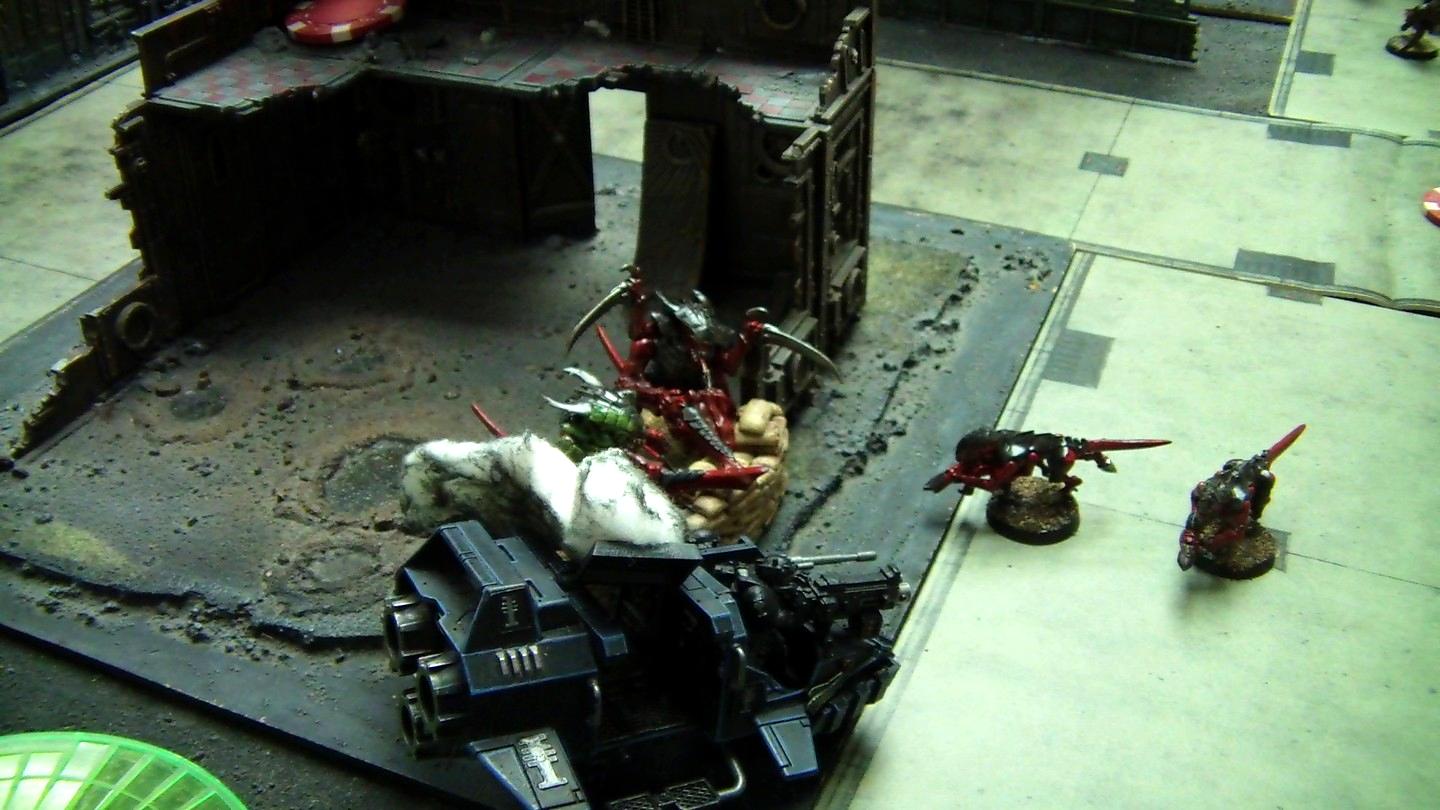
Turn 3 – Tyranids The Swarmlord cast Iron Arm, getting +2S/T. He also cast Enfeeble on the Bikers, but once again they denied it (after Crablezworth rolled the dice into the same building as before! I swear, that building is cursed)... damn it! The Carnifexes used the ruins in front of them as cover from the Vindicator and advanced towards the center of the field. Finally, the Hormagaunts barrelled straight towards the Vindicator... however, after I had done this move I realized that they couldn't even damage the thing (no Adrenal Glands)! D'oh!
In the Shooting Phase, the Hive Guard continued to suck, failing to even damage the Vindicator. The Tyranid Warriors also fired their Deathspitters at the Land Speeder, but only knocked off a hull point. In the Assault Phase, the Genestealers finished off the 2 Tactical Marines and the Drop Pod and then spread out to (hopefully) mitigate the damage that the rest of the Marines would cause next turn. Meanwhile, the Swarmlord failed to get into combat with the Bikers, despite being only a few inches away. The Bikers ended up killing a Gargoyle and then used Hit & Run to escape the combat.
All-in-all, my luck needs to improve or I'm going to be in trouble very soon...
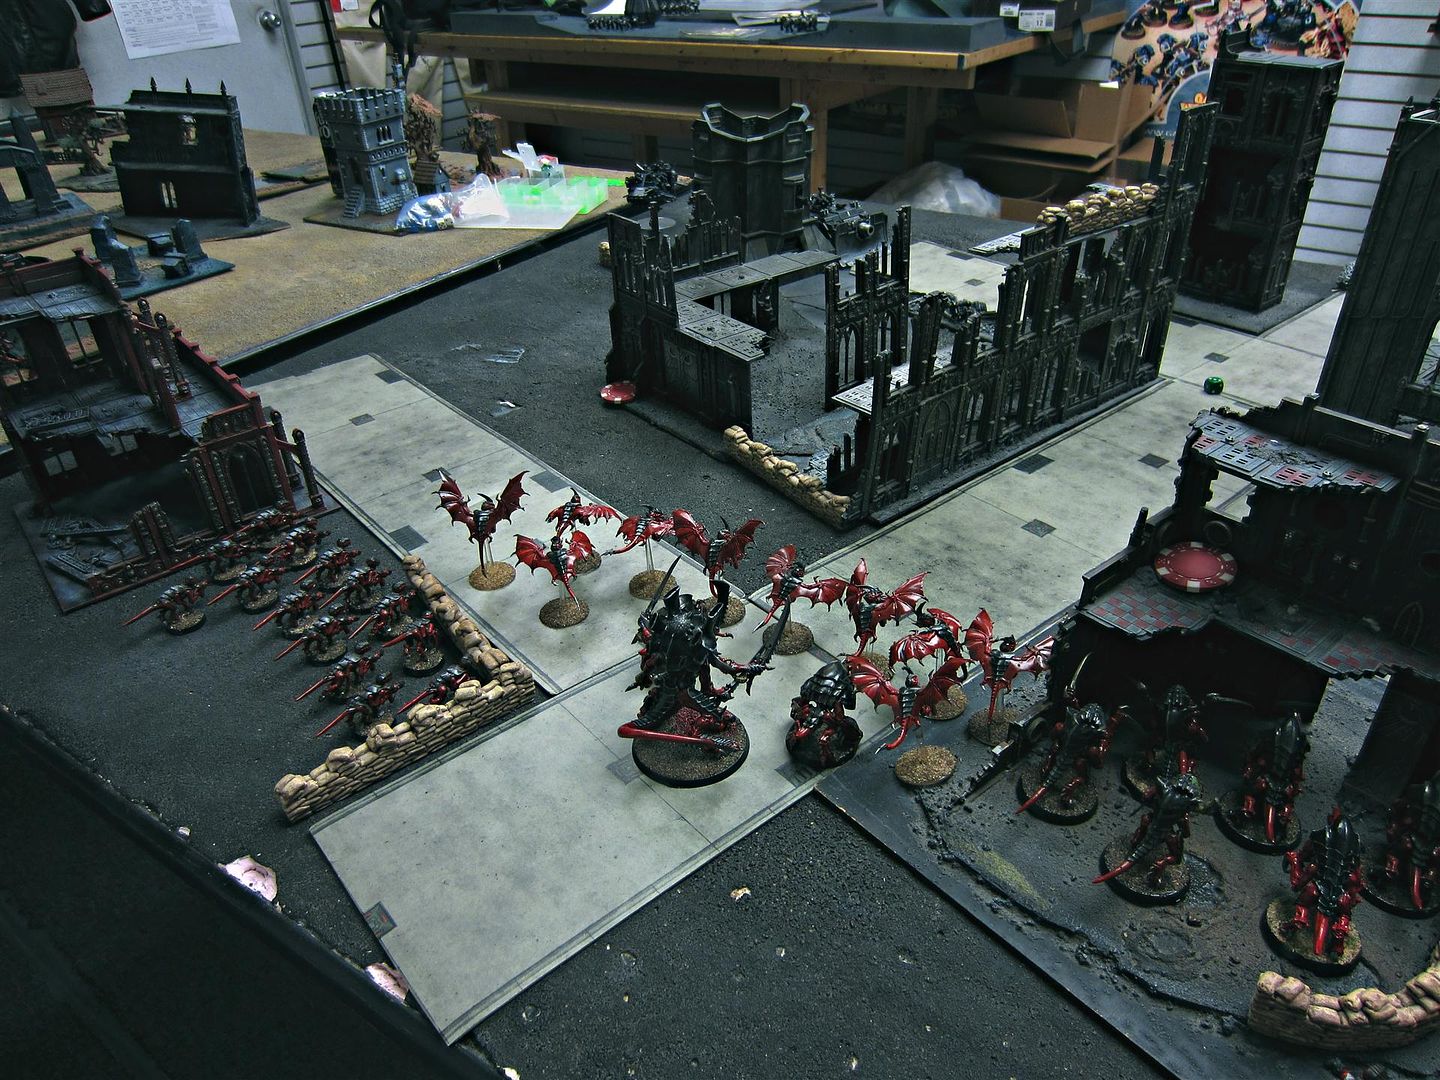
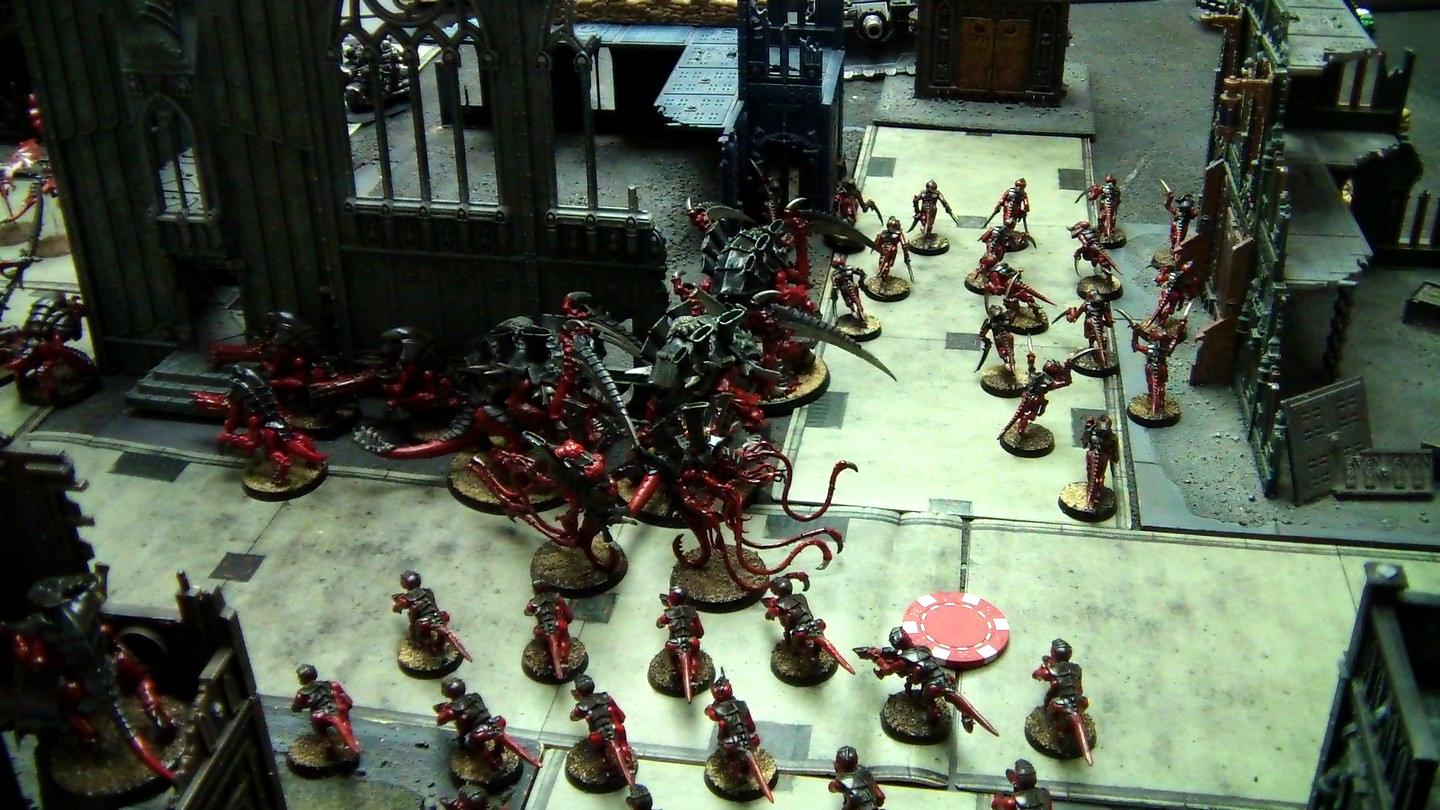
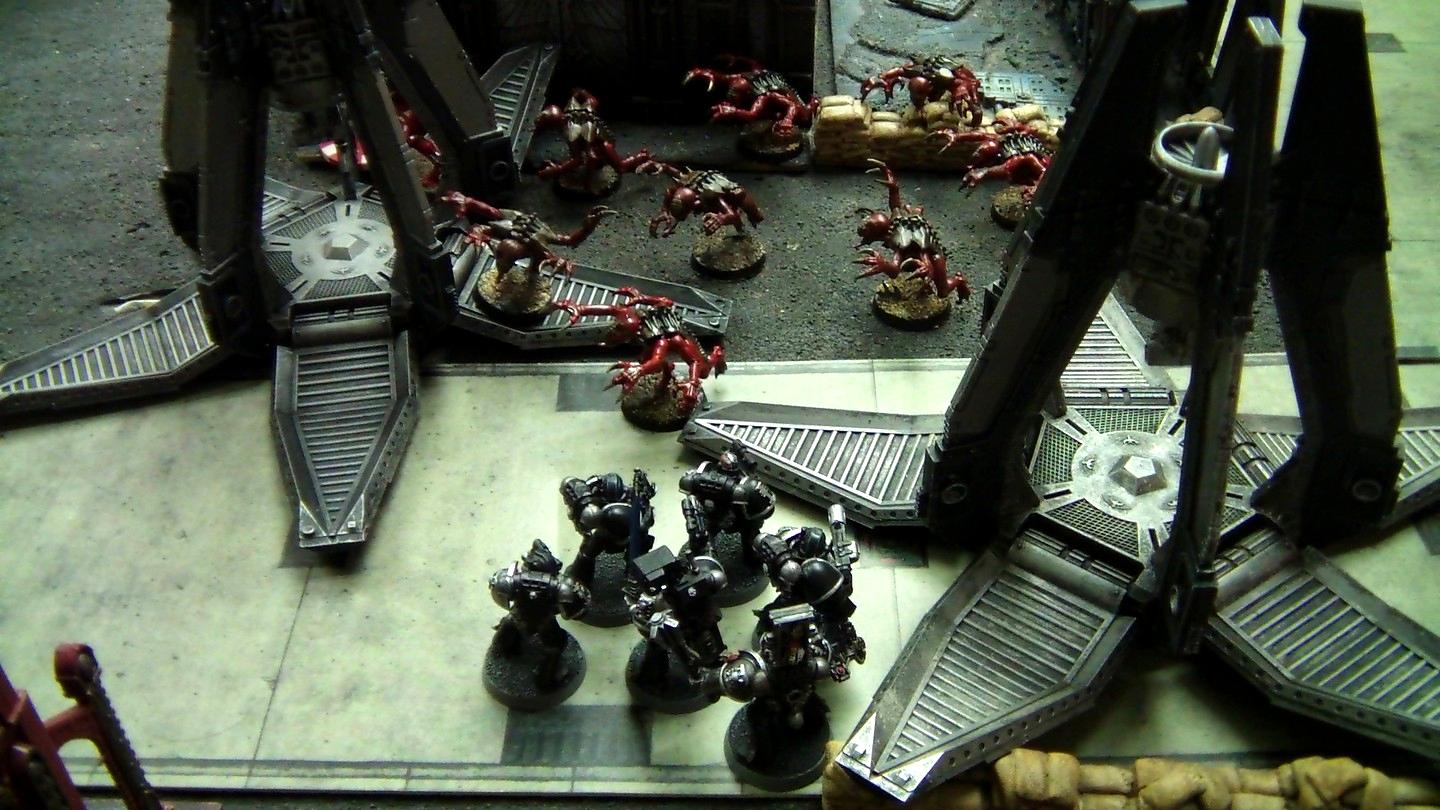
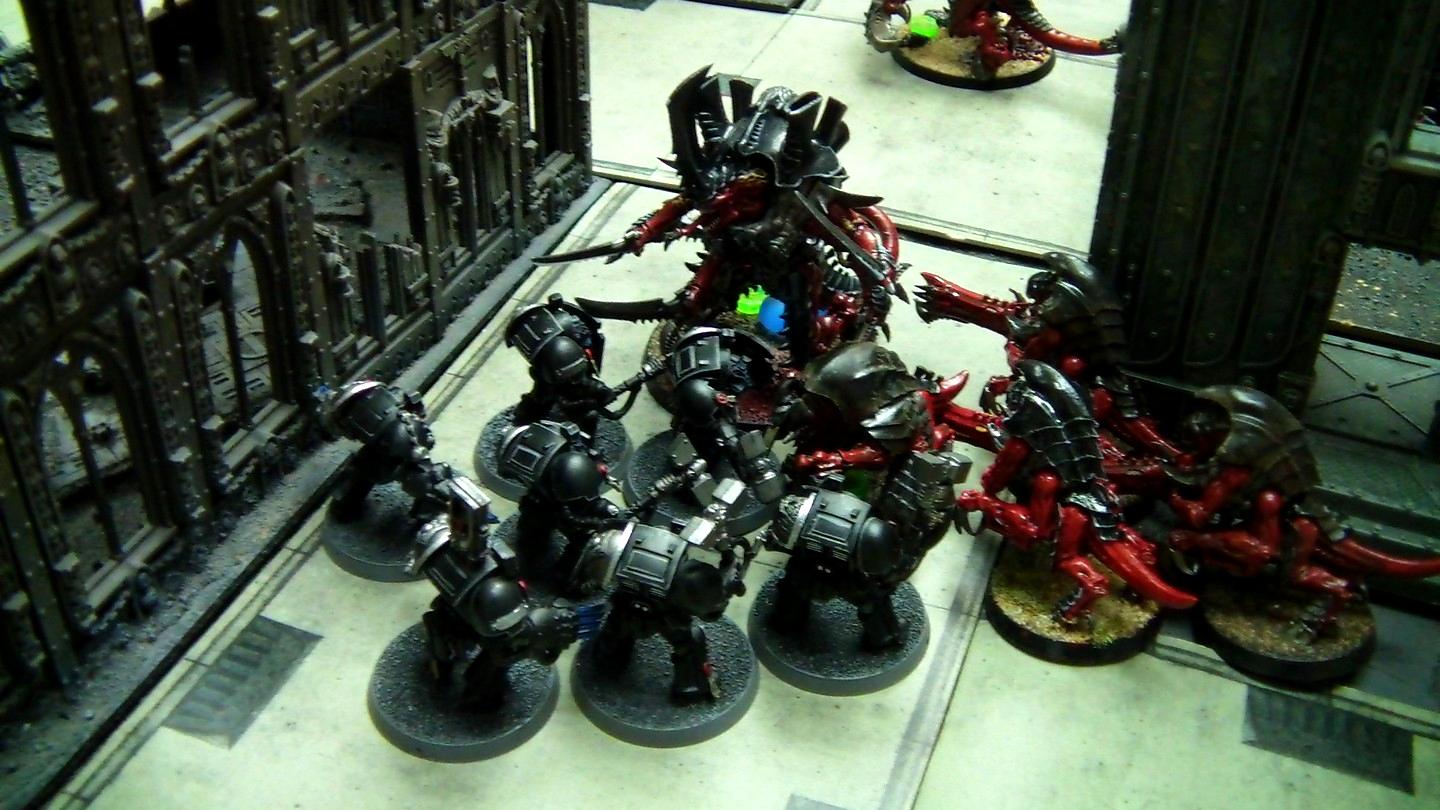
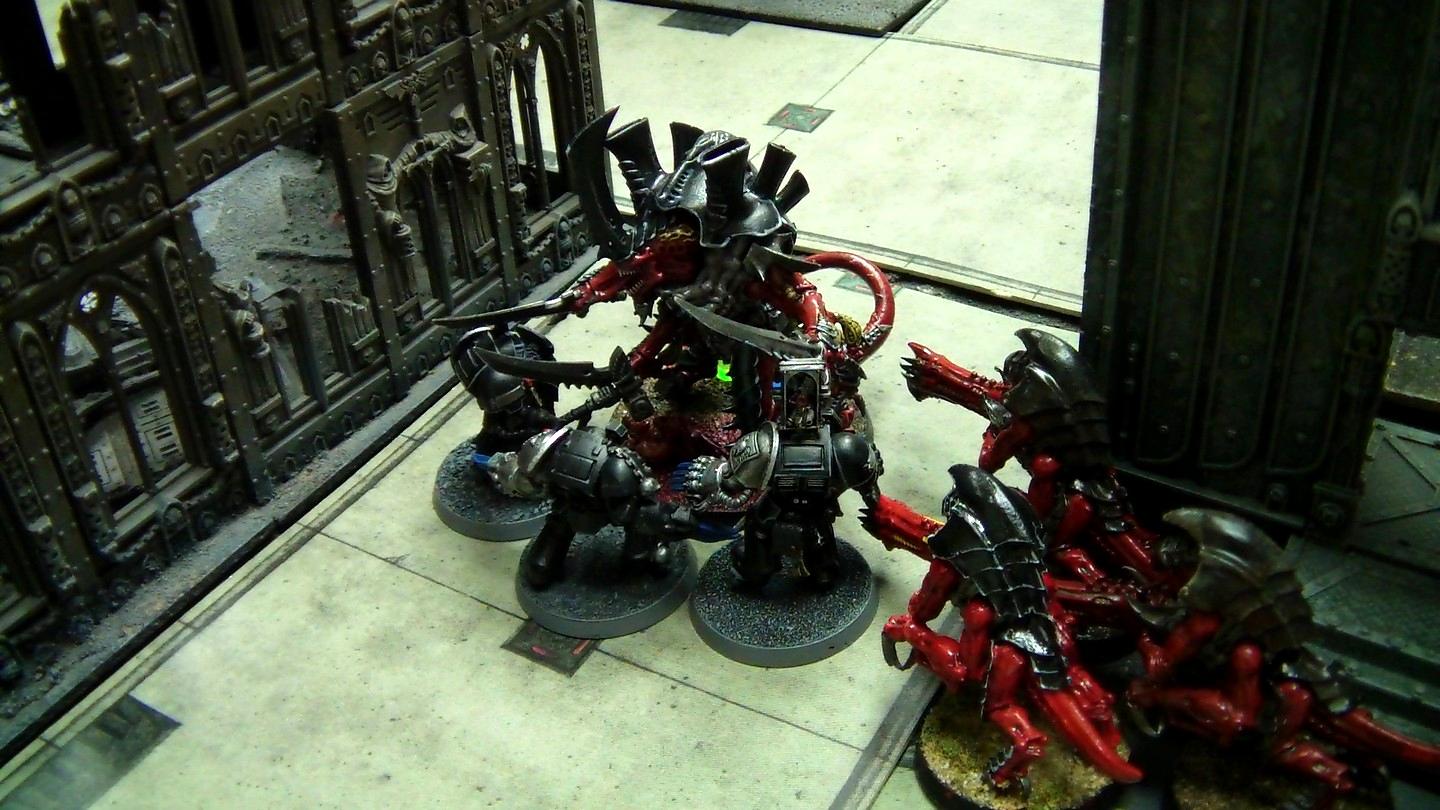
Turn 3 – Deathwatch At the beginning of the turn, Crablezworth's last reserve unit arrived, his Assault Terminators. They arrived just beside the Warriors' objective. Meanwhile, the Vindicator, Scouts and Bikers moved to open fire on the Swarmlord and his Guards. The Typhoon Speeder also moved in to attack the Termagaunts on the bottom-right objective.
In the Shooting Phase, the combined fire of the Bikers, Vindicator and Snipers (to be fair, they had to use snap shots since they moved) were only able to kill 1 Guard (thank God for Iron Arm). However, the other Vindicator, Land Speeder Storm and Typhoon Speeder ganged up on my Termagaunts, killing 12 of them! Finally, the Drop Pod, Combat Squads and Baron Samedi combined fire to kill 8 Genestealers, leaving only the wounded Broodlord. A stray Lascannon shot also managed to kill 1 of the Warriors.
Turn 4 – Tyranids Things were looking pretty grim, so I decided that my only real chance to salvage things was to turn the Swarmlord around and hopefully tie down those Assault Terminators. He cast Iron Arm once more, getting +1S/T. He also tried to cast Enfeeble on the Hammernators, but once again Crablezworth denied me when he rolled the die into the cursed building! Holy ! Seriously, I number crunched the odds of getting 3 deny rolls in a row, and it's a 0.4% chance... in other words, crazy good luck (or, as Crablezworth puts it, “alien technology” ). Anyway, the Carnifexes moved in to hopefully attack the Thunderfire Cannon or Bikers, or at least hit them with their bio-plasma. The Hormagaunts then moved to hopefully assault the Thunderfire Cannon, while the Warriors and Termagaunts went after the Land Speeder Storm. Finally, the Broodlord cast Warp Speed and then moved to charge the right-most Combat Squad.
In the Shooting Phase, the Hive Guard finally managed to take out the right Vindicator. The Carnifexes also decided not to bio-plasma the Bikers because they didn't want to risk losing the charge and/or wiping out the Bikers and then getting shot afterwards. Also, the Gaunts and Warriors fired at the Land Speeder Storm, but didn't wreck it.
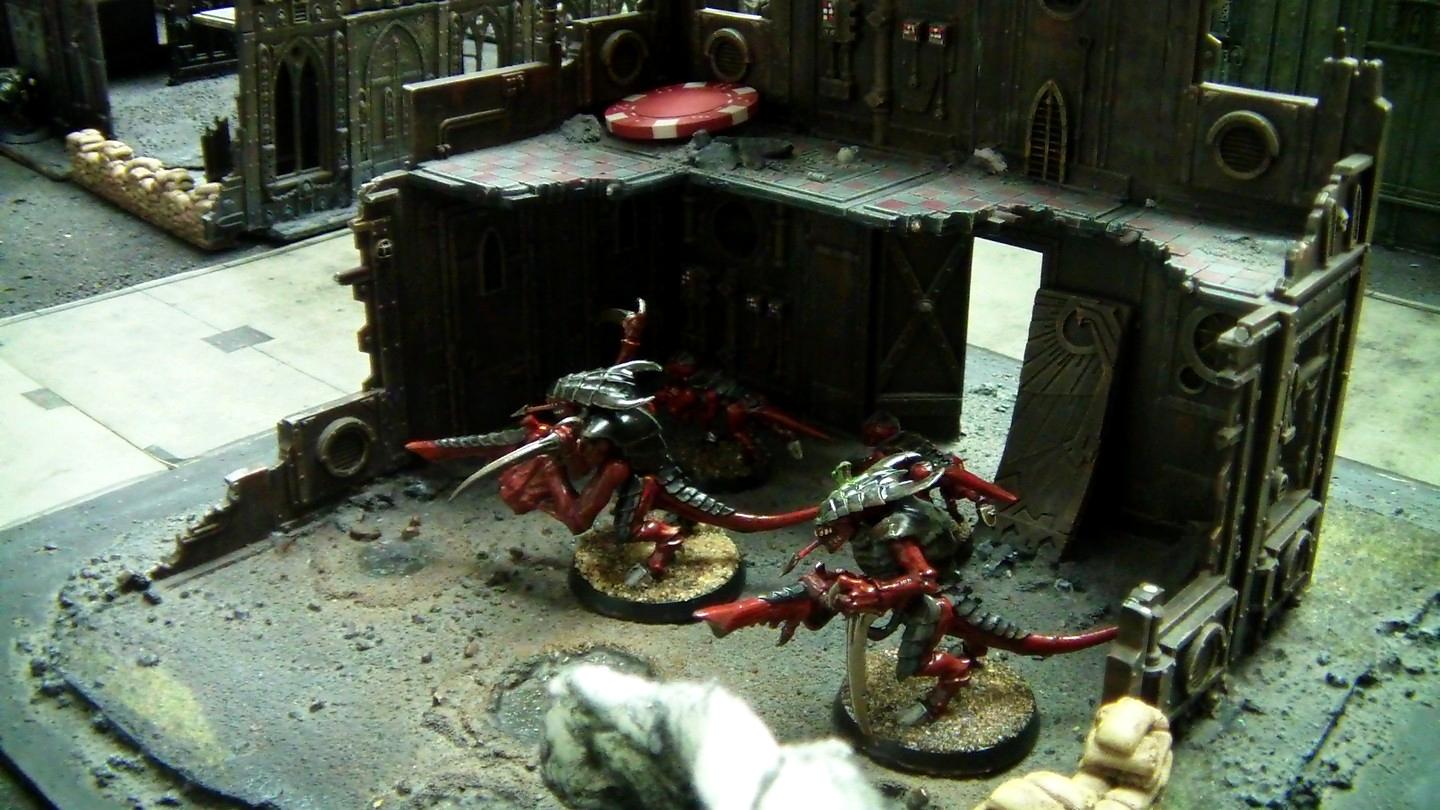
In the Assault Phase, the Swarmlord failed his charge roll on the Hammernators (it was a long shot anyway, I needed 10”). Unfortunately, so did the Hormagaunts and the Carnifexes. On the positive side, the Termagaunts and Warriors both succeeded, and wrecked the Speeder. The Broodlord also charged into combat but whiffed severely, failing to kill any of the Marines before he was cut down.
That turn didn't help any. I'm almost assuredly doomed now, but we'll see how many of them I can take down in the meantime.
Turn 4 – Deathwatch In a surprising move, Crablezworth decided to send his Hammernators after the Swarmlord instead of my Warriors. I guess he wanted to go for the glory, or at least to tie up my big beasty, instead of killing my remaining scoring units.
In the Shooting Phase, the Bikers, Vindicator and Scouts shot at my Carnifexes, but luckily I didn't lose any. The Hormagaunts were less-fortunate however, as the Thunderfire Cannon killed 7 of them and caused them to fall back 11”. This was, however, actually rather fortunate, since I needed them to hold the bottom-right objective now anyway.
In the Assault Phase, the Hammernators charged the Swarmlord, who scythed down their sergeant in a challenge. Meanwhile, the other Terminators killed the remaining Tyrant Guard.
Turn 5 – Tyranids At this point, the game was basically winding down – not only was I going to need a miracle to pull off a draw (much less a win), but I also thought the store was closing soon (I had forgotten about Christmas hours though, so it was actually probably open for another couple hours). The Swarmlord cast Iron Arm (+3S/T) and Enfeeble on the Hammernators... which, as you can probably guess, was denied. ALIEN TECHNOLOGY!!! My Gargoyles moved to try to contest the Scouts' objective in case there was another turn, while the Fexes moved to kill the Bikers. The Hormagaunts secured the bottom-right objective under cover from the Venomthropes. Finally, the Warriors and Termagaunts secured the nearest objective, hoping to weather the turn and pull out a draw.
In the Shooting Phase, the Hive Guard sucked once more, failing to shoot down the Land Speeder Typhoon (are 6 Preferred Enemy BS4 S8 shots not enough?!?). The Carnifexes also fired their bio-plasma at the Bikers (mostly because I wanted to try it out), killing almost all of them in the process! Impressive!
In the Assault Phase, the Swarmlord killed 2 more Hammernators, but took a wound in the process (I forgot he got a 4++ in CC though). The Carnifexes also (predictably) destroyed the remaining Bikers.
Ok so my last-ditch plan is formulated: if the Warriors can repel the combat squad, and hold the bottom objective, I can tie the game if it ends this turn. If the game goes another turn, then my Gargoyles can contest the top objective and my Carnifexes can wipe out the Scouts, netting me a win. It'll be desperate, but it's feasible.
Turn 5 – Deathwatch Basically the only movement that Crablezworth did was rotate his Vindicator to shoot my Gargoyles and send a combat squad to assault my Termagaunts. In the Shooting Phase, the Thunderfire Cannon and Scouts fired at my Carnifexes, killing 2 of them (they were already wounded though). The Land Speeder Typhoon also killed only a single Hormagaunt (that, my friends, is why Venomthropes rock). The Vindicator also killed my Gargoyles. Finally, in the Assault Phase, the Combat Squad destroyed my Termagaunts and consolidated to contest my objective. The Swarmlord also killed another Hammernator without taking any damage.
I needed the game to go for another turn if I wanted to have a chance of pulling out a tie now. We rolled and...
AFTERTHOUGHTS Damn, my luck was very harsh in this game (and, inversely, Crablezworth's was astronomically good). Crablezworth began rolling his single dice into that same building throughout the game and of the dozen-or-so times he did it, he only rolled 1 or 2 results that weren't a 6. Honestly, there's only one reasonable answer for that now:
In all seriousness though, I didn't really deserve to win anyway in my opinion. I played rather sloppily throughout. For example:
-I didn't keep objectives in mind until Turn 4
-I forgot about the Drop Pods and Termies until right before they arrived
-Forgot that Hormagaunts could not glance the Vindicator
I also should have split the Carnifexes into 3 different broods. I originally had 2 Fex broods in the 2500pt list, but when we changed it to 2000pts I didn't think to split them up. That would have helped a lot I imagine. Also on the list-building level, it would have been nice if I had a couple Tervigon models, since my scoring units are all very fragile currently. I also handicap myself somewhat because I don't like to use the Doom... he's just way too cheesy and not fun to play against.
Oh well, it was a fun game in any case. Looking forward to playing more in 2013!
Nice report, I love the photos and your nids are painted really good!
Also in the future don't forget the swarmlord's alien cunning and the ability to grant FURIOUS CHARGE or PREFERRED ENEMY to a single friendly unit in the shooting phase within 18". He could have given the hormagaunts furious charge, which they could then have glanced the vindicator to death (3 attacks each, hitting on 3's, rerolling 1's, glancing on 6's, yadda yadda yadda). Preferred enemy is also useful on shooting units too - I suggest 16 devourer termagants in a spore pod for a lovely 200 points.
Overall it looked like a great game, congrats to your opponent for the win and better luck next time!
Been out of the game for awhile, trying to find time to get back into it.
Brilliant report between two wonderfully painted armies! This caught my eye, though:
Meanwhile, the Swarmlord failed to get into combat with the Bikers, despite being only a few inches away. The Bikers ended up killing a Gargoyle and then used Hit & Run to escape the combat.
???? As far as I recall, regular Space Marine Bikes don't have Hit and Run. Not unless they're led by Khan, anyway.
Cpt Stubbs wrote:Great report. Your bugs look amazing!!
Thank you.
tetrisphreak wrote:Nice report, I love the photos and your nids are painted really good!
Also in the future don't forget the swarmlord's alien cunning and the ability to grant FURIOUS CHARGE or PREFERRED ENEMY to a single friendly unit in the shooting phase within 18". He could have given the hormagaunts furious charge, which they could then have glanced the vindicator to death (3 attacks each, hitting on 3's, rerolling 1's, glancing on 6's, yadda yadda yadda). Preferred enemy is also useful on shooting units too - I suggest 16 devourer termagants in a spore pod for a lovely 200 points.
Overall it looked like a great game, congrats to your opponent for the win and better luck next time!
Yeah, I usually forget about Alien Cunning, but in this game I had been using it to give the Hive Guard Preferred Enemy (some good that did them). In retrospect though, giving Furious Charge to the Hormagaunts would likely have been more effective to destroy the Vindicator (I did the math and I should have had 5 glancing hits).
ImotekhTheStormlord wrote:Very nice report and paint jobs
Lord of Nonsensical Crap wrote:Brilliant report between two wonderfully painted armies! This caught my eye, though:
Meanwhile, the Swarmlord failed to get into combat with the Bikers, despite being only a few inches away. The Bikers ended up killing a Gargoyle and then used Hit & Run to escape the combat.
???? As far as I recall, regular Space Marine Bikes don't have Hit and Run. Not unless they're led by Khan, anyway.
Hmm, you're right. Well it was a minor rules quibble and it wouldn't have made a huge difference honestly.
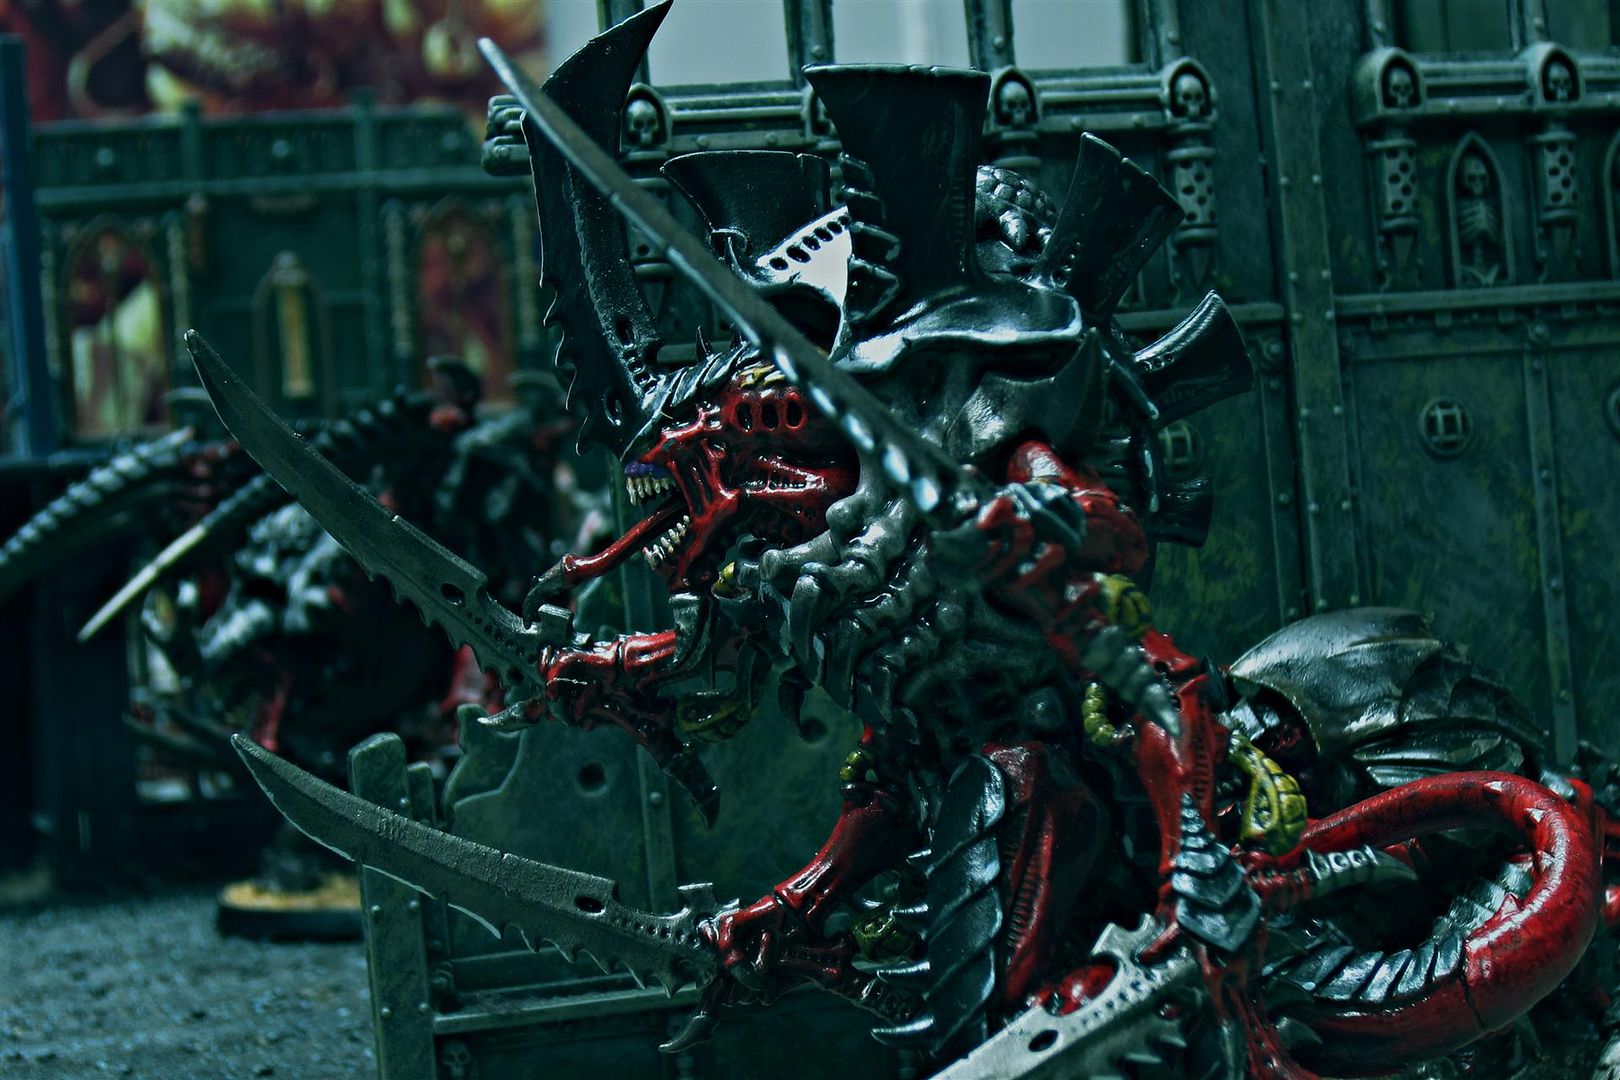
Eldercaveman wrote:I am so jealous of that Swarmlord model, awesome looking battle, and great report once again.
Thanks again! The pictures really make it look better than it is haha
Very nice batrep. The combination of the pics and vassal board made it very easy to follow the action. The turn write-ups were also concise and descriptive without being full of typos or useless fluff. Great job and I hope to read more like this.
"Sternguard though, those guys are all about kicking ass. They'd chew bubble gum as well, but bubble gum is heretical. Only tau chew gum." - MajorStoffer
"Everytime I see someone write a message in tactics saying they need help because they keep loosing games, I want to drive my face through my own keyboard." - Jimsolo
Really excellent report mate, the terrain looks great but the models in particular look spectacular. That's the kind of game that gets new blood interested in the hobby IMO
Mr. DK wrote:Wow that was an awesome report..felt like a short movie
MarsNZ wrote:Really excellent report mate, the terrain looks great but the models in particular look spectacular. That's the kind of game that gets new blood interested in the hobby IMO
Just a small note, even if the Broodlord rolls a witchfire power that he can't use, he can't re-roll it, per the Nid FAQ. I know you didn't re-roll it, just letting you know for future games.
WH40K Death Guard 5100 pts.
Daemons 3000 pts.
DT:70+S++G+M-B-I--Pw40K90-D++A++/eWD?R++T(D)DM+
28 successful trades in the Dakka Swap Shop! Check out my latest auction here!
2nd edition: Blood Angels
3rd edition: Imperial Guard
4th edition: Iron Warriors
5th edition: Death Guard
6th & 7th edition: taking a break - power creeep (lethality of game) became too hot to handle
Great report, really clear and entertaining. Good to see really well done and fully painted armies too.
I think stealth is given to a unit by a joining hero, so Telion gives the unit of snipers camp cloaks for free, though this may have been faq'ed in the last batch I'm not up to date. If the bikers were beaten they may have been able to Combat Tactics out of that fight instead of HnR.
My combined Macragge PDF Imperial Guard and Ultramarine 3rd Co. Blog Clicky
Xenocidal Maniac wrote:Wow, this is really cool. Thanks for sharing. Wish the pictures were just a little bit brighter, but really fun to look at nonetheless!
At some point I'll have to get a better camera and maybe a little light for bat rep pictures to fix that.
797th Red Tigers wrote:Those Deathwatch units are excellently kitbashed, blows any of my creations out of the water.
sumi808 wrote:Really like your style of battle report, keep them coming
Thanks, will do! Haven't gotten a chance to battle nearly as much lately, but I'm trying to line up something soon.
RandyMcStab wrote:Great report, really clear and entertaining. Good to see really well done and fully painted armies too.
I think stealth is given to a unit by a joining hero, so Telion gives the unit of snipers camp cloaks for free, though this may have been faq'ed in the last batch I'm not up to date. If the bikers were beaten they may have been able to Combat Tactics out of that fight instead of HnR.
I think stealth and camo cloaks stack if I'm not mistaken.
This message was edited 1 time. Last update was at 2013/01/29 12:55:39
No one Provokes me with Impunity Atlas' Blood Oath - In progress, 22W 14L 4T (2012) - 14W 6L 0T (2013)
Craftworld Mymeara 440 points - in progress (....sort of a given ) - 4W 2L 0T (2013)
DQ:90S++G+M-B--IPw40k13++D++++A+/fWD-R++T(T)DM+ Where beautiful and brilliant people go to hang out - Lord Sanguinius' fb page
RandyMcStab wrote: Stealth and Shrouded stack I don't think Stealth and Stealth do. However I may be wrong!
Hmm no you're right. I thought Camo Cloaks were just "+1 to cover" and then were stackable, but I just checked and since they both confer Stealth then they do not. My mistake.


 Turned out very cool though...

 ), and came up with a
  ! Damn, I was hoping to bring the Gargoyles onto even(er) footing...


 The Bikers ended up killing a Gargoyle and then used Hit & Run to escape the combat.


 ! Seriously, I number crunched the odds of getting 3 deny rolls in a row, and it's a 0.4% chance... in other words, crazy good luck (or, as Crablezworth puts it, “alien technology”


 Impressive!


 8000
8000
 10,000
 5000
5000 


 Night Lords P&M Blog:
  Salamanders P&M Blog:


 5000
5000 

 Daemons 3000 pts.
 Imperial Guard (and friends) fighting for the Greater Good.
 2500 points
  1850 points

 No one Provokes me with Impunity
 440 points - in progress (....sort of a given