Switch Theme:

Boarding the Desolation: A Space Hulk Project Blog  [RSS] Share on facebook Share on Twitter Submit to Reddit
»
Author Message
Advert


Forum adverts like this one are shown to any user who is not logged in. Join us by filling out a tiny 3 field form and you will get your own, free, dakka user account which gives a good range of benefits to you:
  • No adverts like this in the forums anymore.
  • Times and dates in your local timezone.
  • Full tracking of what you have read so you can skip to your first unread post, easily see what has changed since you last logged in, and easily see what is new at a glance.
  • Email notifications for threads you want to watch closely.
  • Being a part of the oldest wargaming community on the net.
If you are already a member then feel free to login now.


Made in us
Mauleed


So after several months of working on my new house and a lot of Necromunda, I took a trip to my (mostly) FLGS, and look what I found!

That's right! Perfect and sitting there and begging me to pick it up and take it home. According to the employee, they had been debating whether or not to hike up the price or send it off to the fires of Ebay for more money, but in the end, they decided to keep this copy in their local community and keep it at the $99 price. YAY!

When Space Hulk came out all those months ago, I wasn't in a place to spend the money, but now….a different story. And, as it turns out, the perfect little diversion to my usual Necromunda and =I=munda madness.

Opening up the box and playing it a few times, I became very excited to start painting and thought to myself, 'there aren't too many Space Hulk Blogs on Dakka yet. Let's have one more!' So here we go!

This Blog is going to focus on Space Hulk ONLY and I think I'm going to keep it restricted to only the contents of the game and how I go about painting them and maybe have a battle report or two. (Of course, I may have to abandon the battle report idea though, as I have played about half a dozen games so far as Marines without A SINGLE victory.)

Anyway, lets get started!


Automatically Appended Next Post:
May 18th: Tools and Tactics

Digging into the models of the Space Hulk set, I decided on a few things right from the start.

First. I wanted to keep the models mostly intact and avoid any of my usual desire to convert models or make up paint schemes. Blood Angels were my first army way back in second edition and I have always had a soft spot for the army (probably spawned way back in the day when I read the first 2nd ed. 40K battle report that pitted Jervis against Andy and gave birth to Captain Tycho). That said, I wanted to leave the Blood Angels as they were and just see if I can paint red armour any better than I used to.

Second. I wanted to make sure the Genestealers would be usable for my Necromunda collection and so they need a paint scheme that will fit not only the traditional look of Space Hulk, but also my Underhive.

And Finally. With the quality of the plastic models, I decided this would be a good project to try several tricks and new techniques I have long wanted to try. While I won't be trying to raise the bar with conversions or color choices, I am going to do everything I can to make this project a learning experience for me and one that will truly test and push my painting skills to the limit.

With these few things in mind, I got started.

Of course, the cleaning phase is about the same as always, though I am using a tool I seldom see on Dakka, which I think is a shame.

This is a Seam Scraper and is used, mostly by railroaders, to clean up all those seam lines and flash. It has a stainless steel triangular blade that is strong enough to take flashing off plastic, metal or resin, but it won't cut into the miniatures as a model knife so often does. I also have a tendency to trim mold lines with an exacto knife, using my thumb to stop the blade, which always leads to many tiny cuts in my thumb. That problem is a thing of the past as well and I highly recommend this great little knife.

I am trying to get a good picture of how well the scraper works, but this is not quite it. You can kinda see here that is completely erases the mold line into a nice little curled piece of plastic.


The rest of the tools are pretty similar, I used a half circle file and a square file for some bits, and drilled out the gun barrels as usual, though I did use a very small bit to also drill out the barrels on the Assault Cannon and the Heavy Flamer.


As for priming, I am using White Primer for the Marines, as I have no desire to try to paint red over black. Also, it has been a long time since I used White Primer, and I wondered how different my newer models would look compared to the old ones. I kept to the black prime for the Genestealers, as their color scheme is going to be primarily flesh colored skin and black Chitin.


Alongside the Genestealers in black are all the door bases. I know this may sound strange, but I am really looking forward to working with these little bases. The plan will be to make them all different, much like the patterns on the doors themselves. They will be a great opportunity for me to try new schemes and techniques for Necromunda terrain. Should be a great deal of fun.

That's all for now. Thanks for your time everyone and, as always, I would love to hear any comments or criticism.

-Yetischool


This message was edited 2 times. Last update was at 2010/05/18 21:21:14


-yetischool

www.yetischool.blogspot.com
A blog covering Necromunda, Malifaux, Puppet Wars and anything Skirmish-based. 
   
Made in gb
Deadly Tomb Guard


London, England

Very nice. always tempted to check out the new Space Hulk but those crazy eBay prices have stopped me. Looking forward to seeing this blog updated. And thanks for the info on the tools. Gonna get me one of those handy little blades

DR:80S+G+M++B+I+Pwhfb92#-D++A++/cWD153R++T(M)DM+

Stick Damn You! - Painting, Modelling and Yodeling... 
   
Made in gb
Deadly Tomb Guard


London, England

*Double posted in error*

This message was edited 1 time. Last update was at 2010/05/18 22:09:59


DR:80S+G+M++B+I+Pwhfb92#-D++A++/cWD153R++T(M)DM+

Stick Damn You! - Painting, Modelling and Yodeling... 
   
Made in us
Mauleed


Thanks Regnak!

Only the first post and I already plugged a product without linking to it. The Seam Scraper I use is ordered from www.mircomark.com and here is the actual link.
http://www.micromark.com/SEAM-SCRAPER,7547.html
It's a great deal there and they will ship it out very quickly. Just be careful…Their site is a dreamland of cool tools and new stuff…


Automatically Appended Next Post:
May 18th: First Glimpses

I figured I would go ahead and use the rest of the pictures I have so far, so just one more quick update today.

Like I said before, the bases are going to be my way of testing several new terrain techniques and the first of those is going to be salt weathering. Basically, I'll paint salt and water onto areas of the base and then, when painted over and removed, the base will have the appearance of bare metal showing under the old paint.

Step 1 of course, is to base the bases in Boltgun. To the left is straight Boltgun metal. In the middle is my test of 1:1 Boltgun and Black and on the right is more like 1:1.5 or 2 Boltgun and Black. Next comes the salt.

And then there is the test model, Brother Scipio. I am generally going for the same Color Scheme as the Eavy Metal set, but I have always thought their Blood Angels were just a hint to orange, so this will be a little bit different.

The armor here is basecoated with 1:1 Blood Red and Mechrite Red. That is followed with a dark wash of about 1:1.5 Red ink and Sepia ink.

Okay, now I have all of my pictures so far loaded, so from here, we'll go to bigger updates. Thanks again and see ya soon!

-Yetischool

This message was edited 1 time. Last update was at 2010/05/19 00:13:11


-yetischool

www.yetischool.blogspot.com
A blog covering Necromunda, Malifaux, Puppet Wars and anything Skirmish-based. 
   
Made in ca
Blood Angel Chapter Master with Wings


Sunny SoCal

Welcome to the Space Hulk Marathon club lol!

Seems like you are off to a good start, though if I may, you may get a smoother blend starting out with straight mechrite and then washing with 1-1 water/sepia ink. The beauty of going that direction I have found is that it really allows you to leverage the transluscency of brighter reds and get a really smooth blend without too much effort.

P.s I know it's a weird thing to notice but your barrels are drilled out perfectly, size and location, what size bit did you use and what technique did you use to 'aim'?

   
Made in us
Mauleed


Thanks MajorTom!

I've been enjoying watching your Space Hulk collection come together as well.

As for the color scheme, I decided to stick with the slightly lighter basecoat as I still plan to blend all the way up to fiery orange and the Mechrite Red by itself is a litle too Burgundy for me on its own. The next couple of steps of deeper shading will get the armor to a dark dark red base, but it will still be a Blood Red instead of leaning toward the purples of Mechrite and burgundy.

As for the drilling on the barrels, that's another thing I owe to the Seam Scraper I talked about earlier. The scraper's point is extremely fine and, because it is a Tetrahedron, you can make a starting hole pretty much just by eyeballing it. Unlike an Exacto knife which will make an uneven hole if you do the same.

The barrels on the Stormbolters were drilled with a 1/16" bit, but you have to be careful, as this size is almost too large to do without splitting the plastic. You have to go slowly and only a little bit at a time or one bad turn will take the entire side of a barrel with it.

This message was edited 1 time. Last update was at 2010/05/19 14:22:23


-yetischool

www.yetischool.blogspot.com
A blog covering Necromunda, Malifaux, Puppet Wars and anything Skirmish-based. 
   
Made in ca
Blood Angel Chapter Master with Wings


Sunny SoCal

seam-scraper ordered lol

   
Made in gb
Lord of the Fleet


London

Sweet! I've always wanted to get Space Hulk, just didn't have the money for it. Good luck with the models!

P.S: Something I've always wondered, what exactly is Scipio doing to his fist? Is he using some sort of scanner, or inspecting his Power Fist or something else?

Valk
   
Made in us
Mauleed


That's correct, Valkyrie. He has an Auspex built into his power fist.

-yetischool

www.yetischool.blogspot.com
A blog covering Necromunda, Malifaux, Puppet Wars and anything Skirmish-based. 
   
Made in us
Mauleed


I find it stunning how easily the real world can keep you from getting any hobbying done until, POOF, more than a month has passed since the last Blog update or, for that matter, since I have made any real progress in the Space Hulk project. It's been slow, but things are getting done.

As it turns out though, this project has become exactly what I hoped it would; a necessary break from the Necromunda collection and a good way to hold back the temptation to start up 40k again. To be honest, I would love you get back in 40k again, but, knowing myself and being without an army, I would never get enough gaming in to make it worthwhile. Not to mention I am sure I would find painting an entire army just as painful as I did back in 2nd and 3rd edition.

Enough! Back to Space Hulk. There has actually been some progress to note, so here we go!

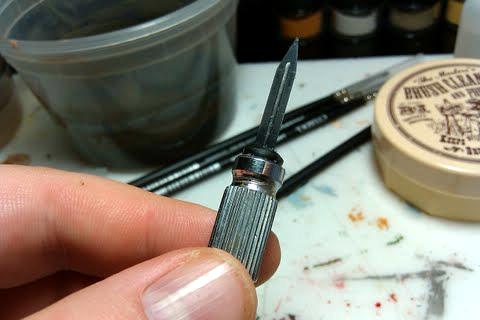
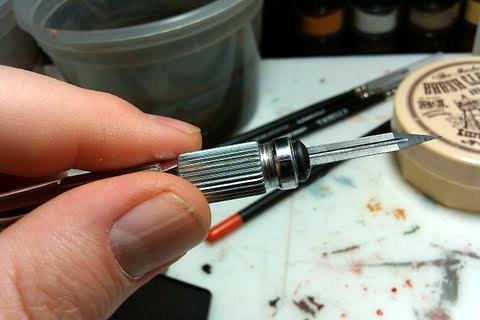
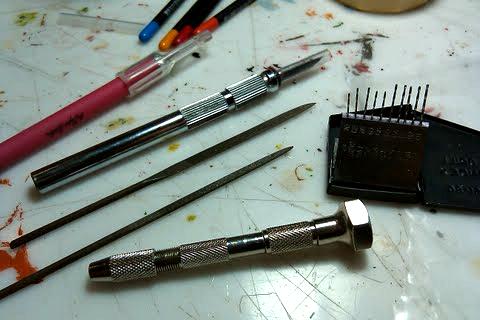
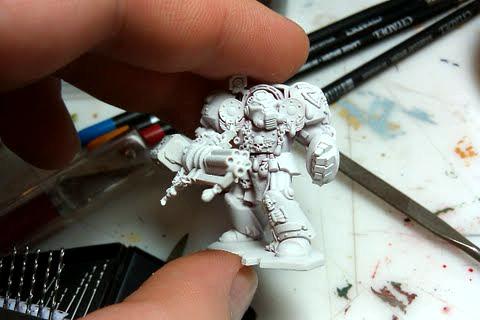
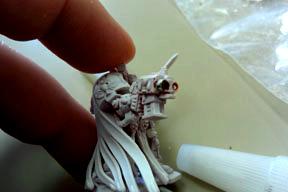
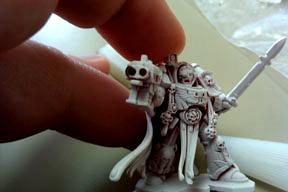
One of my biggest concerns with the project has been Vet. Sergeant Lorenzo. During the initial cleaning process, he was mangled both by too much handling, and a tragic incident involving pin-vice-user-error. The later was the bigger problem. As I noted in prior posts, I am drilling out the barrels of Stormbolters as large as I can make them without drilling away the side of the barrel…and with Lorenzo, I drilled away the side of the barrel.

For the repair, I decided to use Brown stuff, as I need to drill out barrels of the repaired piece, I wanted the putty as strong as I could make it. I think the repair turned out pretty nice, but we'll have to see what it looks like once he's all painted.

This means the modeling side of this project is coming to a close. I ended with the Broodlord, a model that was almost enough to make me buy the game by itself.
I can't wait to field this guy as a Patriarch for my Genestealer Cult. The problem with the Broodlord, however, is his size. He is simple too tall for the Underhive.

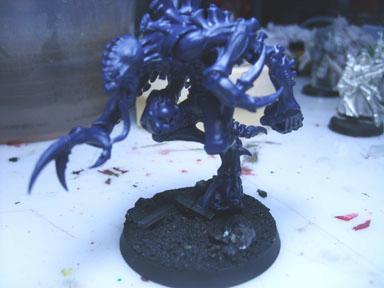
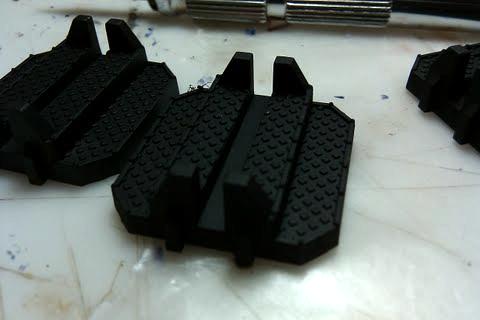
To make him more compatible with Necromunda, I decided to magnetize the Broodlord to his base. This will let me use a regular large base to match the rest of my normal Necromunda Genestealers.

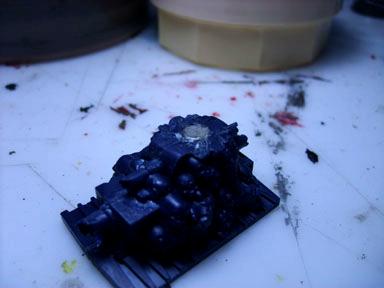
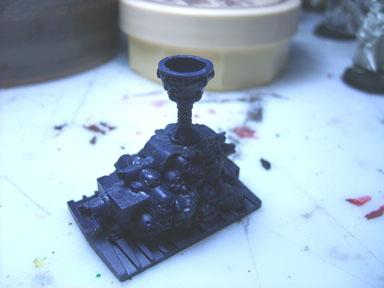
While I was at it, I decided to fix another problem…the Goblet objective. This thing is small enough I'm afraid I'll knowk it off the board and it will disappear into my dog's mouth. So I magnetized it as well.

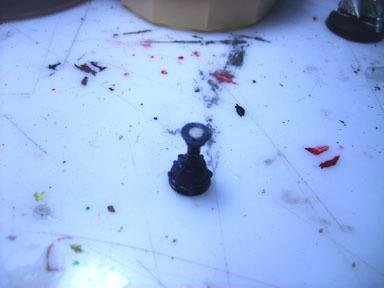
Now, when in play, the Goblet will have an impressive stand that will really make it an objective worth reaching.


Now for some paint. When I started work painting, I initially though I would do a single model at a time. While the idea was to let me work on each model with excruciating attention to detail, it has proven to be a maddening mistake. The first model has taken long enough to make me question if I'll ever get the project done.

Instead, I am going to work on the Marines, and eventually, the Genestealers, in sets of three or four. This will be far more efficient, as I often only have enough time to paint a single color or highlight. Taking care of all the red basecoat on 4 models makes me feel like I accomplished something, even in a small amount of time.

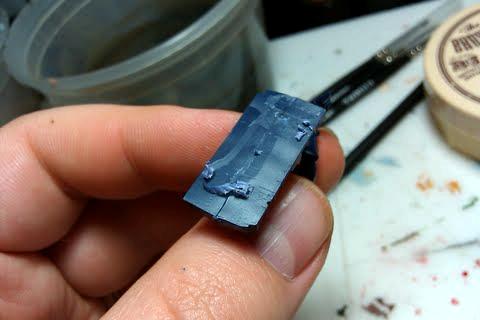
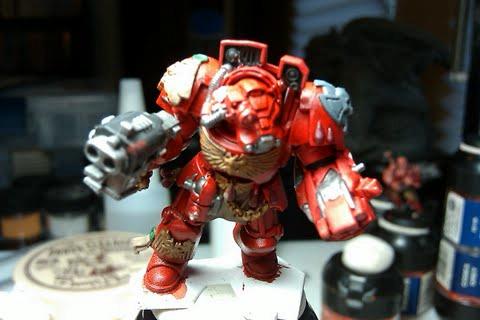
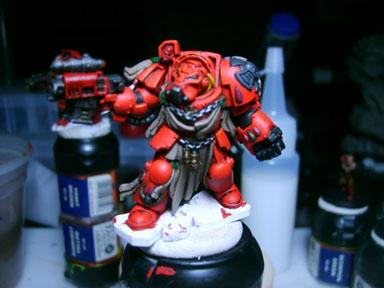
This is the first of the Marines, Brother Dieno.

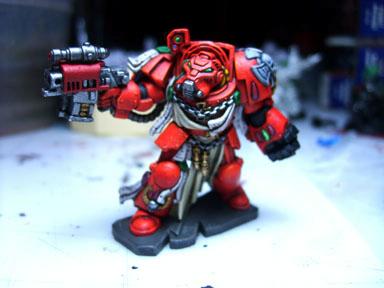
I know I started with Scipio, but I was unhappy with his initial shading coat, so I did Dieno instead to finalize the color scheme.

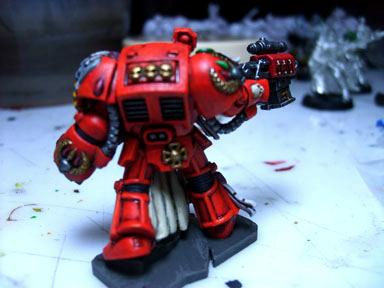
Not much has changed in the color scheme, but it's as follows:

Basecoat of 1:1 Mechrite Red and Blood Red
Wash of 2:1:1 Sepia Ink, Red Ink and Water
Highlights: starting from the Mechrite and Blood red mix to pure Blood Red, then 1:1 Blood Red, Fiery Orange.
And finally finished with a line highlight of pure Fiery Orange.

I am very pleased with everything but the photos, so I hope to have some better ones up soon.

As far as the bases, I'm really just not sure what I'm doing yet. Dieno is based with Charadon Granite and then a simple highlight. I like the idea of the color, but it needs some work. I may have to go back and work on them all once I have all the models done.

Well that’s if for now. I'd love to hear what you all think! Thanks for your time!

-yetischool

This message was edited 1 time. Last update was at 2010/06/25 16:52:32


-yetischool

www.yetischool.blogspot.com
A blog covering Necromunda, Malifaux, Puppet Wars and anything Skirmish-based. 
   
Made in gb
Swift Swooping Hawk


Scotland

Very nice painting going on there.

I'm really liking the marines.


"Now I am become Death, the destroyer of worlds." - J. Robert Oppenheimer - Exterminatus had it's roots way back in history. 
   
 
Forum Index » Dakka P&M Blogs
Go to: